After 7 months of exploration, I finally settled on Animation & Motion Design.
Don't wanna be here? Send us removal request.
Statistics
We looked inside some of the posts by k00288191 and here's what we found interesting.
Average Info
Notes Per Post
119
Likes Per Post
111
Reblog Per Post
7
Reply Per Post
1
Time Between Posts
2 days
Number of Posts By Type
Text
16
Photo
1
Last Seen Tumblr Blogs


Fun Fact
69% of Tumblr users are millennials.
Text
Mini Me - final animation
24/03/2023
Looking through my Tumblr account I just realised that I never uploaded the final version of my replacement animation.
My original version (where the timing was out) was created in Premier Pro but the final version was created in Animate which gives better timing control as it progresses frame by frame. This helped the mouth shapes to better match up with what was being said.
A feathering was also applied to the outer edges of the mouth shapes in PhotoShop to help them blend in better to the Mini Me's face.
10 notes
·
View notes
Text
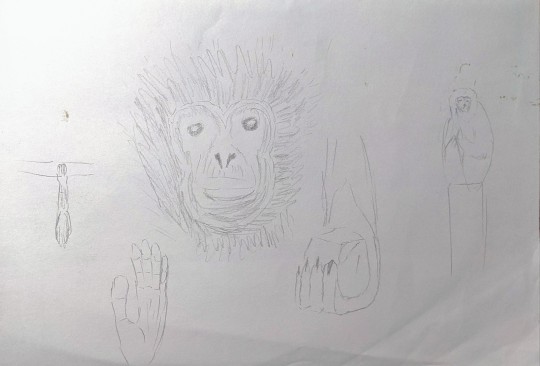
Foto Wildlife Park #2
Part of our task was to study the animals in the wildlife park, rather than going straight into drawing them.
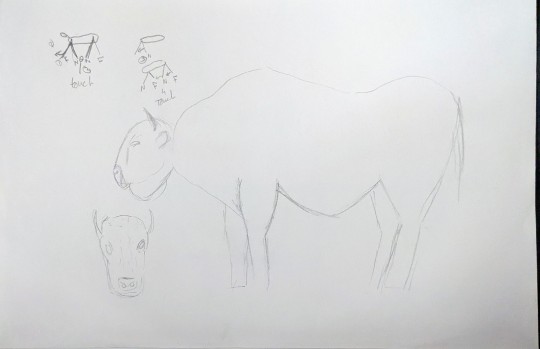
This was my first attempt at drawing a European bison. But I also studied how they walked. I was surprised to learn that their hooves touch (front and rear) under the animal. I tried to sketch that movement in the top corner of this page.
6 notes
·
View notes
Text
Colour Grading and adjustments
01/05/2023
Group: @k00280496, @k00284145, @k00288409, @k00284075
Another area that proved more complicated that expected was the colour grading and adjusting what a scene looks like in post (covering up distracting portions when the camera is intentionally handheld).

Some of our shots were recorded with a red-orange gel held in front of the camera. Unfortunately, it didn't give us the colour we wanted and ended complicating the colour grading more than if we had make the shots without the gel. But it was a good learning experience.
3 notes
·
View notes
Text
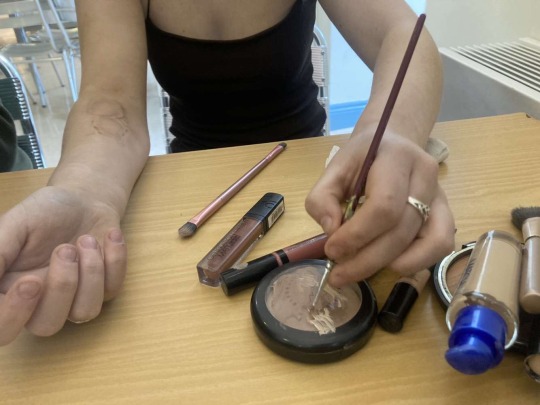
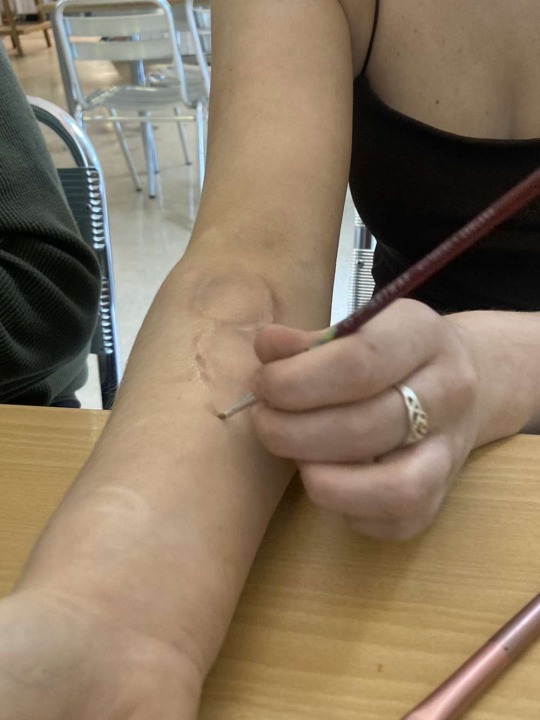
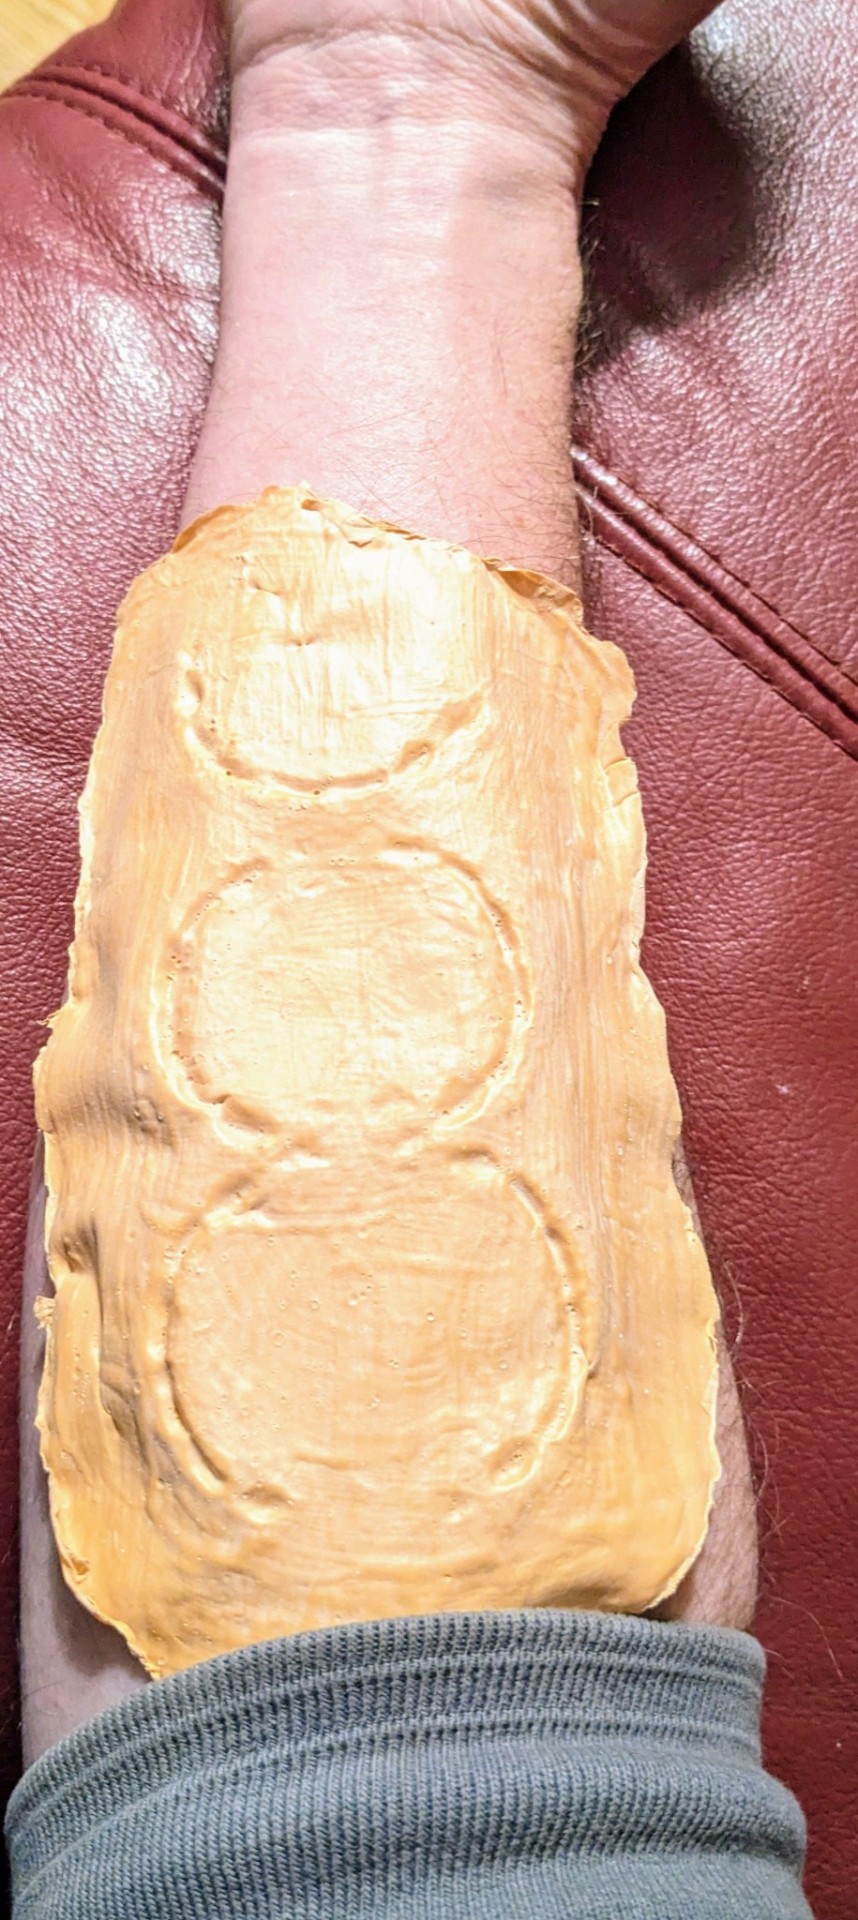
The bite marks shot proved to be more difficult than I expected. With my first attempts at making latex bite marks not releasing, to final creating the prosthetic but failing to blend it into the arm, going with the makeup bite marks worked out brilliantly. Well done, Jenn!
Re-shoot and Editing
We had to re-shoot the "Arm Shot" with Ellie to make the bite look more realistic. I went ahead and tried to recreate the bite with makeup. I used a mix of foundation, brown eyeliner and lipstick we had lying around and used a mix of both makeup brushes and a paintbrush to apply them to my arm. Between the limited materials and the use of my left (non dominant) hand, I'm pretty proud of the result. I think the subtlety of the makeup is closer to the look of the bite in the original shot from The Last Of Us.
I struggled for a while with the clip of Ellie looking through the red glass, when editing. I finally managed to create the blue light in the background using a "spotlight" effect in premiere pro. I think this really helped tie the shot together and adds to the overall finish and accuracy of the shot. I was really pleased with the outcome.
8 notes
·
View notes
Text
The Last of Us - sweding bloopers
28/04/2023
Group: @k00280496, @k00284145, @k00288409, @k00284075
If you can't laugh at yourself, then you can't really laugh... here are some out cuts from making our version of the episode 9 The Last of Us preview...
5 notes
·
View notes
Text
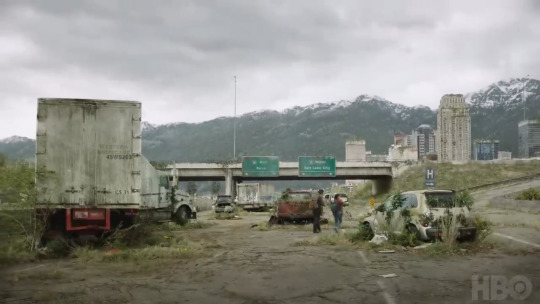
The Last of Us - side by side
28/04/2023
Group: @k00280496, @k00284145, @k00288409, @k00284075
As promised, here is the comparison of the original preview for episode 9 of The Last of Us and our no budget remake...
13 notes
·
View notes
Text
The Last of Us - Episode 9 sweding
28/04/2023
Group: @k00280496, @k00284145, @k00288409, @k00284075
Our version of the long preview for episode 9 is finally finished. It was a lot of fun to make and I learned a lot along the way, including getting to know my team much better. It was great working with you all.
So, here it is - a side by side will be in the next post, so stay tuned.
0 notes
Text
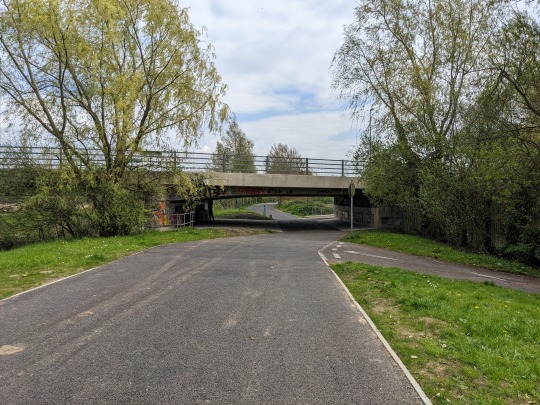
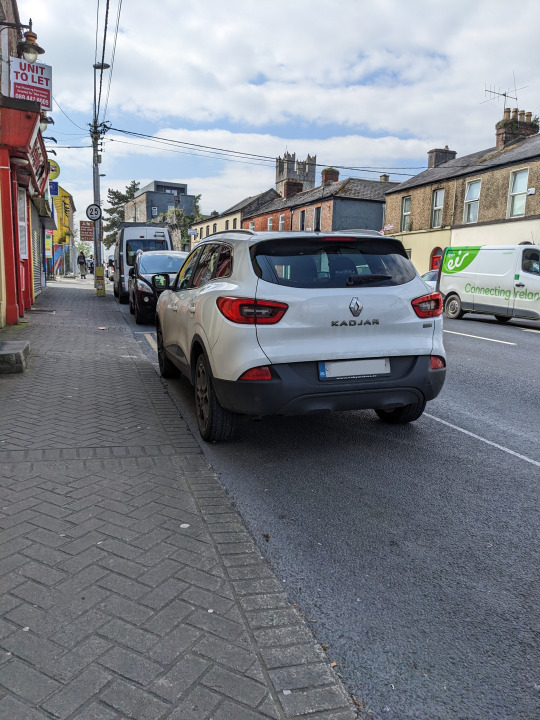
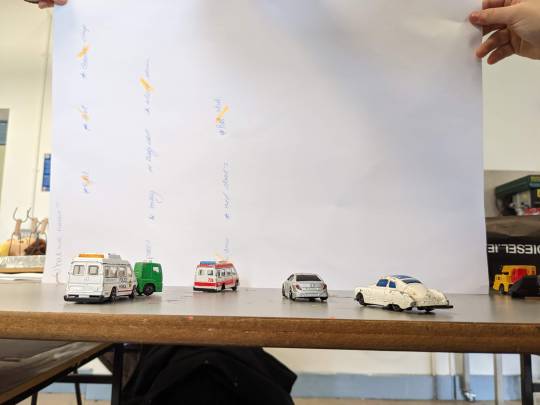
Walking by bridge - version 2
Group: @k00280496, @k00284145, @k00288409, @k00284075
Before deciding on going with the green screen version and adding video to the photo composite, we also tried the reverse to see which would work better.
Because the camera was handheld (to match the original), adding the static trucks and cars didn't look right because of the movement. They are floating in the scene...
0 notes
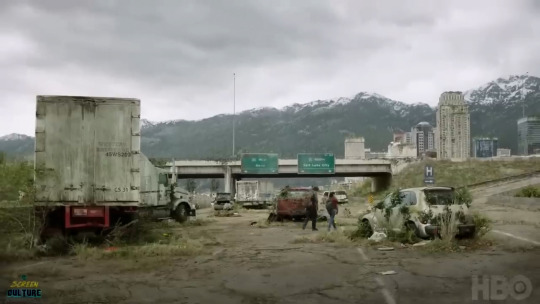
Text
Creating the background scene
26/04/2023
Group: @k00280496, @k00284145, @k00288409, @k00284075
This has been an ongoing development that I think is close now (although still very different from the original scene).


Kyra @k00284075 has prepared the green screen video footage to be added to this background.
10 notes
·
View notes
Text
Preview Comparison - wip
25/04/2023
Group: @k00280496 @k00284145, @k00288409,@k00284075
Still a work in progress, I need to do the colour grading and light to dark adjustments (and to learn how to do those), but I'm happy with how it's looking so far.
21 notes
·
View notes
Text
Zombie Bites
23/04/2023
Group: @k00280496 @k00284145, @k00288409,@k00284075
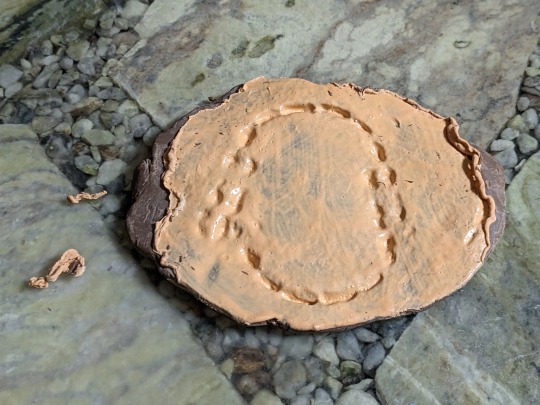
My third attempt at making latex zombie bites for the scene where Ellie is sitting in the front of a car rubbing her forearm that was previously bitten.
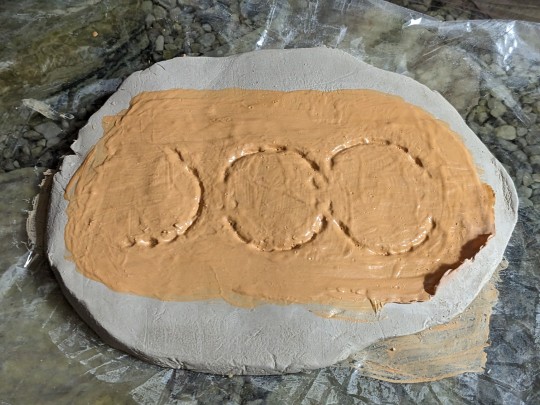
While I preferred the shapes of my first two attempts, they (1) didn't release from the New Plast and (2) was put on ceramic clay when it was too wet.
The successful bites had the liquid latex added to near leather hard clay.
2 notes
·
View notes
Text
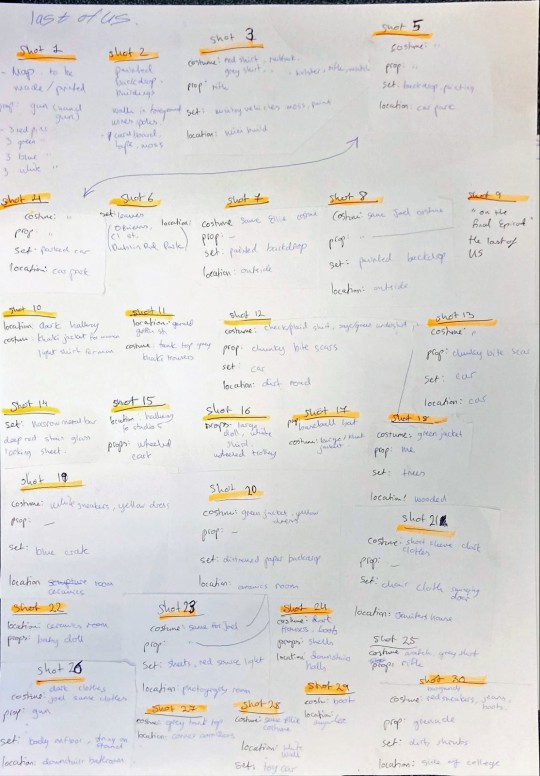
The Last of US
Preproduction
Group: @k00280496 @k00284145, @k00288409,@k00284075

0 notes
Text
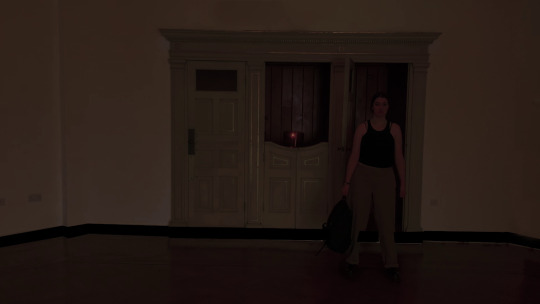
The Last of US - E09 preview
19/04/2023
Group: @k00280496 @k00284145, @k00288409,@k00284075
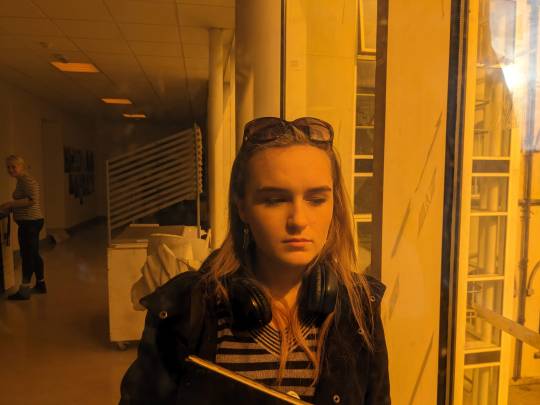
What a fun, great day of filming today with our team. Below was the first shot that we captured.
Using the 'Plan It Pro' app, we determined that the sun shined in the windows in front of the 1st year computer lab up until 9am. So, it was an early start to get the bed sheets up and get into costume.

This is one of first bloopers! The moment when you realise that you made a mistake and smile about it...
Talking with Paul Tarpey, the day before, about the scene and how to capture it, we decided the best route was to hold a red/orange gel in front of the camera rather than looking for red bed sheets. There is a red cast on Joel in the scene too, so this route worked out great!
15 notes
·
View notes
Text
Opening Shot
17/04/2023
I ran the numbers using the measure tool in Photoshop :)
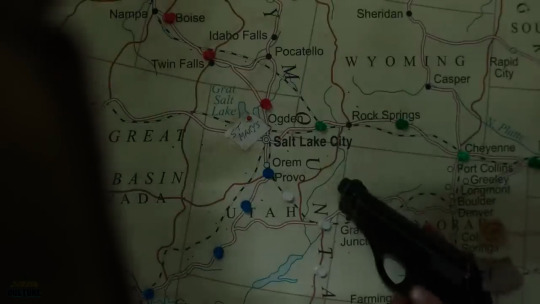
- comparing the length of the gun in the opening scene to the width of the map... (given that a Glock 19 is just over 7 inches) then the width of the map is roughly 24 inches - so basically A2 size if we get a full sized prop.
8 notes
·
View notes
Text
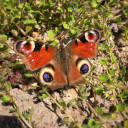
Foto Wildlife Park
28/03/2023
The 1st year AMD trip to Foto Wildlife Park was a great experience. With the goal of some en plein air observation and drawing of animals and class bonding, everyone was happy that even the weather played it's part!
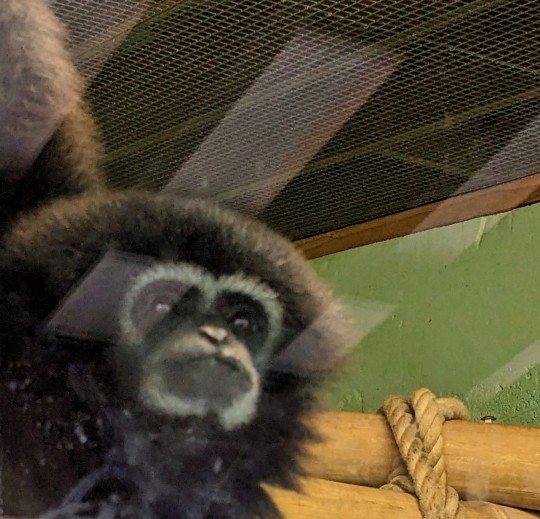
I got drawn to this little guy, who was happy to pose right in front of his window.
Hopefully, he feels I got his good side.
4 notes
·
View notes