
Last Seen Blogs

axolotlart
☼Axolotl☽

constructionnetwork
Construction Network Service

nayeonline
ari

ngardgni
BubbleTeaConnoisseur

Text
Frozen Cherry Fruit Salad
A few basic ingredients: cherry pie filling, crushed pineapple, sweetened condensed milk and Cool Whip make up the base for this old school frozen delight! From there, make it your own with easy add-ins.
Frozen Cherry Fruit Salad
I live on the Gulf Coast, and down here, the humidity is as important as the temperature. Maybe even more so! We've been under 100+ degree heat advisories here for awhile now because of that heat index. In June. Already. I pray we don't see a hurricane this year, well, ever again in my lifetime really, that knocks out power for long. Gotta have that air conditioning down here!
When the weather heats up like this, cooling foods are a steady in my house. Watermelon, cucumbers, grapes, cantaloupe, strawberries are consumed regularly around here! Of course, although they may mostly be relegated to those family gatherings more so these days, we have our icebox and freezer desserts too. This cherry salad is one of those that has been around for years.
In it's refrigerated form, you've probably seen it around the net referred to as a "fluff," but the most classic version that I know was always frozen. Old school, it was made with four basic ingredients: cherry pie filling, crushed pineapple, sweetened condensed milk and Cool Whip, though nuts and marshmallows are typically added.
Southern Style Hissy Fit Warning Now, first things first. This fruit salad has been around a long time. Longer than me even I think! It's a holiday favorite all over, but in the south, it's a summertime potluck favorite as well. Lots of folks love this fruit salad. Lots of folks still make it.
If you, however, happen to take issue with using any of the above ingredients, well.. then don't make it, it's as simple as that! But... certainly please refrain from lecturing the rest of us about it too. While you can substitute homemade pie filling, homemade sweetened condensed milk, and stabilize some homemade whipped cream, that really takes away from the simplicity of this old school fruit salad. If this recipe is really not for you, then feel free to move on along, nothing to see here! tucking away soapbox
These days, those basic ingredients been expanded quite a bit, often made with a cream cheese and/or pudding base and a wide variety of fruit - mandarin oranges, jarred maraschino cherries, peaches, canned cherries in syrup, strawberries, blueberries, cranberries and even bananas. Typically a nondairy topping (like Cool Whip) is used, sometimes jello, cottage cheese, sour cream and even coconut are included.
Crushed pineapple has always been a traditional ingredient in this fruit salad though you really do want the pineapple to be dry, so as not to mush up the salad. Drain it early on, using a mesh strainer and then use folded layers of paper towels to press out any additional excess juices. Some people prefer to use chunks or tidbits instead.
Refrigerate it in a bowl or dish for a spoonable soft serve style from the refrigerator, or freeze it in a single container - a 9 x 13 inch pan or loaf pans, where you can slice it or cut into squares to serve. Little individual dessert cups, or muffin tins and paper cups are common and what I used here. I froze half in cups, and did the other half in a square pan.
If you do freeze it, like most freezer desserts, you'll want to give it a little time at room temperature to soften a bit before serving, just to make it easier to eat. About 15 minutes is usually good.
For more of my favorite fruit salads, check out my collection on Pinterest!
If you make this or any of my recipes, I'd love to see your results! Just snap a photo and hashtag it #DeepSouthDish on social media or tag me @deepsouthdish on Instagram!
Yum
Recipe: Frozen Cherry Salad
©From the Kitchen of Deep South Dish
Prep time: 10 min
Inactive time: 8 hours
Yield: About 8 servings
Total time: 8 hour 10 min
Ingredients
1 (20 ounce) can crushed pineapple, well drained
1 (21 ounce) can cherry pie filling
1 (14 ounce) can sweetened condensed milk (not evaporated milk)
1/2 cup minced pecans
1/2 cup mini marshmallows
1 (8 ounce) carton Cool Whip
Stemmed maraschino cherries, for garnish, optional
Instructions
Drain the pineapple well, reserving the juice for another use if desired; set aside. Mix together the cherry pie filling, condensed milk and pineapple. Add the pecans and marshmallows, then fold in the whipped topping until well blended.
Transfer to a serving bowl for soft serve and refrigerate for at least four hours. If freezing, line cupcake pans with 24 paper or silicone liners, or transfer into loaf pans or a 9 x 13 inch pan. If frozen, let rest for 15 minutes before serving.
Cook's Notes: Give the crushed pineapple plenty of time to drain - you want it very dry. Place into a mesh strainer and use layers of paper towels to press out all of the moisture. When serving as a refrigerator "fluff," this fruit salad is very versatile. Add in a variety of canned fruits or fruit cocktail, softened cream cheese, pudding mix (reserve pineapple juice and dissolve dry pudding in the juice), double up on the Cool Whip, exchange the crushed pineapple for tidbits, add chopped maraschino cherries. Make it your own!
Source: http://deepsouthdish.com
PRINT THIS
Requires Adobe Reader - download it free!
©Deep South Dish
☛ Are you on Facebook? If you haven't already, come and join the party! We have a lot of fun & there's always room for one more at the table.
Check These Recipes Out Too Y’all!
Frozen Strawberry Pretzel Salad
Pink Jello Salad
Pineapple Icebox Cake
Posted by Mary on June 29, 2018
Thank you for supporting my work! Please note that Images and Full Post Content including Recipe ©Deep South Dish. Recipes are offered for your own personal use only and while pinning and sharing links is welcomed and encouraged, do not copy and paste post or recipe text to repost or republish to any social media (such as other Facebook pages, etc.), blogs, websites, forums, or any print medium, without explicit prior permission. Unauthorized use of content from ©Deep South Dish is a violation of both the federal Digital Millennium Copyright Act (DMCA) and copyright law. All rights reserved.
Material Disclosure: Unless otherwise noted, you should assume that post links to the providers of goods and services mentioned, establish an affiliate relationship and/or other material connection and that I may be compensated when you purchase from a provider. You are never under any obligation to purchase anything when using my recipes and you should always perform due diligence before buying goods or services from anyone via the Internet or offline.
120406BDBR
.
Source: http://www.deepsouthdish.com/2018/06/frozen-cherry-fruit-salad.html
0 notes
Text
Taco Bell is testing Toasted Breakfast Burritos, but only in one state
We're going to take our horse to the Old Town Road and ride it through the Taco Bell drive-thru, because restaurants in Nashville are selling Toasted Breakfast Burritos, y’all. For a limited time only, Tennesseeans can find the new item in three varieties from 6 to 11 a.m.
The 50 Best Burritos in America
The first option is the Hash Brown Toasted Breakfast Burrito, which features your choice of bacon or sausage, eggs, nacho cheese sauce, a three-cheese blend and a hash brown wrapped in a toasted flour tortilla. This can be ordered a la carte for $1.99 or paired with another hash brown (because why not?) and medium drink for $4.19.
Next up is the Grande Toasted Breakfast Burrito with a double serving of scrambled eggs; your choice of bacon, sausage or steak; a three-cheese blend; Fiesta Potatoes and pico de gallo in a toasted flour tortilla. The bacon and sausage versions are $2.79 a la carte and $4.99 with a hash brown and medium drink. The steak burrito is $3.49 a la carte and $5.69 as part of the combo.
Last but not least is the Cheesy Toasted Breakfast Burrito made with eggs, nacho cheese sauce and your choice of sausage, bacon or Fiesta Potatoes in a toasted flour tortilla. This is available a la carte only and, wait for it, only costs a dollar. Wallets everywhere are rejoicing.
Also new to Taco Bell is a slushie closely related to Mountain Dew Baja Blast, the Cherry Sunset Freeze. This colorful frozen drink features a pineapple base with a cherry syrup swirl. The regular size costs $2.39 and a large is $2.59, but you can get a regular for just $1 from 2 to 5 p.m. every day nationwide. According to a company spokesperson, it tastes like summer — just like these cocktails you need to make before the season is over.
Source: https://www.thedailymeal.com/news/taco-bell-breakfast-burritos/081619
0 notes
Text
Strawberry-Lime Watermelon Slush
This watermelon slush is the BEST summertime refreshment drink! All it takes is three simple, healthy ingredients... naturally sweetened with no refined sugar!

I walked into our food co-op the other day to find myself swimming in a sea of giant watermelons. (Melon heaven!) Which of course means one thing: summer is officially here! 🍉 My 5 year old daughter is obsessed with watermelon, and given my recent acquirement of said giant melon I wanted a fresh new way to enjoy it instead of the usual plain chunks or shapes. She's a big fan of tangy lemon/lime flavor and of course strawberries so it seemed like a perfect match. When I was a kid, slushies were my go-to choice on a hot summer day when we rode our bikes down to the ice cream shop... it always felt like the ultimate refreshment!

And c'mon... this color?! Can we take a moment to appreciate how awesome nature is for providing us with actual HOT PINK food? I'm thinking these would make some pretty rad frozen fruit pops as well! Would love to hear if you give it a try. See the notes below the recipe for some additional tips/variations. Happy summer friends! 😎
Quick note: in my experience, there's a big difference in the quality/taste between organic non-GMO vs. conventional produce (in addition to the environmental & health benefits). If it's available in your area, I highly recommend buying organic when possible. Especially for this drink when ripe, sweet, flavorful melons & berries can make all the difference!

Vegan, gluten-free, oil-free
Makes 1 large or 2 small slushes
Ingredients
2 cups seedless watermelon (frozen)
1 heaping cup strawberries (fresh or frozen)
2 Tbsp. fresh lime juice (about 1 juicy lime)
Optional: 1-2 tsp. coconut sugar or agave to sweeten, fresh mint or basil, ice cubes
Directions
Cube watermelon and place in freezer for at least an hour or two.*
When ready to make, rinse and hull the strawberries.
Place frozen watermelon, strawberries, and fresh lime juice in blender.
Blend until slushy and serve immediately.
*Notes:
Freezing watermelon: I set the melon cubes on a baking sheet (or shallow non-glass bowl) to freeze. They fully freeze after about 2-3 hours and become very hard. If you freeze them in a bowl, the cubes will be stuck together (and often to the bowl!) so just let thaw for 15-20 minutes before using.
If freezing a big batch of watermelon, it's sometimes easier to freeze them in a single file on a baking sheet first, then once they fully freeze to place them in a storage container for longer-term.
If your blender isn't very strong, only freeze the watermelon for about 60-90 minutes or let thaw a bit before blending.
Variations:
Try this with lemon juice instead of lime (or a combo!)
If using fresh strawberries, you may want a few ice cubes to keep it extra "slushy", or you could freeze your hulled strawberries with the watermelon if you'd like.
Depending on how sweet your watermelon & strawberries are, you may need some extra sweetener to taste - agave, coconut sugar, etc.
Adult readers 21+ feel free to add some spirits to this drink... you know, if that's your thing ;)
Printer Friendly Version
Other summer favorites!!
Ultimate Greek Chopped Salad
Edamame, Tomato, Corn Salad with Lemony Dressing
Fresh Tomato Basil Pasta with Garlic
Mediterranean Three Bean Salad
Classic Potato Salad
Tropical Matcha Smoothie
Come join The Garden Grazer on Instagram 🍓 and share a pic if you make this! (Seeing happy hot pink goodness makes me smile.)
Pin for later:

Source: https://www.thegardengrazer.com/2018/06/strawberry-lime-watermelon-slush.html
0 notes
Text
Healthy Vegetarian Meal Plan 01.20.2019
On this week’s healthy vegetarian meal plan: Dairy-Free Potato Soup, Vegan Alfredo Pasta with Crispy Chickpeas, Loaded Lemony Greek Salad, Creamy Vegetable Chickpea Curry, and Sweet Potato Parsnip Fritters.
Happy meal prepping, and have a great weekend!
Sunday
Dairy-free Potato Soup from Making Thyme for Health
Prep Ahead Tip: Recipe comes together fairly quick. Entire soup can be made up to 2 days in advance, if desired.
Vegan/Gluten-free Substitutions: Recipe is already vegan and gluten-free.
Monday
Vegan Alfredo Pasta with Crispy Chickpeas from She Likes Food
Prep Ahead Tip: Cauliflower alfredo sauce can be made up to 2 days in advance.
Vegan/Gluten-free Substitutions: Recipe is already vegan. Use gluten free pasta to make gluten free.
Tuesday
Loaded Lemony Greek Salad from Eats Well With Others
Prep Ahead Tip: This recipe comes together quickly, no need to prep ahead.
Vegan/Gluten-free Substitutions: Omit the feta cheese to make this vegan. Substitute quinoa or millet for the bulgur to make it gluten free.
Wednesday
Creamy Vegetable Chickpea Curry from Hummusapien
Prep Ahead Tip: Veggies can be chopped ahead of time.
Vegan/Gluten-free Substitutions: Recipe is vegan and gluten-free.
Thursday
Sweet Potato Parsnip Fritters from The Roasted Root
Prep Ahead Tip: Parsnip and sweet potato can be boiled up to 3 days in advance.
Vegan/Gluten-free Substitutions: Recipe is gluten-free and vegan.
Click HERE to print the shopping list!
Source: https://www.theroastedroot.net/healthy-vegetarian-meal-plan-01-20-2019/
0 notes
Text
Chick-fil-A gets cheesy by adding mac and cheese to menus nationwide
Chick-fil-A hasn’t added a new side dish to its menu since 2016, so the chain decided it was time to do something about that. Starting Monday, August 12, the chicken sandwich giant now offers a classic macaroni and cheese side dish, baked fresh in the restaurants each day.
10 Ways Fast Food Chains Are Playing With Your Head
The new mac and cheese follows a classic recipe, and features a special blend of cheeses including cheddar, Parmesan and Romano. It’s available as a side dish and on the chain’s catering menu alongside some of the most famous fast food items of all time, like waffle fries and salad.
“Mac & Cheese is the quintessential comfort food, and something we are so excited to offer our guests at Chick-fil-A,” said Amanda Norris, executive director of menu and packaging, in a statement. “We think it’s the perfect pairing with our Original Chicken Sandwich, nuggets and our grilled chicken offerings, but it’s also great on its own as a snack.”
There’s one more new item on the Chick-fil-A menu, but this one’s only available for a limited time. Frosted Caramel Coffee combines the restaurant’s custom blend of cold-brewed coffee with vanilla Icedream dessert and caramel syrup. It’s a seasonal offering, so it will only be available until November 9 or while supplies last.
As for the mac and cheese, the gooey addition was tested in five markets, and positive feedback from those diners helped bring it to the permanent menu. It will now be available nationwide. But if you want to bring a homemade touch to the iconic dish, here are 34 recipes for the most over-the-top macaroni and cheese.

Source: https://www.thedailymeal.com/eat/chick-fil-a-adds-mac-and-cheese/081219
0 notes
Text
Tuna Fried Rice

Tuna Fried Rice
Egg fried rice is one of my favourite go-to meals for small boys (and big Irishmen)! So I’m always looking for ways to tweak it and make it more exciting.
I’m also always looking for ways to get my boys to eat more fish. This tuna version ticks both boxes!
And it’s a great pantry meal to have as a backup. Just keep some precooked rice in the freezer like I do. Too easy.
I’ve given a range of tuna quantities so you can adjust depending on how fishy you want your fried rice to be.
Ingredients
1-2 medium cans tuna in oil 200g / 7oz each
3 cups 360g / 12oz cooked rice
2 handfuls frozen peas
1-2 tablespoons soy sauce
toasted sunflower seeds or nuts to serve (optional)
2 green onions (scallions) chopped (optional)
Instructions
Heat a generous glug of oil in a large frying pan or wok. Add tuna, rice and peas and stir fry for a few minutes until everything is hot.
Remove from heat and stir in soy sauce. Taste and add extra soy as needed.
Serve hot rice topped with green onions and seeds / nuts (if using).
Variations & Substitutions
no cooked rice – follow this recipe to make your own. Or you can buy par cooked rice in ziplock bags in the supermarket. It’s better if you allow the rice to cool completely before frying – the texture isn’t the same with freshly cooked rice. Although it will still be lovely.
vegetarian – replace tuna with eggs (recipe here) or tofu.
more substantial (carb lovers) – more rice!
more substantial (low carb) – use more tuna and possibly some egg as well. Use a low GI rice like basmati or Doongara (available in Australia). And be generous with your seeds / nuts. I’ve used sunflower seeds in the photo but my boys love it with cashews and my Irishman loves his with peanuts. You can replace some of the cooked rice with cauliflower ‘rice’ (raw grated cauliflower). I’ve seen recipes for fried ‘rice’ using all grated cauliflower but I think it’s too much cauliflower – even for me.
Low FODMAP – replace peas with chopped red capsicum (bell peppers) and make sure to only use the green parts of the green onions.
hot! – use tuna with chilli oil or add some finely chopped fresh or dried red chilli.
different veg / more veg – feel free to replace the peas with any stir fry veg like snow peas, green beans, asparagus, capsicum (bell peppers).
herby – serve with mint or coriander (cilantro) leaves.
nut-free – use sunflower seeds or just skip the nuts.
different protein – eggs are the usual but you could use pre-cooked chicken or sausages instead. Actually given how much my boys love sausages and thinking that will be a good new one to try! Or stir fry some sliced chicken thigh or breast fillets or crumbled sausage meat in the pan first and then when it’s cooked add the rice and peas.
Waste Avoidance Strategy
tuna in oil / rice / soy sauce / sunflower seeds or nuts – keep them in the pantry.
frozen peas – keep in the freezer.
green onions – skip them or keep in the fridge in a plastic bag for weeks.
Prepare Ahead
Best when freshly cooked. Leftovers will keep in the fridge for up to a week or can be frozen. To serve, fry in a little oil until everything is super hot. If you are planning to keep leftovers make sure you refrigerate them asap, preferably before you sit down to eat but no more than an hour.

More rice recipes…
Have fun in the kitchen!
With love,
Jules x
Tags: dinner, easy, fried rice, rice, simple, soy sauce, tuna
Source: https://thestonesoup.com/blog/2018/11/27/tuna-fried-rice/
0 notes
Text
Peanut Butter Kitchen Sink Cookies Caramel, Pretzels, M&Ms, and More
Oh yes, these peanut butter kitchen sink cookies (as in, there’s EVERYTHING but the kitchen sink in them) are amazing! Soft, crunchy, caramelly, delicious!
Weeks ago I asked for your help on Instagram (here’s the plea) to name this over-the-top loaded cookie. And wow, did you ever come through! To the tune of 400+ responses! Even more of you chimed in on this Friday Thoughts post with last minute name suggestions. I have loved each and every one of them (I’ll highlight a few of my favorites below) – and laughed out loud at more than one. You guys are funny.
But in the end, it seemed appropriate to go with the name that sums it all up in one broad, sweeping title (and by far, the most popular name suggested): almighty peanut butter kitchen sink cookies.
Soft, chewy, crunchy, sweet, salty, caramelly – this cookie has it all.
When visiting Montana this summer, my sister-in-law, Erin, made these cookies for us two days in a row (because our greedy hands couldn’t get enough), and I knew immediately my blog wouldn’t be the same until I had a recipe like this on my site. Since then, I’ve made these cookies myself four or five times (including making and serving 150 of them at my cousin’s wedding dinner a few weeks ago), and they have skyrocketed to favorite cookie status. I mean, just look at them! The wow factor is huge.
When I was probably about 10 years old, we lived in Houston, Texas, and my mom had a church responsibility to follow up with the young 19-something missionaries serving in our area. One day she went over there to visit with them (and mostly check to see if their often-neglected apartment was getting cleaned), and they proudly told her they had made cookies and sent them to their families!
Because they had a very sparsely furnished kitchen, she was quite surprised. She politely asked them what kind of cookies they had made. Chocolate Chip. Then she kindly and somewhat gently asked what they had used to make them (they literally only had a couple cereal bowls, plates, and a few utensils). Unabashed, they announced that without the use of a large mixing bowl, they had the brilliant idea to use their kitchen sink to mix the dough! (And then borrow baking sheets from a neighbor.) A few more probing questions from my slightly aghast mom revealed that no, no indeed, the rather grimy kitchen sink hadn’t been scrubbed cleaned before the cookie making endeavor.
I remember my mom coming home and telling us about this kitchen sink cookie experience and with a furrowed brow wondering out loud if she should somehow alert the families that might be on the receiving end of these cookies?? I have no idea if those cookies ever made it to their destination and what the result was, but I’ve always had a bit of a gag reflex thinking of those kitchen sink cookies from the 1980’s
Thankfully these peanut butter kitchen sink cookies I’m sharing with you today are not literal in anyway (no kitchen sinks were used or harmed in the making of these cookies). They are 100% delicious and totally food safe, I promise. 🙂
If you want to see a whole list of name suggestions, here you go. My 12-year old lovingly compiled this list after reading through the hundreds of Instagram responses. So many great cookie name ideas! I just love you guys.
Here are a few notable/clever favorites:
–G.O.A.T. (greatest of all time) cookies
-Whatcha-Mel-Callsit cookies (hahaha)
-What You Find Under the Carseat Cookie (slightly gross but super funny)
-Spanx Busters
-Pantry Cleanout or Pantry Raid Cookie
-Pretzel Monster Cookies
-Mary Poppins Cookie (because Mary Poppins is Practically Perfect in Every Way) 🙂
Other than adding in a bazillion extra ingredients, these peanut butter kitchen sink cookies aren’t any more difficult to whip up than your average, every day drop cookie.
The soft peanut butter cookie dough base is mixed together (in a stand mixer or using an electric hand mixer) with the flour just barely getting incorporated before adding in all those glorious extras.
Why not?? Here’s what’s going on in these cookies so far:
-toasted pecans (I’m normally a don’t-put-nuts-in-my-cookie kind of gal, but they are super tasty in these cookies! Use them!)
-peanut butter chips
-chocolate chips
-caramel balls (I’m talking about the Kraft brand of unwrapped caramel bits similar in size to large chocolate chips; when I’ve been out, I unwrapped soft Kraft or Trader Joe’s caramels and cut them into pieces with my bench knife aff. link…a labor of love that is totally and completely worth it)
-M&Ms (I’ve used regular M&Ms, dark chocolate M&Ms, and caramel M&Ms)
I think you could play with the add-ins to your hearts content. What about:
-other chopped up candy bars (the sky is the limit)
-pretzels IN the dough vs just pressed on the outside
-other types of chopped nuts
-coconut
Once the cookie dough is mixed, roll the dough into balls. Because of all the add-ins, the dough balls won’t be perfectly round. That’s ok. All those lumps and bumps just mean extra yumminess.
Press the top of the cookie dough into the coarsely chopped pretzels and then turn over and lightly press the pretzels into the soft cookie dough so they stick. Again, we aren’t going for perfection here! These cookies have a rustic porcupine-spiked vibe going on, and I love them all the more for it.
Of course you can eliminate the pretzels from the cookie lineup, but they really do add that salty crunch that is awesome (and they don’t get soft/soggy after baking).
These cookies will spread just like other drop cookies…but probably not quite as much thanks to all the bulky add-ins. They are meant to be super soft and slightly puffy.
I’ve given some notes in the last step of the recipe directions about how to end up with a flatter cookie if you want (or, conversely, what to do if your cookies are flattening too much).
Since these cookies have also affectionately been dubbed “clean out the pantry cookies” – I can’t wait to see what other variations you come up with! You clever and adventurous bakers never cease to amaze me.
Just in case you end up with more cookies than you deem safe for your self-control OR you need to make a bunch in advance, these baked and cooled cookies freeze great (yep, even with the pretzels). I stack the cookies in between sheets of wax paper in a large tupperware and then take them out of the freezer several hours before I want to serve them. Tasty as the day they were made!
After all this talk about PB kitchen sink cookies, looks like I better go grab a couple out of the freezer just to remind myself how delicious they really are.
One Year Ago: Monterey BBQ Chicken Pasta One Pot Dinner!
Two Years Ago: Fresh Zucchini and Tomato Linguine 30-Minute Meal
Three Years Ago: Tender Grilled Pork Chops
Four Years Ago: Triple Chocolate Zucchini Cookies
Five Years Ago: Good Morning Power Muffins Full of Whole Grains and Superfoods!
Six Years Ago: Ebelskivers: Puffy Danish Pancakes
Seven Years Ago: Cheesy Zucchini Rice
Eight Years Ago: Oreo Cheesecake Bites
Yield: 4-5 dozen
Prep Time: 40 minutes
Cook Time: 10 minutes
Total Time: 50 minutes
Ingredients
1 cup (8 ounces, 16 tablespoons) butter, softened (I use salted)
1 cup (9 ounces) creamy peanut butter (I use Skippy or Jiffy)
1 cup (7.5 ounces) granulated sugar
1 cup (7.5 ounces) packed light or dark brown sugar
1 teaspoon baking powder
1 teaspoon baking soda
3/4 teaspoon salt
2 large eggs
2 teaspoons vanilla extract
2 1/2 cups (12.5 ounces) all-purpose flour
1 cup (6 ounces) chocolate chips (I use semisweet)
1 cup (6 ounces) peanut butter chips
1 cup (7 ounces) caramel balls (see note) or chopped soft caramels
1 cup (7 ounces) M&Ms (regular, caramel, etc)
1 cup (4 ounces) chopped, toasted pecans
2 cups coarsely chopped pretzels
Instructions
Preheat the oven to 350 degrees F and line a couple baking sheets with parchment paper.
In the bowl of an electric stand mixer fitted with the paddle attachment or in a large bowl using a handheld electric mixer, mix together the butter, peanut butter, granulated sugar, brown sugar, baking powder, baking soda and salt until well-combined and super creamy, 2-3 minutes, scraping down the sides of the bowl as needed.
Add the eggs and vanilla and mix well, 1-2 minutes.
Add the flour and mix briefly until the flour is partly combined. Add the chocolate chips, peanut butter chips, caramel, M&Ms, and pecans. Stir with a wooden spoon or spatula (or mix very slowly with the electric mixer) until evenly combined.
Scoop out several tablespoons of cookie dough (I use a #40 cookie scoop) and roll into balls. They won't be perfectly round as all those add-ins will create some bumps. Don't stress. Press the top of each cookie ball into the chopped pretzels (and then lightly press the pretzels into the cookie dough to stick) and place the cookie dough balls several inches apart on the prepared baking sheets.
Bake for 9-11 minutes. These cookies stay fairly puffy (thanks to all the add-ins); for slightly flatter cookies, press them lightly into more of a disc-shape before baking or bake at 325 degrees F. If, for some reason, your cookies are flattening too much, try increasing the baking temperature to 375 degrees F.
Notes
The caramel balls I'm talking about in this recipe are the unwrapped soft caramel bits about the size of large chocolate chips sold by Kraft (usually in the baking aisle). When I haven't been able to find those, I unwrap soft caramels (either Kraft or Trader Joe's) and cut into pieces with a bench knife. It's a labor of love, but so worth it for these cookies!
Recommended Products
As an Amazon Associate and member of other affiliate programs, I earn from qualifying purchases.
Recipe Source: from Mel’s Kitchen Cafe (inspired from a recipe my sister-in-law, Erin, made for us in Montana this summer)
Disclaimer: I am a participant in the Amazon Services LLC Associates Program, an affiliate advertising program designed to provide a means for me to earn fees by linking to Amazon.com and affiliated sites.
Posted on July 30, 2019 by Mel

Source: https://www.melskitchencafe.com/peanut-butter-kitchen-sink-cookies/
0 notes
Text
My Ultimate Tailgate Menu for Football Season.
by Jessica on September 3, 2018 25 8
It’s here! My favorite time of year! And I’m bringing you killer tailgating recipes.
And should I say, it’s one of my favorite days of the year too.
For the last few years, I’ve shared massive lists of my favorite recipes for football season. Things that work for parties, tailgating, the super bowl – everything! I have them from years back, but you can find last year’s, 2016, 2015 and 2014 at those links.
So much good food!
This year I wanted to do something different. I know that I constantly have SO many FAVORITES, it can be hard to choose what to make. These ten recipes are exactly what I make over and over again – and also what YOU make over again. They are some of the most popular recipes on the site and ones that are perfect to make and take. Or make at home! The best ten tailgating recipes that you need in your life, right now.
First up, apple cider sangria!
This is by far the most popular cocktail here on the blog and one I look forward to all year. You can make a huge batch ahead of time and it’s so, so good.
Next, snacky things. We have chipotle caramel chex mix, because it’s completely addictive. And can also be made ahead of time!
Of course we also have buffalo chicken dip, because… hello football season. I hadn’t actually had this in years because I sort of burned myself out on it. We ate it after shooting and it was SO GOOD. Always a huge hit.
I also suggest making this pub cheese. It’s dreamy with sourdough pretzels or veggie sticks. Super easy and flavorful and easy to make ahead. Great with beer too.
And these easy puff pastry cheese straws are another necessity. They are best served ASAP, but they do hold up for a few hours after making. They make a perfect dipper.
For a main dish, I love to switch it up between this slow cooker BBQ beer chicken or saucy pulled pork. Buns, BBQ sauce and maybe some garnish are all you need!
A great salad that holds up well is my harvest honeycrisp salad! The kale is hearty and actually gets better as it sits. Just in case, you can take the apple and slice it there if you wish, however it will be okay in the salad too. This salad is INCREDIBLE.
The best treats I can recommend are these insane brownies that everyone goes crazy over, as well as these giant rainbow cookies. Both are awesome, just depends on your mood.
All of these recipes together create a fantastic menu, but the pieces work separately too. I can’t even explain how much I adore alllll of these recipes.
For fun, you can find these twinkle fall leaf lights here and the soft yeti cooler (which is incredible and keeps stuff cold/frozen forever!) here. These Pendleton blankets are so ridiculously warm (and are a great gift!) – they are wool and make perfect seat covers or can really warm you up too.
I found this jar drink dispenser at homegoods a few years ago and we just used a small folding card table to set up the snacks!
I’d looove to hear down below about your go-to game day recipes.

Source: https://www.howsweeteats.com/2018/09/tailgating-recipes/
0 notes
Text
Honey Lemon Bars
6 Freestyle Points 135 Calories
Pucker Up! These sweet and tangy Honey Lemon Bars made with fresh lemon, lemon zest and honey and a whole wheat shortbread crust are a little lighter than traditional lemon bars, but are so tasty and hard to resist.
I love a good sweet and tangy lemon treat. Some of my other favorite lemon treats are Lemon Cheesecake Yogurt Cups, Pink Lemonade Confetti Cupcakes and Lemon Cranberry Scones.
These lightened bars use far less butter and sugar than traditional lemon bars. Honey is a natural way to sweeten these lemon bars but it also darkens the color of the bars compared to traditional lemon bars. But no worries, they taste so good you really won’t care. The only problem with these lemon bars is that I find myself making excuses to eat another, so I suggest making these only if you have some friends to share them with!
I first posted these in 2012, and noticed some people had issues with the lemon topping running under the shortbread. So I tested them again a few times and perfected them.
Tips for Perfect Lemon Bars
Use a glass or ceramic baking dish. I find using a glass or ceramic baking dish is best to avoid a metallic taste.
Make a sling for easy removal. To easily remove the bars from the baking dish once ready, make a sling with parchment paper. Line the pan with the 2 long sheets of parchment paper placed perpendicular to each other in the pan. They should be long enough to hang over the sides to use as handles to lift out the baked lemon bars before cutting.
When making the crust, make the sides higher to prevent spillage. Add the flour mixture to the baking dish pressing into an even layer and up the sides of the dish about 1/4-inch so the filling doesn’t spill out.
Let the crust cool once baked before mixing the ingredients for the topping.
Don’t add the powdered sugar until ready to serve.
Use a clean hot knife for cutting. Clean in between cuts.
Honey Lemon Bars
Pucker Up! These sweet and tangy Honey Lemon Bars made with fresh lemon, lemon zest and honey and a whole wheat shortbread crust are a little lighter than traditional lemon bars, but are so tasty and hard to resist.
Ingredients:
For the crust:
6 tablespoons white whole wheat flour
6 tablespoons all purpose flour
1/4 cup light brown sugar (not packed)
3 tablespoons cornstarch
2 teaspoons grated lemon zest
1/2 teaspoon baking powder
1/4 teaspoon kosher salt
4 tablespoons unsalted butter, cut into bits and chilled
1 tablespoons 0% Greek yogurt
For the filling:
1/3 cup honey
3 large eggs, lightly beaten
2 tablespoons white whole wheat flour
1/8 teaspoon kosher salt
1 teaspoon grated lemon zest
5 tablespoons fresh lemon juice
1 tablespoon powdered sugar, for dusting on top
Directions:
Preheat the oven to 350F.
Prepare an 8-inch square glass or ceramic baking dish pan by lightly spraying the inside with baking spray.
Make a sling: Cut 2 sheets of parchment paper 15 x 15 inches each. Fold them in half so they are 7 1/2 x 15 inches, which will make them sturdier.
Line the pan with the 2 long sheets of parchment paper placed perpendicular to each other in the pan. This is so you can get the bars out after they are cooked, so don’t skip this step. They should be long enough to hang over the sides to use as handles to lift out the baked lemon bars before cutting.
Spray the inside of the parchment with baking spray.
For the crust: In a food processor combine the flours, brown sugar, cornstarch, lemon zest, baking powder and salt and process until well combined.
Add the butter and yogurt to the flour mixture at once and pulse at least a dozen times before turning out into the prepared pan and pressing into an even layer and up the sides of the dish about 1/4-inch so the filling doesn’t spill out.
Bake until evenly browned about 30 minutes. Shut the oven off and cool the crust on a metal rack for at least 20 minutes.
Once cooled, heat the oven to 325°F.
Prepare the filling in a medium bowl by whisking together the eggs, honey and lemon zest. Add the flour 1 tablespoon at a time, and the salt and mix well. (this is best to prepare just before baking)
Stir in the lemon juice and pour over the cooled crust.
Bake until filling is set, about 22 to 25 minutes.
Cool completely before lifting the bars out of the pan with the parchment. For best results, refrigerate overnight for a firmer topping.
Cut into 12 squares using a clean hot knife, clean in between slices.
Dust with confectioners sugar just before serving.
Makes 12 bars.
Can be made a day ahead.
Nutrition Information
Yield: 12 servings, Serving Size: 1 bar
Amount Per Serving:
Freestyle Points: 6
Points +: 4
Calories: 135 calories
Total Fat: 5g
Saturated Fat: 3g
Cholesterol: 57mg
Sodium: 76mg
Carbohydrates: 21g
Fiber: 0.5g
Sugar: 12g
Protein: 3g
All images and text ©Gina Homolka for Skinnytaste
Photo credit: Jess Larson
posted March 31, 2019 by Gina
Don’t Miss a Recipe!
Get new free recipes and exclusive content delivered right to your inbox:
Source: https://www.skinnytaste.com/skinny-honey-lemon-bars/
0 notes
Text
18 Recipes to Kick off your Post-Holiday Reset

It's increasingly difficult to get consensus on what makes the most healthful diet, but I think we can all agree that eating more nutrient-dense plants after an overly-indulgent holiday season is a positive thing. Putting a handful of new, veg-centric recipes into rotation this time of year can help move the needle in the right direction. Hopefully this will provide a bit of inspiration! Many of the recipes are easily adaptable, and weeknight friendly. Enjoy!
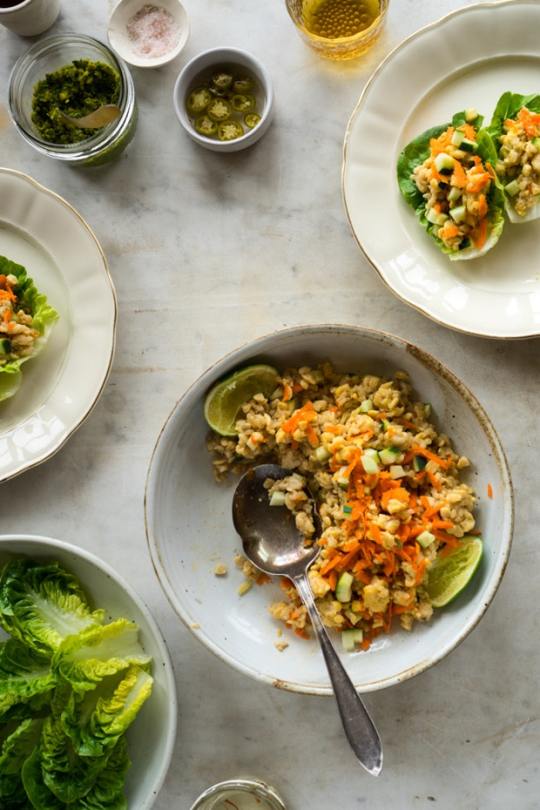
1. Garlic Lime Lettuce Wraps - I love these! Ginger and garlic tempeh rice, folded into lime-spiked lettuce wraps with lots of herbs, cucumber, and carrots. A one-pan meal that comes together in no time! Get the recipe here.
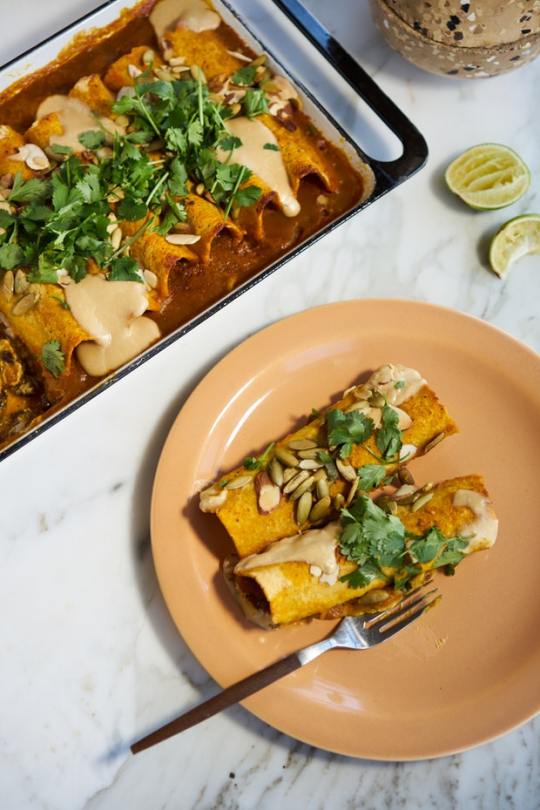
2. Quick Vegan Enchiladas with Sweet Potato Sauce - These are knock-out delicious, in the oven in less that ten minutes, and a healthful alternative to all the heavy cheese versions out there. With black beans, sweet potatoes, and a stealthy turmeric boost.Get the recipe here.
3. Spicy Tahini Noodles with Roasted Vegetables - A weeknight winner! Make a simple, thinned-out tahini sauce, roast some vegetables while your pasta water is coming to a boil, toss and serve on one platter. If you like those old-school Chinese restaurant spicy peanut noodles, these are sort-of their tahini slathered distant cousinsGet the recipe here.

4. California Tom Yum Soup - The perfect antidote to holiday over-indulgence. This version is a distant relative of the vibrant, brothy tom yum soup you likely know and love. Get the recipe here.

5. Last Minute Red Lasagna - A true weeknight lasagna. No pre-cooking sauces, no pre-cooking noodles. You, literally, stir the first five ingredients together into a vibrant crushed tomato sauce, and start layering. Also, it isn't a cheese bomb.Get the recipe here.

6. Ten Ingredient Alkalizing Green Soup - Ten ingredients in a blender and you've got a potent, alkalizing green soup - spinach, herbs, garlic, with silky coconut cream, and some green split peas for staying power. Get the recipe here.

7. Chickpea Cauliflower Korma - A riff on the Chickpea Cauliflower Korma recipe in Jennifer Iserloh's The Healing Slow Cooker - chickpeas, cauliflower, combined with a not-shy simmer sauce. (conventional / Instantpot versions) Get the recipe here.

8. Vibrant, Vegan Double Broccoli Buddha Bowl - Made with seven ingredients on green overdrive. You double up on broccoli through a coconut green curry pesto and florets, then toss with a quinoa base. Get the recipe here.

9. Immunity Soup - A soup built on a monster white pepper broth. White pepper with jolts of ginger, and stabs of garlic - clear and strong topped with tofu, mushrooms, watermelon radish, and lots of green onions. Get the recipe here.

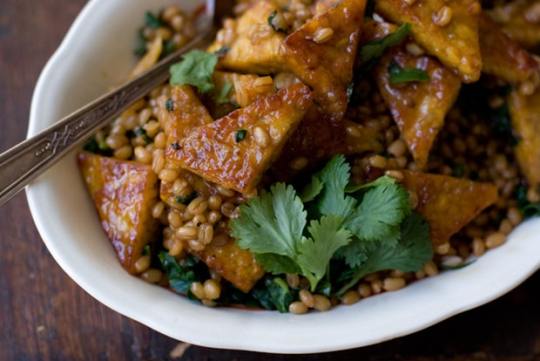
10. Orange Pan-glazed Tempeh - The best tempeh recipe I've highlighted to date - it features a simple ginger and garlic-spiked orange glaze that plays of the nutty earthiness of the pan-fried tempeh beautifully. Get the recipe here.
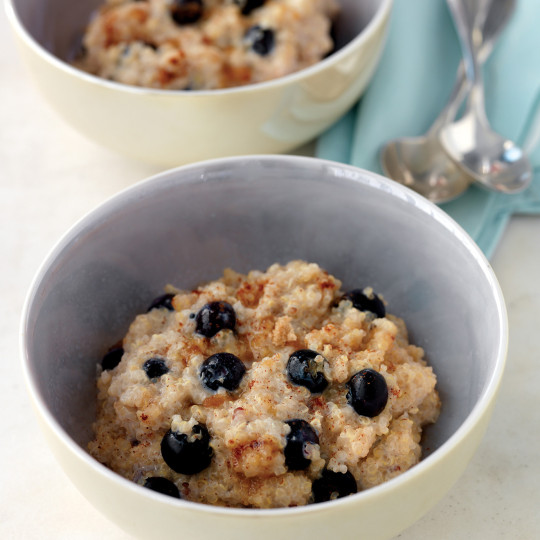
11. Chia Breakfast Bowl - So easy, so good! Soak the chia seeds in your favorite nut milk, top with smashed berries, fresh passionfruit juice, pepitas, and big flakes of toasted coconut. A bit of bee pollen adds a boost and some pretty. Get the recipe here.

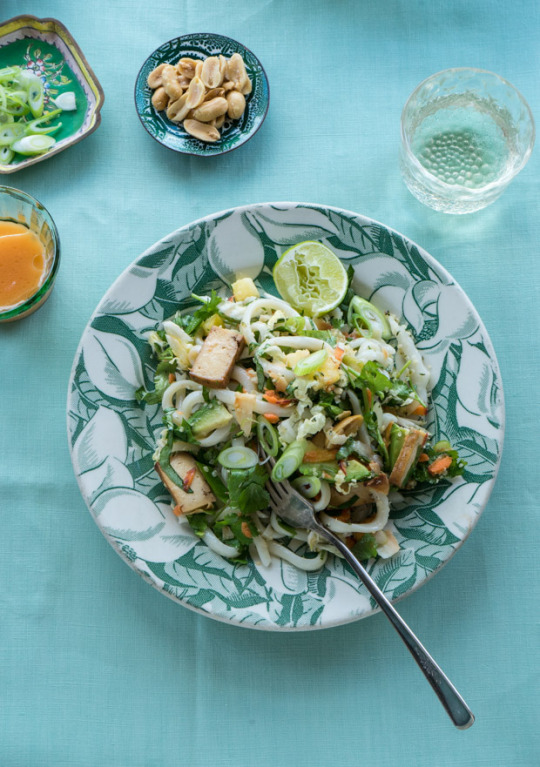
12. Sriracha Rainbow Noodle Salad - A radiant, color-flecked tangle of noodles, cabbage, shredded carrots, pickled sushi ginger, and an abundance of cilantro, basil, and scallions. It has tofu and peanuts, coconut, ginger, avocado, and hemp seeds. Get the recipe here.
13. Mung Yoga Bowl - The kind of bowl that keeps you strong - herb-packed yogurt dolloped over a hearty bowl of mung beans and quinoa, finished with toasted nuts and a simple paprika oil. Get the recipe here.

</a
14. Vegetable Noodle Soup - This vegetable noodle soup is as simple, direct, and delicious as it gets. Vegetarian and vegans looking for an alternative to chicken noodle soup, try this! Get the recipe here.

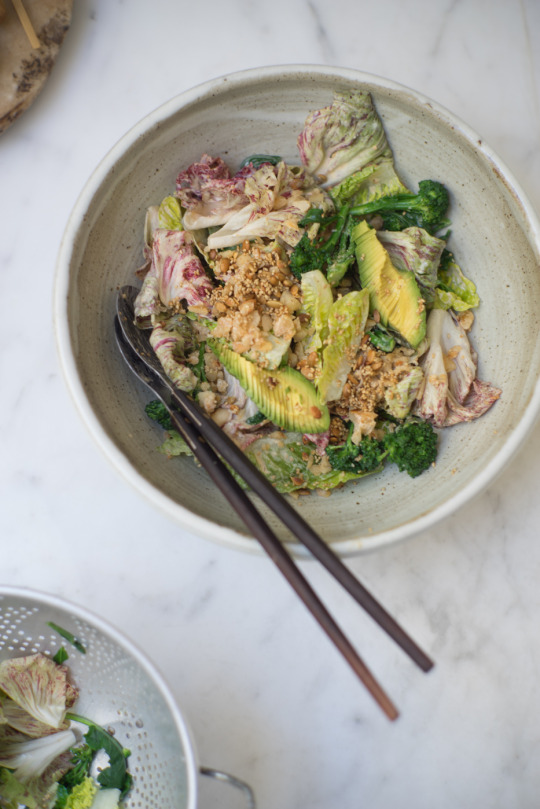
15. Anna's California Miso Avocado Salad - So good! A California-inspired Miso, Avocado, & Bean Salad from A Modern Way to Eat, by Anna Jones. Seasonal greens and beans are tossed with an assertive, creamy miso dressing. There are crunchy seeds, and broccoli, and avocado - it all comes together into a brilliant, beautiful, feel-good salad.Get the recipe here.
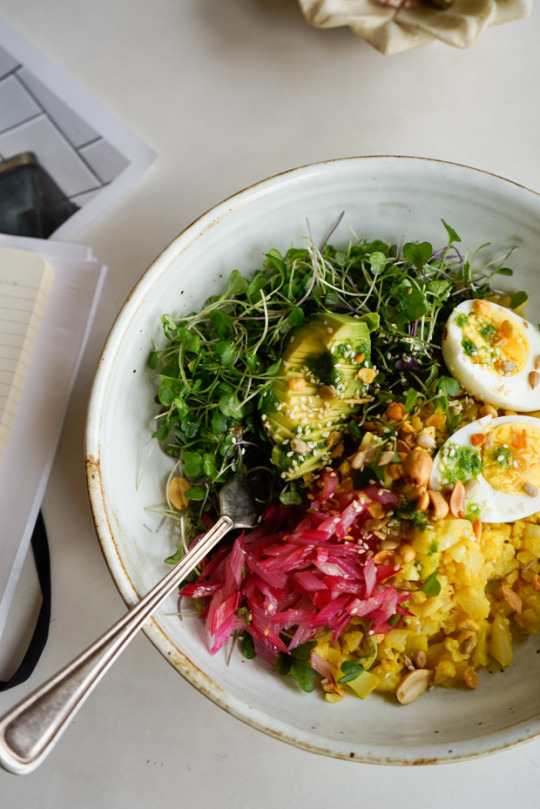
16. Rainbow Cauliflower Rice - Lightly cooked cauliflower is chopped, then tossed, with turmeric, cumin, cayenne, and a touch of ghee - add sliced avocado, hard-boiled eggs, toasted seeds, rainbow chard stems, lettuces. Get the recipe here.
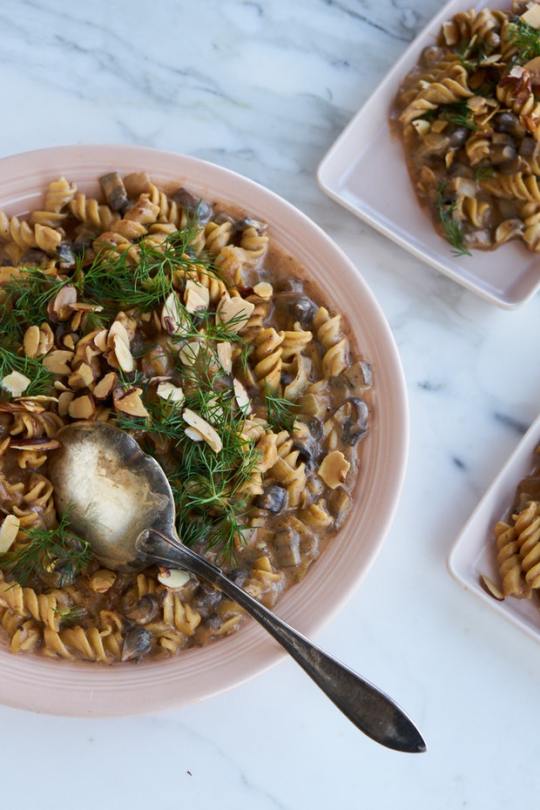
17. Mushroom Stroganoff - This fantastic vegan mushroom stroganoff is a total crowd-pleaser. You can make it in an Instant Pot, or stovetop. Made with caraway-spiked vodka, and a hearty mushroom base, you get all of what you love about mushroom stroganoff, without the all the butter and cream. Get the recipe here.
18. Winter Green Miso Paste - Keep this on hand for flash-quick, healthy meals. A herbaceous, green miso paste with some garlic bite, rounded out with lots of scallions, cilantro, ginger, and some rosemary. Plus ten simple ways to use it. Get the recipe here.

Share this...
Pinterest
0Facebook
0Google+
0email

WEEKNIGHT EXPRESS features 10 Vegetarian, Plant-centric Recipes for Feel-Good Food — Fast!
Subscribe to get 32-pages of recipes to view on your tablet, e-book reader or phone.

Follow Me:
Instagram
Youtube
Facebook
Pinterest
Related Recipes

Brilliant Non-Alcoholic Cocktails Everyone Loves
Non-alcoholic cocktails don't have to be a bummer. Play around with aqua frescas, shrubs, kombuchas, and fresh fruit syrups. All can be fun components in mocktail-type drinks like these.
13 Inspiring Instagrammers to Follow for Healthy, Feel-Good Food
My hope is that they'll all inspire you to want to jump into the kitchen. They tend to celebrate lots of plants and vegetables, and generally integrate food, cooking, balance, and wellness into their lives in a way that inspires others.
Life Changing Green Rice Porridge (Instant Pot, Vegan)
I don’t use the term life changing lightly, but this rice porridge recipe fits the bill. It’s a one pot, effortless, green, nutrient-packed twist on one of my favorite things to eat.
Twelve Whole-Food Plant-Based Kale Recipes You Should Try This Week
Kale every day. Your body will thank you. Kale-centric recipes for the week ahead.
More Recipes
Whole Grain
WFPB
Vegetarian
Vegan
Soups
Side Dishes
Sandwiches
Salads
Pasta
Quick
Main Course
Low Carb
Instant Pot
Holiday
High Protein
Gluten Free
Drinks
Dinner Ideas
Desserts
Cookies
Chocolate
Breakfast
Baking
Appetizers
Follow Me:
Instagram
Youtube
Facebook
Pinterest
Popular Ingredients
avocado
egg
herb
kale
lemon
lentil
quinoa
pasta
tomato
turmeric
yogurt
zucchini
arugula
asparagus
basil
broccoli
buttermilk
cauliflower
chickpea
chocolate
curry
tempeh
tofu
ALL
© 101 Cookbooks 2019
Use of this site constitutes acceptance of its User Agreement and Privacy Policy.

Source: https://www.101cookbooks.com/18-recipes-to-kick-off-your-post-holiday-reset/
0 notes
Text
Printable Dog Walking Toys
These printable pups want to go for a walk and you can help them out! Put your plastic drinking straws to use as their leashes and let the fun begin.
Plastic drinking straws are a problem for our environment. Instead of using straws one time and throwing them out, make them into a fun toy. Simply wash a few used flexible straws to give them a new purpose!
If you don’t want to use straws for this, you can also swap in pipe cleaners for the leash. Either way is fun to play with as you walk these colorful dogs.
Ready to get started? Because it’s time for walkies!
Printable dog images
Cardstock
Clean Flexible Straws or Pipe Cleaners
Scissors
Hole Punch
Tape
Glue Stick
Step 1
Print the dog walkers PDF on cardstock and cut out the shapes. Some of the tight angles are tricky to cut, but if you cut into them from the two sides (like you’re cutting a slice of pie), it’s easier.
Step 2
Fold the two edges of the rectangle piece on the dotted lines. Punch a hole at the marked circle.
Step 3
Extend the flexible straw all the way, then bend it down as far as it will go.
Trim the short section of the straw to make it shorter than the rectangle piece. For the green dog, you’ll need to trim it more than for the other dogs.
Step 4
Insert the short section in the punched hole on the rectangle, then tape it to the non-printed side.
Step 5
Apply glue stick to the two folded down flaps of the rectangle.
Step 6
Stick the two cut out dogs to the sides of the rectangle. Make sure that the straw comes out near the dog’s collar.
Dogs love other doggy friends (most of the time), so be sure to make a few more dogs so they can play together. Of course, remind them to stay friendly with each other!
Now, grab hold of the end of the straw leash and take your new pup for a walk!
Walking these dogs just on their own is fun, but you can also use them with dolls so they can have some pets to play with. They could even start a dog-walking service. The good news is that with straw leashes, they won’t get all tangled up!
Happy crafting!
Source: https://www.handmadecharlotte.com/printable-dog-walking-toys/
0 notes
Text
Culver’s Butterburger Recipe
September 3, 2018 // no comments »
Culver’s Butterburger Recipe
If you ever get a chance to go to Culver’s restaurant, you have the try the butter burger. These fresh burgers are delicious and juicy and topped with condiments to your liking. Here is a copycat recipe to create the Culver’s butterburger. It is called a butter burger not because the butter is actually in the beef patty but because the butter is spread onto the bun itself. You can top these burgers with whatever you like. I just did cheddar cheese and pickles. Enjoy.
Print Recipe
Culver's ButterBurger
Yield: 4 Servings
Ingredients:
8 tablespoons salted butter
salt and pepper (to taste)
1lb ground beef
4 hamburger buns
4 slices cheddar cheese
dill pickle slices
Directions:
Form the ground beef into 4 patties. Season on both sides with salt and pepper to taste. Spread 2 tablespoons of butter onto each bun top.
Heat a large skillet to medium-high heat. Add the beef patties and cook for about 3 minutes. Flip and cook for an additional 2 minutes.Top each with a slice of cheddar cheese. Cook until the cheese has melted and the burgers the fully cooked (the internal temperature has reached 160 degrees F).
Transfer the patties to the bun bottoms. Top with pickles and the buttered bun tops.
Beef, Main Course, Recipes
no comments »
Yum
Related Posts
June 19, 2012 BBQ Chicken Burgers Recipe
June 14, 2008 Chocolate Chip Cookies Recipe
July 30, 2015 Chorizo Quesadillas Recipe
Name (required)
Mail (required - will not be published)
Website URL
Comment
Source: https://blogchef.net/culvers-butterburger-recipe/
0 notes
Text
40+ Healthy Asian-Inspired Recipes
From wonton soup and lettuce wraps and more, skip the take-out and make one of these 40+ healthy Asian-inspired recipes at home for dinner tonight!
Cooking with Asian ingredients is not only good for the waistline but it makes for healthy eating much more interesting! Whether it’s adding ginger root to your chicken stock, stirring in hoisin to your stir-fry or sautéing veggies in sesame oil, cooking Asian food is easier than you think! Save money and calories, ditch the takeout menu and try cooking one of these healthy Asian recipes today!
If you’ve been reading my blog for awhile or follow me on Instagram, you are likely well aware that I’m mildly obsessed with Asian food. Whether it was my very first bite of dim sum in San Francisco’s Chinatown or large family gatherings at one of Berkeley’s many Thai restaurants, I have been eating authentic Asian food for as long as I can remember.
In fact, my Dad would frequently take my sisters and I out for “Sushi Saturdays” at Tokyo Grill, the same restaurant we now take our toddlers for salmon sashimi and spicy tuna rolls. The best weekends would end with a big Sunday dinner at Mr. Lee’s, a hole-in-the-wall Vietnamese restaurant where I learned how to dip rice paper in hot water to create the perfect bbq pork fresh roll.
Needless to say, I am smitten with the salty, sour, sweet and spicy flavors that makes Asian food so delicious and well balanced. As a result, if given the choice, I will always choose a steamy bowl of pho or a quick and easy stir-fry over a slice of pizza or a juicy burger any day of the week. The best part? By nature, authentic Asian food is often more nutritionally balanced than traditional American food.
Full of fresh vegetables, fragrant herbs and naturally low calorie ingredients like soy sauce and rice vinegar, adding a few Asian recipes to your weekly meal plan is not only delicious but a great way to ensure a healthy meal the whole family will love. To get you started, here are 40 Healthy Asian-Inspired Recipes from some of your favorite food bloggers!
Your fork is waiting.
Stir-Fry Sichuan Beef
This Stir-Fry Sichuan Beef recipe is super flavorful. The sauce combines the flavors of soy, ginger, ketchup, hoisin sauce, and chili bean sauce. The vegetables include onions, green bell peppers, and a garnish of scallions, all ingredients that are readily available. The sauce is amazing.
Check out this recipe!
Vegan Scallion Pancakes
Vegan scallion pancakes require few ingredients but are full-on in flavour. Although they may look tricky to make if you’ve never done it before, the technique is actually very simple – just flatten, roll, coil, flatten and fry.
Check out this recipe!
Be sure to check out my Asian Recipes Pinterest board for more fresh and fabulous ideas!
Source: https://thelemonbowl.com/20-healthy-asian-inspired-recipes/
0 notes
Text
COCONUT CHOCOLATE CHIP COOKIES
Food should be nourishing and delicious. It sounds simple, right? With sweets especially, it can be so hard to find treats that are as good to eat as they are for you. My friend Laurel, the baker behind the grain-free and refined-sugar-free (and sometimes vegan) goodness known as Sweet Laurel Bakery, has shared some of her simplest and most satisfying recipes with me. My favorite thing about her recipes is that they’re always made with whole ingredients, no funny stuff or filler, so even the biggest sweet-tooth loves them.
Coconut and chocolate together just makes me happy. These little cookies aren’t classic chewy chocolate chip cookies, they’re more like little shortbread cookies made with coconut – tender but crisp. The shards of dark chocolate punctuate the cookies perfectly and make these my favorite accompaniment to coffee.
INGREDIENTS
For about 3 dozen cookies
2 cups almond flour
1/2 teaspoon kosher salt
1/2 teaspoon baking soda
1/2 cup unsweetened shredded coconut (we used Bob’s Red Mill)
1/2 cup coconut oil, melted
1/2 cup agave nectar
1 tablespoon pure vanilla extract
1/2 cup homemade chocolate chips
DIRECTIONS
Preheat oven to 350.
Stir together the dry ingredients in a medium bowl. Separately, whisk together all wet ingredients and stir into the dry ingredients. Add chocolate chips and stir to combine. Place one to two inch balls of batter onto greased and parchment lined baking pans and lightly press down. Bake for 7-9 minutes, until just golden brown around the edges. Remove from the oven and place the cookies on a cooling rack.
INGREDIENTS (HOMEMADE CHOCOLATE CHIPS)
4 ounces unsweetened baking chocolate (100% cacao), (organic is preferable)
1 tablespoon agave (or more depending on how dark you like it)
DIRECTIONS
Break baking chocolate into one inch pieces and place in thick saucepan or double boiler. Over a very low heat, melt baking chocolate. Once melted, take off heat and add agave and stir. Pour chocolate onto parchment paper and spread into a rectangle, about 8×12 inches. Place parchment in freezer. Once hardened (will take a few minutes), break of pieces and use as needed.

Source: https://www.thekitchykitchen.com/?recipes=/coconut-chocolate-chip-cookies/
0 notes
Text
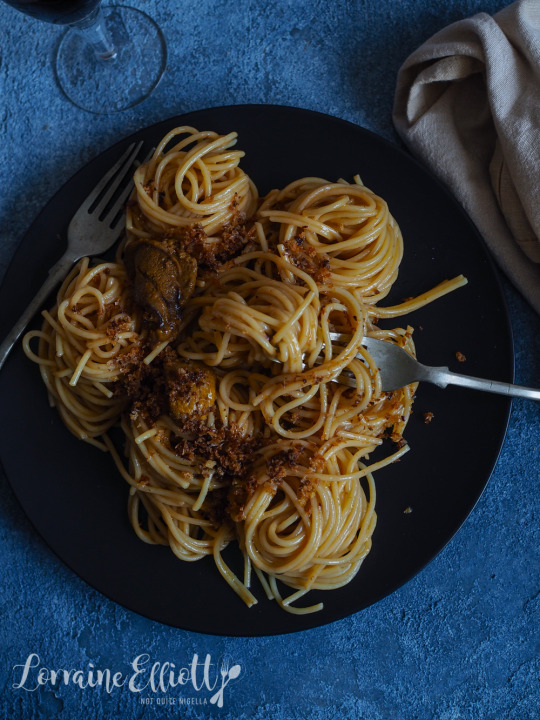
Simple & Divine Sea Urchin Uni Pasta

This sea urchin roe pasta is simplicity itself. Spaghetti is slicked and glossy with buttery sea urchin sauce and then topped with a crunchy pangrattato and more sea urchin roe! This is a dish that you may see at restaurants but is so easy to replicate at home I wonder if I'd ever order it again. It is also made in less than 15 minutes! If you love sea urchin, please make this!
I have found raw sea urchin roe can be a polarising item. You either tend to love or hate it. I love it and it has a wonderfully creamy jellied texture like panna cotta with a the flavour of the sea. It has been described as having an intimate kiss with the ocean.
But sea urchin roe is also high in omega three, low in calories and is an aphrodisiac. And apparently sea urchins or uni (pronounced "oonee" in Japanese) are also taking over the Great Barrier Reef so much that scientists are urging people to eat it.

This recipe is from a friend of mine JY. It's so simple I wondered if it would actually work. But it does. And even if you don't like sea urchin raw, this sauce transforms it beautifully into something else entirely. It's not overly fishy and the butter tempers the sea flavour. I can't even explain how it happens, you've just got to try it.
Speaking of explaining, the other day Mr NQN and I were in the park with our beloved late Miss Mochi Moo (RIP my little one). We passed by an enormous tree, whose roots spanned out metres from it's thick trunk. I pointed out the huge roots to Mr NQN as we almost tripped over them.
"You know why they have roots?" he said but before I could answer, "It's so they can get water from the ground easily."
I looked at him as if he were an alien. "Yes I know cos you know I've lived and I wasn't just born," I said to him drily. Cos while I don't remember calculus or trigonometry, I remember science basics because I'm alive.
He continued undeterred. "Oh, well it's also so it can root itself to the ground to support the trunk because it's so large," he continued. At that point I think my head exploded and I started laughing. "Um. Do I look daft?" I said to him. I mean some things might warrant explaining. But to an adult human who had a full education, things like tree roots don't! I also made sure to explain this sea urchin to him ;)
So tell me Dear Reader, do you like sea urchin? And did you know that about trees? ;) Do you find people explaining basics to you often?
An Original Recipe by Lorraine Elliott
Preparation time: 5 minutes
Cooking time: 10 minutes
Serves 4
500g/1.1lbs spaghetti
8 sea urchin roe plus 8 extra to decorate
125g/4ozs. butter, melted
1/2 cup panko breadcrumbs
50g/1.7ozs. butter
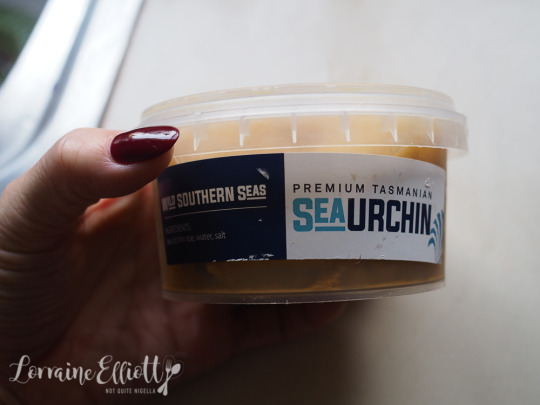
Step 1 - Boil the spaghetti in plenty of salted boiling water. Meanwhile, blend the 8 sea urchin roes and then add the melted butter and blend again to form a sauce.
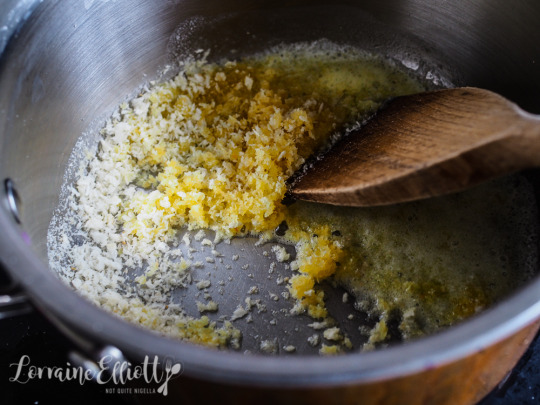
Step 2 - In a small saucepan heat the remaining 50g of butter. Add the panko breadcrumbs to this and then cook until the breadcrumbs are browned and smell nutty. Put aside.
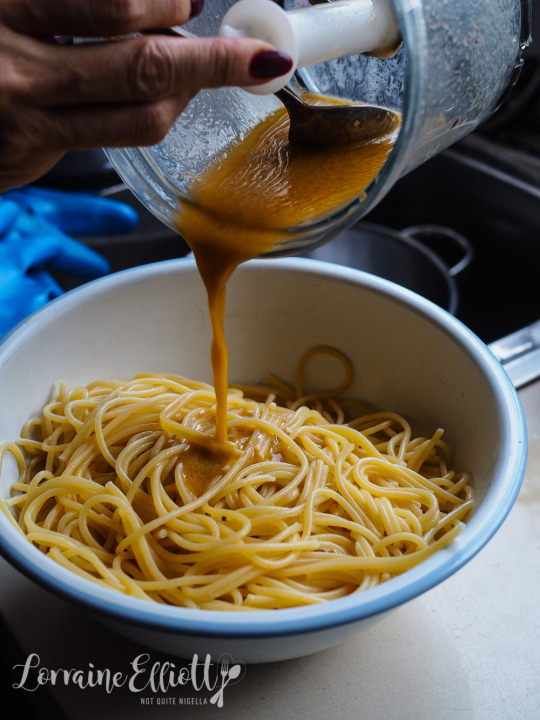
Step 3 - When the pasta is cooked, drain and then toss in the sea urchin butter (pulse it again in the food processor just before doing this to make sure that it is emulsified). Place on serving plates and add two sea urchin on top of each plate and then do with the buttered crumbs.

Source: https://www.notquitenigella.com/2019/03/29/sea-urchin-uni-pasta/
0 notes
Text
Parisian Fish with Almond Sauce

Parisian Fish with Almond Sauce
Another brilliant simple dinner inspired by my lovely friend Clotilde’s book Tasting Paris.
If you’re a Francophile like me you really should treat yourself to a copy. It’s wonderful insight into the Paris food scene through the eyes of a local.
Anyway back to this dinner! By using almond butter (or other nut butters) we make a delicious creamy sauce that’s the perfect accompaniment to crispy pan fried fish.
While I’ve used bream (a white fish) in the photo, I did enjoy it slightly (only very slightly) more the first time I made it with ocean trout.
Oh and the photo has macadamias because I was out of almonds. But roast almonds would be a better compliment for the flavours in the sauce.
If you want to take the green veg serving option, steamed green beans, asparagus or grilled zucchini would be my picks.
And as always, the water doesn’t count in my 6-ingredient limit!
Ingredients
100 g 4 heaped tablespoons almond butter
4 tablespoons water
1 clove garlic minced
2 tablespoon lemon juice + halves to serve
2 fish fillets
salad leaves or green veg to serve
roast almonds or other nuts
Instructions
For the sauce mix almond butter, water, garlic and lemon juice in a small bowl until it is smooth and creamy. Season with a pinch of salt. Taste and add more salt or lemon if needed.
Heat a medium frying pan on a medium high heat. If the fish has skin, score the skin 3-4 times to help prevent it curling up. When the pan is hot add a little glug of oil and cook fish skin side down for 3-4 minutes. Turn and cook for another 2-4 minutes or until the fish is cooked to your liking (thicker fillets may take longer unless you like them quite rare in the middle).
Smear sauce over the base of two plates in off centered circles. Top with hot fish (skin side up). Place salad or veg on the side and scatter over almonds and finish with lemon halves.
WINE MATCH: A nice crisp dry Pinot Gris or Riesling .
Variations & Substitutions
vegetarian / vegan – serve the almond sauce with grilled or roast eggplant slices or halves. Add extra nuts to make it more substantial.
more substantial (carb lovers) – roast or steamed potatoes.
more substantial (low carb) – extra fish, extra nuts or extra low carb veg (beautiful boiled broccoli or grilled zucchini is excellent!).
Low FODMAP – make a peanut & lime sauce instead of the lemon and almond. This is one of those rare occasions where smooth peanut butter will work better. And skip the garlic or add a few tablespoons of garlic oil to the sauce.
nut-free – use tahini (sesame seed paste) or sun butter (sunflower seed butter). And replace almonds with croutons or torn chunks of sourdough bread.
carnivore – sauce is also good with grilled or pan fried chicken.
Waste Avoidance Strategy
almond butter / roast almonds or other nuts – keep them in the pantry.
garlic – will keep in the pantry for months. Best if in a dark corner in a brown paper bag.
lemon – whole lemon will keep wrapped in a plastic bag in the fridge for months.
fish fillets – freeze them.
salad leaves – are highly perishable. My first path would be to use them for another meal (salad for breakfast!) but if that isn’t possible you can pop them in the freezer. They will wilt down but can then be used anywhere you’d use wilted greens. At least this way they won’t go slimy.
green veg – most will keep for a week or longer in a plastic bag in the fridge.
Prepare Ahead
I like it best when freshly made but you could make the sauce up to a week ahead and keep it in the fridge. Allow to come to room temp before serving. Leftovers will keep in the fridge for 1-2 weeks or can be frozen.

Have fun in the kitchen!
With love,
Jules x
Tags: almonds. sauce, dinner, fish, french, simple
Source: https://thestonesoup.com/blog/2019/01/21/parisian-fish-with-almond-sauce/
0 notes
Text
Red, White & Blue Baked Alaska
Have you ever had one of those days, weeks, months, years? This year is turning into one set back after another! As you know my mother passed away in January, very suddenly. That was really hard on all of us. Just the worst. We all know we are going to lose our loved ones one day, but somehow, when it happens, we are never prepared for it.
Then my oven broke, not once, but twice . . . and I was without a working oven for about 2 1/2 months altogether. After that somehow, its still a mystery to me, my stick blender disappeared. Not the whole thing, just the motor for it. And now today my electric mixer has blown up. Right in the middle of making these lovely desserts. I apologise in advance for the crummy photos. They are not as pretty as they might have been had I not had to beat up the egg whites by hand.
I had no sooner got everything ready to go, went to plug in my electric mixer and there was a loud bang. Let me tell you I just about hit the ceiling! Shocking to say the least! I near jumped out of my skin! Its a wonder I didn't drop something.
And in the meantime ice cream was starting to melt . . . I quickly threw them back into the freezer and then began beating furiously with my hand whisk.
It takes forever to whisk egg white stiff with a hand whisk. I don't know how our grandmothers did it. They must have been made from much sturdier stuff and had stronger arms.
We are so very spoilt! We truly are! Anyways I finally got it all stiffed up and went to spread it on my frozen cakes. It was deflating as fast as I was spreading it. Blah . . . there is no comparison to electric whisked whites . . . but I did my best!
The end result was no less tasty, but not quite as pretty as I had envisioned. I wanted to share them anyways, because this is a really solid recipe and with all your stars aligned will absolutely turn out beautifully! Its easy and quick and very delicious!
You can make as many or as few as you like! I made two, but you could make ten or even twenty if so inclined. Simple.
They work best if you cut the cake, cover it with the jam and ice cream and berries and freeze the night before. That way they are really cold when you go to spread the meringue over top and pop them into the oven. If they are really cold when you go to bake them the ice cream won't melt in the oven. It will still taste good if the ice cream does melt a bit, but trust me when I say they won't be as pretty!
Yield: variable
Author: Marie Rayner
Print
With ImageWithout Image
Red, White & Blue Baked Alaska
You can make as many or as few of these as you like. I will give the quantities for two, but you can multiply them to make more. Quick, easy and delicious. You can cut out and top the cakes before hand, keeping them in the freezer until you need them, covering with meringue at the last minute prior to baking.
ingredients:
2 slices of pound type of cake (Madeira cake) 1/2 inch thick
2 tsp good quality strawberry preserves
2 scoops of vanilla ice cream, or strawberry/raspberry ripple
sliced strawberries
Mixed berries to serve
For the Meringue:
3 large free range egg whites
2 1/2 TBS caster sugar
instructions:
These preparations can be made the night before and then put into the freezer. Take your slices of cake and using a 2 1/2 inch round cutter, cut out two round circles from the cake. Line a small baking sheet with parchment paper. Lay the cake slices, well apart on the lined baking sheet. Spread each with a teaspoon of strawberry preserves. Top with a scoop of ice cream and surround each scoop of ice cream with slices of strawberry around the bottom edge. Put in the freezer to get really cold. (You can do this the night before.)
When you are ready to bake your desserts, preheat the oven to 220*C/425*F/ gas mark 7.
Break your egg whites into a clean glass bowl. Whip with an electric whisk until they start to get foamy. Continue to beat, adding the sugar slowly until the egg whites are stiff and glossy.
Remove your cakes from the freezer and working quickly with a small flat flexible spatula cover the cakes with the meringue, swirling it decoratively, and covering the top and sides completely.
Pop the oven tray into the preheated oven for 8 to 10 minutes until light golden brown. Carefully remove from the baking tray with a large metal spatula and pop onto serving dishes. Serve immediately with an assortment of fresh berries on the side.
I have no idea how long I will have to wait until I can get a new mixer. It will probably be months, but in the meantime I reckon I am going to develop some seriously arm muscles. Every cloud as a silver lining!
Source: https://theenglishkitchen.blogspot.com/2019/06/red-white-blue-baked-alaska.html
0 notes