
Statistics
We looked inside some of the posts by labelfinally and here's what we found interesting.
Average Info
Notes Per Post
21
Likes Per Post
21
Reblog Per Post
0
Reply Per Post
0
Time Between Posts
4 days
Number of Posts By Type
Text
17
Last Seen Tumblr Blogs


Fun Fact
Tumblr has a low social media market share in South America.
Text
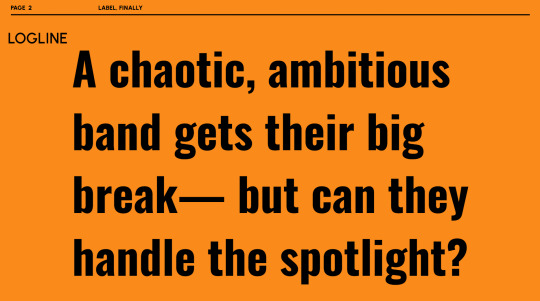
CREATIVE CRITICAL REFLECTION
You can find the timestamps according to the questions in the description of the video and you can access subtitles when opening the video in YouTube.
youtube
1 note
·
View note
Text
Critical reflection reflection + idea
Forgive me, I had to include this tautology in the title.
My first idea this reflection was to make it as absurd as possible, to match the style of the mockumentary that I was focused on. The first inspiration came when I stumbled upon an hour and a half long absurd but genius premiere of a highly anticipated album from Andre 3000, which turned out to take a completely unexpected turn in its style. The guy was literally doing nothing and was just lying on the floor listening to his creation, occasionally standing up and doing even more absurd things. This video rang something in me, and I drew a parallel with my own experiences when creating my opening and with the opening's meaning that were profoundly similar. While the characters in the opening were living through a procrastination crisis, I also had a decent portion of my own. Therefore, the recording of me on the background has a double meaning, representing both the movie's first central conflict and my own creative state. I tried to recreate my usual day full of procrastination, filled with video games and pointless wanderings about.
To furtherly add to the absurdity, I filled the remaining time where the camera stopped recording me, with various, completely random stock footage. Some of those were correlating with the movie's theme (music) and I tried to find the ones that are as absurd as possible. The other ones, like those with nature, were aimed at recreating the "documentary" commentary feel, because my chosen genre of mockumentary is partially a documentary.
Lastly, when creating the opening for the reflection, I was inspired by an old an ancient mockumentary called Monty Python and the Holy Grail. Its exceptional opening credits were completely out of place and random, making it humorous. I really liked this idea and so it was the main inspiration for the intro.
To conclude, I feel like this creative critical reflection has made me to think about my project all over again, look back at that tremendous progress I have made and just reflect upon my own achievements, struggles and efforts.
1 note
·
View note
Text
TITLES
An important thing to note were the titles. I opted out to not include the actor and the production team (that is, just me) names and they would simply go to the ending credits. I’ve done it with an intention of not disrupting the ~flow~ of the opening. Considering the opening’s dynamics of being fast paced and quite rushed, the traditional titles would be extra there.
What I did instead, assuming that I already had time limits pressing me from every direction possible, was that I squeezed the movie’s title into the horribly short 2 second frame. It appeared to be fine so I left it at that.
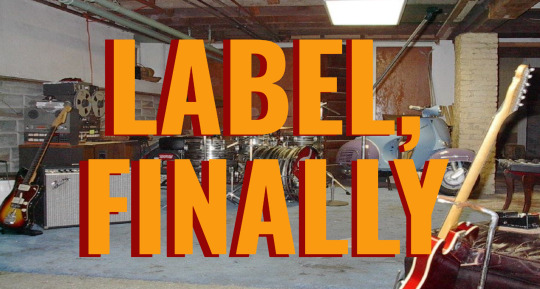
The initial idea was to do this epic appearance of the movie’s name, create an animation of the two words: “LABEL, FINALLY” falling down onto the screen like heavy rock blocks, as if crushing the screen beneath. It was mainly inspired by those 90s cheap arcades or blockbuster film productions. I wanted to give it this feel of nostalgia and also sprinkle it with a corny but a well known trick. This all was to add to the humorous effect of the comedy, an excessive hyperbole to introduce the movie as the peak of heroic, epic cinema - when in reality it’s a mockumentary about the story of a reckless band, nothing heroic about it. However, it hints at it. It foreshadows how the rest of the movie will look and feel like, how it will purposefully mock the industry illustrating it as something godly, when in fact, it’s not.
Unfortunately, I was not able to do it , due to the extremely unpleasant time limit. However, I tried to replicate it and make it fit. I came up with an idea to just show the text over the last shot of the sequence which was Chris(the bassist) giving an interview. I still wanted to do it as dramatic as possible. The sound was the most important aspect to it. I found a Western-like sound effect - a strum of an acoustic guitar in a minor scale and a crash cymbal mixed together. I placed the text right in the middle of the screen, with the specifically chosen colors - red and yellow which are in the primary color palette of the movie. They matched up with the pale yellow couch where the characters were interviewed and the red pillows on the said couch. I chose specifically those colors just to resonate with the overall theme of the movie, red is for the fierce and rogue nature of the band, yellow to bring out the nostalgia of those times.
Overall, the titles, although short and not ideal, still have done their job in presenting the movie and signifying the start of a story about to unravel, which is pretty much the whole aim of the opening and the titles - to adjust the audience to the movie about to begin.
2 notes
·
View notes
Text
Editing #3 (Final Cut)
In order to not lose any precious time and energy, I instantly started working on shortening the opening’s length.
The first and most obvious thing to do was to cut the clips as much as I could.
I started cutting out the extra pauses (which were not really extra as they have contributed to the comedic effect of the film, but sacrifices had to be made). I have also cut out some interview parts as some of them were pretty long (Alex’s, for example). This, in turn, resulted in some scripted jokes being simply discarded. However, I’ve tried to tailor it so that the dialogues would still keep their initial meaning and context, in order for the audience to understand the plot. The cutting itself had helped me to reduce the length to 2 minutes 25 seconds which was still a bit too much.
Next, I have noticed that some actors spoke really slow (like June). The actor had done a great job in portraying this character as neutral and lacking any excitement of being in a band through her manner of speaking. However, it was way too slow and I had to do something about it. An idea popped up into my head - I sped up the video manually to win some time. In turn, it came up a bit unnatural and rushed, but the main point was in reducing the running time of the opening and I succeeded.
In the end, after that merciless process of cutting and deleting, I reduced the running time from 2 minutes and 44 seconds to 2 minutes and 11 seconds. That is 33 seconds of discarded material , which was perfectly fine and could have made the opening more complete, but unfortunately I had to risk integrity for time.
To reflect, I would say that this experience had taught me to plan ahead, follow the time limit of the scenes and calculate whether it will work or some adjustments have to be made in order to avoid such unpleasant surprises.
And to cite David Lynch:

2 notes
·
View notes
Text
Editing #2 (Rough Cut)
In total, it took me about three days to get myself together to cut and glue the whole thing. I was working mostly at home but in order to make the process faster I had brought my laptop with me and was also editing at school.
I have used DaVinci Resolve 18 to edit the opening. Luckily, I am already familiar with this software as I have had a decent chunk of previous experience in working with it. Personally, it’s the best software for me and it ideally fits my needs. It’s not too excessive in its functionality which makes it simpler to use and get accustomed to.
Still, in the very beginning of editing I had some difficulties in remembering the hot keys and different types of functions there but I quickly remembered everything once I got into it and there was no looking back. I brushed off my rusty skills and started the tremendous process of editing.
When I have finally finished cutting, a critical inconvenience came up. My rough cut of the opening was 2 minutes 44 seconds. This is 44 seconds over the limited requirements. It was really bad and discouraging and sad. The cut came out in its most ideal shape - just as I had intended it. It was smooth and simply beautiful.
However, I had to do something about those 44 seconds(which is truly A LOT of shots), regardless of their vitality in the opening - I couldn’t simply cut off huge pieces of the scenes as they all were neatly linked together. For example, the interview parts were created as consecutive and complementary shots - deleting them would mean the opening would lose all of its meaning. It would be unclear for the audience to catch what is going on and understand the contexts.
In order to not lose any precious time and energy, I immediately started working on shortening the opening’s length.

2 notes
·
View notes
Text
Editing #1
My first step in editing was to sort out the clips (out of nearly 50 recorded takes, I have extracted a total of 24 successful takes). While it was relatively simple and straightforward - I just had to choose the best takes, the struggle entered when I was sorting out the sound tracks. It was nearly 70 tracks(and I needed less than 30% of those the be actually included). It was a real pain to scroll and listen through all of them to find the one that fits the video. Fortunately, I was bright enough to use a clapperboard while shooting, so I could hear the take number and the shot number both on the video(also see it) and on the separate sound track. This way, I was able to connect both sound and image a tiny bit faster but it didn’t help me much as I still had to look for those takes in an endless array on random file names.
All in all, I have learned a painful lesson for the future to keep a list of successful takes right there on the set to ease my already stressful struggle of editing.
2 notes
·
View notes
Text
Sound/Music Development
My movie, essentially connected with music, HAS to have music.
Unfortunately, I didn’t have the time to produce my own piece of soundtrack so I had to use already existing compositions out there, looking for them on the mighty Google.
My previous experience in editing has rescued me from hours and hours of endless searching in hopes of finally stumbling upon a “copyright-free, royalty-free” website (I don’t want to get in trouble for presumably “stealing” an artists intellectual property, that is their music).
Thankfully, I already had my music supplier ready. The amazing website Pixabay (https://pixabay.com/) came to my rescue. It can be a really laborious task to find that one ideal soundtrack (especially on a copyright-free website where the instance of finding good music written not by a random sequence is a true wonder) and I really struggled at first. I needed to find something short but striking and catchy.
After some time of searching and endless scrolling I found the sacred soundtrack for the opening under the prompts: “rock”, “guitar”, “loud”, “dynamic”. A real wonder that I did.
I included that one piece of 15 something seconds in the very beginning and it really changed the whole scene of arguing. It added dynamics, it crafted the mad spirit and it created the explosive atmosphere.
Apart from that, the sound of the characters’ replicas and dialogues was recorded on the set with a boom microphone (mentioned couple posts back) and it turned out very clear, so I didn’t do any reshoots or re-recordings.
In one of the scenes, where the Chris character is in an interview, I deliberately didn’t record the sound of his speech so that he would be complete mute (that’s all a part of the scuffed and corny pun of bassists not being heard). I used Pixabay again to find a static sound of a microphone peeping, shuffling, whatever - just something to make it clear that it was an “accidental” technical issue. Surprisingly, it was tougher to find the right one but luckily, I had the patience.
The final external sounds used were at the very end where the shortest ever title of the movie was shown. I searched (again, on Pixabay) for a dramatic single guitar strum and guess what - it was the easiest sound to find. It turned out sounding like something you would hear in a dramatic Western and it was just the right to conclude the opening full of drama and tragedy of arguments.
All in all, sound is important. Might be the most important. Without the right soundtrack or sound effects, the movie can cease to make sense or be a total failure. That is why I spent a good chunk of my time looking for the right sound and I certainly don’t regret it.
2 notes
·
View notes
Text
Set Decorations
While building my set, I took the role of both art director and production designer. I genuinely enjoyed it.
My main goal was to conduct a total makeover to my school's auditorium and to make it look like an actual garage studio.
With the help of my friend, I've moved countless boxes and long-forgotten rubbish to clutter the background as much as possible, to give it a garage look.
Next, I arranged the musical instruments so that they could match two criteria: looking aesthetically pleasing to the public eye and being visible from any angle of the set. The latter point was to create the sense of fullness and ensure that there were no bare spots in any of the shots. This would be not realistic at all, have you seen a real life garage?
To give it a little of spice and legitimacy that the Degenerate Rascals are not some strangers and have been practically living in that garage, I decided to use a whiteboard to fabricate some of the "legitimate" lyrics of the song that they were "apparently" working on. I tried to make it as scuffed and corny as possible to represent the sole nature of a whimpering rock band writing about teenage love and break up. I have also asked the actors themselves to write different comments, draw, doodle or write any possible phrase that they felt their character would write.
I have also extracted some out-of-use movie posters from the school's walls and put them to good use to decorate the extremely empty wall in the background that was freaking me out.

All in all, I tried to make the setting as believable and legitimate as possible. My main mission was to breathe life into the soulless auditorium and I think I've succeeded and created the setting that matches the movie's wicked but cozy mood.
Here are some setting pictures:


0 notes
Text
EQUIPMENT LIST
My equipment list is not really long and pretty typical for low-end productions (like mine).
For the video and image, I will use my personal Canon EOS M50 Mark ll camera. It's a basic and easy to operate camera and I'm familiar with it, which is making my job simpler on this part. Another reason as to why I'll use this camera is because I want the image to be like on old handcams from the 90s. I want to go for this grainy picture and paler color, maybe even poorer quality. Inspired by Trailer Park Boys series, I want to purposely make the production seem cheaper to recreate an atmosphere of that time more accurately. It will add up to the overall idea of a mockumentary as a parody and a caricature of actual documentaries.
I will record sound on a Zoom recorder from my school connected on a big Boom microphone. This will help me to get a clearer sound of the actors' dialogues. As a backup, my camera's original microphone will also be recording if anything goes wrong. I will ask my friend to help me and be the sound crew holding the microphone while I'm behind the camera.
Lastly, I will set up the lights to make it look like a poorly illuminated area (which is a garage studio). I will have one lamp in the mise-en-scene, it will have a warm yellow tint. Additionally, I will place the main light with a diffuser which will be backstage. It's going to be colder and a bit harsher than the first one and it's going to illuminate the whole setting, blending with the smaller yellow light to create a perfect balance of lighting. It won't be too dark nor too bright.
This is it for the equipment package, nothing much but still pretty much to set up and control. I will set up the lights on the day I will be setting up the whole scene and I will adjust them according to the situation.
1 note
·
View note
Text
PITCH
Investors and producers unite - the almighty pitch presentation is here!!!
A short, 15 minute presentation about my movie kept nagging at my soul for about two weeks and I'm glad it's over.
The pitch itself included the already crafted and perfectly polished treatment, storyboard, character descriptions and most importantly, the budget.
After a tiring session of talking for more than 10 minutes straight (which doesn't happen often) and a couple of questions from the investor audience, I was successfully released and Label, Finally was greenlit!!!!!
As I'm writing about it right now I want to reflect and say that this was certainly a unique and new experience for me and I now know that ideally, I should produce a plan for my presentation before going on stage and not improvise like I did this time.
All in all, here are a couple of slides:

1 note
·
View note
Text
Shooting day 2
This was the day dedicated to recording interview parts. I expected it to go easier. Disclaimer: it didn’t.
From my part it was much easier - the shots were static and essentially identical. However, the real deal was for the actors. They needed to sit still, memorize their lines act out their lines WITHOUT LAUGHING. The latter part was really tough to implement, but the did it. Eventually.
The shoots also were delayed by some 40 minutes because of a little accident which involved one of the actors stepping on a really horridly reeking tiny little surprise left by one of the cats and it was spread out across the whole shooting area. It was an actual biohazard, we could not breathe. Thankfully it got sorted out but we still lost some valuable time.
This was the final day of the shoots. To conclude, it was definitely an experience. It was fun, tiring, annoying in some parts and unique. It had taught me to plan ahead and definitely to be ready for unpleasant surprises, delays and deviations from the original plan. Now comes the real struggle - the editing.
1 note
·
View note
Text
Shooting day 1
The day has finally come.
Previously I've created a group chat with all the actors. Prior to the shooting day, I reminded them trillion of times to be in the required outfits. Fortunately for them, they were.
It took me a good hour to get the setting right. I wanted to go for this garage band look so I needed to make my school's auditorium to look like a garage. I made some mess here and there, put the instruments in right positions and set up the lighting. It was a little bit tough moving the furniture around and I was rearranging it constantly, until I got it right.
I brought some snacks for the actors so they will be motivated to work. I think my strategy was successful.
All in all, we shot 5 of out 8 scenes and it took about 2 hours. I was exhausted but happy with the results, and it's all that matters.


Here’s the final setting
0 notes
Text
Camera Tests
An hour or two before the shootings began, I was smart enough to conduct a camera test to cancel out any possible difficulties with exposure, focus and the overall image.
The set was all ready and it was the perfect opportunity to test out the quality of illumination, whether it was enough or not really. It had turned out that it was quite a sufficient amount of lighting on set. Unfortunately, I didn't have any other light sources available at that time, so I had to change the camera's settings in order to lighten up the image in any way possible.
I decided to increase the ISO value. As a result, I got the camera's sensor to be more sensitive to light, and the image was bright and visible. But. With the increase of ISO settings, comes the holy grain aka noise. Therefore, the image turned out to look as if it lacked quality, even though I shot it at 1080p.
Believe it or not, it was the best outcome that could have happened. A lot of noise contributed to the creation of this perfect, crispy and heavenly 90s handcam quality. And luckily, it was my main intention. In my case, where the events unfold exactly during this dominant poor-recording-quality times, it was like the cherry on top. It was the missing piece of the puzzle.
Despite my tremendous luck, I should conduct the camera tests at least a couple of days before the actual shootings and I have learnt that lesson. Even though it turned out fine, it was still stressful and I was on the verge of panicking that the camera wasn't behaving the way that I wanted it to.
Here's a short clip of me trying to adjust the zoom, the focus and the exposure of the drumset:
0 notes
Text
Target audience research + reflection
In this blog post, I am going to explore the target audiences of the comedy genre in depth and additionally reflect upon my earlier post on target audience.
Initially I've tried to research the target audience for mockumentaries specifically. However, there is really limited research done in that field, so I've decided to go wider and focus on comedy as a genre. occasionally trying to apply the mockumentary genre (where possible).
It is important to consider the age demographics of the audience for my film. The research has shown that comedies are consumed by mostly late teens and young adults. This adds up to an age range of 16-25 or sometimes even up to the early 30s. My film specifically is targeted for a range of ages. However, as the characters in the movie are all somewhere near 19-20 years, the corresponding audience of a similar age will be more emotionally drawn towards the movie as they feel that they are able to relate to the characters.
Apart from age, gender of the audience plays a huge role. The comedy target audience based on gender, is divided into 3 categories: male, female and gender-neutral. Which one of those three types are going to be targeted depend on the movies context. As my movie is about a rock band, which is a field stereotypically saturated with males, the expected target audience may be predominantly male. However, with the vast emergence of female-centered rock bands or rock bands having both males and females in them (Yeah Yeah Yeahs, No Doubt, Fleetwood Mac), these stereotypes begin to get blurred. The fictional band in my movie has both males and females equally taking part in the band's life. As a result, the target audience for my movie is expected to be more gender-neutral than male-dominated.
A media theory for the gendering of audience to apply here would be Judith Butler’s Gender Trouble. Butler states that gender is not something one is, it’s something that one performs. My expected gender-neutral audience means the film avoids classic tropes of male and female characters and typical real life rock bands with female or male members. In music or rock films, gender is usually performed with their styles, outfits, characters and personas. The personalities of my characters don’t revolve around their gender and it’s not the main emphasis - it is their actions and performances that matter. Therefore, the characters being gender-neutral makes the target audience take on the same appearance.
Lastly, it is important to consider the theme of the movie. As I've mentioned before, it is more likely that people who have at least some interest in rock music or feel interested in/nostalgic about the 90s will consider watching the movie.
To reflect, I have to say that my view on the target audience for my film has remained constant. Compared with the previous blog post, I have now done significantly more research on the topic of target audience which allows me to concretely establish the type of target audience for my film.
1 note
·
View note
Text
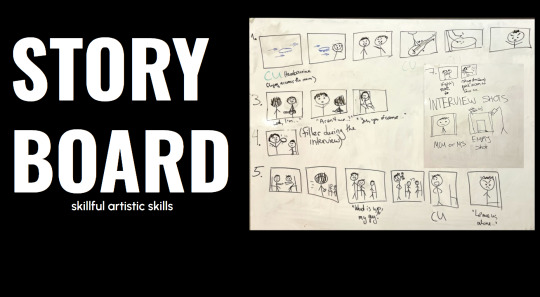
SHOT LIST
Just one day before the first shooting day I decided to make a shot list. Tomorrow I will shoot filler scenes for which the shot list is for. I’m not going to make a shot list for interview scenes because they are absolutely static and don’t differ in any possible way.
In total I have 19 shots for filler scenes - not that much but still it’s going to take time to shoot all those. I really hope that the shot list will prevent me from forgetting to shoot any shots because I am not so willing to do reshoots after the initial shootings are over.


1 note
·
View note
Text
PROPS
As my movie is about a rock band, musical instruments in the opening are a must. Therefore, I need instruments, which are:
a drum set
a guitar
a bass guitar
a piano
And, most importantly:
A TAMBOURINE
Thankfully, my school has all of those, so it's one worry less.
For the setting, I literally need to make a garage. I'm going to transform my schools auditorium into a garage studio and I will need some specific props for that:
a couch
a lamp with warm lighting
some carton boxes in the back
some scuffed posters on the walls
a whiteboard to write lyrics on
absolutely random stuff on the background that you would normally find in your average garage (old and useless furniture, dusted crates with long-forgotten garbage, different canisters and jars with unknown contents, etc.)
Getting these props is one of the most easiest tasks possible because they are pretty ordinary and I even might find most of them in my school's storage room. I plan to set everything up on the first shooting day so prior to that, I have to make sure that everything is there and available.
1 note
·
View note