
Don't wanna be here? Send us removal request.
Statistics
We looked inside some of the posts by lee-media and here's what we found interesting.
Average Info
Notes Per Post
0
Likes Per Post
0
Reblog Per Post
0
Reply Per Post
0
Time Between Posts
25 days
Number of Posts By Type
Text
11
Video
1
Photo
5
Last Seen Tumblr Blogs


Fun Fact
Tumblr.com is the 103rd most visited website in the world.
Text
Animation Evaluation
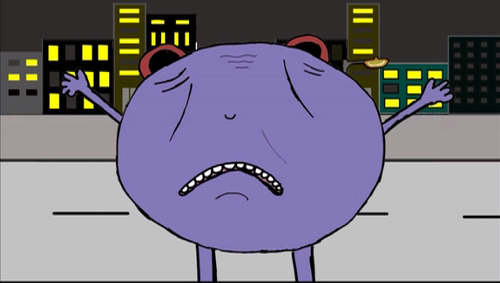
The whole idea was to portray a plum walking down the street, then crossing the road without looking and eventually got hit by a car - thus exploding plum juice all over the car.
In the beginning I started by creating my character, which evolved through the process. I invented the character using Adobe Photoshop along with a graphics tablet to assist me.
At first the character was green, and was more small and round. This changed over-time when I decided on my characters backstory and concluded he would be a plum that's fallen off a tree - this is when I made him purple.


Overall the animation runs smoothly, there aren't any parts I find to be disrupting in the animation. The movement of the character flows well, and doesn't appear to have any issues or unrealistic. However on the second part of the animation (in the streets) it appears to be somewhat splitting up slightly. This could have something to do with the settings I used to export it, but I was unable to resolve this issue.

Overall the narrative of the animation is easy to understand and follow. Anyone would be able to identify the location of the animation (countryside & street) and along with the cars moving, you can see the character gradually running closer into the road, and gets hit. There is also a POV shot to show the car coming, to show how close it's getting - at this point I have included the characters face (close-up shot of his face) showing his facial expressions dropping and his arms raising in the air.
I think this animation could be seen in different views - for some I think it would be seen as amusing due to the fact he's a plum and juice goes all over the car. But it could be seen as a sad storyline.
During the whole process I encountered a few issues - especially with the layers. I realized I had white gaps in between some of the building in the background which I was unable to take out without ruining it. I made the mistake of not creating enough layers so things got difficult to make changes to. When I played the animation at the end I found it was over very quickly, my character was moving much faster than I had intended, this made it difficult for the viewers to catch what happened in one viewing. I eliminated this issue by importing it into Final Cut and modifying the speed down to 50% from 100%.

In comparison to a professional cartoon I believe my animation could be of their standards as long as it was slowed down, this way you could get a fuller understanding of the story. Of course mine is far more shorter than a professional cartoon, but I do believe it follows the same conventions. The main reason that supports this is the characters facial expressions which all professional cartoons use to express their emotions and portray their personality. I have successfully made my character move, caused an event (getting hit by a car) and displayed his facial expressions toward the event as I believe any professional cartoon would use.

This is a picture from the famous cartoon Family Guy. From the image you can see the facial expressions used on each individual character. I have used facial expressions on my character too, which creates personality and emotion as all professional cartoons tend to also.
If I was to repeat the process I would have created a different location all together for the street. I wasn't happy with the way the building in the background looked, they looked very unrealistic poor quality. The windows to create seemed very over-used and repetitive along the whole background. For the beginning part of the animation with the parallax scrolling I believe works well and looks well besides one issue - this being the trail of dirt along the bottom was misplaced during the creating. I also forgot the to colour the teeth white on a separate layer because I had the background layer as white - so his teeth unded up not coloured in during the final. I also failed to move the birds along with everything else during the parallax scrolling since I was focused so much on the character. In future I would be far more aware of all the elements to prevent this. I didn't notice these issues until I had finished this part of the animation and I didn't have the time to fix it. But overall I am pleased with the outcome.
0 notes
Text
Animation storyboard, facial expressions & drawings (planning/pre-production)
Animation scan from Lee O'Keefe
Anim scan 2 from Lee O'Keefe
0 notes
Text
Animation (Photoshop process)

This was my layers within Photoshop of my animation. Using folders made the whole animation a substantial amount easier to keep track of the whole process - especially when creating the frames.

This is my animation timeline in Photoshop, which shows the frames I have created for the animation.

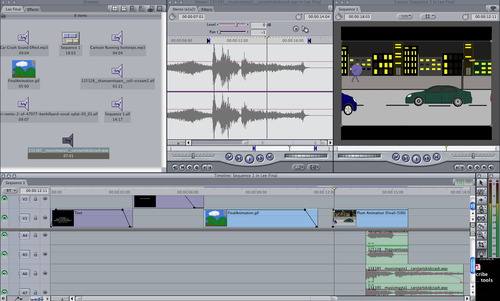
At the end of creating the animation in Photoshop I exported it out as a Quicktime movie. Once I had the movie format I imported it into Final Cut so I could make some edits to build up the animation further by adding sound effects and some fade-outs. I also particularly liked the parallax scrolling so I decided to add this to the beginning of my animation including the street. I also believed these two worked together as one whole story. I used a fade because it broke up the background and made it more acceptable rather than a sudden jump between scenes.
I obtained some free sound effects online. I added these into my animation to bring it more to life - sound effects like footsteps and a car crash I think were very beneficial as it adds to the whole effect of the story.
0 notes
Text
Second Animation (Football player)

This is a second animation that I created of a football playing doing kick-ups.
I created it in the same way as the other animations - drawing the same man and action just slightly moved in each layer/frame, then bringing it together in the animation bar to create the animation.
0 notes
Text
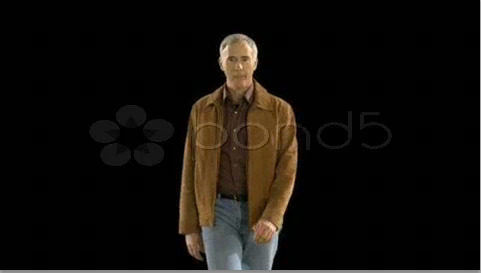
Rotoscoping

This was my attempt at Rotoscoping. I took this short video of a man (in image below) and split it into frames. I traced over the man on each layer using my own character, then went to Windows>Animation and made each layer of my character into a frame.
Once I had this I could play the frames to make him walk in this way. Overall I found the task quite time consuming and very repetitive. It was also quite tedious and difficult to keep track of all the layers.
0 notes
Text
Angry animators bouncing ball

To create this bouncing ball animation I followed the guide for Angry Animators Bouncing Ball guide: http://www.angryanimator.com/word/2010/11/26/animation-tutorial-1-bouncing-ball/
First I began with creating the Arc line:

This was the line the ball would follow throughout the animation and used a base-line.

Then I created a new layer and added numbers to the arc line. These numbers are where the ball will appear.

Then I began by drawing the major ball positions in the line. These were 1, 5, 6, 4, 12, 13. When it came to creating number 6 I had to ensure the ball contained the same volume otherwise according to the guide it would have looked weird - as if it had grown physically.

By the end this was how it looked within Photoshop. Now it was time to create the animation using the feature in Photoshop (Windows>Animation). I began by hiding the arc and numbers layer since I didn't want the viewer to see this part.


This was how it looked in the end. I hid all the layers each ball was on then started by making one ball visible each time for each frame. I allowed two balls to be on a frame at once as you can see in the animation timeline.
At the end when I played it, it turned out as the animation displayed at the top of the post.
Overall I think it works well and looks how a bouncing ball would. I believe the tutorial was good and I would be able to create the same animation again in the future but in more detail - creating a more realistic arc line and ball to make it more interesting.
0 notes
Text
GIF History
The GIF (Graphics Interchange Format) is a bitmap image format. CompuServe were the ones that introduced it during 1987.
It has wide support and portability therefore it became used wide-world all over the internet. It's supported by early browsers and numerous websites including blogs.
Some of the qualities of a GIF:
Supports up to 8 bits per pixel
Allows a single image to reference a palette of up to 256 distinct colours (chosen from the 24-bit RGB)
Supports animations
Compressed via lossless data (reduce file size with no loss of quality)
Supports Transparency
There are some disadvantages of using the GIF too, though.
Using 24-bit colour results in inflated image sizes
Normal colour limitation makes GIF unsuitable for reproducing colour images
Difficult to keep the file size small enough to transfer over the internet - must keep animation very simple

This is an example of a GIF. I think they are good because GIF's can be short and quirky entertainment on the internet that don't waste much time. I see them generally as more of a bit of fun and keeping humour over the internet since they are too short to convey any informative information or make a full animation including a story line.
0 notes
Text
Animation Walk Cycle

This is my animation walk cycle I created within Adobe Photoshop. First I began by drawing my character out in different movements (as seen in the above image) based on the walk cycle from the image placed below.
Once I drew the movements of my character in outline (using a tablet in Photoshop) I coloured him in. Once I had created my walk cycle I created an animation using the animation feature in Photoshop - adding frames as you can see from the frame timeline in the above image.
I had created each movement on a separate slide. At the end of creating them all I had to hide all layers except the top one, then press play on the timeline for the animation to run. Once I knew it was running as intended I exported it out of Photoshop.

UNIT24 - ANIMATION
0 notes
Text
Pixar Presentation/research
Institutional research (pixar) from Lee O'Keefe
0 notes
Photo

I created this panel using Photoshop. Using the tablet I drew the all the outlines using black on its own layer.
On different layers I began adding colour to the features i.e. skin, sink, t-shirt.
The image has a rough-look to it, which is what I was trying to achieve so it was more comic-like than realistic. I am overall happy with this image, although I could have added some more detail (shading - lower opacity of the same colour on certain parts i.e. sink).
UNIT02-AO1
0 notes
Photo

This was my version of a previous Little White Lies front cover which I recreated in Photoshop.
0 notes
Photo


Today I have created a close-up shot for my animation, I have also added all the characters in a row - including the last couple having emotion on the characters face before he is hit by a car.
All the characters are lined up in a row ready to turn into an animation for next lesson.
UNIT24-AO3
0 notes
Photo

Today I have finished off creating most of the background for my parallax scrolling. (finished colouring the cars off and lamp post). In the next lesson I expect to add in a few extra objects (like the lamp post) and a little detail.
Next lesson once I have finished off adding extra bits, I plan to get my character involved, and get him walking along my scene.
UNIT24-AO3
0 notes
Text
15 second animation ideas
My character falls out of a tree and because he's a plum, he explodes when he hits the floor and juice goes everywhere.
Somebody picks my plum character off a tree and bites into him, eating half his body.
UNIT24-AO3
0 notes
Photo

First off I began with drawing my character several different times in Photoshop, but in each image he was moving slightly in a walking motion. This has been done so I can proceed to animate it to walk.
After doing this I went onto creating my background (using 5 layers – i.e foreground, background, etc). I kept them on layers so I could move them at different paces during the animation to create the illusion of my character moving (parallax scrolling).
Once I had all my layers ready, I selected all the layers for my character and grouped them (ctrl + g) and I did the same for my background layers, this making it easier to locate the correct layers needed.
I created a new document in Photoshop (7087 pixels by 1080 pixels 72 resolution). I also obtained a grid which was the correct size for a TV screen, this to know what would be in my frame exactly – I locked this layer so it didn’t move at all.
I dragged in my grouped layers (character and background) to this new file. Then I went to windows>Animation. I had to hide all the character layers apart from one, and then make one visible – moving it in front of the last each time to make it move. Each time I moved the character along I clicked “duplicate selected frames” (the icon beside the bin which looks like a new layer icon in Photoshop).
Once my character had got half way through the whole grid, I then started placing the next movement on top of the character, so he was walking on the spot, and moving the background layers along to the left – moving the background layer the least, and the foreground the most, thus giving the illusion of the character moving. After doing a cycle of walking on the spot, I continued my character to walk off the scene. At the end of this, I made each frame 0.2 seconds long each.
After I had done this, I had to go to Image>Canvas Size and cropped it down to the size of the grid. I then had to hide the grid on all the layers and save for web and devices – saving it as a PNG so it would stay animated.
Overall I believe my attempt has been successful, it looks like it’s walking, I have it walking on the spot whilst the background moves to make it look like it’s still walking, he then proceeds to walk off shot how I had planned.
However, I had birds in my background with cloud and I forgot to move this layer along constantly throughout, so the birds stop in the sky during part of it which was a mistake I made. I also moved the background layers a bit slow, so my character was walking fast then slowed down a lot when I did the parallax scrolling, then gained a lot more speed once moving off again – If I were to do it again I would move the layers more so it keeps my characters pace up.
UNIT24-AO6
0 notes
Text
Primary/Secondary Research
What is Primary Research?
Primary research is when marketers research to gather original data for themselves. This process is usually carried out after they have somewhat knowledge of the situation – they would normally gain knowledge of it from secondary research beforehand.
The term “Primary research” is often used amongst academic research, market research and also competitive intelligence.
What are the advantages of it?
The researcher can extract the information they need without having lots of meaningless information on top. The researcher can have control over the whole situation, like how much information they want to take, and they can focus on specific areas if they wish to do so.
What is Secondary Research?
Secondary research is when you take research that has is already existing by somebody else. E.g. someone doing primary research, then posting it online – then somebody who extracts information from the online post would be doing secondary research.
Secondary research tends to be common within medical research and market research.
What are the advantages of it?
Secondary research is easy to gain access to, especially with the access of the Internet. This method could also save a lot of hassle and money. From doing primary research, the researcher may have to travel out and such, whereas secondary research you can easy find from online.
UNIT02-AO4
0 notes