
Don't wanna be here? Send us removal request.
Statistics
We looked inside some of the posts by letsdesignbrostuff-blog and here's what we found interesting.
Average Info
Notes Per Post
1
Likes Per Post
1
Reblog Per Post
0
Reply Per Post
0
Time Between Posts
9 days
Number of Posts By Type
Text
5
Last Seen Tumblr Blogs


Fun Fact
70% of Tumblr users say the Dashboard is their favorite place to spend time online.
Text
The Pros and Cons of Interactive Web Design
Web design improves at a rapid pace. More and more new ideas and solutions are available every year. Therefore, as a designer, you should truly take your time to learn the features each type of design offers. One of the more exciting ways of making websites is implementing interactive web design. It offers the user the full digital experience and engages him or her to connect on a more personal level. However, as with everything else, there are two sides to this story. So before you decide to apply this approach, make sure that you first understand the pros and cons of interactive web design.
Web Design Technologies and Strategies
Website development requires a lot of different technologies and strategies. When building websites or apps, there are two main approaches you can take - human-centered design and UX centered design. Nevertheless, whichever approach you decide to take, you can always make them static and interactive. The static environment represents a website that allows the user to browse its content in a well-known pattern whereas with an interactive environment, you are actually engaging the user with the website. There are plenty of beautifully-made interactive websites. Some examples of this include APPS, Webflow, and Cyclemon websites. Hence, if you ever need some inspiration on how to create an interactive website, be sure to check them out!
The Pros of Interactive Web Design
You will notice that many advantages of interactive web design can be implemented using the static approach. However, they create a completely different experience for the user. Interactive web design is more often used for educational, business, and entertainment purposes. As such, it can offer valuable data. 1) It engages the customer Interactive web design keeps your customers occupied and engaged with the website. It allows for a higher form of communication, where the customer must do more than just browse your website. On top of that, customers can leave comments to let you know how their experience was. By analyzing this data, you can use it as a means to work on necessary improvements.

2) The experience is more personal When a user is asked a few simple personal questions, that web experience reaches a whole other level. It creates a feeling of someone actually being there on the other side and communicating with you. That differs a lot from static websites, where you can just browse the content that is pretty much always the same. 3) It allows you to better target your audience When you are creating a website, think about your targeted audience. Even though you are shifting your focus towards a specific sector, not all clients will be interested in the same things. What’s great about an interactive approach is that it allows you to make that selection process even more specific and shows clients only a narrow field of their interest. 4) An improvement in the gaming industry Another benefit of interactive web design is that you can create games that can be played online. It allows your customers to not only connect with you but with their friends as well. 5) It allows for a fantastic learning experience Interactive websites are excellent for learning. They increase your concentration and focus, and as such, they make your learning experience better. This is especially important for young students. Essentially, interactive websites enable kids to learn how to communicate with digital technology. 6) Online shopping development Online shops are one of the major components of 90% of websites today. The interactive web design makes online shopping much easier as it provides more options to your customers. 7) Interactive websites are easy to update If you have a static website made from scratch, you must rely on your programmer to make the changes you want to see. However, with interactive technology, you can easily make updates yourself, even without any knowledge of IT. 8) It allows a multitude of options Having a website that operates on a server-client and client-server side creates opportunities. It allows a multitude of options that a static website generally lacks. By using databases, you can provide both a finer digital experience for your customers while also collecting data from these users.

Know When to Use Interactive Web Design
Although interactive web design may look nice, you should only use it when you really need it. Some of the examples where you can definitely implement interactive web design include: Polls Quizzes Surveys Assessments That's where it really shows its usability.
The Cons of interactive web design
I am sure that at this point, interactive web design may seem like such a fantastic idea to you. However, let's look at some of the reasons why you should have second thoughts when considering this approach. 1) It uses flash The majority of interactive websites uses flash technology. Even though the options you get with flash may sound convincing, the truth is that it is slowly becoming obsolete. A study has showed that flash technology had web usage of over 80%. About ten years ago you would likely find it on almost any website. However, nowadays its usage has dropped below 17%. As a result, Google decided to make it obsolete and remove flash completely from Google Chrome by the end of the year 2020. With that in mind, all interactive websites that are based on flash technology will no longer work in the years to come. Hence, you will have to find a different approach. 2) It is complicated, and it costs more Creating interactive websites is an exciting task, but it requires a lot more time and effort than people expect. Most of all, it is expensive. Today, you can have a nice-looking static website for just under $100. Thus, if you are on a short budget, interactive web designs may not be the optimal choice.

3) Users’ negative comments can harm your reputation Keep in mind that when you allow users to interact and communicate with you by leaving comments on your website, this can have both positive and negative impacts on your business. While you can surely use that feedback to improve your website’s features, it can also play a role in harming your online reputation since those comments will be visible for everyone to see. 4) Interactive websites can glitch Once you have a finalized product, everything will look good. However, the road until you reach that point can be quite rocky. An interactive website allows your users to make inputs, which can sometimes lead to errors if not done correctly. Since there is no fixed number of pages, this can cause unforeseen issues that will need be dealt with before your website can properly function again. 5) Interactive websites take more time to load A static website loads much faster. The benefit of having a fixed number of pages is that it always loads in the same timeframe. However, as an interactive website is full of animations, this will delay loading and your users might be frustrated with that. 6) Re-design becomes much more complicated If you decide to re-design or change your website, this will be harder on so many levels. Depending on what you wish to update or remove, the process might be exponentially harder. Also, keep in mind that in order to successfully update your website, you will need someone with a lot of skills and experience in reading and analyzing complicated codes. 7) Optimization for the mobile environment Today it is a standard that every website is optimized for a mobile environment. When it comes to static websites, that is a piece of cake. Responsive design makes everything easier, and the code is much simpler to work with. However, with interactive web design, you must think carefully about the usability. Not all options will look and be used the same way on PC and on mobile. With that in mind, some of the options that require more space will have to be removed or completely changed in order to adapt to the smaller size of mobile screens. 8) Security Static websites only have server-to-client communication, and they don't use database connectivity. On the other hand, interactive websites are the complete opposite. For this reason, security might be compromised.

Furthermore, they also use a lot of queries when communicating with databases. Server-side programming like PHP, JSP, Asp.NET, etc. allows for great versatility, but it also comes with its share of disadvantages as well.
Do you need an interactive web design?
Ask yourself if you really need an interactive web design. Bear in mind that you are essentially creating a digital experience for your users. Although it may look amazing and can provide many options, if you don't really need it, it can simply be a waste of time, money, and space. Your users might get frustrated when interacting with the website, especially if it doesn't really get them anything that they otherwise wouldn't have received from a static website.
The Pros and Cons of Interactive Web Design Made Easy
There are many ups and downs when it comes to the application of this approach. Personally, I like interactive web designs, but as a programmer, I know the level of skills and knowledge it requires to successfully implement it. So, to sum it all up: You can target the audience more easily Interactive websites provide valuable feedback, but can also be harmful for your online reputation Users are provided with more engaging options, however the creation process is complicated and costly User experience is enhanced, but the load time and browsing will require more time Server-side programming allows for more features, but this simultaneously creates security issues Flash technology is being removed from the online experience Hopefully, you now have achieved better understanding of the pros and cons of interactive web design. Read the full article
0 notes
Text
What is the price for a logo design in 2019?
Running a business involves estimating costs to deliver the highest quality products to your clients. However, it is likely that you’ll often encounter unexpected obstacles, especially when pushing projects through that final 1% until completion. Being able to approximate costs, in particular when it comes to outsourced professional work related to marketing, can do wonders for the quality of your projects and personal stress levels. Knowing the fair price range for a service can also make you a much better negotiator, since you’ve gotten the information to leverage. Although this won’t make much of an impact when negotiating with a single designer or a small agency, it can definitely come in handy when dealing with companies, which by default are often predatory and want to squeeze as much profit out of their client as possible. Having this kind of information supplies you with a professional tone that enables you to avoid some of the costs that’s considered to be part of the professional logo business. So, let’s take a look at the price for a logo design in 2019.
How much does a logo design cost?
Logo design price often doesn’t include marketing, supplies, or branding costs unless explicitly stated. When you’re dealing with a freelancer, you might get by with a couple hundred dollars. However, the full package that includes a professional logo, the art and involvement at all stages of the design process can cost up to a million with some well-known agencies or graphic designers. The problem is that, at times, the logo quality doesn’t necessarily match the price that designers or agencies charge. This means that you cannot always expect a higher-priced logo to be better than a logo that costs less. You might find an agency that delivers exquisite work below the market price or a pricey agency that delivers mediocre results. Although it might sound surprising, it is actually quite true – the price tag is often a poor indicator of what you’re going to get when it comes to professional design services. Discovering what your brand needs often requires a human-centered approach that assesses your business from a design standpoint to deliver branding materials. If you already know and understand your brand, you’ve just made the work that much easier, and in all likelihood, cheaper. The more research and data you can provide in your brief, the more you’ve cut down on the cost and complexity of the design before even hiring anyone. Depending on the preparatory work you’ve already done, you can often negotiate for more favorable terms for your logo design project. Or, you can also just indicate that you know what you’re doing and expect previously agreed on results.
How much would I pay for a logo design?
At DesignBro, the price for logo design starts at $199. This includes, at the very least: 3 original, high-quality logo designs production-ready files needed for your business full copyright on all logos As your requirements increase, so does the price, however you will be involved in the logo design process every step of the way, even down to inputting RGB values of colors you want to see used in the design. Alternatively, you can fill out the client brief with as much information as you can, and we’ll work on the design until completion. If you don’t have any ideas about which design direction to go for, we can help you out by finding other great logo designs that can serve as inspiration for you. As with all the other design processes, logo creation is iterative. Throughout the design stage, you’ll be able to communicate with the designers and give feedback on their logo designs. Once they’ve sent you their revised versions, you’ll be able to select 1-3 finalist designs that you love most. More polishing will be done accordingly to your feedback, and by the end of the finalist stage, you would have to pick the winning design. Our platform works like a design contest which allows professional and top-quality designers to compete for your business. By doing this, we can ensure that you will be fully satisfied with the results of the logo design project.
Create a logo design by yourself
If you’d like to flex your creative muscles, you can easily find any of the numerous logo design services online. They typically have an automated process where you type in your name and click a couple of logo designs you already like to get a simple, but usable logo that can be immediately passed on to the branding department. However, there will be a couple downsides to this. At the other end, a computer algorithm crunches your choices and determines what you want to see based off of what previous users who clicked on those same images were happy with. That process is a rough estimate that works most of the time but might not produce anything unique you’d actually like to use for your business. There are also free programs and apps that you can use to produce a high quality logo. But to be perfectly clear – given enough time, you can create a professional logo for free all by yourself. The only problem is that we can often be so busy with daily tasks that we simply can’t spare a single hour, let alone hundreds of hours needed to make a professional logo. You could buy Adobe Photoshop for $20.99 a month but you’d also need to watch or read a bunch of tutorials to learn how to use it. Affinity Designer is another great tool for making logos, except it costs $49.99. How about CorelDRAW at $659? The easiest solution is to hire a professional who has already acquired some of these tools and get a high quality logo much more quickly. Working with a human designer rather than a computer algorithm means actually being listened to by someone who’s been through these same logo design process and knows them inside out. Here at DesignBro we use a human-centered design process that emphasizes personal access to a professional designer, resulting in client agency and logo quality. You get to be in charge of the process and detail exactly what you want and expect the logo to look like instead of struggling with a computer algorithm. You’ll have a professional designer address your concern while also having the freedom to be as involved in the design process as you desire. If this is what you’re looking for, the DesignBro platform could be the perfect solution for you.
Buy and customize a logo template
The easiest way to make a logo is through what’s known as a “logo template”. In essence, these are pre-made logos that have been stripped of details and often get bundled together by thousands. The designer company that made these logos saves money by selling the same template over and over again, while the user also doesn’t have to make a logo from scratch. Apparently, it’s a win-win situation, so what’s the catch? The catch is that you, the final user of the logo, aren’t actually buying the logo template, but rather a license to use it in some capacity. That single word, “license”, means that you’re not the owner of the logo but a restricted user who has to abide by the terms and conditions set out with the license, which can be anything the real owner says they are. For example, buying a “MEGA BUNDLE 1100 Logos & Badges” that costs $19 may seem like a great deal, except that’s the “Personal License”, which means you can’t use the logo for anything except for your own amusement. You won’t even be able to upload the logo to a social media account that has any form of “commercial activity”. It’s only with the $38 third-tier license, the “Extended Commercial”, that you can finally use the logo in your business. However, there’s still fine print limiting how many products can bear the logo. If you breach any of these terms, you’ll learn the meaning of another fine word – copyright. In copyright cases, the creator of the content almost always outright wins, resulting in ruinous penalties for the defendant. This is why DesignBro offers such beautiful terms, with two wonderful words: “full copyright”, meaning that once you buy the logo from DesignBro, you are the full owner of the logo design and may use it as you please. There is no fine print, no terms attached and absolutely no legalese.
Online Logo Maker
For those who can’t imagine designing without an internet connection, there is a whole plethora of online logo makers. They range from plain to complex with prices to match. In most cases, the online logo maker doesn’t put the price upfront. Instead, it waits until you’re well underway to making your logo then later presents you with the fee. Just like what we’ve seen with logo templates, companies that provide the logo services will try to squeeze out as much money as they can out of you. That’s not a problem on its own, except when the fee is intentionally hidden so that you get invested in the logo design process. This typically takes the form of charging up to $50 just to be able to download the logo that you spent time to make. In worst cases, you may experience the owner company of that logo who will offer several tiers of downloads, with the lowest quality file that is practically unusable for any business purpose still being charged $10-20. There is typically no way to know these fees in advance but there’s another catch – you often have to create an account before being able to access the online logo maker. The charge then comes out to be: expose your email address to potential spammers spend time to make logo that might be downloadable be charged money to get the logo you made With DesignBro, it’s all very simple and there are no hidden fees or catches. You commission a logo, pay the amount upfront and get your logo design. It’s straightforward, fair, and sensible.
Crowdsource the design
Crowdsourcing is defined as the “method of outsourcing work by appealing to people to contribute to the project”. In essence, crowdsourcing means the client puts up an order, specifies a budget and gets dozens or hundreds of sample designs. When the client chooses the best design, the winning designer gets paid. Logo design projects on crowdsourcing websites are priced at around $150, which often nets the client up to a hundred designs from different designers. In theory, this sounds amazing but in practice there is very little involvement from the client, who has to sift through a large number of designs and pick one as the winner. Worse yet, the client can only provide a short description of the logo purpose and a couple of words, such as “playful, traditional” to explain the logo’s look and feel. Crowdsourcing websites promise that all work sold there is unique but a client doesn’t always have a way of knowing that. If a designer submits a logo design based off of a logo template in breach of a license, the client will get burned with a copyright claim. At DesignBro, you’ve got plenty of ways to describe your logo and how you want it to look with the creative brief. All work is 100% unique and the copyright is all yours.
Hire a freelance logo designer
Freelancers are a mixed bunch and vary from graphic design amateurs to geniuses. The best way to find out which are which is to prepare a bunch of minor work, such as doing sketches, and see which freelancer turns out to be the most reliable. Because it’s a single person you’ll be dealing with, time zones, the language barrier, and personal issues can all come into effect, hampering how much work you can forward to that one person to do. Roughly speaking, graphic design freelancers are priced as follows: Offshore Designer: $100 – $250 Beginner Freelancer: $100 – $1000 Experienced Freelancer: $1000 – $5,000 Renowned Freelancer: $5000 – $15,000 The hardest part of working with a freelance graphic designer is searching for that one amazing worker and then having to repeat the entire searching process when he/she eventually takes a break or quits. You’ll inevitably get involved in your freelancer’s personal affairs and have to juggle your own business and that of your freelancer. However, at DesignBro, there’s an entire team of design experts who can jump in whenever one of them goes down. To ultimate leads to quality and consistency across all DesignBro services.
Hire a logo design agency
Past the freelancer services, there’s a whole new layer of graphic design professionals grouped as agencies. They are roughly priced at: Small Design Studio: $5000 – $30,000 Mid-Sized Agency: $5000 – $50,000+ Branding Agency: $50,000 – $100,000 Renowned Branding Agency: $100,000 – $1,000,000+ World Famous Designer: $100,000 – $1,000,000+ Working with a sizable logo design agency comes with a whole slew of benefits, some of which are getting access to a great marketing strategy and a global brand identity. This kind of agency is no longer just a hired worker, but a legitimate business partner that closely coordinates with your company to find the best approach in any given market. At this stage of the logo design game, the cost can be monstrous. Millions are spent left and right to assess and define the brand without necessarily netting any actual results. That kind of iterative design process is certainly lucrative for the logo design agency, but not many clients can afford that kind of price for such services.
What logo design & branding process include?
Logo design and branding process are complementary parts of a greater design process. In other words, the branding process acts like a framework while the logo design is similar to a small vine spreading across and around the framework. The branding process involves discovering what makes the brand unique and special from all of its competitors within the same market. It’s all about aligning all communications to this identity so that the brand stands out and is meaningful and memorable to its target audience. Once that is completed, the logo design is halfway done and simply has to be polished accordingly. For example, a fruit yogurt company might discover that kids and teenagers are the ideal market for the brand. The company decides the marketing will involve purple and red smiley faces with white splashes and starts implementing these elements in all of its marketing materials. By doing this, there is a consistent graphical theme to all the marketing materials that appeals to the target audience, after which point it’s fairly simple to come up with a logo that represents the brand and reinforces that same appeal. Note that both of these processes should be based on market research and be made to appeal to the target demographic. After all, the more data and research done in advance, the better the results of both branding and logo design will be.
Tips for a successful logo design
Logo design is a creative process that is meant to produce art; simple, but still art. Brainstorming helps immensely when doing creative work, including logo design. So, before you finalize the design concept, try to pick up as many interesting ideas and jot them down. Carefully discard the least valuable ones and repeat the process until you come up with something that is perfect for your brand.. Just like all graphic design processes, logo design is iterative and benefits from grooved communication channels. Everyone should chip in to give their input on what the logo should look and be like. After one logo version is complete, forward it to everyone who gave their input and again ask for opinions. This helps everyone identify with the logo and feel like a part of the team, which means that the logo will ultimately represent everyone in the company.
How to choose a logo designer
Now that you’ve gotten some information on how to create a high-quality logo design, you can leverage what you’ve just learned into striking a great deal for yourself and your business. Ultimately, getting a great logo designer means weighing all the pros and cons until you reach the optimal solution, whether it’s a freelancer or a design agency. No matter what you choose, DesignBro’s platform will always be at your service to help you discover just the kind of logo that will make your brand shine the way it truly deserves. Read the full article
0 notes
Text
A Short History of Graphic Design
Graphic design is a field that is widely known today by people around the world, but even if it had been existing since forever, its origins had to come from somewhere. The term itself first appeared in print in the 1922 essay “New Kind of Printing Calls for New Design” written by a typographer William Addison Dwiggins. Later on, “Raffe's Graphic Design” published in 1927 was the first book title that included the words ‘graphic design’ on a cover. Although Leon Friend's 1936 book “Graphic Design” is believed to be the earliest comprehensive description of the field, today, there are millions of publishings that focus on both its brief history and its compelling subject in general. We’d like to think that everything that is significant in history happened during our lifetime. However, to truly grasp the bigger picture of graphic design , we should take our time to dig into its historical discoveries, starting from the very first cave paintings. This is where it all began. Graphic Design Roots: Prehistory Age

Image source: Medium Where should you look to find the origins of graphic design? You’ve probably heard of the Lascaux caves in Southern France, Rome's Trajan's Column, or the illuminated manuscripts of the Middle Ages and so on. Fast forward just a couple thousand years later, you’ll discover the Blau Monument (3100-2700 BC), a pair of inscribed stone objects from Mesopotamia which is now located in the British Museum. It’s the first known artifact to use both words and pictures on it. We already knew that the history of graphic design didn’t kick-off with computers or any other digital means. It has been assumed that graphic design has almost no end and is strongly interwoven with human existence and culture. The traces of the earliest undisputed art originated with the Homo sapiens’ Aurignacian archaeological culture in the Upper Paleolithic. Hence, it could be said that the vague preference for aesthetics probably already emerged in the Middle Paleolithic, which was about 100,000 to 50,000 years ago. Cave paintings 38,000 BCE Since graphic design, in its most basic description, is the art of creating graphics on a surface, it can literally be done on canvas, paper, computer screen, stones, pottery, or even on cave walls. The other name for cave paintings is "parietal art", and they were exhibited on cave walls, ceilings, and date back to around 38,000 BCE in Eurasia. Around 35,000 years ago, the first cave painting “Pettakere” was made in Sulawesi, Indonesia. However, their exact purpose is still not yet entirely known by scientists. Ancient people decorated walls with paint made from dirt or charcoal mixed with spit or animal fat. What's important is that at that time, they couldn't write, so apart from being just a simple decoration, their designs could have probably served as a means for communication as well. Some theories ascribe a religious or ceremonial purpose to them. The most common themes in European cave paintings are large wild animals, such as bison, horses, aurochs, deer, and tracings of human hands (most likely artists’ signatures) as well as abstract patterns. Sumerian written language 3300 – 3000 BCE At one point, writings started to appear, and one of the earliest known written languages is Sumerian. The so-called proto-literate period of Sumerian writing spans roughly 3300 to 3000 BC. In this era, records were purely logographic (icons used to represent entire words instead of phonetic sounds), and they all had phonological content. It was underlined by researchers that this logographic way of constructing a language suggested the natural ability for humans to use visual representations to communicate complex ideas. Surprisingly enough, this natural method refers directly to the field of modern graphic design. Archaic Sumerian was the earliest stage of inscriptions with linguistic content, beginning with the Jemdet Nasr (Uruk III) era from about 3100 to 3000 BC. The oldest document of the proto-literate period was the Kish tablet. Paper and Printing Era
Image source: ThoughtCo. Before the idea of graphic design has proliferated to support commercial and creative endeavors such as magazines, logo designs, book covers, and outdoor advertisements up to reaching its digital forms, it first had to get familiar with paper and print! Contrary to popular belief, Gutenberg entered the playfield pretty late, since the origins of paper and graphics actually began with Chinese discoveries. The invention of paper in 105 AD by a Chinese man was what led to the concept of printing. It was around a thousand years later, in 1045 AD, that the first moveable type was invented. In 1276, a paper mill arrived in Fabriano, Italy, and this era was known for officially kicking off the first paper mill in Europe. However, only in 1450 was the system for printing books and other forms of literature at its heights. In 1460, the first illustrations in a printed book followed. Advancements in Chinese printing 200 CE – 1040 CE Some of the Chinese printing discoveries included non-papyrus paper making, woodblock printing, and movable type. Since 200 CE, they were already using wood reliefs to print and stamp designs on silk clothes and later on paper. It was only in 1040 (400 years before Gutenberg) that Bi Sheng invented the world’s first movable type printing press out of porcelain. During the Tang Dynasty (618–907), wood blocks were initially cut to print on textiles. However, they were later used to reproduce Buddhist texts. The Buddhist scripture printed in 868, was the earliest known printed book. Beginning in the 11th century, longer scrolls and books were produced, making them widely available to the masses (960–1279). Medieval calligraphy 700 - 900 It seems as if people have always had the inherent drive towards art, and this has been evidential since the early cave paintings. As human development progressed, typography became more important, since aesthetic horizons were being broadened and the intellectual mind was increasingly eager to collect information. This period dates all the way back to the Middle Ages. Texts in this era were still produced and replicated by hand, and the artistry in producing small portions of exquisite books was what made these items and its creators stand out of the crowd. Interestingly, in Islamic cultures for example, figurative art was seen as sacrilegious. Therefore, typography was among the few permissible ways of artistic expression at the time. European heraldry ~1100 - 1400

Image source: Enacademic Heraldry is a system by which coats of arms and other armorial bearings are devised, described, and regulated. In all likelihood, the first real logo, in its semantic entirety, was actually the coat of arms which became a symbol used to represent family houses or territories. During the Crusades, soldiers from different countries used them on armor and battle flags to distinguish themselves apart. As coats of arms are therefore used to represent certain values, it can be successfully compared to the modern use of a logo for brands. Storefront signage 1389 Looking back at the 14th century, times seemed rather hard. During this era, beer and ale were commonly drunk by people, therefore King Richard II of England made a law that ale houses must have signs out front so that the public could find them easier. This allowed for various work opportunities for graphic designers at the time since pubs ' visual identities and drinking etiquettes were graphic products waiting to be designed. This was how the first signage that represented commerce was born. The Birth of Graphic Design - The Industrial Revolution Era 1760 – 1800

Image source: Foundation for Economic Education For hundreds of years, people’s lives were primarily focused on agriculture. Folks farmed small pieces of land for the subsistence of their own families, producing DIY tools, furniture, and clothing for their use or inter-neighborhood trade. The Industrial Revolution began in Great Britain around 1760 and from then on, it spread to other parts of the world. To put it shortly, it was a cultural and economic shift from the cottage industry to a factory-based manufacturing system. But what did this mean for the field of graphic design? As a major turning point in the history of human mankind, it marked almost every aspect of daily life. The general mechanization acted as a strong accelerator of processes. When it comes to printing speed in 1810, industrial innovation allowed for 400 pages to be printed per hour. According to some critics, civilisation was shifting from admiring humanist values to worshiping material goods. Mass production brought the need for mass communication, therefore the nature of visual information had changed significantly during this era. Graphic communications became more important, photography was invented, while the expansion of printers, advertisement, and posters also occurred. Growth of Graphic Design: Up until 1900s This was when good design days came about. Gutenberg's printing press enabled people to recreate text, art, and design on a massive scale and in a cost-effective manner. From this, companies started to learn how to grow in terms of their visual identity and how to sell with the use of it. Invention of the Gutenberg press – 1439 What changed thanks to Johannes Gutenberg's invention was people’s attitude towards printed books and the press. With accessibility came all sorts of profits starting with easier mass communication and affordable knowledge and information. The year 1439 changed civilisation and shaped Western culture. Graphic design ultimately gained a supporter, with the Gutenberg press paving the way for its broad commercial use. First logos – late 1400s We've already mentioned where the roots of logos lie, but before the press arrived, it had been a whole different story. The printing industry allowed for graphic designs to be multiplied perfectly in an infinite number of times. The first logos were limited to marks on companies' documents. Parallel to actually being used to visually represent a company, a logo was also meant to present the brand’s advancement in its printing technique. In short, how well the logo was printed reflected how well everything else was printed by them. First print advertisements – 1620s You know them. They are funny, and today we often laugh at them when they appear on the internet. The first printed advertisements' amateurish style were as amusing and original as for our modern, refined perception. They appeared suddenly in massively printed newspapers. In that era, they were called “coranto”. The ads invasion happened in Europe in the early 1600s, but written advertisements initially date back to ancient Egypt. So what was all the fuss about? The thing is, this became the first time people could actually see images in mass-produced ads. Chromolithography – 1837 The further the technological progress reached, the more the world of graphic design could develop and spread its wings. Look at the seemingly simple ability to print in color or at chromolithography for example. It dramatically changed the perspective and broaden the range of advertising possibilities - characteristic, brand-linked color schemes, color-based emotional connections, etc. Furthermore, chromolithography enabled a higher degree of realism and attractiveness added to the simple objects of life and fashion. Until then, graphic design was solely based on shapes and marks. That's why the message was first of all clear and informative. Later on, the graphic design field of commerce started to approach the topic based on emotional attitudes, an approach that is very well-known to us today. Growth of Graphic design: After 1900s In 1993, Paul Rand successfully distinguished the core of this profession: “To design is much more than simply to assemble, to order, or even to edit: it is to add value and meaning, to illuminate, to simplify, to clarify, to modify, to dignify, to dramatize, to persuade and perhaps even to amuse. To design is to transform prose into poetry.” Today's form of graphic design began developing since the late 1800s. Whereas technological advancements of the industrial revolution era completely changed the game, the time to develop the specific tools and learn how to play with them came afterwards.
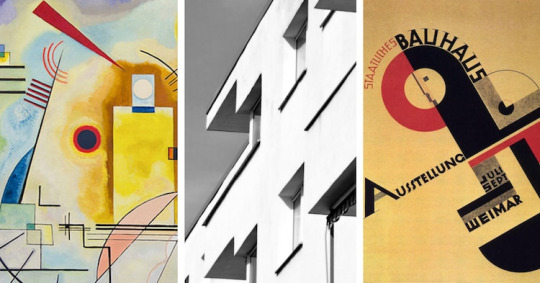
Image source: My Modern Met In 1903, the first graphic design agency, The Wiener Werkstätte, was established. The benefit of graphic design became evident and widely recognized since then, which helped kick off an entirely new industry. The Wiener Werkstätte was the first organization of visual artists which included architects, painters, and early graphic designers. They boldly reached out to cubism and other stylistic innovations, and their symbolic accomplishments set the stage for the Bauhaus and Art Deco styles. Staatliches Bauhaus was founded in 1919 in Weimar, Germany. Another difficult German word linked to it, the ‘Gesamtkunstwerk’, was an artistic ideal that encompassed or synthesized existing art forms into one perfect work. The goal that was actually brought into life - Bauhaus became one of the central driving forces behind the popularization of the modernist style. In 1922, William Addison Dwiggins explained in his book what graphic design actually was. Hence, the actual profession and the style of life in which it brings has been well-described through it. Moreover, “Thoughts on Design” by Paul Rand (the designer responsible for the logos for Ford, Westinghouse, Yale, ABC, UPS, and IBM) was published in 1947. In his book, he focused on “functional-aesthetic perfection,” an ideal balance between a logo looking good and communicating its points effectively. Up to this day, graphic designers' books and speeches collectively happen to fuel all the creative innovations within this field. Graphic design in this day and age From the 1950s onwards, the Industrial Revolution became almost insignificant compared to the digital one. Instead of mass printing, humans are enjoying the continuous technological advancements, with the computer, Internet, and social networks being huge turning points to how graphic design is today. Online platforms created many professions and opportunities for graphic designers. Meanwhile, digital softwares became more and more polished, cheaper, and more accessible than ever before. In 1990, the first version of Adobe Photoshop was released, creating a revolution in the way graphic designers worked. Photo manipulation created a whole new subcategory of graphic design. Prior to this, only artistic collages provided the possibility to blend together elements of photography, illustration, and CGI. Now, practically everything can be done. What are the forecasts for the future then? The above-mentioned route of surprising turns in the development of graphic design and the progression of visual communication is exciting because it shows that this field has no end. It continuously develops and changes paths, but the core idea of communication with the use of visual symbolism remains the same. Today, graphic design trends, styles, and preferences vary from designer to designer, but one thing is for sure - there is infinitely a plenitude of space for development. Read the full article
0 notes
Text
Describing the Graphic Design Process in a Few Steps
What is the Design Process in Graphic Design? If you are someone who is interested in graphic design and is highly considering taking on a professional career in this field, one of the most crucial things that you will have to know and understand is how the graphic design process works. Graphic design involves a very intricate process, where every detail must be carefully thought about and selected in order to create a cohesive and stunning design. Essentially, the graphic design process consists of the following steps: 1. The creative brief 2. Graphic design research 3. Research & brainstorm 4. Build on your concepts 5. Sketching 6. Refining 7. Presenting 8. Revisions 9. Final delivery The graphic design process is not without its challenges, and for those who are non-designers or are new to the industry, it may seem a bit complex to grasp. However, in this article, we are here to describe it all to you in the simplest manner. This way, you’ll be able to gain a better understanding of what the graphic design process entails and how you can best execute each step in order to become a successful graphic designer. Graphic Design Process Steps The Creative Brief

In this very first stage, listening to your client’s needs and expectations will be key to a successful design. Therefore, it’s really important that you are attentive and are jotting down all the necessary information needed to execute the project. Read through your client’s brief several times until you are sure that you’ve developed a clear understanding of what their goals are. If possible, it would be even better to personally speak to them, whether that is through a meeting in person or a phone call. If you ever get the opportunity to do that, make sure to take advantage of it and ask as many questions as you can so that everything becomes crystal clear to you and that you are left with no confusion with what you have to do. When reading or listening to the creative brief, what’s critical to take note of is the budget as well as the deadline of the project. After all, you could have the best graphic design skills, but if you are someone who cannot meet your client’s deadlines, that will be something that will really impact your reputation and credibility as a professional designer. Once you’ve received this information, consider how long the design process may take so that you can factor this into your work plan and schedule. Lastly, be sure to look out for important keywords and deliverables such as your client’s market, their brand’s identity or tone of voice. Graphic Design Research When conducting graphic design research, it is highly recommended to check out the latest design trends. Whether you are hired to design a poster, flyer, calendar, logo, or packaging design, you should go out and explore to see what’s already out there within your client’s market. Going out to any public space such as grocery stores or malls, or even browsing through online platforms are great ways to gather better insights about your client’s market as well as all the designs that already exist. This way, you’ll know exactly how you can differentiate your design from those of your client’s competitors. At the end of the day, you want to create unique designs that will make your client stand out from the rest. For example, if your client were to run a cosmetic business, you can always check out cosmetic stores to see what the current design trends are for this market. Be sure to also take note of designs that have been successful and those that are not as this will help set the right foundation for your own project. By conducting thorough graphic design research, you’ll be able to figure out which design direction you should aim for. Research & Brainstorm Although you may have already done your research on current graphic design trends, it is going to be extremely important for you to conduct more research on your client’s business. The research stage is crucial and must be taken seriously since it is also the step that requires the most time and effort. However, good research will always be worth it in the long-run as it will enable you to truly sync your creative ideas to answer the client’s brief. So what should you research at this stage? Mainly anything that helps you to better understand your client’s business. This can include their brand history, culture, vision, values, target consumers, and competitors. However, it would also be valuable to explore the market trends within your client’s business, as well as the design styles and colors that you could potentially use. After you’ve done your research, you should already be having a clear idea of how you can best satisfy your client’s needs. You’ve figured out exactly what elements you should within your design and what style you should go for, so now all that’s left to do is to start brainstorming on some ideas for your project. Build On Your Concepts Once you’ve done your research, then it will be time to further build on it. During this stage, you should develop around 3-5 concepts in order to provide your clients with some design choices. When coming up with all these creative ideas, be sure to keep the brief at the back of your head. This way, you’ll be able to satisfy your clients by aligning everything to it. In addition, make sure that these concepts are something that you love and are extremely proud of. After all, the worst thing you could do is to present your clients with something that you yourself don’t even like. Sketching

You’ve now developed some concepts to present your client with. However, in order to best illustrate them to your client, you’ll have to start sketching them out so that they know exactly what you mean. Once they actually see and understand what the design would or could look like, this will also allow you and your client to be on the same page. In this stage, you need to create rough drafts of your designs. Sketching helps graphic designers to visually communicate their ideas in a quick and efficient manner. Depending on the time constraints, you can either sketch out something really quickly or make it super detailed. However, the most common way to go about this is to quickly draw your ideas on paper using either a pen or pencil. At this point, you are free to draw out anything and there will be no limits since your drawing doesn’t necessarily need to reach perfection. It’s just more so that both you and your client get a clear idea of the main concept of the design. Draw out the symbols and motifs that you may want to use and experiment with different fonts and colors to find those that look best. While you are allowed to be as creative as want and create a variety of versions, ensure that you’re still sticking to brief, keeping your client’s goals and objectives in mind. This will save you lots of time later in the process since you won’t have to go back to square one and fix everything. Refining Next, you have to refine your drafts. You can do this by creating digital illustrations of your designs using software like Adobe Illustrator. By digitalizing your designs, your client will be able to get an even better picture of what the final design would look like. If needed, discuss with your client what they want to see and expect from these digital designs since you’ll be at a point near finalization. To save you from having to redo a lot of the things, make sure you develop your design accordingly to your client’s feedback so that you’ll be ready to present the best final versions to them in the next stage.

Presenting You’ve finally finalized your design concepts digitally, so now it is time to present your work to your clients. When presenting work to your client, always make sure that you are delivering and explaining every single aspect of your project in the best way. During this step of the graphic design process, it will also be the time where you’ll most likely receive even more feedback from your client. This is the prime time to gather as much feedback and constructive criticism as you can, not the time to be too proud of your work. Feedback is what’s going to help improve your design to fit your client’s needs, and at the end of the day, you need to execute your project in ways that will best satisfy your client so that you can help their business succeed. Revisions By this point, your client would’ve already chosen the design that they love most, and this will be the one that you will have to go back and revise. Discuss with your client if there is anything else they’d like to see improve and use this feedback to make the necessary changes. Ideally, as you’ve already developed and refined your ideas earlier, the changes during step shouldn’t be too drastic. Most of the time, it can involve changing the color or shade of the design, scaling, maybe even choosing a different font. However, stylistically, the overall design concept should be kept the same. The revision stage is not about changing the entire design, but rather making minor tweaks to perfect it. Final Delivery Now that everything has been revised, you’ll have to make the final delivery of the project. Once done, you can head over and begin the production stage. Whether the design is supposed to be printed or used on digital media, you need to make sure to double-check everything beforehand. Take a careful look at the scale, sizing, as well as all the file formats. This way you can be sure that everything is in its highest quality and that you will be able to deliver the necessary files to your clients. Otherwise, if there is an error and the design gets sent for production, this could end up being a huge waste of money and time. All in all, just make sure that everything is complete and ready to go prior to the production stage. Read the full article
0 notes
Text
What was the Best Graphic Design Software in 2019
The graphic design process requires software tools that can provide solutions to real-time design problems. Ranging from free tools for a beginner designer to paid ones for a pro, you can find all sorts of tools to suit your design niche. If you are in need of any kind of design, a placeholder will do, but for anything beyond that you will simply have to dig deep to find the exact design software that fits your needs. From simple to complex and free to paid, here are some examples of the best graphic design software in 2019.
1) Adobe Illustrator CC
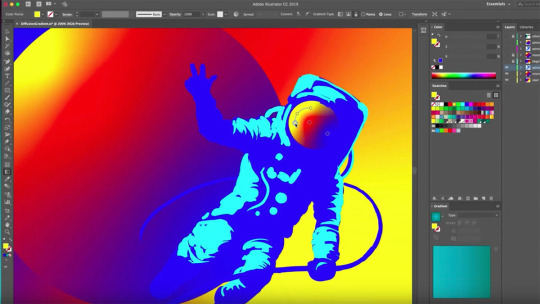
Image source: Digital Arts Online This program is Adobe’s flagship product, perhaps even more so than Photoshop. With hundreds of useful and imaginative options available, Adobe Illustrator allows you to create perfection down to the very last vector of every image. In fact, Adobe Illustrator is considered to be the software that most professional graphic designers use to create high-quality and complex designs. The main focus of Adobe Illustrator is to create pictures from scratch or edit one of the stock photos from its built-in library. More importantly, Adobe Illustrator receives two major updates a year, offering 100 GB of cloud storage with the subscription. Why choose Adobe Illustrator? Adobe Illustrator is a great graphic design tool that doesn’t have a 100% compatibility with other software outside the Adobe software suite, a.k.a the “Creative Cloud”. While Adobe Illustrator is perfectly usable on its own, it truly shines when coupled with the rest of the Adobe graphic design tools. If you’re planning on using other Adobe tools or already are, definitely use Adobe Illustrator to maximize the compatibility synergy. Pros: Supreme precision Professional results Synergizes with other Adobe tools Cons: Subscription based, costing $20.99/month Not 100% compatible with non-Adobe products
2) Adobe Photoshop
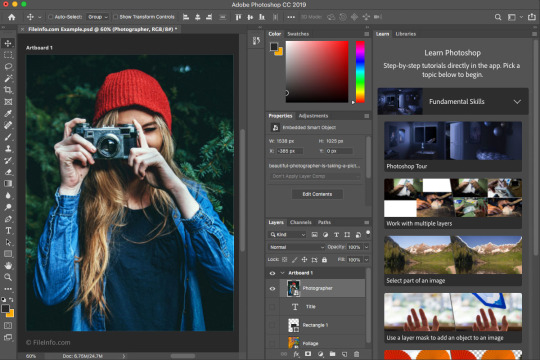
Image source: FileInfo The classic and one of the most well-known graphic design software out there, Adobe Photoshop was initially created in 1988 and has been steadily improved since. The software mostly deals with raster images, which are those that are made using a pixel-based program or a digital camera. Professionals wanting a smooth blend of photorealistic elements would definitely want to pick Adobe Photoshop. The various intricate shadow and color manipulation options enables you to take any number of pictures, perfectly splice them together, and achieve something that looks completely real to the point that today, there’s even a verb created out of this which is “photoshopped”. Why choose Adobe Photoshop? The biggest advantage of Photoshop is in its wealth of options and how well they’re documented. Thanks to Photoshop’s popularity, there’s literally hundreds of tutorials and walkthroughs for any given option to help ease a newbie into becoming a graphic design pro. While there is still a learning curve, it’s easier than ever to get into Photoshop and become a pro at using it, which is considered to be a skill in its own right. Pros: Extremely well supported Most compatible graphic design software on the market Professional-quality results Intricate graphic design options Best suited for photorealistic (raster) images Cons: Subscription based, costing $20.99/month Requires some learning
3) Pixlr
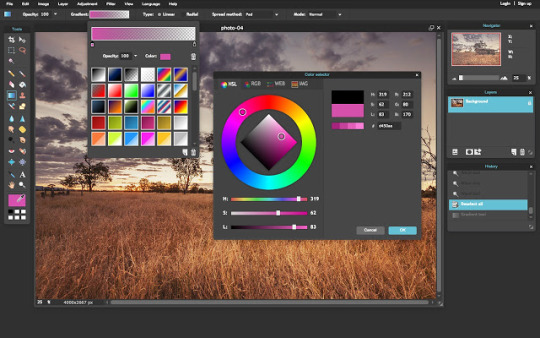
Image source: Chrome Web Store In 2019, browsers have become better than ever before. They are versatile and have moderate hardware requirements, allowing them to do everything except graphic design; for that, you’ll also need to use something like Pixlr. Serving as an internet-based collection of graphic design tools, Pixlr allows anyone to jump right in and start creating wonderful graphic design content using only a browser or Pixlr app within seconds. From taking a screenshot to editing and downloading it, Pixlr covers all the basics of capturing photos and editing. Why choose Pixlr? The biggest advantages of Pixlr are the mobility and immediacy it affords. By using only a browser (or app for mobile devices), you can edit, save, and continue editing on the go whenever you’ve got a few minutes of spare time. Professional graphic designers tend to pack it for travel because they can’t work without their special hardware. Hence, Pixlr allows for a very convenient and lightweight work schedule that adapts to you. Advanced Pixlr editor costs $5/month but also reveals its biggest downside – the dearth of options in the free version of Pixlr. Pros: Low hardware and software requirements Free Beginner-friendly Cons: Not suitable for detailed, in-depth work
4) Sketch
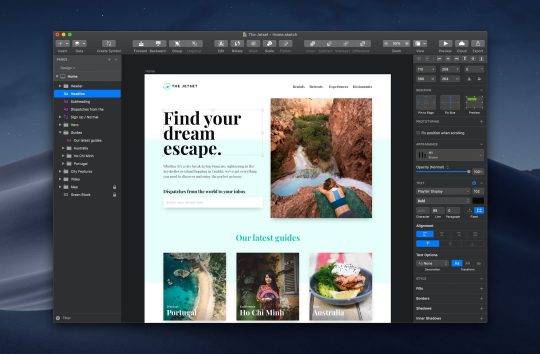
Image source: PC Mag Some graphic design projects are so complicated that they require an entire team to complete. That’s where Sketch comes in. Focusing on collaborative solutions, Sketch allows an entire team to coordinate and stay up-to-date through innate Sketch tools while still being a highly competent program for graphic design. Why choose Sketch? In a large organization, it’s hard to keep track of who’s doing what and when. Using Sketch Libraries, the entire company can be on the same page, with designers having a consistent style and managers able to keep track of the progress and make sure everyone is synchronized. Even better, Sketch also works with Dropbox and GitHub. Pros: Contains collaborative tools Free trial Cons: Only available on Mac Not ideal for a single user
5) Inkscape
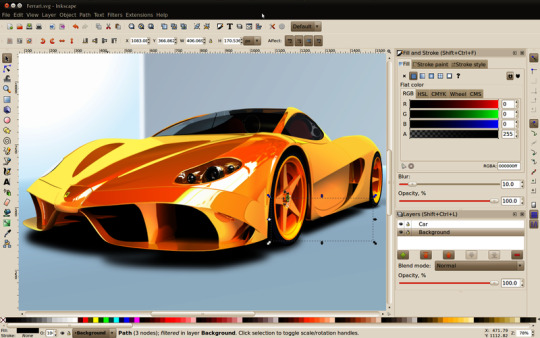
Image source: Techworld This is a free graphic design tool that can be used for vector-based images. Like other free solutions, it is supported by the community, often leaving you to scratch your head if you were to get stuck on it. If you have any questions, you are meant to engage with the community until you find the answer you were looking for. Inkscape is a welcome addition to the graphic design market, mainly because by using it, we support the idea of free software. It is free both in terms of it costing $0 and it not being constrained by anyone. Why choose Inkscape? Inkscape is an open source, meaning that everything surrounding its functionality is under public scrutiny. You could, in theory, check out the code used to create it and tweak it to your heart’s desire or make your own version of Inkscape and sell it for profit. There is no company lording over how you should use Inkscape – it truly is a free and flexible graphic design tool. The idea of building a community through joint effort is present in every aspect of Inkscape. In fact, users are even able to contribute to translations and write help articles for the program. Although Inkscape is close to being completely finished, it is still considered to be a program that has quite some bugs and quirks you’ll have to find workarounds for. Pros: Free Open source Has a community built around it Cons: Lack of professional support Still in beta as of October 2019
6) Apple Motion
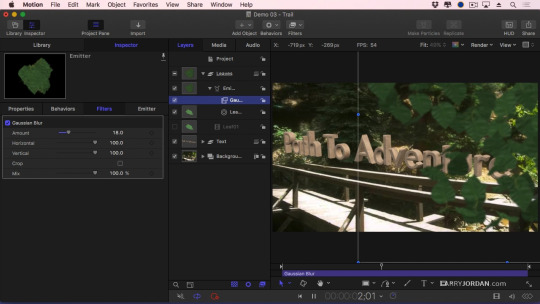
Image source: Larry Jordan More and more static content is being woven together into animations and hosted on video platforms. In cases where you want to rehash and reuse static graphic design leftovers to create an animation, Apple Motion will be a suitable choice. Why choose Apple Motion? Animations and animated transitions are the forte of Apple Motion. The program is well-stocked with pre-made effects that make it easy for anyone to ‘drag & drop’ their way to glitzy and shiny animated content made out of scraps. Pros: User- and beginner-friendly In-depth controls for nuanced effects Cons: Only available on Mac
7) CorelDRAW
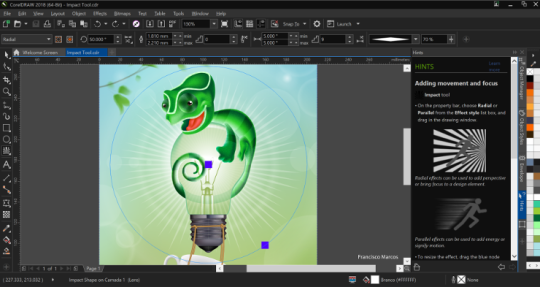
Image source: PC Mag Clean, professional, and detailed – those are the main attributes of CorelDRAW. Using the symmetrical drawing function, you can produce mirrored images of anything you draw and edit them however you see fit. From tiny details to massive projects, CorelDRAW does everything a professional graphic designer could ever want a software to do. However, learning how to handle the wealth of options it offers is another challenge for a beginner graphic designer. Why choose CorelDRAW? CorelDRAW is an extraordinary tool with a price to match it. If you’re designing the most intricate and complex graphic designs out there, CorelDRAW is truly one of the best and most reliable software solutions to use. For everything else, there are cheaper and more accessibles programs out there that will do the job just fine. Pros: Interface compatible with touch devices Scalable graphics engine allows adding tiny details to massive projects Produces results of professional quality Cons: Price Steep learning curve
8) Affinity Designer
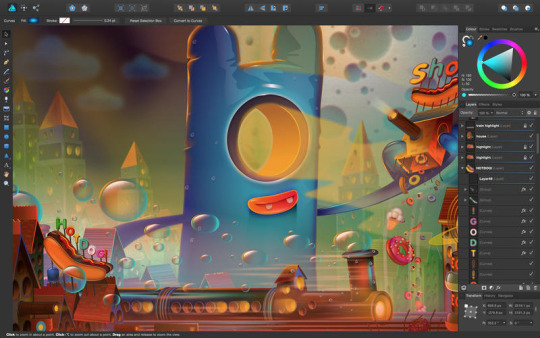
Image source: AppKed Affinity Designer is a graphic design tool capable of producing designs of sublime quality. You can zoom in and out to your desire, allowing you to screen the details or take a look at the larger image. From miniature designs to massive projects, Affinity Designer can handle it all, provided that you have the hardware to match. Why choose Affinity Designer? Affinity Designer excels at producing otherworldly, creative art that’s inspired by meditation and religious works. If you’re the type of designer that isn’t content with fiddling with stock photos, give Affinity Designer a spin and see what you end up with. Pros: Realistic shadow editing Layered editing One million percent zoom Cons: Hardware requirements
9) Canva
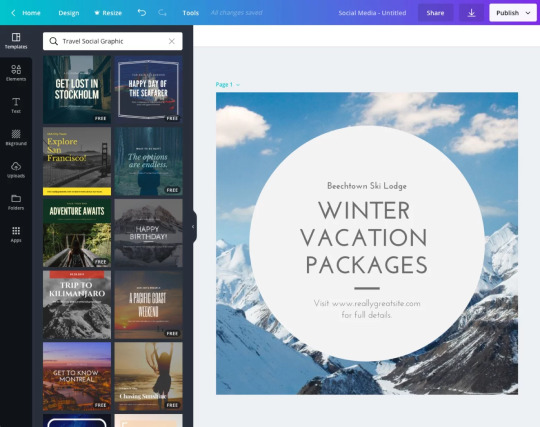
Image source: Canva If Pixlr is too complicated for you, luckily there’s Canva for you to use. With simple graphic design options, Canva isn’t meant to compete with the likes of Adobe Photoshop. However, it merely provides the bare minimum of utility for any user, even those with very little to no graphic design experience, wanting to start their own business or print out a graphic design without having to call anyone to walk them through it. Templates automate the design process even further and now graphic design is doable with just the simple use of a mouse. Why choose Canva? Canva has a clean, minimalistic interface and options to match. There’s not much depth in Canva but that’s actually perfect for senior users who might get flustered encountering the wealth of editing options in a more professional editor. Pros: Perfect for layman users Free Cons: Requires an internet connection
10) Adobe InDesign
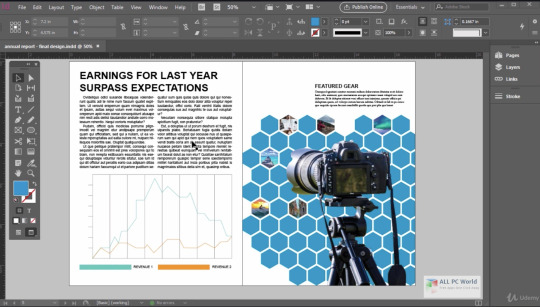
Image source: All PC World This is another one of Adobe’s products with the same monthly subscription but a slightly different toolset. It is mainly used for print and publishing design, such as books or any other document that contains multiple pages. The interface is balanced and smartly adjusts to the user’s needs, providing them with contextual information on the go. Plus, the main benefit of Adobe InDesign is that it provides a comprehensive overview of the project, allowing you to troubleshoot problems before you send the file off for printing. Just like with all other Adobe products, you will be nudged towards buying as many other Creative Cloud programs as possible since they all coordinate seamlessly. For example, it’s possible to get the entire Adobe font library within InDesign and then have specific fonts from it used across the entire project done in other Adobe software solutions. Why choose Adobe InDesign? Complex publishing graphic designs that have an intricate structure or layout will be those that will benefit from Adobe InDesign the most. The more different parts there are in the project, the more work there is to be done when changing anything. Thankfully, InDesign allows you to view the entire project at once to find out what should be changed and where. Changes and adjustments become a breeze when InDesign is involved. Pros: Integration with other Adobe products Huge font selection Overview and easy adjustment of the entire project Cons: Subscription based, costs $20.99/month Some features are still barebones
11) Xara Designer Pro X
Image source: Magix Different stages of design might require changes to be made to its parts or the entire project while still maintaining the color and font. Changing individual elements in the projects while keeping its integrity will require a special type of graphic design software, and this is where Xara Designer Pro X comes in. Xara Designer Pro X comes with over a million stock photos and templates. Why choose Xara Designer Pro X? This is one of those software products that attempt to be a single solution for all your graphic design needs, and when it comes to desktop publishing, Xara Design Pro X definitely succeeds. This is quite a capable tool that can equally handle both raster and vector images with ease. However, it can also output documents, images, or even entire HTML websites. Pros: Extensive templates library Available on Steam Cons: Pricey at $299 Windows only
12) Gravit Designer
Image source: Gravit Designer In some instances, you simply can’t do without Windows but that’s an operating system that does become oppressive after a while. The ideal graphic design software would thus allow you to skip and hop from one operating system to another as you please, maintaining all your projects in sync. Gravit is one such cross-platform graphic design solution meant for professionals. Why choose Gravit Designer? Precision vector tools in Gravit Designer make it a child’s play to make creative, dreamy designs out of any shapes and colors imaginable. You can create all the print and digital designs for a product from start to finish, including stationery and app UI. A neat feature of Gravit Designer is the ability to import an image and turn it into a set of fully editable vectors. Pros: Trial and free version Cross-platform Flexible vector editing options Cons: Subscription based, $49/year Read the full article
1 note
·
View note