
Don't wanna be here? Send us removal request.
Statistics
We looked inside some of the posts by limasmithblog and here's what we found interesting.
Average Info
Notes Per Post
0
Likes Per Post
0
Reblog Per Post
0
Reply Per Post
0
Time Between Posts
11 days
Number of Posts By Type
Text
17
Last Seen Tumblr Blogs


Fun Fact
1,644 Tumblr posts in 1 second.
Text
Easy Guide to Access Calix Router Settings
Manage your home Wi-Fi and connected devices directly through the Calix router login. After connecting to your Calix network, open a web browser and navigate to the router's IP address (often 192.168.1.1). Use your administrator username and password to access advanced settings and personalize your network for optimal performance. Optimize your Calix router.
0 notes
Text
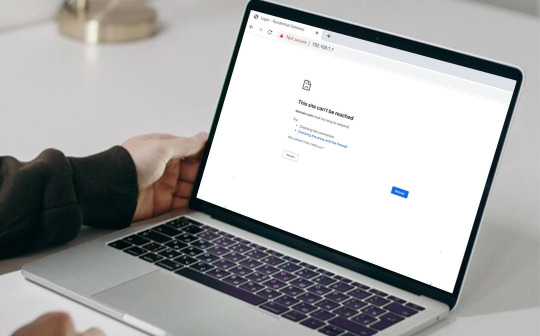
How to Fix a Calix Router That Won’t Connect to the Internet
A Calix router not connecting to internet can result from outdated firmware, service provider issues, or incorrect WAN settings. Start by restarting your router and checking cable connections. Log in to the admin page for configuration review. Struggling with Calix network issues? Visit us now for easy-to-follow troubleshooting steps and improve your connection.
0 notes
Text
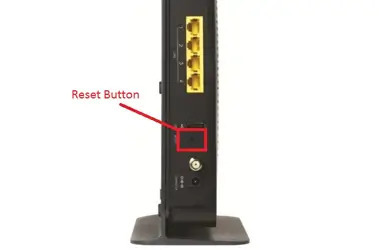
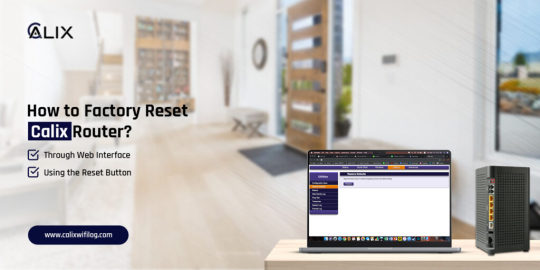
How to Perform a Factory Reset on a Calix Router

To learn how to reset calix router, locate the reset button, usually on the back. With the router powered on, press and hold it for about 10 seconds until the lights blink, indicating a reset to factory defaults. Check our online resources for what to do after the reset. If you need human assistance, drop us a line!
0 notes
Text
Calix Router Status Lights: What a Blinking Green Light Tells You
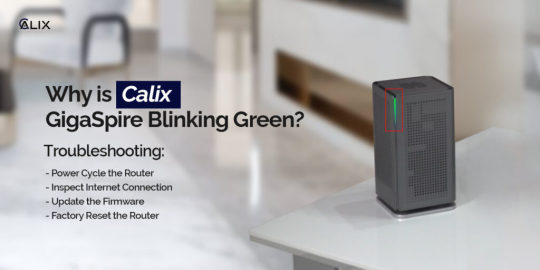
Seeing your Calix router blinking green often indicates it's trying to connect or update. Wait a few minutes; if it continues, reboot the device or check your DSL/cable line. Persistent blinking may need a firmware refresh or ISP check. Still blinking? Chat with our experts now for a quick fix!
0 notes
Text
How to Update Your Calix Router Firmware – Step-by-Step Guide

Calix Router Firmware Update begins by checking the router’s power supply. Then, connect your laptop/computer to the router’s WiFi and type 192.168.1.1 in the URL bar and login using your admin details. Next, head to Maintenance, choose the firmware for your model and click Upload. Reach out to our tech team for step-by-step instructions.
0 notes
Text
What Are The Quick Fixes For A Calix Router Blinking Green?

Nowadays, Calix routers are available as top-of-the-line products in the telecommunications market. These networking devices are equipped with advanced wifi technology, but sometimes users face issues with them, such as a Calix router blinking green. However, the flashing green light indicates different scenarios according to the device's operation.
Likewise, the normal Calix router flashing green LED generally assures the good working of this networking device. Further, if this stays for a long time, then it should be an issue. In addition to this, if you want to explore complete details about the blinking green light issue on your Calix gateway, then this guide is for you. Read it completely to find reasons and fixes!
Why is the Calix router blinking green constantly?
Generally, having a persistent green light on your networking device counts as a problem with it. Likewise, we list out the several reasons that are responsible for this issue:
Damaged hardware
ISP problems
Technical glitches
Network issues
Incorrect router settings
Loose connections/Faulty cables
Quick steps to resolve the Calix router blinking green issue
Furthermore, in the above section, we discussed the causes behind the flashing green light. Now, it is time to troubleshoot these errors promptly for the smooth operation of the networking device.
But before you move forward, it is crucial to understand the normal behavior of this LED on the Calix router. Therefore, take a look at the casual green LED flash on the Calix router:
A software upgrade is in process.
The networking device boots up
WPS is trying to initiate a connection with the available device
Resolutions for the Calix router blinking green
Now, after understanding the normal green light behavior, let’s take a look at the quick fixes for resolving it on your Calix router:
Firstly, place your networking device in a ventilated place where the signal strength is good.
If you use a direct wifi connection and face frequent connection drops, then connect an Ethernet cable to the router.
Next, check that the power and network cables are linked properly.
Make sure none of the router components are damaged.
Eliminate the signal interferences, like mirrors, cordless phones, baby monitors, furniture, etc.
Replace the torn or broken cables/adaptor if present.
Power cycle the networking device to eradicate technical glitches and bugs. This may fix the Calix router blinking green light issue.
Remove the corrupted firmware file if present and upgrade it to the recent version by following the on-screen guidelines.
Contact your network service provider to resolve the continuous network issues, or if there is no network.
Look at the router and modem ports, like WAN/LAN, as these are not burned or cracked.
Cross-verify the router settings, such as connected devices, Network frequency, etc.
When unable to resolve the issues, then factory reset Calix router.
In the end
In a nutshell, this complete guide walks you through the complete details on the Calix router blinking green. Here, you will get to know the reasons behind a constant green light. Along with this, you will also learn the normal flashing behavior of this LED and easy troubleshooting tips if it is an issue. If you still need expert tips regarding the same, then connect with us!
0 notes
Text
Why Is My Calix Router Not Connecting to the Internet?
In case, your Calix router can't connect to the internet, just reboot the router, examine the cable operation, or switch the network settings. Ensure that your ISP's service is active, and in case of any need, update the router's firmware. In such a scenario, it is advisable to get in touch with your internet service provider or the Calix support service if you need further assistance. Check out this link to troubleshoot.

0 notes
Text
How to Reset Calix Router for Faster & More Stable Internet
Need assistance with How to Reset Calix Router? No worries To do so, locate the reset button on your networking device and pick a paper clip. Then, press and hold the button for at least a few seconds and release. To know more related info, get in touch with us!
0 notes
Text
Why Is My Amped Wireless Extender Not Working? Quick Fixes & Tips
If the Amped wireless extender not working, then, it is due to loose cable connections, power outage, extender, and router placed far away, improper configuration, technical glitches, etc. Further, to resolve this, fix the cable connection, ensure that there is an adequate power supply, position the extender, and router nearby, configure the device properly, power cycle, etc. For troubleshooting tips, approach us!

0 notes
Text
Steps to Meshforce Setup?
MeshForce Setup can be accomplished using the app, first, open the My Mesh app on your phone. Next, enter the valid login details on the login page. After that, visit the Setup wizard and access the advanced settings to configure the device. Further, follow the instructions or drop us a line to complete the process!

0 notes
Text
Steps to Change Arris WiFi Password?
To Change Arris Wi-Fi Password, open a web browser and type 192.168.1.1 IP address in the URL bar. Then, a login window appears to enter the default username and password. Now, visit the master Setup wizard. Afterward, follow the instructions on the Basic Setup> Wireless settings. For more details, visit our site!
0 notes
Text
How to Amped Wireless Extender Reset?
For the Amped wireless extender reset, first, locate the button on your networking device. Now, press & hold the button for at least 10- 15 seconds and then release. Here, the device reverts to its default settings. For more related info, reach out to us on our site!
0 notes
Text
Why Roomba Docking Station Not Working?
Roomba docking station not working issue occurs due to dirty charging contacts, inappropriate location, power outage, sensor issues, connectivity issues, etc. Further, to resolve this, clean the charging contacts, relocate the dock station, ensure that there is an adequate power supply, inspect the sensor, stabilize the internet, etc. If the problem persists, drop us a line for more solutions!

0 notes
Text
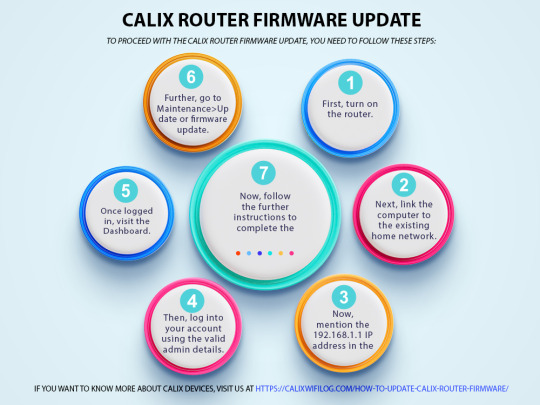
How to Calix Router Firmware Update?
For the Calix Router Firmware Update process, first, open the web browser and type the 192.168.1.1 IP address in the URL bar. Now, enter the admin credentials on the login window. Once logged in, Maintenance>Update or firmware update, and then go ahead with the upcoming guidelines. For more info, visit us!
0 notes
Text
Steps to MeshForce M3 Setup?
MeshForce M3 Setup can be accomplished using the app, first, open the My Mesh app on your phone. Next, enter the valid login details on the login page. After that, visit the Setup wizard and access the advanced settings to configure the device. Further, follow the instructions or drop us a line to complete the process!

0 notes
Text
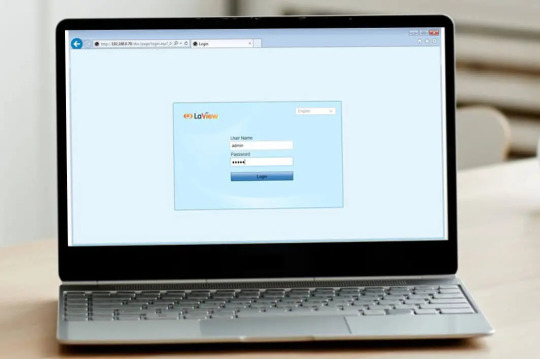
How to Laview Camera Login?
Before proceeding with Laview Camera Login, ensure that you have an active internet connection, accurate web/IP address, valid admin details, computer/smartphone, Laview app, etc. Further, there are two ways to access the device i.e. via the web GUI and the app. If you want to know more, approach us!
0 notes
Text
How to iRobot Roomba Setup?
For the iRobot Roomba Setup, first, you need to download the iRobot Home app on your phone. Next, open the app and log in using the default admin details. After login, visit the smart Home Dashboard of the Roomba vacuum device. Then, add your device to the app by tapping on ‘Add Your Product". To know the complete process, approach us!

0 notes