
Don't wanna be here? Send us removal request.
Statistics
We looked inside some of the posts by louisbfmp2 and here's what we found interesting.
Average Info
Notes Per Post
0
Likes Per Post
0
Reblog Per Post
0
Reply Per Post
0
Time Between Posts
23 hours
Number of Posts By Type
Text
17
Last Seen Tumblr Blogs


Fun Fact
There were a total of 171.5 billion posts on Tumblr in 2019.
Text
Gameplay Video and Evaluation
youtube
This is the gameplay video for TongueTied.
I'm happy with how the game turned out and the gameplay was about 9 minutes and 30 seconds so I would say that's successful.
I set an ambitious target and hit it and I am very happy with it all. I did have to sacrifice some ideas and concepts due to time and my inability to code them but other than a few ideas all of them worked out exactly as I wanted them to.
0 notes
Text
Game Finale

This is code for the door at the end of the chase sequence and it puts up a widget that says 'Something doesn't feel right' and then the game cuts to black and a thank you message is shown.


This is a line of code that plays sound effects of rocks falling to make it seem like the room caves in. After the sounds finish a thank you message widget pops up, it looks like this:
I just wanted to say thank you to the school and the teachers that helped me through college.
This is how the sequence looks ingame:
0 notes
Text
Ending Rooms

This is what rooms one of the chase looks like, I made fake doors so they are easily distinguishable so it is easier for the player to get through the chase sequence.

I wanted to make the rooms progressively harder.

This is the third room.

And the final room. I wanted to make it look insane because I wanted to confuse the player as much as I could.
This is how it looks ingame:
0 notes
Text
Adding an Ending 2
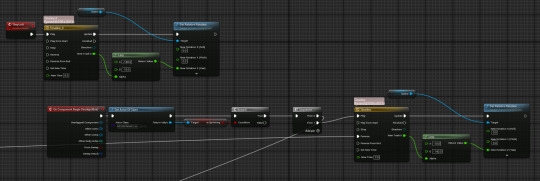
The custom event at the top right is to close and reset the door.
On begin overlap it checks if the player is sprinting and if that is true the door opens.

The prompt overlap is to put a widget up on screen and this is the code for the widget.


It is the same as the last widget but different words.
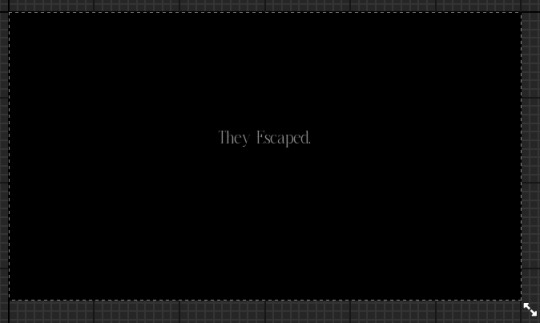
On event end overlap it just removes the widget and starts playing a heartbeat sound effect to make it more intense. It also puts a timer on screen so the player knows how long they have left until the person they are chasing escapes.
On event tick the countdown starts and when it ends the time dilation is set to 0.01 and a widget is shown.
The widget plays a sound in the code on construct.

This is what is played when the timer ends and the player hasn't gone through all of the doors.

This is the reset chase custom event and it just closes doors and resets code so that the player can be reset when the timer runs out.
0 notes
Text
Adding an Ending
I made this room with 3 doors for the intended entrance to this part on the right, a test room in the middle for new tasks and puzzles and on the left is the control room and the player is going to go in there and chase after the person in charge.
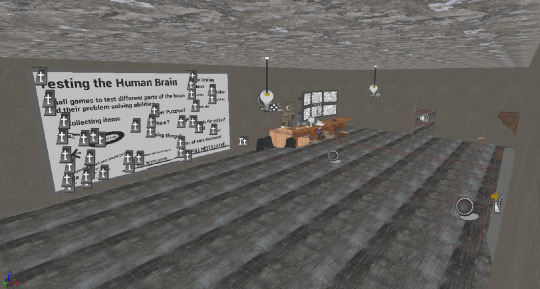
And this is what the control room looks like, I wanted to add a whiteboard so the player can see the thought process of the antagonist and see what they were going to do. I also made 6 monitors to show the cameras they are looking at.

I made a collision box that the player hits and it causes a widget to pop up and the games tick rate to go down to 0.2.

This is the widget that hopefully won't confuse the player and will tell them to hold sprint while going through the door.

I made the widget play a sound so that it just seems more natural. Both animations are just fading in and out.
This is how it looks ingame:
0 notes
Text
Main Menu
The Main Menu is identical to the pause menu, all of the buttons and animations are exactly the same but there are a few differences and those are the music and a video.
I also have for when you press the quit or play button it changes the text to something else.


I also have this to make it seem like the light in the main menu is being turned on.

This is the code for the video, it is very simple and just uses an mp4 on a material. You also need a plugin.

Electra player just helps make the video play.

0 notes
Text
Pause Menu

When making my pause menu I wanted to make a smooth system with transitions and clean movement.
These are all of the animations:
It looks a little weird in this video but the animations play in a certain way so they don't have overlapping buttons.

This is the code for the pause menu. With every button that is hovered over it plays an animation to increase its scale from 1 to 1.1 so that it is easily shown when the mouse is hovering over the buttons which is the code on the left of the image.

Event construct plays an animation of the menu opening and also a two sounds, one to signify that the menu has opened up and another sound to give ambience to the pause menu. The sound is the tuning of a radio.

This is the apply button and graphics slider, the graphics slider sets the scalability quality to low, medium or high and depending on what is picked the text is set to that and the text changes when the slider is between 0% and 33% it is low, 34% to 66% is medium and 67% to 100% is high. The apply button plays a sound and just applies to changes to the graphics.

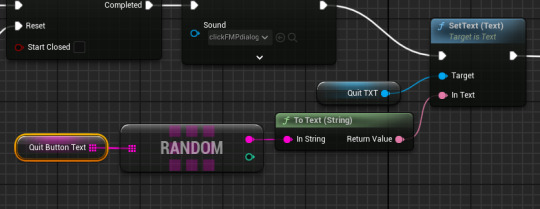
The quit button plays a sound and an animation that goes back to the main menu and obviously opens up the level with the menu on it.

The play button plays a sound and removes the pause menu by playing an animation and also set the game to not be paused while also stopping the radio tuning ambience.

When the options button is pressed it first plays a sound, then plays an animation to move the play, options and quit button and show the video, sound and back button.

When the sound button is pressed a sound is played and then an animation to move itself and the video button while also making the sound slider visible and useable.

The back button plays the options button animation in reverse but it also checks if the video or sound button has been pressed, if they have then it reverses the animation of whatever was pressed and then it plays the options animation in reverse.

This is the sound slider and it just changes to volume of the game.

When the video button is pressed a sound is played and an animation is played to move the video button while also making the graphics slider and frame cap come out.

These are the frame caps and obviously when 30 is pressed the frames go to 30 and when 60 is pressed the frames go to 60.
0 notes
Text
Adding another jumpscare

There are pipes in the second part of my game and I wanted to add another jumpscare at some point so I decided here because when I researched into 'Poppy Playtime' I played the game and there was a jumpscare just like what I want to do so I took inspiration from that.

First I had to make an actor for the pipe,

I then made a niagara effect, I changed the spawnrate, lifetime of the particles, the gravity and shape radius in which the particles would move and the speed they travel at. Finally I changed the material of the particles to make it look like smoke. With this done I started the code,

This code is on begin overlap, when the player overlaps with the collision box, the box is destroyed and the niagara effect is activated aswell as some sound effects. I also added more collision boxes so the player has to crouch under the steam.
This is how it looks ingame:
0 notes
Text
Improving Keypad Task

There was originally a problem with the keypad and that was that it only had colours and this was a problem because that meant that if anyone confused the colours or has some sort of colour blindness they wouldn't be able to pass the task. So to combat this I added a symbol to every key so that the player has something else to relate the hints to.
0 notes
Text
Frame Problem
I had a HUGE problem with the frame rate being stuck at around 10-20 fps and at first I thought it was a problem with different things being on event tick and the textures being too large but I changed some actors being on event tick and I also changed the textures to be smaller and lower quality but that didn't help at all. It was only when I played my game and got to the power cut section did the frames get better and that gave me the idea of the problem being the lighting and after deleting the lights my frames were at around 70-80 fps so it was all the lighting and shadows.
To combat this I first tried nanites but that didn't do anything and then I tried turning cast shadows off and that helped but I didn't want to do that with my game because it would like 100x less realistic and that's the opposite of what I want so I decided to turn every light on and make it so that whatever room you are in the specific lights for that room turn on and every other rooms lights turn off until you enter the rooms. This made the frames obviously improve drastically and the game is now perfectly playable.
I managed to do this by making a collision box and creating this code:

The code basically makes it so that whatever lights are connected to the collision box will turn on when the collision box is overlapped and when the overlapping has stopped the lights will turn off.

To link the lights I just needed to make a new element and then use the pick tool which is the pipette symbol and just select the actors ingame.
This is how it looks ingame:
0 notes
Text
Making minigame 4

This is the code to control the pawn, I needed to make this minigame a pawn because I couldn't control it how I wanted if it wasn't a pawn.
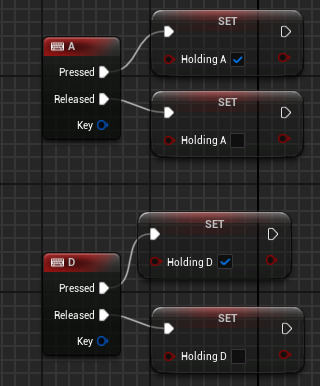
The controls for this game are A and D, this is because these were the easiest buttons to use and I am going to make a prompt to tell the player that this is the case. A turns on the boolean 'Holding A' and when it is released it turns it off, and when D is held it turns on the boolean 'Holding D' and again when it is released it turns it off.

The booleans activate this code that is on event tick, first it checks if a or d is being held if that is true then it sets the number on the actor to what it equals, after that it checks if the number is between 255 and 259 if it is then it changes the screen material to solid green which is what the colour hint is for the code, it also stops the static sound and plays a 'victory sound'.

This code is also on event tick, the first part checks if the number on the actor is between 72 and 76 if it is then it makes a 5 visible and if it is false then it makes it invisible, this five is the order in which the colour green comes in the code. Below that is a branch checking for if the player is holding A, if they are then it has a delay of 0.01 seconds and rotates the dial by -1 degrees on the Z axis and adds -1 to the number on the actor. The same goes for holding D but instead of adding -1 it just adds 1.

This code is on event tick and check for if the number on the actor is below 0 and above 360, if it is above 360 it then sets the number to 0 and if it is below 0 then it sets the number to 360.

This is what the pawn looks like in game and the thing with the number on it is the dial, the number shows the rotation of the dial and lets the player be more accurate with dialling the TV.
This is what it looks like ingame:
0 notes
Text
Making minigame 3

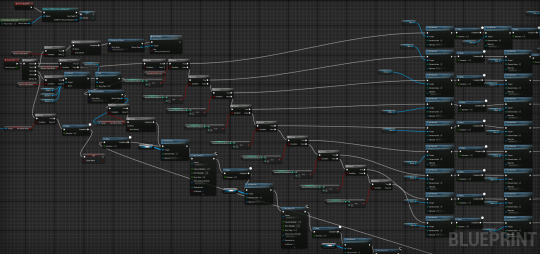
This line of code is the same as minigame 2, I added an 'interact' interface and added tags to the different components when you interact with these components they will do different things, in this instance choice one will set every choice for each round to 1 and choice 2 it will set the value to 2 and choice 3 will set it to 3.
These different choices are for the different rounds of questions,

This is round one done on begin play and the equation is set to 3x2=?, the choices are 1. 5, 2. 7 and 3. 6. The answer is obviously 6 and so when the player interacts with the number 6 this code plays:

This is on event tick, it checks if the chosen answer is equal to the actual answer and if that is true then it goes to round 2 but if it is false it will do nothing. It will then go to round 2 and then when that is answer correctly it goes to round 3:
This is the code for round two and three, they are custom events so on event tick instead of having a huge amount of code it just runs the custom event. They do the same as round 1 by setting the numbers to make an equation with 3 different answers and when the correct numbers are chosen it goes to the next round.

Once round 3 has been completed this code will play, first it plays a 'victory sound' and then for 3 seconds it switches between random numbers from 1-9. Once that 3 seconds is complete it shows the colour and order in which it is in the code.

This is what the game looks like, it is just a simple whiteboard with numbers on it. I got the whiteboard from a past project I had done.
This is what it looks like ingame:
0 notes
Text
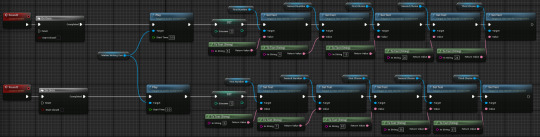
Making minigame 2

I used the asset that I had made for the keypad for this minigame as it would be a colour memory game and using this asset again would save lots of time and also it would fit perfectly because it is a colour keypad.

First I started by adding an 'interact' interface to interact with the components on the actor and this is done by adding tags to every component I want to interact with and so I added the tag to each button. To actually make them work I made this block of code, the code checks what component has been interacted with an depending on the object name it makes different things happen, like the specific button press down and change colour.

This is for the start button and it refers to this code:
First on begin play a reference to the player is set, then on event tick it checks if the start button has been pressed. When that is true it then chooses a random number from 1-9 for the different buttons.

This code is then carried out and if the player picked the correct button after a 3 second delay then a sound is played to signify the player is correct and if the player pressed the wrong button then a sound is played to signify the player is incorrect.
After this no matter if the player was correct or not the machine breaks and sparks fly out, it then sets the 'memory game broke' boolean to true and this code is carried out:
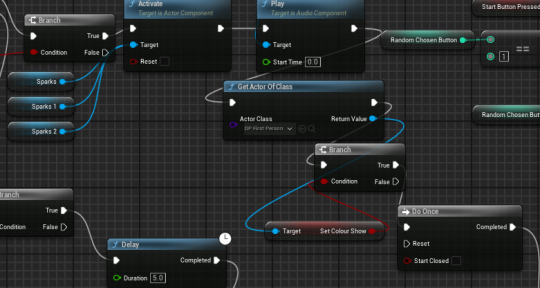


This long line of code is repeated for 5 seconds until the colour hint for the code is revealed,

From all of this code this is how the game looks and plays:
It looks good but I might make the player complete a few rounds before making the machine break.
0 notes
Text
Menu Design
Typically for menus in the past I have done still images and hard cuts but this time I want to try my hardest and produce a nice looking menu system. I think this will be relatively easy because an easy way to make the menus look better is to have a video instead of a still background. I also don't want things to look out of place like bright buttons and things like that so I will just simply remove them if they don't look good.

This is pretty much the opposite of what I want and that is because of the obnoxious buttons and still background.
0 notes
Text
Main Menus and Pause Menus
Minecraft:
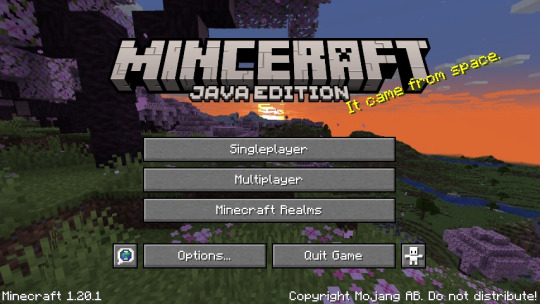
Minecraft's menus are simple but effective, there are no crazy animations or smooth transitions just hard cuts to the next menu. But there are so many different things you can change like language, video and audio settings, keybinds and mouse settings, etc. I want to do the same with the video and audio settings but due to the timeframe I can't make settings like language and keybinds a possibility. One thing I want to do differently is make both my main menu and pause menu have smooth transitions. I want the buttons to move around to make room for more settings.
0 notes
Text
Research for remaining Minigames

This is the colour memory game in 'Poppy Playtime' I want to recreate this and this is the perfect opportunity to so I am going to try and recreate this for one of the minigames.
The minigame will be a much easier and simpler version and by this I mean it won't be as extravagant and it won't go on for as long. But I do think the machine breaking is a good idea because that will how unprepared the antagonist in this game is.
I searched 'Minigames for Videogames' to try and get inspiration for different minigames but I had no luck due to most results being card games and definitions however I looked at horror games and a game that came to mind was 'Baldi's Basics' and I thought about the maths problems you have to do and how that would fit the players brain being 'tested'. So I searched into that and found these two options.
Option 1:

Option 2:

Option 1 is to have a widget pop up and the player types in an answer and option 2 was the player having to select the right number out of a choice.
I want to do option 2 because it seems more natural and like something that is real and set up unlike having a widget pop up. The maths equations are going to be simple, just easy multiplication so the player doesn't struggle and so the gameplay flows.
I got an idea from a friend to do a minigame about tuning a radio or TV and I thought it was a really good idea so I am going to try and do that.

When tuning a radio you need to turn a nob to tune it to a radio station.

And this is the same with old TVs.
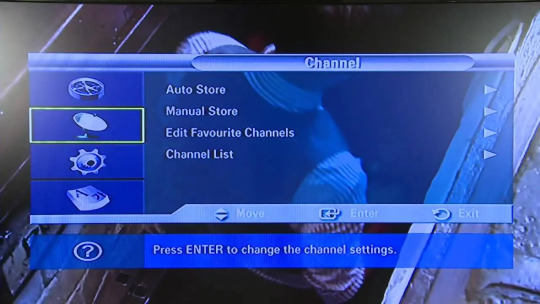
However when tuning a newer TV you just use the remote and go through a settings menu, I want to use the old method with the tuning nob, it will just make for better gameplay and so I an have multiple things for the player to tune to rather than just have a menu that says what they are.
0 notes