
melty-choco-bjd
Melty Choco BJD
BJD and Dollfie related posts! Mainly sewing and photography focused.
♡ https://www.flickr.com/photos/meltychoco-bjd/
♡ https://denofangels.com/members/ashefaust.95654/
13 posts
Don't wanna be here? Send us removal request.
Last Seen Blogs
classic-lit-couples-showdown
Classic Couples Tournament

withoutteamalice
if my room was a blog it'd look something like this

lifebetween-lines
Life Between Lines
nightwingxtte
It's all about catching people when they fall.
Text
#bjd fashion#bjd photography#bjdhobby#ball jointed doll#bjd#bjd sewing#dollfie#dollfiedream#dollfie dream#dollfie collector
3 notes
·
View notes
Text
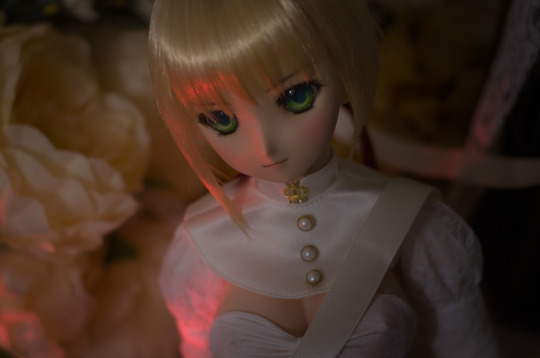
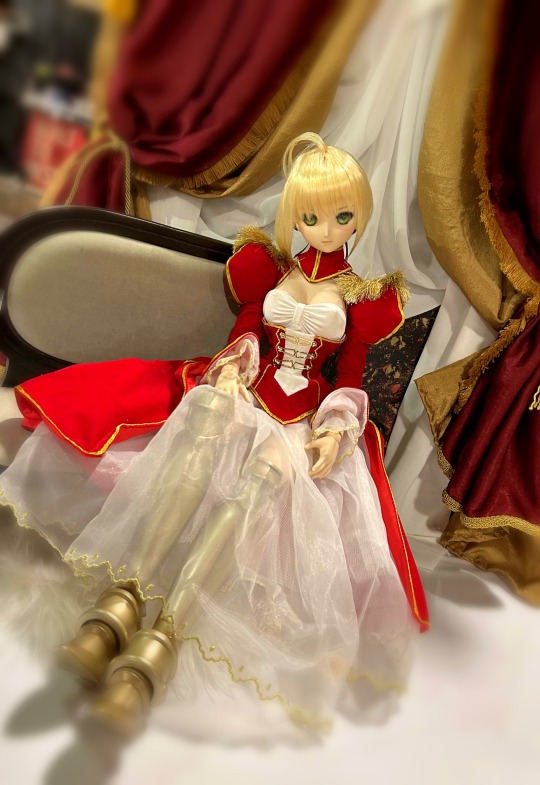
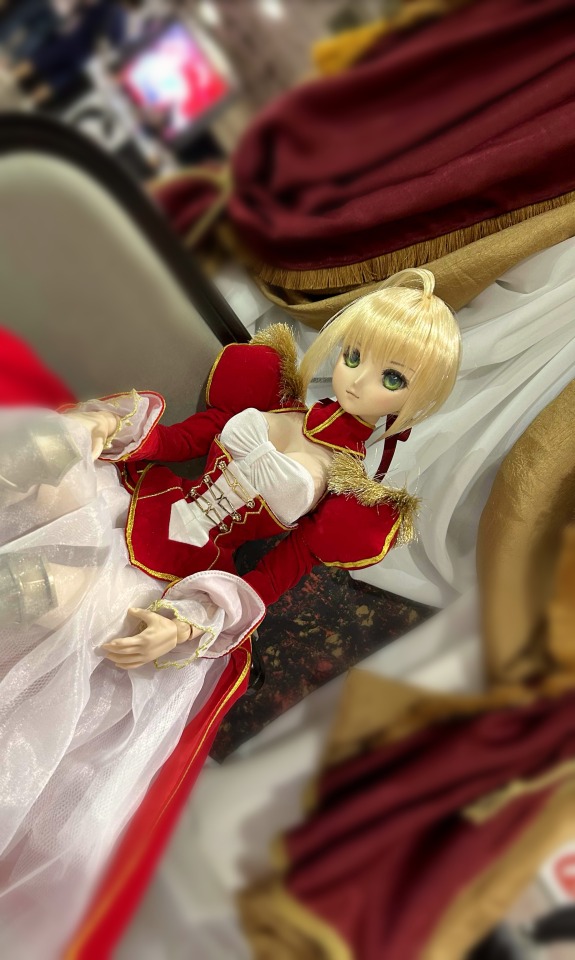
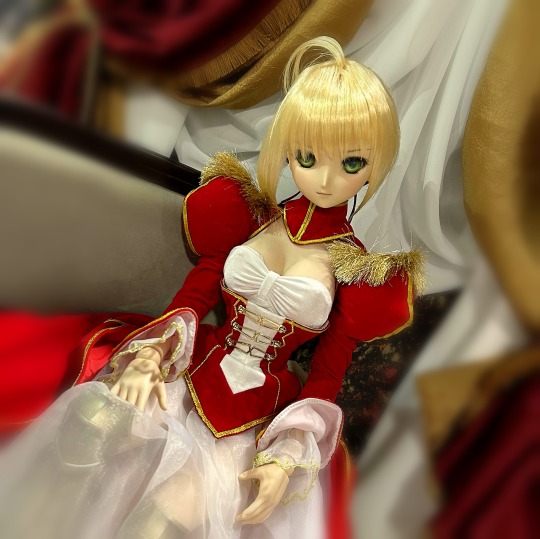
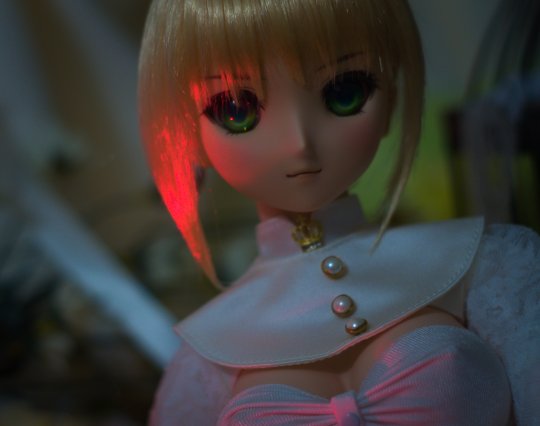
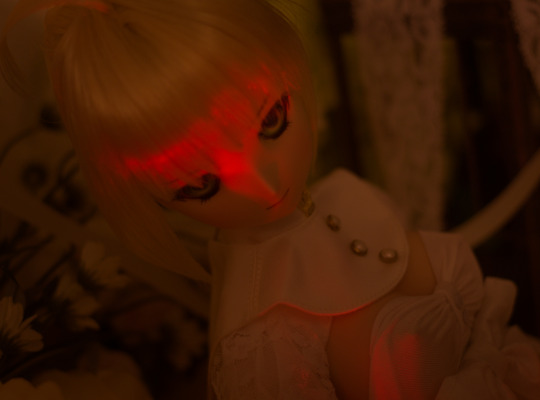
【Photoset】 Flowers & Pearls (II)
Doll: VOLKS DD Saber EXTRA
Wig/eyes: VOLKS fullset default
Outfit: mana_jen (on Instagram)
Scene & photo: me
1 note
·
View note
Text
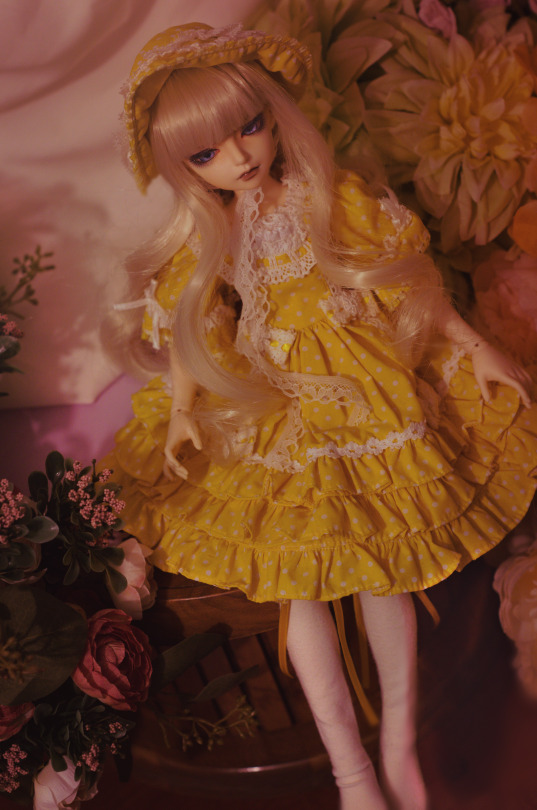
Doll: Fairyland Minifee “Kyle”
Outfit: purchased local (might be this in yellow?)
Wig: Etsy (realised it was a Taobao reseller afterwards)
#bjd fashion#bjd photography#bjdhobby#ball jointed doll#bjd#bjd artists#bjd eyes#bjd faceup#bjd sculpts#bjd sewing
6 notes
·
View notes
Text

Doll: Fairyland Minifee "Kyle"
Outfit: purchased local (might be this in yellow?)
Wig: Etsy (realised it was a Taobao reseller afterwards)

#bjd fashion#bjd photography#bjdhobby#ball jointed doll#bjd#bjd artists#bjd eyes#bjd faceup#bjd sculpts#bjd sewing#bjd props
7 notes
·
View notes
Text
Doll: VOLKS DD Saber EXTRA
Wig/eyes: VOLKS fullset default
Outfit: mana_jen (on Instagram) (not including hat)
Editing & photo: me
#doll photography#dollfie#dollfie dream#dollfiedream#dollfie collector#bjdhobby#bjd#bjd sewing#doll collector#doll sewing#bjd photography#bjd fashion#ball jointed doll#super dollfie
10 notes
·
View notes
Text
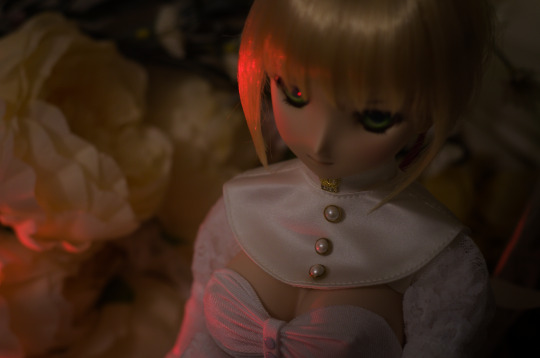
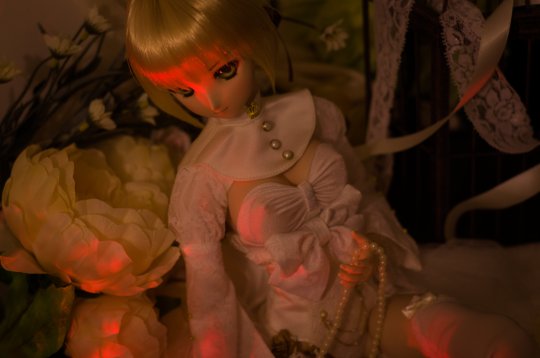
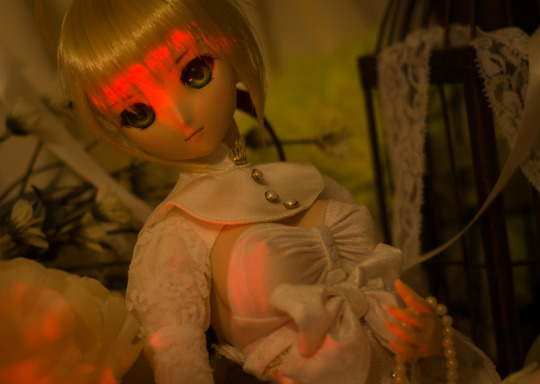
【Photoset】 Flowers & Pearls
Doll: VOLKS DD Saber EXTRA
Wig/eyes: VOLKS fullset default
Outfit: mana_jen (on Instagram)
Scene & photo: me


#dollfiedream#bjd photography#bjd fashion#ball jointed doll#bjd#bjd sewing#doll collector#doll sewing#dollfie#saber extra#fgo fate grand order#fgo nero#nero claudius#bjdhobby
6 notes
·
View notes
Text
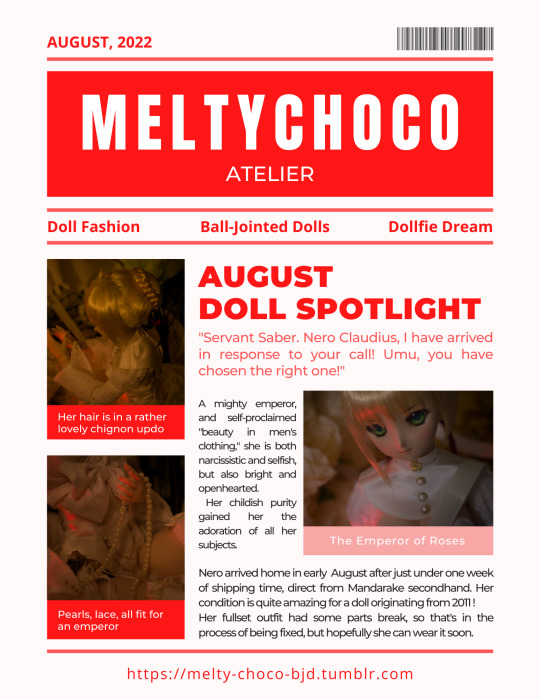
#dollfiedream#dollfie#dollfie collector#bjd photography#bjd#bjd fashion#bjd sewing#bjdhobby#fate extra#fate grand order#fgo fate grand order#fate servants#nero claudius#fgo nero#meltychoco newsletter
2 notes
·
View notes
Text
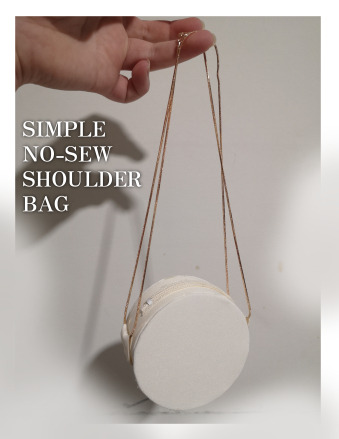
Simple No-Sew Shoulder Bag for Dolls
This is cross-posted from my DoA thread for those of you who don't use that site!
Materials needed:
- hot glue gun (and hot glue sticks of course)
- fabric (non-fraying fabric strongly encouraged)
- cardstock in standard weight, flexible
- cardboard with a thickness between 0.3mm to 0.5mm
- zipper that matches fabric colour (only for decoration)
- some kind of jewelry chain, about 20-40cm total length and openable
- a ruler (and a measuring tape if you're adjusting the scale)
> Preface
This is the first time I've made a bag in this way and I made an effort to choose a way that is easy and cost effective, therefore the bag features a lot of paper materials. The resulting item is somewhat delicate and should not get wet. It's best used as an accessory when taking photos, not for rough play. It may not last long term due to the type of glue used. If you want a long-lasting and sturdy bag please follow tutorials for human-sized bags with real materials!
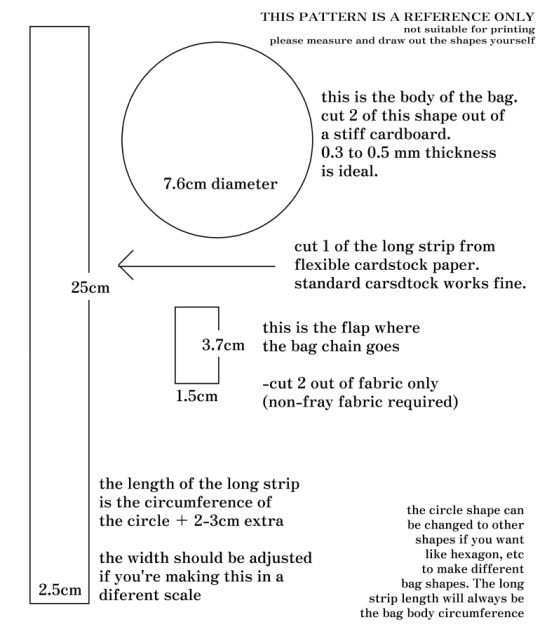
> Pattern
This pattern is the rough layout of the inner structure of the bag. The long strip is made of flexible cardstock, and the bag body is semi-thick cardboard. The flaps that hold the bag chain are fabric only.
This pattern is not drawn to scale and can't be printed. Please draw out the shapes on paper yourself following the measurements.
The given measurements are for a bag that fits 60cm dolls and above -- it would be too oversized for anything smaller. For 60cm dolls it appears as a large bag. For larger sizes it will be smaller and may need a longer chain as well.
Feel free to adjust the measurements for other sizes! Just reduce the diameter of the body circle, and adjust the length of the long strip to match the circle's new circumference. Then make the long strip width smaller, and you should be fine.
> Process
First step is to cut out the pattern onto the correct materials. Circles on thick cardboard, long strip on flexible cardstock, and the the flaps out of fabric. Then just cut big loose shapes out of fabric and place the cut out pieces on top of the fabric.
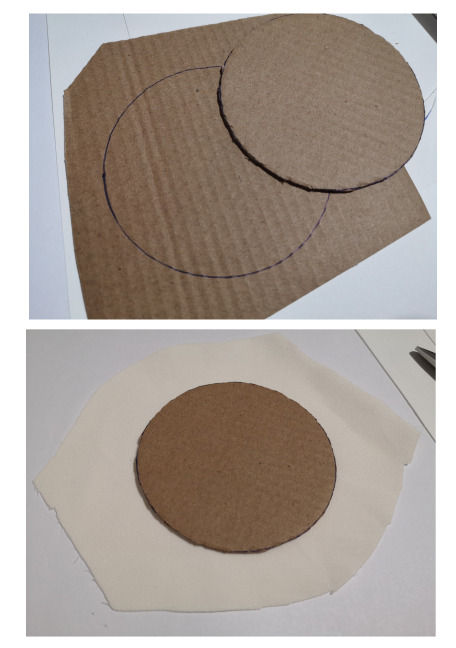
Now this is where you need to get your glue gun heated up and ready. You're going to glue the fabric ends to the "bad side" of the cardboard/cardstock pieces. Try and keep the fabric taught as you glue, to make sure it's not loose over the pieces of cardstock/board.

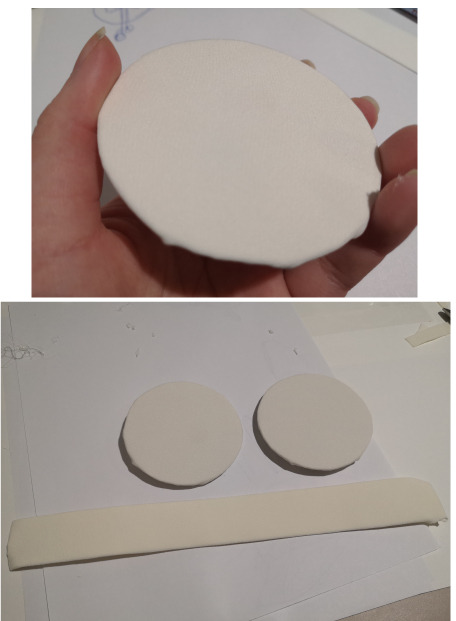
When the fabric is all glued down, it's gonna look like an ugly mess on one side.
But when you flip it over it will be nice and smooth! Repeat this process for all the cardboard/stock pieces as shown.
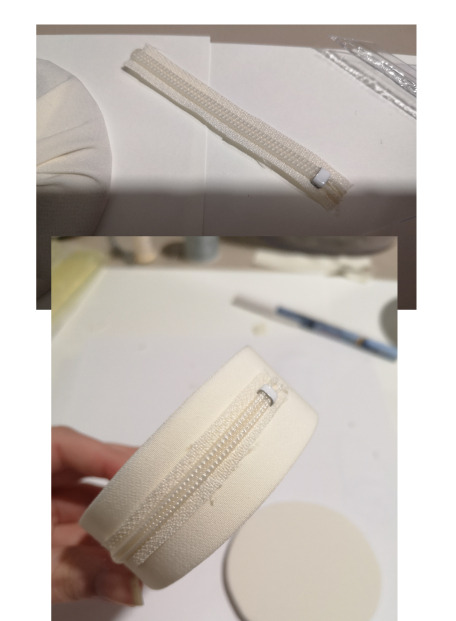
The next step is to take the long strip and secure it in a circle shape. Attach the ends together over top of one another with hot glue. You should check to make sure it fits the flat circles before you apply glue.

Next, cut any excess fabric from the zipper, and cut it down shorter if needed. Then glue it to the long strip. You should place it on the opposite side of the strip's joined ends. The joined ends of the long strip will be at the bottom of the bag. Just a note, this bag doesn't open. The zipper is decorative only!
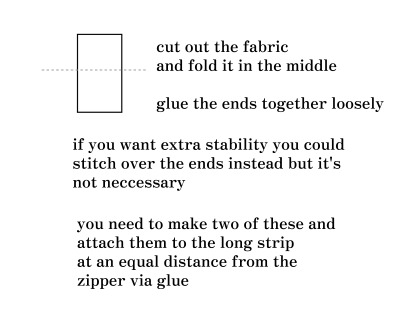
You should also attach the fabric flaps that hold the chains at this point, but I forgot to take pics, so here's a little diagram sorta. Make sure the "loop" end points upwards towards the zipper. You can see the next pics for visuals on their position sorta.
The only remaining thing to do is glue the flat circles to the long strip. I didn't take pics of the process, but you just apply glue to the edge of the flat circle or the long strip bit by bit and attach the pieces together as you go. Make sure the glue is inside the bag, not on the outside, and be very generous with your glue!
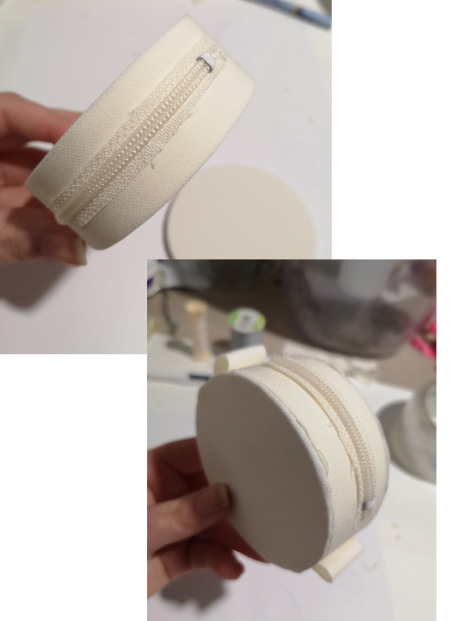
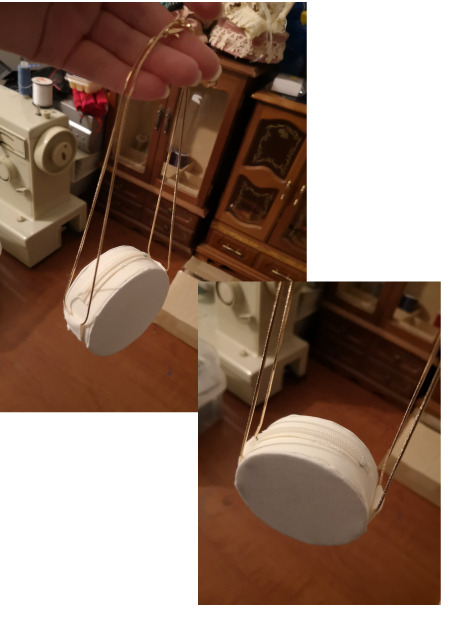
You should get something that looks like this:
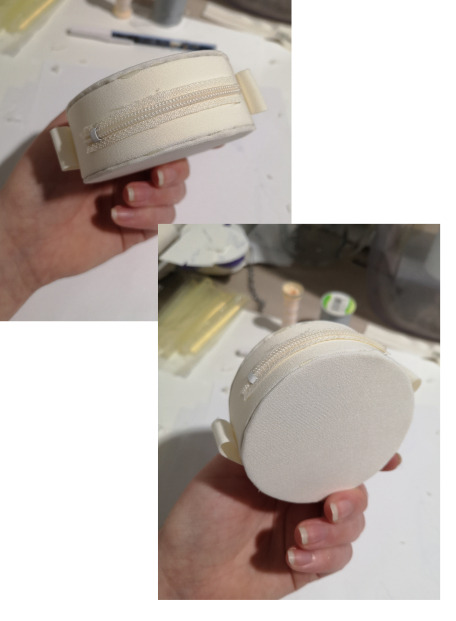
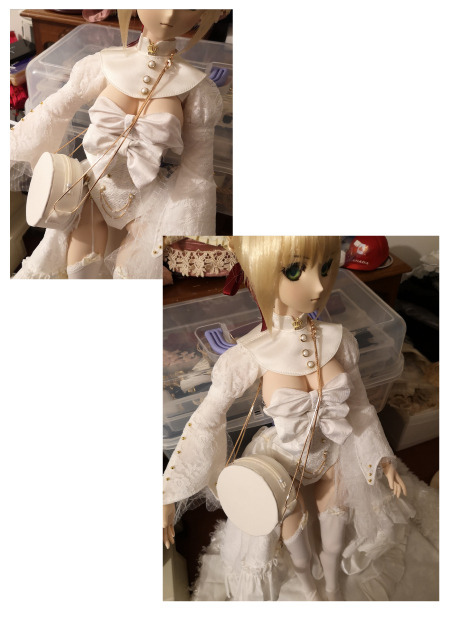
Now just thread the jewelry chain through the flaps, doubled up, and pull it to the right orientation.
Sorry that my example pics for showing it on the doll kinda suck. Part of her outfit (the bralette thing, you can see it falling) broke while I was taking pics so I was a bit rushed to get a pic before it completely fell off.
As stated before, on 60cm dolls the bag is large. If you made this for a 70cm doll it would be smaller. But I like the size for this scale, I think it's cute.
I left mine plain, but you can also glue bows, buttons, beads, lace etc to either side to decorate it, or attach tassels or charms to the bag chains at the sides.
You could also easily use this method with different shapes to make more unique bags.
I hope this was useful to someone! I had fun making the bag and will probably make more in different shapes and styles eventually.
--
#dollfiedream#dollfie#ball jointed doll#bjd artists#bjd#bjd photography#bjd fashion#bjd sewing#bjdhobby#doll sewing#doll collector#doll photography#doll fashion#doll crafts#meltychoco tutorial
27 notes
·
View notes
Text
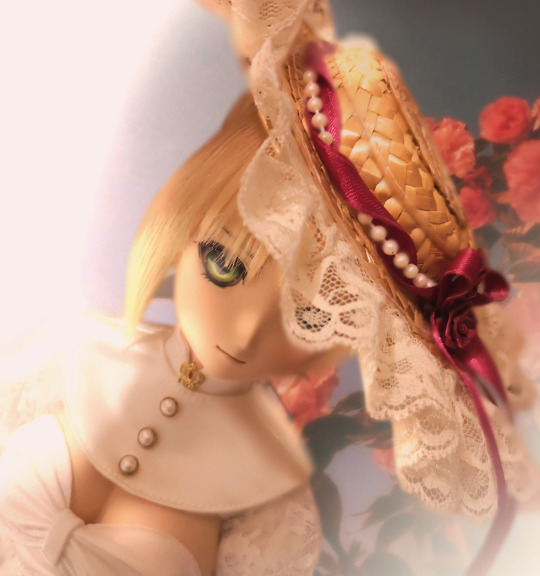
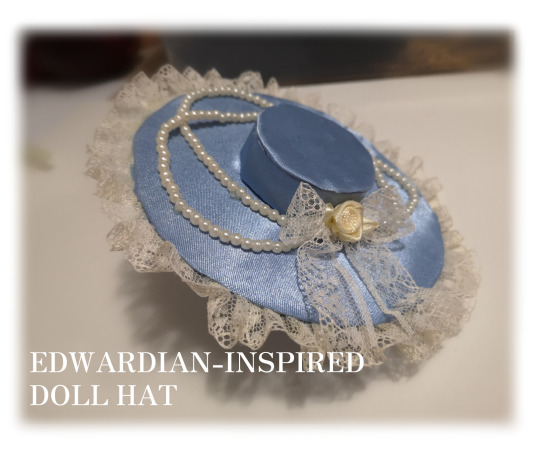
Edwardian-Inspired Doll Hats
This is cross-posted from my DoA thread for those of you who don’t use that site!
I really like the big, old-fashioned lady's hats with all the ruffles, bows, ribbons, and flowers, sort of like these (particularly #6 and #3), so I decided to try making one!
I loosely followed this tutorial for 1/12 scale hats, except of course some things have to be changed for 1/4. I measured out my own pattern pieces.
I am an absolute beginner myself when it comes to hatmaking and am mostly following someone else's guidelines. This is my first time making a hat (for dolls or otherwise).
☆ PREP: MATERIALS USED─── ⋆⋅☆
- secondhand fabric (satin, cotton)
- secondhand accessories (lace, fabric rose, plastic pearls)
- cardstock
- hot glue
- needle & thread
This was intended to be a no-sew project, but halfway through I realized I needed something to line the inside of the main hat body, so I ended up sewing up a quick cotton lining.
☆ PREP: PLANNING THINGS OUT─── ⋆⋅☆
I started by sketching out my rough idea for the hat design; a simple hat with some lace, flowers, and beads, based on the materials I had available. I tried to visualize the structure to help me understand the pattern shapes I'd need to make.
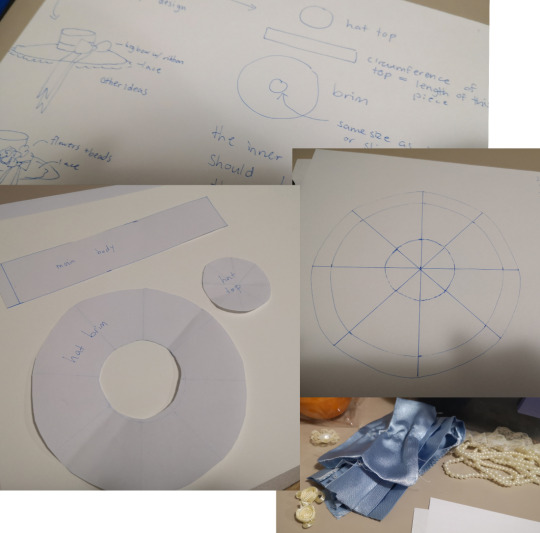
Next up was making the pattern -- which took a little math but was still pretty easy.
I had to make a circle freehand, so I used a ruler to make sort-of-equal lines to guide me. I measured an approximate distance for the brim on my doll's head, and the width of the hat inner hole / outer top, then used those measurements to make the pattern pieces.
I cut them out for testing and I ended up needing to redo them a few times.
Afterwards, I made a "final test copy" from cardstock and taped it together loosely to see how the scale looked on my doll, and to try out some accessory placements.
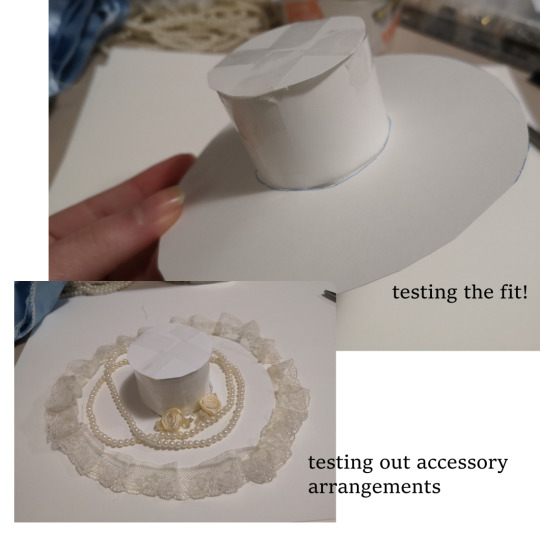
The main body ended up being too tall, so I took the cardstock model apart and trimmed it before moving on.
☆ WORKING ON THE ACTUAL HAT─── ⋆⋅☆
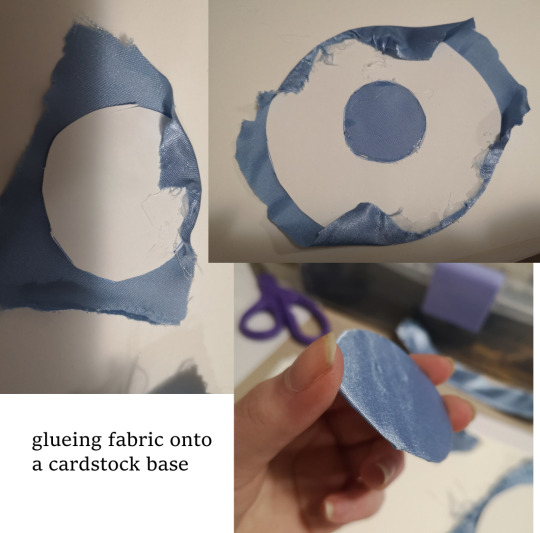
Now that I had a base out of cardstock, I moved on to gluing the fabric onto the main pieces. I was using this pretty blue fabric!
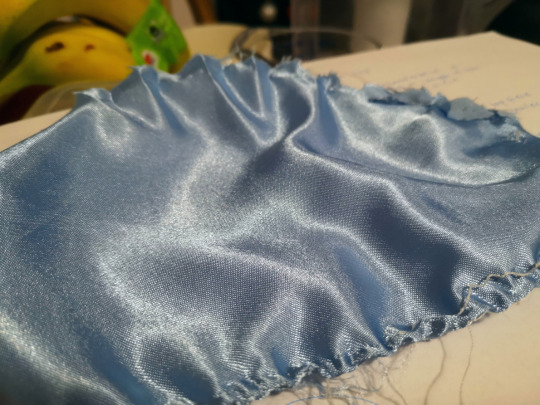
I mostly did this on my own, but after looking at the tutorial again I realized I basically did the same thing as them. I used hot glue for this process -- while it was drying I pushed it down with my fingers to keep it flat and to help keep things flush together.
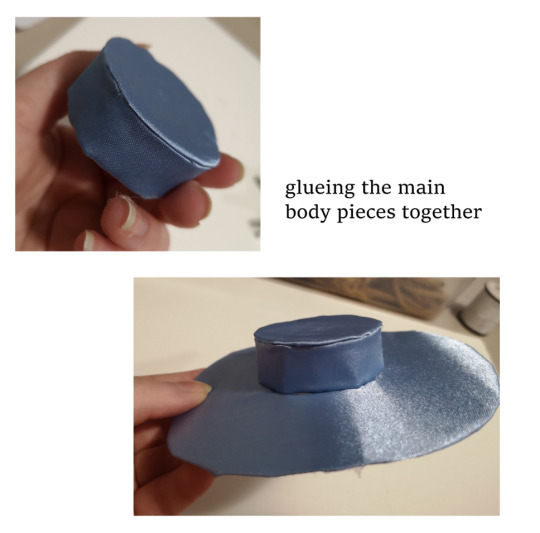
Now that I had the main body pieces done, they looked like this:
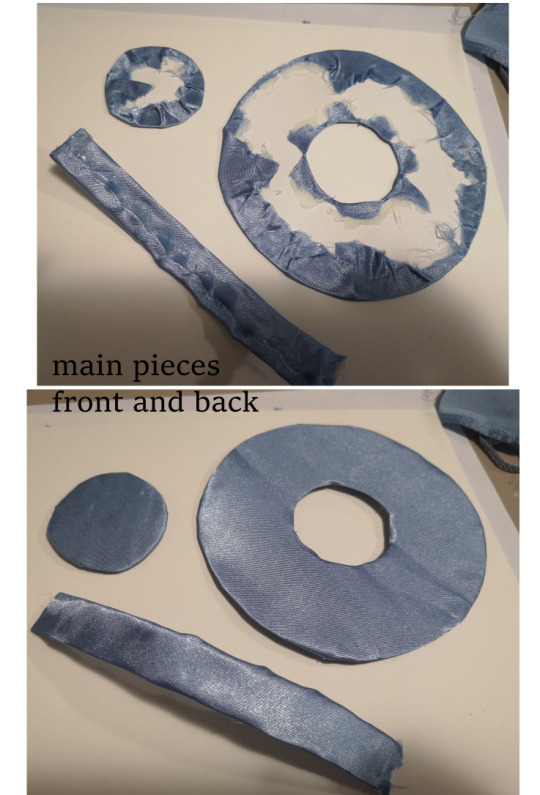
At this point I realized I was going to need to find a way to line these pieces, or else you'd be able to see the glue-y parts underneath. I decided to make a second brim, cover it in fabric, and add lace to it, so I could glue the "bad" sides of both brims together to both hide the glue and add lace cleanly.
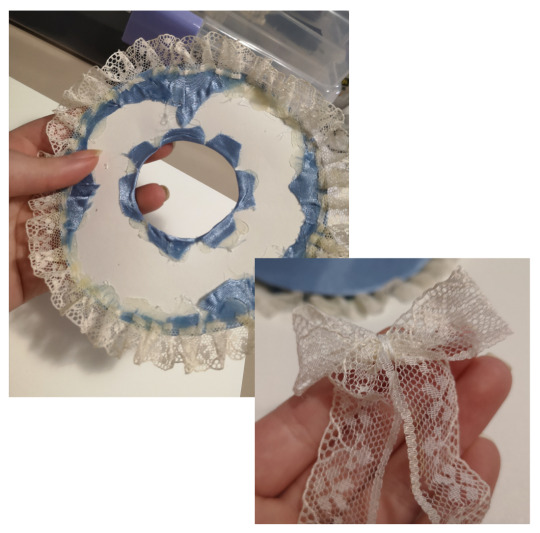
I also made a little lace bow out of the extra lace I had left over.
Next, I glued all the main pieces together. First the hat top and the side strip, and then the main brim to the little top-sidepiece combo.
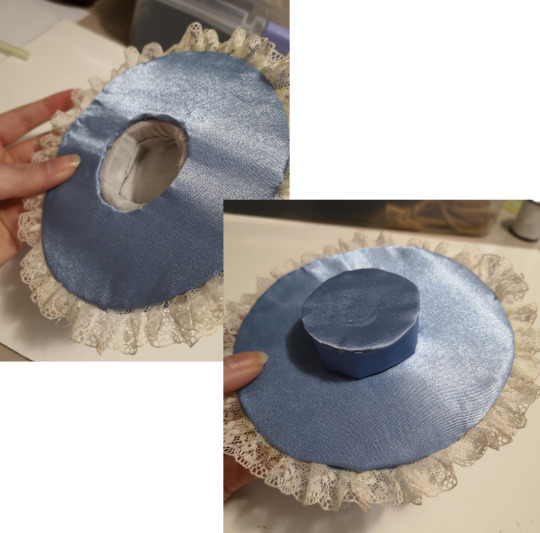
This is when I stopped to sew the cotton inner lining and glued it inside, so I could later sandwich the sticking-out ends in between the "bad sides" of the two brim pieces.
Then I glued on the bottom brim piece, and the main piece was complete!
☆ ACCESSORIZING AND TRYING IT ON─── ⋆⋅☆
Finally, I placed on the beads, lace bow, and fabric flower, and glued them into place.
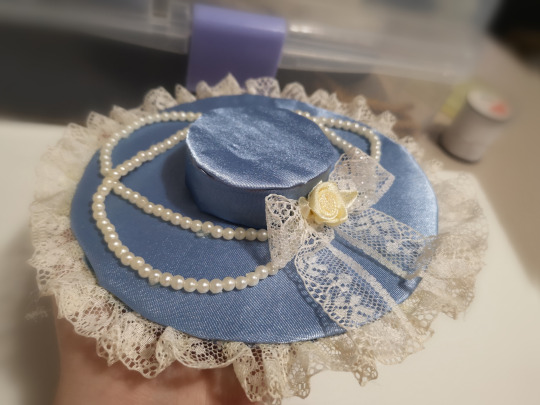
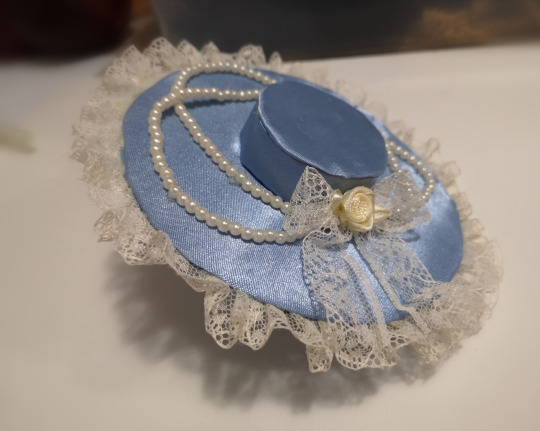
I think it came out surprisingly cute!
I tried it on my doll after, but it was a bit hard to get it to stay still and not fall off. It's likely because the head hole in the hat is a bit too small.
I was only able to get it to stay on a flat angle, but I intended it to be tilted a bit. I think it looks a bit silly flat, but I can't think of a way to fix it
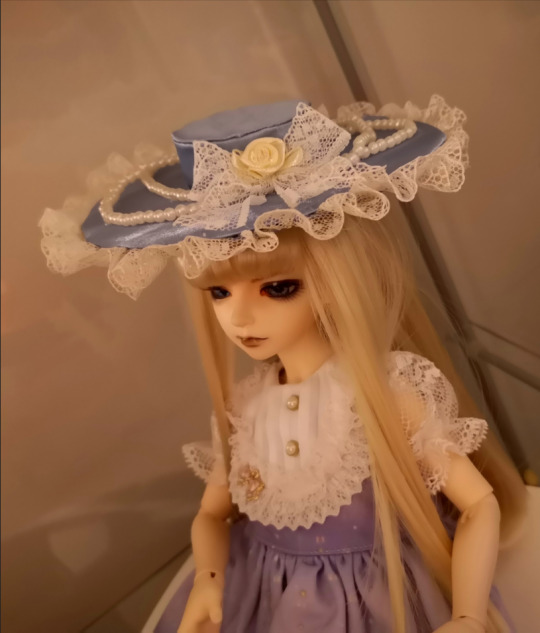
Overall I think it came out really well, even if the fit isn't 100%. I'm definitely going to try making more hats in the future. I'd like to try a top hat, or a leather hat, maybe.
--
#bjd sewing#bjd photography#bjd#bjd fashion#bjdhobby#bjd artists#bjdoll#ball jointed doll#doll#doll sewing#doll collector#doll crafts#doll fashion#doll photography#meltychoco tutorial
20 notes
·
View notes
Photo

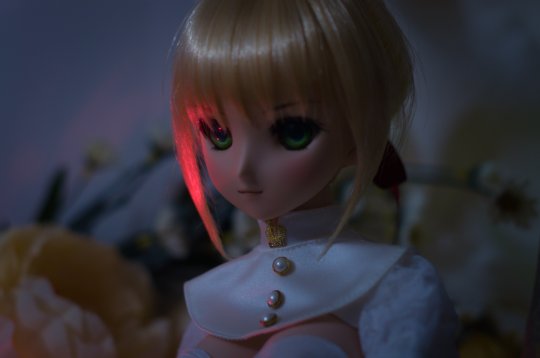
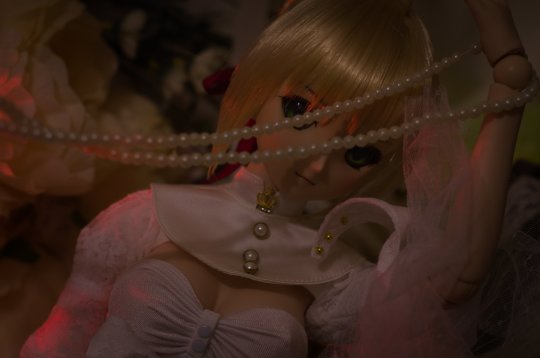
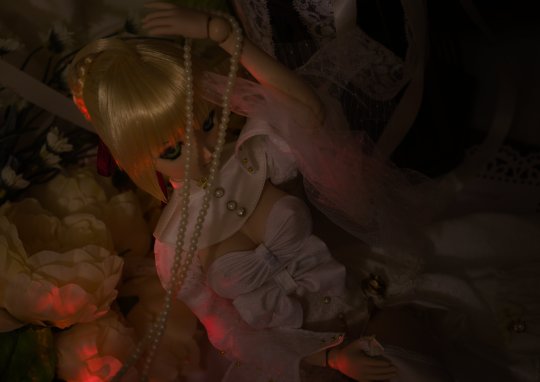
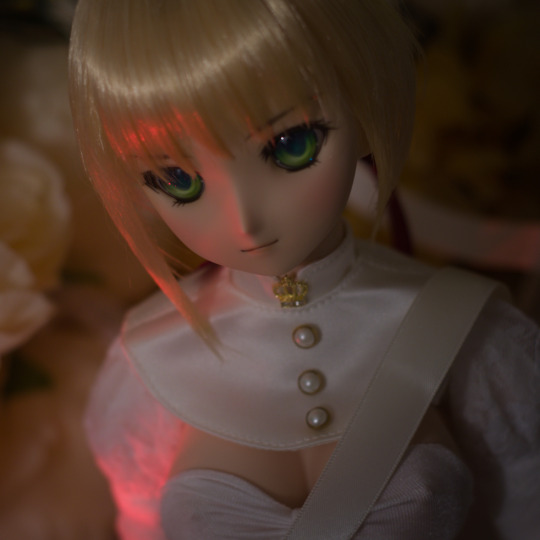
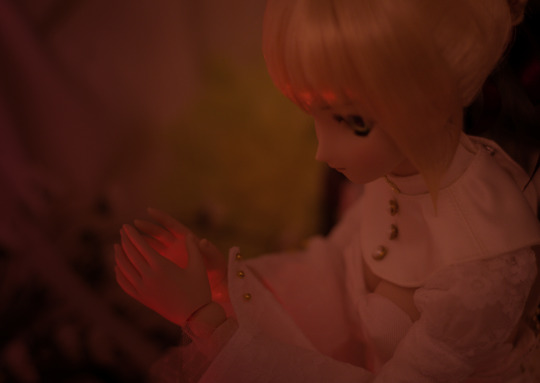
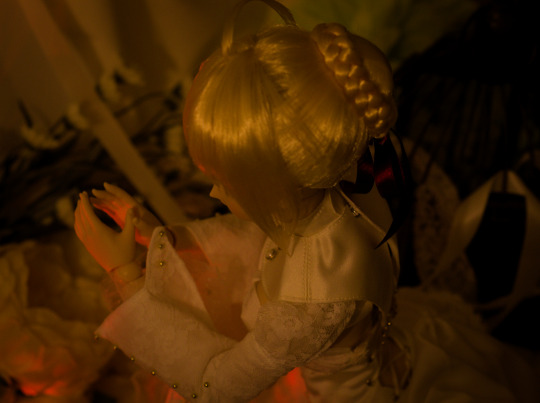
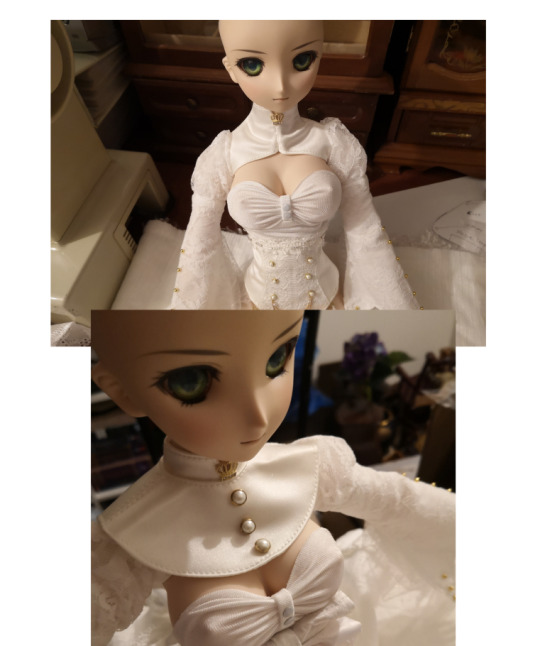
Prayers and Pearls | DD Nero Claudius PHOTOSHOOT 002
Wig: VOLKS
Eyes: VOLKS
Outfit: mana_jen (instagram)
Scene and photo: me
2 notes
·
View notes
Photo
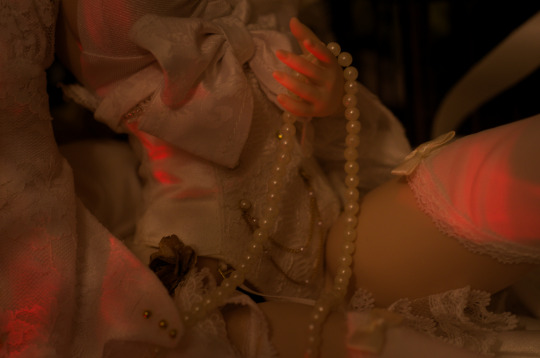
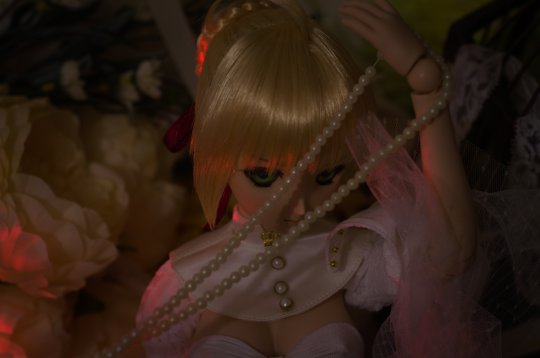
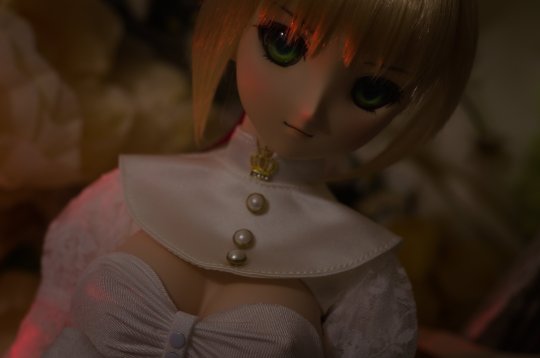
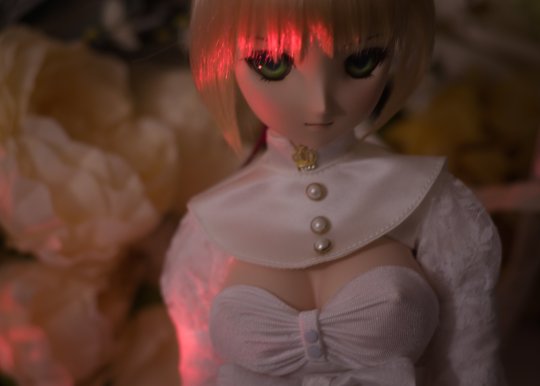
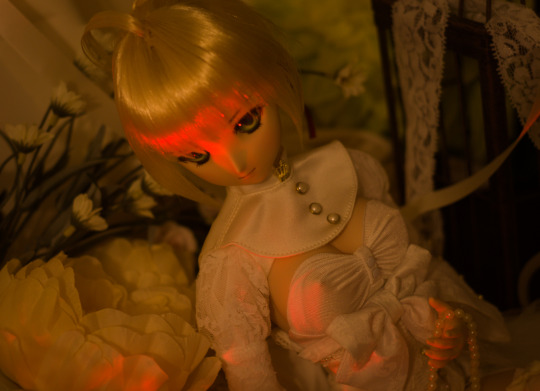
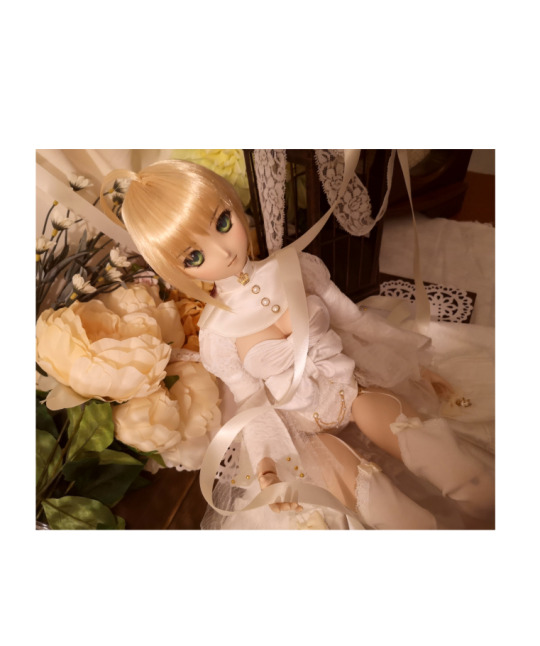
Prayers and Pearls | DD Nero Claudius PHOTOSHOOT 001
Wig: VOLKS
Eyes: VOLKS
Outfit: mana_jen (instagram)
Scene and photo: me
2 notes
·
View notes
Photo


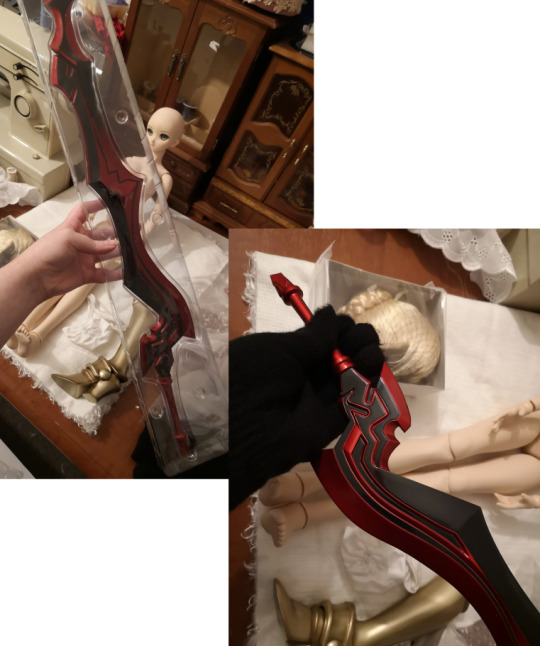
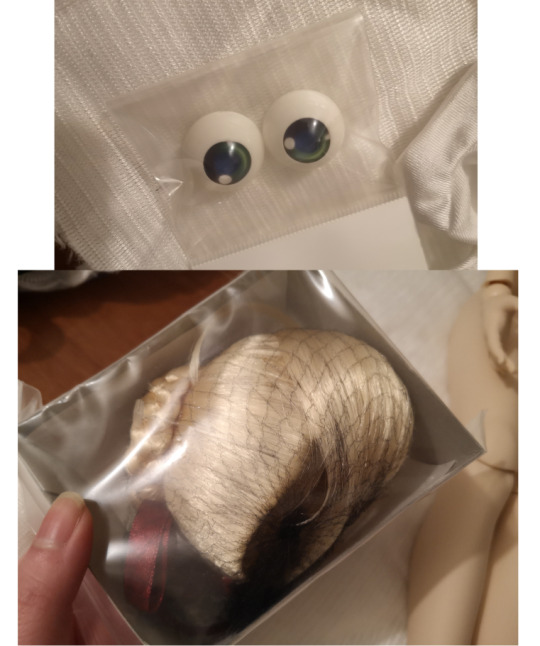

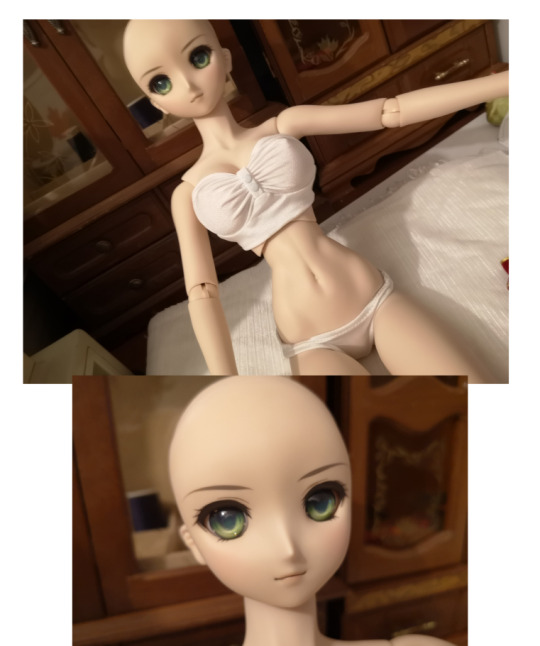

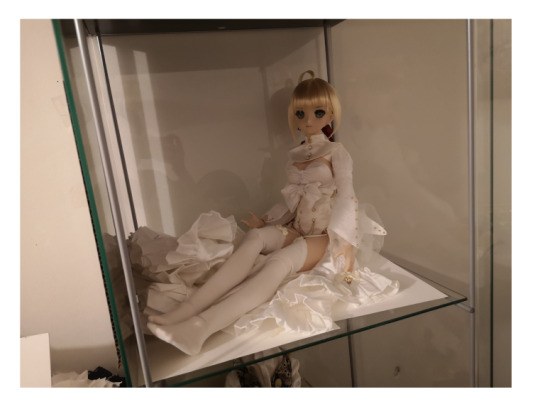
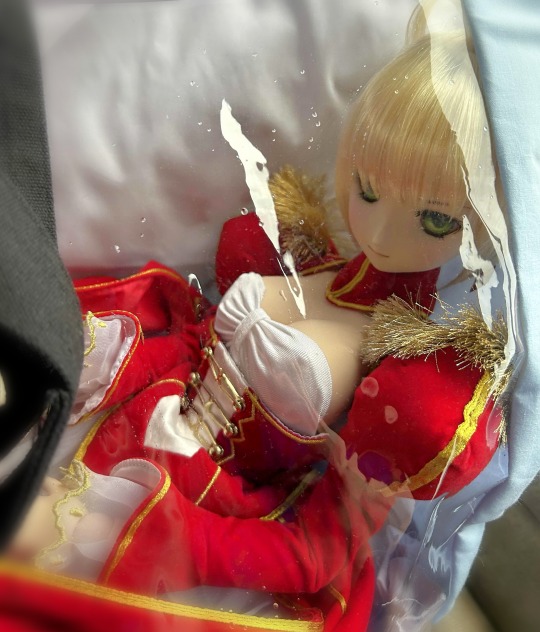
DD Nero 2011 vers unboxing pics from today!
She’s in amazing condition for such an old doll and I really love her~
5 notes
·
View notes