
Don't wanna be here? Send us removal request.
Statistics
We looked inside some of the posts by mindbloinfo and here's what we found interesting.
Average Info
Notes Per Post
1
Likes Per Post
1
Reblog Per Post
0
Reply Per Post
0
Time Between Posts
19 days
Number of Posts By Type
Link
12
Last Seen Tumblr Blogs


Fun Fact
Tumblr was attacked by a cross-site scripting worm deployed by the Internet troll group GNAA on Dec 3, 2012.
Link
MS-Word, MS-Excel, Web Page to PDF
Users who use computers, laptops, tabs and smart mobile phones definitely are familiar with the PDF file format.
In this article we will learn how to convert Microsoft Word, Microsoft Excel file formats to PDF with the help of Microsoft Office’s ‘Save As PDF’ extension, how to download and install Save As extension for MS Word and MS Excel and How to save any web page as a PDF file format.
Full form of PDF is ‘Portable Document Format’ and essentially the PDF file format mostly used to create non-editable documents. Do you know why we use PDF file format so much? After looking at some features of the PDF file format below, you will understand the importance of PDF file format.
Features or Characteristics of PDF file format:
Multi Platform
Secure
Accessible
Searchable
Extensibility
Compression
Font Management
Digital Signature
Further we will discuss these points in detail. Now let’s go to our main purpose of this article, that is How To Convert Word document or excel document to PDF file format with the help of 'Save As' Extension.
MS Word To PDF
Microsoft Word is a simple, popular and one of the best word processing software of Microsoft Office suite.
With the help of this software, we can create a document, can send by mail or other messaging platforms, we can print it and much more.
Some time we need to convert MS word documents to PDF for many reasons like security or non editable documents. If you use the old MS-Office 2007 or earlier versions then you need to install the ‘Save As PDF’ extension which is provided by Microsoft. Otherwise, you don’t need to install the extension for latest versions of MS-Office.
Because, Microsoft already provides a ‘Save As PDF’ extension in the latest version of MS-Word. However, if your MS-word software does not have the save as PDF extension then you will need to install it.
# Download Save As PDF extension
Once you have installed the Save As PDF extension, you don’t need to download and install it for MS Excel separately. To download the ‘Save As PDF’ extension just click on below link. Before downloading it, you must confirm that your MS word software doesn't have a ‘Save As PDF’ option, if there is an option of Save As PDF, then you don’t need to download and install it.
To check this, open MS word file, Click on file from top-left corner, next click on Save As option from file menu.
If you do not see the save as PDF option, then you will need to install the ‘save as PDF’ extension. You can download the Save As PDF extension from the link below. >> Download Save As PDF Extension
Word to PDF format
Once you have installed the extension, now open your Word Document which you want to convert word to PDF format.
Word to PDF
Click on Microsoft Logo from top-left corner, move the cursor on Save As option, just in the right panel you will see an option of ‘PDF or XPS’ option.
Just click on the ‘PDF or XPS’ option and save it where you want. Fine! Your saved file will be a PDF format file.
Excel to PDF format
Microsoft Excel is a widely used Microsoft Office programme. It's a spreadsheet software used for saving and analyzing numerical results.
You can convert your excel spreadsheet or file in PDF format. Once you have installed the Save As PDF extension mentioned as above, you don’t need to install ‘Save As PDF’ separately for excel.
now open your Excel Document which you want to convert Excel to PDF format.
Excel to PDF
Click on Microsoft Logo from top-left corner, move the cursor on the ‘Save As’ option, just in the right panel you will see an option of ‘PDF or XPS’ option.
Just click on the ‘PDF or XPS’ option and save it where you want. Fine! Your saved file will be a PDF format file.
Web Pages to PDF
Sometimes we need to save a web page for further use, but the web page is developed with the help of HTML, JS, CSS, Python, etc. languages that all people may not know these languages.
When you save any web page, then its file format may be .html, .htm and to read that page, you must know index file and also other component files such as, images, .js file, .css file, etc.
if you want to save any web page as in PDF format from your computer, Laptop or Smartphone then it is very easy. Just follow the following steps. Open any web page that you want to save as PDF. Just right click on the web page and click on Print option or click on file menu and then click on Print button or just press Ctrl+P button from your keyboard. You will see a print dialogue box. (see Fig.)
Web Page to PDF
Now you must select Printer as ‘Save As PDF’ from destination menus. Set appropriate page size, Margin, scale and many options from more settings. After setting up all above settings, just click on the Print button to save the Web Page or Pages as a PDF file format.
Web Page to PDF from Mobile or Smartphone
If you are using a Mobile phone or Smartphone and want to save Web Page as a PDF file format then follow the following steps. Open web browser (we recommend Google Chrome web Browser) in your Mobile or Smartphone. Click on ‘three dots’ located at top-right side. Click on the Share button, you will see there are many sharing options appear. Just click on the Print option. If there is none of any printer installed on your smartphone then ‘Save As PDF’ will be a default printer. Now click on ‘PDF’ from Aqua colored circle. Your web page or pages will be downloaded. You can set up the appropriate page setting. If you are trying to download web pages as a PDF from Mozilla Firefox on your smartphone then it may be difficult to download web pages as a PDF file format. If you like this article then share this with your friends, on social media groups, etc. Thanks!
0 notes
Link
Black Hat SEO
If you are a blogger or web developer then you may be familiar with SEO. SEO stands for Search Engine Optimization. The SEO techniques are divided into three types:
White Hat SEO
Black Hat SEO
Grey Hat SEO
In this article we will learn what is Black Hat SEO, Black Hat Meaning in simple Language, What are Black Hat SEO techniques and tools, the difference between White Hat SEO and Black Hat SEO, Black Hat SEO Examples, and much more.
>> What is SEO? What is Black Hat SEO and its meaning in simple Language? Black Hat SEO is a type of Search Engine Optimization, using this technique you can optimize your blog or website.
This will help you to get your website ranked first in search engine results. This type of SEO method is not preferred by Search Engine and may be detected as an illegal, spam SEO method.

Black Hat SEO
Disclaimer: We the ‘mindblowinfo.com’ do not promote or suggest doing Black Hat SEO and any illegal activities that violate the rules and guidelines of Google or any other Search engine. This content is for only informational purposes.
The Black Hat SEO does not follow the rules and regulations of search engines and is practicing illegal methods and tools of SEO that is why it is called Black Hat SEO. Black Hat SEO is nothing but an over-optimization of White Hat SEO and completely opposite to White Hat SEO according to their methods that are used for SEO. We often visit websites that rank first in the Google search engine, but the content is inconsistent and confusing.
Then how these types of websites or blogs are ranked in the top position in Google search results? Which techniques and tricks they have used for SEO?
Generally, these types of websites or blogs follow the Black Hat Techniques and tools. So what are the black hat SEO techniques and tools? We categories these black hat SEO techniques or tools into four types, these are:
Over Optimization
Content Scam
Link Manipulation
Crooked Sites
Let’s get details of the Black Hat SEO technique or tools one-by-one. Before we go ahead again we request you that please don’t use Black Hat SEO to earn money or in any fraudful activities.
>> What is White Hat SEO?
1) Over Optimization
If you want to get your website or blog in the top position then you must optimize your website or blog by using the following SEO Techniques or tools.
In black hat SEO, SEO experts give priority to Black Hat SEO instead of quality content. In Black Hat SEO, the following techniques or tools are widely used to over-optimize websites or blogs.
i) Keyword Stuffing:
In SEO, keyword is the most important factor; it helps search engines to identify the intention and subject of the website or blog.
Repeated use of the same word in an article is called keyword stuffing. If you use keyword stuffing a lot in your article then it may be possible to rank in top position of search engine results.
But sometimes keyword stuffing can hamper your rankings and even get a penalty from search engines. So be sure to be a little careful when stuffing keywords.
ii) Alt tag
To make your blog attractive it is important to use images in your blog. When you insert an image the Alt Text (Alternative text) used for the image is required by the search engine for what image is about.
Because search engines can’t identify images only by their appearance. So if you use your keyword as Alt tags to your every image that are inserted in your blog then your ranking can be increased by this Black Hat SEO technique.
iii) Hidden tag/tinny text
If you use a lot of keyword stuffing then your article will be boring and readers will search for another article without reading it.
This will increase your bounce rate. As a result, your ranking will decrease.
As a solution to this, you can hide some keywords by using CSS hidden property which makes your article look good and only search engines can detect your hidden keywords. By this Black Hat Technique, you can grow your blog’s ranking.
iv) Irrelevant Keywords
Keywords are a very important part of SEO. When you write an article, you use keywords that attract readers and rank top in Google.
But if the content of your article is not related to those keywords, then your article will be rude and meaningless to the readers.
Articles like this certainly rank in Google but readers will not find it appropriate. If you want to get to the top of Google search results without considering the readers then this is the way to go. But we do not support such techniques to get in the rankings.
v) Linking Over Optimization
If you insert many links in your top ranking post articles, that is Linking Over Optimization.
The inserted links must be relevant and limited to your post article, otherwise users may be confused and they will be frustrated and leave your website to search for the content they expect.
This will increase your bounce rate and can have a detrimental effect on Google rankings. In black hat SEO, content providers use this technique to rank on top in Google search engine.
Because Google considers that you provide other reference information to users using links. Link Optimization is important and a part of on Page SEO.
if you don’t know what On Page SEO is? Then read What is an SEO article from this website.
2) Content Scam
Content is the King and Google also wants to provide genuine content to the user. According to Google's algorithm, the quality, quantity and uniqueness of the content is most important.
Writing unique and excellent articles is a complicated and time consuming thing. So some article writers write articles with the help of automated software or by modifying another article like article spinning.
Some Following content scamming methods are useful for Black Hat SEO.
i) Copied Content
In black hat SEO, article writer, Blogger or YouTuber they don’t want to do hard work, research and spend time on their article or youtube video.
They just want to publish articles or videos, no matter who created the content. The copied content means not only just copy and paste but also copy their ideas, things, techniques, etc.
using this technique, many publishers ranked their post or article or videos even the whole blog or youtube channel too. This is also a Black Hat SEO technique.
ii) Content Automation
Content automation is a subset of content marketing automation that incorporates the systems and processes that help to reduce the need for human interaction in the content lifecycle.
The aim is to programme, or automate, any repetitive, time-consuming, or costly content operation. Content automation is basically a mixture of semantic analysis and natural language processing.
These technologies allow each individual piece of content to be read and structured in an automated way that is standardized (maintains the same standard) and reusable.
This is also a part of black hat SEO, by this, publishers create contents automatically using this technology.
iii) Article Spinning
An copied article re-written by changing a few words in a text, using synonyms as well as changing the syntax, keeping the content of the article intact by using some tools that are called as article spinning.
Generally you can copy 30% of content from other content but some publishers copy the whole content and spine them using a content spinning tool. There are a lot of article spinning tools available on the internet.
You can copy content from top ranked posts and spine them to avoid content policy violation of Google.
Keep in mind that, using this technique, there are a few possibilities to rank your post on top position in Google search engine.
iv) Cloaking
Cloaking in SEO is a technique for boosting a website's search engine rankings for particular keywords by serving users content or information that varies from what is provided to search engine crawlers (i.e. spiders or bots). There are following types of Cloaking.
User-Agent Cloaking
IP based cloaking
JavaScript cloaking
HTTP_REFERER cloaking
HTTP Accept-language header cloaking
Cloaking is a Black Hat SEO technique used to attract users and increase web traffic and ranking.
Be careful while using this technique, because you may be penalized by Google for this Cloaking technique.
3) Link Manipulation
Despite Google's efforts to punish and prevent link abuse, your rivals will continue to find new ways to manipulate your links.
One of the most recently discovered methods will result in the automatic removal of up to 39% of the backlinks you've created.
It's critical to understand how to safeguard the links you've worked so hard to create, particularly if your competitors are focusing on the high-authority links.
i) Web Ring
For those that are new to the Internet, a webring is simply a series of websites connected together in a circular structure, all of which are related to the same subject or theme.
In the 1990s and early 2000s, webrings were very common, particularly among amateur websites. Every site had a common navigation bar to be part of a webring; it included links to the previous and next website.
You might finally enter the site you began at by repeatedly clicking next (or previous); this is where the word webring came from.
A "Random" button most of the time led to a random website in the webring. Another same technique is link form, this is similar to werings technique.
The minor difference between webrings and link form is that in webrings users visit websites or blogs through a serial link but in link form, users can visit multiple websites or blogs using their links randomly. While webrings had moderators (your website had to be authorized by the moderator), if one of the websites in the ring was damaged, inaccessible, or offline, the click-through rate would presumably decrease.
In order to gain more traffic from similar sites, websites usually entered a webring. Webrings may have been considered a search engine optimization strategy back then.
And it's possible that it was because search engines back then used different ranking factors.
ii) Guest Post Spam Link
Some publishers or webmasters allow you to write a guest post on their blog or website.
The guest post writer or post publisher inserts many spam links on that blog or website.That may also be a black hat SEO.
using this black hat SEO, your site’s domain authority increased and your site or blog may rank on top position in search engine results.
iii) buy cheap link - link exchange
There are many blogs or websites that have more traffic and their site or blog ranks on top position in search engines.
Artificial forms of link building, such as link buying and renting, are a sub-discipline of SEO in the off-page field.
The goal is to use financial capital to raise connected popularity. Link buying is a direct interference by link builders in acquiring backlinks.
As a consequence, it is the polar opposite of natural link construction. If you don’t know what Backlink is and how to create it then read What is Backlink?
iv) comment spam low quality directory submission
You may have seen comments made by users on a website. If the user is a blogger or youtuber, he writes the text related to their website or content in the comments and submits the link of his website in it.
These comments can be made on websites, YouTube, Facebook and other social media. This is called comment spam low quality directory submission.
4) Crooked Sites
Crooked sites means those websites from which users land to the main single website. It includes Doorway Pages/Gateway Pages, Rich Snippet Markup, Mirror Sites, Private blog Network.
i) Doorway Pages/Gateway Pages
We can understand the meaning of Doorway Pages from their name. It means a website or many websites are acting as a door that targets a single website.
Those websites or web pages are called Doorway Pages. In 2014, Google introduced Doorway page algorithm to penalize doorway page websites. So how to use this technique?
Suppose you have 10 websites between them 6 websites are ranked on top in search engine results. Insert non-ranked website links in those ranked sites. By this your all websites may rank in top 10 results of the search engine.
ii) Rich Snippet Markup
Rich Snippets is a term that refers to structured data markup that site owners or web developers can add to their existing HTML to help search engines better understand what information is on each web page.
The main search engines, on the other hand, have gone a step further and now use this markup to display richer search results, making it easier for users to find the information they need.
in fact this not a part of Black Hat SEO, but when you optimize this technique again and again the that may be a Black Hat SEO.
iii) Multiple Mirror Sites
Another common SEO malpractice is setting up multiple mirror sites with identical content.
This is typically done in order to build an online presence for each of the mirror sites and then divert users back towards the primary website, or to obtain back-links in bulk.
Google treats this as duplicate content and can penalize you to your and your website website for this practice.
For example, suppose you have multiple websites and the content of those websites are also the same or copied for all websites so that is called Multiple Mirror Sites.
iv) Private Blog Network (PBN)
A private blog network (PBN) is a set of authoritative websites used to generate backlinks for a single website.
It's a set of unrelated websites that all connect to the same central domain in order to transfer link equity and boost its rankings.
So the above mentioned SEO techniques are generally considered as a Black Hat SEO. be careful while using Black Hat SEO techniques, because over optimization of black hat SEO may penalize your website.
You can mix up White Hat SEO and Black Hat SEO techniques to rank your website. We can say that may be a Grey Hat SEO. If you like this article then please share it with your friend or on social media. Thanks!
0 notes
Link
White Hat SEO
Every blogger and web designer wants to grow their website or blog on top of google’s search engine.
For this SEO is the most important factor to make your blog on top in google search engine.

White Hat SEO
SEO:
SEO stands for Search engine Optimization. It is used to rank websites or blogs at the top position in search results.
It is a part of search engine marketing. SEO is helpful to increase the number of visitors to your website or blog.
If you don’t know what exactly SEO is, then click on the following link to get more information about SEO. >> What is SEO?
Techniques of SEO:
There are many techniques of SEO but there are two major techniques of SEO that are White Hat SEO and Black Hat SEO.
in this article, we will learn the White hat SEO technique.
What is White Hat SEO?
White Hat SEO is a search engine optimization method that follows the rules of the search engine.
It optimizes your website or blog on the basis of quality content, providing services to the user by giving them priority.
It promotes positive ratings ethically and legally by search engines. It is a sad fact that black hat SEO ranks quickly in the top position than White Hat SEO.
this rank is not sustainable, it is only temporary. Because when Google or any other search engine found keyword stuffing or spam it decreases the Ranking.
But this does not happen with White Hat SEO. The ranking obtained by White Hat SEO may be slow but it is sustainable and that is the true significance of White Hat SEO. To face that challenge and punish to Black hat optimized sites, Google changed their algorithm time-to-time. There are some specific strategies or elements of White Hat SEO.
White Hat Strategies:
1) Relevant Content:
Relevance is vital in order to make your content marketing strategy a success.
It is important to make blog posts, articles, and infographics that cater to a large audience.
but if it does not fulfill their particular desires and needs, you do not make the most of your efforts to sell content. Today content is available everywhere. The saturation of so much freely available online information can be overwhelming and confusing to users.
Creating relevant content on topics related to your industry helps to position you as an expert in that field. Before they convert, a customer is likely to have about seven touchpoints with your brand.
So ensuring that you are clear at all stages of the user experience helps you become a trusted expert in that industry.
Your content makes it more possible for customers to want to do business with your brand. This strategy makes your website or blogs valuable for both users and search engines.
2) Well-labeled images:
“A Picture is worth a thousand words.” Images are most important to introduce your intention to your audience. The pictures are visually appealing. When a visitor enters a website or blog, they won’t spend a lot of time on a page that has a layout that they don’t like.
The images are breaking the text and soften the visual appearance of large blocks of text. That contains a lot of information. In White Hat SEO, you must use copyright free well-labeled images in your website or blog.it helps to optimize your website ethically and legally.
3) Relevant Links and References:
For SEO, backlinks and useful referring pages are most important. They represent a “Vote of Confidence” from one site to another.
>> What is Backlink?
There are many types of backlinks but you must have good and genuine backlinks for your website or blog.
Search engines will assume that content is worth linking. Obtaining these good backlinks can have a positive impact on the ranking position of a site.
4) Meaningful sentences:
When users search for something in the search engine they get top results. When users enter a specific site or blog, they would try to find their intention on that site.
Users trying to understand and get meaning from text on that site. If the content and group of sentences are meaningless then suddenly the user gets back and searches on other websites.
That is considered as a bounce. Impact of more bounce rate decreases your ranking in search engines. So make sure that your content is fulfilled with meaningful sentences.
5) Keyword Density:
Keywords are the most important factor in SEO. excessive use of the same keyword called keyword stuffing.
In White Hat SEO keyword density must be less than or equal to 4% of content in your website or blog.
6) Unique and Relevant Page titles:
Most users are attracted to your website or blog by reading the title of your website or blog.
If your blog’s title and content inside your blog are irrelevant then the bounce rate may increase.
To optimize your website or blog you must use the relevant title of your website according to content.
Importance of White Hat SEO:
As practicing any other techniques like black hat SEO, can get their website penalized or banned. It is important for webmasters and SEO experts to only do White Hat SEO. White Hat SEO is completely opposite to black hat SEO. Any activity that seeks to boost the search ranking of a website while also preserving its credibility and is in accordance with the standards of the search engine is considered an example of White Hat SEO.
White Hat SEO requires more work and effort than black hat SEO, but short term costs outweigh the long term benefits.
White Hat SEO should be your strategy if you want to be an ethical marketer and build a reputation in your market.
we hope you like this article, please share this article with your friends and on social groups.
Thanks!
0 notes
Link
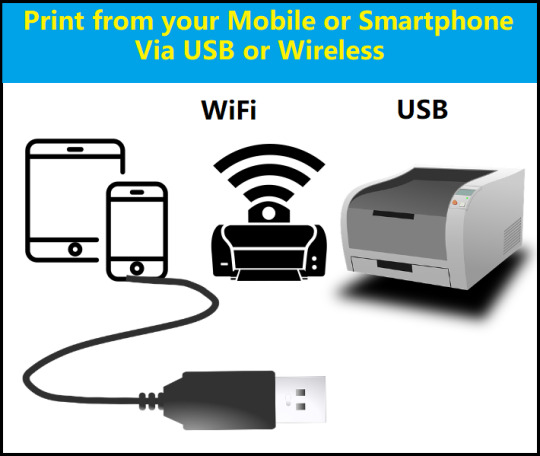
Day-to-day uses of mobile phone raises; new technologies are rapidly developed. Now in this modern age of technology, we share photos, documents, or other important files.
Between them, we want to print some photos or documents. For that, you must have a printer with or without wireless. There are many ways to print a document or photo from your mobile or smartphone. Further, we will discuss wired printing and wireless printing from your mobile phone.
How to print from mobile without a wifi printer?
If you are using a printer without wifi or want to print a document using a printer without wifi then here is a solution.
Print from mobile phone via USB:
If you are using a non-wireless printer and want to print a document or photo from your mobile or smartphone.
For this, you need the following accessories and mobile applications. 1) Mobile: android/ios 2) OTG cable: C2/C3 type cable 3) USB printer Cable 4) Printer: Laser/Inkjet 5) Print sharing Mobile app: Provided by Printer Manufacturer company or any other third party Mobile Application.
Steps:
1) Install Print Sharing App on mobile phone:
To take out print from your mobile you must install a print sharing application on your mobile phone.
The application may be provided by a printer manufacturing company if not then install any third-party print sharing application (we do not promote any third-party app that is why we can’t suggest any app) from the play store/ app store.
2) use OTG cable or dongle:
After installing a print sharing app on your mobile, connect OTG cable or dongle to your mobile phone and connect the printer USB cable to OTG.
plugin the power cable of the printer and install printing paper in the tray of the printer.
3) print a document or photo:
If you have completed the print setup as mentioned above, then let’s try to print a document. 1) open any document that you want to print. 2) at the top-right corner, click on three dots. 3) click on the Share button. 4) select the print sharing app that you have already installed. 5) choose the print method from the app as a USB print. 6) select the printer that you have connected to your mobile phone via OTG-USB. 7) make proper page set up as required, like page size, number of copies, page number, etc. 8) Now you are ready to take out print from your mobile or smartphone. Click on the ‘Print’ button.
Done! You have successfully taken out print from your mobile phone or smartphone. The above-mentioned settings/steps/menus of the application may vary according to the print sharing application.
If you are facing any problems then read the user manual of the installed application.
Any third party application may be paid or free, please be careful while using any third party print sharing application.
mindblowinfo.com is not responsible for any fraud that occurred by the print sharing application.
Print from mobile via wireless printer:
In this article, we have already learned how to print from a mobile phone or smartphone via USB-OTG cable.
Now we are going to learn How to print from a mobile using a wireless printer. There are a lot of printer manufacturing companies offering wireless printers.
If you want to take out print from your mobile phone via wireless/wifi/Bluetooth, then you must have a wireless printer. There are two ways that you can send print from your mobile phone or tablet to your printer wirelessly. 1) Direct print to your wifi printer 2) Print via same wifi network through router
Android smartphone:
Direct print to your wifi printer:
If you have a printer with wifi facility then you can print directly from your mobile phone to your wifi printer.
It’s very easy to print directly to a wifi printer because the printer you have used comes with wifi capability and a mobile application plugin or print sharing application.
You don’t need any third-party app to do this.
Use android default print service:
The latest Android devices come with a built-in printing service.
If you are connected with a wifi printer on the same network then it can be easier to print a document using the default print service on your android smartphone.
How to use default print service in android devices:
1. Make sure your smartphone is connected to your wifi printer on the same network. 2. Pull down the shade from your mobile screen and tap on the gear icon. It opens the setting panel. 3. Tap on the connected devices and next tap on connection preferences. 4. Tap printing and next tap on default print service. 5. Tap the toggle to switch the default print service on. After that, your wifi printer should now appear below. You have successfully turned on your default print service and added a wifi printer.
Print a document:
Now after doing the printer setup as mentioned above, we are ready to take a print from your mobile photo to your wifi printer. 1. Open any document that you want to print. 2. Just click on three dots from the top-right corner of the document. 3. Click on the print button. This print option is shown because we have enabled the default print service, if you don’t see the print option then make sure you have enabled the default print service. Now tap on the printer and select a printer detected by default print service that we have already enabled. You are ready to take out print, just click on the blue-colored print button.
You have successfully taken out a print from your mobile phone. If you are using an old android smartphone with less than the android 10 version up to the android 4.4 version then your device is not capable of default print service.
how can I print from this type of android smartphone?
Using official Mobile app:
Almost all printer manufacturers provide their official mobile application or plugin along with wireless printers.
if you’re using an older android device with Android 4.4 and newer, Install printing the official app or plugin from the app store. Follow the below steps. 1. Make sure your Wi-Fi printer and Android device are connected to the same local network via wifi. 2. Open any document to take print from your mobile. 3. Click on three dots located at the top-right corner of the document. 4. If you have successfully installed the print sharing app or plugin provided by your printer manufacturer, you will see the print option with a connected printer name. 5. Just click on the install plugin or app and select printer. 6. Now you are ready to take out print. 7. Just click on the print button, well done! You have successfully taken out print from your mobile phone.
Use wifi-direct print service:
There are some wifi printers which provide wifi-direct print service. By using this service, you don’t need any plugin or application to print from your mobile phone. Turn on the hotspot from your wifi printer. Turn on your mobile’s wifi and find a wifi printer nearby you.
You will see a wifi-direct printer, just tap on that and connect to a wifi printer. open a document that you want to print from your mobile phone or smartphone. Click on three dots from the top-right corner. Just click on the print button. Done!
You have successfully taken out print from your mobile or smartphone.
Apple’s iOS mobile phone:
We have discussed how to print from your android mobile phone. Now we are going to learn how to print from your Apple’s iOS mobile to wireless printer. iOS provides a built-in Air print application in your Apple iPhone. You don’t need any third-party application or plugin. Make sure that your printer is capable of Apple's Air-print feature. Connect your wifi printer to your wifi printer. Open any document and click on the share button. Click on the print option Select printer and click on the print button. Done! You have successfully taken out print from your iPhone. Print technology is evolving just as new technology is evolving every day. New methods of mobile printing are evolving and changing day-to-day. There was a very famous printing mobile application by google that was google cloud print service. But unfortunately from 1 December 2020 google cloud print service will no longer. So friends in this article we have discussed how to print from your mobile or smartphone via USB or wireless.
If you like this article then please share this with your friends or relatives.
0 notes
Link
Best Free Download Manager
Download Large files without interruption
Sometimes we want to download large-sized files or Movies or any other file which is very large in size.
We are trying to download these files with the help of Browser’s Download manager, but if there is a large file and consumes more time then downloading may be interrupted.
To avoid interruption, we need special download manager software. But there are several paid software available that we can’t afford.
Free Download Manager
In this article, we will introduce to you a free and stable Download Manager with a Browser extension.
When you search for a free download Manager for your Computer or Laptop, then you will see that there are a number of free software packages available.
But be aware! That free software may fake or spam and cause harm to your Computer or Laptop.
So the question is, is not there any free download Manager software with premium features?
The answer is Yes! There is one of the most free premium Download Manager software with great features.
And that is ‘Free Download Manager Software’ which is the best free download manager software for your Computer or Laptop.
>> [100% working] Turn off windows 10 Automatic Update Permanently
>> Extend 'C' Disk drive Volume Size without format
How do you get this free download manager software?
Let’s go to know how to download 'free Download Manager Software' for your computer or Laptop.
If you are using the Windows operating system then click on the below link to download free download manager software.
Free Download Manager for Windows
If you are using Mac Operating System then click on the following link to download free download manager software.
Free Download Manager For Mac
Free download manager software is also available for the Android Operating system with some limitations.
With the help of the above-mentioned links, download free download manager software according to your desire.
The older versions of this software are also available on their official site i.e. www.freedownloadmanager.org. visit and download the older version of this software.
This software doesn’t need any crack or activation or fees. So download this software only by the above-mentioned links to avoid spamming.
This software is available in both 32 bit and 64-bit versions.
>> Create Partition in Pendrive
How to Install Free Download Manager Software
If you download the setup file of Free Download Manager then just right click on the setup file and click on Run as Administrator.
wait for a few minutes, your software will begin to install. After a few minutes, your free download Manager Software install and ready to use.
You can also download browser extensions for Google Chrome as well as for Mozilla Firefox browser too. To download the extension, use the following links.
Extension for Google Chrome
Extension for Mozilla Firefox
How to use Free Download Manager
If you want to download any file or video or movie, you must have a download link of that file.
Free Download Manager interface
Open free download manager software in your Computer or Laptop. You will see a plus button (+) at the top-left corner.
Click on the plus button and past your download link.
If you copy the download link before clicking on the plus button, then this software automatically fetches the download link.
After that, click on the download button. Fine! Your download will start. You can pause or resume downloading several times without any interruption.
This is an amazing feature of this software. You can manage your download destination according to your convenience.
Features of Free Download Manager
It is absolutely free of cost with premium features.
You can pause or resume downloading as per your convenience.
You can download large files or videos without any interruption.
This software doesn’t need any crack or activation.
You can use this software on windows as well as on Mac operation systems and also on Android operating systems.
Browser extension is available for Google Chrome and Mozilla Firefox free of cost.
You can download YouTube videos and whole playlists from YouTube.
>> Best Browser for Better Experience
Using Extension
Download free download manager extension with the help of the above-mentioned links for Google chrome as well as for Mozilla Firefox. Add it to your browser.
Keep in mind that, to download files or videos using the extension, you must enable ‘pause to cache downloads from all sites’ by clicking on the extension.
When you are playing any video, you can download it with the help of an extension.
So friends enjoy your downloading without interruption. We hope you like this article, please share this with your friends and social groups.
>> What is SSD?
Thanks!
0 notes
Link
We collect and store more information in mind for further use.
We retrieve that information as per need, same as a computer system has memory to store information and instructions.
Mainly there are two types of computer storage 1) Primary Storage also called ‘Memory’ and 2) Secondary Storage. In this article we are going to know more information about Primary Storage of Computer and primary storage devices. First of all, what is Primary storage of a computer?
Primary Storage or Memory of a Computer
Primary Storage also known as Main memory or internal memory or just Memory is a main component of a computer.
It holds memory for a short time while running the computer. It is much faster, smaller in size and costly than secondary storage devices.
Primary memory is an electronic chip which is made up of semiconductors. There are two types of primary memory that are 1. RAM and 2. ROM.
Primary memory may be either Volatile or non-volatile memory because data stored on RAM is temporary but stored on ROM is permanent.

While you are working on the computer the data stored on primary memory until you save it on a specific drive of secondary storage.
Instructions or program data currently required for performing specific tasks by the CPU stored on primary memory.
The CPU retrieves data from a specific Memory location that is Memory address to perform tasks.
Definition of Primary Storage or Memory of Computer
Primary Storage or Main memory or internal memory or just Memory of a Computer is an electronic chip situated on the motherboard that holds data, instructions and programs that are currently in use in a computer system that is called Primary Storage or Memory of a Computer/Laptop.
In the Secondary Storage devices article; we have already discussed the types of Secondary Storage devices.
Like that primary storage or memory of a computer divided in their types. There are two main types of Primary Storage or Memory, these are as follows.
Types of Primary Memory of a Computer
1) RAM (Random Access Memory)
RAM is a Primary memory of a computer that holds Data, instructions and Current Processing Data from the CPU (Central Processing Unit) of a computer stored for a short time period.
RAM is an electronic chip which is made up of semiconductors and situated on Motherboard of a computer.
RAM is a Volatile or Temporary Memory that means while you turn off your computer or turn off due to power outage, all data instruction held on RAM will be lost.
You can save your computer work data currently stored on RAM to Secondary Storage devices for example MS-Word processing, MS-excel data, etc.
Secondary Storage devices can’t lose data or information until you delete it. You can read and write data from RAM.
RAM is very small in size, much faster and expensive compared to secondary storage devices.
The speed of your computer depends on how much RAM is installed on your computer. The size of RAM is available between 256 MB to 32 GB.
Types of RAM
There are two types of RAM 1. DRAM (Dynamic Random Access Memory) and SRAM (Static Random Access Memory).
1) DRAM:-
The DRAM (Dynamic Random Access Memory) requires refresh again and again thousands of times in a second.
It is less expensive and slow in speed compared to SRAM (Static Random Access Memory). It is commonly used in normal PCs (Personal computers) or laptops.
2) SRAM :-
SRAM (Static Random Access Memory) does not require refresh again and again. SRAM is much more expensive, faster in speed compared to DRAM.
SRAM is also used as a cache memory in your computer.
2) ROM (Read Only Memory)
ROM (Read Only Memory) is non-volatile primary storage of computers that means data stored on ROM can not be changed or erased by the user.
Why is this ROM called Read Only Memory? ROM is an electron chip made by Semiconductors and it can be only read by CPU that's why ROM is called Read Only Memory.
The ROM chip not only used in computers or laptops but also used in TVs, AC, Mobile Phones, Washing Machine, etc. appliances.
In computers, ROM is used in the booting process, in BIOS (Basic Input Output System) the booting process (BIOS system) examines all connected Hardware, input output devices works properly or not.
To start a computer, Start up instructions and programs are required.
Those instructions and programs are stored in ROM by the Manufacturer which can’t be changed or erased by the user.
Types of ROM
1) MROM (Masked Read Only Memory):-
full form of MROM is 'Masked Read Only Memory'. At the time of manufacturing of MROM, data or instructions are stored by the manufacturer.
This data or instruction can not be changed, erased or rewrite program.
This type of ROM was inexpensive and was used in old computers, today this type of ROM chip is not used.
2) PROM (Programmable Read Only Memory):-
Full form of PROM is 'Programmable Read Only Memory' and also called a User Program to ROM.
This type of ROM is designed as a blank chip by the Manufacturer. In this type, users have rights to write programs or instructions according to their requirements.
This type of ROM gives a chance to the user to write or store desired data or instructions.
But this is not easy, for this an expert person must have proper knowledge of programming.
Once any data or instructions are stored on PROM, it can’t be changed or erased by anyone.
Users have only one chance to write data or instructions on PROM. to write data or instructions on PROM, a special device is required that is called a PROM programmer.
3) EPROM (Erasable Programmable Read Only Memory)
Full form of EPROM is 'Erasable Programmable Read Only Memory' and it can be erased. It is a very difficult process to erase data from EPROM.
Ultra Violet Rays are used to erase data or instruction from EPROM.
This process can take 30 to 35 minutes to erase data from EPROM.
After that users can rewrite, store data or instruction on the EPROM according to their requirements.
This is not a selective memory type; it means you can’t erase a specific part of memory, the whole memory will be erased.
4) EEPROM (Electrically Erasable Programmable Read Only Memory):-
This is another erasable type of ROM memory. The full or EEPROM is 'Electrically Erasable Programmable Read Only Memory 'and also called Flash EEPROM.
In this type data or instructions can be erased by electricity.
That's why it is called Electrically Erasable Programmable Read Only Memory.
Users can also erase a specific area or memory and update or rewrite a program on EEPROM that differs from EPROM. This type of chip is used in industrial areas. So we have discussed two main types of primary storage of a computer that are RAM (Random Access Memory) and ROM (Read Only Memory) and their types. There are some other types of primary storage of computers that are as follows.
Cache Memory
The CPU speed is extremely high compared to the main memory access time. The performance of the CPU therefore decreases due to the slow speed of the main memory.
To reduce the operating speed mismatch, a small memory chip is attached between the CPU and the Main Memory, the access time of which is very close to the processing speed of the CPU.
It's called the CACHE memory. CACHE memory is accessed much faster than conventional RAM.
To store programs or data currently running or temporary data often used by the CPU.
So every memory makes the main memory faster and bigger than it really is. It's also very expensive to have a larger memory cache size, and it's usually small in size.
Registers
The CPU processes high-speed data and instructions; there is also movement of data between different computer units.
It is necessary to transfer the processed data at a high speed. The computer uses a number of special memory units called registers.
They are not part of the main memory, but store data or information temporarily and forward it as directed by the control unit.
0 notes
Link
Today we are using a number of digital smart devices for specific purposes. Since the invention of the computer, Computers have evolved enormously.
Today we are witnessing a change in the size of the computer, increasing the speed of the computer as well as increasing the storage capacity in computers.
Computer Memory:
To perform a specific task, processing data and instructions, the computer system needs storage devices.
At the beginning of computer invention, there was a very small amount of storage capacity devices available.
But today we are using a large amount of storage capacity devices in a computer.
There are mainly two types of storage devices i.e. Primary storage devices and secondary storage devices in a computer.
In this article, we are going to know Secondary storage devices and Characteristics of Secondary Storage devices in the computer in detail.
Secondary Storage Device
The primary memory that is RAM (Random Access Memory) or Read-Only Memory has a specific and limited storage capacity of data.
That may either be volatile (RAM) or Read-Only Memory (ROM).
Thus to store large amounts of data, the computer system needs Auxiliary or Secondary Storage Memory.
It stores data and instructions for further use to perform specific tasks. The secondary storage is non-volatile and it has a large capacity of storage compared to Primary memory.
The secondary memory or storage can not be accessed directly by the CPU. to access contents from secondary storage, the secondary storage needs to be first brought into the main memory.
The computer usually uses its input/output channels to access secondary storage and transfers the desired data using an intermediate area in primary storage.
Secondary Storage Devices
Let’s get more information about different types of secondary devices.
➤ Hard Disk Drive (HDD)
➤ Solid State Drive (SSD)
➤ USB Flash Drive (Pendrive)
➤ Secure Digital Card (SD Card)
➤ Digital Versatile Disc (DVD)
➤ Compact Disc (CD)
➤ Floppy Diskette
➤ Magnetic Tape Drive
Hard Disk Drive (HDD):
The Hard Disk Drive (HDD) of a Computer is a Non-Volatile Secondary Storage Hardware Memory device that controls Reading, writing, retrieve, and store data.
Hard Disk (HDD)
HDDs are considered as the main memory of a computer system. The operating system, software files, media files and folders, documents, and much more stored on HDD.
Hard Disk Drive (HDD) can be used in Desktop Computers, Laptops, Servers, for CCTV camera storage devices, at Data Centers, etc.
there are two types of HDD namely internal HDD and external or portable HDD.
The internal HDD is connected to the motherboard via ATA, SATA, EIDE, or SCSI cables. You can store data on HDD Permanent until you erase or delete it.
👉 How To extend 'C' drive size without format
Characteristics of Hard Disk Drive [HDD]:
HDD provides a large number of storage capacities compared to primary memory or optical discs like CDs and DVDs.
The storage size of a personal computer hard disk is from 160 GB to 2 TB and much more.
The speed of data retrieval and data transfer is much faster than a floppy disk.
All files and folders including the operating systems stored on HDD.
Data can be stored permanently on HDD until they delete it.
HDD is a Secondary storage device that can be replaced and upgraded easily.
You can take back up your data using a Portable or external HDD.
Definitely, HDD is better than primary memory or some optical disc like CDs and DVDs.
today you can buy an HDD as a Secondary Storage device with a storage capacity of 160 GB to 2TB (Terabyte) and more.
Solid State Drive (SSD):
A solid-state drive (SSD) is a modern Secondary Storage Device. now used in some Laptops and desktop computers.
Till now, the cost of SSD is very high compared to HDD. In the future, the cost of an SSD may be decreased.
It is very small in size and it does not have any moving mechanical and magnetic parts like a disk, gear, springs, actuator arm, Platters, spindle, etc. it consists only of electronic chips.
👉 What is SSD (Solid State Drive)? | HDD VS SSD
Characteristics of SSD:
SSD does not have any Mechanical and Magnetic components.
The size of the SSD is much lower than the traditional HDD.
SSD is a lightweight Secondary Storage Device made up of fiber and electronic chips.
The speed of SSD is much faster than any other storage device.
The response time (Latency) is very low as compared to any other storage devices.
Due to non-mechanical parts, SSD is a more durable Secondary Storage Device than others.
An SSD is more reliable than HDD.
There are many differences between SSD and HDD
👉 The difference in SSD and HDD
USB Flash Drive ( Pendrive):
The USB Storage Device is a Secondary Storage Device that uses flash memory to store data.
It is rewritable, removable, and much smaller than HDD or SSD and is called a Pen Drive because of its size like a pen.
USB Flash Drive (Pendrive)
Today the USB Flash Drives are available with B type and C type USB pins for use in smart devices like mobile.
The USB flash drives are based on flash memory which is a type of floating-gate semiconductor memory that was invented by Fujio Masuoka in 1980.
Today USB flash drives are available with up to 2TB data storage Capacity and in the future, its size may be rising.
USB Flash drives are mostly used to take a backup, store files and documents, transfer files, and format PC or Laptop by making USB bootable Pendrive.
Characteristics of USB Flash Drive (Pendrive):
A USB flash drive does not need any external source of power.
A USB flash drive does not need any special software to run on a computer or laptop or any other desired device.
A USB flash drive is also called a Thumb drive or Pendrive because of its sizes like a thumb or pen.
You can easily store and transfer data in a USB flash drive up to 2TB or more.
This is a more reliable secondary storage device and safe and secures your data.
A USB flash drive is the cheapest and fastest way to store your documents, files, and folders.
You can make your flash drive write protected to secure your data.
Stored contents in a flash drive are permanent and secure until you delete it.
You can make your flash drive as a bootable drive to format your system.
You can make up to 4 Partitions in a USB flash drive to store your different types of data.
👉 How to make partition in Pendrive
Secure Digital Card (SD card):
Secure Digital (SD) is officially abbreviated as an SD card. We are familiar with SD cards because in no. digital devices and smartphones we are using it smartly.
The SD card is a non-volatile memory (Secondary Storage Device) and has been developed by SD Associations.
Secure Disc (SD Card)
In 1999 the Secure Digital (SD) Memory Card was developed and marketed by SanDisk, Matsushita, and Toshiba.
The card was derived from MMC (MultiMediaCard) and offered a high density of memory for the time being based on the Secure Digital Music Initiative (SDMI) standard and digital rights management.
There are many types of SD cards are available in the market like Mini SD card, Micro SD card, SDHC [SD Host Controller] card, SDIO [Secure Digital Input Output], SDXC [Secure Digital eXtended Capacity] micro card, SDUC [Secure Digital Ultra-Capacity], SDSC [Secure Digital Standard Capacity], etc.
Characteristics of SD card:
SD cards are non-volatile Secondary storage devices that are user exchangeable.
SD cards are very small in size that is 24*32 mm and is 2.1mm thick.
All SD cards have 9 pins i.e. electrical contacts and a write-protect switch.
All SD cards need 2.7V to 3.6V electricity to perform functions.
The speed of the SD card is defined as Speed class i.e. Class 2, Class 4, Class 6, and Class 10.
You can use an SD card in Photography or Video Recorder devices by using SD card Adaptor.
The SD card is reliable, has broad interoperability, and is now operated by more than 665 companies all over the world.
It's small, lightweight, and simple to handle, and can be switched between various devices.
A device compatible with an SD memory card uses a decoder software to play music, video clips, and movies without a drive mechanism unlike in CD and DVD players.
Digital Versatile Disc (DVD):
A DVD or DVD-ROM, short for digital versatile disc or digital video disc, is a disc used as a Secondary Storage devices capable of storing significantly more data than a standard compact disc (CD).
DVDs are widely used to store and view movies, as well as other data.
DVD
The Matrix DVD disc image is an example of a DVD movie. In 1997, DVD-ROM drives that use these discs were first sold.
Commonly DVDs can store 4.7 GB data but there are other types of DVDs that their capacity for storing data may be varied.
The film Twister became on March 25, 1996, the first feature film to be put on DVD.
Characteristics of DVD:
DVDs are used to store large amounts of data up to 4.7GB and in several types up to 17.08 GB too.
DVDs are generally used to store films/movies.
DVDs are portable secondary storage devices that can be transported from one computer to another computer.
According to storing data, there are two types of DVDs that are Writable (DVD-R) and Re-writable (DVD-RW).
You can not erase or delete data from DVD-R (DVD-ROM).
You can erase or delete and edit data from DVD-RW.
DVD-RW mostly used for applications which need updating information or record over old data.
Compact Disc (CD):
Compact Disc (CD) is a portable Secondary Storage device that is mostly used in the past.
James Russell, an American inventor, envisaged storing and playing audio recordings as an alternative to vinyl albums.
In 1966, he was the first person to file a patent for a product that resembles a combination of laser, digital recording, and optical discs.
Then in the 1980s Philips Electronics and Sony Corporation purchased technology licenses.
CDs are used to store playback media files, mp3s, Videos, and some other small files.
Its storage capacity is 650MB to 700MB. A CD works by focusing a semiconductor laser of 780-nanometer wavelength on a single track of the disc.
As the disc rotates, differences in the way light is reflected off the polycarbonate layer at the bottom of the disc is measured by the laser beam, converting it into sound.
Characteristics of Compact Disc (CD):
A compact disc is a portable storage Device, which can be used in digital form to record, store, and playback audio, video, and other data.
A standard compact disc is 1.2 mm thick, weighs between 15g and 20g, and has an audio capacity of 80 minutes or 650 megabytes (MB) to 700 MB, measuring 4.7 inches or 120 millimeters (mm) across.
A CD works by focusing a semiconductor laser of 780-nanometer wavelength on a single track of the disc.
The laser beam measures differences in the way light is reflected off the polycarbonate layer on the bottom of the disc as the disc rotates, transforming it into sound.
CDs are fragile and prone to scratches; they can be repaired, but they may affect disc readability.
Floppy Diskette:
A floppy disc is a magnetic Secondary Storage device used as a computer storage medium.
The floppy disc consists of a thin, flexible magnetic disc that is sealed in a plastic carrier.
Floppy
A computer system must have a floppy disc drive (FDD) to read and write data from a disc.
Also, a disc is simply referred to as a floppy. Floppy discs had been widely used to distribute software, transfer files, and create back-up copies of data since the early days of personal computing.
When hard drives were still very expensive they also used floppy discs to store a computer's operating system.
Several different types of floppy discs were developed. The floppy size decreased, and the storage capacity increased.
In the 1990s, however, other media began to replace floppy discs as the primary storage medium, including hard disc drives, ZIP drives, optical drives, and USB flash drives.
Characteristics of Floppy Diskette:
A floppy drive is classified as a 3.5-inch drive, which means that, in a computer case, it fits into a 3.5-inch drive bay.
The first floppy drives that were developed, however, were up to 8 inches. They form a rectangular prism. Click the link in the Resource section for an image.
The floppy drive uses floppy diskettes that are shaped like thin squares (for a picture, click the link in the Resource section).
The main function of the floppy drive is to read and write data to floppy diskettes.
For storing data that does not require a lot of space, computer users can still use floppy drives and diskettes.
You can store many word processing documents and low-quality images, for instance, but you can’t store any video or music files on a floppy diskette.
Magnetic Tape Drive:
Magnetic Tape Drive is a Secondary Storage device that provides high-density, low-cost storage medium with low access or slow access information/data.
It consists of a spool of magnetic material, electronics and mechanical parts.
The data can be accessed in a sequential form which is stored on Magnetic Tape.
Mechanically, a tape drive can rewind the tape, sequentially search the tape, and stop the tape.
An I / O program would have to command the tape unit to rewind the tape in order to access data stored on a tape and then sequentially search the tape from the start until a match is found.
The addressed data can be removed once discovered.
Characteristics of Magnetic Tape Drive:
Magnetic tapes consist of a thin plastic strip with a magnetic coating on which data can be stored.
Magnetic tape information storage is a low-cost, high-density storage medium for low-access or slow-access data.
The tape unit operates in a simple manner. The data on the tape can be accessed only in sequential form.
Data can store as well as can be changed or removed from a magnetic tape strip.
Mechanically, a tape drive can rewind the tape, sequentially search the tape, and stop the tape.
Magnetic tapes are used in a number of ways. There are many different features, including audio and data usage. More commonly, magnetic tapes are used for cassette and VHS tapes.
As new technologies evolve every day, so does the evolution of secondary storage devices. If you liked this article, be sure to share it with your friends and relatives. Thanks!
0 notes
Link
Today approximately 35.43% of people use Windows operating system. We know the current version of the Windows operating system that is Windows 10.
➤ What is SSD (Solid State Drive)? | HDD VS SSD
➤ How to Extend 'C' Disk drive Volume Size
Through various updates, Windows is trying to give you some special features of Windows and is trying to solve a problem with the help of updates.
But does everyone need these updates?
If you are using Windows 10 operating system and are bothered by updates from Windows and a lot of data consumption then this article will be very useful for you.
In this article, we will show you how to turn off automatic updates from Windows temporary or permanent.
There are different methods to turn off these windows automatic updates, we will tell you the methods which we have tried it ourselves.
Let's start to learn to stop or turn off Windows 10 automatic updates using the following methods.
Method 1 (turn off Temporarily):
If you want to turn off windows updates for some time or want to pause automatic updates for a specific period then follow this method. Click on ‘Start’ menu > Settings
You will see that there are many settings in the newly opened window. Find and click on the ‘Update & Security’ option. From the left menus, select the ‘Windows Update’ option. You will see there are some options like Check for updates, Pause updates for 7 days, Change active hours, View update History, Advanced options, etc (see fig. 3).
Exact below check ‘updates’, you will see ‘Pause updates for 7 days.’ If you want to pause windows updates for 7 days then simply click on that option. You can temporarily disable automatic updates for 7 days by this processor.
If you want to enable automatic updates then just click on ‘Check for updates’ after that you receive important updates from windows. Do you want to resume windows updates for more than 7 days? No problem, we have another option to do it. Just follow the following steps. Look at fig. 2 there is an option called ‘Advanced options’ just below the view update history.
fig. 2
Click on Advanced options you will see three sections: ‘Update Options’, ‘Update notifications’, and ‘Pause updates.’
in the pause updates section, there is a drop-down menu called 'Select date’ just under ‘Pause until’ which contains several dates.
Select a date that you want to pause update until that date. By this method, you can pause windows automatic updates for a maximum of 35 days.
If you want to re-enable automatic updates then just click on Check for updates. So these above processors are not for turning off Windows 10 updates permanent!
How to turn off windows 10 automatic updates permanently?
Friends, remember that Microsoft provides you with important updates not to bother you but to secure your system by updating security patches.
If you disable Windows 10 automatic updates permanently then remember that after some time or some months you must turn it on manually.
Because by this method Microsoft can’t update your system automatically. So let’s start to turn off windows updates permanently, just follow the following steps.
Method 2 (turn off permanently):
In this method, we are using ‘Local Group Policy’. be aware that we are going to edit the windows group policy.
Read all steps very carefully, because any wrong step may cause to harm your system. So please read it very carefully. To edit group policy, search ‘Run’ and enter ‘gpedit.msc’ command line and then click ok. A group policy edit window will be open. (see fig. 3)
fig.3
Very important Note: sometimes you can’t access Group Policy. When you run gpedit.msc command then you may see a message ‘Windows can not find ‘gpedit.msc’, Make sure you’ve typed the name correctly, then try again.’
it means you must enable access to group policy. To enable group policy editor, run ‘gpedit.bat’ file. Click here to download the ‘gpedit.bat’ file. Save it on your desktop. Right-click on gpedti.bat file and run it as administrator. Wait to complete command execution, it may take 2 to 5 minutes. Don’t close the command window until complete all command execution.
Ignore the above important note if you have successfully opened the Group policy editor. (see fig.4)
fig. 4
You will see the Local Group Policy editor divided into two panels, i.e. Left panel, and right panel. (see fig. 4)
Look at the right panel, there are two sections: Computer Configuration and User Configuration. Expand 'Administrative Templates' from the Computer Configuration section.
Then find and click on Windows Components. (see fig. 4) Look at the Right panel, at the bottom, find out and click on Windows update. You will see a lot of settings appear in front of you. Now find and click on Configure Automatic Updates. A new window will be open. (see fig.5 ).
fig. 5
There are three important settings. 👉Not Configured:- it means don’t change any update settings, just leave as default. 👉Enable:- it means you can manage the update settings manual. 👉Disable:- it means disable Automatic updates permanently. If you want to turn off windows 10 automatic update permanently, then select the Disable option. That’s it! You have successfully disabled windows automatic updates. Doing this processor, please don’t make any other changes in the Local Group Policy editor. Any other wrong changes can make it harmful to your system. We hope you have liked this article, please share this article with your friends who are bothered by Windows Automatics updates. Thanks!
0 notes
Link
Hello friends, today many of us use computers and know how to use them. We use a keyboard and mouse as input devices.
Many of us are super gamer and they also use keyboard and mouse to play games. But sometimes we need to press the Shift Key for more time.
Did you experience that when you press shift key for 5 times, you will see a pop up message box like
“Do you want to turn on Sticky Keys? Sticky Keys lets you use the SHIFT, CTRL, ALT or Windows Logo keys by pressing one key at a time. The Keyboard shortcut to turn on Sticky Keys is to press the SHIFT key 5 times.”
this makes you very upset because you really don't know what is sticky keys are? How sticky keys turn on?
How sticky keys turn off? And how to use sticky keys.
look at the following image.

Fig. 1
So what is Sticky Keys?
Sticky keys are those keys which perform multiple functions by using them in combination.
Like CTRL+A, CTRL+C, ALT+CTRL+DEL etc. these are sticky keys or function keys.
But sometimes, Handicapped person or finger injured person can’t use these function keys by holding one or more keys.
These ‘sticky keys turn on’ functions can help them to perform these types of functions.
Uses of sticky keys
‘Sticky keys’ is a function of GUI (Graphical User Interface) which is specially used for Handicapped person or Fingers injured persons to perform multi key functions like SHIFT+CTRL+DEL.
Traditionally, when we want to copy something by using shortcut CTRL+C in this function we must hold CTRL key then press C.
But using Sticky keys, you don’t need to hold one or many keys to perform this type of function.
If you are a handicapped or fingers injured person then use Sticky keys to perform multi key function. To use sticky keys, follow these steps.
Press the SHIFT key for 5 times and you will turn on sticky keys (you will show a pop up box like in the above image.
Click on the ‘Yes’ button). Look at your taskbar at the Right side, there will be some square shaped keys shown.
Suppose we want to open a task manager with shortcut keys CTRL+ALT+DEL using one hand or one finger.
Using sticky keys, you do not need to hold any key. Just press CTRL leave it, then press ALT leave it and then press DEL key. You will open Task Manager.
That's all. Like this you can perform many multi function keys to perform this type of function.
Sticky keys turn on:
Sometimes you want to use sticky keys, then how do sticky keys turn on?
It's very simple, just press the SHIFT key 5 times. You will hear a ‘beep’ and see a dialog box open (fig. 1) click on the ‘Yes’ button to activate the sticky key function.

Fig. 2
Look at your task bar at the
right side. There is a four squared icon. See fig. 2. That means you have activated the sticky key function.
Now you're ready to use the sticky key function.
Sticky keys turn Off:
If you have accidentally activated sticky keys or your sticky keys function has finished and want sticky keys turned off then press and hold any function key then press any other function key.
You will successfully turn off sticky keys function. You can turn off sticky keys by pressing SHIFT keys 5 times too.
Sticky keys turn Off Permanently:
If you accidentally re-activate the sticky keys and you want to turn them off permanently, it is very easy.
Just open control panel > Ease of Access center > Make the keyboard easier to use > set up sticky keys > then untick turn on sticky keys when SHIFT is five times.
Then click on apply and OK. you have successfully turned off Sticky keys function permanently.
If you want to activate it again then follow the above steps and tick mark turn on sticky keys when SHIFT is five times.
So this is how we see, what are sticky keys? Use of sticky keys, how to turn on sticky keys and how to turn them off.
Friends, you must have liked this article. Be sure to share this article with your friends or on social media.
Thanks!
0 notes
Link
If you are thinking of buying a new laptop or computer then definitely read this article.

Understand the terms Laptop SSD and HDD. in this article we will learn what is SSD?, SSD full form, difference in SSD and HDD, SSD vs HDD speed and much more.
in this article we will cover the following points:
👉 What is SSD ?
👉 HDD vs SSD (difference in SSD and HDD)
👉 SSD vs HDD speed
👉 Types of SSD
👉 Benefits of SSD
So let's get started. You can jump to a specific point by clicking above.
What is SSD?
We are using many types of electronic devices for store documents, photos, videos, songs etc.
When the computer was invented, at that time there were only limited space storage devices.
Like floppy and Hard disk drive (HDD) with very low storage size.
But today we are using many types of storage devices with high storage size. Like HDD, SDD, micro sd cards, pedrives etc.
We all are familiar with HDD (Hard Disk Drive), micro SD card, Pen Drives etc. but do you know what is SSD? Lets get more information about SSD.
so What is SSD? What is the long form of SSD? we can define SSD as follow:
SSD:
SSD is a modern technology of storage devices which is used in laptops and computers.
What is SSD? an SSD is nothing but an upgraded version of an SD card which uses flash based memory.
SSD replaces traditional Hard Disk Drive (HDD) and their mechanical parts.
More about SSD
The long form of SSD is Solid State Drive. SSDs are increasingly being used in current laptops and computers.
SSD was invented in the 1970s and 1980s. It has been used ever since. Initially SSD was used in supercomputers but now it is being used in all laptops and computers.
The SSD technology was extremely expensive and the storage capacity was very small that was 2MB to 20MB storage compared to ridiculous 5-digit prices.
SSD technology has occasionally been used in the military and aerospace sectors, but would not have been used in consumer devices until the 1990s.
we have already discussed what is SSD? SSD memory chips are comparable to random access memory (RAM).
Files are stored on a grid of NAND flash cells instead of a magnetic plate. Each grid (also known as blocks) can store between 256 KB to 4 MB.
The SSD controller has the exact address of the blocks, so that it is (almost) instantly available when your PC requests a file.
There is no waiting for the read / write head to find the information it needs. SSD access times are therefore measured in nanoseconds.
So far we have seen what is SSD?, the full form of SSD as well as other information about SSD.
Next we will look at SSD vs HDD (the difference in SSD and HDD).
Let's get started.
HDD vs SSD (the difference in SSD and HDD)
There is a big difference between SSD and HDD, the full form of SSD is Solide State Drive and the full form of HDD is Hard Disk Drive.
Based on some of the following points, we will understand the difference between SSD and HDD.
Physical:
While looking at the difference in SSD and HDD, There is a big physical difference between SSD and HDD. The SSD has only IC and a few chips, so it weighs very little and is small in size. As seen in HDD, due to the large number of mechanical parts, it weighs more and is larger in size.
Components:
Considering the components between SSD and HDD, there is a big difference because their work mechanism is completely different from each other.
HDDs have more Mechanical parts than SSDs.
SSD does not have mechanical parts but there are some ICs, Chips are available.
Read and Write time:
HDD has longer Read and write time because it takes more time due to mechanical parts to gather information from disk.
while, SDD has lower Read and Write time because it takes less time to gather information from flash drive by means of SSD.
It means the processing speed of the SSD is higher than the HDD.
Latency:
Latency means the response time taken by machine. Obviously HDD has higher latency compared to SSD. That is the main difference in SSD and HDD, because the speed of your computer or laptop depends on Latency.
I/O Operations per Second:
Operations performed in a computer or Laptop total depends on the speed of your SSD or HDD.
HDD supports fewer input/output operations per second due to low speed. while SSD supports more input/output operations because of its higher speed.
Fragmentation:
what is fragmentation? Fragmentation is a process that inefficiently uses storage space, decreases efficiency or output and sometimes both.
The exact effects of fragmentation depend on the specific method of allocation of storage in use and the particular type of fragmentation. You need fragmentation and defragmentation in your HDD because HDD is a metal-magnetic disk. while for SSD, there is no need of fragmentation and defragmentation. this is also a major difference between SSD and HDD.
Data Transfer:
the data is transferred sequentially in HDD, while the data transfer in SSD is random access.
Reliability:
HDD is less reliable due to the possibility of mechanical failure, like head crash and susceptibility to strong magnets. While an SSD is more reliable because it does not have mechanical and magnetic parts.
Price:
When you buy SSDs or HDDs, find out the difference in their price. The price of HDD is much lower than the price of an SSD.
In the future the price of SSD will be less but at present the price of SSD is a bit higher. this is also main difference in SSD and HDD.
so we hope you understand the differences in SSD and HDD.
We have learned what is SSD? And the difference in SSD and HDD. Let us now turn to the next point that is SSD vs HDD speed.
SDD vs HDD Speed
lets discuss the comparison in SSD vs HDD Speed.
A hard disc drive is a circular plate or disc that is covered with a magnetic material film.
In this magnetic film data is processed. Data is read & write using the disc spins and a magnetic head. The speed at which the disc or platter spins-measured in Revolutions Per Minute (RPM)-defines the read / write times in large part. For example, a SATA III hard disc drive at 5,400 RPM will have read / write speeds of around 100 MB / s, while it will be around 150 MB / s for a 7,200 RPM drive. On the other hand, SSD 's data read / write technology varies completely from HDD's. SSDs do not use rotating disc to read / write data, and thus there is never a question of latency caused by rotation of the disc. In addition files are sporadically written around the cells. Giving simultaneous access to each cell which means reading data at a faster rate. A SSD with SATA III communication has an average read and write speed of about 550 MB / s and 520 MB / s , respectively. Some of the SSDs could also offer 600MB / s of speed. Moreover, connecting an SSD to a faster interface such as PCIe improves its speed even more.
PCIe SSDs average speed is around 1.2 GBps to 1.4 GBps, and some high-end SSDs can also offer a speed of up to 2.2 GBps.
this is a comparison in SSD vs HDD Speed.
at this point we have discussed What is SSD?, HDD vs SSD (difference in SSD and HDD) and next we will discuss Types of SSD.
Types of SSD
When you shop for an SSD, you’ll encounter a number of different terms such as mSATA or PCIe. So what does it all mean? Here’s a primer on what you need to know. To attach an SSD to your system, you need to connect it using a specific interface. Common interfaces are: When you are going to buy a SSD for your PC or Laptop then you will encounter different concepts/terms like PCIe or mSATA etc. so what are the meaning of these terms?
1. NVMe SSDs and PCIe:
PCI Express (PCIe) is Generally used to connect high-performance graphics cards, network cards, or other peripherals. This interface gives you high bandwidth and low latency, it gets fast connection between the SSD and your CPU / RAM when you need fast communication. SSDs that use this form of link are based on the Nonvolatile Memory Express (NVMe) model , which provides higher input performance per second (IOPS) and even lower latency than SATA. NVMe has a total capacity of up to 16 GBits per second, which, due to several parallel channels, operates at a rate of up to 4,000 MB per second.
2.mSATA III, SATA III, and traditional SSDs:
SATA (Serial Advanced Technology Attachment) is an older Storage technology.
this technology is primarily designed for storage, with speeds of up to 6 GBit / s, or about 600 MB per second.
NVME is gradually phasing out SATA which is much quicker. An upgrade to a SATA-based SSD will still support older PCs or laptops with a hard disc drive, though.
After knowing types of SSD, let's discuss some benefits of SSD.
Benefits of SSD
High Speed:
SSD does not have mechanical parts, its latency is very low compared to HDD. it consumes less battery power and performs many calculations within seconds. That's why it gives very high speed to your computer or laptop.
Mobility:
SSDs have low power requirements and therefore contribute to improved battery life in laptops and tablets. SSDs are also shock-resistant, which decreases the chance of losing data when mobile devices are dropped.
SSD for Gaming:
Gaming Laptops/computers have always reached the boundaries of the latest computing technology, justifying fairly costly gaming output equipment.
These types of machines required low latency and high performance and that can be done by SSD.
Durability:
SSD has no mechanical part and is small in weight and size. This increases its durability.
Business:
Companies that deal with massive quantities of data (such as programming environments or data analysis) also rely on SSDs, so access times and file transfer speeds are crucial.
After reading this article, you must have understood, what is SSD? SDD VS HDD (difference in SSD and HDD), SSD vs HDD Speed, Types of SSD and benefits of SSD.
If you liked this article, please share it with your friends.
Thanks!
0 notes
Link
Fashion Blog
A Golden Opportunity
Fashion is the word we all know and of course everyone's favorite! This article will be for bloggers only. Because Fashion Blog is a Golden Opportunity for Bloggers.
The current fashion trend is very high. Today, a large number of people are searching for information about fashion on Google.
The special thing is that there are very few blogs with in-depth information about fashion.

If you are a blogger and you have a question about blog topic (niche), then this article will definitely helpful for you.
So what is fashion?
In the world of everyday life, everyone wants to look beautiful, to attract everyone to me, to look different from others, to have everyone's eyes on me.
For this reason, various attractive clothes, attractive jewelery, attractive items, etc.
became available in the market and they started being used by a large number of people. This is called fashion.
Why fashion blog is a Golden Opportunity?
From the following points you will notice that a fashion blog is indeed a golden opportunity.
key factors of Fashion Blog
Trend:
Today everyone thinks that I should be attractive no matter how rich or poor the person is.
But people don't know much about how I can look beautiful, attractive.
You can guide these people about fashion through your blog. Fashion Blog is a Golden Opportunity in this special niche.
Changing lifestyles:
If you think about it, in the past, women only wanted to see the mother and child in the four walls.
Then in such a situation women could not think of hanging. If you take a look around now, you will see a whole new world of fashion.
Today, everyone's lifestyle has completely changed, so Fashion Blog is a Golden Opportunity, not only for women but also for men.
High CPC:
Fashion trends are seen not only in a particular country but in all countries.
If your blog starts to be searched globally, you will get high CPC. The rate is going to be very high.
if you are a beginner and don't know what is CPC then read here >> what is CPC, CPM, CTR, RPM in Google AdSense.
Turn your Passion into Profit:
Reading this article means you are a blogger. You may be a woman or a man, but you are also doing new fashion for yourself every day.
Wearing different clothes every day, taking photos, taking selfies, going out for walk.
You can tell people about your favorite things, your lifestyle and the secret of your beauty through your fashion blog.
You do not have to do anything different. You share your lifestyle and make money. that's why Fashion Blog is a Golden Opportunity for blogger.
Affiliate Marketing:
People will be interested in buying the products you refer to by looking at the information on your fashion blog.
At the same time, provide affiliate links of those products on your blog so that you too can benefit from it.
Many bloggers are confused as to whether both AdSense and affiliate marketing can be done.
So friends, you can do both, put the affiliate link on your fashion blog only after getting AdSense approval from Google.
Product Sporsorship:
Once your fashion blog starts to rank well, big cosmetics companies will give you product sponsorship. This will create another source of income for you.
Those companies will pay you a lot of money for this sponsorship. All you have to do advertise their products on your blog.
these are some key factors of Fashion Blog is a Golden Opportunity for men fashion blogs and also for women fashion blog.
How to write a fashion blog?
When writing a fashion blog, your blog should have the following points.
1.Introduction to Fashion:
Let introduce what is fashion to your audience or people and show them how you too are fashionable in your daily life.
2.Photos and Selfies:
Share your own fashionable photos and selfies on your blog to make your fashion blog look attractive.
3.Share your Experience:
Share your good experiences in the fashion world with your audience so they can be motivated.
4.Cosmetics or product info:
In your fashion blog, you need to know what cosmetics and items are available in the fashionable world and how to use them.
5.Fashion for men and women:
Tell people that fashion is not only for women but also for men and you should mention in your blog how important it is.
6.Festive fashion:
Guide your audience on what kind of fashion should be worn at a particular festival or event.
if your are a beginner and don't know how to write blog post then to know it, click here 'How to write a blog post'.
Read all the above information in order and carefully, if you don't understand, read it again.
Fashion blog is a golden opportunity for bloggers. Make the most of that opportunity and build your career in blogging.
we hope you liked this article. Share this article with your friends and relatives.
Thanks!
0 notes
Link
How to Create Partition in pendrive
Friends, today we are using modern technology for different purposes. All previous records, along with other information, were written down and photocopies of various documents were taken out.
Today we store all our information, all the documents in one small device.
In the past, there used to be large cassettes for storing songs or videos, but today we can easily store as much information as we want in a small pendrive.
Many people today are familiar with computers. A computer has a hard disk for storing information and is partitioned to make it easier to store and retrieve information.

In the past, the storage capacity of pendrive was not high. If you look today, pendrives with storage capacity of 32GB, 64GB, 128GB, 256GB, 1TB, 2TB are available today.
It is difficult to manage and retrieve information in a pendrive with such a large storage capacity.
Just as a computer's hard disk is partitioned, so if you partition a pendrive, it will be easier to store and retrieve information.
How to Create Partition in Pendrive
In this article we will give you a step-by-step guide on How to Create Partition in pendrive.
Read this article carefully, understand each step so that you will not have any problem while partitioning.
This article is going to be very important for you.
How to Create Partition in pendrive:-
before partitioning your pendrive, make sure your pendrive is empty or take backup your data.
to perform this 'Create Partition in Pendrive' task, we need a third party software tool called 'Bootice'. you can download this tool by following links.
Download Bootice 64 bit
Download Bootice 32 bit
after download BOOTICEx64.rar or BOOTICEx86.rar extract that file.
open that bootice.exe file you will see following user interface.

Fig.1
go to This PC/My Computer and see your pedrive's volume. Only one drive appears on the pendrive. Ok go to bootice tool there are many tabs are available on bootice tool.
(adsbygoogle = window.adsbygoogle || []).push({});
select your pendrive from Destination disk When choosing your pen drive from destination disk (fig), choose it carefully, do not choose a hard disk or other storage device instead of a pen drive.
click on 'Parts Manage' tab (fig.1)
you will see there is a new window opened. (Fig.2)

Fig.2
Click on Re-Partitioning tab then select USB-HDD mode (multi partition) (fig. 2) from new window because we want to create multi partitions in pendrive.
then click 'Ok' A new window will open once again. in this window you will see Settings about partition size.
There you will see the automatic size taken for partitioning. If you want to change that size, you can. Click OK without making any other changes.
A new window will open in front of you. close it and go to this PC / My computer.
You will still see only one drive of your pendrive and its size will be reduced. So where did the rest of the drive go? Don't worry, you're not done yet.
Your pendrive's partitions have been successfully created, only they are hidden. make them visible by assigning a letter.
Carefully complete the following steps.
Open 'Run' Program (click on start and search Run).
enter 'diskmgmt.msc' command in Run Program and click OK.
A window will open in front of you showing options like Disk 0 and Disk 1.
In Disk 1, you will see four drives, out of which only one drive has a letter assigned to it, just like (G).
you must assign a letter to another drive. To do this, right click on each of the other three drives and click on Change drive letter and path.
Click on Add from new opened window and click OK without making any other changes. A new window will open in front of you. Close it and do the same procedure for other drives.
Now close all windows, open This PC/My Computer and look you have successfully create Partition in Pendrive.
Sometimes Bootice tool Automatic assigns a drive letter, if you don't see partitions of your pendrive then make the above mentioned procedure to make partition drive visible.
Revert to Single Partition
If you want to make a single partition drive from multi partitions of your pendrive then follow the following steps. before that if your drives have any Data then backup it first.
>>Open Bootice tool
>>Select your pendrive from destination disk and click on Parts Manage. >>Click on Re-Partitioning >>Select USB-HDD mode (Single Partition) >>Click OK.
that's it! you have successfully created a single partition of your pendrive.
So in this article we have learnt How to Create Partitions in Pendrive and we hope you liked this article.
If you do not understand a step, read this article again. Remember to be careful not to lose your important data while performing the above process.
Thanks!
1 note
·
View note