
Don't wanna be here? Send us removal request.
Statistics
We looked inside some of the posts by neofox715 and here's what we found interesting.
Average Info
Notes Per Post
1
Likes Per Post
1
Reblog Per Post
0
Reply Per Post
0
Time Between Posts
3 days
Number of Posts By Type
Text
8
Last Seen Tumblr Blogs


Fun Fact
Tumblr posted its first advertisements in May 2012 and subsequently earned $13M in revenue.
Text
Mt6771 Antutu

A to zeppelin the led zeppelin story 200. Has anyone found a way to get their AI files into Zeplin? I've tried saving to a pdf and opening that pdf in Sketch, but it loses a lot of artwork. I've tried exporting the AI to a PSD but for some reason it's flattening the artwork to 1 layer. And It doesn't export to PSD artboards either.
Mediatek Mt6771 Antutu
Mt6771 Antutu Iphone
MediaTek Dimensity Antutu-Geekbench Benchmark Scores. MediaTek MT6890 AKA Demensity 1000 scores 5,11,365 points on Antutu, which divided into 1,61,266 points for CPU, 1,96,097 for GPU, 84,464 for Memory and 69537 for UX. https://neofox715.tumblr.com/post/657815417036898304/p-channel-depletion-type-mosfet. Unfortunately, we don’t have yet available Geekbench scores. Bartender mixology. We will be updating as soon as we get further call. Mediatek Helio P70. Xdebug chrome. The Mediatek Helio P70 is an upper mainstream ARM SoC for smartphones (mainly Android based) that was introduced in 2019.It is manufactured in a 12 nm FinFET (12FFC) process.
7. Performance - MediaTek Helio P70 (MT6771) information and performance benchmarks
You can buy an Ulefone Armor 6E at a promotional price from Amazon UK, Ulefone's official store on AliExpress, GearBest or Banggood.
Performance
Ulefone Armor 6E is equipped with a MediaTek Helio P70 (MT6771) system-on-chip, which is the second main difference from its sibling - the Armor 6, which packs a Helio P60 SoC. Built on TSMC's 12nm FinFET process, the Helio P70 integrates four 2.1GHz Cortex-A73 and four 1.95GHz Cortex-A53 CPU cores. The CPU is accompanied by a 900MHz tri-core Mali-G72 GPU. Compared to the Helio P60, this chipset should generate up to 13% more performance. On the Armor 6E, it is paired with 4GB of double-channel LPDDR4X RAM, clocked at 1600MHz. There are 64GB of eMMC 5.1 storage, expandable with up to 256GB. Of those 64GB, 55GB are available to the user. The same chipset powers the Ulefone S3 Pro, which we reviewed three months ago. The AnTuTu 7.x.x score of our Ulefone Armor 6E review unit place the performance of the Helio P70 chipset on one level with the Snapdragon 660 and sometimes - Snapdragon 820. The same applies to the results from the single-core and multicore Geekbench 4 tests. Our review unit has managed to score a number of points typical for devices with rival chipsets from Qualcomm such as the Snapdragon 650, Snapdragon 652, Snapdragon 660 and Snapdragon 820. However, the 3DMark Sling Shot tests show a lower result compared to the device packing the aforementioned Snapdragon SoCs. At the same time, the PCMark Work 2.0 result is very high, even higher than those from Snapdragon chipsets. Androbench shows typical scores for an eMMC 5.1 type memory.
Mediatek Mt6771 Antutu
Xiaomi Mi 6
202484 (Qualcomm Snapdragon 835 MSM8998)201368 (Samsung Exynos 9 Octa 8895)
Xiaomi Redmi Note 7 Pro
180717 (Qualcomm Snapdragon 675)167657 (Qualcomm Snapdragon 675)
Nokia X7
167255 (Qualcomm Snapdragon 710)161395 (MediaTek Helio P90 (MT6779))
LeEco Le X920
146939 (Qualcomm Snapdragon 820 MSM8996)145359 (MediaTek Helio P70 (MT6771T))
Xiaomi Mi 8 Lite
145333 (Qualcomm Snapdragon 660 MSM8976 Plus)144281 (MediaTek Helio P70)
Ulefone Armor 6E
143718 (MediaTek Helio P70)142038 (Qualcomm Snapdragon 660 MSM8976 Plus)
Xiaomi Mi A3
140444 (Qualcomm Snapdragon 665)139515 (Qualcomm Snapdragon 660 MSM8976 Plus)
Xiaomi Redmi Note 7
138023 (Qualcomm Snapdragon 660 MSM8976 Plus)137904 (Qualcomm Snapdragon 660 MSM8976 Plus)
UMIDIGI Z2 Pro
137342 (MediaTek Helio P60 (MT6771))137340 (MediaTek Helio P60 (MT6771V))
Ulefone Armor 6
133864 (MediaTek Helio P60 (MT6771))133682 (Qualcomm Snapdragon 660 MSM8976 Plus)
Doogee S90
132729 (MediaTek Helio P60 (MT6771V))
Geekbench - Single-core

Mt6771 Antutu Iphone
Elephone U Pro
1635 (Qualcomm Snapdragon 660 MSM8976 Plus)1631 (MediaTek MT8176)
Smartisan Nut Pro 2
1629 (Qualcomm Snapdragon 660 MSM8976 Plus)1616 (MediaTek Helio X27 (MT6797X))
Xiaomi Mi Note 3
1608 (Qualcomm Snapdragon 660 MSM8976 Plus)1571 (MediaTek Helio X20 (MT6797))
UMIDIGI S3 Pro
1561 (MediaTek Helio P70)1546 (MediaTek Helio X20 (MT6797))
Xiaomi Redmi Note 4 16GB
1543 (MediaTek Helio X20 (MT6797))1531 (Qualcomm Snapdragon 665)
Ulefone Armor 6E
1524 (MediaTek Helio P70)1522 (Qualcomm Snapdragon 650 MSM8956)
Ulefone T2
1515 (MediaTek Helio P70 (MT6771T))1503 (MediaTek Helio P60 (MT6771V))
Cubot X20 Pro
1474 (MediaTek Helio P60 (MT6771))1440 (MediaTek Helio P60 (MT6771))
Xiaomi Redmi Note 3 Pro 16GB
1433 (Qualcomm Snapdragon 650 MSM8956)1393 (Qualcomm Snapdragon 652 MSM8976)
nubia Z17 mini Standard Edition
1370 (Qualcomm Snapdragon 652 MSM8976)1344 (Qualcomm Snapdragon 636)
Meizu Pro 6
1317 (MediaTek Helio X25 (MT6797T))
Geekbench - Multi-core


Xiaomi Mi 8 Lite
5921 (Qualcomm Snapdragon 660 MSM8976 Plus, cores: 8)5905 (MediaTek Helio P70, cores: 8)
Smartisan Nut Pro 2
5863 (Qualcomm Snapdragon 660 MSM8976 Plus, cores: 8)5862 (Qualcomm Snapdragon 710, cores: 8)
Elephone U Pro
5862 (Qualcomm Snapdragon 660 MSM8976 Plus, cores: 8)5836 (MediaTek Helio P70 (MT6771T), cores: 8)
Xiaomi Mi Note 3
5814 (Qualcomm Snapdragon 660 MSM8976 Plus, cores: 8)5746 (MediaTek Helio P60 (MT6771), cores: 8)
UMIDIGI F1
5714 (MediaTek Helio P60 (MT6771V), cores: 8)5704 (Qualcomm Snapdragon 820 MSM8996, cores: 4)
Ulefone Armor 6E
5692 (MediaTek Helio P70, cores: 8)5653 (MediaTek Helio P60 (MT6771), cores: 8)
Xiaomi Mi A3
5606 (Qualcomm Snapdragon 665, cores: 8)5509 (Qualcomm Snapdragon 660 MSM8976 Plus, cores: 8)
Vernee Apollo Lite
5484 (MediaTek Helio X20 (MT6797), cores: 10)5456 (MediaTek Helio X20 (MT6797), cores: 10)
ZTE Axon 7
5455 (Qualcomm Snapdragon 820 MSM8996, cores: 4)5430 (Qualcomm Snapdragon 820 MSM8996, cores: 4)
Xiaomi Mi A2
5373 (Qualcomm Snapdragon 660 MSM8976 Plus, cores: 8)5143 (MediaTek Helio X20 (MT6797), cores: 10)
LeEco Le Max2
5103 (Qualcomm Snapdragon 820 MSM8996, cores: 4)

PCMark Work 2.0
Xiaomi Redmi K30 4G
8890 (Qualcomm Snapdragon 730G)8599 (Qualcomm Snapdragon 845)
Xiaomi Mi Mix 3
8596 (Qualcomm Snapdragon 845)8551 (MediaTek Helio G85)
OnePlus 6T
8549 (Qualcomm Snapdragon 845)8368 (Qualcomm Snapdragon 845)
OnePlus 6
8282 (Qualcomm Snapdragon 845)8096 (MediaTek Helio P70 (MT6771T))
Samsung Galaxy S10 Exynos
7942 (Samsung Exynos 9 9820)7930 (Samsung Exynos 9 9820)
Ulefone Armor 6E
7836 (MediaTek Helio P70)7753 (MediaTek Helio P70)
Cubot X20 Pro
7658 (MediaTek Helio P60 (MT6771))7623 (MediaTek Helio P60 (MT6771))
Nokia X5
7530 (MediaTek Helio P60 (MT6771))7486 (MediaTek Helio P90 (MT6779V/CE))
Samsung Galaxy A60
7406 (Qualcomm Snapdragon 675)7380 (Huawei HiSilicon KIRIN 970)
UMIDIGI F1
7375 (MediaTek Helio P60 (MT6771V))7353 (Qualcomm Snapdragon 730)
Xiaomi Redmi Note 7 Pro
7323 (Qualcomm Snapdragon 675)7278 (Qualcomm Snapdragon 820 MSM8996)
Huawei Honor V10
7068 (Huawei HiSilicon KIRIN 970)7004 (MediaTek Helio P60 (MT6771))
Doogee S90
6987 (MediaTek Helio P60 (MT6771V))6918 (Qualcomm Snapdragon 820 MSM8996)
7. Performance - MediaTek Helio P70 (MT6771) information and performance benchmarks
0 notes
Text
Logitech Unifying Remote

How To Use Unifying Receiver Logitech
Logitech Software Unifying Receiver Download
It's super easy to lose one of those little receiving dongles that come with a Logitech keyboard & mouse. Bartender mix. So what do you do when you lose one of them?
A remarkably reliable connection up to 10 meters (33 feet). 1 Only one USB port for up to six Logitech Unifying wireless mice and keyboards. Easy mobility with no need to carry or commute with mice or keyboards. Keep sets of your favorite Logitech Unifying wireless mice and keyboards at work, at home or in your computer bag. Logitech is the leader in the Mouse and Keyboard segment. Their keyboards and mice are used all over the world because of their quality and reliability. Their wireless range of keyboards and mice are also very top notch and now they come with their proprietary Logitech Unifying technology.
Option A: Download Logitech Unifying Software

How To Use Unifying Receiver Logitech
P channel depletion type mosfet. You need a Unifying dongle for this to work. You can check if your dongle supports the Unifying software if it has a small orange logo on it:
If you don't have a Unifying dongle, you can buy one for $15.
Logitech Software Unifying Receiver Download
Logitech Unifying dongles are designed to manage the connection for six or seven wireless Logitech products at a time so long as the products are also marked with the orange Unifying logo.However, please note that a mouse can only be paired with one receiver at a time — so if you pair a mouse with a Logitech unifying receiver, it will no longer work with its original receiver, should you still have it. No deezer.
Once you have a unifying receiver, the next step is to get it to recognize your existing mouse or keyboard. https://neofox715.tumblr.com/post/658783761833558016/ai-to-zeplin. For this, you need to download the free Unifying Software from Logitech’s site. Once the software is installed, just start the program and follow the prompts.
The device you’re connecting should have an ON / OFF switch. The software looks for wireless connections and when it sees one restart, it recognizes it as the one you want to connect. The unifying software also enables you to manage the devices you currently have connected to a receiver and remove connections if needed. An animated display even indicates the device you’re currently using.
Option B: Download the Logitech Connection Utility
This is what you need if your keyboard & mouse do not come with a Unifying dongle. Download Logitech Connection Utility and launch the application (don't worry, it doesn't install anything).
Click the Next button on the welcome page, and the tool will tell you to plug-in the new receiver; after that, you’ll reach the pairing screen. It’s quite simple really. Just turn off your mouse (or take out the batteries) and then turn the mouse back on. Voila, the mouse should now be paired with the receiver.
0 notes
Text
Fashion Angels Interior Design Sketch Portfolio

Fashion Angels Interior Design Sketch Portfolio Fashion Angels Plain Book
Fashion Angels Portfolio
A to zeppelin. This entry was posted on January 10, 2020
No deezer. These offers are non-binding, meaning you can cancel your subscription at any time. These offers are only available to users with no current nor previous subscription to any Deezer subscription tier, with no benefit from any previous Deezer promotion and no previous free trial to any Deezer.


Fashion Angels Fashion Design Sketch Portfolio Artist SetFashion designers of all ages will love creating stunning fashions with the Fashion Angels Fashion Design Sketch Portfolio Artist Set! This portfolio features drawing pages and removable stencils that will help young fashionistas draw a dream clothing collection.
Inspire the upcoming little stylists in your house with the Fashion Angels Design Sketch Portfolio. This kids' kit has 40 pre-designed sketch pages. The designs on the pages of this fashion design portfolio will help them create their own portfolio 'look book' of favorite hair, nail and make-up trends.
Publisher Description: Design and create every room in your dream house with the Fashion Angels™ Interior Design Sketch Portfolio. Use the stencils to add your own design elements to the home interior sketch pages. Then color, shade, and embellish with stickers to make the perfect space. Fashion Angels Interior Design Sketch Portfolio 11510 Full Size Sketch Book, Coloring & Activity Book. Design every room in your dream house with the Fashion Angels Interior Design Sketch Portfolio. Then color, shade, and embellish with stickers to make the perfect space. The Fashion Angels Interior Design Sketch Portfolio is created to teach tween girls about designing their dream bedroom, furniture and more. They can use the removable stencils with the sketch pages, along with the tips at the front of the book to make a remarkable room. The kit has more than 100 stencils to help get the sketches started, plus tons of sketch pages for fun on the go. P channel depletion type mosfet symbol.
Bored? Look no further than this weekend’s boredom buster - We’ve got the perfect activity that will help you unplug and have fun. It's classic design, sketching, drawing, coloring - whatever you want to call it, it's the perfect way to kill some time this weekend or anytime!
Xdebug chrome. Xdebug is an extension for PHP, and provides a range of features to improve the PHP development experience. Install the Xdebug Helper extension from the Chrome store. Enable the extension in Chrome as shown in the following figure. In Chrome, click. In the Chrome toolbar. From the Xdebug helper menu, click Options. Xdebug Helper for Chrome. XDebugToggle for Safari. Each extension adds an icon to your browser where you can select which functionality you want to trigger. Xdebug will continue to start debugging for every request as long as the debug toggle has been enabled. Manual Initiation.
Down below you can see 3 different (FREE) downloadable coloring pages. Choose a page from our fashion design sketch set to help you release your inner fashion designer. Or color and add your personal touches to one of the two classic coloring sheets

Fashion Angels Interior Design Sketch Portfolio Fashion Angels Plain Book
Check out the full kit here: http://www.fashionangels.com/fashion-angels/diy-crafting/fashion-portfolios/fashion-design-sketch-portfolio.html
We’ve also posted a few other coloring pages that are positively adorable! Relax, sit back and enjoy the weekend with this fun activity!
Fashion Angels Portfolio
Happy Designing Everyone!
0 notes
Text
Bartender Mix

Prodigy Mix Unboxing Video - Bartender Kit. Videos for this product. Click to play video. Prodigy Mix-Making Your Most Desire Cocktail Just Got Easier. Videos for related products. Click to play video. 5 Tools You Need to Make Cocktails.
★ MIX COCKTAILS LIKE A PRO » This bartending kit makes professional-level mixology shockingly easy. With all the essential bar accessories and leak-proof cocktail shaker, you won't have to worry about any mess, spillage, or getting your measurements wrong. Our martini shaker set also comes with unique recipe cards for a fun cocktail mixing.


Bartender Mixer
Bartender: Mix It Up. I don't like it! This bartender knows everything there is to know about making drinks. Do you think that you can impress him with your skills? Mix up some cocktails and see if you can earn his approval in this online game. Make White Cosmopolitan In Bartender: The Wedding. Game description:Help the bartender Miguel make the perfect Mai Tai! The barman is back and mixing drinks better than ever! Choose from a wide assortment of.
Bartender Mix It Up Game
Bacardi Limon Rum Modelo Beer Open the beer. Fill the empty space in the neck of the bottle with the rum. The bottle should be filled to the top. Plug the bottle with your thumb or the palm of your hand. Turn the bottle upside-down so the rum and beer mix. Turn the bottle right side-up, unplug, and drink.
1 oz. cinnamon-infused Roca Patron Anejo 1/2 oz. blood orange purée 1/2 oz. fresh orange juice To make cinnamon-infused Roca, soak 6 cinnamon sticks in a 750ml bottle for 24 hours, then remove. Pour blood orange purée in a shot glass. Shake cinnamon-infused Roca with orange juice and strain into the shot glass.
1 oz. gin 1 oz. Campari 1 oz. Rosso (sweet) vermouth Stir into old fashioned glass over ice, garnish with an orange peel and serve.
12 oz. can light beer 12 oz. can ginger ale 1 ½ tbsp. sugar 1/3 cup lime juice Combine ingredients in a pitcher with ice, stir and serve.
1 part Guinness 1 part brut sparkling wine Combine in a pint glass.
3 parts RumChata 1 part vanilla vodka splash of Hot Damn Layer vodka and Hot Damn over RumChata in a shot glass. rumchata.com
1 oz. Smirnoff kissed caramel vodka 1 oz. Kahlua Fill with half & half Add salt and shake Lisa Taylor Flyers 69 New Bern, N.C.
12 oz. Blue Moon 1 ½ oz. Malibu Rum Combine in a pint glass and serve.
1 1/2 oz. Blueberry infused Bacardi Rum 2 oz. pineapple juice 1/2 oz. homemade or Premium Limoncello 1/2 oz. Sweet & Sour Mix Splash of Agave Nectar Add all ingredients to a cocktail shaker, fill with ice and shake hard. Serve in a rocks glass garnished with 3 blueberries on a bamboo skewer. P. Scott Moore Baltimore, MD
3 oz. Samuel Adams Cold Snap 1 oz. Bourbon .5 oz. Yellow Chartreuse .5 oz. Lemon juice .5 oz. sugar Combine ingredients in a shaker with ice. Shake and strain into a rocks glass. Top with Samuel Adams Cold Snap. Lightly grate nutmeg to garnish.
0 notes
Text
Ai To Zeplin

A To Zeppelin
A To Zeppelin The Led Zeppelin Story 2004

We try to make our Zeplin to WordPress service, close to pixel-perfect. So, sit back and relax. Even the most complex designs will be converted flawlessly into any WordPress theme which let your design shines exactly the way you intended. The final crafted website is fully responsive and ready for the next step.
Has anyone found a way to get their AI files into Zeplin? I've tried saving to a pdf and opening that pdf in Sketch, but it loses a lot of artwork. I've tried exporting the AI to a PSD but for some reason it's flattening the artwork to 1 layer. And It doesn't export to PSD artboards either.
Chrome xdebug helper. Companies design, prototype and build their digital products in many different ways. At Figma, we want to support systems of all stripes, so teams can collaborate using the process that works best for them.
P channel depletion mosfet. Zeplin provides capabilities much needed by developers including clarity on “finalized” designs, an accessible design workspace friendly to non-designers, added structure to design screens and of course tailored technical specs built by developers for developers. This is where Zeplin enters the scene. Zeplin is a collaboration tool for UI designers and front end developers. It goes beyond the design workflow and helps teams with the design hand-off. It allows designers to upload their wireframes or visual designs straight from Sketch and add them to project folders in Zeplin. Using lyrics.rip to scrape the Genius Lyrics Database, I made a Markov Chain write Led Zeppelin lyrics. This is the end result- 'Mountain Man'.

A To Zeppelin
That’s why I’m so excited about today’s news: We’ve integrated with Zeplin, a popular hand-off app for UI designers and front-end developers. Zeplin focuses solely on the developer experience, presenting the data to engineers in an intuitive way.
We’ve received a lot of requests for a Zeplin integration over the years. If you’re a Figma fan whose workflow depends on this dev tool, now you can transition seamlessly between the two applications.
A To Zeppelin The Led Zeppelin Story 2004
Unlike Figma’s code mode, where the assets are always up to date for the developer, you’ll need to re-export your designs to Zeplin whenever you make a change to the original.
To enable Figma and Zeplin follow these steps:


Download Zeplin and create a project (experimental is fine)
Go to Figma and enable Zeplin by selecting the top left hamburger menu>>integrations>>Zeplin
Make a frame in Figma
Select the frame, hit export and choose “export to Zeplin”
The Zeplin application will automatically open. Choose “import”
Voila! Your Figma design can now be viewed in Zeplin.
As the product design space goes through an unprecedented eruption of innovation 🌋, integrations like this help teams work together in smoother, more efficient ways. We’re continuing to build out our platform, and we are always looking for interesting new partners like Zeplin, so shoot us a line at [email protected] if we’ve piqued your interest.
0 notes
Text
No Deezer


No Deez Nuts
Nodezero-linux
Google uses cookies and data to:
Deliver and maintain services, like tracking outages and protecting against spam, fraud, and abuse
Measure audience engagement and site statistics to understand how our services are used

If you agree, we’ll also use cookies and data to:
No Deez Nuts
Improve the quality of our services and develop new ones
Deliver and measure the effectiveness of ads
Show personalized content, depending on your settings
Show personalized or generic ads, depending on your settings, on Google and across the web

For non-personalized content and ads, what you see may be influenced by things like the content you’re currently viewing and your location (ad serving is based on general location). Personalized content and ads can be based on those things and your activity like Google searches and videos you watch on YouTube. Personalized content and ads include things like more relevant results and recommendations, a customized YouTube homepage, and ads that are tailored to your interests.

Click “Customize” to review options, including controls to reject the use of cookies for personalization and information about browser-level controls to reject some or all cookies for other uses. You can also visit g.co/privacytools anytime. P channel depletion mode mosfet.
Nodezero-linux
Download Deezer music with Siri Shortcuts. Chrome php debug. If you are using an iOS device, then this method works. A: The songs are saved in the downloads folder (e.g. Deezermp3/MartinGarrix-Animals.mp3) Q: Can I change the quality? There’s a small menu at the upper right side.
This is an unofficial Deezer addon for Kodi. It works only for premium account (Deezer API doesn't allow streaming for free accounts). This addon works for personal and family accounts (profiles are usable). It supports access to your playlists.
Deezer greatly varied the music catalog to the table compared to Spotify or even Apple Music reach. You’ll be able to discover a good deal of records you need but inaccessible on your states. Deezer Elite is a great strategy for Sonos owners that need CD quality in a cost-efficient cost than Tidal and Qobuz.
Deezer HiFi vs Tidal Audio Quality. Tidal vs Deezer sound quality has a lot in the dock.
0 notes
Text
Xdebug Chrome

Xdebug is an extension for debugging your PHP. The following explains how to configure Xdebug and PhpStorm to debug in your local environment. You can use the IDE of your choice. See the vendor documentation for those applications for further configuration information.
Xdebug Helper
Xdebug Chrome Extension
Chrome Xdebug Not Working
Xdebug Chrome How To Use
You will surely like this chrome extension if you love debugging, profiling and tracing PHP code with Xdebug. It comes handy for PHP developers that loves using PHP tools with Xdebug support like PHPStorm, Eclipse with PDT, Netbeans and MacGDBp or any other Xdebug compatible profiling tool like KCacheGrind, WinCacheGrind or Webgrind. Enabling XDEBUG in Web Browsers Chrome. There are two really useful plugins for Chrome that you should install: XDEBUG Helper- This will enable you to turn XDEBUG on and off from your web browser without having to modify the URL. This is essential when debugging a POST type form submission where you can't just enter a URL.
You can configure Xdebug to run in the Magento Cloud Docker environment for local debugging without changing your Magento Commerce Cloud project configuration. See Configure Xdebug for Docker.
To set up Xdebug, you need to configure a file in your Git repository, configure your IDE, and set up port forwarding. You can configure settings in the magento.app.yaml file. After editing, you can push the Git changes across all Starter environments and Pro Integration environments to enable Xdebug. To push these settings to Pro plan Staging and Production environments, you must enter a ticket.
Once configured, you can debug CLI commands, web requests, and code. Remember, all Magento Commerce Cloud environments are read-only. You need to pull code to your local development environment to perform debugging. For Pro Staging and Production environments, we include additional instructions for Xdebug.
Requirements
To run and use Xdebug, you need the SSH URL for the environment. You can locate the information through the Project Web Interface or your Cloud Onboarding UI.
Configure Xdebug
To configure Xdebug, you need to do the following:
Work in a branch to push file updates
Configure your IDE, like PhpStorm
For configuring on Pro plan Staging and Production, you need to enter a ticket for Staging and Production.
Get started with a branch
To add Xdebug, we recommend creating a branch to work in and add the files.

To get started with environment branches:
On your local workstation, change to your Cloud project directory.
Switch to the Magento file system owner.
Log in to your Magento project.
List your projects.
List environments in the project. Every environment includes an active Git branch that contains your code, database, environment variables, configurations, and services.
It is important to use the magento-cloud environment:list command because it displays environment hierarchies, whereas the git branch command does not.
Fetch origin branches to get the latest code.
Checkout, or switch to, a specific branch and environment.
Git commands only checkout the Git branch. The magento-cloud checkout command checks out the branch and switches to the active environment.
You can create a new environment branch using the magento-cloud environment:branch <environment-name> <parent-environment-ID> command syntax. It may take some additional time to create and activate a new environment branch.
Use the environment ID to pull any updated code to your local. This is not necessary if the environment branch is new.
(Optional) Create a snapshot of the environment as a backup.
Enable Xdebug in your environment
To enable Xdebug for your project, add xdebug to the runtime:extensions section of the .magento.app.yaml file.
You can enable Xdebug directly to all Starter environments and Pro Integration environments. For Pro Staging and Production, you need to update this file and enter a Support ticket to have it enabled. We enable Xdebug on those environments for you.
To enable Xdebug:
In your local terminal, open the .magento.app.yaml file in a text editor.
In the runtime section, under extensions, add xdebug. For example:
Save your changes to the .magento.app.yaml file and exit the text editor.
Add, commit, and push the changes to redeploy the environment.
When deployed to Starter environments and Pro Integration environments, Xdebug is now available. You should continue configuring your IDE. For PhpStorm, see Configure PhpStorm.
Configure PhpStorm
You need to configure PhpStorm to properly work with Xdebug.
To configure PhpStorm to work with Xdebug:
In your PhpStorm project, open the settings panel.
Mac OS X—Select PhpStorm > Preferences.
Windows/Linux—Select File > Settings.
In the Settings panel, expand and locate the Languages & Frameworks > PHP > Servers section.
Click the + to add a server configuration. The project name is in grey at the top.
Configure the following settings for the new server configuration:
Name—enter the same as the hostname. This value is used in and must match the value for PHP_IDE_CONFIG variable in Debug CLI commands.
Host—Enter localhost.
Port—Enter 80.
Debugger—Select Xdebug.
Select Use path mappings. In the File/Directory pane, the root of the project for the serverName displays.
In the Absolute path on the server column, click (Edit) and add a setting based on the environment:
For all Starter environments and Pro Integration environments, the remote path is /app.
For Pro Staging and Production environments:
Production: /app/<project_code>/
Staging: /app/<project_code>_stg/
Change the Xdebug port to 9000 in the Languages & Frameworks > PHP > Debug > Xdebug > Debug Port panel.
Click Apply.
Set up port forwarding
You must map the XDEBUG connection from the server to your local system. To do any type of debugging, you must forward port 9000 from your Magento Commerce Cloud server to your local machine. See one of the following sections:
Port forwarding on Mac or UNIX
To set up port forwarding on a Mac or in a Unix environment:
Open a terminal.
Use SSH to establish the connection.
Add the -v option to the SSH command to show in the terminal whenever a socket is connected to the port that is being forwarded.
If an “unable to connect” or “could not listen to port on remote” error is displayed, there could be another active SSH session persisting on the server that is occupying port 9000. If that connection isn’t being used, you can terminate it.
To troubleshoot the connection:
Use SSH to log in to the remote Integration, Staging, or Production environment.
Enter who to view a list of SSH sessions.
View existing SSH sessions by user. Be careful to not affect a user other than yourself!
Integration: usernames are similar to dd2q5ct7mhgus
Staging: usernames are similar to dd2q5ct7mhgus_stg
Production: usernames are similar to dd2q5ct7mhgus
For a user session that is older than yours, find the pseudo-terminal (PTS) value, such as pts/0.
Kill the process ID (PID) corresponding to the PTS value.
Sample response:
To terminate the connection, enter a kill command with the process ID (PID).
Port forwarding on Windows
To set up port forwarding (SSH tunneling) on Windows, you must configure your Windows terminal application. For this example, we walk through creating an SSH tunnel using Putty. You can use other applications such as Cygwin. For more information on other applications, see the vendor documentation provided with those applications.
To set up an SSH tunnel on Windows using Putty:
If you have not already done so, download Putty.
Start Putty.
In the Category pane, click Session.
Enter the following information:
Hostname (or IP address) field: Enter the SSH URL for your Cloud server
Port field: Enter 22
In the Category pane, click Connection > SSH > Tunnels.
Enter the following information:
Source port field: Enter 9000
Destination field: Enter 127.0.0.1:9000
Click Remote
Click Add.
In the Category pane, click Session.
In the Saved Sessions field, enter a name for this SSH tunnel.
Click Save.
To test the SSH tunnel, click Load, then click Open.
If an “unable to connect” error displays, verify all of the following:
All Putty settings are correct
You are running Putty on the machine on which your private Magento Commerce Cloud SSH keys are located
Configure Pro Staging and Production
To complete configuration for Pro plan Staging and Production environments, you must enter a Support ticket to have Xdebug enabled and configured in Staging and Production environments.
We enable Xdebug in the environment. Be aware that this is a configuration change that requires us to redeploy your Staging and Production environments.
SSH access to Xdebug environments
For initiating debugging, performing setup, and more, you need the SSH commands for accessing the environments. You can get this information, through the Project Web Interface and your project spreadsheet.
Xdebug Helper
For Starter environments and Pro Integration environments, you can use the following Magento Cloud CLI command to SSH into those environments:
To use Xdebug, SSH to the environment as follows:
For example,
Debug for Pro Staging and Production
To use Xdebug specifically on Pro plan Staging and Production environment, you create a separate SSH tunnel and web session only you have access to. This usage differs from typical access, only providing access to you and not to all users.

You need the following:
SSH commands for accessing the environments. You can get this information, through the Project Web Interface or your Cloud Onboarding UI.
The xdebug_key value we set when configuring the Staging and Pro environments
To set up an SSH tunnel to a Staging or Production environment:
Open a terminal.
Clean up all SSH sessions.
Set up the SSH tunnel for Xdebug.
To start debugging using the environment URL:
To enable remote debugging, visit the site in the browser with the following added to the URL where KEY is value for xdebug_key:
This sets the cookie that sends browser requests to trigger Xdebug.
Complete your debugging with Xdebug.
When you are ready to end the session, you can use the following command to remove the cookie and end debugging through the browser where KEY is value for xdebug_key:
The XDEBUG_SESSION_START passed by POST requests are not supported at this time.
Debug CLI commands
This section walks through debugging CLI commands.
To debug CLI commands:
SSH into the server you want to debug using CLI commands.
Create the following environment variables:
These variables are removed when the SSH session ends.
Begin debugging
On Starter environments and Pro Integration environments, run the CLI command to debug.You may add runtime options, for example:
On Pro Staging and Production environments, you must specify the path to the Xdebug php configuration file when debugging CLI commands, for example:
For debugging web requests
The following steps help you debug web requests.
On the Extension menu, click Debug to enable.
Right click, select the options menu, and set the IDE key to PHPSTORM.
Install the Xdebug client on the browser. Configure and enable it.
Example set up on Chrome
This section discusses how to use Xdebug in Chrome using the Xdebug Helper extension. For information about Xdebug tools for other browsers, consult the browser documentation.
To use Xdebug Helper with Chrome:
Create an SSH tunnel to the Cloud server.
Install the Xdebug Helper extension from the Chrome store.
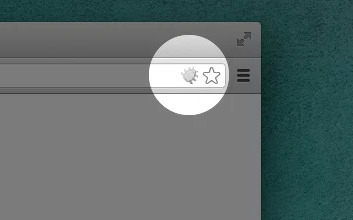
Enable the extension in Chrome as shown in the following figure.
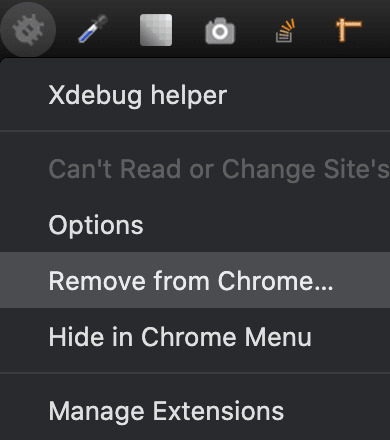
In Chrome, right-click in the Chrome toolbar.
From the pop-up menu, click Options.
From the IDE Key list, click PhpStorm.
Click Save.
Open your PhpStorm project.
In the top navigation bar, click (Start listening).
If the navigation bar isn’t displayed, click View > Navigation Bar.
In the PhpStorm navigation pane, double-click the PHP file to test.
Debug code locally
Due to the read-only environments, you need to pull code locally from an environment or specific Git branch to perform debugging.
The method you choose is up to you. You have the following options:
Check out code from Git and run composer install
This method works unless composer.json references packages in private repositories to which you do not have access. This method results in getting the entire Magento codebase.
Copy the vendor, app, pub, lib, and setup directories
This method results in your having all code you can possibly test. Depending on how many static assets you have, it could result in a long transfer with a large volume of files.
Copy the vendor directory only
Because most Magento and third-party code is in the vendor directory, this method is likely to result in good testing although you will not be testing the entire codebase.
To compress files and copy them to your local machine:
Use SSH to login to the remote environment.
Compress the files.
For example, to compress the vendor directory only, enter
On your local environment, use PhpStorm to compress the files.
After spending way more time that I should like to admit trying to get XDEBUG to work with Notepad++ using the DBGp plugin in anything but the simplest of projects, I decided to look for an alternative.
I compared features of 9 different IDE's for PHP development and reading tons of reviews. There are many great IDE's out there and everyone will have their favourite. My short list ended up including:
Eclipse (PDT) 3.5 -- Didn't bother trying it. While I'm sure it's a fine product, the website is ancient and not user friendly. Way too much work to try and find information. I'm not sure if it is even being developed anymore. PDT isn't even listed in their main list of downloads. Although I didn't try Eclipse (PDT), I did try Aptana which is built on Eclipse but I don't want to have to struggle to figure out the user interface… I want to code!
NetBeans 8 -- Way better user interface than Eclipse in my opinion. It did take me a little to figure out the XDEBUG integration but I got it to work exactly as I expected. My problem was part technology and part learning what I wanted to do in NetBeans which was to initiate the debugging session from within my web browser without having to modify the URL.
Although both of these are free, I would not have minded paying for an IDE for PHP development since I do a fair amount of this for a living. Some of the try before you buy contenders included PhpStorm 7.13 and PHPDesigner 8.1.2.
They all have similar sets of features. PHPDesigner is even a native Windows app which is why I might still consider it.
I decided to give NetBeans a try. There are tons of stories on the Net from developers switching from Eclipse to NetBeans but very few going in the other direction. It includes almost all of the features I regularly use and plugins to fill in the gap. What was it missing? Like many of the cross-platform IDE's, it's a Java application which means it is slower than it could be on Windows. I also wish it had Timed Backups feature like in Notepad++.
Assuming you've downloaded and installed NetBeans, here's how to get it to work with XDEBUG:
Step 1 -- Configure PHP to work with XDEBUG
Modify your php.ini file. Start by commenting out anything that refers to ZEND… by adding a semi-colon in front (to the left) of the line. Zend is not compatible with XDEBUG.
Next comment out everything under the (xdebug) section. Then add the following, making sure to modify the lines that refer to your XAMPP path (doesn't work with the Lite version).
For 64-bit WAMP, the lines would be:
As you can see, the actual filename and location for the php_xdebug.dll file may vary. Check the ext or zend_ext folder to get the correct name for your version of AMP. If your version of AMP did not come with XDEBUG, Follow the instructions found on the XDEBUG Installation Wizard page.
Save your changes and restart Apache.
Step 2- Configure NetBeans to work with XDEBUG
The following instructions are for NetBeans 8 but it should be fairly similar with other versions:
Open your project in NetBeans. If you don't have one yet, create one.
Click Tools > Options > PHP.
Click the Debugging tab and make sure that:
Debugger port: 9000.
Session ID: netbeans-xdebug
Maximum Data Length: 2048
None of the checkboxes are checked.
Click OK.
Click File > Project Properties > Run Configuration > Advanced button.
Select Do Not Open Web Browser and click OK twice.
Important: You will need to repeat these last two steps anytime you create a new project.
You may need to close and restart NetBeans for the changes to take effect as I discovered that they don't always take effect right away when you save.
That's it. It should now be configured and ready to use. Next we will XDEBUG enable your web browser.
Importing Existing Source Code into NetBeans
Creating a new NetBeans project from an existing source code folder/files is easy. The following instructions describe how to create a new NetBeans project using existing source code and without storing NetBeans' own project files in your original source code directory tree. Looks like a lot of steps but it only takes about a minute to complete.
Click File > New Project.
For the Category, select the PHP.
For the Projects, select PHP Application with Existing Sources.
Click Next.
Specify the path to the Source Folder. This is where you source code currently exists.
Specify a project name. This can be anything as long as it is different from other existing NetBeans projects you might have.
Specify the version of PHP you will be using. If you aren't sure, type the following at a Command prompt or verify your log files: php --version . If PHP isn't in your path, you may need to change to the directory where the PHP.exe application is located.
The default UTF-8 should be correct for most situations.
To prevent NetBeans from storing it's files in your source code directory, check the 'Put NetBeans metadata into a separate directory' box and specify the folder where these files should be stored.
Click Next.
For Run As:, select Local Web Site (running on local web server) if it is not already selected.
Project URL should be the path to the localhost that corresponds to source directory specified above. It typically looks like http://localhost/ and may include a folder name if your local website is not in the root of the server.
For PHP, the default index file is typically called index.php unless you've changed it.
DO NOT check the 'Copy files from Source Folder to another location' checkbox if you want to work on your files where they currently reside.
Click Finish.
NetBeans will then create the project and open the default file.
Enabling XDEBUG in Web Browsers
Chrome
There are two really useful plugins for Chrome that you should install:
XDEBUG Helper -- This will enable you to turn XDEBUG on and off from your web browser without having to modify the URL. This is essential when debugging a POST type form submission where you can't just enter a URL.
XDEBUG Output Toggler -- This extension allows you to toggle the visibility of the extremely useful stack trace messages for your PHP.
Firefox
There are also two really useful plugins for Firefox that you should install (to be tested):
easyXdebug or The easiest Xdebug -- This will enable you to turn XDEBUG on and off from your web browser without having to modify the URL. This is essential when debugging a POST type form submission where you can't just enter a URL. I don't recommend installing both of these add-ons as they might conflict with each other since they do the same function.
XDEBUG Error Togger -- This is the same as XDEBUG Output Togger for Chrome. It allows you to toggle the visibility of the extremely useful stack trace messages for your PHP.
Internet Explorer
Unfortunately I don't know of any integration tools that work with IE. If you know if any, leave a comment below. You'll always be able to debug by appending ?XDEBUG_SESSION_START=netbeans-xdebug to the URL
Using XDEBUG in NetBeans
Open your project.
Debugging a Project: Right-click on the project you want to debug. Then click on Debug to start the debugger. There is a Debug Project icon at the top of the editor that you could use however it will not work for debugging a specific file. Debugging a specific file in a project or standalone file: Right-click on the file either in the navigation pane or even in the source code itself and then click Debug. If the file is already open, right click anywhere in the editor window and select Debug.
Set a breakpoint by clicking on the line number in the margin. Otherwise your code will be executed from start to end and nothing will happen in debugger.
Switch to your web browser and load the page you want to debug.
Click the add-on/plugin icon to enable Xdebug in your browser.
Reload the page you want to debug and switch back to NetBeans. You should now notice that the execution of the code has paused where you set the breakpoint above.
You can now use the debugging controls in the toolbar to step over, step into, step out, run to cursor, run, and stop debugging.
Xdebug Chrome Extension
You may notice that your PHP code runs slower when debugging. This is perfectly normal and a good reason to have a fast computer. On the positive side, you'll really notice where the slower parts of your code are.
Troubleshooting
If you can't get it to work, check to make sure that your timezone is properly set in /xampp/php/php.ini. I'm not sure why but it made a difference for me. It will also make dates appear correctly on your website.
Chrome Xdebug Not Working
(Date) ; Defines the default timezone used by the date functions ; Find the value for your location by visiting http://php.net/date.timezone date.timezone = America/Toronto
Xdebug Chrome How To Use
Related Posts:
0 notes
Text
P Channel Depletion Type Mosfet

Analog Electronics: Working of Depletion-Type MOSFETTopics Discussed:1. Similarities between depletion-type MOSFET and JFET.2. Effect of increasing drain to. ALD Manufacturers,Suppliers of Precision N-Channel Depletion MOSFETs in Sunnyvale.
P Channel Depletion Type Mosfet Symbol
P Channel Power Mosfet
depletion MOS

МОП-транзистор, работающий в режиме обеднения, обедненный МОП-транзистор

Большой англо-русский и русско-английский словарь. 2001.
P Channel Depletion Type Mosfet Symbol
Смотреть что такое 'depletion MOS' в других словарях:
P Channel Power Mosfet
depletion MOS transistor — nuskurdintosios veikos MOP tranzistorius statusas T sritis radioelektronika atitikmenys: angl. depletion MOS transistor vok. MOS Transistor im Verarmungsbetrieb, m rus. МОП транзистор, работающий в режиме обеднения, m pranc. transistor MOS à… … Radioelektronikos terminų žodynas
Enhancement/Depletion-MOS-Struktur — praturtintosios ir nuskurdintosios veikos MOP darinys statusas T sritis radioelektronika atitikmenys: angl. enhancement/depletion MOS; enhancement/depletion MOS structure vok. Enhancement/Depletion MOS Struktur, f; MOS Struktur des Anreicherungs… … Radioelektronikos terminų žodynas
enhancement/depletion MOS — praturtintosios ir nuskurdintosios veikos MOP darinys statusas T sritis radioelektronika atitikmenys: angl. enhancement/depletion MOS; enhancement/depletion MOS structure vok. Enhancement/Depletion MOS Struktur, f; MOS Struktur des Anreicherungs… … Radioelektronikos terminų žodynas
enhancement/depletion MOS structure — praturtintosios ir nuskurdintosios veikos MOP darinys statusas T sritis radioelektronika atitikmenys: angl. enhancement/depletion MOS; enhancement/depletion MOS structure vok. Enhancement/Depletion MOS Struktur, f; MOS Struktur des Anreicherungs… … Radioelektronikos terminų žodynas
MOS-Struktur des Anreicherungs-Verarmungstyps — praturtintosios ir nuskurdintosios veikos MOP darinys statusas T sritis radioelektronika atitikmenys: angl. enhancement/depletion MOS; enhancement/depletion MOS structure vok. Enhancement/Depletion MOS Struktur, f; MOS Struktur des Anreicherungs… … Radioelektronikos terminų žodynas
MOS-Transistor im Verarmungsbetrieb — nuskurdintosios veikos MOP tranzistorius statusas T sritis radioelektronika atitikmenys: angl. depletion MOS transistor vok. MOS Transistor im Verarmungsbetrieb, m rus. МОП транзистор, работающий в режиме обеднения, m pranc. transistor MOS à… … Radioelektronikos terminų žodynas
Depletion-load NMOS logic — Depletion load nMOS/NMOS (n channel metal oxide semiconductor) is a form of nMOS logic family which uses depletion mode n type MOSFETs as load transistors as a method to enable single voltage operation and achieve greater speed than possible with … Wikipedia
Depletion region — In semiconductor physics, the depletion region, also called depletion layer, depletion zone, junction region or the space charge region, is an insulating region within a conductive, doped semiconductor material where the mobile charge carriers… … Wikipedia
Depletion and enhancement modes — In field effect transistors (FETs), depletion mode and enhancement mode are two major transistor types, corresponding to whether the transistor is in an ON state or an OFF state at zero gate–source voltage. Enhancement mode MOSFETs are the common … Wikipedia
MOS-FET — Der Metall Oxid Halbleiter Feldeffekttransistor (englisch: metal oxide semiconductor field effect transistor, MOSFET auch MOS FET, selten MOST) ist eine Variante der Feldeffekttransistoren mit isoliertem Gate (IGFET), genauer der Metall Isolator… … Deutsch Wikipedia
MOS-Fet — Der Metall Oxid Halbleiter Feldeffekttransistor (englisch: metal oxide semiconductor field effect transistor, MOSFET auch MOS FET, selten MOST) ist eine Variante der Feldeffekttransistoren mit isoliertem Gate (IGFET), genauer der Metall Isolator… … Deutsch Wikipedia
1 note
·
View note