
A crochet blog with free patterns you can change to fit sizes you want!
Last active 2 hours ago
Don't wanna be here? Send us removal request.
Statistics
We looked inside some of the posts by nerdy-stitches and here's what we found interesting.
Average Info
Notes Per Post
327
Likes Per Post
219
Reblog Per Post
108
Reply Per Post
0
Time Between Posts
1 month
Number of Posts By Type
Text
13
Last Seen Tumblr Blogs


Fun Fact
Tumblr’s website traffic is steadily declining.
Text
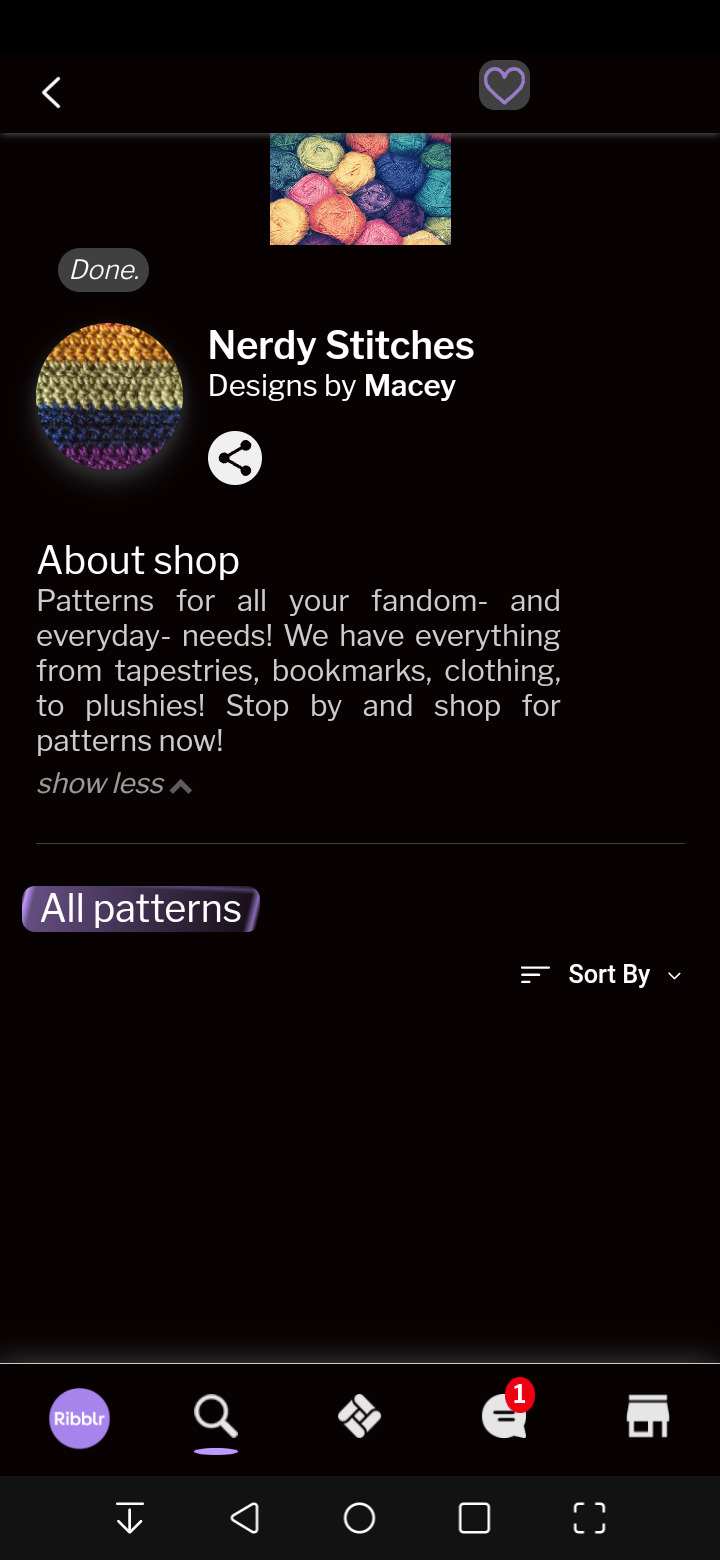
Introducing My Pattern Shop on Ribblr!
Due to my mom's recent passing, I need to start selling my patterns to help out my family. Don't worry! My patterns here on Tumblr will still be free! But if you have the Ribblr app and want to buy my patterns, I now have my own shop and will be posting soon. I will try to keep my prices low so anyone can afford them.
2 notes
·
View notes
Text
It's spooky season! You know what that means??? Go absolutely batshit insane trying to make a textured plushie of the lamb from Cult of the Lamb while absolutely hating puff stitches but I'm actually getting better at them but I still hate them with a fiery passion!!!


#crochet#crocheters of tumblr#crocheting#yarn#yarn crafts#cult of the lamb#cotl lamb#amigurumi#puff stitch#I hate this stitch so much!!!#aaaahhhh
5 notes
·
View notes
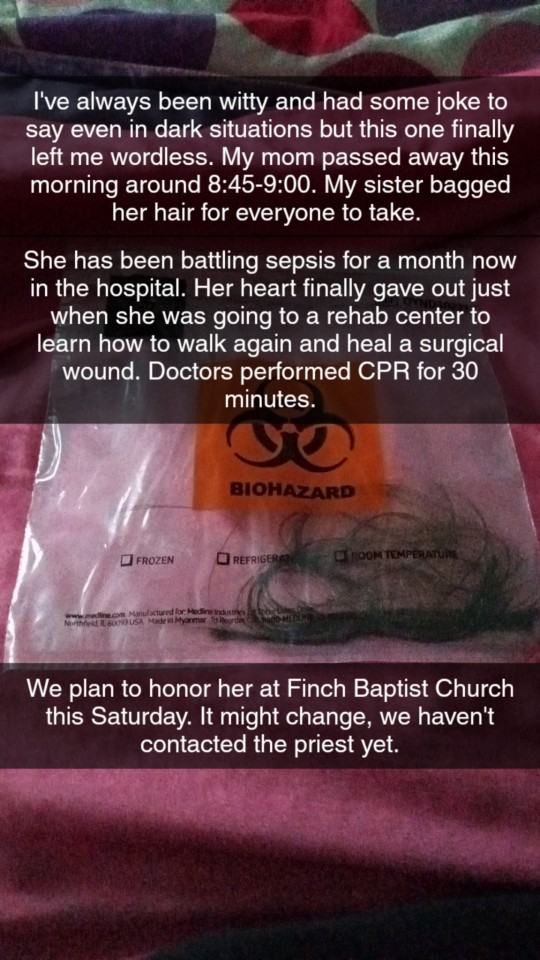
Text
I don't feel like retyping an obituary. I'm just reposting my Snapchat story and I'll repost this to my other accounts. Sorry if I don't post for a long time or react to sent messages.
3 notes
·
View notes
Text
Historian: People used to knit Morse code to tell people secret messages during the war.
Me: So you're telling me I can make my sister a hat that says "butt face" and she won't know unless she learns Morse code? Tell me more-
#yarn#yarn crafts#knitting#siblings#shenanigans#as the younger gay brother it's my duty to insult my sister but I do it in ✨style✨
248 notes
·
View notes
Text
Crochet Pattern: This Jolteon will end up being 7 inches in height!
Me Looking at The Massive Jolteon Head I Took Two Days to Complete: Yeah, no. It ain't gonna be that small. 🥴

That's my head for reference.
6 notes
·
View notes
Text
Hey, guys! I recently entered into an online amigurumi competition for Halloween and would appreciate it if everyone who sees this would go to Hobbii.com and like my entry! I knitted a vampire frog, it's so scary it's almost... Ribbiting! 😆
hobbii.com/competitions/halloween-amigurumi-championship/participants/9a627e2c-aa78-4430-a5e7-e22722f1581c


#knitting#knitblr#knitters of tumblr#hand knitted#yarn crafts#yarn#yarnblr#competition#hobbii#hobbies
2 notes
·
View notes
Text
Sea Bunny Plush Pattern
Last night I was free handing a plush I wanted to make for my cousin's daughter and came up with a prototype pattern for a sea bunny plush. It came out almost perfect and the only thing I would change is my hook size to reduce the holes in the plush and swap my embroidery with buttons. Anyways- here's the pattern!


Materials:
White yarn
Black yarn
A crochet hook
Darning needle
Scissors
Optional: jewelery wire for ear support (not recommended if making for small children)
Safety eyes or buttons (optional if you prefer embroidery)
Pattern
This pattern is worked with double crochet stitches, not the usual single stitch found in amigurumi. I tend to have trouble making magic circles with single stitches as it makes a tight knot with the first stitch so I went with double crochet.
Body
Row 1
Create a magic circle and crochet 6 stitches then pull the circle closed.
Row 2
Increase in every stitch.
Row 3
Stitch one, then increase. Repeat throughout the row.
Row 4
Stitch two, then increase. Repeat throughout the row.
Row 5
Stitch three, then increase. Repeat throughout the row.
Rows 6-10
Stitch in the round without increases.
Row 11
Stitch three, then decrease. Repeat throughout the row.
Row 12
Stitch two, then decrease. Repeat throughout the row.
Row 13
Stitch one, then decrease. Repeat throughout the row. Stuff the body until form then squish into desired shape.
Row 14
Decrease in every stitch. Sew the hole shut.
Ears
The ears are worked into the body from the third row from the top of the sea bunny.
Row 1
Work four single crochet stitches into the body of the sea bunny.
Rows 2-5
Double crochet in every stitch. Make sure to chain 2 before each row, this will count as an extra stitch.
Row 6
Decrease, stitch, decrease.
Row 7
Decrease, decrease.
Row 8
Decrease and tie off. Weave ends into the ear for extra support. If desired, weave in jewelry wire to keep it upright.
Repeat rows 1-8 for the other ear.
Tail
To make the tail of the sea bunny, create a pom-pom by wrapping black yarn around 3-4 fingers until you have your desired thickness. Tie the bundle of yarn then snip the loops. Using the yarn you tied the bundle with, secure the tail to the back of the sea bunny. Fluff up the strands of yarn into a ball then trim until it resembles a pom-pom. For extra fluff, don't trim the yarn. Instead, use a comb or dog brush to fluff out the yarn, shape it, then trim to desired size.
Face
Decorate the sea bunny with a cute little face using either embroidery, safety eyes, or buttons. Attach the eyes onto row four from the top of the head, two stitches from the middle. In the middle, one row down, attach the nose, and if desired, embroider a mouth. If using buttons, make sure that they are tight enough to not move much, especially if you're making the sea bunny for young children. If using safety eyes, melt the plastic on the back of the eyes inserted into the body of the bunny to ensure that it will not get loose.
Speckles
Use a darning needle to embroider random speckles onto the bunny. You can add as many or as few as you desire.
If you followed these directions, then you will have yourself a cute and fluffy little sea bunny plush! Happy crafting!
Sea Bunny plush is the property of Macey Garrett (Maxwell Garrett 🏳️⚧️). All rights are reserved. You may not publish this pattern for profit. If published, give credit to the original maker under the blog name Nerdy Stitches. Only allowed publications are free patterns.
1 note
·
View note
Text
I'm working on a new knitting project which is a plushie of the Pokémon Oddish and I'm using my two smallest circular needles, the largest of the two is being used for the body of the plush and it's still huge.

For context, that's a 24" cord. It's big enough to make me a hat. My smallest needles are half that size and going to make the feet. It's gonna be one dummy thiccc Oddish. 😅
1 note
·
View note
Text
I reposted this to my main blog and realized while doing so that I had forgotten to mention that I was taking photos of my grandma's crochet work to show my knitting club and that's why I just now noticed that she incorporated my design into her piece.
I recently joined a knitting club at my local library and everyone kept talking about who they learned knitting and crochet from and I've told them that I learned amigurumi (crochet stuffed animals) because I grew up watching my Irish grandma crochet tapestries so I taught myself to impress her. But before I learned to crochet I learned how to design tapestry patterns and made a little heart pattern for my grandma to make. A few years later she made a pillow cover for her and my grandpa's anniversary and for 13 years afterwards I never noticed the bottom half was my pattern and I just wanted to show everyone.

That's my pattern I made when I was 8! I have ADHD so I just never noticed it the whole time it was there. I made that heart pattern!
25 notes
·
View notes
Text
I recently joined a knitting club at my local library and everyone kept talking about who they learned knitting and crochet from and I've told them that I learned amigurumi (crochet stuffed animals) because I grew up watching my Irish grandma crochet tapestries so I taught myself to impress her. But before I learned to crochet I learned how to design tapestry patterns and made a little heart pattern for my grandma to make. A few years later she made a pillow cover for her and my grandpa's anniversary and for 13 years afterwards I never noticed the bottom half was my pattern and I just wanted to show everyone.
That's my pattern I made when I was 8! I have ADHD so I just never noticed it the whole time it was there. I made that heart pattern!
25 notes
·
View notes
Text
Attention fellow crocheters!
I know I haven't posted in months but it has come to my attention that the yarn store Hobbii is doing online crochet competitions. I figured I'd put that out there in case anyone is wanting to do something with their crochet hobby. Right now they have two crochet competitions and one knitting competition that will be going until mid August. I myself am working on a project to enter into the current summer amigurumi competition that will be my most complicated piece to date and a huge leap in skill for an intermediate crocheter like me. For those who enter be sure to post the link to your entry in your blogs or even this comment section so people can vote for it. Winners get gift cards to the shop. I am not being sponsored or anything to talk about it but I just wanted to share that there is an opportunity to share your projects for a chance at prizes. And stay tuned to my blog because once I'm done with my project I will be sharing it!
4 notes
·
View notes
Text
Crochet Apron for Mother's Day
This pattern is great for anyone who has a mother or grandmother that loves cooking. I designed this pattern for my grandma because she's always cooking for everyone, especially when something happens and someone can't cook for themselves. This pattern is just for the apron itself, if you want to add special details, feel free to do so! I may even make a few tutorials for embroidery you can add to any project. This pattern is one of two I am making for mother's day this year so stay tuned for the next pattern! You will need a few measurements before you start which are:
Across the chest and under the breasts
Across the hips
Before we start, you need to know how to do a linked double crochet. I chose this specific stitch so the apron is quick to work up but can be functional in the kitchen because it has less holes for food to fall through. I will make tutorials for different crochet stitches soon. To start the project, chain enough loops to cover your chest area, or if you have the measurements of the person you're making this for, chain enough for their chest.
Linked double crochet until you have enough rows to cover the chest.
Continue linked double crochet stitches but slowly increase on the edges of the piece until you get to the hip area. For best results, skip a row after each increase row. One increase per edge.
If the piece is too narrow for the hip size, chain until you get enough stitches to cover the hips. You may have to tie off one chain to chain on the other side.
Continue linked double crochets until you get to your desired length.
For the straps of the apron follow this:
For the straps, we're going to do a ribbed stitch. It's very simple to do, you can do any stitch you want for a ribbed stitch, but what you want to do is one row for half double, double, and triple crochet stitches and two rows for single crochet stitches.
Once you have however many rows for your desired stitch, turn your project and stitch into the front loops.
Repeat steps one and two until you get to the length you need for your strap. You need a neck strap and straps to tie the apron with. A total of 3. Two long straps and one short strap. If you want to do a border for the apron, repeat the strap process and sew on the border to the apron. For the corners, double crochet, chain two, then increase to form a clean edge.
For a pocket follow these steps:
Chain however many loops are needed for the pocket size you want. You can do any size pocket but most aprons have a big pocket on the waist.
Linked double crochet five rows for a big pocket, 3 for a small pocket.
Start decreasing at the edges for every row.
Keep decreasing until you have five stitches left for a big pocket, 2 for a small pocket.
Tie off and sew the pocket onto the apron.
If you want a border for the pocket, follow the strap pattern.
Remember that this pattern is measure to size. There are no set stitches or rows because everyone has a different body shape so it's up to you to decide the number of stitches and rows. This project is easy to work up but I wouldn't leave it until the last minute if you want to have a good result. The apron is also customizable as it has plenty of space for embroidery and any other details you want to put on it.
Be warned that I am NOT responsible if you make this for your wife and you get an early funeral! Make at your own risk! Not all women will take it well! 😅
If anyone got that vine reference, I love you for it!
I am new to making patterns and such so if you have any tips, resources, or critique to make my patterns better, please share in the comments!
#crocheters of tumblr#crochet#crocheting#crochet pattern#free crochet pattern#crafts#yarn crafts#yarn#mother#mother's day
3 notes
·
View notes
Text
Welcome to my Tumblr blog!
My name is Max, the creator behind this blog, as well as the creator of the blog sketchbook-magic, but I rarely post.
I'm a trans male, 20 years old, and I like crochet, video games, cartoons, Broadway musicals, and anime.
My designs revolve around my interests and I leave many up to you to chose how many stitches and rows they have. All of them are free and if you wish to have the same results as me, I will put my process in each post unless the designs are reliant on size such as phone pouches and clothes.
Crocheters rejoice as all patterns found on this blog are FREE! No links, no pay walls! If you can find them on my blog, then you can crochet it!
If you have any questions about pattern instructions, how to do certain stitches, or anything else, feel free to ask!
Unless stated to be from me, images found on this blog do not belong to me and can be found on Google Images.
#blog intro#introducing post#introducing myself#introduction#crocheting#crochet#crocheters of tumblr#blogger
2 notes
·
View notes