
ninjagocosplays
Ninjago Crafts and Stuff
Your hub for Ninjago Cosplay things
26 posts
Last active 2 hours ago
Don't wanna be here? Send us removal request.
Last Seen Blogs

survivorsolomonislands
Tumblr Survivor: Solomon Islands

sharpcbjects-a
the afterglow.

novellenight
Novelle Night

phyllisanthos
O Carvalho de Phyllis

thatlazyblog
K. (aren)
Text
I'm aware no one asked, but I do want to bring up the question of "you gave the resource and instructions, but I don't have a sewing machine so I can't make this!"
A lot of my sewing is done by hand, and often wonderfully portable! When I'm on campus, I have a small pouch with some materials and tools on hand for long breaks, let's have a look.
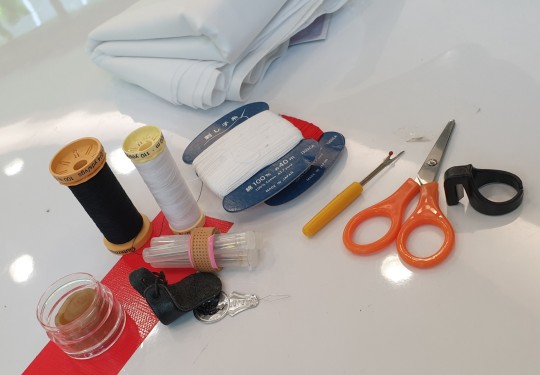
These are the very basics I always carry
-my threads, and a cake of beeswax if I'm bringing cotton, silk or linen threads. I enjoy using cotton threads if only because polyester thread, being completely synthetic is not my jam. These are from Gütermann, the orange border denotes cotton thread, the pale yellow is polyester (which I'm using only because the store is all out of white cotton threads), and not pictured is bright yellow for linen and light blue for silk. I believe green is for top stitch, gray for upholstery; but I may be wrong.
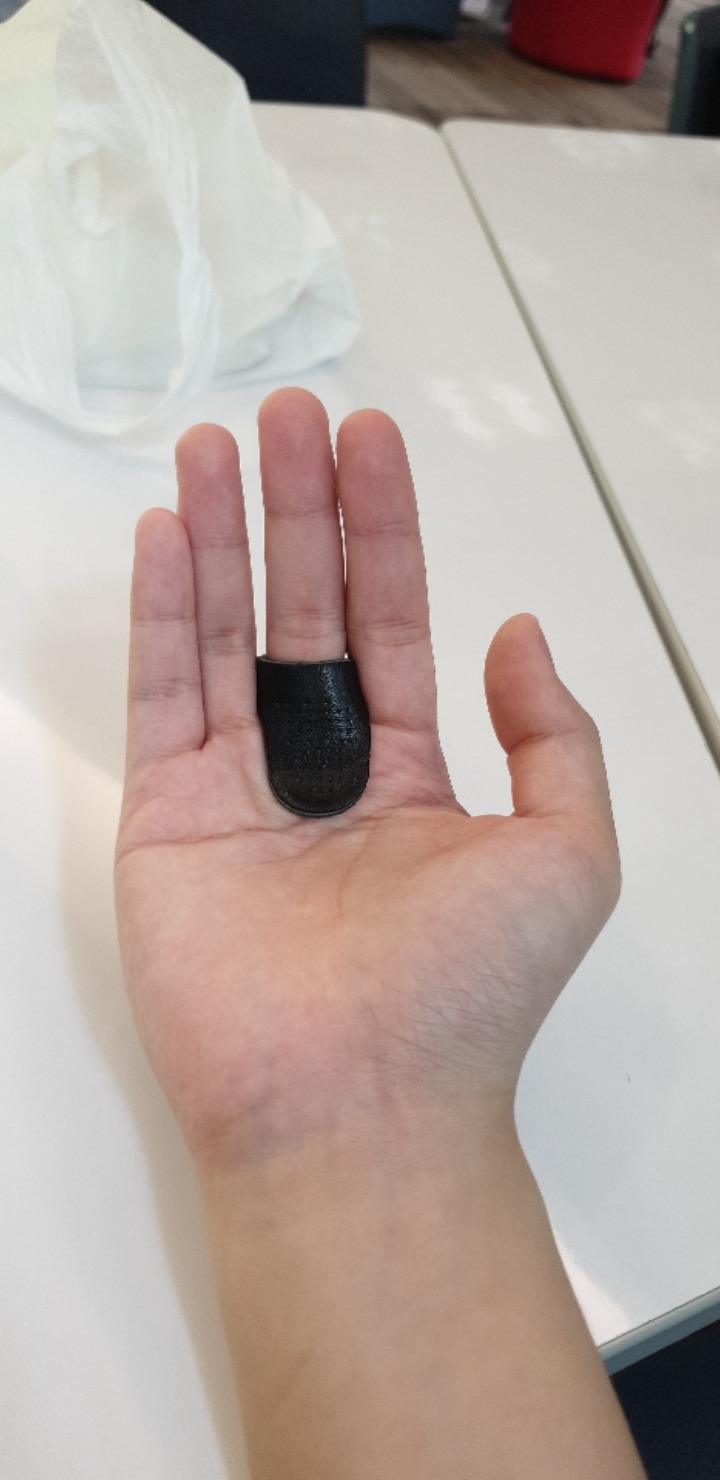
-some thimbles, an absolute necessity. Depending on the types of stitching, you may need more than one. The black one you see is actually a leather sashiko thimble which is worn like this:
-needles! I have them in little polypropylene tubes, sorted by type and function. One holds my wee tiny no. 10 sharps, one holds my sashiko needles and the last holds some thicker needles to repair my father's workwear. You can use small glass tubes with cork caps, but I use what I have for now.
-a seam ripper. Little guy often goes missing, so I also own a ring cutter, which is a ring you wear on your index finger on your non-dominant hand to cut threads with.
-small scissors. These came out of a first aid kit I used to carry, but their small and wonderfully portable size makes it easy to carry, and is quite sharp - it's meant cut the gauze dressing for your wound quite cleanly after all.
Bonus mentions to my two cards of sashiko threads, and the little needle threader that I have but never use.
You may want to carry fabric marking supplies like a small pencil and tailor's chalk, but I often leave them out because I tend to cut my fabric at home. I don't often carry pins with me unless I think I need it, so that's also something you can consider.
#sewing essentials#historical sewing#historical japanese sewing#sewing tips#cosplay sewing tips#ninjago cosplay guides
27 notes
·
View notes


Photo


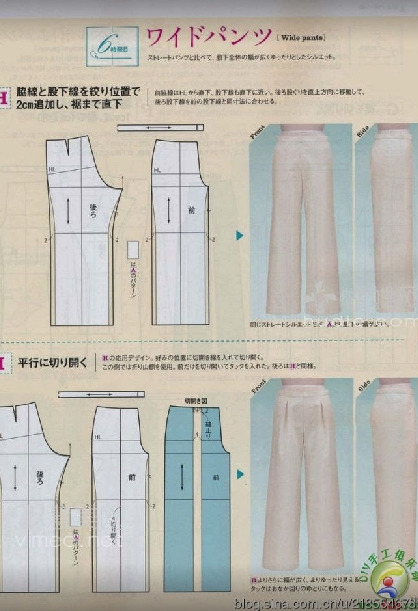

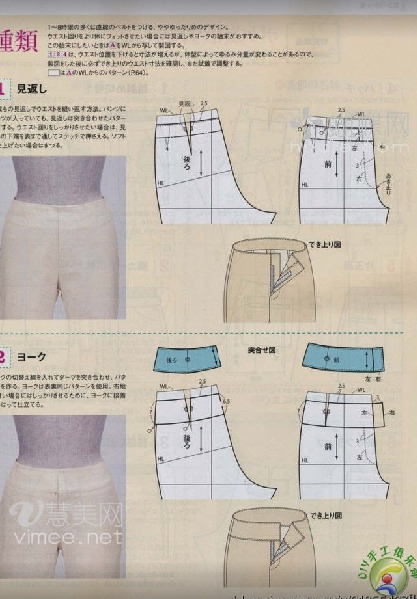

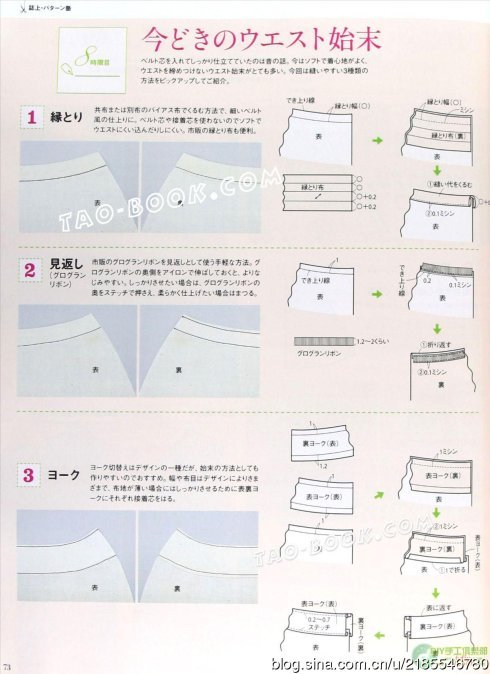
Pants patterns references (´∀`)♡
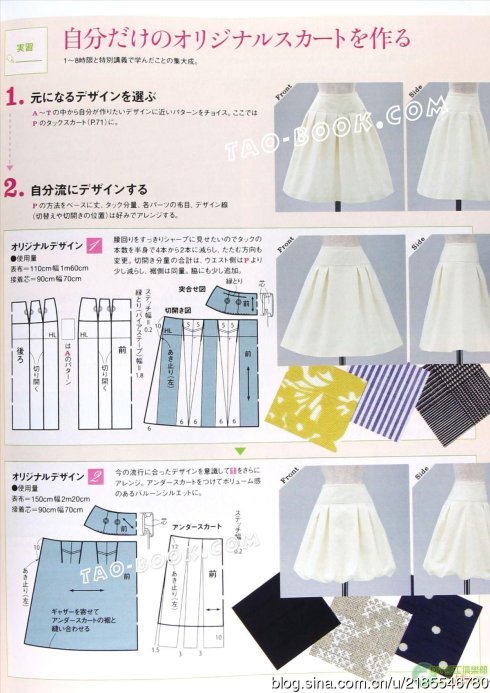
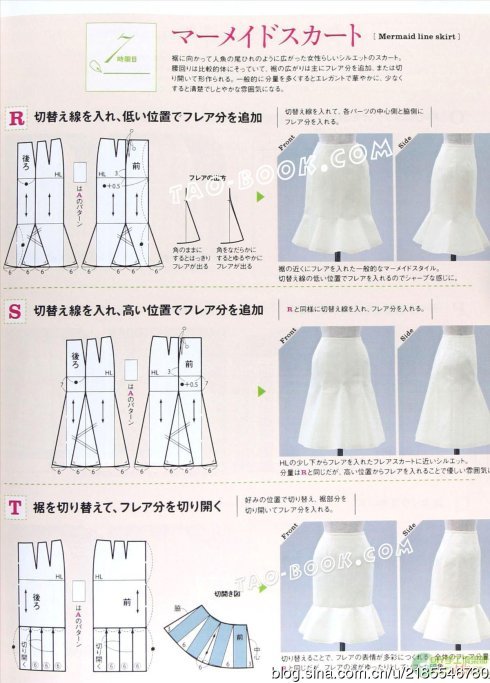
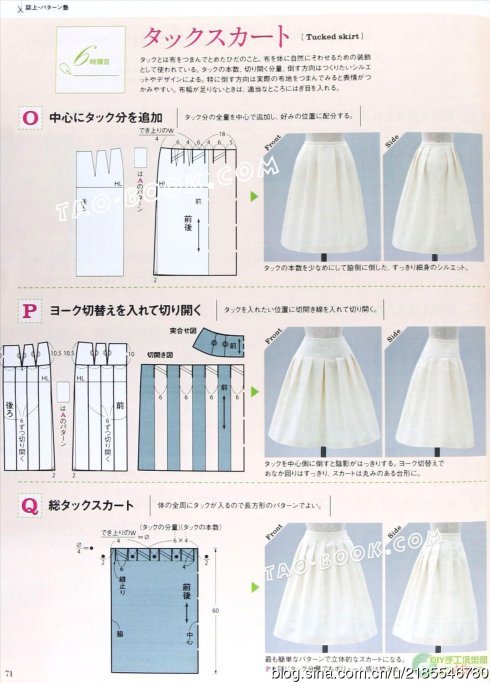
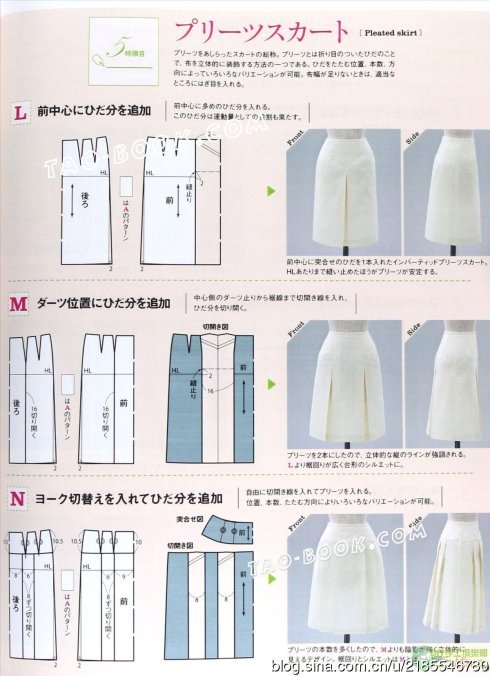
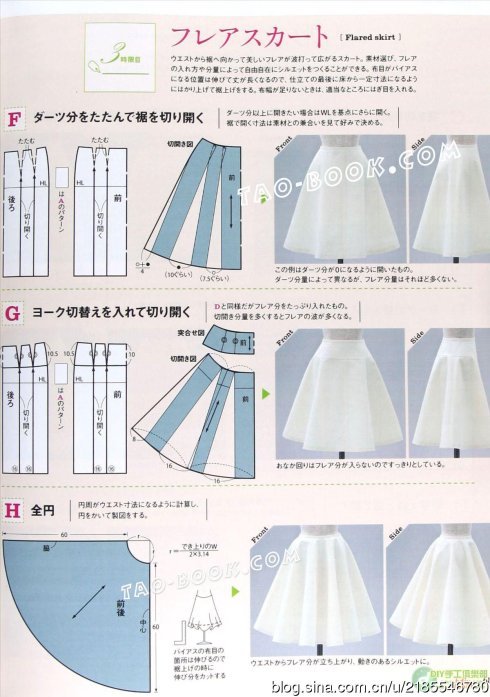
Skirt references
1K notes
·
View notes
Text
Welcome back folks I have unironically decided I want to dress up like everyone's favorite Sensei (Garmadon, no offense Wu) and we are gonna take this to the max with bling and tradition I GUESS???
And because I'm a cheap baby with just enough brain cells we are making chinese knots today
3 notes
·
View notes
Text
I 3D modeled an Aeroblade! The files will be available to purchase on my etsy @IngleWoods by tomorrow and you can get 10% off with the code NINJAGO10 until 14 January in commemoration of Lego Ninjago's 10th anniversary

52 notes
·
View notes
Text

Welcome back folks
Big updates!
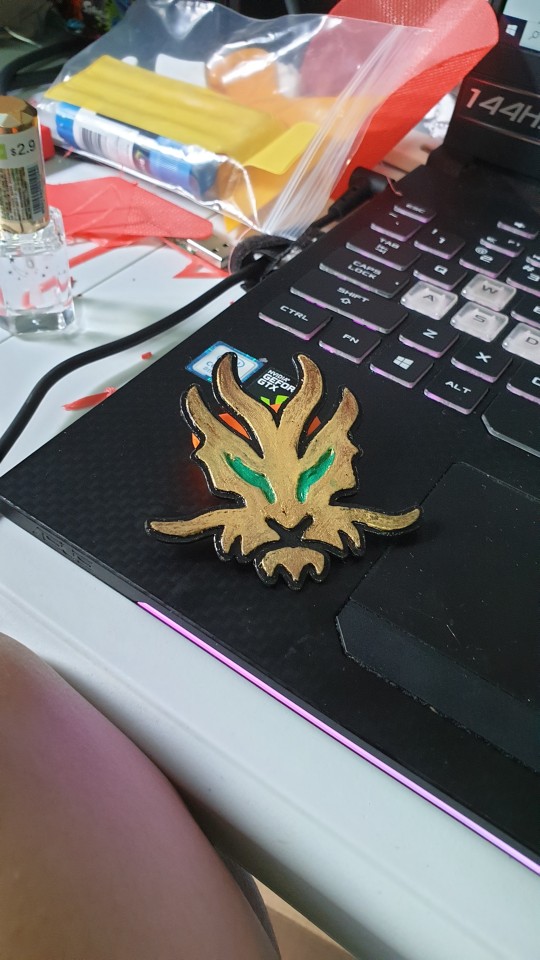
So basically, I got a 3D printer (Monoprice MP Select Mini 3D Printer V2 - Black) recently!
You can see some of my tools in the picture too, let me know if you guys want more details on what I consider "essential" tools!
The green round print is Sensei Garmadon's badge, printed in 1.75mm PLA filament. I made the 3D model myself, so you absolutely can ask me directly for the 3D file if you so desire to have one yourself.
As for Tournament Lloyd project's update - I'm still awaiting the will to make bias tape but otherwise we will get right back to ToE posting.
1 note
·
View note
Text
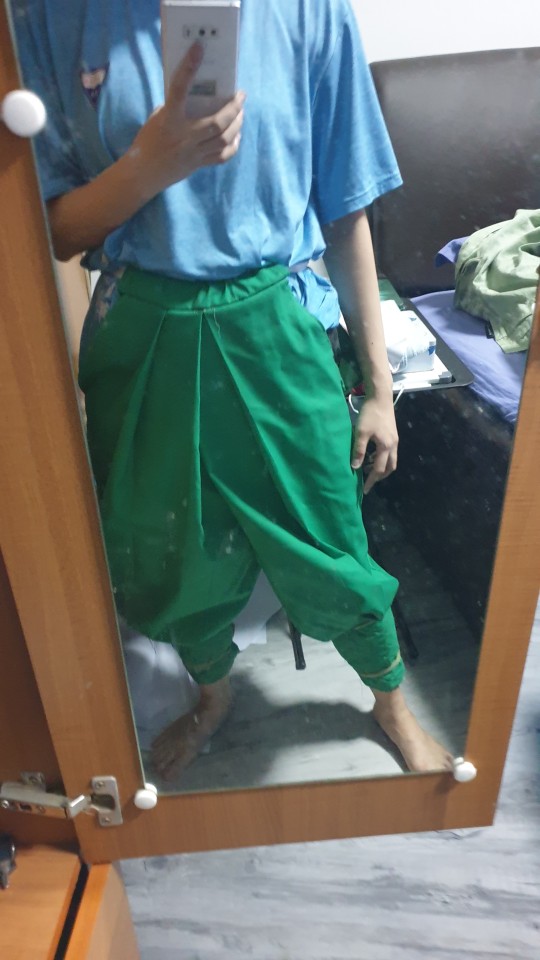
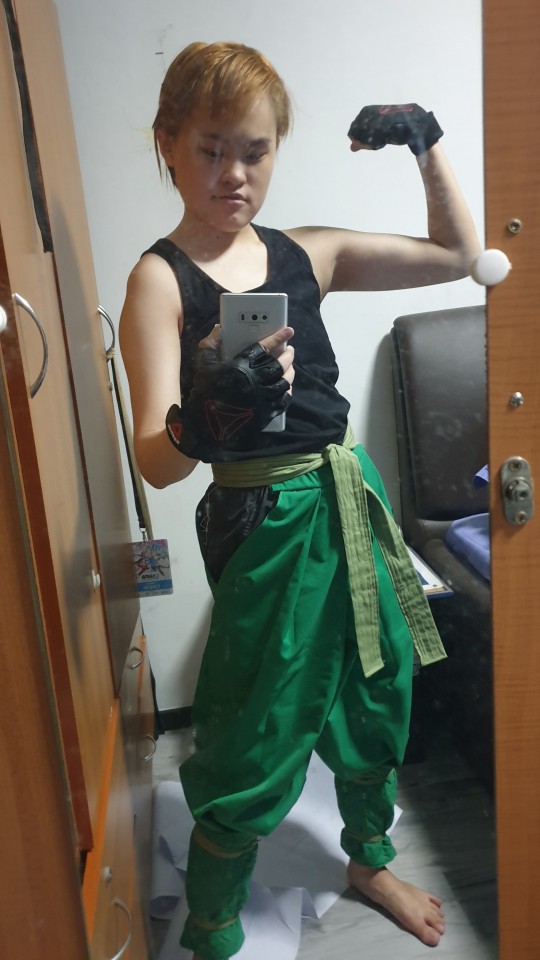
More or less done. Just need to properly starch and press this thing and take out all the basting
The pants are actually pleated, like regular hakama, and instead of a standard waistband or a standard hakama himo closure I went for something inspired by my own dogi in kenjutsu training - drawstrings that run through channels and cross before tying off.
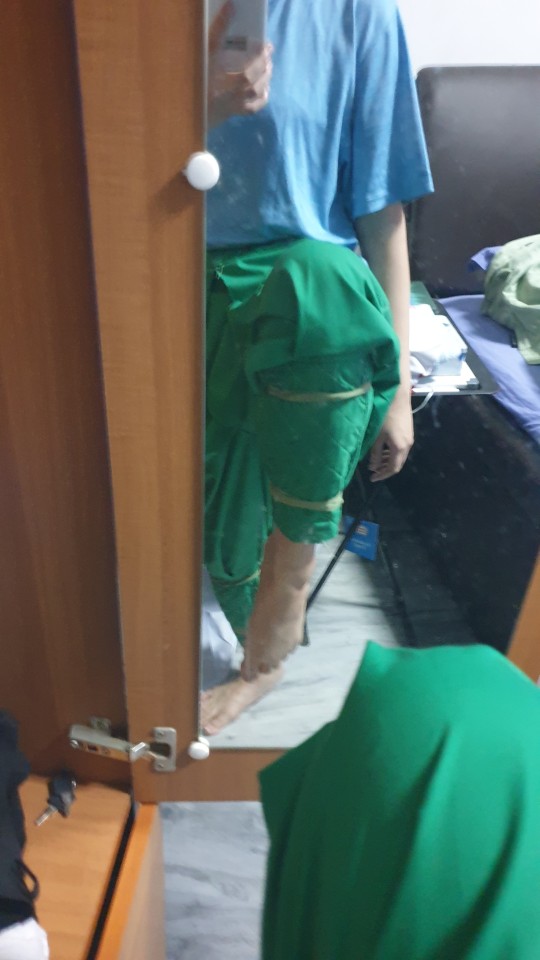
A look at the shin armor details, you'll notice that the decorative stitching is almost invisible, but you can still notice a very slight touch of dimension and the poof of the pants is actually nice here.
Seeing as my source pattern actually comes from a Japanese indie patternmaker, and fits contextually with my (relatively meagre) understanding of shinobi-no-jutsu (or now commonly just ninjutsu) I think it's a fairly decent look that I achieved for this costume.
3 notes
·
View notes
Text

I was curious if the straps would be of any use outside of a separate closure and the answer is yes.
Anyway these bois are going on by hand
2 notes
·
View notes
Text
Is it really cosplay if you don't rip the same seam out 6 times because you forgot how hakama work?
ANYWAY
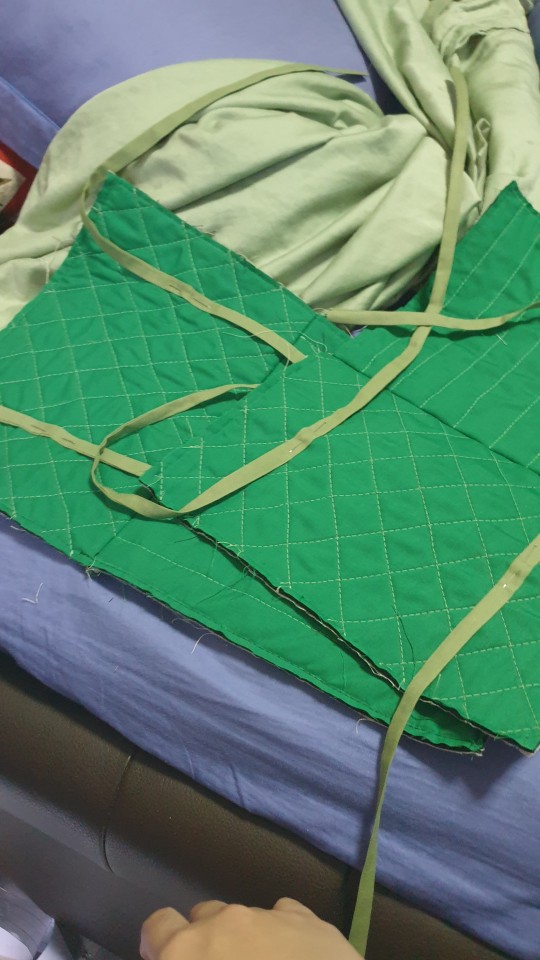
We have pants. Kind of.
Needs to be pressed again and the corner gaps sewn in so we can add a waistband before we take out the basting.
The pants are gonna be directly partially sewn to the shin guards
....which currently looks like this on my messy bed. I'll probably be working some velcro into these and make the straps more of a decorative thing. Or whatever. For now I break for lunch before I throw my entire sewing machine out the window.
2 notes
·
View notes
Text
Is it really cosplay if you don't rip the same seam out 6 times because you forgot how hakama work?
ANYWAY

We have pants. Kind of.
Needs to be pressed again and the corner gaps sewn in so we can add a waistband before we take out the basting.
The pants are gonna be directly partially sewn to the shin guards

....which currently looks like this on my messy bed. I'll probably be working some velcro into these and make the straps more of a decorative thing. Or whatever. For now I break for lunch before I throw my entire sewing machine out the window.
1 note
·
View note
Text
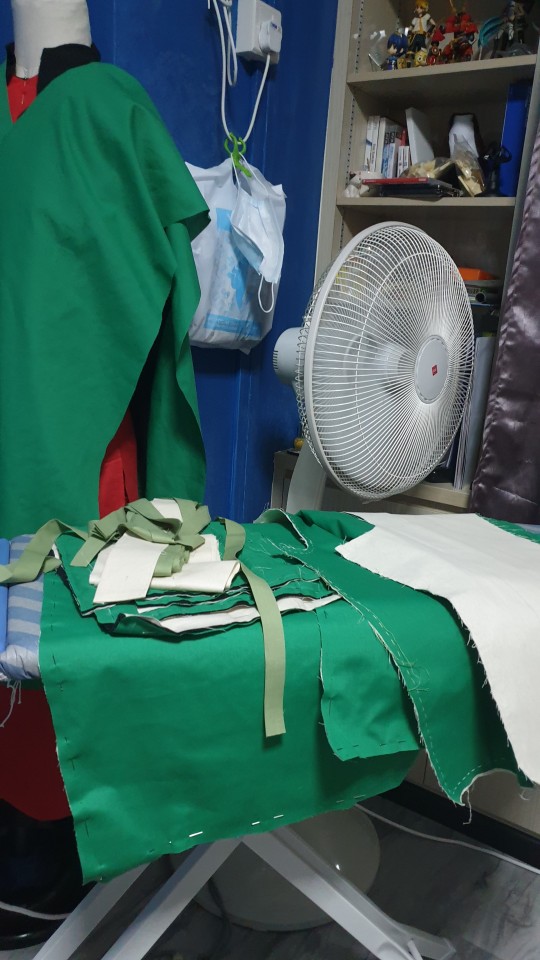
Minor update for the night
I managed to get the hakama pieces pressed and starched nicely, as well as the straps that will become the himo. My final decision was to attach the straps directly to the shinguards rather than using channels to hold them.
The other half of the hakama are only currently pinned to their calico interlining, and has to be basted and pleated tomorrow.
For the shin guards - I ripped the decorative stitching out. I'll be sewing them by machine and also assembling the shin guards by machine since I've just been requested to replace the pockets on my father's work jeans and I ain't doing that by hand.
The mannequin is holding the two pinned halves of the shirt temporarily because I plan to work on the hakama and then deal with the shirt after since the shirt obviously is more detailed. I'm not opening that can of worms YET.
Tomorrow while I'm settling the machine work I'll also be making my bias binding and the such, so more on that in a bit.
3 notes
·
View notes
Text
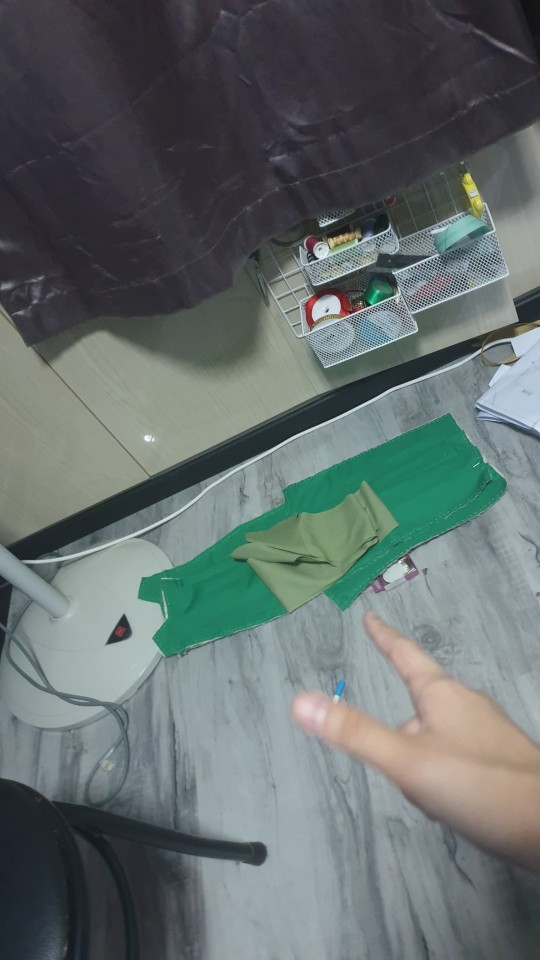
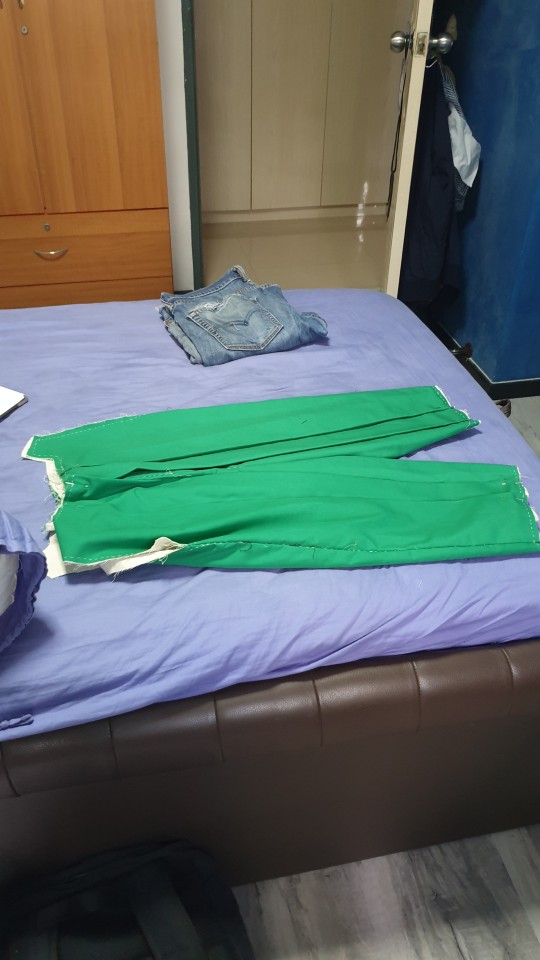
Slept almost 40 hours let's get back on the road.
I haven't had a chance to cut the remaining pieces yet, but what I did do was flatline the hakama back by basting the calico to it and pinning in the pleats based on the lines I marked on the calico.
I'll be pressing all these pieces in the picture later, since the himo and obi pieces are gonna need the middle crease to know what's going on.
Other than that, once everything is pressed, it's back to the shin guards. I'll deal with the waistband modifications for the hakama later because I cannot be bothered right now. I may or may not cut some panels to block in the side hakama gaps as detailing, but we'll see how things go.
2 notes
·
View notes
Text
Work tasks for Tournament Lloyd atm:
-Finish cutting pieces
-Prepare bias strips
-Prepare vinyl transfers
-starch and pleat hakama (must wait for ironing pad to arrive first)
I'll probably update again when there's actually progress
3 notes
·
View notes
Text
We get another update tonight I suppose
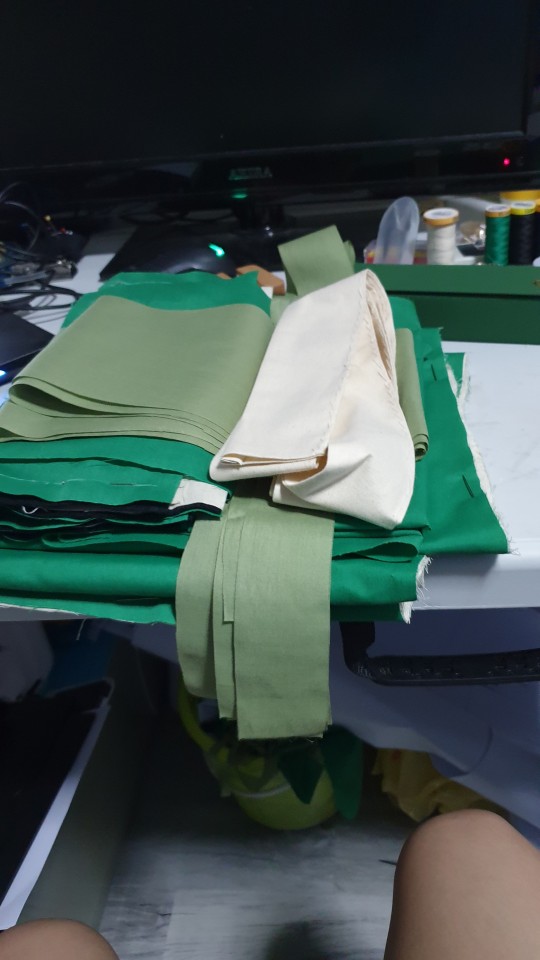
I managed to cut most of the other main pieces. The only ones I'm short of now is the shirt (2 green pieces and the black strap), a waistband for the hakama and the calico flat lining for the hakama front and shirt.
The biggest ones in the pile (at the bottom) are the hakama back pieces already pinned and ready to baste, followed by the as of now unfinished hakama front and one last shin guard piece. The more yellow-green strips will be worked as an Obi and straps for the shin guards, and I'll be slicing up the cabbage from that fabric for bias strips since I'm lazy to go out across the country for a few packs of bias tape that might not even match right.
The calico strip you on the top of the pile and the wide yellow-green strip under is the obi pieces - while it's perfectly possible to make the obi without any support from interfacing or a structured lining I just prefer how it feels with the structure since that's what I'm used to in martial arts. I'm debating on pad-stitching the calico for extra support and strength in staying as a single thick strip than a tube.
I MIGHT rip out the patterned stitching I did in the last update and redo them by machine, but if you're following along and don't have one it can be omitted because I'm just being extra here.
1 note
·
View note
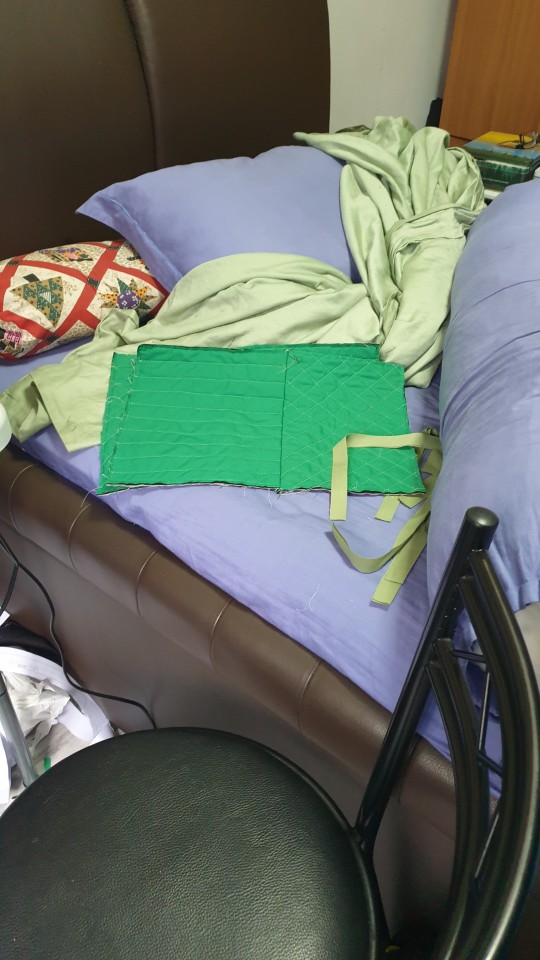
Text
Tournament Lloyd Update
I started on the shin guard pieces.

Okay so. Pictured is one piece of the shin guard
It's 3 layers pinned together (green broadcloth, black fleece because I forgot to buy quilt wadding, and the last layer is calico)
I have yet to buy the actual "lining" fabric so this is how we be right now. The layers are backstitched together because that's how I roll.
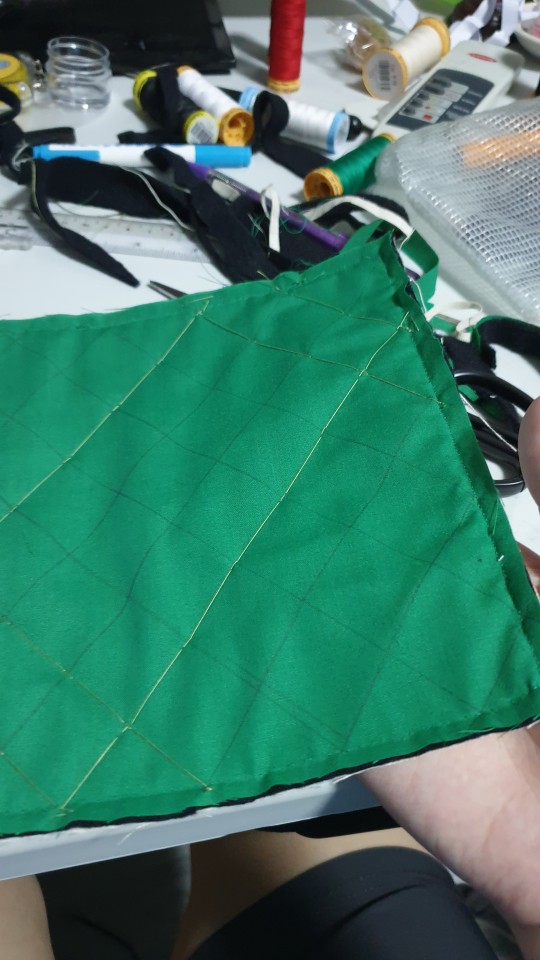
And then I pencil marked some lines like a heathen and stitched on purely decorative nonsense. I'll be adding a channel for the straps on top later on.
Basically you have a front side of the guard and the back, and the channel is on the front and ties in the back.
8 weeks left.
2 notes
·
View notes