
Ollie | 26 | He/itSideblog for cross stitching and other crafty things!
Last active 60 minutes ago
Don't wanna be here? Send us removal request.
Statistics
We looked inside some of the posts by olliepoparts and here's what we found interesting.
Average Info
Notes Per Post
136K
Likes Per Post
74K
Reblog Per Post
62K
Reply Per Post
115
Time Between Posts
24 days
Number of Posts By Type
Text
16
Photo
1
Last Seen Tumblr Blogs


Fun Fact
Kazakhstan’s Minister of Communications and Informatics has blocked the Tumblr site because it contained 60 sites of terrorism, extremism, and pornography in 2015.
Text

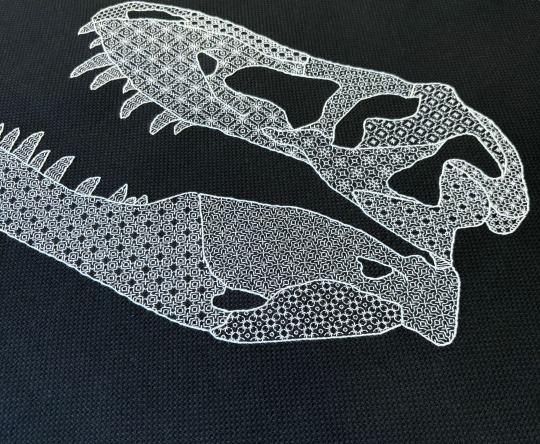
Rex here has been buried in my drafts folder for awhile now, but I finally dug him up and finished designing him. Blackwork embroidery on black 14-count Aida cloth.
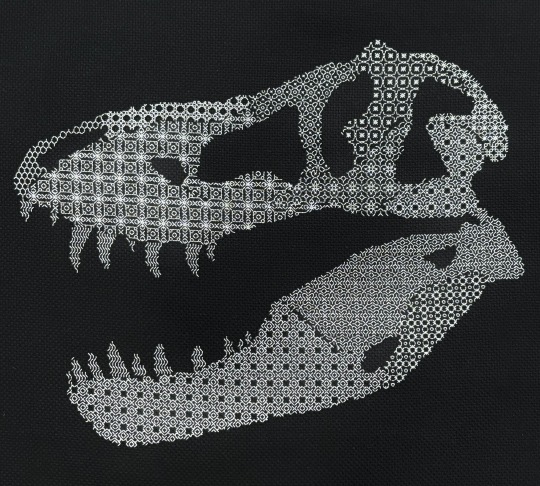
Here he is before I stitched the outlines, and I think part of me likes him better this way. The bones have different fill motifs, but they aren't starkly delineated textbook-style.
Pattern here or here.
626 notes
·
View notes
Text


I finished the belt with the Dublin Dragons pattern... finally.
This one was tough, but I'm so proud of it. I'll be wearing it to medieval markets this year!
1K notes
·
View notes
Text


I also cross stitch, in addition to reblogging nonsense.
284 notes
·
View notes
Text

Took a month to do the last day’s worth of course, and still utterly impossible to photograph correctly.
Pattern is Heart Sampler by Kitt Massiah, who I hope can forgive me the changes, a pattern is a recipe and I cook with my heart
Notable trivia for this one, every single stitch of it was done with @ayeforscotland ‘s YouTube archive on
2K notes
·
View notes
Text
How to print your own graphic T-shirts like this at home for less than 5$

You are going to need:
- acrylic paint in your desires colours (if you want to put light colours on dark fabric pick up white paint too to use as an underpainting so your colours show up)
- paper sheet
- masking tape
- exacto knife
- makeup sponge you don't mind ruining
- printer (optional)
This is made using my trusty method of stenciling. First you need to pick up a pattern - for biggest chance of success pick something high-contrast and with as many details as you think you'll be able to cut out by hand - if in doubt go simpler so that there's higher chance you finish the project.
I picked the danse macabre skeletons (imagine the background is black)

If you have a printer put your image in an editing progam (if you don't have one downloaded use canva, its online and free) and invert the colours to use less ink.
If you don't have a printer I suggest taping a piece of paper to your monitor and tracing by hand, or you could even do it by putting the picture on your phone zoomed in and tracing it part by part moving the paper as you move the picture underneath. Of course you can also just design your own print, add stuff, change em, anything.
Then what you do is you cover your paper in a layer of masking tape from each side - this is to give it structure and pervent marrying of the paper to the fabric.

Then you get an exacto knife and slowly cut out everything you want to print. Don't rush this step or you'll risk ruining your stencil. Make sure to leave structural supports for your stencil, you can either incorporate them into the design or just leave out stripes that you can fill in later. You can check how your stencil will look like by bringing it twoards a light source, to track if you like the direction the project is heading.
This particular stencil took me 2 hours I believe (i did it last year I don't remember)
Then you masking tape the stencil to your shirt, pant, bag, whatever honestly, this will work on any flat fabric and make sure to put a barrier inside so the paint doesn't bleed to the other side - it shouldn't do that but it can so why not pervent it.


And now using acrylic paint you dab on the paint thin layer by thin layer - the goal is to have not a lot of paint on your sponge so it doesn't bleed but to work it into the fabric really hard so your graphic is durable and doesn't crack. You don't need fabric paint or to mix in any medium since you're working the plastic so deep into the fibers. For white paint i usually do 4-5 coats, for dark paints on light fabric usually two is enough, but it's up to you entirely.
And now just let it dry for a while and it's ready! It's safe to wear probably within 10 minutes, just check if it's not sticky. Best thing is that the stencil is reusable so you can make more, you can do it in different colours, different garments, you can do just about anything. Have fun!

Washing care is how you would take care of any graphic tee - wash inside out on the "hand washing" setting in a washing machine and let air dry and also use minimal detergent - If this is too much to ask just turn it inside out when putting it in the wash, that's where most protection comes from.
This whole thing took me maybe 3 hours total. The shirt I used I thrifted for maybe 2$ and the materials I bought once and have been using for years, so the total cost of putting this print on this shirt to me was nearly 0$.
2K notes
·
View notes

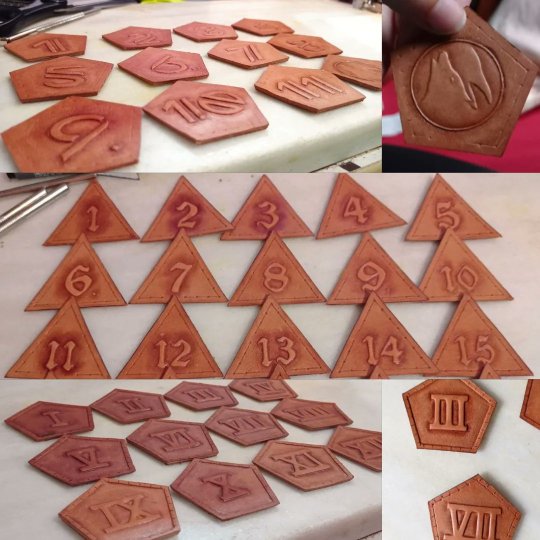
Text
MG063 - Spadge!
Dragon claws in action...
Doverspike.Art (is sorely outdated)
44 notes
·
View notes
Text
Avian Articulation
MG062 - Hawke Golden yellow leather with gloss black talons
Yes, you can commission these, in many different styles! Details at: https://forms.gle/Tmhf9gDrCMZdSmcN7
Doverspike.Art
168 notes
·
View notes
Text

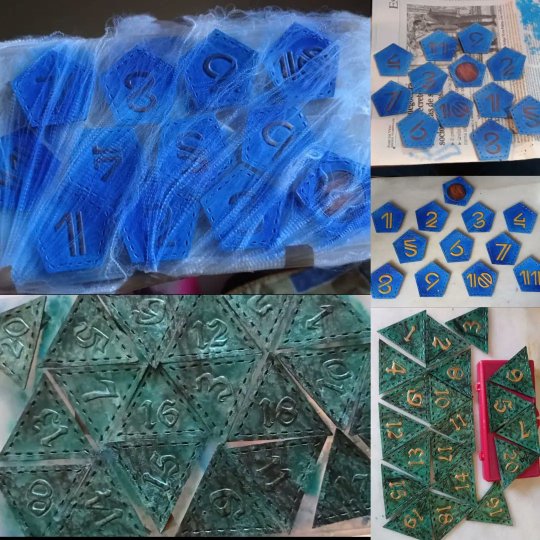

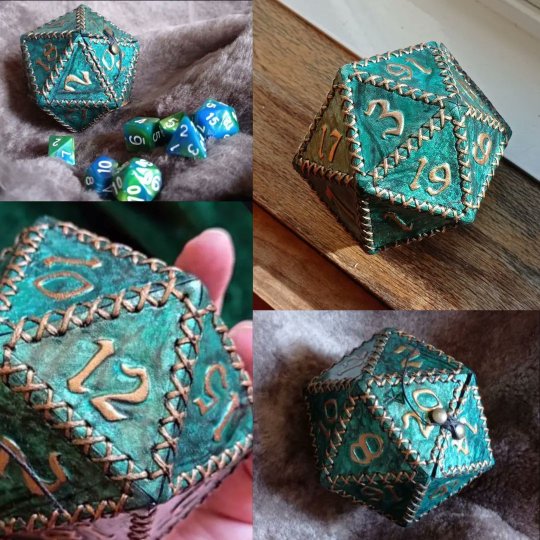
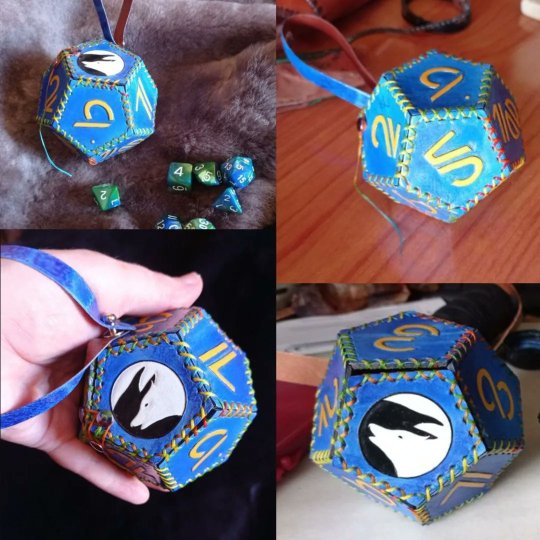

Three similar but very different pieces. One for a challenge, one for creativity and one for plain and pure fun. The emerald and gold d20 is in the hands of my friend Noelia, who wanted a bag with a nice marbled design but left all the creative decisions in my hands, trusting me blindly. The blue d12 was commissioned by Ana with very specific specifications: inspired by the game Coyote and crow, with the corporate colours and a specially designed typology. And the antique bronze d12 came about while watching my friend Capitán Yelmo playing a game with a very Ancient Roman aesthetic, and where I tested the viability of a semi-invisible half meat seam (with a satisfactory success). Three pieces that sum up very well my creative capacity starting from the (almost) same pattern.
121 notes
·
View notes


Text

Lil bookmark while I'm working on a big project. :) First try at black work, I think I did okay. Pattern by PatchyAtBestCo on etsy.
815 notes
·
View notes
Text


Obviously the key reason to get into weaving is the near limitless pride flag potential.
This is 8 metres of trans warp threaded for 5 different twills. Winding the warp went SO MUCH BETTER than my first project a couple weeks ago and I am especially proud of how smoothly my warp chains unravelled.
With the trans yarns I also ordered sample cards for a couple different yarn companies so that I can compose some rainbow flag variants.
Hype hype hypeeeee
13K notes
·
View notes
Text

The Fall on the Farm pattern is finished and framed :) I'm really happy with how it turned out.
I'm gonna make a similar pattern for each season, so stay tuned.
The cute fox is from @ceramicorn
191 notes
·
View notes
Text
NEW RESOURCE ALERT! RSN ( Royal School of Needlework) Collection & Archive
The Royal School of Needlework have started to digitise their extensive archive of embroidered objects and patterns and they have uploaded the first 100 objects onto their website. This is a really good resource for people who are interested in the history of hand and bordering and replicating historical patterns and motifs.
Each entry contains high resolution images of each object in the collection as well as its dimensions. Additionally, each entry contains a list of the stitches used in the creation of the object.
I have linked to the collection and in archive on my pinned master post and in the comments.
youtube
81 notes
·
View notes
Text
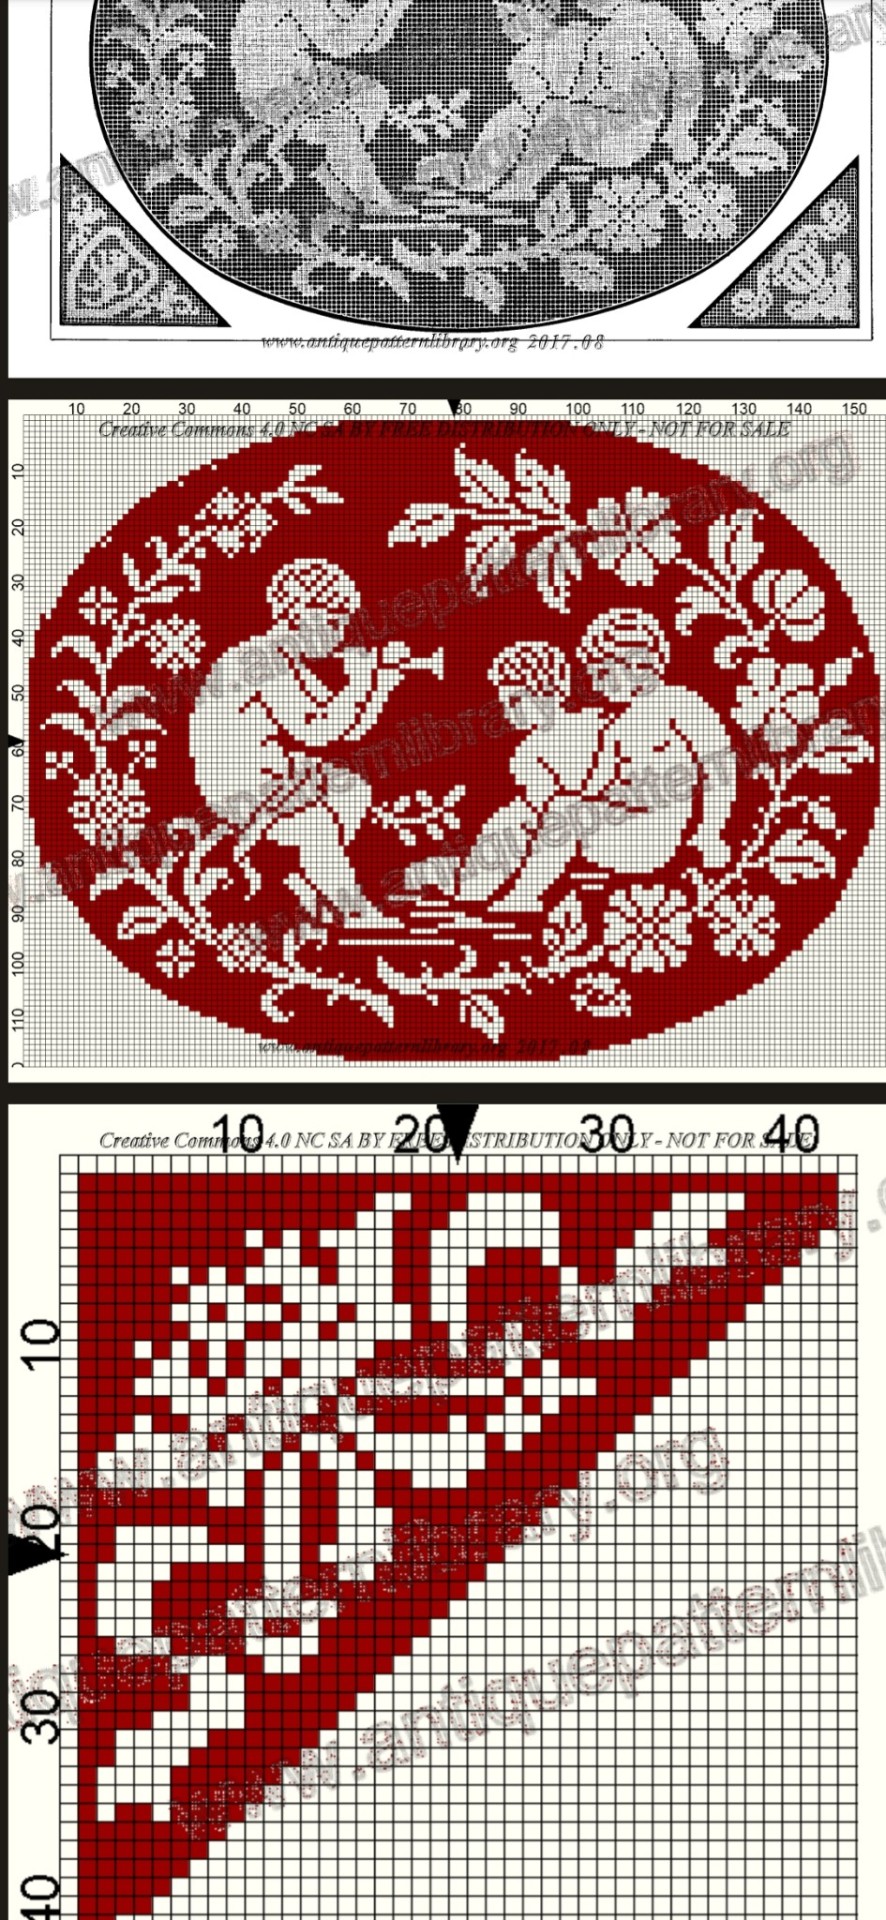
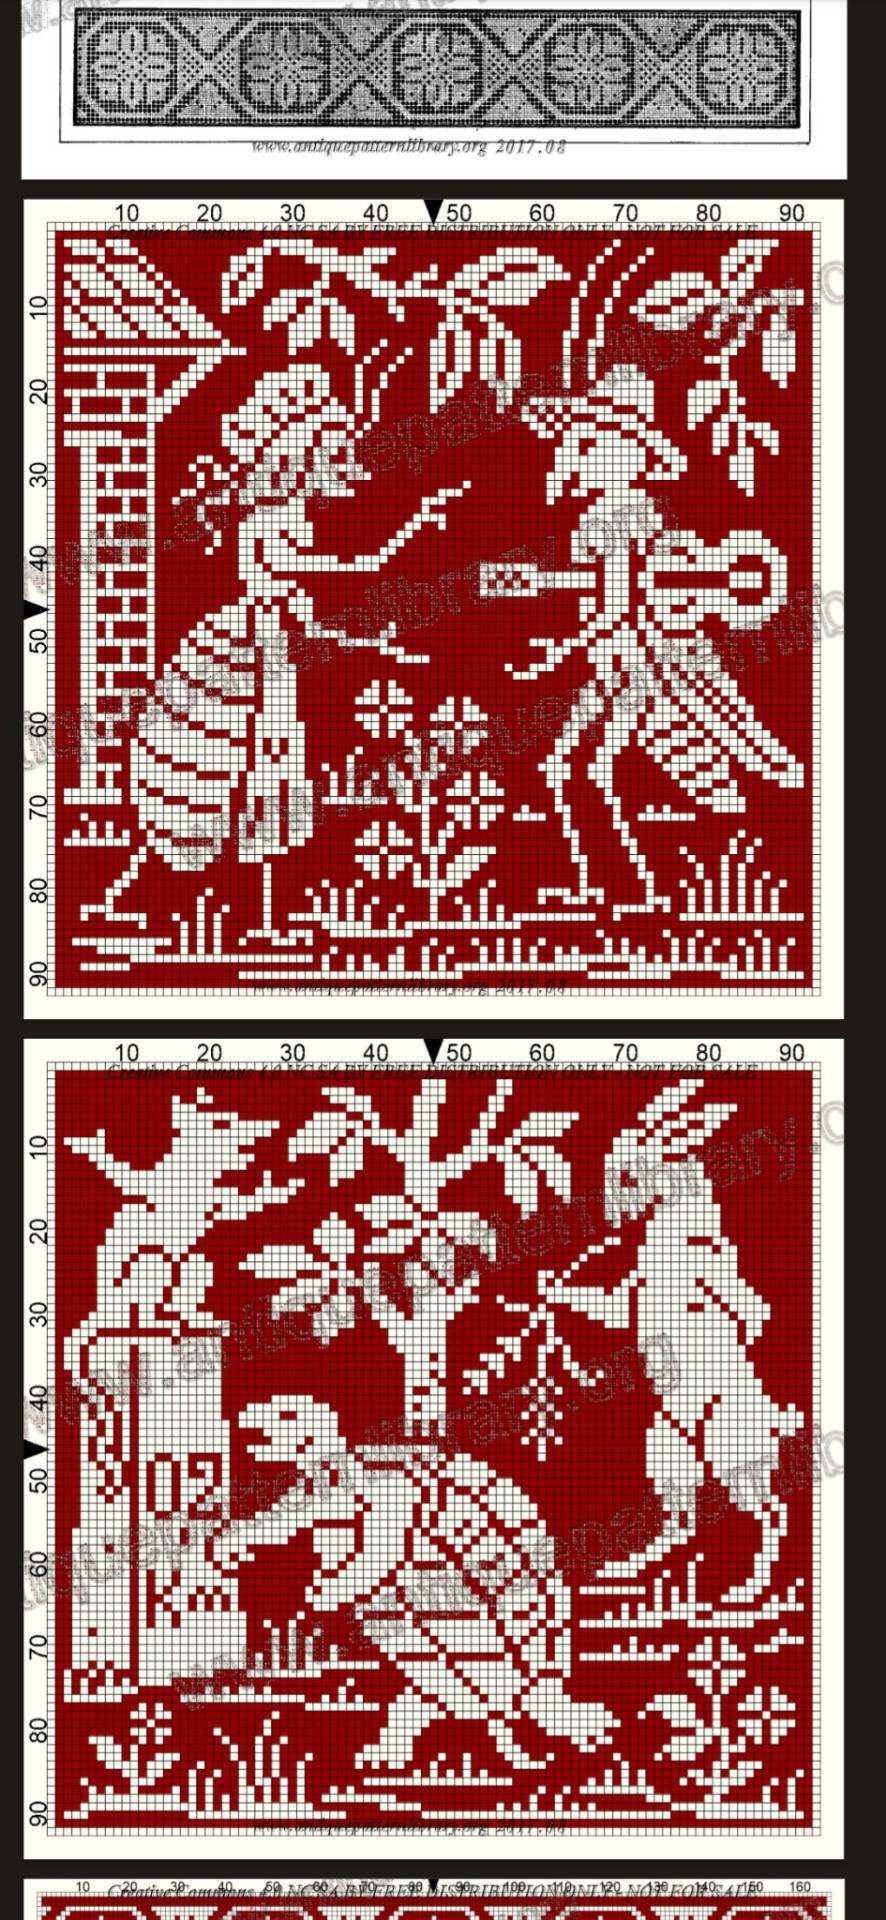
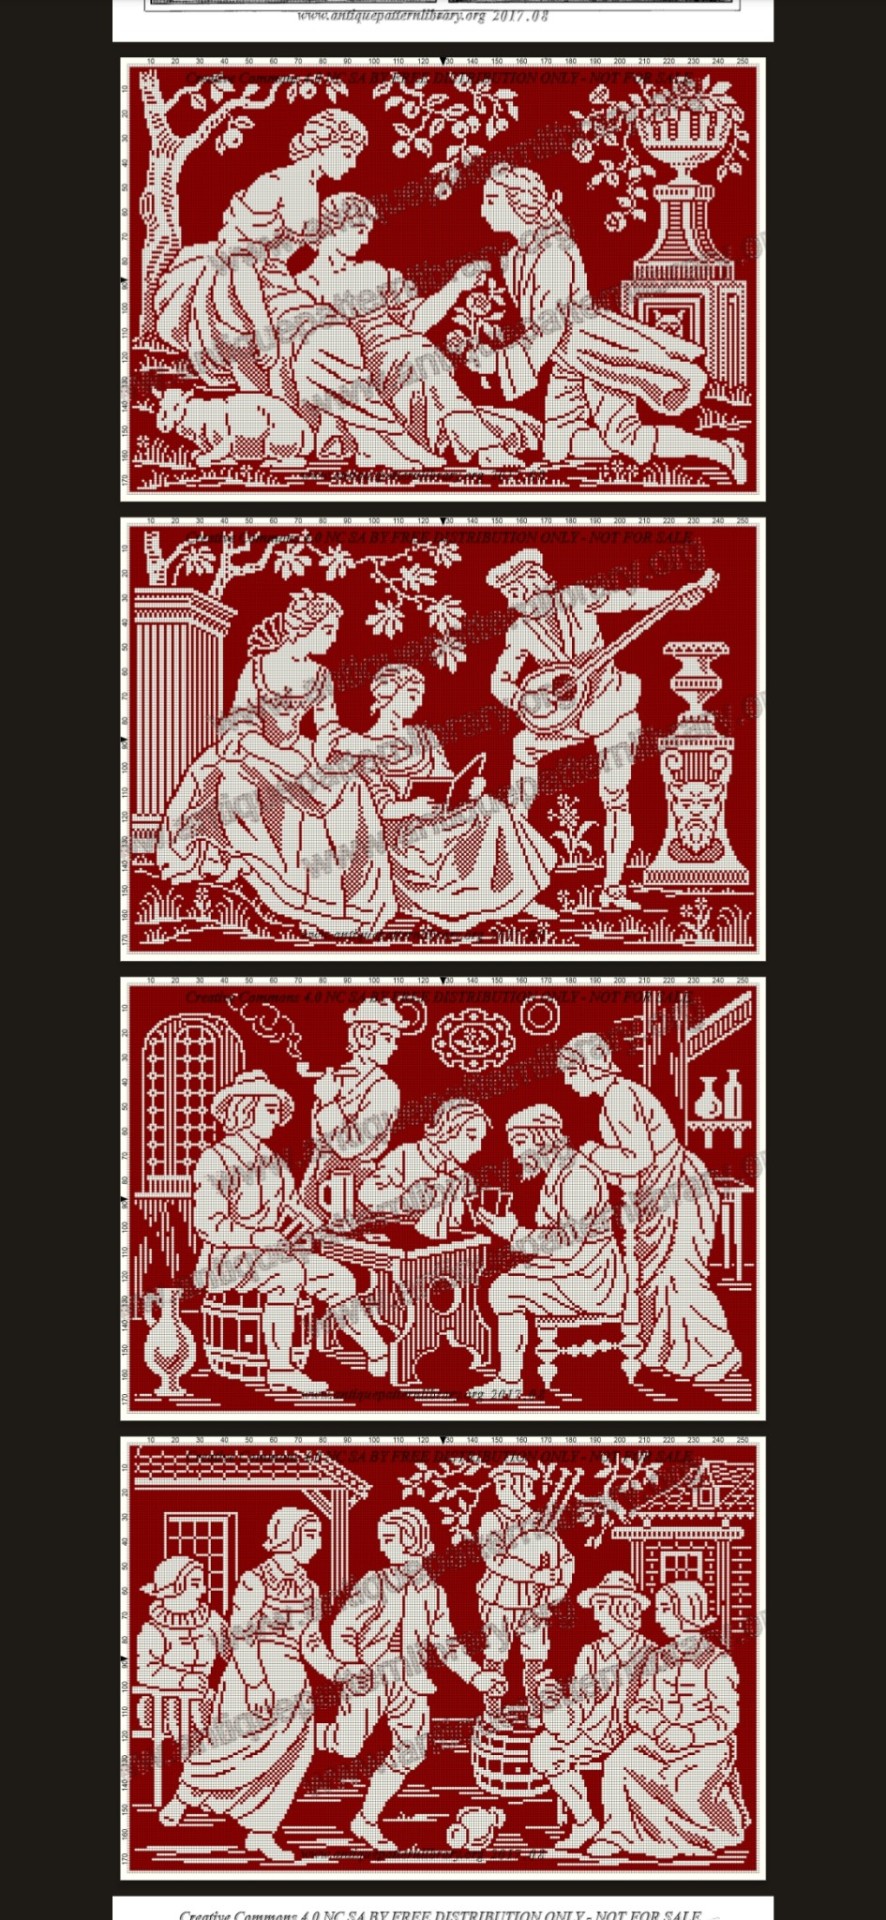
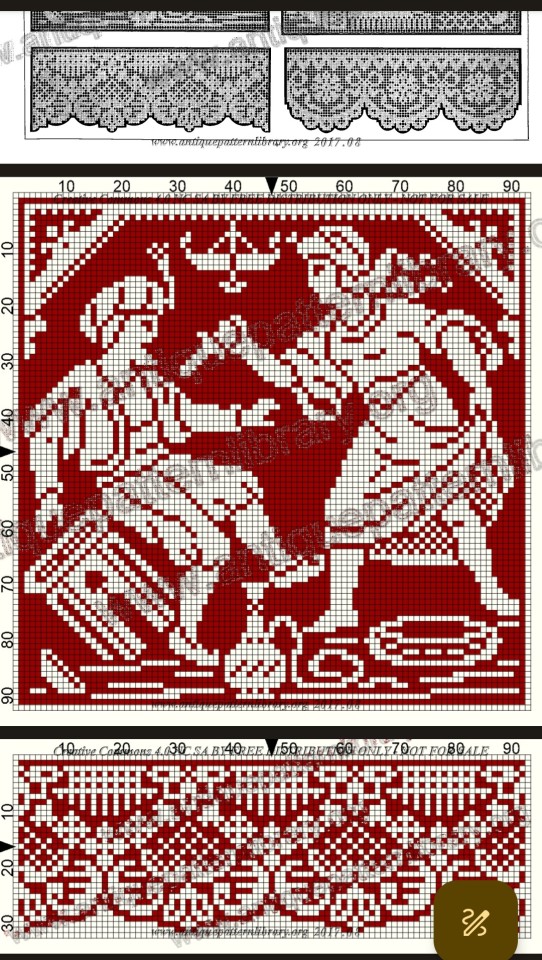
K so not to be dramatic or anything, but there's a free vintage French pattern book available on antiquepatternlibrary so if you like to crochet/weave/make pixel art/tie epic friendship bracelets don't walk- RUN.
It has scenes from aesop's fables! Cherubs doing things! Beheadings! Greek muses! Little farm people! Intricate floral pattern! Goth stained-glass window like patterns! Fun little corner pieces! Eeeeeeeeeeeeee
https://www.antiquepatternlibrary.org/html/warm/C-TT008-180.htm


33K notes
·
View notes