
Don't wanna be here? Send us removal request.
Statistics
We looked inside some of the posts by pearcar93-blog and here's what we found interesting.
Average Info
Notes Per Post
0
Likes Per Post
0
Reblog Per Post
0
Reply Per Post
0
Time Between Posts
3 days
Number of Posts By Type
Text
17
Last Seen Tumblr Blogs


Fun Fact
Tumblr was created by web developers David Karp and Marco Arment.
Text
Is Autoimmune Paleo The Best Diet For Hashimoto’s?
Recently, I got an email from a reader asking me how I manage to not feel guilty when indulging in the foods I love. She had recently been diagnosed with an autoimmune disease and was trying to figure out what diet was right for her without turning her life completely upside down.
It wasn’t an easy note to answer. Because there’s no simple antidote to guilt and food shame, otherwise I would surely write you a how-to on the subject. I find that the most useful answer is knowing you’re not alone in feeling it.
If you’ve read The Wellness Project, then you know it took me far longer than the year at hand to get my healthy hedonism mindset under control. There were so many should not’s when it came to the diet piece. So many contradictions. So much confusion.
When I cross-referenced the prevailing anti-inflammatory diets, the no-no foods listed on my yellow legal pad included the trio from my vice detox—alcohol, caffeine, and sugar—along with the big eight allergens: dairy, wheat, eggs, tree nuts, peanuts, shellfish, fish, and soy. Some recommend no eggs, seeds, beans, legumes, or grains of any kind.
Many only advocate animal protein if its wild, grass-fed, free-range or organic. And others said no animal protein at all. Add nightshade vegetables (tomatoes, peppers, potatoes, and eggplant) and cruciferous vegetables (broccoli, cabbage Brussels sprouts and, yes, kale) for thyroid sufferers and it starts to feel like all that’s left are organic blueberries not flown in from Chile.
One of the flagpole diets I came across was AIP, otherwise known as Autoimmune Paleo. The books that promoted it unequivocally said that all autoimmune peeps would benefit.
While knowing that most autoimmune diseases are more alike than different, I struggled to see how so much restriction could be necessary for everyone. And then inevitably felt guilty about the food groups I didn’t manage to eliminate.
Eventually, I came to understand that my initial instincts were right. I just didn’t have the clinical practice to back them up. Which is why I asked Jill Grunewald, as the second post in her HashiPosse series, to break it down. Below she explains what autoimmune paleo is, why it’s not necessarily the right answer for those of us with Hashimoto’s, and when it might be time to give it a try.
If you’ve been wondering about AIP or found yourself confused about who falls under its umbrella of efficacy, I hope you’ll give this post a read!
Jill’s approach is very similar to my own in the 4 Weeks to Wellness Program. For those looking for some support trying out an elimination diet, finding your trigger foods, or slowly on-boarding to a healthier lifestyle, I highly recommend joining me for the fall session!
Enrollment is officially open. You can find out more here.
With health and hedonism,
Phoebe
Is AIP The Best Diet for Hashimoto’s Thyroiditis?
If you’ve been tuned into the thyroid and Hashimoto’s (autoimmune hypothyroidism) community, you’ve likely heard of (or tried?) a Paleo or Autoimmune Paleo diet (AIP).
There are varying twists, but generally, with Paleo, you’re eating what’s believed to be what our ancestors ate: meat (grass-based/pastured), fish, vegetables, fruits, nuts, seeds, herbs, spices, eggs, unrefined coconut and olive oil, and animal fats like ghee, lard, and tallow. According to some, fruit is off limits. Others only support eating berries.
Most notably, the paleo lifestyle excludes grains (including corn) and legumes (including soy), dairy (although some allow grass-fed), sugar, caffeine, and oils derived from seeds and grains, which can be high in inflammation-promoting Omega-6 fatty acids. Some claim no eggs and others say no starchy vegetables because they can’t be eaten raw.
An AIP diet, often recommended for those with autoimmune conditions, is similar to Paleo, but in addition to the above exclusions, eschews nuts, seeds, eggs, dairy, nightshade vegetables, and generally, fruit.
These diets have become the “prescription” for any manifestation of autoimmunity, but may not be the answer for everyone.
I see merit in these approaches in some circumstances, but I’m wholeheartedly skeptical of removing whole food groups from your diet, even for people with autoimmunity. This skepticism is thoughtful, based on years of taking a different approach that’s not so restrictive, and seeing my clients get the results they’re seeking.
I do have some “restrictions” around grains and legumes, which has always been to largely limit flour-based products and eat true whole (intact) non-gluten grains, in moderation, because it’s true that a diet heavy in grains can be inflammatory and lead to weight gain and blood sugar issues.
Legumes/beans are a great source of plant-based protein, but I recommend not making legumes the sole protein of any meal, unless you can truly handle them without digestive distress. Even some who don’t have autoimmune conditions can have a difficult time digesting legumes (i.e. those with SIBO or IBS who may find relief on a low FODMAP diet).
My Essential Thyroid Cookbook contains chapters called “In Defense of Grains” and “In Defense of Legumes” that highlight the research of Justin Sonnenburg, PhD and Associate Professor of Microbiology and Immunology at Stanford and the author of The Good Gut, co-authored by his wife Erica Sonnenburg, PhD. They’ve been trailblazers in discovering how the fiber in grains and legumes improves the health of our gut microbiome, our digestive “mini ecosystem.”
Likewise, Dr. Susan Blum, author of The Immune System Recovery Plan, regularly mentions quinoa, amaranth, millet, teff, buckwheat, various types of rice, and also legumes as part of her healing program.
Just in the last year or so, I’ve witnessed many functional medicine/functional nutrition experts sing the praises of moderate intake of properly prepared grains and legumes.
AIP Isn’t For Everyone
I was diagnosed with Hashimoto’s in early 2008. At that time, the popularity of the Paleo diet hadn’t crested.
Given that 70-80 percent of our immune system is in our digestive tract, I did the gut-healing Elimination Provocation diet—a version similar to the one I share with my clients today. It’s a temporary diet and excludes nuts—but not seeds, grains, or legumes, with the exception of peanuts (which are technically legumes) and soy (also a legume).
Within a few months, my Hashimoto’s was managed—without the use of thyroid hormone replacement drugs. Over those next couple of years, prior to the popularization of the AIP diet, the vast majority of my clients had the same success—plummeting antibodies and alleviation of their hypothyroid/Hashimoto’s symptoms.
Considering this, it’s difficult, in my opinion, to rationalize a highly restrictive diet in all circumstances, for everyone with autoimmunity.
I prefer a flexible Paleo diet or a “Paleo template,” in the context of the Elimination Provocation diet. Flexibility is key—it gives people more of a feeling of control and “I can do this” vs. “I have to do do this.”
Stress = Antibodies
Many who’ve tried strict Paleo and/or AIP diet have expressed feelings of stress and frustration at the highly restrictive nature of these diets—and some have seen increased antibodies, worsening of symptoms, and confusion about how long to eat this way. (I worked with many of these “AIP refugees,” as I call them.)
Some thrive on (and love) the AIP diet and I’m not here to disregard its merits! But often, it’s a two-steps-forward-two-steps-back situation. The stress that ensues—at least for some people—isn’t conductive to the healing that needs to take place.
There’s enough evidence showing that stress increases antibodies. It’s even said to be a trigger for the onset of autoimmune diseases. According to Dr. Mark Hyman, “Stress worsens the autoimmune response.”
While some may be directly affected by grains and legumes, others can get their autoimmunity managed while continuing to eat small amounts of these foods—as long as other dietary triggers are investigated vis a vis an Elimination Diet.
At the beginning of this post, I said that I see some merit in an AIP diet right out of the chute in some circumstances. In addition to the foods excluded in the Elimination Provocation diet, I recommend the exclusion of grains, legumes, and seeds, in two circumstances: when the symptoms of autoimmunity are so painful and distressing as to cause life-altering circumstances or when a simple Elimination Diet hasn’t proven successful.
According to Chris Kresser, a long-time Paleo proponent, autoimmunity expert, and author of The Paleo Cure, “The belief that ‘everyone’ will benefit from one particular dietary approach—no matter what it is—ignores the important differences that determine what is optimal for each person. These include variations in genes, gene expression, the microbiome, health status, activity levels, geography (e.g. latitude and climate), and more. When it comes to diet, there is no one-size-fits-all approach.”
Hopefully you can see that I’m not anti-AIP. Given that there are equally effective and also flexible approaches to gut healing and immune modulation that tend to dovetail more easily with our busy lifestyles, I feel that it’s in many people’s best interest to start with a less restrictive approach, which is also conducive to sticking with the healing protocol and getting the results wished for!
Jill Grunewald, HNC, Functional Medicine Certified Health Coach, and founder of Healthful Elements, is a thyroid health, Hashimoto’s, and alopecia (autoimmune hair loss) specialist and co-author of the #1 best selling Essential Thyroid Cookbook, of which this post is adapted from (the chapter, “Why This is Not Another Paleo or AIP Cookbook”).
Source: https://feedmephoebe.com/autoimmune-paleo-diet-hashimotos/
0 notes
Text
Cheesy Chicken

Cheesy Chicken
The first time I made this I just piled everything into a baking dish. Popped it in the oven and set the timer so dinner cooked itself while the boys and I went for a walk to the dam.
So easy!
The only trick was I didn’t take the timer with me so we had to guess when we needed to be home. Luckily we made it!
But next time I’ll use the timer on my phone :)
As always just use the recipe as a starting place. Make it your own with inspiration from the variations below.
Ingredients
4 medium zucchini (800g / 28oz)
4 chicken thigh fillets (450g /1lb)
1/2 cup tomato passata or puree
1 teaspoon smoked paprika optional
150 g (5oz) grated cheese
1 bunch coriander cilantro or parsley
Instructions
Turn your oven on to 250C (480F). Slice zucchini into rounds about 1cm (1/2in) thick and place in a baking tray.
Chop chicken thighs into 2 pieces and place on top of the zucchini. Mix tomato and paprika (if using) and pour sauce over the chicken. Sprinkle with a pinch of salt and pop in the oven for 15 minutes.
When the timer goes, scatter the cheese over the top of the chicken and return to the oven for another 5-10 minutes or until the cheese is melted.
Serve with coriander / parsley leaves sprinkled over.
WINE MATCH: A big buttery Chardonnay.
Variations & Substitutions
no smoked paprika – it’s lovely without. Or you can replace with ground cumin or coriander.
hot! – add a little dried chilli powder or fresh chopped chilli to the tomato. If you have some chipotle chilli in adobo sauce, definitely use them! Or serve with your fave hot sauce.
keto / ultra low carb – skip the tomato. replace 1/2 the zucchini with baby spinach leaves added at the end. Reduce the cheese. Serve with mayo or aioli.
vegetarian – replace chicken with cooked chickpeas, black beans or lentils. Tempeh or tofu is another option.
dairy-free – skip the cheese and serve roast chicken and veg with a tasty sauce like mayo or smashed avocado & lime. Or cashew sour cream.
more substantial (carb lovers) – roast sweet potato or other root veg separately. Or serve with corn chips, warm tortillas, rice or pita.
more substantial (low carb) – serve with sour cream or avocado smashed with lime and salt. Or these zucchini tortillas. Or roast nuts.
different vegetables – bell peppers (capsicum), eggplant, cherry tomatoes, mushrooms, cauliflower, broccoli or finely sliced onion are all great! If you want to use root veg, cook them separately or add them to the pan and roast for 15-20 minutes to give them a head start before adding the zucchini. Leafy greens (cooked separately) or salad leaves can give a nice boost. I usually add a big scoop of home made sauerkraut for a little probiotic crunch.
different protein – sausages, chicken breast fillets, ham, cooked chickpeas, cooked black beans, lentils, tofu or tempeh.
Waste Avoidance Strategy
zucchini – will keep for 2 weeks or longer in a plastic bag in the fridge. To keep it even longer, cook sliced zucchini in a little butter until just soft then store in an airtight container in the fridge.
chicken thigh fillets – freeze them.
tomato passata or puree / smoked paprika – keep them in the pantry.
cheese – most hard and melting cheeses will keep for weeks wrapped in waxed paper or baking paper and stored in an airtight container (or sealed ziplock bag) in the fridge. If you need to store for longer cheese can be frozen.
coriander – best to use for another meal. Can be frozen but will wilt when defrosted.
Prepare Ahead
You can but I prefer the chicken freshly cooked. Leftovers will keep in the fridge for a week or can be frozen. To serve, warm in the oven or in a frying pan with a little oil – will look messy but still delicious!

More Simple Low Carb Chicken Dinner Ideas
Have fun in the kitchen!
With love, Jules x
Tags: cheese, chicken, low carb, simple

Source: https://thestonesoup.com/blog/2019/06/10/cheesy-chicken/
0 notes
Text
Open Fridge: Inside Healthy Chef Dan Churchill’s Refrigerator
Hey Friends! One of my all time favorite ways to show how easy it can be to live a healthy lifestyle is with a little tour of my fridge and pantry. So that’s what I’ll share with you all today. I get asked often how I keep my fridge stocked when I might be recipe testing, at the restaurant all day, or traveling! And the answer is to be flexible, control what you can control, and always try to keep some color around.
When you first open my fridge, the thing you might notice is that it doesn’t look like a typical fridge. I might have quart containers full of sauces or spreads I’m testing (these are containers frequently used in the restaurant world). There might be one item in bulk if I’ve been experimenting with a new recipe (like Brussels sprouts for roasting or cilantro for a sauce). But, you’ll also find some core staples and ingredients that I always keep around.
I always have a big bottle filled with water so that it will be ready and waiting for me in the morning when I get up, to be filled with my daily scoop of Athletic Greens. This is how I prefer to start my day, and gives me a big boost that really takes my day to the next level.
Lemons and limes are one of my favorite ingredients in the kitchen. There are so many ways to use them, from zest to juice to the peel itself, so you can never go wrong by having tons of these guys around.
I keep plenty of sauces in the fridge as well. Many of these are homemade and created from herbs and roasted vegetables — like the butternut squash spread we use at Charley St or our roasted tomato beet sauce. Some are condiments like fish sauce, tamari, or mustard, which are all incredible incorporations into recipes.
Next, as I mentioned before, you’ll find tons of “meal prep” items, or recipes I’m testing. I usually try to keep some roasted veggies on deck, as well as cooked grains and maybe a protein or two. Boiled eggs, poached chicken, or a vegan option like chickpeas are great for me to have around, as I need plenty of protein to support my workouts.
Last but not least, I always try to keep some fresh herbs in the fridge. These are used in my spreads and sauces, but also make for a great tasty, nutritious, and colorful garnish on any bowl or plate. I personally love cilantro, dill, and basil. You can whip up a quick pesto in seconds if you have any of these herbs around!
My fridge is almost always stocked thanks to what I do every day in the restaurant, but if you’re looking to start from scratch and build the color-packed fridge or pantry of your dreams, I suggest starting small. Pick a few key items you use in your kitchen often, and a few basic pantry staples.
Make sure you have healthy colorful ingredients that are prepped and ready to go, so you can take the guesswork out of your healthy routine. Then, when you’re ready to get cooking, all your healthy ingredients are right there for you and ready to go. Preparing in advance and controlling those things you can control — like which ingredients you buy organic, which you can find locally — makes all the difference.
Dan Churchill is the Executive Chef at Charley St. Café in New York City, host of his Feast With Friends show – and he’s constantly creating recipes for his YouTube and Instagram followers. Dan also knows the importance of food, fitness and a healthy lifestyle. In addition to being an avid surfer who recently completed a marathon, he was the personal chef for skier Lindsey Vonn during the 2018 Olympics.
Check out our full Open Kitchen line of essentials, like Dan uses, here!
Source: https://blog.williams-sonoma.com/open-fridge-inside-chef-dan-churchills-refrigerator/
0 notes
Text
After School Snacks That Won’t Ruin Dinner!
Need after school snacks that won’t ruin dinner? Yes, it’s possible!
Kids area always hungry when they get home from a hard day of learning. They need brain food to power them through their homework! But that doesn’t mean their snacks have to fill them up so much that they won’t want to eat dinner. In fact, there are some snacks that will fill them up just enough to get them through and still leave them hungry enough to eat what you put on the evening dinner table.
EASY SNACKS FOR KIDS TO MAKE:
One of the biggest gifts we can give our kids is learning how to feed themselves well. This lesson can easily start with snacks! Kids feel empowered when they know their way around the kitchen, and giving them healthy options is the best way to ensure they learn how to work with healthy, real foods. Simple snacks are something all school aged children should be able to manage. So set them up for success! Make sure the fridge is stocked and that they know what they can help themselves to when they get home. It takes the stress off of you too!
KID APPETIZERS:
If you feel a little lost trying to stock the fridge for the kids, think of kid appetizers. Just small, healthy bites that are easy to serve and have a nice dose of nutritional value. Think whole, real foods in small pieces. Things like, carrots and hummus or celery and nut or seed butter. Real foods they can easily grab from the fridge and put together without cutting or cooking.
HEALTHY SCHOOL SNACK LIST:
Make a list. Life is always easier with a list. Think of all the real, wholesome foods your kids actually like, and the pair them together in tasty ways. Posting that list on the fridge does double duty because then your kids also know what is available to them with a simple glance at the fridge door. I actually found a magnetized white board that I attached to the fridge so Mini Chef can easily cross things off as he eats them. This way I know I need to get more when he runs out.
EASY TO MAKE SNACKS WITHOUT COOKING
If your kids come hope to an empty house, it can be a little nerve-racking to think of them turning on the stove while you’re still at work. Especially if they are on the younger side. Using real foods that can be eaten raw or things that can be taken out of the fridge and don’t need warming are your best bets. Even if your kids know how to work the microwave, fresh, real foods are the best nutritionally. So make sure they have access and know how to put together combination they will enjoy.
AFTER SCHOOL SNACKS THAT WON’T RUIN DINNER:
FROZEN GRAPES (Photo & Recipe courtesy of eMeals)
After a long day at school, few things are as refreshing and refueling as these little goodies. Kids love them, they won't make a mess, and they are easy to put in a bag or bowl to munch on while doing homework.
HUMMUS WITH WHOLE GRAIN PITAS OR VEGGIES (Photo & Recipe courtesy of eMeals)
This one is fantastic. It gives your kids fiber and whole grains and/or veggies and is just filling enough in smaller amounts to still leave them hungry for dinner.
WATERMELON CUBES WITH FETA (Photo & Recipe courtesy of eMeals)
This delicious treat gives them a little bit of sweet with a little bit of tang along with some hydration. Not a bad deal after a hard day of learning!
GRANOLA (Photo & Recipe courtesy of TheTomatoTart.com)
Granola is always a wonderfully portable and filling snack. This delicious recipe won't leave you or your kids wanting.
CUMIN DUSTED CARROT FRIES (Photo & Recipe courtesy of KitchenTreaty.com)
If you have a little time before you pick the kids up, or your looking for a way to get the kids helping in the kitchen, nothing could be more fun than making these Cumin Dusted Carrot Fries! Yum!
AFTER SCHOOL CRACKERS
If your kids like a little more crunch in their after school snacks, try nut butter on whole grain crackers and top with a little fruit!
PERFECTLY HEALTHY BANANA PUDDING
You can't go wrong with only the purest of ingredients in a bowl of pudding. If your kids want a little something sweeter after school, you can give them this without any guilt or worry whatsoever! Check it out here.
COCONUT POPCORN
Popcorn is the ultimate kid's snack. I haven't met a child yet who doesn't like popcorn and it's quick and easy to make! Try this recipe here for Coconut Popcorn. Soooo good!
BLUEBERRY COTTAGE CHEESE
Most kids don't generally go straight for a container of cottage cheese. But add a little fruit, some chia seeds and maybe a touch of honey, and they'll be asking for it again and again. Check it out here.
CHIPS & GUACAMOLE
Guacamole is easy to make and will definitely help fill up those little tummies without getting them too overly full. Try this recipe!
BANANA WRAPS
If you're looking for a fast and easy snack they can even eat on the go (like in the car on the way home!), this is a wonderful option.
Edit
What do you think? Pretty good list? What do you typically feed your kids after school?
PRINTABLE DOWNLOAD!
From the Gracious Pantry archives. Originally posted 8/10/13.
Source: https://www.thegraciouspantry.com/clean-eating-after-school-snack-ideas/
0 notes
Text
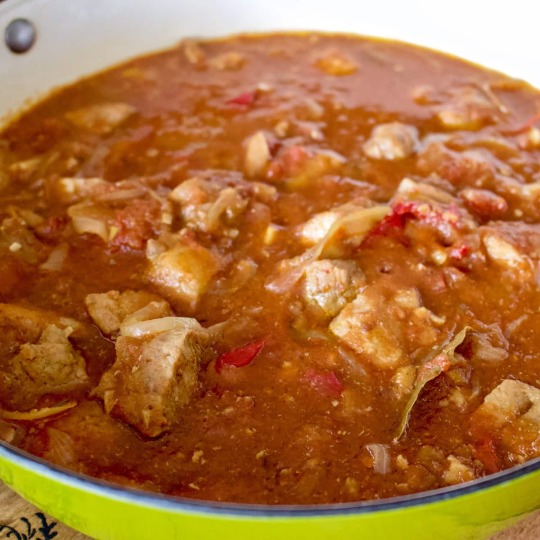
Pizza Beans
Pizza beans! A vegetable-forward version of baked ziti in which the pasta is replaced with white beans. The recipe makes a large tray, so it’s perfect for leftovers throughout the week.
So. The toddler sass.
!&*($#@&*$#)&*()#@
My whole life is an endless chorus of “No, mommy! BIG GIRLS DON’T DO THAT.”
Apparently big girls don’t: wash their hands, put their toys away, take naps, eat lunch, eat breakfast, eat dinner, (but y’know cake is okay), use the potty….okay, so the list is ENDLESS.
It might be faster to make a list of things big girls do do. It would include approximately two things: (1) destroy everything in their path, (2) ignore everything that mommy says, especially as it pertains to any of the aforementioned activities.
Except, of course, for those rare occasions when big girls are really sweet and tell you they love you “so so much” for absolutely no reason at all.
And then they totally shock you by eating their KALE and their BEANS in what can only be described as a completely unprecedented eating frenzy. No, I don’t know what kind of vegetable loving alien invaded my kid’s body, BUT PLEASE CAN IT STAY?!?!
Clearly these pizza beans are just magical entities that Smitten Kitchen invented to save the lives of mamas everywhere. They’ve got the best cheese crust layer on top and really do taste alarmingly like pizza. I’m not sure how she does it. Heck, I’m not even sure I want to know. Some questions are better left unanswered. Let’s just eat.
Pizza Beans
Pizza beans! A vegetable-forward version of baked ziti in which the pasta is replaced with white beans. The recipe makes a large tray, so it's perfect for leftovers throughout the week.
Ingredients
2 tbsp olive oil
1 large onion, chopped
2 carrots, peeled and diced
salt and red pepper flakes, to taste
2 large garlic cloves, minced
¼ cup white wine
1 bunch curly kale leaves, torn
28 oz canned crushed tomatoes
1 lb dried white beans, cooked until tender
¾ cup vegetable broth
½ lb mozzarella, coarsely grated
⅓ cup grated parmesan cheese
Instructions
Heat the oven to 475F.
In a large oven-proof Dutch oven, heat the olive oil on medium high heat. Stir in the onion and carrots. Season with salt and red pepper flakes, to taste. Cook until the vegetables start to brown, about 10 minutes, stirring frequently. Stir in the garlic and cook for anothe rminute.
Add the wine and scrape up any browned bits on the bottom of the pot. Simmer until it evaporates, about 1-2 minutes. Stir in the kale and cook until wilted, another 1-2 minutes. Add the tomatoes and bring to a simmer, then stir in the beans and broth. Allow to simmer for 10 minutes, then remove from the heat.
Sprinkle the beans with the mozzarella, then the parmesan, and bake for 10-15 minutes, or until browned on top. Allow to sit for 5-10 minutes to set, then serve warm
3.5.3208
Source: https://joanne-eatswellwithothers.com/2018/10/pizza-beans.html
0 notes
Text
David Burtka’s Favorite Pasta Sauce & Why He Makes Bacon Popcorn With His Kids
Welcome to “More Ketchup, Please,” our newest series that’s spilling the beans on all the different ways we cook for, and with, our kids. We've got some great guests stopping by, to get schooled by their little ones on how to perfect family favorites. The more (cooks) the merrier? We think so.
Actor and chef David Burtka knows exactly how to throw a great party (as evidenced by his new book Life Is a Party: Deliciously Doable Recipes to Make Every Day a Celebration). One of his secrets for hosting? Involving the whole family. As Burtka says, “Parties should be for everyone, and not just the adults.” Which is why his kids usually make an appearance.
Gideon and Harper, Burtkas’s 8-year-old twins with husband Neil Patrick Harris, are regular sous-chefs in the kitchen, whether it’s to whisk batter, pick herbs—or lick egg beaters. While they each have a trademark recipe, it’s their combined forces that have produced the real winners. Like the sweet and salty popcorn with mini meringues, a genius spin on Kettle Corn—so popular it’s now part of the Burtka-Harris family folklore, second only to Burtka’s legendary Bolognese (watch the video for that story).
In this week’s episode, Burtka and the twins bring their cooking skills to our kitchen, to make not one but three kinds of popcorn—mini meringue, curry butter, and drumroll, please…bacon fat with bacon bits. Because let’s face it, everything tastes better with bacon.
“It’s a popcorn bar!” says Burtka. And if that isn’t a heck of a crowd-pleaser, we don’t know what is.
Bacon Fat Popcorn
View Recipe
Ingredients
3 tablespoons bacon fat 2/3 cup popcorn kernels Kosher salt Bacon bits (optional)
3 tablespoons bacon fat 2/3 cup popcorn kernels
Kosher salt Bacon bits (optional)
Popcorn with Curry Butter
View Recipe
Ingredients
3 tablespoons unsalted butter 1 tablespoon curry powder 3 tablespoons canola oil 2/3 cup popcorn kernels 1 teaspoon kosher salt
3 tablespoons unsalted butter 1 tablespoon curry powder 3 tablespoons canola oil
2/3 cup popcorn kernels 1 teaspoon kosher salt
Sweet-and-Salty Popcorn with Mini Meringues
View Recipe
Ingredients
For the mini meringues
2 large egg whites at room temperature 1 pinch cream of tartar 1 packet fine salt 1/3 cup sugar
2 large egg whites at room temperature 1 pinch cream of tartar
1 packet fine salt 1/3 cup sugar
For the popcorn
3 tablespoons canola oil 2/3 cup popcorn kernels 3 tablespoons unsalted butter, melted Kosher salt
3 tablespoons canola oil 2/3 cup popcorn kernels
3 tablespoons unsalted butter, melted Kosher salt
What’s your favorite recipe to cook with your kids? Tell us in the comments below.
Source: https://food52.com/blog/24338-david-burtka-popcorn-bar-recipe
0 notes
Text
How To Make Oatmeal
Wondering how to make oatmeal properly? It’s not rocket science, but it does help to know which oats to use to get your desired results, and how to cook them properly to get those expected results.
There are categories of oats, and knowing what you are buying at the store is super helpful when making different types of oatmeal or recipes that include it. For example, if a recipe calls for instant oats and you substitute with steel cut oats, you’ll have nothing but a hot mess on your hands.
TYPES OF OATS:
There are two main types of oats Steel cut and rolled. Steel cut is a cut all it’s own, cut with steel blades as indicated. Rolled oats come in different levels of processing.
WHAT ARE STEEL CUT OATS?
Steel cut oats are the least processed oats available. The raw whole oats are cut into grain-like pieces that take the longest of all oats to cook. However, because they have more of the whole oat, they also have more fiber and nutrition. Steel cut oats are the healthy “standard” of oats. That being said, they do have a chewy texture when cooked, which some people don’t care for.
WHAT ARE ROLLED OATS?
Under the “rolled oats” category, you’ll find several types of oats. They are literally rolled over with rollers to flatten them out into the shape you are familiar with. The different types are:
Old Fashion Oats – Slightly more processed than steel cut oats.
Quick Cooking Oats – Definitely more processed than steel cut oats.
Instant Oats – Extremely processed compared to steel cut oats.
HOW TO COOK OATMEAL:
There are a few ways to cook oats.
On a stove top with liquid.
Baked in the oven in baked goods.
In a slow cooker.
In an Instant Pot or other pressure cooker
Overnight oats – these don’t get cooked at all. Just soaked overnight!
HOW TO COOK STEEL CUT OATS:
For a 4 cup yield:
4 cups water + 1 cup steel cut oats.
HOW TO COOK ROLLED OATS:
The ration for almost any type of rolled oats (unless the package says different) is:
1 cup water + 1/2 cup oats You can also substitute the water with milk for creamier oats. Any type of milk, dairy or non-dairy, will work.
COOKING PROCESS FOR ANY OATS:
This applies to any type of oats.
Always bring your liquid to boil, first.
Then add your oats and cook for the time specified on the package. This can be anywhere from 5 minutes up to 40 minutes, depending on the type of oats you are using.
COOKING TIMES FOR OATMEAL:
Steel cut oats – 30-40 minutes
Traditional oats – 20-30 minutes
Quick cooking or Instant Oats – Cook for about 1-3 minutes and then let sit with the heat off and a lid on, until the oats are finished.
And remember, oats can be cooked similar to pasta. They can be enjoyed al dente all the way up to complete mush. The length of cooking times and liquid can be adjusted, depending on your desired outcome. Never go below the specified water requirement on the package. But if you love a mushier oatmeal, you can always add slightly more (a tablespoon or two) and cook it a little longer to get a mushier outcome.
SUBSCRIBE: Remember to subscribe to my free, Gracious Pantry Newsletter to receive all my latest recipes in your inbox! Click here to sign up!
OATMEAL RECIPES:
Enjoy!

Source: https://www.thegraciouspantry.com/how-to-make-oatmeal/
0 notes
Text
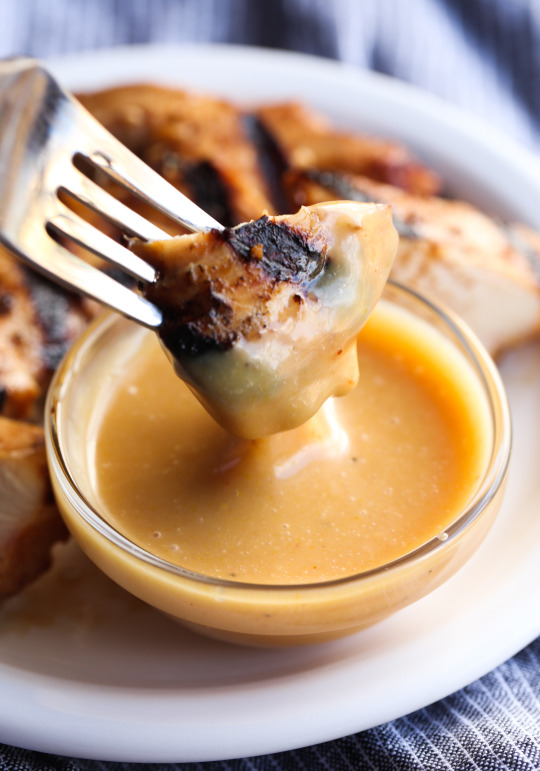
Grilled Salmon with Lemon Garlic Sauce
Loaded with Omega 3’s and ready in under 30 minutes this grilled salmon with lemon garlic sauce is sure to please any palette.
My husband and I first discovered wild sockeye salmon during a trip we took to Seattle years back when we were dating. Our vacation just so happened to take place in May, right as the wild sockeye season was in full swing.
What’s the difference between wild and farmed salmon?
Color: Wild salmon has a darker red color over farmed salmon
Taste: Wild salmon has a deeper flavor than farmed salmon
Nutrition: Farmed salmon has similar nutritional benefits but is typically fattier.
To our delight, we dined on the most flavorful, rich and tender salmon of our lives. The recipe I’m sharing with you today brings back so many great memories of Seattle.
No sockeye salmon available? No worries – this recipe works well with any type of salmon or fish. When possible, always purchase wild salmon but don’t skip the fatty fish if it’s not available. In fact, studies show that the health benefits of wild salmon out weigh the potential risks of purchasing farm raised salmon.
Here are some of my other amazing salmon recipes:
Your fork is waiting.
<![CDATA[.wprm-recipe-rating .wprm-rating-star.wprm-rating-star-full svg * fill: #343434; ]]>
Course: Entree, Main Dish
Cuisine: American
Keyword: grilled salmon
Prep Time: 10 minutes
Cook Time: 15 minutes
Total Time: 25 minutes
Servings: 4
Calories: 302kcal
Loaded with Omega 3's and ready in under 30 minutes this grilled salmon with lemon garlic sauce is sure to please any palette.
Questions / Comments? Print Recipe
Ingredients
20 oz salmon cut in 3-4 oz filets
2 tablespoons olive oil
2 cloves garlic grated
1 zest and juice of lemon
1/4 cup fresh parsley chopped
1 teaspoon sea salt
1/2 teaspoon pepper
Instructions
Pre-heat a grill (or grill pan) on high heat.
Season flesh side of the salmon with a sprinkle of salt and pepper.
When grill is hot, spray with non-stick grilling spray.
Place salmon on the grill and cook about 5-6 minutes per side until you reach your desired level of doneness. (I like mine a little pink, especially when it's high quality sockeye.)
While fish is cooking, whisk together olive oil, garlic, lemon juice/zest, parsley, salt and pepper.
Drizzle sauce over the fish before serving.
Nutrition Facts
Grilled Salmon with Lemon Garlic Sauce
Amount Per Serving
Calories 302 Calories from Fat 170
% Daily Value*
Total Fat 18.9g 29%
Saturated Fat 3g 15%
Cholesterol 88mg 29%
Sodium 634mg 26%
Total Carbohydrates 2.2g 1%
Protein 30.4g 61%
* Percent Daily Values are based on a 2000 calorie diet.
DID YOU MAKE THIS RECIPE?If you tried this recipe I would love to to see it and have you share! Tag me @thelemonbowl using the hashtag #thelemonbowl!
Questions or Comments?Click Here to send me a note or rate the recipe!
Want more HOT grilled meal ideas? Check out my Pinterest board!
Source: https://thelemonbowl.com/grilled-salmon-with-lemon-garlic-sauce/
0 notes
Text
Lucky Socks for St Patrick’s Day
Avoid getting a pinch this St. Patrick’s Day with these lucky green socks! They come together super quickly and are the perfect fun and silly touch for any outfit. Kids who love to dance will especially love these playful socks as they jingle with every step. We used these green unicorn socks as our starting point but any socks you have on hand will do. Watch the how-to video and read the full instructions below!
Socks
Pom poms
Tassels
Bells
String/embroidery thread
Hot glue gun
Needle and thread (optional)
Step 1 Cut pieces of green string or embroidery floss into short lengths about 4″ long. Thread each through a gold jingle bell and tie two knots to secure it in the middle of the string. Repeat for as many bells as you like – we did six bells, three for each sock. Lay your socks out flat and apply a dab of hot glue to the top edge. Carefully press the two loose string ends of one of the jingle bells into the glue to secure in place.
Step 2 While the glue is still hot, place a colorful pom pom (we used pink!) onto the glue. Repeat with two more bells next to that first one, and for the other sock as well. You can place these bells and pom poms on the sides like we did, on the back instead, or even all the way around if you want some super lucky and jingly socks!
Similarly, cut two more pieces of string, also about 4″ each, and thread two mini tassels onto each one. Tie a double knot to secure them in place in the middle of the string. Just like with the bells, apply a dot of hot glue to the top edge of the sock (next to the other pom poms), stick the loose ends of the string in place, and cover with another pom pom.
And voila! Your extra lucky socks are all ready to wear!
If you don’t want to permanently turn your socks into these jingly lucky socks, instead of using hot glue, using a needle and thread to attach the strings and pom poms instead. That way, when St. Patrick’s Day is over, you can simply snip the threads, remove the charms, and wear the socks plain again. Happy crafting!
Looking for even more St. Patrick’s Day crafts? Check out these pipe cleaner rainbow crowns, these jumbo lucky charms hair clips, or how about this cardboard rainbow puzzle?!
Video and photography by Caroline Gravino Creative Direction by Handmade Charlotte
Source: https://www.handmadecharlotte.com/lucky-socks-st-patricks-day/
0 notes
Text
Hestan Essential Pan Review & Giveaway
posted by Jaden
This is a Hestan Essential Pan Review, including both PROs and CONs (and a giveaway at the end) – Jaden
We’ve been cooking with the Hestan Essential Pan for the past 3 weeks. It’s appropriately named…as I found myself reaching for this pan over all my other pieces of cookware. The size and shape of the pan makes it suitable for braising pork, making clam chowder, sautéing green beans, cooking carne asada and even a stir-fry for 2.
3.5 -Quart Hestan Essential Pan:
10″ diam., 3 1/2″ high (4 3/4″ high with lid).
5-qt. cap.
4 lb. 9 oz. with lid.
5-Quart Hestan Essential Pan:
11 1/2″ diam., 3 1/2″ high (5″ high with lid).
5-qt. cap.
4 lb. 9 oz. with lid
I have the 3.5 Quart Hestan Essential Pan:
What is Hestan Cookware?
The Hestan NanoBond surface is stainless steel bonded with thousands of titanium and chromium-based alloys. There are no chemicals used in this cooking surface. That means a cooking surface that’s environmentally friendly and incredibly durable….4x harder than stainless steel. The cookware is so innovative, that Hestan owns 14 global patents for the fit and finish.
Cooking with the Hestan Essential Pan
Tonight, we’re making carne asada tacos for me and my son.
I like the long, ergonomic handle. It fits my hand well.
Steak browns evenly. I really like the shape of the Essential Pan, the high sides allow you to stir, flip, toss your food without it spilling.
The Nanobond technology provides a very dense, extremely durable cooking surface. Food doesn’t stick. You can use metal utensils.
Since I also have the Hestan Frying Pan, I’ll show you how amazing this surface is. I’m warming up tortillas with cheese. Even if I sprinkle shredded cheese on the surface….
….it releases cleanly.
Tacos for my son….
And for me….
Cleaning the Hestan Essential Pan
Just a regular scrubby side of the sponge and dish soap.
I did find that after multiple uses of the pan, I needed to use Barkeeper’s Friend (liquid version, not the powder) to keep the surface shiny and new. Hestan also includes their own special cleansing polish, which works amazing.
One of my favorite features of the pan
The inside rivets are flush to make scrubbing the pot easier.
However, the outside of the pan, near the handle is really difficult to clean well, especially when grease and food bits get stuck between the pan and the bottom of the handle.
Does it scratch?
The Hestan cookware that gets the most abuse in my kitchen is the Hestan wok. Because of the nature of wok cooking, lots of movement in the pan, lots of moving the wok on and off the cooking grates, and well…because I’m also kinda hard on my cookware, I thought I’d show you comparison between two woks.
My old kitchen has heavy cast iron grates that tend scratch up all cookware.
This is the bottom of an almost $300 wok that’s 8 months old.
This is the bottom of the Hestan wok that is also 8 months old….but used more often. A few minor scratches, but barely noticeable.
Both pans were cleaned with Barkeeper’s Friend (liquid version, not the powder) right before I took the photos.
Hestan is expensive
Hestan cookware is sold at Williams Sonoma. It’s pricey. The 10-piece set is $1,500 on sale (though the price is comparable to other high-end stainless steel cookware, like All-Clad d5 or copper lines.)
The 3.5 quart Hestan Essential Pan with lid is on sale right now for $299. The larger 5-quart pan is $399. I have the 3.5 quart pan, and I found it the perfect size.
There is a lifetime warranty, and the cookware is made in Italy. I’ll add one more PRO to this cookware – it’s very lightweight. You can use a pan even this large with just one hand.
If I were to just get ONE Hestan cookware piece, it would be the 3.5 quart Hestan Essential Pan. It’s such a versatile size and shape. I’ve been using Hestan cookware line for over a year now. The pans still look brand new.
This was my first piece, a frying pan, 1 year old (and used weekly). It still looks brand new. Note that I always hand-wash my cookware, and also use the Hestan polishing paste about once every few weeks.
You can purchase Hestan cookware at Williams Sonoma or direct from Hestan’s website.
** Please add [email protected] to your contacts to help prevent email notifications from going into spam folders.
Never miss another Steamy Kitchen Giveaway!
Subscribe to our Giveaway Notifications to keep up to date on all of our giveaways! We will even throw in a special gift when you confirm your subscription!
List of Past Winners.
DISCLAIMER & OFFICIAL RULES: The giveaway product is provided by the sponsor of the giveaway and will be shipped from the sponsor directly. No purchase necessary to enter or win. Giveaway is open to people who are 18 years of age at time of entry and open to people worldwide. Steamy Kitchen and its sponsors only ship physical prizes to United States addresses. However, Steamy Kitchen reserves the right to provide an Amazon.com or Amazon.ca gift card for the value of the prize (at time of publishing) in lieu of shipping physical product due to shipping costs and logistics, especially for our international winners. Steamy Kitchen assumes no responsibility for late or misdirected entries due to SPAM, technological, or e-mail filtering issues or for prizes lost in transit. Winner will be notified by email, and must respond within 5 business days, otherwise winner will forfeit the prize and another winner may be drawn. For this giveaway, entrants can enter the designated number of times per e-mail address per day. The use of any system, robot, agent, or software to automatically submit entries in connection with this Giveaway is prohibited. Winners of giveaways are published on Steamy Kitchen, and winner's name and city/state/country are announced in Steamy Kitchen email newsletters. See rest of the Official Giveaway Rules.
Comments Off on Hestan Essential Pan Review & Giveaway
Source: https://steamykitchen.com/47734-hestan-essential-pan-review-giveaway.html
0 notes
Text
Breakfast Pigs in a Blanket
Sharing is caring!
Breakfast Pigs in a Blanket are both sweet and savory and make an easy breakfast the whole family will enjoy. Only 4 ingredients needed!
Fully cooked sausage links are wrapped in puff pastry that has been drizzled with a little pancake syrup. They are baked for 15 minutes and get wonderfully golden and crispy.
Pigs in a Blanket are a favorite appetizer of mine. Why not enjoy them for breakfast too? This recipe uses breakfast sausage instead of hot dogs or cocktail wieners to make an unbelievably delicious breakfast and brunch dish.
You could use crescent roll dough for this recipe, but you really can’t beat the buttery light crunch of puff pastry.
You want to use fully cooked sausage for this recipe. You can find it in the refrigerated section with the bacon. Or you can buy it frozen, but you will need to thaw it. As an alternative, you can use uncooked sausage links and cook them. Let them cool before proceeding with the recipe.
Make sure your puff pastry is thawed sufficiently or it will crack when you roll it out.
Use a pizza cutter to quickly and easily cut the puff pastry into squares.
To make them spicy, sprinkle a little cayenne pepper on each puff pastry piece before placing the sausages on them.
More Breakfast Recipes:
Breakfast Pigs in a Blanket
Breakfast Pigs in a Blanket are both sweet and savory and make an easy breakfast the whole family will enjoy. Only 4 ingredients needed!
Keyword: Pigs in a Blanket
1 large egg
1 teaspoon water
1/2 (17.3-ounce) package frozen puff pastry, thawed
2 tablespoons pancake syrup
1 (9.6-ounce) package fully cooked breakfast sausage links
Preheat oven to 400 degrees and line a rimmed baking sheet with parchment paper.
Whisk together egg and water in a small bowl and set aside.
Roll the thawed pastry sheet out on a lightly floured surface. You want it to roughly be 14x10-1/2 inches. Cut it into 12 squares. Don't worry too much about the shape or size of the puff pastry pieces as long as they are big enough to wrap around the sausage.
Drizzle a little pancake syrup on each square and place a sausage so that it sits diagonally on each square.
Brush two opposite corners of puff pastry with egg wash on each square. Pull the corners up over the sausage and pinch them together to seal. Place on prepared baking sheet.
Brush tops with egg wash and bake 15 to 18 minutes, or until golden.
To make this dish spicy, sprinkle a little cayenne pepper on each piece of puff pastry before adding the sausage.
Be sure to thaw the puff pastry sufficiently before rolling it out or it will crack.
I like to roll the puff pastry out on a piece of parchment paper sprinkled with a little flour. Makes for easy clean-up.
Recipe adapted from Paula Deen
Disclosure: This post contains affiliate links.

Source: https://spicysouthernkitchen.com/breakfast-pigs-in-a-blanket/
0 notes
Text
A STUDY ON FRITTATAS
Brunch for a group. Inexpensive dinner. Cook once, reheat through the week breakfast. Put a slice in a tortilla or between toast and you’re off. Frittatas are just the best. Especially for some who always have leftover bits and hate waste.
*raises hand*
Too much zucchini? Trying to set yourself up to start your day with protein? Frittata! I saved a few videos in my story highlights if a visual helps. I believe a frittata is one of those meals that can go so many directions, that once you understand how they work, you can make them out of all sorts of things.
I am going to add some bullets here, because honestly, it’s just easier to shoot off opinions that way than try to craft sentences that go together. Once you have the basics down, you can make up your own creation. I would love you to chime in with your favorite combos or your tips below! If you’re one for a crust, I’m a big fan of this recipe.
Things I know about frittatas:
I like the vegetables inside to be cooked. The key to not having a water logged frittata, is cooking some of the water off of the vegetables first. You can roast or saute, and then cool. This includes greens, though they literally need about 30 seconds. Any meats need to be cooked in advance before adding too.
I’m going with a ratio of 2 eggs per person for one serving. You can do a 4 egg frittata for 2 in an 8” pan, 4-6 people in a 10” pan and upwards. The thicker you make the frittata, you’ll need to increase the baking time. Just keep giving the middle a little tap and pull it when it’s no longer liquidy. I keep a lower heat to try to keep the bottom from burning.
I strongly suggest using a nonstick or well-seasoned cast iron pan (I LOVE this pan - crisps, frittatas, casseroles, the best)…or the whole thing can be baked in a well greased, oven-proof dish. I suppose that would be called an “egg bake” but whatever, does it matter?
Cheese. I tend towards sheep or goats cheeses, and those both work well in frittatas. They are lower in fat, so can dry out, but with a short, low oven time, they do fine. You just don’t want a super dry cheese, in my opinion. Parmesan is ok, but it is so dry, you will not get any pockets of creaminess, it will mostly just taste like delicious salt, which is not a terrible thing by any means. If you choose a meltier cheese like cheddar, I def like most mixed in and a little on top.
Prep ahead
Let’s say you’re hosting the following morning or trying to get a leg up on Christmas morning (or just a Monday :)
Whisk all your eggs, dairy, seasoning in one bowl you can keep covered in the fridge. Have all your add-ins cooked and ready (zucchini sauteed, sausage cooked, tomatoes roasted, whatever). Pull them all out while preheating the oven, and then proceed with the recipe from there. Gently warm the pan with the fillings in it, add the egg mixture, pop it in the oven.
Favorites
sauteed mushroom, greens and goat cheese roasted tomatoes, greens, pesto, goat cheese roasted zucchini, peppers, tomatoes, little bit of minced red onion, feta just steamed asparagus, tons of herbs, goat cheese crowd pleaser: potatoes, bacon, greens, white cheddar
GREEN VEGETABLE FRITTATA
Serves 4
I am listing the vegetables I used here, inspired by what I had in the fridge. You really can put anything in a frittata…ok, most thing. Be sure that the vegetables have a similar cooking time, if you’re sauteing everything together. For example, potatoes take longer to become tender than zucchini, so while you can mix these two, you need to start the potatoes off first, and then add the zucchini after the potatoes have been going for 10 minutes, so you don’t burn the zucchini or turn it to moosh. Things like peppers and tomatoes cook the same, assorted greens are typically quick, etc.
Ingredients
1 small leek 1 small zucchini 1 small bundle of broccolini
extra virgin olive oil sea salt
8 eggs 1/3 cup heavy cream (canned coconut milk works as a non-dairy option) dollop of pesto or sour cream (or non-dairy alternative), optional fresh ground pepper 3-4 ounces soft goat cheese fresh green herbs, for garnish
Instructions
Clean the leek and trim the zucchini. Chop the vegetables small. Heat a drizzle of oil in a medium nonstick or seasoned cast iron pan. Add the vegetables, pinch of salt and saute until tender, and cooked down, about 6 minutes. Turn off the heat and let them cool down. Move them around occasionally to release any steam pockets.
Preheat the oven to 325’.
Whisk the eggs and cream (or non-dairy alternative) well. Lots of air in there, keep whisking. Whisk in a dollop of pesto or sour cream, if using, and a few grinds of fresh black pepper. If you like spice, a dash of red pepper flakes. Crumble half your cheese in here.
With the heat on low, distribute the vegetables around in your nonstick pan and pour the egg mixture on top. Let it sit for a couple minutes just to set the bottom. Sprinkle the remaining cheese on top, and put the pan on the middle rack of the oven. Bake for 16-20 minutes until the center juuuuust stops jiggling. Better to pull it out on the side of underdone.
Let it cool down, garnish with tons of fresh herbs. Serve with toasty bread and fresh tomatoes if you have them.

Source: https://www.sproutedkitchen.com/home/2018/9/25/a-study-on-frittatas
0 notes
Text
The Everything Summer Salad (Watermelon, Corn & Cucumber Salad with Avocado Vinaigrette)

I call this my Everything Summer Salad, because it's a mix of some of my favorites of the season. Juicy watermelon, crisp cucumber and radishes, sweet corn, and ripe avocados. Served with diced cilantro and a handful of fresh cheese, it hits all the perfect summer flavor notes.

Summer is the best time for hitting the markets. From fresh fruit to sweet corn to piles of fresh greens and everything in between, I tend to get a little carried away filling my baskets with all the gorgeousness. It's so easy to eat healthy in the summer when all the good things are at their best--and salads like this are such a great way to bring it all together.
Colorful, flavorful, and (best part!) so quick and easy to make.

I love serving this at a summer bbq party as a side to all the grilled meats, or bring it with you on a picnic or potluck.
This one pairs with really just about anything (we enjoyed it with some shrimp fajitas served outside in our garden).
Don't forget the bottle of chilled rosé! (I bet a pitcher of icy margaritas would be perfect, too.)
Love this recipe? Here are a few other fun salad ideas for you:
Warm Brussels Sprouts Caesar Salad with Bacon Croutons
Carrot Salad with Dijon Vinaigrette
Golden Herbed Quinoa Salad
The Everything Summer Salad (Watermelon, Corn & Cucumber Salad with Avocado Vinaigrette) Serves 6
Ingredients 3 ears sweetcorn 2 cups diced watermelon 1 English cucumber, sliced 1 small bunch radishes, finely sliced 1/3 cup fresh cilantro, roughly chopped 1/4 pound fresh mozzarella, diced
For the avocado vinaigrette dressing 1/4 cup white wine vinegar 1/4 cup fresh lime juice 1/2 cup olive oil 1 small whole ripe avocado (such as Hass) 1 teaspoon kosher salt 1 small jalapeño pepper, seeds and stem removed
Directions Peel the corn, rub with vegetable oil, and place directly on the flame of a gas stove OR on a hot grill , cooking 1-2 minutes per side until charred. Remove from heat, let cool, then cut off kernels.
In a large bowl, combine charred corn kernels, diced watermelon, cucumber, radishes, cilantro, and mozzarella. Toss well to combine.
In a food processor or blender, combine the vinegar, lime juice, olive oil, avocado, salt, and jalapeño. Puree until smooth. Taste and adjust seasoning as needed.
Just before you’re ready to eat, add a couple tablespoons of the dressing to the salad and toss to coat. Add more dressing as needed (you won’t use all of it—save it for another salad!)

Source: http://www.alwaysorderdessert.com/2017/07/the-everything-summer-salad-watermelon.html
0 notes
Text
Upside Down Walnut, Chocolate, & Pear Cake
Our little back house we are renting is about four miles from the ocean here in Costa Mesa/Newport Beach. We get the foggy marine layer on the mornings it chooses to hang over the coast, and we have a very tempered climate year round. In the past I’ve brushed southern California off as having no seasons, but this just isn’t true. I think with social media these days we see so much in the fall of the iconic leaves changing, and more clearly defined seasons of certain regions of the world, that is has become commonplace to standardize these quarterly shifts. Maybe it’s just me and my tendency to seek out change, but I’m coming around to seeing a more full, open picture. Every little dot of latitude and longitude on the map has it’s own unique characteristics when it comes to seasons, and I’m beginning to appreciate our a-typical southern California ones.
September and October are two of the warmest months here where I live, which is wonderful if you can get past the photos of falls leaves and warms mugs of cocoa elsewhere. Why is it wonderful? The crowds of people have all gone home, the kids are back in school, and the beaches and national parks are now near-empty to enjoy. Around here we call it “locals’ summer”. I don’t do well in the heat, so this time can be tough for me to get through, but November and December are the greatest gift after these few warm months. This is my season, this is the time of year I fall in love with California. The air is chilly and as crisp as you can get with the pacific ocean nearby. The light is the most beautiful light I’ve ever seen. The sunsets make you weak in the knees. And the smell that permeates the entire city is pure heaven. The farmers market is still overflowing, with fall produce finally coming in alongside unlikely jewels such as tomatoes, avocados, oranges, and so many greens (kale, chard, herbs, etc). Local pomegranates are half the size of my head and two dollars a piece.
Approaching Thanksgiving this year, and hosting for the first time with my parents coming into town, I tried pondering a new theme we could base our cooking around that felt more fitting for our area. As is typical this time of year, we have a three day heat bump that lands right over Thanksgiving. Normally I would say something negative about California and how I wish I lived somewhere cooler. But not this year, I’m celebrating where we live. So we are having a California-themed Thanksgiving with dishes made from all of the produce that was overflowing the most at the farmers market this past weekend. Our backyard will be in shade in the late afternoon, so we will set up the table under our twinkle lights and eat outside. Roasting a dozen heavy dishes on a warm day doesn’t sound right to me, so I’m planning a few lighter twists. I’ll be sure to share them on Instagram stories a bit if you’re curious to see what we are making. I’m really excited you guys, it feels good to be going with the grain and not against it for once.
Part of my inspiration to dig deeper into understanding and loving the unique spot in the world where I live came from reading Valentina‘s pages in her new cookbook, Everyday Vegetarian. She lives in a small medieval town on the eastern side of Italy and shares her region’s history and culinary traditions in a way that reads like a poetic novel. From cover to cover you are immersed in recipes and stories that overlap each other into one beautiful picture of her culture. Valentina takes traditional recipes that have been passed down for generations in her family, alongside some newer ones of her own, and shows how to make them vegetarian (and many of them vegan too) without compromising the tradition. It’s beautifully photographed, with such a lovely cover to have sitting out on your kitchen counter too (see photo below recipe). She shows how there is so much more to Italian cooking outside of pasta and tomato sauce (although she has recipes for both from scratch that are incredible) and how to cook throughout the seasons in her nook of the world as well. I want to make every recipe from cover to cover and book a trip to Italy ASAP to experience so much of what she describes.
The first recipe that jumped out to me was her grandma’s upside down prune cake, which she suggests in the fall making with pears, nuts, and chocolate instead. So I did just that, and it was so scrumptious I had to share it with you here too! I used a mixture of freshly milled flours from the incredible people over at Eat Grain, which I link to individually in the recipe below. You can taste the freshness, and even see it, in these flours. I’ve never experienced anything like it – and the nutrition is suppose to be even better as well! Check out their line on their site here if you’d like, they are shipping anywhere in North America for free for the rest of the year – which is perfect timing for some holiday baking.
I hope those of you celebrating Thanksgiving this week have the most wonderful, joy-filled time. Maybe this cake could even squeeze onto one of your holiday tables too ;). -xx
SHOP MY PANTRY >>
RECIPE NOTES: The recipe below is pretty darn near exact to Valentina’s, with a few small exceptions. Here are the few substitutions I made which you can convert back to the original if you desire to: I use coconut sugar instead of brown sugar, apple sauce instead of sunflower oil, and a mixture of whole spelt and rye instead of whole wheat. I also halved the recipe below and prepared it in a 6 inch springform pan in the photos above, since I knew we would have lots of sweets on hand this week. This worked out really well, but I know I’ll be making the full recipe next time – it was just too good.
UPSIDE DOWN WALNUT, CHOCOLATE, & PEAR CAKE Makes one 10 inch cake, serves 8 to 10.
1 3/4 cups almond or soy milk 1 tablespoon apple cider vinegar 1/4 cup of water 2 teaspoons vanilla extract 1/4 cup unsweetened apple sauce (or sunflower oil) juice and zest of 1 lemon 1 cup coconut sugar, plus 1 teaspoon for the pan 1 cup of sifted spelt flour (white) 3/4 cup whole spelt flour 1/4 cup whole rye flour 1/3 cup potato starch 1 heaping teaspoon baking soda 1 heaping teaspoon baking powder 1 teaspoon ground cinnamon pinch of salt 15 small pears 1/3 cup chopped raw walnuts 1/3 cup chopped dark chocolate
optional: extra chopped walnuts and dark chocolate for sprinkling on top
Preheat the oven to 350F. Line a 10-inch springform pan with parchment paper and lightly oil the sides (I forgot to oil mine and it still removed itself nicely, but it is probably safer to do so). Sprinkle about a teaspoon of coconut sugar on the bottom.
Combine the sifted (white) spelt, whole spelt, and rye flour with the potato starch, baking soda, baking powder, cinnamon, salt, coconut sugar, and lemon zest in a large bowl and whisk to remove any lumps (I sifted mine, and added the sugar and zest afterwards).
In a large glass measuring cup, combine the almond or soy milk, vinegar, and lemon juice and stir. After a few seconds, the milk will start to curdle. Immediately add the water, applesauce (or sunflower oil), and vanilla. Stir well. Slowly pour this into the dry mix, stirring with a whisk to break any lumps. The batter will be somewhat on the liquid side.
Core each pear and slice into 1/4 inch thick wedges. Arrange in a circle in the prepared springform pan, until the bottom is completely filled. Sprinkle the chopped walnuts and dark chocolate on top, and slowly pour the cake batter into the tin. Bake for 40 to 50 minutes (mine took 50), until cooked through when tested in the center with a toothpick. Once cooked and golden on top, turn off the oven and let it sit inside for 5 minutes more.
Remove the cake from the oven and release from the springform pan onto a wire rack. Flip upside down so that the pears are on top, and peal away the parchment paper. This is optional, but while the cake is warm I sprinkled some dark chocolate on top, and when it had melted I added a small handful of additional chopped walnuts. Once fully cooled, slice and serve the cake. Store leftovers in an airtight container on the counter, or in the fridge (it’s really good cold), and enjoy within three days.
This recipe was originally found in the cookbook Everyday Vegetarian, and is being republished here with Valentina’s permission. See more of her beautiful work on her blog, Hortus Cuisine, and on Instagram.
I love seeing what you create! Be sure to tag your photos on Instagram with #FWmakers.
This post contains affiliate links (they are underlined for clarity). Purchases you make through these links will help fund the work I do here on Faring Well at no extra cost to you. Thank you sincerely for your constant love and support.
Naturally Vegetarian by Valentina Solfrini O R D E R H E R E
Source: http://faring-well.com/upside-down-walnut-chocolate-pear-cake/
0 notes
Text
Cheesecake Factory’s(™) Santorini Farro Salad
Today I have a secret recipe for a healthy dish served at The Cheesecake Factory. The Santorino farro salad is a light and fresh combination of farro, cucumbers, tomatoes, beets, red onion, feta cheese. This salad is tossed in a light vinaigrette and served with tzatziki sauce on the side.
Enjoy!
=-=-=-=-=-=-=-=-=-=-=-=-=-=-=-=-=-=-=-=-=-=-=-= Natural Remedy Beats Ibuprofen For Pain Relief Unlock the power of organic turmeric extract and safely treat pain and inflammation. Learn about all the proven benefits of turmeric: Go Here =-=-=-=-=-=-=-=-=-=-=-=-=-=-=-=-=-=-=-=-=-=-=-=
=-=-=-=-=-=-=-=-=-= New Secret Recipe =-=-=-=-=-=-=-=-=-=
Cheesecake Factory’s(™) Santorini Farro Salad Like this recipe? Get our secret recipe cookbooks on sale – Go Here

For Santorini Farro Salad: 2 cups Cooked Farro 1/2 English Cucumber washed 1 cup Halved Grape Cherry and/or Yellow Tomatoes 2 Cooked Beets large dice 1/4 cup Thin Sliced Red Onion 1/4 cup Crumbled Feta Cheese 1 tbsp Balsamic Vinegar 1 tbsp Extra Virgin Olive Oil Kosher Salt & Black Pepper as desired Tzatziki Sauce see recipe below
For Tzatziki Sauce: 1 1/2 cups Nonfat Greek Plain Yogurt I used Fage 1/2 cup Grated English Cucumber 2 Cloves Garlic minced 1 tsp Fresh Dill chopped 1 tsp Fresh Mint chopped 1 tsp Salt
For Santorini Farro Salad:
Line a platter with the cooked farro.
In a bowl, combine the cucumbers, tomatoes, beets, onion, feta, vinegar and oil; mix well and place on top of the farro.
Serve with Tazatziki Sauce on the side.
For Tazatziki Sauce:
Combine all ingredients in a bowl and mix well. Keep chilled in refrigerator until ready to use. Can be made up to two days beforehand.
Have a comment or question about this recipe? Post it here
Source: Recipe Secrets Forum
Until Next Time… Be Well!
Kind Regards,
Ron
PS- Join us on Facebook and get more recipes and freebies: Go Here
PPS- Forward this email to a friend or tell them to sign up here.
=-=-=-=-=-=-=-=-=-=-=-=-=-=-=-=-=-=

Source: https://www.recipesecrets.net/blog/recipes/cheesecake-factorys-santorini-farro-salad/
0 notes
Text
Sister Pie’s Salted Maple Pie
<![CDATA[ .tasty-recipes-quick-links text-align:center; .tasty-recipes-quick-links a padding: 0.5rem; ]]>
Hi Friends. I hope you all had a wonderful Thanksgiving. I’m still typing up my after-action report, but in the meantime I wanted to share with you a recipe for Sister Pie‘s salted maple pie, a perfect fall dessert, a salty-sweet, custardy treat that received rave reviews this past Thanksgiving.
Sister Pie, if you don’t know, is a bakery in Detroit founded by Lisa Ludwinski, a Michagan native, and her cookbook came out a few months ago. A few days before Thanksgiving, in search of one more pie to add to my dessert spread, I began paging through Sister Pie and landed on this recipe, the bakery’s take on a classic chess pie, an old-fashioned Southern dessert which typically contains cornmeal, butter, sugar and eggs. Sister Pie’s version also contains cornmeal but is sweetened with maple syrup and is finished, once the pie cools, with a nice sprinkling of sea salt. I find it irresistible. I think you might, too.
Though I’ve only made one recipe from the book, I have no doubt it’s going to get heavy use — the day after Thanksgiving, I curled up on the couch by the fire and read it nearly cover to cover, transfixed as much by its story as its recipes, the sweet and savory alike. The introduction to the book, which includes the bakery’s mission statement and an analysis of each sentence, made me cry multiple times. This was one trigger: To support their mission of accessibility, they have a program — the Sister Pie-It-Forward program — that allows customers to pre-purchase pie slices, the paper representation of which gets strung along a pie-it-forward clothesline, ready for anyone to unclip at anytime and to use for any reason. No one leaves without a slice. Pie it forward. Can you handle it?
I don’t want to spoil too many more details, but Lisa also encourages her employees to dance, drink water, sleep, eat cookies, hustle, and be kind. I mean, what? Who? Where? Places and people like this really exist? Fellow cookbook collectors, bakers, and pie lovers: I think you should add Sister Pie to your wish lists.
Print
<![CDATA[ .tasty-recipes-image float: right; .tasty-recipes-print-button background-color: #666677; display: inline-block; padding-left: 1em; padding-right: 1em; padding-top: 0.5em; padding-bottom: 0.5em; text-decoration: none; a.tasty-recipes-print-button color: #fff; a.tasty-recipes-print-button:hover color: #fff; .tasty-recipes-rating.tasty-recipes-clip-10 -webkit-clip-path: polygon(0 0, 10% 0%, 10% 100%, 0% 100%); clip-path: polygon(0 0, 10% 0%, 10% 100%, 0% 100%); .tasty-recipes-rating.tasty-recipes-clip-20 -webkit-clip-path: polygon(0 0, 20% 0%, 20% 100%, 0% 100%); clip-path: polygon(0 0, 20% 0%, 20% 100%, 0% 100%); .tasty-recipes-rating.tasty-recipes-clip-30 -webkit-clip-path: polygon(0 0, 30% 0%, 30% 100%, 0% 100%); clip-path: polygon(0 0, 30% 0%, 30% 100%, 0% 100%); .tasty-recipes-rating.tasty-recipes-clip-40 -webkit-clip-path: polygon(0 0, 40% 0%, 40% 100%, 0% 100%); clip-path: polygon(0 0, 40% 0%, 40% 100%, 0% 100%); .tasty-recipes-rating.tasty-recipes-clip-50 -webkit-clip-path: polygon(0 0, 50% 0%, 50% 100%, 0% 100%); clip-path: polygon(0 0, 50% 0%, 50% 100%, 0% 100%); .tasty-recipes-rating.tasty-recipes-clip-60 -webkit-clip-path: polygon(0 0, 60% 0%, 60% 100%, 0% 100%); clip-path: polygon(0 0, 60% 0%, 60% 100%, 0% 100%); .tasty-recipes-rating.tasty-recipes-clip-70 -webkit-clip-path: polygon(0 0, 70% 0%, 70% 100%, 0% 100%); clip-path: polygon(0 0, 70% 0%, 70% 100%, 0% 100%); .tasty-recipes-rating.tasty-recipes-clip-80 -webkit-clip-path: polygon(0 0, 80% 0%, 80% 100%, 0% 100%); clip-path: polygon(0 0, 80% 0%, 80% 100%, 0% 100%); .tasty-recipes-rating.tasty-recipes-clip-90 -webkit-clip-path: polygon(0 0, 90% 0%, 90% 100%, 0% 100%); clip-path: polygon(0 0, 90% 0%, 90% 100%, 0% 100%); .tasty-recipes-nutrition ul list-style-type: none; margin: 0; padding: 0; .tasty-recipes-nutrition ul:after display: block; content: ' '; clear: both; .tasty-recipes-nutrition li float: left; margin-right: 1em; .tasty-recipes-plug text-align: center; margin-bottom: 1em; display: -ms-flexbox; display: flex; -ms-flex-align: center; align-items: center; -ms-flex-pack: center; justify-content: center; .tasty-recipes-plug a text-decoration: none; box-shadow: none; .tasty-recipes-plug a img width: 150px; height: auto; margin: 5px 0 0 8px; display: inline-block; @media print .tasty-recipes-no-print, .tasty-recipes-no-print * display: none !important; .tasty-recipes border: 5px solid #666677; margin-top: 6em; margin-bottom: 4em; .tasty-recipes.tasty-recipes-has-plug margin-bottom: 1em; .tasty-recipes-plug margin-bottom: 4em; .tasty-recipes-print-button display: none; .tasty-recipes-image-shim height: 69.5px; clear: both; .tasty-recipes-entry-header background-color: #666677; color: #FFF; text-align: center; padding-top: 35px; padding-bottom: 1.5em; padding-left: 2.5em; padding-right: 2.5em; .tasty-recipes-entry-header.tasty-recipes-has-image padding-top: 0px; .tasty-recipes-entry-header .tasty-recipes-image float: none; text-align: center; transform: translateY(-115px); margin-bottom: 1em; /* Decide if we need this */ .tasty-recipes-entry-header .tasty-recipes-image img -webkit-border-radius: 50%; -moz-border-radius: 50%; border-radius: 50%; border: 5px solid #666677; height: 150px; width: 150px; display: inline-block; .tasty-recipes-entry-header h2 font-size: 2em; font-weight: 400; text-transform: lowercase; margin-bottom: 0; text-align: center; color: #FFF; margin-top: 0; padding-top: 0; padding-bottom: 0; .tasty-recipes-has-image .tasty-recipes-entry-header h2 margin-top: -115px; .tasty-recipes-entry-header hr border: 1px solid #B7BBC6; background-color: #B7BBC6; margin-bottom: 1em; margin-top: 1em; .tasty-recipes-entry-header div.tasty-recipes-rating text-decoration: none; border: none; .tasty-recipes-entry-header .tasty-recipes-rating:hover text-decoration: none; .tasty-recipes-entry-header div.tasty-recipes-rating font-size: 1.375em; display: block; .tasty-recipes-entry-header .tasty-recipes-rating p margin-bottom: 0; .tasty-recipes-entry-header span.tasty-recipes-rating margin-left: .25em; margin-right: .25em; color: #FFF; .tasty-recipes-entry-header .rating-label font-style: italic; color: #B7BBC6; font-size: .6875em; display: block; .tasty-recipes-entry-header .tasty-recipes-details margin-top: 1em; .tasty-recipes-entry-header .tasty-recipes-details ul list-style-type: none; margin: 0; .tasty-recipes-entry-header .tasty-recipes-details ul li display: inline-block; margin-left: .5em; margin-right: .5em; font-size: 1em; line-height: 2.5em; color: #fff; @media only screen and (max-width: 520px) .tasty-recipes-entry-header .tasty-recipes-details .detail-icon height: .8em; margin-top: .4em; .tasty-recipes-entry-header .tasty-recipes-details ul li font-size: .875em; line-height: 1.75em; @media only screen and (min-width: 520px) .tasty-recipes-entry-header .tasty-recipes-details .detail-icon height: 1em; margin-top: .6em; .tasty-recipes-entry-header .tasty-recipes-details ul li font-size: 1em; line-height: 2.5em; .tasty-recipes-entry-header .tasty-recipes-details .tasty-recipes-label font-style: italic; color: #B7BBC6; margin-right: .125em; .tasty-recipes-entry-header .tasty-recipes-details .detail-icon vertical-align: top; margin-right: .2em; display: inline-block; .tasty-recipes-entry-content padding-top: 1.25em; .tasty-recipes-entry-content .tasty-recipes-buttons margin-bottom: 1.25em; margin-left: 1.25em; margin-right: 1.25em; .tasty-recipes-entry-content .tasty-recipes-buttons:after content: " "; display: block; clear: both; .tasty-recipes-entry-content .tasty-recipes-button-wrap width: 50%; display: inline-block; float: left; box-sizing: border-box; .tasty-recipes-entry-content .tasty-recipes-buttons a text-transform: uppercase; text-align: center; display: block; color: #FFF; background-color: #666677; font-size: 1em; line-height: 1.375em; padding-top: 1em; padding-bottom: 1em; font-weight: bold; margin-top: 0; border: none; border-radius: 0; text-decoration: none; .tasty-recipes-entry-content a img box-shadow: none; -webkit-box-shadow: none; .tasty-recipes-entry-content .tasty-recipes-buttons a:hover background-color: #979599; text-decoration: none; .tasty-recipes-entry-content .tasty-recipes-buttons img vertical-align: top; .tasty-recipes-entry-content .tasty-recipes-buttons img.svg-print, .tasty-recipes-entry-content .tasty-recipes-buttons img.svg-pinterest height: 1.25em; margin-right: .375em; margin-bottom: 0; background: none; display: inline-block; @media only screen and (min-width: 520px) .tasty-recipes-entry-content .tasty-recipes-button-wrap:first-child padding-right: .625em; .tasty-recipes-entry-content .tasty-recipes-button-wrap:last-child padding-left: .625em; @media only screen and (max-width: 520px) .tasty-recipes-entry-content .tasty-recipes-button-wrap width: 100%; .tasty-recipes-entry-content .tasty-recipes-button-wrap:nth-child(2) padding-top: 1em; .tasty-recipes-entry-content h3 text-transform: uppercase; font-size: .75em; color: #979599; margin-bottom: 1.5em; .tasty-recipes-entry-content h4 font-size: 1em; padding-top: 0; margin-bottom: 1.5em; margin-top: 1.5em; .tasty-recipes-entry-content hr background-color: #EAE9EB; border: 1px solid #EAE9EB; margin-top: 1em; margin-bottom: 1em; .tasty-recipes-entry-content .tasty-recipes-description, .tasty-recipes-entry-content .tasty-recipes-ingredients, .tasty-recipes-entry-content .tasty-recipes-instructions, .tasty-recipes-entry-content .tasty-recipes-keywords padding-left: 1.25em; padding-right: 1.25em; .tasty-recipes-entry-content .tasty-recipes-description p margin-bottom: 1em; .tasty-recipes-entry-content .tasty-recipes-ingredients ul, .tasty-recipes-entry-content .tasty-recipes-instructions ul list-style-type: none; margin-left: 0; margin-bottom: 1.5em; padding: 0; .tasty-recipes-entry-content .tasty-recipes-ingredients ul li, .tasty-recipes-entry-content .tasty-recipes-instructions ul li margin-bottom: .625em; list-style-type: none; position: relative; margin-left: 2.5em; line-height: 1.46; .tasty-recipes-entry-content .tasty-recipes-ingredients ul li:before, .tasty-recipes-entry-content .tasty-recipes-instructions ul li:before background-color: #666677; -webkit-border-radius: 50%; -moz-border-radius: 50%; border-radius: 50%; height: .5em; width: .5em; display: block; content: " "; left: -1.25em; top: .375em; position: absolute; .tasty-recipes-entry-content .tasty-recipes-ingredients ol, .tasty-recipes-entry-content .tasty-recipes-instructions ol counter-reset:li; margin-left: 0; padding: 0; .tasty-recipes-entry-content .tasty-recipes-ingredients ol li, .tasty-recipes-entry-content .tasty-recipes-instructions ol li list-style-type: none; position: relative; margin-bottom: 1em; margin-left: 2.5em; line-height: 1.46; .tasty-recipes-entry-content .tasty-recipes-ingredients ol li:before, .tasty-recipes-entry-content .tasty-recipes-instructions ol li:before content:counter(li); counter-increment: li; position: absolute; background-color: #666677; -webkit-border-radius: 50%; -moz-border-radius: 50%; border-radius: 50%; height: 1.45em; width: 1.45em; color: #FFF; left: -1.25em; transform: translateX(-50%); line-height: 1.5em; font-size: .6875em; text-align: center; top: .1875em; @media only screen and (max-width: 520px) .tasty-recipes-entry-content .tasty-recipes-ingredients ol, .tasty-recipes-entry-content .tasty-recipes-instructions ol margin-left: 0; .tasty-recipes-entry-content .tasty-recipes-notes padding: 1.25em; background-color: #EDF0F2; .tasty-recipes-entry-content .tasty-recipes-notes ol counter-reset:li; margin-left: 0; padding: 0; .tasty-recipes-entry-content .tasty-recipes-notes ul margin-left: 0; padding: 0; .tasty-recipes-entry-content .tasty-recipes-notes p, .tasty-recipes-entry-content .tasty-recipes-notes ul li, .tasty-recipes-entry-content .tasty-recipes-notes ol li background-color: #FFF; padding-left: 1.5625em; padding-right: 1.5625em; padding-top: 1.25em; padding-bottom: 1.25em; position: relative; -webkit-clip-path: polygon(20px 0, 100% 0, 100% 100%, 0 100%, 0 20px); clip-path: polygon(20px 0, 100% 0, 100% 100%, 0 100%, 0 20px); margin-bottom: 1.5em; @media only screen and (min-width: 520px) .tasty-recipes-entry-content .tasty-recipes-notes p, .tasty-recipes-entry-content .tasty-recipes-notes ul li, .tasty-recipes-entry-content .tasty-recipes-notes ol li padding-left: 2.5em; .tasty-recipes-entry-content .tasty-recipes-notes p:before, .tasty-recipes-entry-content .tasty-recipes-notes ul li:before content: "i"; display: block; background-color: #666677; -webkit-border-radius: 50%; -moz-border-radius: 50%; border-radius: 50%; height: 1.3em; width: 1.3em; font-size: .75em; line-height: 1.3em; text-align: center; color: #FFF; position: absolute; left: 1.167em; top: 1.9em; .tasty-recipes-entry-content .tasty-recipes-notes ol li:before content:counter(li); counter-increment: li; position: absolute; background-color: #666677; -webkit-border-radius: 50%; -moz-border-radius: 50%; border-radius: 50%; height: 1.45em; width: 1.45em; color: #FFF; left: 2em; transform: translateX(-50%); line-height: 1.5em; font-size: .6875em; text-align: center; top: 2em; .tasty-recipes-entry-content .tasty-recipes-notes p:last-child margin-bottom: 0; .tasty-recipes-entry-content .tasty-recipes-keywords background-color: #EDF0F2; padding-bottom: 1em; padding-top: 1em; .tasty-recipes-entry-content .tasty-recipes-keywords p font-size: 0.7em; font-style: italic; color: #979599; margin-bottom: 0; .tasty-recipes-entry-content .tasty-recipes-keywords p span font-weight: bold; .tasty-recipes-nutrifox text-align: center; margin: 0; .nutrifox-label background-color: #EDF0F2; .tasty-recipes-nutrifox iframe width: 100%; display: block; margin: 0; .tasty-recipes-entry-content .tasty-recipes-nutrition padding: 1.25em; color: #666677; .tasty-recipes-nutrition .tasty-recipes-label font-style: italic; color: #B7BBC6; margin-right: .125em; font-weight: 400; .tasty-recipes-nutrition ul text-align: center; .tasty-recipes-nutrition li float: none; display: inline-block; line-height: 2em; .tasty-recipes-entry-footer background-color: #666677; padding-top: 1.5625em; padding-bottom: 1.25em; padding-left: 2.5em; padding-right: 2.5em; text-align: center; .tasty-recipes-entry-footer .tasty-recipes-footer-content display: inline-block; .tasty-recipes-entry-footer img width: 65px; .tasty-recipes-entry-footer h3 color: #B7BBC6; font-size: 1.25em; line-height: 2.25em; margin-top: .5em; margin-bottom: .125em; padding: 0; line-height: 1em; .tasty-recipes-entry-footer p margin-bottom: 0; color: #FFF; font-size: .75em; .tasty-recipes-entry-footer p a color: #FFF; text-decoration: underline; box-shadow: none; border-bottom: none; .tasty-recipes-entry-footer:after content: " "; display: block; clear:both; @media only screen and (max-width: 520px) .tasty-recipes-entry-footer h3 margin-top: .5em; margin-bottom: .5em; .tasty-recipes-entry-footer text-align: center; @media only screen and (min-width: 520px) .tasty-recipes-entry-footer img float: left; .tasty-recipes-entry-footer h3, .tasty-recipes-entry-footer p margin-left: 90px; clear: none; text-align: left; /* Print view styles */ .tasty-recipes-print-view font-size: 11px; background-color: #fff; .tasty-recipes-print-view .tasty-recipes-print-button display: inline-block; .tasty-recipes-print padding:0; font-size: 11px; .tasty-recipes-print-view .tasty-recipes margin-top: 1em; .tasty-recipes-print .tasty-recipes-entry-header background-color: inherit; color: inherit; padding-bottom: 0; padding-left: 1em; padding-right: 1em; padding-top: 1em; .tasty-recipes-print .tasty-recipes-entry-header .tasty-recipes-image float: right; transform: none; .tasty-recipes-print.tasty-recipes-has-image .tasty-recipes-entry-header h2 margin-top: 0; .tasty-recipes-print .tasty-recipes-entry-header h2 color: inherit; margin-bottom: .5em; .tasty-recipes-print .tasty-recipes-entry-header hr display: none; .tasty-recipes-print .tasty-recipes-entry-header span.tasty-recipes-rating color: #000; .tasty-recipes-print .tasty-recipes-entry-header .tasty-recipes-details ul padding: 0; clear: none; .tasty-recipes-print .tasty-recipes-entry-header .tasty-recipes-details ul li line-height: 1.5em; color: #000; .tasty-recipes-print .tasty-recipes-entry-header .tasty-recipes-details .detail-icon display: none; .tasty-recipes-print .tasty-recipes-entry-content img max-width: 50%; height: auto; .tasty-recipes-print .tasty-recipes-entry-content .tasty-recipes-ingredients ul li, .tasty-recipes-print .tasty-recipes-entry-content .tasty-recipes-ingredients ol li margin-bottom: 0.25em; line-height: 1.1; .tasty-recipes-print .tasty-recipes-entry-content .tasty-recipes-instructions ul li, .tasty-recipes-print .tasty-recipes-entry-content .tasty-recipes-instructions ol li margin-bottom: 0.5em; line-height: 1.1; .tasty-recipes-print .tasty-recipes-entry-content .tasty-recipes-ingredients ul li:before, .tasty-recipes-print .tasty-recipes-entry-content .tasty-recipes-instructions ul li:before top: 0.3em; .tasty-recipes-print .tasty-recipes-entry-content .tasty-recipes-ingredients ol li:before, .tasty-recipes-print .tasty-recipes-entry-content .tasty-recipes-instructions ol li:before top: 0; .tasty-recipes-print .tasty-recipes-entry-content .tasty-recipes-notes p, .tasty-recipes-print .tasty-recipes-entry-content .tasty-recipes-notes ul li, .tasty-recipes-print .tasty-recipes-entry-content .tasty-recipes-notes ol li padding-top: 0; padding-bottom: 0; background-color: #EDF0F2; clip-path: none; .tasty-recipes-print .tasty-recipes-entry-content .tasty-recipes-notes p:before, .tasty-recipes-print .tasty-recipes-entry-content .tasty-recipes-notes ul li:before top: 0; clip-path: none; margin-bottom: 0.5em; @media print .tasty-recipes-print .tasty-recipes-entry-footer img display: none; .tasty-recipes-print .tasty-recipes-source-link text-align: center; ]]>
Sister Pie’s Salted Maple Pie
Description
Reprinted with permission from Sister Pie, copyright © 2018. Photography by E. E. Berger. Published by Lorena Jones Books, an imprint of Penguin Random House.
From Sister Pie, a new cookbook from the eponymous bakery in Detroit, this salted maple pie, to me, is everything I want in a dessert: a sweet and salty custard in a flaky, buttery crust. Heaven. It was perfect for Thanksgiving, but I think it’s nice for fall in general.
A few notes: I don’t blind bake pie dough anymore — it never seems to make a huge difference to me and the effort always feels impossible at the moment. I’ve included my foolproof pie dough recipe below, which yields 2 rounds (and which, unlike Sister Pie’s recipe, is made in the food processor.) I don’t think it’s worth halving the recipe because it freezes beautifully. For Thanksgiving 2018, I made a double batch of the pie dough and made three other pies in addition to this one: Bourbon Pecan (No Corn Syrup), Ronnie Hollingsworth’s Most Excellent Squash Pie, and Apple-Frangipane Galette.
Also, I didn’t use the egg wash on the crust — because my dough has a little bit of sugar in it, it browns beautifully on its own.
Finally, I find my Emile Henry pie plate makes the best crust.
Ingredients
one round foolproof pie dough (recipe below; see notes above), rolled out to 11-12 inches
1⁄2 cup plus 2 tablespoons (1 1⁄4 sticks) unsalted butter, melted and cooled
1 cup maple syrup
3⁄4 cup packed light brown sugar
1⁄4 cup fine yellow cornmeal
Heaping 1⁄4 teaspoon kosher salt
3 large eggs
1 large egg yolk
3⁄4 cup heavy cream
1-1⁄4 teaspoons pure vanilla extract
for finishing:
Flaky sea salt
1 cup heavy cream
sugar
Instructions
Preheat your oven to 350°F. Fit the rolled out pie round into a 9-inch pie plate. See video guidance for trimming the excess dough and crimping it to make a nice fluted edge: in sum, trim excess dough, fold edge back and underneath, pinch to create the fluted edge.
Make the filling: In a medium bowl, combine the melted butter and maple syrup. Whisk in the brown sugar, cornmeal, and kosher salt.
Crack the eggs and yolk into another medium bowl. Add the cream and vanilla and whisk until combined.
Slowly pour the egg mixture into the maple mixture and whisk just until combined.
Place the pie plate on a parchment-lined baking sheet. Pour the filling into the pie shell.
Transfer the baking sheet with the pie on it to the oven and bake for 45 minutes to 1 hour, until the edges are puffed and the center jiggles only slightly when shaken. It will continue to set as it cools.
Remove the baking sheet from the oven and transfer the pie to a wire rack to cool for 4 to 6 hours. Once fully cooled and at room temperature, sprinkle generously with flaky sea salt, slice, and serve.
To make the whipped cream, beat the heavy cream with a wire whip or in an electric mixer until soft peaks begin to form. Sprinkle in a small handful of sugar and a pinch of sea salt and beat until peaks begin to get firmer. Taste. Add more sugar and salt to taste. Beat until peaks begin to hold their shape or until they reach a texture you like — I like billowy, not-quite-stiff peaks. Store in fridge until ready to serve.
Store leftover pie, well wrapped in plastic wrap or under a pie dome, at room temperature for up to 3 days.
Print
<![CDATA[ .tasty-recipes-image float: right; .tasty-recipes-print-button background-color: #666677; display: inline-block; padding-left: 1em; padding-right: 1em; padding-top: 0.5em; padding-bottom: 0.5em; text-decoration: none; a.tasty-recipes-print-button color: #fff; a.tasty-recipes-print-button:hover color: #fff; .tasty-recipes-rating.tasty-recipes-clip-10 -webkit-clip-path: polygon(0 0, 10% 0%, 10% 100%, 0% 100%); clip-path: polygon(0 0, 10% 0%, 10% 100%, 0% 100%); .tasty-recipes-rating.tasty-recipes-clip-20 -webkit-clip-path: polygon(0 0, 20% 0%, 20% 100%, 0% 100%); clip-path: polygon(0 0, 20% 0%, 20% 100%, 0% 100%); .tasty-recipes-rating.tasty-recipes-clip-30 -webkit-clip-path: polygon(0 0, 30% 0%, 30% 100%, 0% 100%); clip-path: polygon(0 0, 30% 0%, 30% 100%, 0% 100%); .tasty-recipes-rating.tasty-recipes-clip-40 -webkit-clip-path: polygon(0 0, 40% 0%, 40% 100%, 0% 100%); clip-path: polygon(0 0, 40% 0%, 40% 100%, 0% 100%); .tasty-recipes-rating.tasty-recipes-clip-50 -webkit-clip-path: polygon(0 0, 50% 0%, 50% 100%, 0% 100%); clip-path: polygon(0 0, 50% 0%, 50% 100%, 0% 100%); .tasty-recipes-rating.tasty-recipes-clip-60 -webkit-clip-path: polygon(0 0, 60% 0%, 60% 100%, 0% 100%); clip-path: polygon(0 0, 60% 0%, 60% 100%, 0% 100%); .tasty-recipes-rating.tasty-recipes-clip-70 -webkit-clip-path: polygon(0 0, 70% 0%, 70% 100%, 0% 100%); clip-path: polygon(0 0, 70% 0%, 70% 100%, 0% 100%); .tasty-recipes-rating.tasty-recipes-clip-80 -webkit-clip-path: polygon(0 0, 80% 0%, 80% 100%, 0% 100%); clip-path: polygon(0 0, 80% 0%, 80% 100%, 0% 100%); .tasty-recipes-rating.tasty-recipes-clip-90 -webkit-clip-path: polygon(0 0, 90% 0%, 90% 100%, 0% 100%); clip-path: polygon(0 0, 90% 0%, 90% 100%, 0% 100%); .tasty-recipes-nutrition ul list-style-type: none; margin: 0; padding: 0; .tasty-recipes-nutrition ul:after display: block; content: ' '; clear: both; .tasty-recipes-nutrition li float: left; margin-right: 1em; .tasty-recipes-plug text-align: center; margin-bottom: 1em; display: -ms-flexbox; display: flex; -ms-flex-align: center; align-items: center; -ms-flex-pack: center; justify-content: center; .tasty-recipes-plug a text-decoration: none; box-shadow: none; .tasty-recipes-plug a img width: 150px; height: auto; margin: 5px 0 0 8px; display: inline-block; @media print .tasty-recipes-no-print, .tasty-recipes-no-print * display: none !important; .tasty-recipes border: 5px solid #666677; margin-top: 6em; margin-bottom: 4em; .tasty-recipes.tasty-recipes-has-plug margin-bottom: 1em; .tasty-recipes-plug margin-bottom: 4em; .tasty-recipes-print-button display: none; .tasty-recipes-image-shim height: 69.5px; clear: both; .tasty-recipes-entry-header background-color: #666677; color: #FFF; text-align: center; padding-top: 35px; padding-bottom: 1.5em; padding-left: 2.5em; padding-right: 2.5em; .tasty-recipes-entry-header.tasty-recipes-has-image padding-top: 0px; .tasty-recipes-entry-header .tasty-recipes-image float: none; text-align: center; transform: translateY(-115px); margin-bottom: 1em; /* Decide if we need this */ .tasty-recipes-entry-header .tasty-recipes-image img -webkit-border-radius: 50%; -moz-border-radius: 50%; border-radius: 50%; border: 5px solid #666677; height: 150px; width: 150px; display: inline-block; .tasty-recipes-entry-header h2 font-size: 2em; font-weight: 400; text-transform: lowercase; margin-bottom: 0; text-align: center; color: #FFF; margin-top: 0; padding-top: 0; padding-bottom: 0; .tasty-recipes-has-image .tasty-recipes-entry-header h2 margin-top: -115px; .tasty-recipes-entry-header hr border: 1px solid #B7BBC6; background-color: #B7BBC6; margin-bottom: 1em; margin-top: 1em; .tasty-recipes-entry-header div.tasty-recipes-rating text-decoration: none; border: none; .tasty-recipes-entry-header .tasty-recipes-rating:hover text-decoration: none; .tasty-recipes-entry-header div.tasty-recipes-rating font-size: 1.375em; display: block; .tasty-recipes-entry-header .tasty-recipes-rating p margin-bottom: 0; .tasty-recipes-entry-header span.tasty-recipes-rating margin-left: .25em; margin-right: .25em; color: #FFF; .tasty-recipes-entry-header .rating-label font-style: italic; color: #B7BBC6; font-size: .6875em; display: block; .tasty-recipes-entry-header .tasty-recipes-details margin-top: 1em; .tasty-recipes-entry-header .tasty-recipes-details ul list-style-type: none; margin: 0; .tasty-recipes-entry-header .tasty-recipes-details ul li display: inline-block; margin-left: .5em; margin-right: .5em; font-size: 1em; line-height: 2.5em; color: #fff; @media only screen and (max-width: 520px) .tasty-recipes-entry-header .tasty-recipes-details .detail-icon height: .8em; margin-top: .4em; .tasty-recipes-entry-header .tasty-recipes-details ul li font-size: .875em; line-height: 1.75em; @media only screen and (min-width: 520px) .tasty-recipes-entry-header .tasty-recipes-details .detail-icon height: 1em; margin-top: .6em; .tasty-recipes-entry-header .tasty-recipes-details ul li font-size: 1em; line-height: 2.5em; .tasty-recipes-entry-header .tasty-recipes-details .tasty-recipes-label font-style: italic; color: #B7BBC6; margin-right: .125em; .tasty-recipes-entry-header .tasty-recipes-details .detail-icon vertical-align: top; margin-right: .2em; display: inline-block; .tasty-recipes-entry-content padding-top: 1.25em; .tasty-recipes-entry-content .tasty-recipes-buttons margin-bottom: 1.25em; margin-left: 1.25em; margin-right: 1.25em; .tasty-recipes-entry-content .tasty-recipes-buttons:after content: " "; display: block; clear: both; .tasty-recipes-entry-content .tasty-recipes-button-wrap width: 50%; display: inline-block; float: left; box-sizing: border-box; .tasty-recipes-entry-content .tasty-recipes-buttons a text-transform: uppercase; text-align: center; display: block; color: #FFF; background-color: #666677; font-size: 1em; line-height: 1.375em; padding-top: 1em; padding-bottom: 1em; font-weight: bold; margin-top: 0; border: none; border-radius: 0; text-decoration: none; .tasty-recipes-entry-content a img box-shadow: none; -webkit-box-shadow: none; .tasty-recipes-entry-content .tasty-recipes-buttons a:hover background-color: #979599; text-decoration: none; .tasty-recipes-entry-content .tasty-recipes-buttons img vertical-align: top; .tasty-recipes-entry-content .tasty-recipes-buttons img.svg-print, .tasty-recipes-entry-content .tasty-recipes-buttons img.svg-pinterest height: 1.25em; margin-right: .375em; margin-bottom: 0; background: none; display: inline-block; @media only screen and (min-width: 520px) .tasty-recipes-entry-content .tasty-recipes-button-wrap:first-child padding-right: .625em; .tasty-recipes-entry-content .tasty-recipes-button-wrap:last-child padding-left: .625em; @media only screen and (max-width: 520px) .tasty-recipes-entry-content .tasty-recipes-button-wrap width: 100%; .tasty-recipes-entry-content .tasty-recipes-button-wrap:nth-child(2) padding-top: 1em; .tasty-recipes-entry-content h3 text-transform: uppercase; font-size: .75em; color: #979599; margin-bottom: 1.5em; .tasty-recipes-entry-content h4 font-size: 1em; padding-top: 0; margin-bottom: 1.5em; margin-top: 1.5em; .tasty-recipes-entry-content hr background-color: #EAE9EB; border: 1px solid #EAE9EB; margin-top: 1em; margin-bottom: 1em; .tasty-recipes-entry-content .tasty-recipes-description, .tasty-recipes-entry-content .tasty-recipes-ingredients, .tasty-recipes-entry-content .tasty-recipes-instructions, .tasty-recipes-entry-content .tasty-recipes-keywords padding-left: 1.25em; padding-right: 1.25em; .tasty-recipes-entry-content .tasty-recipes-description p margin-bottom: 1em; .tasty-recipes-entry-content .tasty-recipes-ingredients ul, .tasty-recipes-entry-content .tasty-recipes-instructions ul list-style-type: none; margin-left: 0; margin-bottom: 1.5em; padding: 0; .tasty-recipes-entry-content .tasty-recipes-ingredients ul li, .tasty-recipes-entry-content .tasty-recipes-instructions ul li margin-bottom: .625em; list-style-type: none; position: relative; margin-left: 2.5em; line-height: 1.46; .tasty-recipes-entry-content .tasty-recipes-ingredients ul li:before, .tasty-recipes-entry-content .tasty-recipes-instructions ul li:before background-color: #666677; -webkit-border-radius: 50%; -moz-border-radius: 50%; border-radius: 50%; height: .5em; width: .5em; display: block; content: " "; left: -1.25em; top: .375em; position: absolute; .tasty-recipes-entry-content .tasty-recipes-ingredients ol, .tasty-recipes-entry-content .tasty-recipes-instructions ol counter-reset:li; margin-left: 0; padding: 0; .tasty-recipes-entry-content .tasty-recipes-ingredients ol li, .tasty-recipes-entry-content .tasty-recipes-instructions ol li list-style-type: none; position: relative; margin-bottom: 1em; margin-left: 2.5em; line-height: 1.46; .tasty-recipes-entry-content .tasty-recipes-ingredients ol li:before, .tasty-recipes-entry-content .tasty-recipes-instructions ol li:before content:counter(li); counter-increment: li; position: absolute; background-color: #666677; -webkit-border-radius: 50%; -moz-border-radius: 50%; border-radius: 50%; height: 1.45em; width: 1.45em; color: #FFF; left: -1.25em; transform: translateX(-50%); line-height: 1.5em; font-size: .6875em; text-align: center; top: .1875em; @media only screen and (max-width: 520px) .tasty-recipes-entry-content .tasty-recipes-ingredients ol, .tasty-recipes-entry-content .tasty-recipes-instructions ol margin-left: 0; .tasty-recipes-entry-content .tasty-recipes-notes padding: 1.25em; background-color: #EDF0F2; .tasty-recipes-entry-content .tasty-recipes-notes ol counter-reset:li; margin-left: 0; padding: 0; .tasty-recipes-entry-content .tasty-recipes-notes ul margin-left: 0; padding: 0; .tasty-recipes-entry-content .tasty-recipes-notes p, .tasty-recipes-entry-content .tasty-recipes-notes ul li, .tasty-recipes-entry-content .tasty-recipes-notes ol li background-color: #FFF; padding-left: 1.5625em; padding-right: 1.5625em; padding-top: 1.25em; padding-bottom: 1.25em; position: relative; -webkit-clip-path: polygon(20px 0, 100% 0, 100% 100%, 0 100%, 0 20px); clip-path: polygon(20px 0, 100% 0, 100% 100%, 0 100%, 0 20px); margin-bottom: 1.5em; @media only screen and (min-width: 520px) .tasty-recipes-entry-content .tasty-recipes-notes p, .tasty-recipes-entry-content .tasty-recipes-notes ul li, .tasty-recipes-entry-content .tasty-recipes-notes ol li padding-left: 2.5em; .tasty-recipes-entry-content .tasty-recipes-notes p:before, .tasty-recipes-entry-content .tasty-recipes-notes ul li:before content: "i"; display: block; background-color: #666677; -webkit-border-radius: 50%; -moz-border-radius: 50%; border-radius: 50%; height: 1.3em; width: 1.3em; font-size: .75em; line-height: 1.3em; text-align: center; color: #FFF; position: absolute; left: 1.167em; top: 1.9em; .tasty-recipes-entry-content .tasty-recipes-notes ol li:before content:counter(li); counter-increment: li; position: absolute; background-color: #666677; -webkit-border-radius: 50%; -moz-border-radius: 50%; border-radius: 50%; height: 1.45em; width: 1.45em; color: #FFF; left: 2em; transform: translateX(-50%); line-height: 1.5em; font-size: .6875em; text-align: center; top: 2em; .tasty-recipes-entry-content .tasty-recipes-notes p:last-child margin-bottom: 0; .tasty-recipes-entry-content .tasty-recipes-keywords background-color: #EDF0F2; padding-bottom: 1em; padding-top: 1em; .tasty-recipes-entry-content .tasty-recipes-keywords p font-size: 0.7em; font-style: italic; color: #979599; margin-bottom: 0; .tasty-recipes-entry-content .tasty-recipes-keywords p span font-weight: bold; .tasty-recipes-nutrifox text-align: center; margin: 0; .nutrifox-label background-color: #EDF0F2; .tasty-recipes-nutrifox iframe width: 100%; display: block; margin: 0; .tasty-recipes-entry-content .tasty-recipes-nutrition padding: 1.25em; color: #666677; .tasty-recipes-nutrition .tasty-recipes-label font-style: italic; color: #B7BBC6; margin-right: .125em; font-weight: 400; .tasty-recipes-nutrition ul text-align: center; .tasty-recipes-nutrition li float: none; display: inline-block; line-height: 2em; .tasty-recipes-entry-footer background-color: #666677; padding-top: 1.5625em; padding-bottom: 1.25em; padding-left: 2.5em; padding-right: 2.5em; text-align: center; .tasty-recipes-entry-footer .tasty-recipes-footer-content display: inline-block; .tasty-recipes-entry-footer img width: 65px; .tasty-recipes-entry-footer h3 color: #B7BBC6; font-size: 1.25em; line-height: 2.25em; margin-top: .5em; margin-bottom: .125em; padding: 0; line-height: 1em; .tasty-recipes-entry-footer p margin-bottom: 0; color: #FFF; font-size: .75em; .tasty-recipes-entry-footer p a color: #FFF; text-decoration: underline; box-shadow: none; border-bottom: none; .tasty-recipes-entry-footer:after content: " "; display: block; clear:both; @media only screen and (max-width: 520px) .tasty-recipes-entry-footer h3 margin-top: .5em; margin-bottom: .5em; .tasty-recipes-entry-footer text-align: center; @media only screen and (min-width: 520px) .tasty-recipes-entry-footer img float: left; .tasty-recipes-entry-footer h3, .tasty-recipes-entry-footer p margin-left: 90px; clear: none; text-align: left; /* Print view styles */ .tasty-recipes-print-view font-size: 11px; background-color: #fff; .tasty-recipes-print-view .tasty-recipes-print-button display: inline-block; .tasty-recipes-print padding:0; font-size: 11px; .tasty-recipes-print-view .tasty-recipes margin-top: 1em; .tasty-recipes-print .tasty-recipes-entry-header background-color: inherit; color: inherit; padding-bottom: 0; padding-left: 1em; padding-right: 1em; padding-top: 1em; .tasty-recipes-print .tasty-recipes-entry-header .tasty-recipes-image float: right; transform: none; .tasty-recipes-print.tasty-recipes-has-image .tasty-recipes-entry-header h2 margin-top: 0; .tasty-recipes-print .tasty-recipes-entry-header h2 color: inherit; margin-bottom: .5em; .tasty-recipes-print .tasty-recipes-entry-header hr display: none; .tasty-recipes-print .tasty-recipes-entry-header span.tasty-recipes-rating color: #000; .tasty-recipes-print .tasty-recipes-entry-header .tasty-recipes-details ul padding: 0; clear: none; .tasty-recipes-print .tasty-recipes-entry-header .tasty-recipes-details ul li line-height: 1.5em; color: #000; .tasty-recipes-print .tasty-recipes-entry-header .tasty-recipes-details .detail-icon display: none; .tasty-recipes-print .tasty-recipes-entry-content img max-width: 50%; height: auto; .tasty-recipes-print .tasty-recipes-entry-content .tasty-recipes-ingredients ul li, .tasty-recipes-print .tasty-recipes-entry-content .tasty-recipes-ingredients ol li margin-bottom: 0.25em; line-height: 1.1; .tasty-recipes-print .tasty-recipes-entry-content .tasty-recipes-instructions ul li, .tasty-recipes-print .tasty-recipes-entry-content .tasty-recipes-instructions ol li margin-bottom: 0.5em; line-height: 1.1; .tasty-recipes-print .tasty-recipes-entry-content .tasty-recipes-ingredients ul li:before, .tasty-recipes-print .tasty-recipes-entry-content .tasty-recipes-instructions ul li:before top: 0.3em; .tasty-recipes-print .tasty-recipes-entry-content .tasty-recipes-ingredients ol li:before, .tasty-recipes-print .tasty-recipes-entry-content .tasty-recipes-instructions ol li:before top: 0; .tasty-recipes-print .tasty-recipes-entry-content .tasty-recipes-notes p, .tasty-recipes-print .tasty-recipes-entry-content .tasty-recipes-notes ul li, .tasty-recipes-print .tasty-recipes-entry-content .tasty-recipes-notes ol li padding-top: 0; padding-bottom: 0; background-color: #EDF0F2; clip-path: none; .tasty-recipes-print .tasty-recipes-entry-content .tasty-recipes-notes p:before, .tasty-recipes-print .tasty-recipes-entry-content .tasty-recipes-notes ul li:before top: 0; clip-path: none; margin-bottom: 0.5em; @media print .tasty-recipes-print .tasty-recipes-entry-footer img display: none; .tasty-recipes-print .tasty-recipes-source-link text-align: center; ]]>
Foolproof Pie Dough
Description
Adapted from a favorite David Lebovitz recipe. I use it for this apple galette, this butternut squash pie, and the below Bourbon pecan pie, also a David Lebovitz recipe.
This recipe yields two rounds and it definitely can be halved, though I suggest making the full recipe because it’s so nice to have on hand.
Ingredients
2½ (320g) cups all-purpose flour
2 T. sugar
½ tsp. table (or kosher) salt
2 sticks (16 tablespoons | 8 oz | 227g ) unsalted butter
½ C. + 2 T. ice water
Instructions
In the bowl of a food processor, pulse the flour, sugar and salt together. Cut the butter into small pieces, then add to the food processor. Pulse at 1-second intervals until butter is the size of peas—should be about 10 quick (1-second) pulses. Add the ice water and pulse again about 10 times until the mixture is crumbly but holds together when pinched. See video above for guidance. Lay two clean tea towels on a work surface. Dump half of the crumbly dough mixture into the center of each. Grab the four corners of the towel together and twist to create a beggar’s purse, pressing the dough into a disk. Unwrap the towel and use your hands to pack and pat the disk together. Wrap one (or both) of the rounds in plastic wrap, tuck in a ziplock bag, and store in the fridge for 3 days or freezer for 3 months.
If baking one immediately, lightly flour a work surface, roll out into a circle an inch or two larger than your pie plate, transfer to pie plate, trim over hanging dough, then crimp dough as desired (see video for guidance). Chill in fridge while you prepare the filling. Pre bake if desired … I’m too lazy anymore.
Posted By: alexandra · In: Baking, Christmas, Desserts, Fall, Holidays, pie, Thanksgiving
Source: https://alexandracooks.com/2018/11/26/sister-pies-salted-maple-pie/

0 notes
Text
French Toast for Two
August 19, 2018by: Christina Lane
French Toast for Two.
I have little Saturday morning routine, and it definitely involves this French toast for two. I’m a bit of a strict Mama when it comes to sugar and screen-time during the week week, so I like to let loose on Saturday mornings. We make French toast with sugary custard and sugary maple syrup on top, and then we eat it on the couch while watching cartoons. Camille thinks it’s the greatest way to wake up, and she’s not wrong.
Over the years, I’ve perfected my French toast for two game. For me, it started in college with leftover sandwich bread, it migrated into a whole wheat bread situation, and now, we’ve come full circle. Brioche bread makes the best French toast.
After years of experimenting, I am confident in this.
Which bread makes the best French toast?
I won’t deny that other breads are perfectly fine in this recipe. However, if your bakery sells a loaf of brioche grab it! It’s one of the only breads, in my opinion, that keeps very well in the freezer. My favorite thing to find is a sliced loaf of brioche.
If you’re looking for ways to use up leftover brioche bread, a tomato sandwich is the perfect vehicle. See also: lightly toasted with butter and bacon and lettuce, the BLT. Brioche bread is so wonderful because it’s an enriched dough, which means it’s made with eggs. The eggs in the dough give it a tender texture like cotton, and a rich flavor. It’s what white bread wants to taste like.
Ways to serve French Toast for Two:
The only mandatory component (besides maple syrup, of course) is salted butter. Salted butter is a revelation on my pancakes for two, and this French toast for two, too! Beyond that, I like a fresh fruit, usually bananas or blueberries, but my daughter loves strawberries.
I made you a little how-to video for this recipe, because I wanted you to see both the amount of time I dunk the bread in the custard (spoiler alert: not very long), and exactly how the butter should look before you start cooking. French toast should hit a hot cast iron skillet and start to sear and puff up immediately. Bread sitting in butter that isn’t hot enough will soak up the butter and become soggy.
Quick tip: if you’re on Desktop, the video is on the side of the page; if you’re on mobile, the video is at the top of the post.
A quick note about freezing French toast:
I hope that you love this recipe so much that you want to double or triple it to serve later in the week. You can definitely do that! After you cook the French toast in the skillet, move it to a wire rack to cool for a few minutes. Place the slices on a sheet pan lined with something non-stick, like parchment paper or a silicone mat, and then freeze. Once the individual slices of French toast are frozen (usually 6-8 hours), then you can stack them in a freeze bag for longer storage. This is called individually quick freezing something so that it can be stored together later.
I freeze slices of this to make a weekday breakfast special for Camille, and she loves having her ‘Saturday breakfast’ on a random Tuesday.
I hope this French toast for two recipe changes your weekend routine into one that becomes a family tradition, like it has for us.
Ingredients
2 large eggs
3/4 cup whole milk (or half and half)
2 tablespoons granulated sugar
1/4 teaspoon ground cinnamon
1/2 teaspoon vanilla extract
1 tablespoon butter, plus extra for serving
4 slices brioche bread
maple syrup, for serving
fresh fruit, for serving
Instructions
In a shallow pie dish, whisk together the eggs, milk, sugar, cinnamon and vanilla extract. Whisk very well.
Meanwhile, in a large skillet over medium-high heat, melt the butter. When it's sizzling, dunk each slice of bread quickly in the egg mixture, and then place in the skillet. Cook the slices of bread on each side until golden brown.
Divide between two plates and serve with extra butter, maple syrup, and fresh fruit.
7.8.1.2
2025
https://www.dessertfortwo.com/french-toast-for-two/

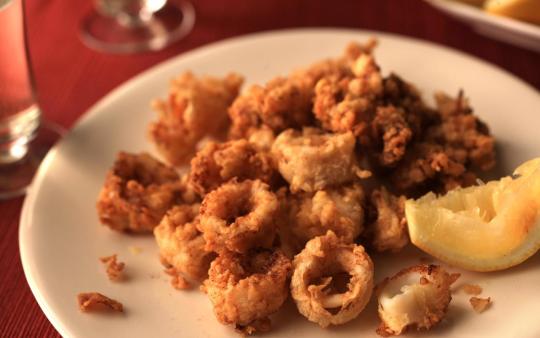
Source: https://www.dessertfortwo.com/french-toast-for-two/
0 notes