
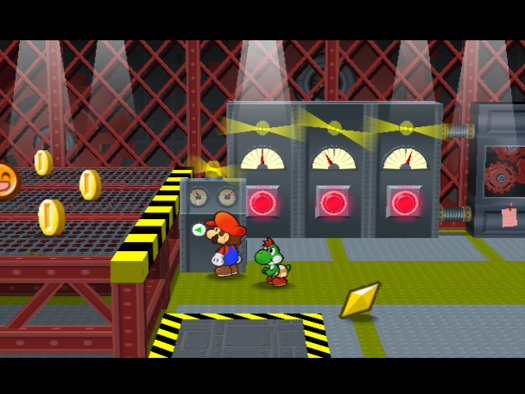
A slightly original challenge run of Thousand Year Door, "finished" as of March 25, 2021.
Don't wanna be here? Send us removal request.
Statistics
We looked inside some of the posts by peril-party-ttyd and here's what we found interesting.
Average Info
Notes Per Post
7
Likes Per Post
6
Reblog Per Post
1
Reply Per Post
0
Time Between Posts
3 days
Number of Posts By Type
Text
16
Video
1
Last Seen Tumblr Blogs


Fun Fact
130K people were victims of a chain letter scam that affected Tumblr in May 2011.
Text
I wonder if there's a way to do this type of run for the other Paper Mario Games....
0 notes
Text
An update on Peril Party's next post:
Guys. The pit of 100 trials? It’s hard. Holy mother of pearl, this thing hurts sometimes. I’ve made 7 attempts in my free time and gotten to floor 74 at max. I know I can do it. But I’ve been taking a break from it for a while. This is the last challenge I can attempt on my file. When I do it, I can hang my hat on this blog and archive it. But until then... I’ll just have to keep trying. Thanks for sticking through the silence. I’m doing my best.
#ttyd#paper mario ttyd#Thousand Year Door#the thousand year door#Post Game#Pit of 100 Trials#challenge run
0 notes
Video
tumblr
2 notes
·
View notes
Text
Chapter 8: A Dragon, 3 Mystical Beings, A Cyborg, A Giant Turtle, and A 1000 Year Old Demon all want me dead.
This is the big one! The final chapter of the video game. We entered the Palace of Shadow and begun our trek to the innermost chambers. Here’s the line up of Battles:
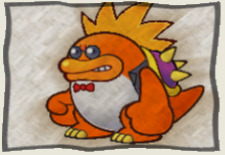
Gloomtail
Shadow Sirens Redux
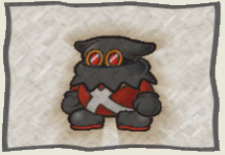
Grodus
Bowser + Kammy Koopa
Shadow Queen
Gloomtail
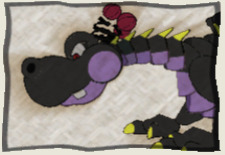
Gloomtail is the brother of Hooktail, who we fought all the way back in Chapter 1! Hooktail was a pushover, but how does her brother fare? He has 80 HP, 2 defense, and 8, 10, or 16 attack. Don’t worry, the 16 attack is always after he charges for a turn. Using Vivian, we can veil to avoid it. (Even if he does it 3 times in a row, like for me). Relative to the rest of this chapter, pretty easy.
Shadow Sirens Redux
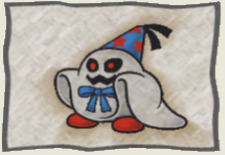


You know how Vivian, the third Shadow Siren is in our party now? Yeah. The other 2 recruited Doopliss to help. They have 40, 40, and 30 HP respectively, and no defense. The hardest part about this fight is that you’re taking 3 hits at once, but Clock Out is your friend here. Use that repeatedly and they won’t be able to make a move!
Grodus & Bowser + Kammy Koopa
These final 3 fights were streamed live on my twitch! If you’d like to take a watch, the link is below below, but i’ll give a brief summary here as well.
https://www.twitch.tv/videos/954368310
This fight is ROUGH. You see, you have to beat Grodus first and then fight Bowser and Kammy Koopa without saving in between the two. That means your luck has to be immaculate for even a chance at beating both fights. About 12 attempts in, I realized that if your partner isn’t out during the turn switch from you to the enemy, Power Lift stays active. In tandem with Quick Change, this allows you to do the following steps:
Power Lift Mario and Whichever Partner you’d like to beef up
Use the partner’s attack. You’ll have to let the timer tick down at least once.
Next Turn, switch order so your partner is in front. Attack with them, then use Mario to put another partner out.
Attack with Mario
When it’s your turn again, switch to the beefed partner and then repeat steps 3 & 4.
Your partner is now powered up “permanently”
This was needed to beat these fights, and probably SQ as well, though I’ve only attempted her once at the time of writing this. I recommend checking the video out so this all makes more sense.
Shadow Queen
I got insanely lucky during the Shadow Queen fight. It took me 3 attempts total and the last one was crazy. Let me start at the beginning.
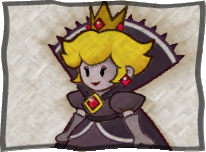
Phase 1: Shadow Peach
After possessing Princess Peach, Shadow Queen has 150 HP, 0 defense and a myriad of attacks from 3 to 14 damage, all piercing. Defense will not save you now. She can also give herself more defense and attack. With power lifted Bobbery, I was doing about 9 damage per turn plus whatever Mario had. This phase, you just have to get her down to about 80 HP, not fully kill her. The strategy from before remains.

Phase 2: Shadow Queen True Form
When you get her low enough, she heals back to 150 HP and begins this phase. (after some cutscenes). 2 things are important to note.
The cutscene heals you for full FP and SP.
There’s a scripted shine sprite Bingo! which will heal you AGAIN for full FP and SP. This means you get 3 moves with full action commands of pure whaling on her before you’d have to heal yourself or whatever.
I used these turns as follows:
Power Lift Mario/Bobbery; Bobbery Bob-ombasts
Bobbery Bob-ombasts again; Mario switches Koops in and uses Clock Out, which fails 70% of the time.
Clock out succeeds, Bobbery bombs.
Next there were 3 turns of her stunned. This was just pure action, with Bomb and Power Smash from both Party Members. At this point she’s at 67 HP. It’s worth mentioning that at least 7 of that damage is from stage hazards. The fog machines at front exploded her twice and there was a fork. Somehow, I got her down to 22 HP. Some well done power smashes and bombs, and the fight will be over. I’m averaging 17 damage a turn, so I power smash. That makes her at 14 HP. She takes her turn, it misses. I bomb with Bobbery. 5 HP left. The stage effects activate. The fog machine explodes once more dealing 5 HP to her. I won. I beat the game.
If you don’t want to watch the full fight, watch the clip of the last 2 turns. I promise it’s worth it. It’s one of my favorite moments in my gaming career. With that, lets talk Statistics.
FINAL RESULTS
Stats:
1 HP / 30 FP / 66 BP
Game Overs:
This Chapter: 26
Total: >62
Badge Setup for Final Fight (Ordered Most BP to Least)
Quick Change
Power Plus
Power Plus P
Defend Plus (x2)
Defend Plus P (x2)
Flower Saver
Power Bounce
Pretty Lucky (x3)
Pretty Lucky P
Unsimplifier
Close Call (x5)
Close Call P (x5)
Power Smash
L Emblem
Attack FX P
Total Playtime:
28:56
Up Next: Pit of 100 Trials and thoughts on the run as a whole. See you then!
#ttyd#paper mario#thousand year door#the thousand year door#paper mario ttyd#challenge run#chapter 8
1 note
·
View note
Text
Chapter Interlude 7-8: Non-Excessive Badge Grinding
All I did for this Chapter Interlude was get 2 more close calls and 1 more close call P (from goomba drops in Petal Meadows. Thanks, Mowz!) I did trade everything in to Dazzle, sold the badges I didn’t need and participated in some gambling. If Rush Badges were allowed, I’d be unstoppable, so I’m glad I changed the rule on that. I was super eager to work through the Palace of Shadow, so I just hopped right in. Sorry if this is disappointing, but I prefer to have the 100% round-up post game. See you soon for Chapter 8!
Stats:
1 HP / 30 FP / 57 BP
Game Overs:
1
0 notes
Text
Chapter 7: “SPAAAAAAACE!”
Holy cow, a comedy video game from a well-known publisher in which part of the climax is the main character and their partner(s) going to the moon? That’s right! TTYD did it 7 years before Portal 2. It’s super cool and the music in the dungeon on the moon bops. Here’s a link, you should listen while reading this for maximum effect. X-Naut Fortress.
Major Battles:
Elite X-naut fight
Magnus Von Grapple 2.0
Major Events:
The Crane Game
It would be fahr out of you to click that “Keep Reading” button, eh?
After arriving at the moon, it doesn’t take much time to find the fortress. It’s off in the background so you know if it’s there second you enter a room. Using Bobbery to blow up a pipe, you enter. Immediately following the first room, you fight...
Elite X-naut
These guys have 10 HP, 1 Defense and 5 attack. We can’t take them out with one attack so I put partners in front and hoped for Close Call to do its job. Finished the fight using only bobbery.
The Crane Game
The Crane Game gives the last star piece, Feeling Fine, And Feeling Fine P which prevent status ailments on you and your partner. Now, we can trade every star piece to Dazzle and get every badge from them. Hooray!
Magnus Von Grapple 2.0
HP is 70, Attack is 3, 6, or 9, Defense is 2! He’s weak to the “Soft” status ailment, so I immediately used Soft Stomp on him to break down that Defense. From then on out, I was able to use Yoshi to deal 6 Damage per turn. With a couple Power Bounces and some Stampedes, he got down to 1 HP and I hammered him for the final hit. Chapter 7 complete! WAY more satisfying that if i’d used Mega Rush Badges, to be honest. I died once to him as well.
Badges:
Feeling Fine/ Feeling Fine P (Crane Game)
Stats:
1 HP / 30 FP / 54 BP
Game Overs:
3
Up Next: Chapter Interlude 7-8!
0 notes
Text
Chapter Interlude 6-7: Around The World
I’m including the first bit of Chapter 7 in this too, just fyi. General White and Goldbob has never felt like Chapter 7 proper, so whatever.
Major Events:
Lumpy visit 3
Merlon visit
A change of rules
General White & Goldbob
It may be cold outside, but click “Keep Reading” and join in around the fireplace as I tell you the tale of Fahr Outpost.
Lumpy

Lumpy’s back! Lumpy’s back! Since I gave him 300 coins, he returns 999, the maximum amount you can carry! I obviously knew this would pay off since I’ve played before but I like this side plot. Now we can buy many a thing from the Howz of Badges with little consequence. (The badge list for this post will be long)
Merlon

Now we have access to every shine sprite in the game. So every single partner can be upgraded. Hooray! I missed one in Twilight Trail, so I had to postpone upgrading Mowz, but she will be upgraded before we go to the moon.
A change of rules
I know. It’s late in the run to be changing rules, BUT... I was bored. So, Rush badges are now unequipped. This means my damage per turn won’t be 50. I want the game to be difficult again.

General White & Goldbob
The General White quest is commonly thought of as the worst part of the video game. This is not wrong in my opinion. You are tasked with finding General White, who you saw in Petalburg during Chapter 1. Going back to Petalburg and talking to the town’s Greeter reveals that General White went to a “Southern, Tropical Island”
Going to Keelhaul Key and talking to Pa-Patch reveals he went to an Arena.
Going to Glitzville and talking to Podler reveals he went to a big tree.
Going to the Great Tree and talking to the puni greeter there reveals he went to a dark area.
Going to Twilight Town and talking to a random twilighter there reveals he “looked tired”.
AND FINALLY, going back to Fahr Outpost and talking to the mayor reveals General White is in his house in town. Did that feel long? It’s worse playing it.
Goldbob is easier, you just have to give him all your coins, but he gives them back.
Now we can Blast Off to the Moon!
Badges, Stats, and Game Overs
This list of badges will not have the location or means by which they were obtained. Most are the Howz of Badges or Charlieton. Apologies for the inconvenience.
Defend Plus P, Power Plus P, FP Plus, Attack FX G, Unsimplifier, Fire Drive, Soft Stomp, Ice Smash, Damage Dodge P, Attack FX P, Super Appeal, Super Appeal P, Power Rush, Jumpman, Simplifier, FP Drain, Slow Go, Timing Tutor, Refund, HP Drain P, Last Stand, HP Plus P, Flower Saver P
Stats
1 HP / 30 FP / 51 BP
Game Overs:
3
Up Next: Chapter 7, Part 2!
0 notes
Text
Chapter 6: Battle Celibacy
Chapter 6 takes place on the tongue-twisting Excess Express, comprised of exactly 6 train cars. For the most part, battles do not exist on the train. It’s all story and exploration. This means this will be a shorter post even though I really like Chapter 6.
I will, however, give a brief explanation of each day and the mysteries solved because I WANT TO.
Major Battles:
Smorg
Major Events:
Day 1
Day 2
Riverside Station
Day 3
Choo Choo! All aboard the “Keep Reading” train!
Day 1:
Day: A pot of stew is stolen from the kitchen. Using observational skills of the stew splatters on the carpet and expert interrogation skills, the guest in cabin 3 is revealed to be the culprit. Giving the pot back rewards us with a star piece. An ongoing mystery begins where Mario is threatened with a “sticky, yummy, explosion”
Dusk: Bub, the tiny bob-omb in cabin 8, wants something for his birthday. The hints given are that it’s someone’s autograph and that he loves trains. The engineer signs a paper for us and we give it to him. Give it to him, and get a shine sprite.
Night: The conductor is 1 blanket short. Someone might be a stowaway! Using Vivian to hide in cabin 4 reveals the ghost of a toad. He asks us to get his old diary from his time alive, and so we trade that for the blanket.
One small issue. To progress to the next day, we have to sleep in the bed in our cabin. This technically counts as healing, and refilled my FP from 17 to 25. This is required to progress, and I had no other choice. I’m making a train exception. Apologies if this is disappointing.
Day 2:
Day: The businessman’s briefcase, the waitress’s earrings, and the passenger in cabin 2′s gold ring have all been stolen. These items combined are said to be able to create that sticky yummy explosion (the briefcase contains details on a type of Honey Syrup). Finding multiple pieces of paper leads us to Zip Toad, the passenger in cabin 1, being the culprit! As we return the items, it becomes dusk and Doopliss sheds the disguise of Zip Toad and runs away. Briefcase return advances the plot, Earrings give a star piece, and ring gives 30 coins.
Dusk (Riverside Station):
The only dungeon in Chapter 6, we’ve got Poison Pokeys, Spiked Parabuzzies and Ruff Puffs. I died once, and then equipped Spike Shield to kill the Parabuzzies easily. In this dungeon you get....

The Ultra Boots! Which upgrades Mario’s base jump attack from 2 to 3.
You use your hammer on some weird navy things in the basement, lower the drawbridge and continue forth!
Night: Go to bed. Nothing happens. Another illegal heal. Sorry.
Day 3:
Day:
SMORG
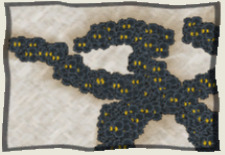
One of the toughest bosses in the game if you’re not prepared! I once had no reasonable badges, no coins, and just a general lack of skill and got stuck on this guy for a while. This time, to preserve the feeling of difficulty, I used ONLY Mario. You first have to take out each “Smorg Miasma”, which you can’t do all in one turn as Mario Alone. Once I took out all three, a single power bounce did the trick, but I was glad to have not done it in just one turn.
And we arrive at Poshley Heights! That’s about the end of the chapter, so I’ll get into the...
BADGES STATS AND GAME OVERS
Badges:
P-up, D-Down (Riverside)
Close Call P (Riverside)
L Emblem (Poshley Sanctum) [I look like Waluigi now]
Stats:
1HP / 25 FP / 48 BP
Game Overs:
1
1 note
·
View note
Text
Chapter Interlude 5-6: Power Up Partner
Major Events:
Ultra Orb
Boat Panels, Around the World (Rogueport)
Not much else, pretty short interlude!
Ultra Orb

Merlon, the guy who upgrades our partners, tells us to go back to Hooktail Castle near the Cursed Chest. Now, with Bobbery, we can break a wall in the castle and get the Up Arrow

Bringing this back to Merlon allows us to upgrade our partners twice! At the end of Chapter 5, I had 12 shine sprites (and Bobbery had no upgrades), so I upgraded Bobbery twice, Goombella again, and Hornet. While in Hooktail Castle, I found Koopook who gave me the Special Card which allows MORE GAMBLING at the Pianta Parlor.
Boat Panels in Rogueport
Four Boat Panels are set off in Rogueport, two in the sewers which lead to three shine sprites total and two above ground that lead to badges and a star piece.
Badges, Stats, and Game Overs!
Badges:
Pretty Lucky (battle hold, stolen with Mowz)
Defend Plus (Boat panel)
Double Dip (Boat panel)
Stats:
1 HP/ 25 FP/ 42 BP
Game Overs:
2
Up Next: Chapter 6!
0 notes
Text
Chapter 5: Piracy is a Fun and Cool Activity
Chapter 5 takes place on Keelhaul Key (which is, as an aside, my Animal Crossing New Horizons town name), a tropical island filled with trees, beaches, and vengeful spirits? oh boy, here we go
Major Battles:
Spikes.
Bulky Bob-ombs
Cortez
Crump
Major Events:
Bobbery!
WHAT? A FOURTH TIME?
If thoughts on my run be yer treasure, “Keep Reading” marks tha spot!
PARTNER GET!
Admiral Bobbery: The last partner obtained during the run. He’s an old seadog, and has a wonderfully written tragic backstory. He can explode enemies in two ways, one with “Bomb” that works directly, and one with “Bomb Squad” that allows him to set time bombs down on the field that damage enemies nearby. He and Koops are the only partners who can first strike and attack enemies on the field. A wonderful last addition to our party.
Spikes
Most of my Game Overs this chapter were wrought not by enemies, but by stupidity. I jumped on a piranha plant twice which automatically deals 1 damage. Then, there’s this room.
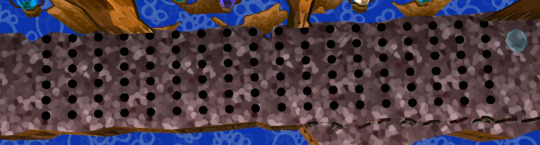
(view from above taken from noclip dot website)
This Room. Always gets me. at least 3 times. Those holes? are spikes. You’re supposed to use Paper Mode or Vivian to avoid them when they periodically come up. Normally, It’s ok. You just lose 1 HP and try again. By chapter 5 you should have like, 30 HP. it’s fine. But, hazards are INSTANT game overs in Peril Party. So I died multiple times to these guys.
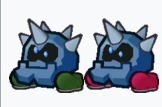
Bulky Bob-ombs

This never happened to me, but if you use Vivian or Bobbery on these guys, it’s almost an instant Game Over, too. they’ll explode for 2, 5, or 8 damage if you let them and if you use Bobbery’s Bomb or Vivian’s Fiery Jinx or complete Shade Fist, their explosions are all triggered. These guys are formidable in a normal run, so don’t poke them in the wrong way.
WHAT? A FOURTH TIME?
There be 4 cursing chests in this game! This most recent one, along with calling me a fool as usual, turns me into a boat if I press “Y” over boat panels! This is the last curse on the run, so it won’t get harder in that respect.
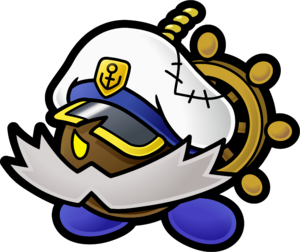
Cortez
Cortez is the Chapter Boss! A pirate spirit haunting the island, he has 60 HP split evenly over 3 phases.
Here’s the thing about Cortez. I expected the worst. With only 2 attacks per turn, there’s no way I can take out all his phases in one turn. It’s impossible. Or is it?
On this episode of Fun Facts about TTYD, did you know that your turn resets when Cortez completes a phase? It’s inconsequential during a normal run, you’re not gonna be doing big damage in those numbers, but for Peril Party? It means that we can just... Ground Pound 3 times with Yoshi. Boom! Fight done. Next!
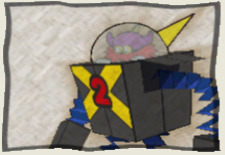
Crump Rematch

Crump is actually... eerily similar to Cortez. Hear me out. Crump has 60 HP split evenly over 2 phases, is a boss that summons other goons (Weapons vs X-Naut Platoons) and drives a ship during the final scene of Chapter 5. Anyway. Turn doesn’t rest for Crump when you take out one phase, so there’s a guarantee of at least one attack in there from him. Close Call comes in clutch and the chapter ends with a way home.
Stats:
1 HP/ 25 FP / 42 BP
Badges:
Ice Power (Jungle)
P-down D-Up (Grotto)
Defend Plus P (Grotto Chest)
Game Overs:
7
Up Next: Chapter Interlude 5-6!
0 notes
Text
Chapter Interlude 4-5: Starlight Brigade
Most of this chapter interlude was spent hunting for star pieces. Here’s the line up!
Major events:
Mowz
Jolene
Dazzle
“Keep Reading” for more details!
PARTNER GET!

Ms Mowz: The only optional partner in the entire series (not counting pixls)!
A trouble appears after Chapter 4 from “????” asking for an elusive badge. Mowz then sends you on a quest back through Hooktail Castle, which let me get all the Star Pieces in panels from Chapter 1. When you get back, she joins your party! Her attacks pierce defense and it’s pretty cool.
Tree Hunting
Went back to the tree for star pieces. I would have taken a trouble for one of the characters in the tree, but the only one tasks you with taking a life shroom to the Puni Elder, which is BANNED because life shrooms.
Jolene
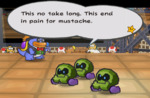
Jolene has a trouble where you pick up stuff from the storage room. This let me get the rest of the star pieces in Chapter 3. She also put me back on the roster for the glitz pit?? So I fought the Goombas again twice and then decided I was bored.
Twilight Town Hunting
Hunted in Twilight Town for Star Pieces, too, bringing the total to 31 Star pieces.
Dazzle

Traded all of the star pieces in. Covered more below in Badges, but here’s (an approximation of) whats left in Dazzle’s inventory.
Happy Heart
Heart Finder
Peekaboo
Power Plus P
Badges:
Last Stand (Random Drop)
Hammer Man (Charlieton, 180)
Spike Shield (Chest unlocked with Vivian)
Attack FX B (Trouble with Mowz)
Super Appeal P (Flurrie House Chest)
Double Pain (Charlieton, 36)
Power Plus (Dazzle, 15)
Flower Saver P (Dazzle, 10)
Happy Flower (Dazzle, 4)
Head Rattle, Piercing Blow, Simplifier, Sleepy Stomp, Damage Dodge (Howz of Badges)
Stats:
1 HP / 25 FP / 36 BP
Game Overs:
4
Up Next: Chapter 5!
0 notes
Text
Section 4, Subsection 2: A Shadow of Your Former Self
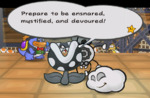
Ok. I lied. That’s not all of Section 4. The game does the “End Of Section!” cutscene, and you can save your game like normal, but that’s not where it ends. See, the demon has committed Identity Theft to the most literal of terms. Now he looks like Mario, and Mario looks like...

Well, he’s totally violet. You need to find a way to reclaim your name and body, and quick. That ghost is galivanting around in your body!
Major Battles:
?????
Doo_liss
Major Events:
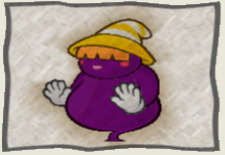
Vivian
Bird
Walking
?????
On the way back to the village, the demon, still in your body, will ambush you. Guess his name, and he says he’ll give you everything back. Veterans, like me, of course already know his name. There’s just one issue. The lowercase letter between “o” and “q” is missing. So we can’t say what his name is, without first going to the location where the letter and his name are. And, no, you can’t use the big version of that letter. I try every time...
The battle is unwinnable. Neither you nor the demon do and damage. You have to run away.
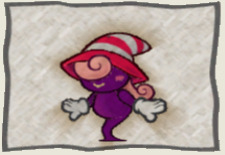
ALLY GET!

Vivian. Remember the shadow sirens that we fought in Section 2? The youngest decides to join you since you’re nice to her! She, of course, doesn’t know you’re Mario, given your stolen name and body, so this might get awkward later... Eh, best not to think about it. She has Shade Fist and Veil. Shade Fist hits for 3 base damage and Veil lets you avoid any attack the next turn, at the cost of her next move. Veil will be useful. Just you wait. We need to sneak back to the Scary Church and get that letter, fast. I dont know how long I can continue without using it.
Bird
There’s a bird in the Scary Church that guards the letter and knows the demon’s name. Finally, we obtain the Lowercase letter “p” and tell the demon his name is Doopliss! Just as an aside, purple poltergeists pick prickly pears per Peter Piper’s problematic precepts. That has nothing to do with Chapter 4; I just wanted to use the letter “p” again. Some crows in Twilight Town also said that telling Doopliss his name will get rid of his unlimited magic.
Walking
This chapter’s main problem is walking. In total you walk to the Creepy Steeple and back 3 times. It wouldn’t be as annoying if the path changed or there were different ways to get there, but the whole chapter is kinda based around progressing like a pendulum, going back and forth. I don’t think it’s as bad as some people say it is, but I was definitely tired of it after I told Doopliss his name. He could have just fought me there, but I had to run back through the hyper goombas and Crazee Dayzees. It’s just a mild inconvenience.
Doopliss

Doopliss uses your previous partners against you! However strong they were, you have to fight them! …Kinda. See, they don’t get the same badge power ups as they had before. But, they have the same HP levels. So I made it a fun little side goal to take out all of the partners, too, even though they all have 1 HP. Vivian leaves at the beginning of the fight, since she’s realized you’re really Mario, but comes back later in the fight, rejecting her sisters. Now she’s part of our party for good! He’s pretty easy to take out, by the way, especially after Vivian comes back. Hit him for 40 HP and reclaim your name!
Badges (there’s a lot), Stats, and Game Overs:
Badges:
Defend Plus (Twilight Town Chest)
Hammer Throw (Trail ? Block)
Tornado Jump (Steeple Well ? Block)
Ice Smash (Steeple Chest)
Flower Saver (Steeple Chest)
Lucky Start (Atomic Boo Reward)
Power Plus (Steeple Chest)
Stats:
1 HP / 20 FP / 36 BP
Game Overs:
None!
Up Next: Chapter 4-5 Interlude!
2 notes
·
View notes
Text
Chapter 4: A Short Hike
Chapter 4 takes place in Twilight Town, a village plunged in eternal dusk. The village has been cursed such that every time the bell in their clock tower (known as the Creepy Steeple) rings, someone in the town will turn into a Pig. Your job is to confront the demon in the Creepy Steeple and stop the curse. This chapter is pretty short, so this post will be too!
Major Battles:
Amazy Dayzee
Atomic Boo
?????
Major Events:
Again? Are you kidding me?
“gnidaR peeK” kcilc ,kniht I tahw ees oT
Again? Are you kidding me?
Once again, I’ve been CURSED! Now, when I hold R and spin the control stick, I turn into a little paper tube! How am I supposed to manage this? This is the 3rd curse on the run and I don’t know if I can take many more...
Amazy Dayzee

This. bastard. has plagued me every casual run I’ve done. It has 20 HP, 1 defense, deals 20 defense piercing damage while putting you to sleep, and can run away. If you manage to beat it, you get the greatest reward of all, experience points. I’ve never beaten one in game.
Until this run. You see, the strategies employed during Peril Party make you the most fragile of Glass Cannons. But, as a result 20 HP of damage is no different from 1 HP! So this thing isn’t as scary. I used Hornet’s ground pound to take this thing out and the results were highly satisfying.

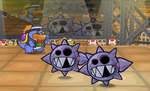
Atomic Boo
Some Boos reside in the Creepy Steeple. At first, there will be none, then you have to open a chest with 200 of them in there (correctly guessing that there’s 200 will reward you with an Ultra Shroom... so basically 50 coins). Then, one will be in the main lobby and ask if you’ll be mean to it. Answering no will make them all swarm you and using your super hammer from Chapter 3 to get them off will result in an optional boss!

With 40 HP and the use of Hornet, he’s kind of a push over. He gives you the badge Lucky Start, though, which can be useful!
?????

???? This is the demon of the Creepy Steeple… But the thing has no name. Whatever. Can still hit him with a hammer. An interesting thing about this fight is that he’s scripted to transform into you, but you can deal all the necessary damage to kill him before than. If that happens, he silently regains 10 HP after the cutscene of transformation. Generally easy fight, although that stipulation means he has to attack at least once.
And that’s the end of the chapter! Mario gets the Ruby Crystal Star and the village is saved!
1 note
·
View note
Text
Chapter Interlude 3-4: GET IN LOSER, WE’RE GOING SPELUNKING
This one hurt a bit. You’ll see why.
Major Events:
Badging
Trouble Center
Hell, or, at the very least, an unpleasant Limbo
Y’all be clicking that Keep Reading button, y’hear?
Badging
After the Glitz Pit, I had about 200 coins and some badges to sell, so I went to the Lovely Howz of Badges which got a stock of Power Rush (P). This works like Mega Rush (P) but adds 2 damage for danger (>5 HP). Pretty Lucky P and Last Stand were available too, so I grabbed ‘em.
Had 10 star pieces so I got Flower Saver from Dazzle.
Trouble Center
I wanted access to one of the Games at the Pianta Parlor. I wanted to GAMBLE. So, instead of taking the easy trouble “Find a guy you already know the location of”, I took the hard trouble “Enter the Pit of 100 trials and get to floor 18.”
Hell, or, at the very least, an unpleasant Limbo
The Pit of 100 trials is a challenge presented by the game. It contains 90 floors of enemies with every 10th floor having some reward for you. You see, the trouble itself, “get to floor 18″, isn’t hard. Not even with 1 HP only. What is hard is my personal goal, “get to floor 50.” Floor 50 has the admittedly stupidly named Strange Sack, which lets Mario carry 20 items instead of 10. Do I need it? No. Have I ever even had to throw something of value away for inventory space? Also no. Do I want it? Absolutely.
I write this section during a mental break from doing the first 18 floors over and over. The closest I’ve gotten is floor 49, so I know this is possible for me. I’m stubborn about this. It will happen.
.
.
5 game overs and 1 and a half hours later, I did it.

I saved twice like I used to do with Pokémon and I’m free. Here’s the breakdown of each reward:
Floor 10: Sleepy Stomp, Keeping
Floor 20, Fire Drive, Keeping
Floor 30, Zap Tap, Keeping for Ch 5
Floor 40, Pity Flower, Selling
Floor 50, Strange Sack
Unknown floor, random enemy drop, HP Plus P, selling
Charlieton with coins gotten from Pit, W Emblem (I look like Wario now)
Statistics, Pins, and Resets
Stats: 1 HP / 20 FP / 30 BP
Badges (outside of the above):
Power Jump, Happy Flower, shrink stomp, unsimplifier, all bought at the Badge Howz on sale
Game Overs: 7! 2 water hazards, 5 Pit attempts gone wrong.
Up Next: Chapter 4!
0 notes
Text
Chapter 3: Back-To-Back Battles
Chapter 3 is one of my favorites. I know I say everything is my favorite in this game, but this one’s special. I’ve been thinking about chapter 3 since I came up with the run idea! If you’ve never played, you may ask yourself, why this one?
Chapter 3 takes place in the aptly named Glitzville, a floating city in the sky. The whole area you explore in the chapter is tiny relative to the other chapters. But the setting takes a backseat to the real reason this chapter is exciting. Glitzville is home to the Glitz Pit, a professional fighting ring. The champion’s belt has the crystal star you need to complete the chapter. As your partners will say, there’s only one way to get it. Fight to the top.
Around 20 opponents, ranging from 5 goombas to a Koopatrol, to not one, but two special minibosses. Each battle starts with a condition, for example, “Don’t use any items!” If you fail the condition but win the fight, you refight the opponents you just did. This is why I’m excited. The chapter is built around battling, which I have made much more difficult. That also means this could be the longest post yet, as I’d like to talk briefly about each battle, given there’s a set number. I will, at most, say one thing about each battle. With all that said, here’s the chapter line up:
Minor League (bottom rank to top rank):
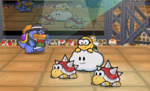
Goomba Bros
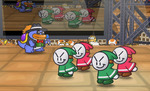
KP Koopas
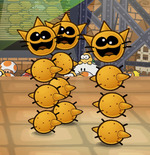
Pokey Triplets
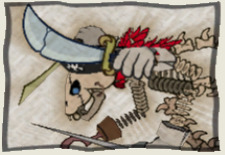
Dead Bones
Spike Storm
Hand-It-Overs
Mind-Bogglers
Punk Rocks
Bob-omb Squad
Title Match: Armored Harriers
Major League:
Tiny Spinies
Poker Faces
Shell-shockers
The Fuzz
Magikoopa Masters
Craw Daddy
Hamma, Bamma, and Flare
Chomp Country
The Koopinator
Champion: Rawk Hawk!
Other:
Macho Grubba
Major Events:
Yoshi!
As before, click “Keep Reading” to see how it went!
MINOR LEAGUE
legend: normal text for the condition means no change in fighting style
italic text means active change in fighting that I did
Bold means I didn’t complete the condition
(Bold and italics means I could have completed the condition but didn’t)
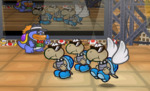
Goombas:
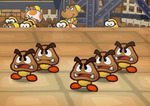
“Appeal Once”; Close Call worked every time.
Koopas:
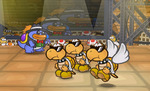
“No special moves”; Goombella overpowered
Pokeys:
“Don’t use your hammer”; Koops only could attack, but easy
Dull Bones:
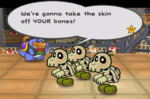
“Don’t use items”; Could have powershelled but relied on a close call chance
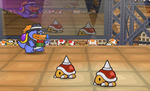
Spinies (1):
“Let the enemy damage you 3 times”; impossible fight. beat them normally.
Spinies (2):
“Don’t switch your partners”; some stalling with lakitu holding a spiny above his head, but better
Bandits:
“Don’t switch your partners”; i did power shell here.
Boggly enemies:
“Use a special move”; Clock Out takes us to the end of the fight (Sweet Treat is unavailable)
Hyper Clefts:
“Use a special move”; Clock out again because I didn’t want to use Earth Tremor, Stylish moves are your friend.
Bob-ombs (1):
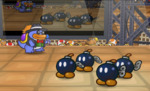
“Don’t use your hammer”; I just forgot not to do this. I was writing all of them down, so I knew, I was just afraid of the explosions
Bob-ombs (2):
“5 turns or less”; I’m already taking out 2 enemies a turn, baby.
Iron Clefts (1):
“Let your enemy damage you 3 times”; which would be fine, just a refight but as is, this first fight is Unwinnable. They have infinite defense. I must lose. Luckily, something I haven’t mentioned is that the Glitz pit doesn’t count dying as a Game Over. I’ll still add it to the counter, though. Now, we have a tough decision to make...
Partner Get!
This is our next partner. He has no name, although Mario Wiki refers to him as “Mini-Yoshi”. The thing about him is, you, the player, name him. I had not thought about this yet. I got the Green Yoshi (there are about 8 variants?). I’m going with “Hornet” because he hits fast and repeatedly for small amounts of damage and is small himself. It occurs to me I think there’s a superhero named the Green Hornet? This isn’t a reference to that, I promise.
Hornet can use “Gulp” to hit the iron clefts against each other, winning the fight. Let’s do this.
But first... I’m gonna upgrade him at Merlon’s. I have the Shines since i didn’t use them on Flurrie and it seems like a good idea.
Iron Clefts (2):
“Win in 5 turns or less”; Gulp costs 4 FP bringing the total FP I have down to 2. I can’t heal per my rules, so I have to wait for a level up.
Spike Buzzies (1):
“Win in 5 turns or less”; They have big defense, I died.
Spike Buzzies (2)
“Don’t use your jump”; Second verse same as the first.
Spike Buzzies (3):
“Don’t use your jump”; I used an item to do 5 damage to one killing it, and won.
Bristles (1):
“Let your enemy damage you 5 times”, Koops is king.
Bristles (2):
“5 turns or less”, same.
Shady Koopas:
“Dont let your partner attack”, A little tough, but Koops tanking hits helped.
Fuzzies:
“Don’t use your hammer”, Left the Flower Fuzzy for last, won easy.
After this fight, a piece of cake appears. It heals you, but you can opt out. There’s another after the Bros fight that’s from the champion and is poisoned, so normally you’d eat the first but not the second. I just didn’t eat either per the rules.
I didn’t document Magikoopas, Dark Craw, Bros, Chomps, or Koopatrol well. Chomps and Magikoopas I know I fought twice, Magikoopas because of an actual loss, Chomps because of a bad condition (think it was take damage). For Koopatrol, I used Shell Shield with Koops and that worked very well. That takes us to...
Mini-Boss: Rawk Hawk

“Use at least one special attack”. With 40 HP, this guy is a tank! … is what I would say if we didn’t get Hornet this chapter! Ground-Pound does numbers with Mega Rush P. Normally, it deals 5 separate instances of 1 damage, but with Mega Rush P, it deals damage counting down. So right now, for me, it deals 6, then 5, then 4, then 3, then 2. Which just so happens to equal 20, HALF of Rawk Hawk’s health. The condition doesn’t really matter for this fight but I did it anyway. Piece of poisoned cake!
Almost immediately after, we sneak in on the owner of the ring who admits to himself to using the Crystal Star to keep himself young forever. It’s a no holds barred, “If you hit 0 HP it’s a game over for real” fight against...
Macho Grubba!
This boss’s whole gimmick is stat changes. He will first up his chances to attack, taking two actions per turn! After this, he’ll up his attack or defense and attack in the same turn. So! The plan is simple: Defeat him in 2 turns. With Yoshi out, he does 40 HP for us, so we need to find a way to do 20 HP with Mario. Luckily, Power Bounce acts about the same as Yoshi’s Ground Pound. With a little strategy, we win the fight, EZ PZ.
And that’s Chapter 3! I didn’t talk as much about the story in this post, because I really wanted to focus on the battles. Feel free to tell me how wrong I am for doing so.
Stats! Badges! Game Overs!
Stats:
1 HP / 20 FP / 21 BP
Badges got:
Power Plus P (Glitzville Chest)
Charge P (Glitz Pit storage)
HP Plus P (Glitz Pit storage) [Will Sell for Money]
Game Overs:
0 technically, but I lost 4 times during the Glitz Pit fights.
Up Next: Chapter 3-4 Interlude!
0 notes
Text
Chapter 2-3 Interlude: Love at First Sight
Chapter 2-3′s interlude introduces the best character. In the game. I don’t make the rules, and while I am biased because of a memory, I think it’s impossible to hate him. Let’s talk about it.
Talking Points:
Merlon Visit 2
Lumpy Visit 2
Don.
Badges & Stats
Merlon:

I visited Merlon again. At this point, if you’ve collected everything, you’ll have 6 shine sprites, enough to fully upgrade your team. But... I’m a spiteful jerk and only upgraded Goombella, not Flurrie. I have no practical reason for this except that Flurrie’s Rank 1 involves healing, which is banned. Maybe just some kind of a challenge, maybe I’m just stupid. Por que no los dos?
Lumpy:

I had some extra change from 2 HP based badges that are, obviously, useless to me. So, I gave Lumpy 2 more 100 coin installments. He’s all ready to go, and I’m happy for him.
DON:

DON. MF. PIANTA. He is my favorite character in the game. You didn’t think there was gonna be a Mob Boss in your fun Mario game, huh? Well guess what, there IS. Don Pianta is the leader of the Pianta Syndicate, and Mario needs to bargain with him for a Blimp Ticket to get to the next chapter. Mario is tasked with finding his daughter and subordinate who are planning to elope. It’s, as he calls it “a whole soap opera.” Don is cold outside, but his close followers tell you he’s got a big heart, and is happy at the end of it all, even after yelling at his daughter and future son-in-law, saying he never wanted to see them again. So to recap, Don is great because
He’s a huge subversion of what “can” exist in a Mario game
He’s a complex character with conflicting goals and feelings
He speaks with a brooklyn accent in text.
TTYD is the third use of Piantas in the Mario franchise ever and this is their main screen time. absolutely stellar.
Stats! Badges!
Stats:
1 HP/ 15 FP/ 18 BP
Badges:
Close Call P (Howz of Badges, ~70 coins?)
First Attack (Howz of Badges, ~70 coins as well)
Flower Finder (Dazzle, 6 star pieces)
Game overs:
None!
Up Next: Chapter 3!
I’m excited for this one....
0 notes
Text
Chapter 2: Patience Party
Chapter 2 is beautiful. It takes place in a primarily greyscale forest, with accents of purple, blue, and green all around. If you had any doubt that TTYD would just be a standard Mario Platformer with RPG battles, this shatters it. The location has this smooth, calming music and just looks so cool.
The only problem... Chapter 2′s gameplay and mechanics just don’t correlate with its world. But, I’ll talk about that more when we get to The Punies™
For now, enjoy the landscape.

Major Battles:
Shadow Sirens!
Magnus Von Grapple
Miscellaneous Events:
Flurrie
“Secret Entrance”
The Punies™
Super Boots
And remember to click “Keep Reading” to get a feel for the run from my perspective!
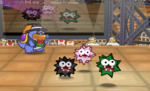
1. Shadow Sirens!
The Shadow Sirens can be formidable. They’re lined up Vivian, Marilyn, Beldam and have 10, 12, and 9 HP respectively. But, since Mega Rush and it’s Partner equivalent were gained in the interlude, we have an excellent damage output. Personally, I took out Marilyn and Beldam on turn one, since Marilyn has the most HP and Beldam can freeze you which is instant Game Over (breaking out of ice costs 1 HP). Vivian punched Goombella, and then I had Mario jump on her. Fight done!
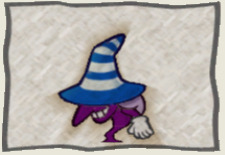
PARTNER GET!

Flurrie: ...Flurrie’s my least favorite. Her overworld ability “Gale Force”, can “ blow away flaps when in the overworld to reveal hidden objects or passageways”, which isn’t as cool as it sounds. Almost every time you use her, there’s a little flap of paper telegraphing “HEY! USE FLURRIE HERE!”. She’s not that useful in battle, either. If I wanted to jump on someone, I would use Mario or Goombella, not Flurrie’s Body Slam. Gale Force in battle is alright, blowing away enemies and still getting star points is nice, but it costs 4 FP to use. She’s also super flirty with Mario from the get-go, despite him shaking his head no every time she says something like “you ARE the cutest, my dear.” I’m just not the biggest fan of her. Flurrie Fans, please feel free to disagree with me, in fact, I’d love to hear why you like her. But for now, she’s mostly just a tool for me.
“Secret Entrance”
One of my favorite gags in the game. I’d be remiss if I didn’t mention it, here’s the full bit.
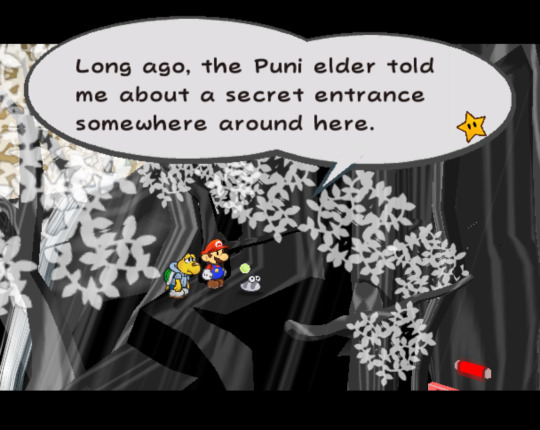
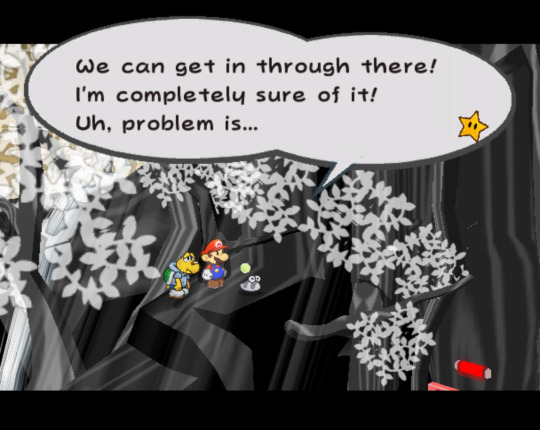

Some time later, when you’ve obtained Flurrie.
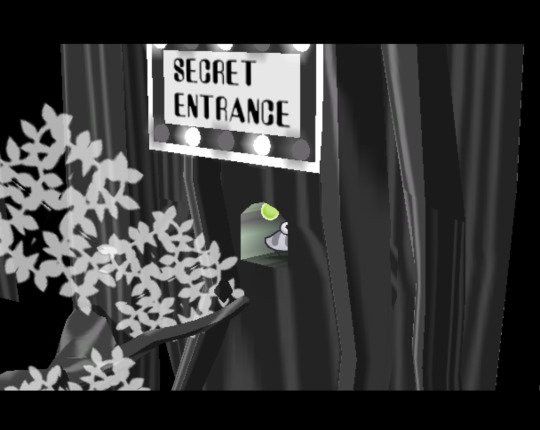
I just think that’s hilarious. Moving on...
The Punies™
The Punies are the worst part of Chapter 2. The GameCube was still in an era when companies were trying to flex what seems simple to us now. The GameCube specifically has at least 3 games where a gimmick at SOME point is having 100 or so models on screen at a time. Pikmin, Pikmin 2, and TTYD chapter 2 all take this a step further by asking that you use these characters, guide them, etc. Pikmin 1+2 are built around this. TTYD is not. So The Punies end up feeling stupid and become less compatriots in these epic battles in the tree but more toddlers you have to babysit. It’s a disappointing gimmick for a chapter that looks so cool.
Super Boots!

The Super Boots are the first truly permanent upgrade. They allow you to spin jump, which breaks panels in the floor and deals 6 base damage in battle. They also provide a base jump upgrade, from 1 HP per bounce to 2. So basically, assuming 0 FP used and no defense on the enemy, we can deal 14 damage a turn with Mario for 26 for the party if Goombella’s out. Things are getting easier.
2. Magnus Von Grapple!
I used Goombella again. Magnus has 30 HP, 1 defense, and 2 attack. The robot can also shoot out its fists which act like Bullet Bills (an admittedly later game enemy), and have 2 HP and 4 attack (no defense). With Mario, I jumped giving 12 Damage from the get go. Goombella gave him 10 damage. He stomped, which usually would deal 2 damage ending the battle, but Close Call/Pretty Lucky came through again and it missed. With 8 HP left, he was swiftly dealt with. Chapter 2 is complete!
Stats at Chapter end:
1 HP/ 15 FP/ 18 BP
Badges obtained:
FP Plus (Outer Tree)
Quake Hammer (Woods ? Block)
P-Down, D-Up P (Hidden Woods ? Block)
Damage Dodge P (Tree ? Block)
Charge (Inner Tree)
Shrink Stomp (Tree Chest)
Game Overs:
2 (1 accidental first strike jump on a spiked enemy, 1 water hazard)
Next Up: Chapter 2-3 Interlude!
0 notes