
pluto-neon
That One Artist
What's Up! I'm PlutoNeon! (pluto-neon) You can use any pronouns! But I am a Girl. I like Homestuck/BFB/BFDI/TPOT/Splatoon/ACNH/ Lego Ninjago/Drawing/ and much more!
223 posts
Don't wanna be here? Send us removal request.
Last Seen Blogs

beau20099
Untitled

illicitallure13
𝙎𝙋𝙃𝙀𝙍𝙀 ☆

tthegreenknight
sir bertilak

wacartsinteractive-blog
Wac Arts Interactive

fine-lines1
Fine Lines
Text
i’m okay with change and i’m fine if things are no longer the same i embrace change

48K notes
·
View notes

Text
Many many Splatoon Fonts!
And so my Tumblr journey shall begin…
Rassicas and I have been working a lot to improve the Inkipedia article on the Inkling language, since in the last few months we’ve made insane progress on deciphering tons of scripts used in the game.
I wanted to make clean graphics for the ciphers of each script, and I was planning on making fonts for these scripts anyways, so now was a pretty good time to do so.
I created some from scratch, and edited some already existing ones to follow the cipher we discovered or to add missing characters, and now we have a font for every single deciphered script there is!


(The round script is the only one I hadn’t changed in any way because it was already deciphered and had a font created based on that by jacebeleren.tumblr.blog)
This means you can now write in any of these Splatoon scripts, and it will be decipherable by the official order these characters are used in in the game!
I uploaded all these fonts on my Google Drive for you to use (the preview on Google’s end for some fonts is broken, the font will still work though).
On the drive, as well as on the Inkipedia article, there’s extended overview images for each script that show the cipher as well.
As you can see, for some scripts theres also some missing letters, often v and x. Once we find these last remaining letters, expect the fonts to be updated as well!
2K notes
·
View notes
Text

I got homestuck adopts to sell!
Theyre all $10! You must have a th (toyhouse) to buy!
Nervous Star: CLOSED
Hello, Mr. Telephone: OPEN
Raspberry Pomegranate: CLOSED
Waiter Skater: OPEN
1 note
·
View note

Text


Hey remember when I said it was the end of the body pillow series? Well I got noticed on an object cringe comp and thought I would make more to celebrate this monumental moment.
Thank you all for following me! I appreciate it lol
78 notes
·
View notes
Note
I have two questions! First: have you ever thought of doing a tarot card suit for your characters? I think it'd work really well for them! And two: help me how do I draw legs
@gravitality
Hi!! I’ve absolutely been thinking about that, yeah, in fact I recently talked about that to my boyfriend just recently. It’ll likely happen after october! And to answer your second question! I made a thing on legs that i hope you’ll find useful!!
So. I’ve already explained basics on legs here, but I don’t think it hurts to go through some extra details to help you understand legs some more.
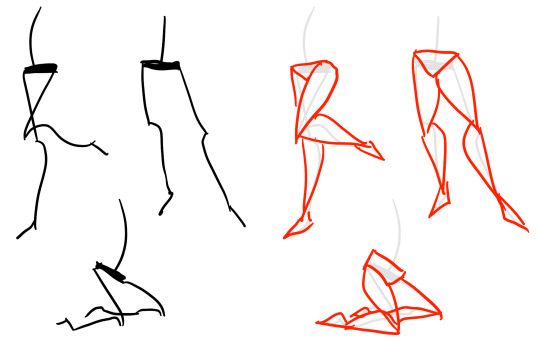
The very basic thing is to imagine legs as teardrops. Again, this has already been covered in said tutorial above, but I figured it’s still good to mention even the most basic thing that I know of. I still highly recommend you check it out to get in more detail and to see some other examples and practices that you do. But basically, think of legs in the shapes of teardrops, when it comes to shape. If you need a simple stick-figure to connect the legs in the first place, make sure that they bend at the knees a bit so that the legs don’t come off as stiff and unnatural.
As you can see, this method works perfectly for realistic legs as it does for stylistic ones. Remember to use these as a guideline, never to be the exact base of the legs you will be drawing. If you draw traditionally, remember not to draw these guides too hard, or they will be hard to erase/do freestyle!
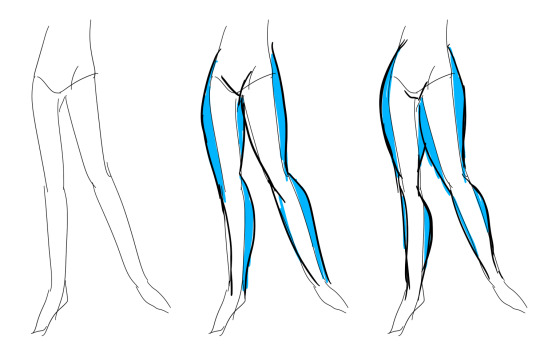
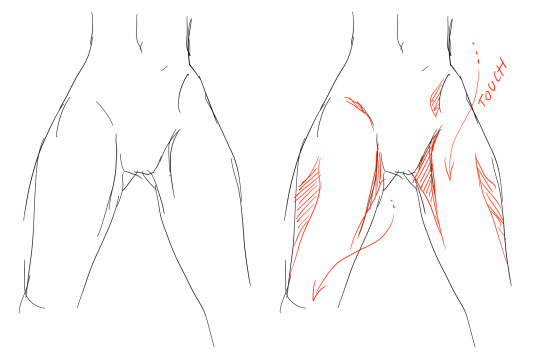
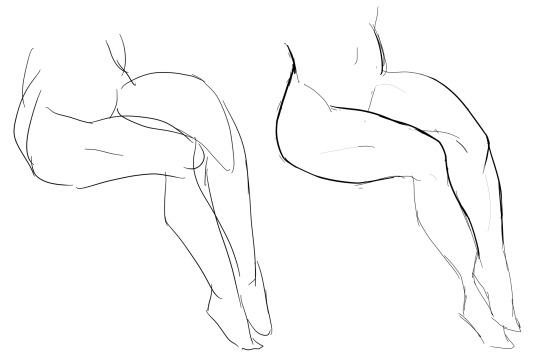
But how do you actually draw out the legs without drawing them perfectly straight, as shown to the left? The trick is to add volume to them, and how you do that can be winged to your own liking. The idea is to think in curves. As no leg is perfectly straight. You may make these curves minimal if you don’t want them to be curvy, but keep in mind, still, that not even your own bones are perfectly straight, so it is highly recommended that you make them bend, at least a little.
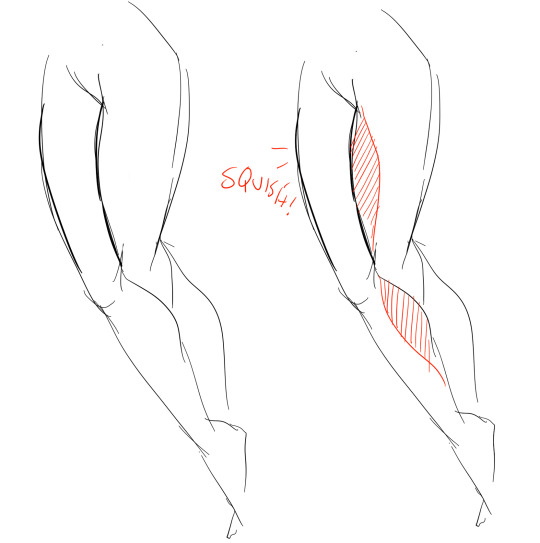
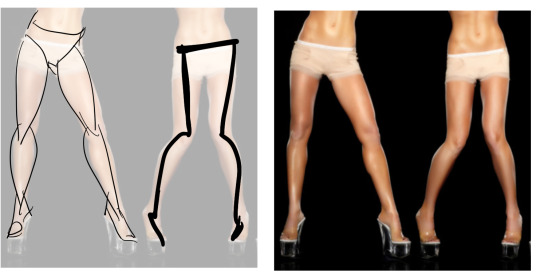
It all depends on how you draw them as well. Say you put your legs together, as shown in this picture, what happens to the fat and muscle? Naturally, they press together, much like how thighs squish on the surface when you sit down (I’m sure most people know what I’m talking about). Make sure this shows in your art! This is very important to keep in mind, because it makes it all look more natural and believable. Try to cross your legs or stand up and sit down again for real-life examples!
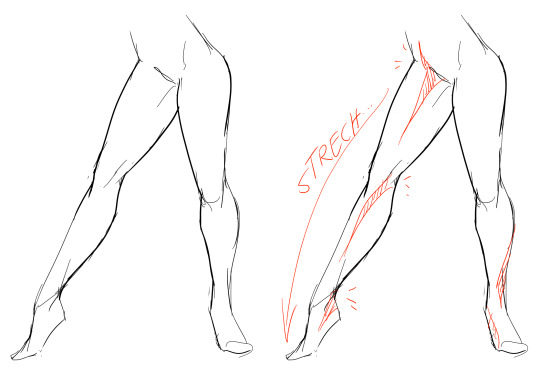
The same applies for stretching your legs, more or less, except they appear to become more ‘hollow’ and slimmer. They become less soft to the touch, too, and might show. Try stretching your legs and feel where the muscles tense and where it feels ‘hollow’. This is very helpful with your art.
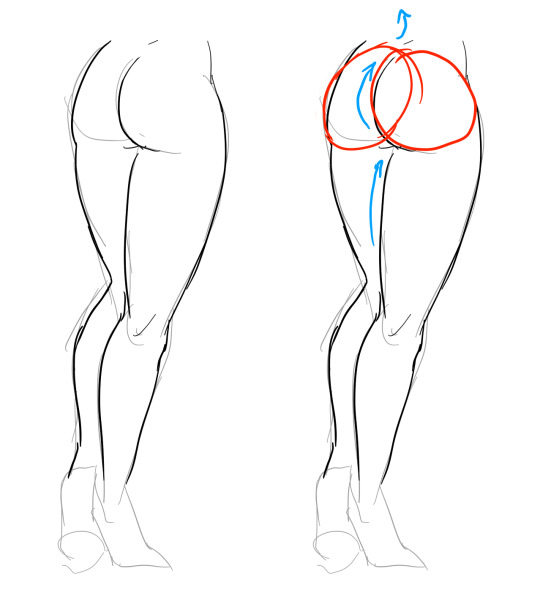
Many leg tutorials talk about legs without mentioning the behind. It requires a tutorial on it’s own, in all honesty, but this is the most simplest way to draw it connecting to the legs. Remember that it comes in many different shapes, and this is just a super basic guide! Two circles overlapping, while following the line and flow of the legs. Remember the muscle/fat as mentioned above!
Okay, so we got the basics of leg shapes figured out? What if you want o draw them in a certain pose, or with a certain silhouette, but perhaps do not have the reference for it? Or you want to blend your style into it? The key is to not shy away from doodling the form. Make mess, draw lightly and don’t care about the anatomy. That way you’ll get everything down without it appearing stiff. You can clean up the sketch later, always, and if you can, use a reference after you have drawn your pose, to correct your drawing.
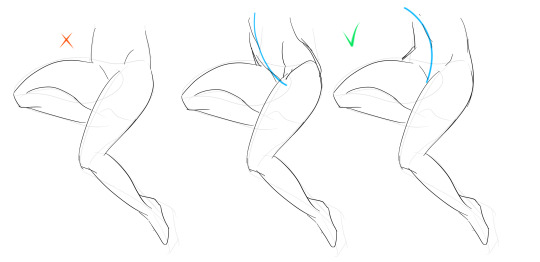
Remember that the hips do a lot to the pose of the legs! Make sure they are in flow with your legs, so that it can look more natural. Remembers that hips ‘rotate’ with the spine.
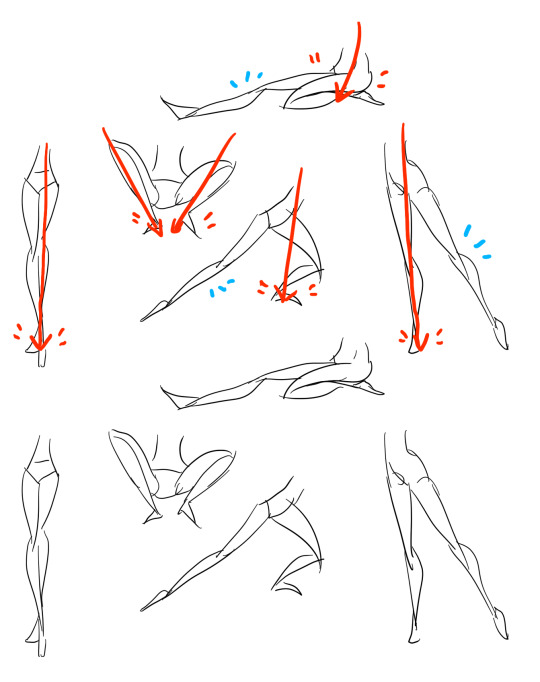
I’ve talked about this method before when it comes to posing, and the same applies for the legs. One way to make legs appear ‘steady’ is to picture them standing in a line, and one of those legs need not to stray from the lines too much, making it steady. If you want a dynamic pose despite the steady pose, you can always have the other leg stray from the line, since it only matters that one leg is steady. This method can create good, casual poses without making them appear boring. (also notice how the teardrop shapes are used here, despite the highly stylized legs)
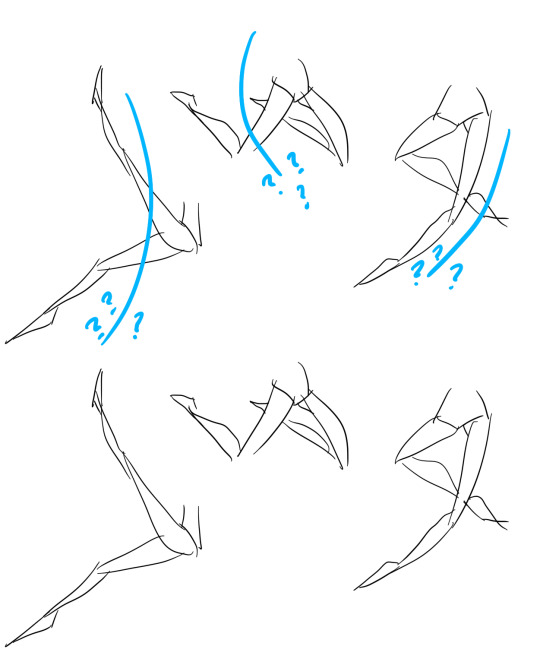
Do you want a highly dynamic pose, or them to appear unsteady, then skip the line entirely and make both legs aim away from it completely. As you can see, the legs appear more moving, in action, as if they’re fighting, falling, or dancing. As you can imagine, this is not a pose that one could stay steady on, suggesting that it’s taken mid-movement. More about posing and this ‘line’ method is talked about in this tutorial.
Hope this helped you, if you have any questions let me know, and if you’d like to check out all my tutorials they can be found here!
28K notes
·
View notes


Note
hi, do you have any more transparents from terezi: rem8er? :D


210 notes
·
View notes
Text


I figured that if y’all were anything like me you’d want a glitchcore moodboard
222 notes
·
View notes
Text
37K notes
·
View notes
Video
158 notes
·
View notes


Note
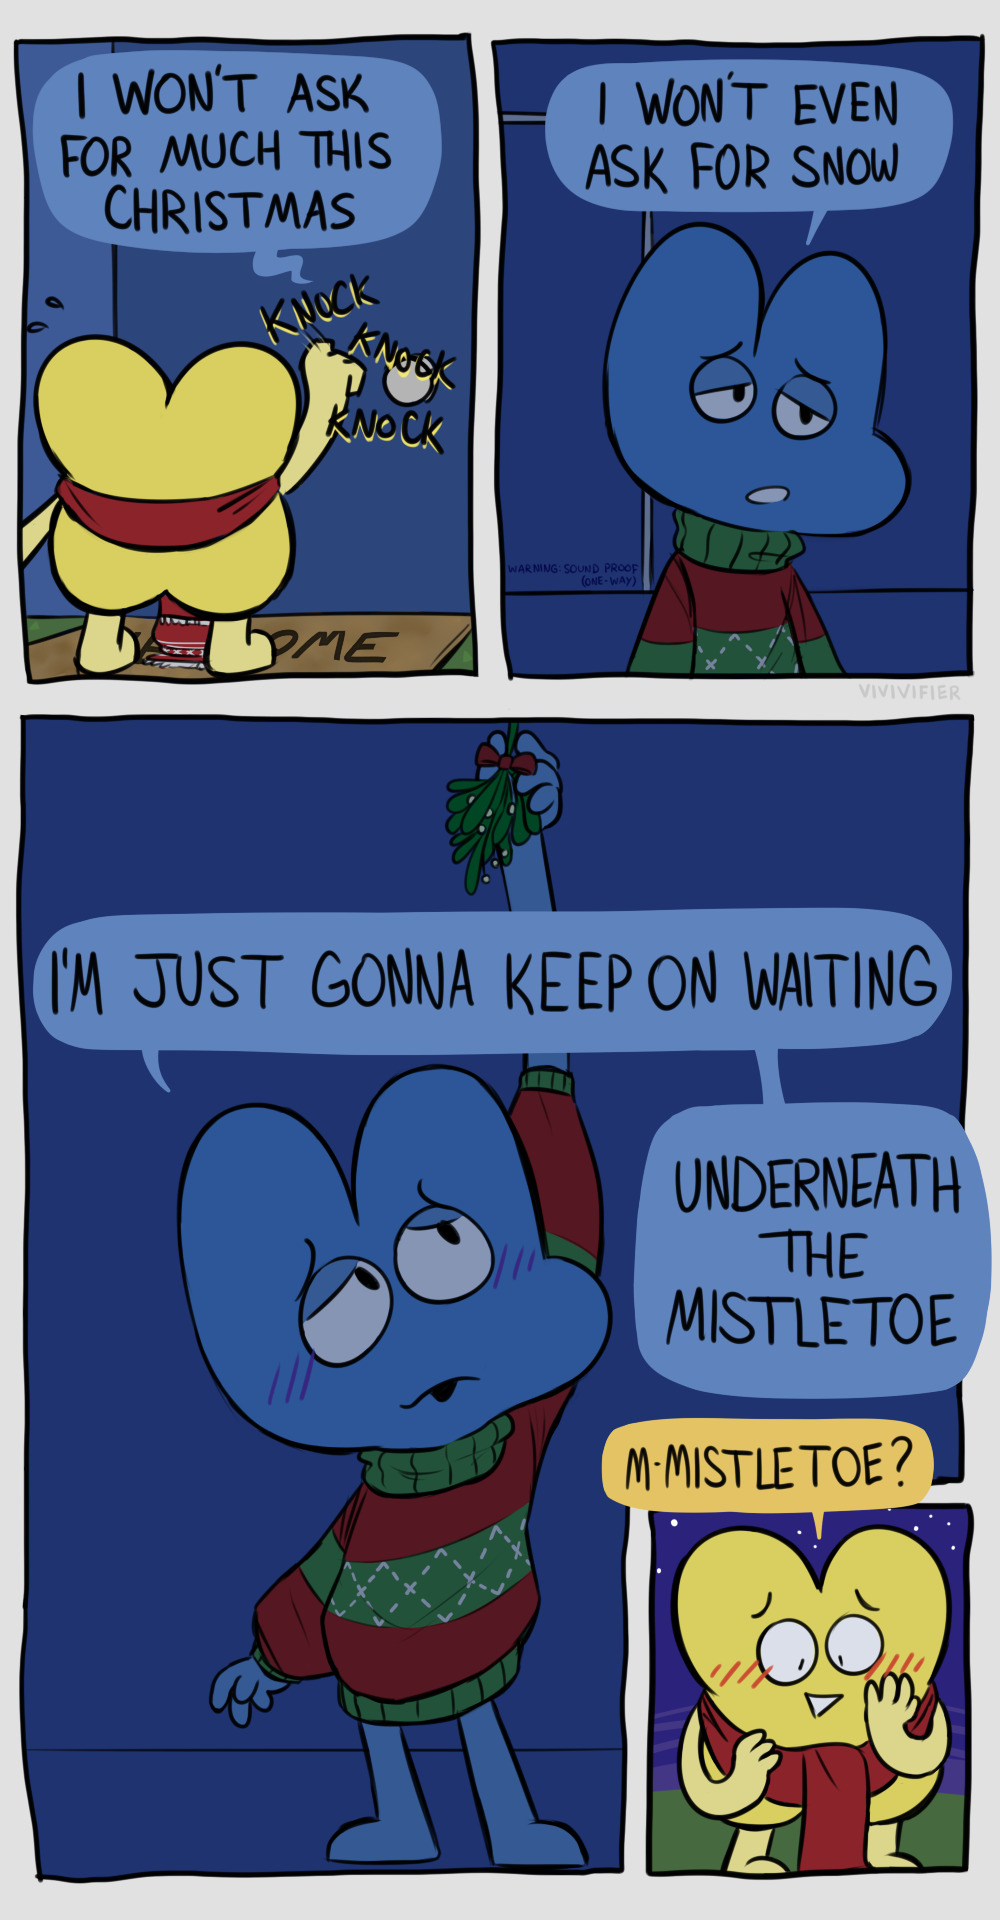
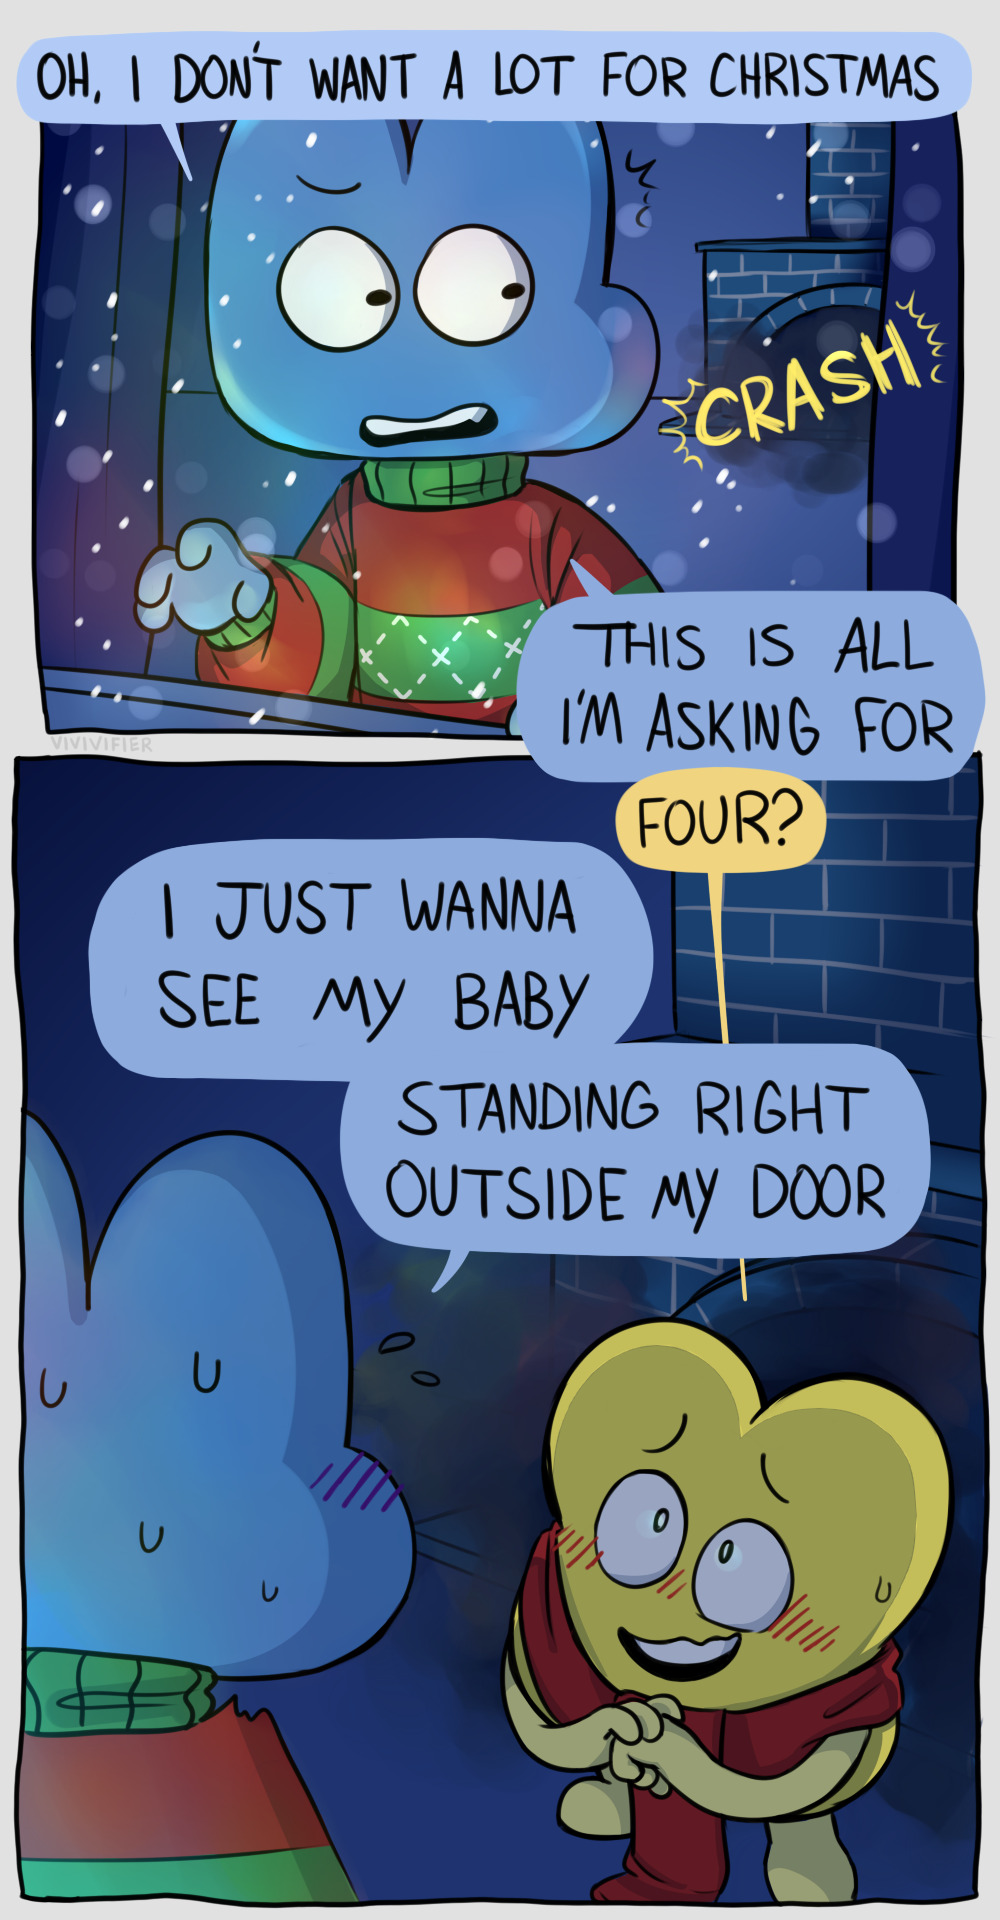
for your consideration: fireoiny but its enemies fake dating to lovers real dating
local idiots become boyfriends over 20 dollars (full comic under cut) (i dont feel like doing a transcript right now its . 1 am i should be asleep)


(got lazy right here and typed the dialogue instead of writing it)


498 notes
·
View notes