
Don't wanna be here? Send us removal request.
Statistics
We looked inside some of the posts by rachaelboudreau and here's what we found interesting.
Average Info
Notes Per Post
19
Likes Per Post
19
Reblog Per Post
0
Reply Per Post
0
Time Between Posts
4 days
Number of Posts By Type
Photo
14
Text
2
Link
1
Last Seen Tumblr Blogs


Fun Fact
Tumblr has a low social media market share in South America.
Photo
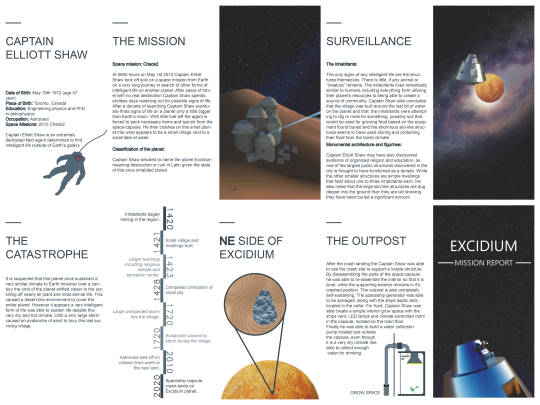
The method I used for this project was pretty standard to what was taught in the labs. I exported all of the technical drawings from Rhino to illustrator and all the renderings from Rhino to Photoshop and for the final product I worked completely in InDesign. All though I had some struggles with v-ray on my laptop and so I had to work with what from previous assignments and Rhino render and work a lot in Photoshop to get them to how I wanted to look. I learned an incredible amount doing this project, especially given the circumstances I had to learn some tools on my own which gave me an even better understanding on how to use all these programs. I had a lot of fun creating this world and imagining a narrative for it. I took the requirements for the “capsule” very literally and that helped shape a lot of my narrative, including the field agent and his profile. I tried to keep the space theme going throughout the drawings by adding a starry night sky to the renders and dark blue tone for the text and a black background for the drawings.
This course taught me a lot and I definitely plan to use these tools for future studio projects. Also working on this final helped me to get past the frustration of learning a new program and has actually got me very excited to use them more. I even plan to use this free time I have to work on fun new projects!
Thank you for an amazing semester!
5 notes
·
View notes
Photo
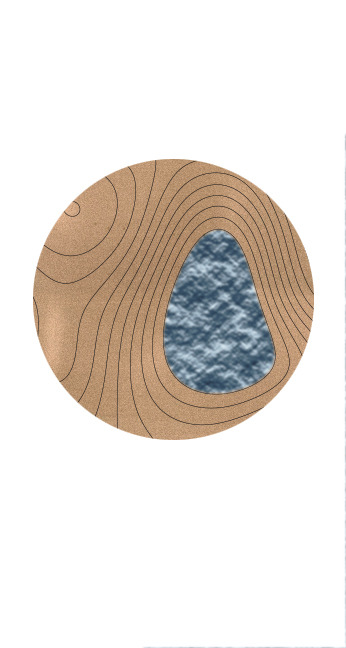
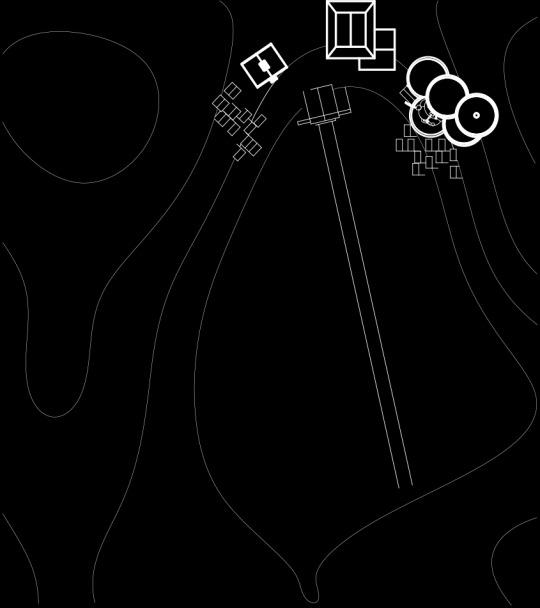
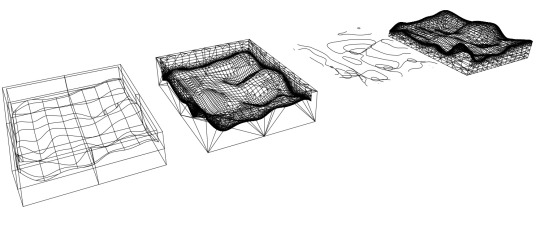
Map
I created a world for the narrative in Photoshop, and used a rendering of the contour map for the location of the outpost and city.
0 notes
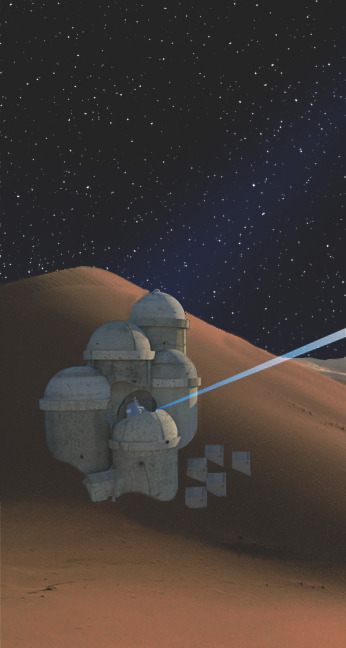
Photo
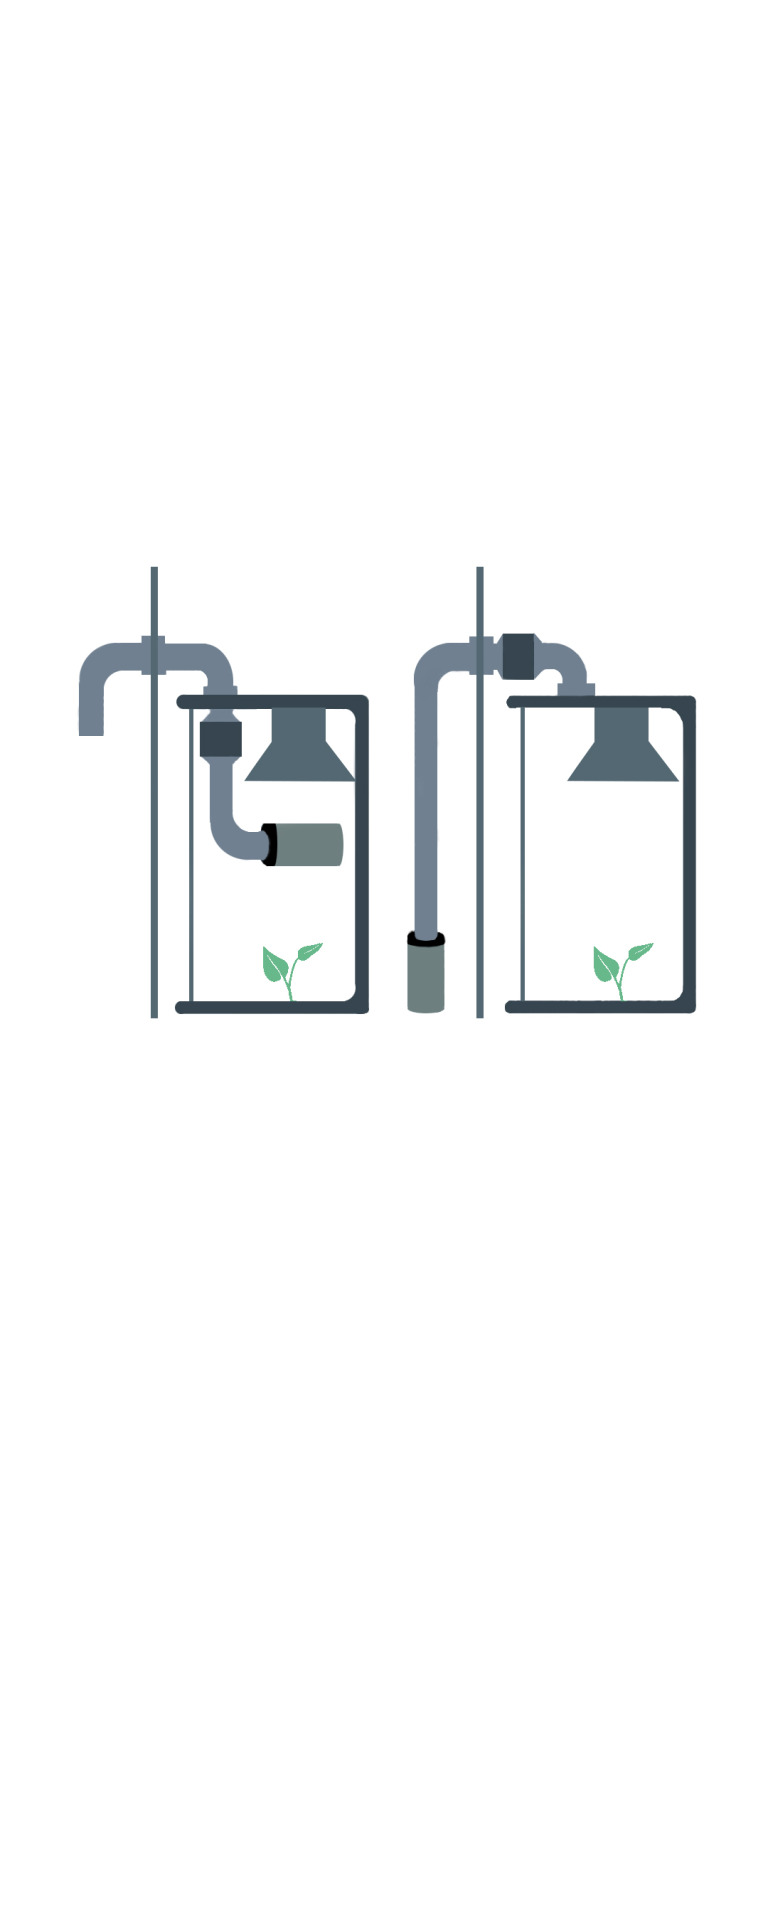
Supporting diagrams to show a self sustaining outpost. Made in Photoshop and transferred to illustrator.
0 notes
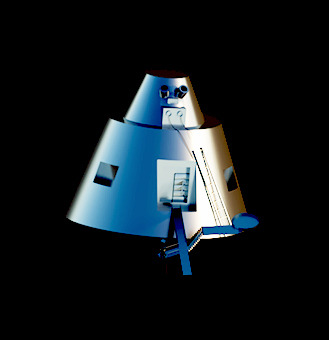
Photo


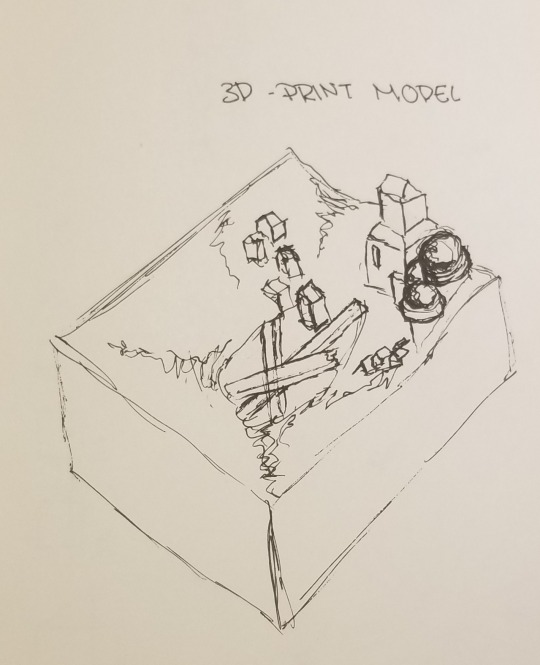
Physical Model
ARCN2105A Digital Practice & Theory
Sunday, March 29, 2020
Rachael Boudreau 101102884
For my final model, I chose a representational/scale model in order to illustrate the form of the full context and landscape since the landscape plays an important role in the narrative, as the sand has nearly buried the entire village. As well as the forms I choose to create are fairly simple and are best represented as their full exterior forms. The integration of the outpost would be clearly represented as a separate detachable model than the landscape and its surrounding elements.
The landscape and the context were going to be made using 3D printing while the outpost and the surrounding elements of the outpost (it’s crash site) would have been made with laser cut in pieces of cardstock and assembled by hand. This would be to focus on the important details since the 3D printing would not capture the fine details. The laser-cut model portion would be modular in order to see the interior of the outpost.
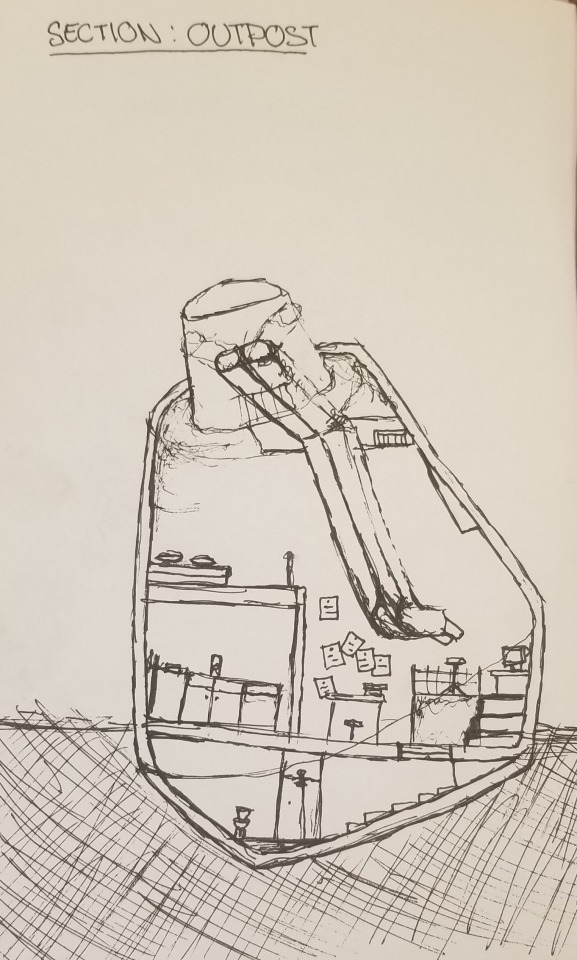
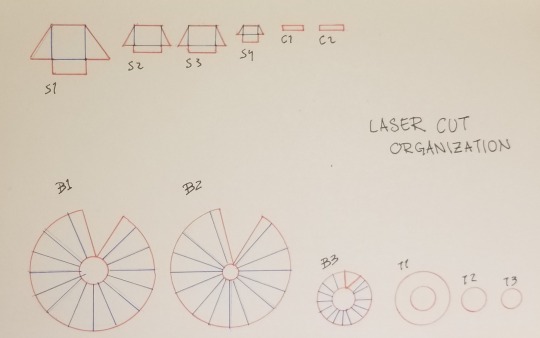
I created multiple sketches to understand the assembly of the outpost, which also included sectional drawings to imagine the interior, and how it was it is meant to be inhabited. I sketched out the laser cut pieces to create a sort of diagram to keep track of all the tiny pieces.
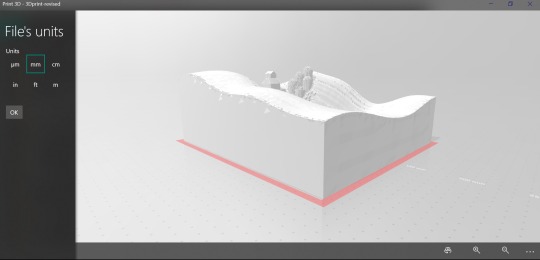
The final digital files are an illustrator file set up for laser-cut and an STL set up for the 3D printer. I started by creating a 24 by 18 inch sheet (size of the laser cut bed) set the colour mode from CMYK to RGB for the stroke colours and had the outline set to red for vector cut, and the areas that needed to be folded set to blue for vector engrave and the line weight set to 0.01mm (0.25pt) and arranged the cutouts to reduce waste material. Finally for the 3D printed model I had to scale the model to 1:100 in order to fit on the 3D printer bed (280x280mm) than I had to fix any and all naked edges than join all surfaces, and BooleanUnion the entire model, lastly I created a mesh and exported it to an STL file and adjusted all needed settings in SolidWorks to create a smooth surface model.
If I can I would really like to try printing my 3D model because I know finding the proper settings that work with the 3D printer is a huge learning curve and I think this would be a great way to practice for future projects and designs.
1 note
·
View note
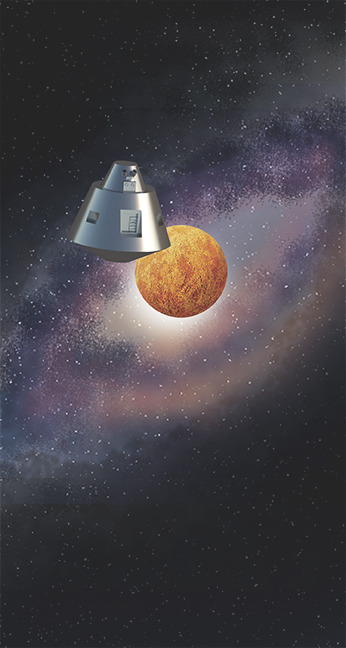
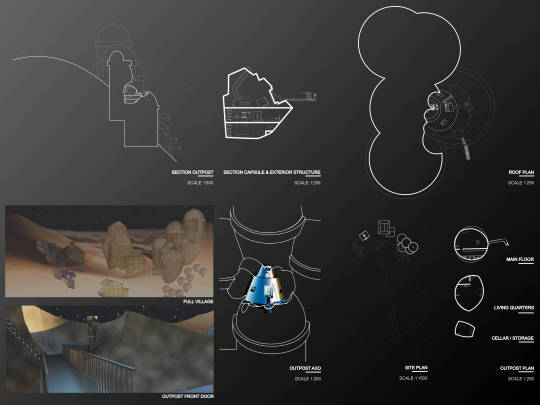
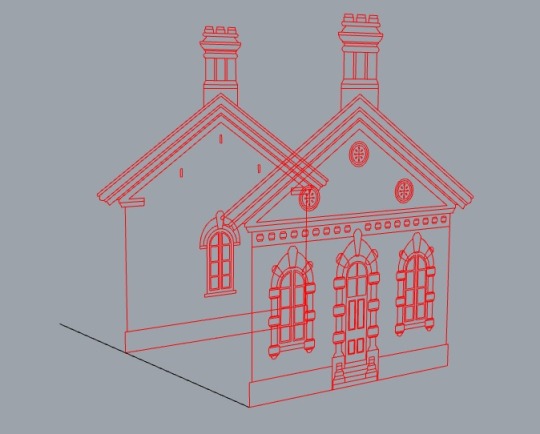
Photo
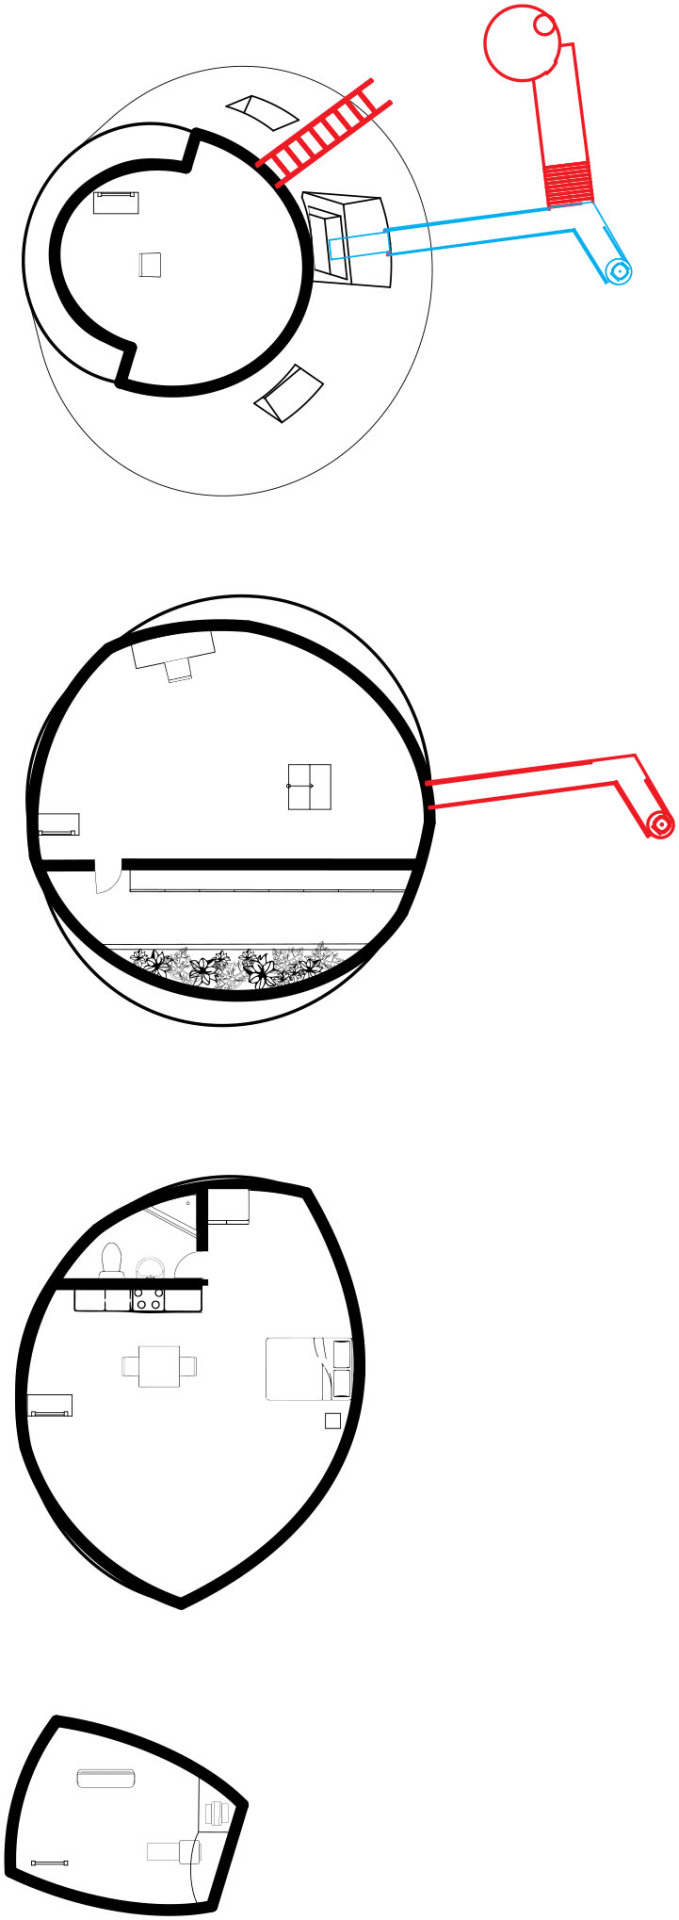
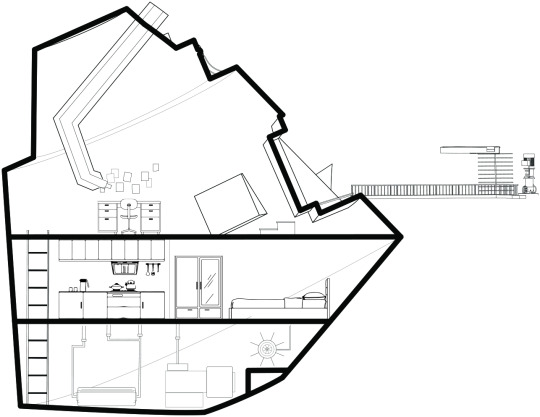

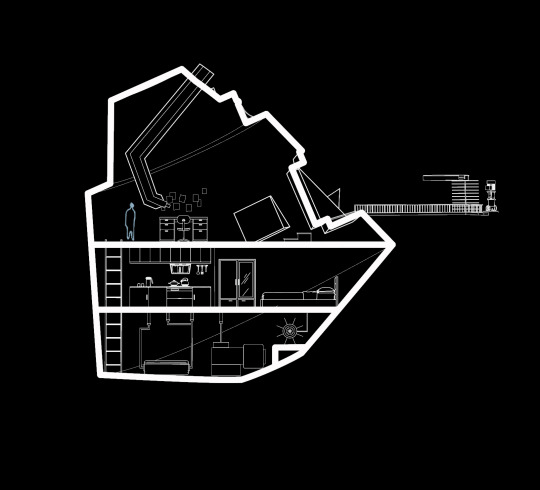
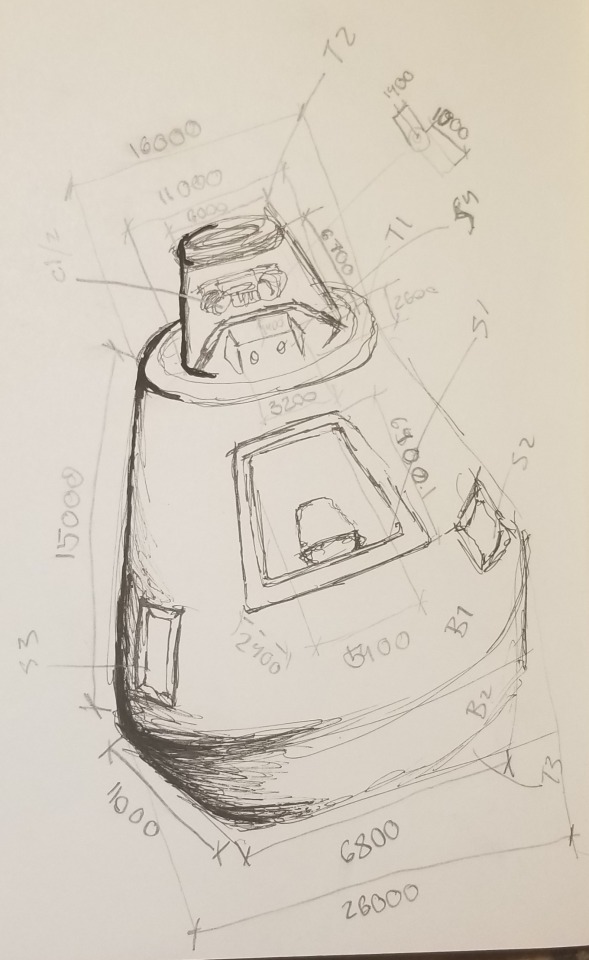
The capsule full detail design.
Plans, Section, Exterior render
For the outpost I took the “capsule” idea very literally which helped shape the narrative and design. After the capsule crashed the interior was leveled out so the exterior remained a crash site and the interior is a complete, livable space. While the exterior “structure” in red and blue on the plans are a viewing stand with a telescope and ladders for outside repairs to the capsule. Finally the crash site itself is apart of “supporting structure” (shown in other drawings and renders).
1 note
·
View note


Link
I discovered this youtube channel recently and I honestly wish I knew about it sooner, because he gives amazing tutorials designed for architects and how to get the absolute most out of your digital designs. I chose to talk about this project specifically because I noticed that I was having a lot of trouble creating realistic and appealing lighting in my final renders. In his video, he goes through a step-by-step workflow on how to create a night time effect, artificial lights and create a realistic shadow and glow on your cut-outs, all in post-production photoshop. I think this video is useful for this course because while not only explaining the very useful tips on how to create an amazing architectural render he also explains the importance of layering, grouping your layers, and using specific camera tools like hue, saturation, lightness, and levels. While these tools are not only used in photoshop but many of the programs we have been using; like using the camera tools in v-ray, and layering in almost everything like Rhino, AutoCAD, Illustrator, etc.
1 note
·
View note

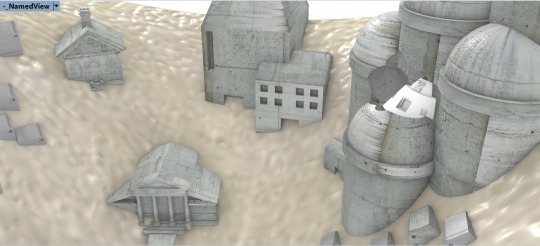
Photo
I now have my Ruins complete and about to move onto the outpost. For this assignment, I had a lot of struggles with rendering, for whatever reason it always comes out low quality or as a clay rendering and I am not sure why. However, I did manage to learn a lot more new commands like how to apply materials and how to properly extrude surfaces. I have found with practice I am getting a lot faster creating environmental qualities for the rendering and learning the importance of properly adding and organizing layers.
1 note
·
View note

Photo
Snapshot of the AutoCAD elevations imported into Rhino
1 note
·
View note


Photo
A smooth typography model set for 3D printing and CNC.
I copied the contour lines and kept them separate in case I decide to go back to create a laser-cut step model.
1 note
·
View note
Text
Task 4 reflection
New Cartographies, Emergent Landscapes
ARCN2105A Digital Practice & Theory Rachael Boudreau 101102884 Tuesday February 04 2020
Troubleshooting Rhino is completely new to me and therefore having to try and use the tools taught during the lab was difficult to remember and it often took several tries to get them to work. I had the most difficulty with the v-Ray and adjusting all the settings and for whatever reason even with it set to high quality it didn’t render high quality. The make2D I found to be a lot simpler than I thought although I am still not sure how to delete unwanted lines while still in Rhino, I had to delete them in illustrator which means I had to spend even more time in illustrator. Overall the project seemed to go very smoothly and I really enjoyed creating and free city. I am definitely getting a lot faster and more familiar with the commands and how they work in Rhino.
1 note
·
View note

Photo

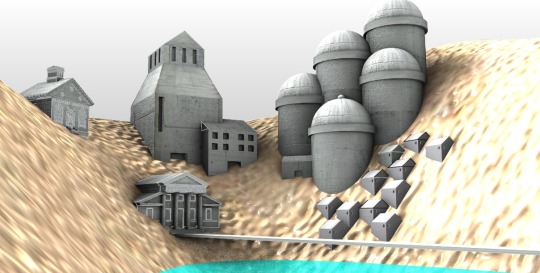
Buried City,
While kingdom followed kingdom in the land, Unshaken âneath the storms of heaven — yet now Its towering gate hath fallen. . . . Anonymous Anglo- Saxon Poet
1 note
·
View note