Welcome to our blog! Here you'll find updates on route setting, special events and happenings at all Rock Spot Climbing locations.
Don't wanna be here? Send us removal request.
Statistics
We looked inside some of the posts by rockspotclimbing and here's what we found interesting.
Average Info
Notes Per Post
8
Likes Per Post
6
Reblog Per Post
2
Reply Per Post
0
Time Between Posts
14 days
Number of Posts By Type
Text
14
Video
3
Last Seen Tumblr Blogs


Fun Fact
US Tumblr user growth rate is estimated to slow down to 4.1%.
Text
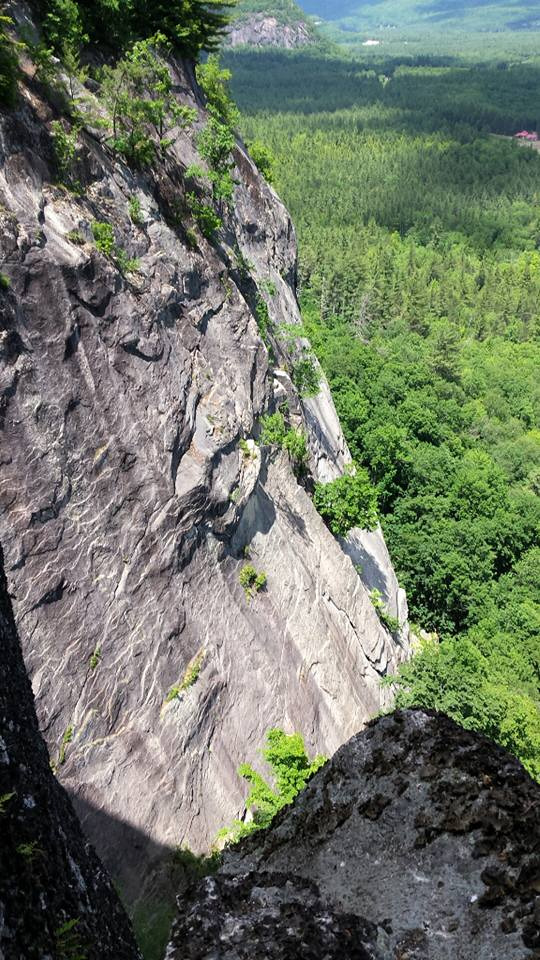
Cathedral Ledge
Article by William Wild

Cathedral is a door into the world of multi pitch climbing. At 500 feet tall it towers over North Conway, bringing tourists from all around to see the views from atop the prow. Few are brave enough to forego the auto road and earn their view with a more direct route. The Thin Air Face, named after the classic 4 pitch 5.6, Into Thin Air, that winds up the granite slab is the way to go if you’ve never been to Cathedral. This was my first route on the cliff and a stepping stone into harder and more adventurous climbing.

The Prow as seen from Into Thin Air, Photo: William Wild
For someone comfortable with easy to moderate trad climbing Into Thin Air is a cake walk. For a 5.9 trad climber the route to do is Recompense. Coming in at 4 pitches and 500 feet tall it follows the longest and cleanest section of rock on the wall. It will make you laugh, cry, sweat, bleed, and it will definitely scare you.
The Thin Air Face as seen from Recompense. Photo: William Wild
The exposure on this route left me awestruck; The last pitch is a slightly overhung 5.9 finger crack that sucks up gear. If long climbs don’t float your boat Cathedral is set up perfectly for cragging. A short hike from the tourist viewing area at the top will land you at the Barber Wall or exploring Airation Buttress.

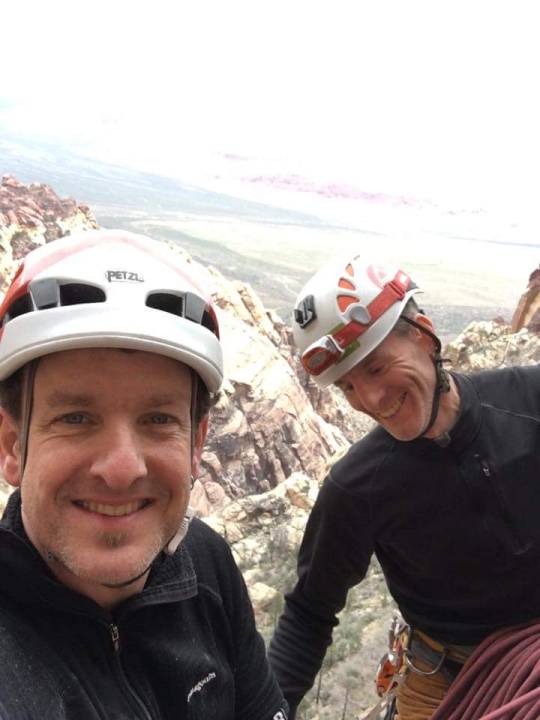
The first two pitches of Recompense, Climber: Samuel Stiles, Photo: William Wild
From the base of the cliff you can head to the North End or play at the Ventilator Slabs. The tiered nature of the cliff provides copious opportunities for adventure. Whether you’re trying to expand your horizons in the trad climbing world or looking for a new project Cathedral has something to offer.
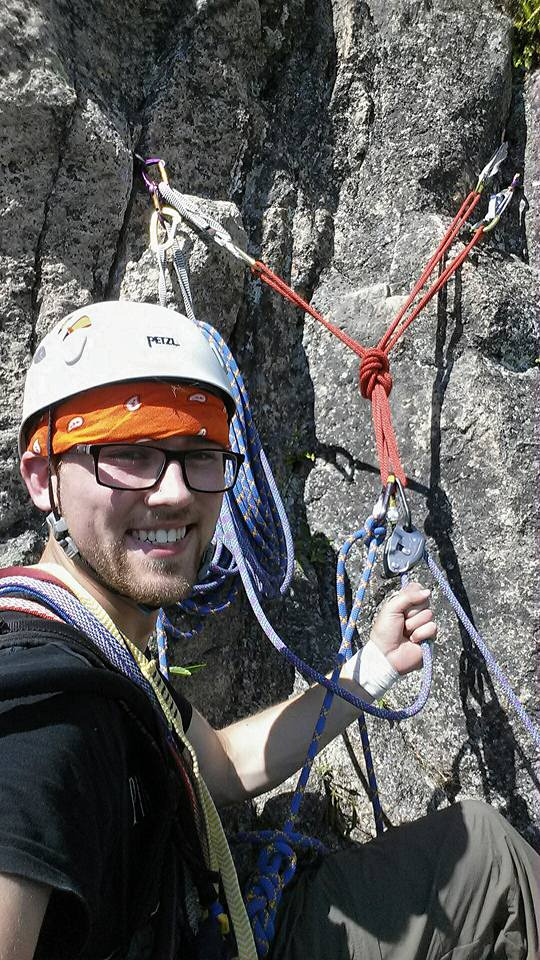
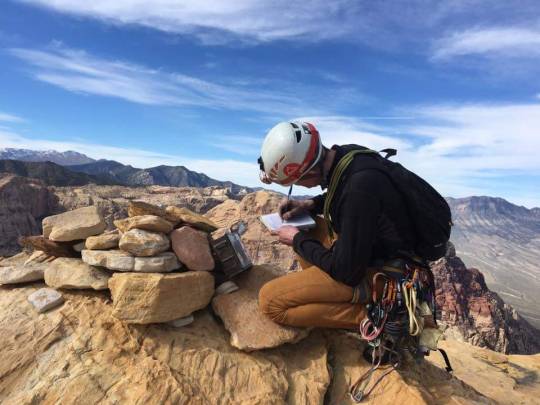
Belaying from some old pitons on Recompense, Selfie: William Wild
WIlliam Wild is a Rock Spot Climbing member and part of the climbing community
Try climbing outside with our great outdoor guiding programs:
http://RockSpotClimbing.com/Guiding
#cathedral#ledge#new hampshire#nh#ne#New England#trad#traditional#climbing#rock#spot#rockspot#rockspotclimbing#william wild#2017#august
1 note
·
View note
Video
youtube
Welcome to season 4 of "Problems of the SET!"
Once a month, we'll pick a few problems of a recent reset at one of our gyms and give you some beta to try out. While there are multiple ways to crush a problem, if these are giving you a hard time, try this beta on for size.
It's been a little bit since our last episode, so thanks for being patient while we get back in the groove of getting these episodes to you monthly!
Lots of updates across all locations, so be sure to subscribe!
If there are any other problems you'd like to see beta for, please let us know in the comments below and we will try our best to get you beta before the next reset posted to your local gym Facebook page.
For general info or for contact info, visit: http://RockSpotClimbing.com/
#rock spot#climbing#bouldering#training#problem of the SET#Problems of the SET#season 4#episode 4#groove#2017#july#peace dale#ri#rhode island#danny#howard#nathan#rome#sean#hannon
1 note
·
View note
Text
A West Coast Perspective of Rumney
Article by Jackson Boyle
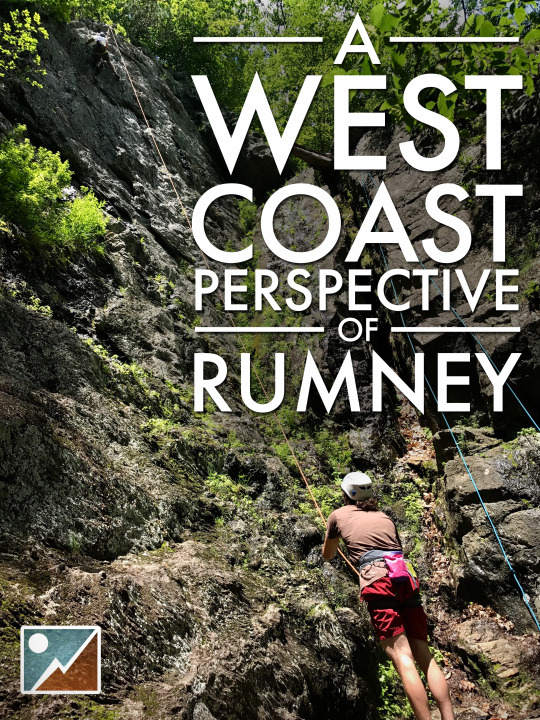
Last week I had the opportunity to visit Rumney Rocks in New Hampshire as part of a Rock Spot Climbing Corporate Marketing Retreat. Our plan was to get some outdoor climbing in while talking marketing strategy and direction for the rest of the year.
Being new to the East Coast, I knew basically nothing about Rumney. In fact I knew basically nothing about the whole east coast before moving from Seattle this past October. Embarrassingly enough, I actually thought Boston was south of New York City until I moved out here. Even after skiing all around the northeast this winter, my New England geography is probably still at a 4rd grade level (why are the states so small?). Apart from knowing Rumney was in New Hampshire and the rock is called schist, I had no idea what to expect.
Having climbed primarily at sport climbing’s hallowed ground of Smith Rock, Oregon, I’m always skeptical of other so called “premier” sport climbing destinations. After our retreat however, I can honestly say Rumney is on that level.
Although I still maintain Smith Rock has a prettier approach, Rumney’s is shorter, depending on which area you’re climbing at and the routes offer more protection than most of the Smith classics. A partly cloudy day midweek provided plenty of parking and minimal crowds. The day started with some warm up laps on the Parking Lot Wall, where a muddy platform forced us to belay acrobatically as we worked to keep our ropes clean and out of the mud. After a few laps, a short rain shower led us to pack up and head deeper into Rumney towards The Meadows.
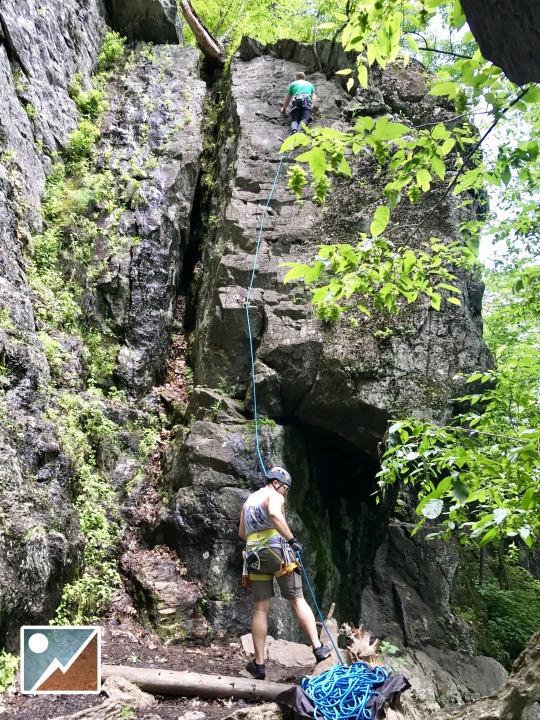
Pete belays Paul who leads “A Week With Pete”
At The Meadows we focused on a few climbs in the area of Meadows Left. After leading both False Modesty and Thou Shalt Not Covet another harder rain shower left us scrambling to collect our gear to hide under an overhang as it passed. The shower seemed to perfectly grease every hand and foothold we used leading the two routes. This made for some difficult 2nd’s as we struggled on wet holds to try and clean our gear.
Jackson belays Paul, as he cleans “Thou Shalt Not Covet”
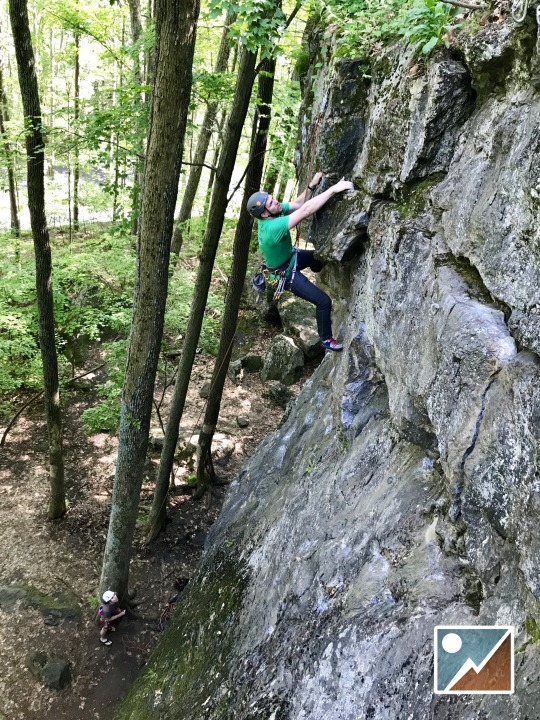
After the shower, steep overhangs offered us the best chance at dry holds. This led us to the far side of Meadows Left where I hopped on No Money Down for a quick burn before we had to head out. The climb starts with a number of smaller balancy shelves leading up to a steep roof marking the far left side of Meadows Left. The holds felt relatively positive but the moves are reachy and committing. Overall an awesome route, with the crux being a tough balancy last move left up to the chains. Cleaning the climb on the way down was almost more difficult than the climb itself, as the overhang made it nearly impossible to stay close to the wall to clean the draws.
Watch Jackson lead the classic, “No Money Down” at the Meadows:
https://www.facebook.com/RockSpotClimbing/videos/10155649253963678/
After only seeing a fraction of what Rumney has to offer, I can’t wait to return. Next time I’ll be heading to Main Cliff, Bonsai, and Waimea to tackle some of the Rumney classics.
Jackson Boyle is the Massachusetts Marketing & Sales Associate
Try climbing outside with our great outdoor guiding programs:
http://RockSpotClimbing.com/Guiding
#west#coast#westcoast#perspective#rumney#new hampshire#nh#ne#newengland#sport#climbing#rock#spot#rockspot#rockspotclimbing#jackson#boyle#jacksonboyle#2017#july
2 notes
·
View notes
Text
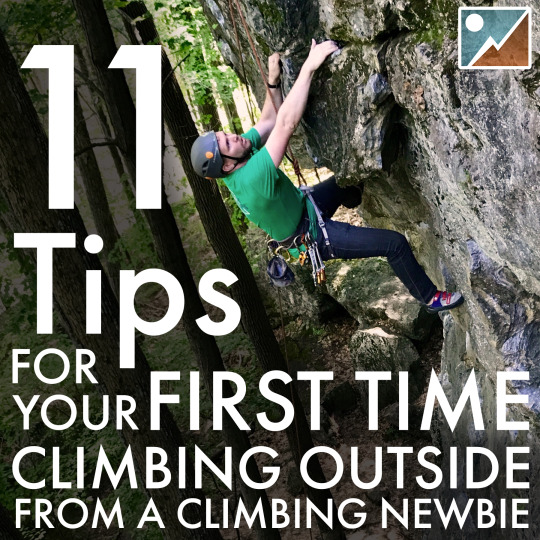
11 Tips for Your First Time Climbing Outside from a Climbing Newbie
Article by Jess Merritt
At the time of this article’s posting, I have been working at Rock Spot Climbing for 6 months. I had no prior rock climbing experience other than a couple Girl Scout trips back in high school. Full disclosure… I still consider myself a pretty new climber.
Outdoor rock climbing wasn't even on my mind considering I am still inexperienced in the indoor climbing world.
About a week ago, I was invited to a corporate marketing retreat in Rumney, New Hampshire.
“Of course!” I said very excited, but also extremely nervous.
Here's my advice on what to think about before,during, and after that very first outdoor climb:
Tip 1: Sleep!!!!
It’s the day before the big climb, and I am up till about 2am nervous that I was going to die the next day, but listen to some nature music and pass out. It is not worth the panic. Get some rest because you have a 14+ hour day ahead of you.
Tip 2: Do NOT bring your Vera Bradley tote bag
Well most of you may already know this, but it is not smart to bring your tote bag on a hiking/climbing trip. Apparently I didn’t get the memo! Don’t be cheap! Go shopping and buy a backpack. I learned that the hard way when I was throwing my bag up the hiking path, then climbing, throwing my bag up the path, then….. Well you get the point.
Tip 3: You don’t HAVE to climb to the top on your first outdoor climb
I (almost) made it to the top on just one attempt at my first wall, and let me tell you, looking down and getting ready to be lowered was not fun. So try going up halfway or wherever you feel most comfortable, and then take a fall. However, the rush and excitement you feel when you climb all the way to the top is indescribable, so if you think you are ready then go for it!
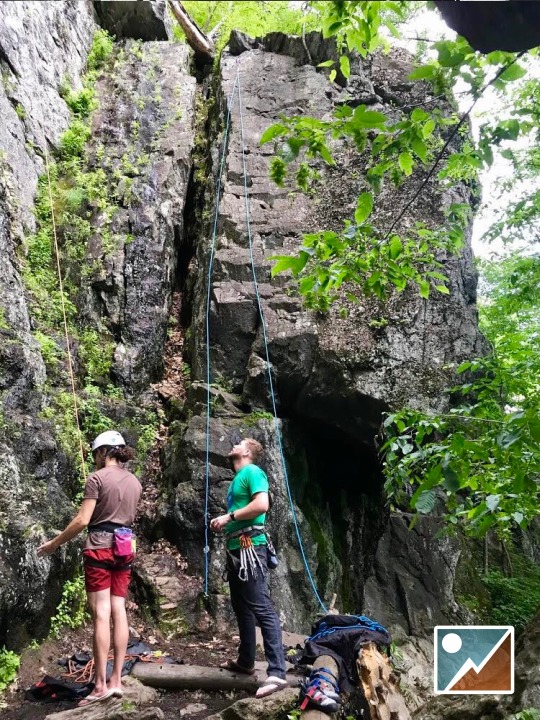
Jackson and Paul get ready to climb in front my first outdoor climb, “A Week with Pete”
Tip 4: Trust your climbing partner!
They have your back. More likely than not, they are more experienced than you are. So trust that they are capable of lowering you to the ground in the safest way they know how. Try not to go up until you have complete faith that both you and your partner are ready to begin.
Tip 5: Climb that first wall 50 times
Get comfortable with your first climb. Climb it once, twice, or fifty times so you know you're ready to move on to the next route. This helped me tremendously when I climbed my second wall, I already felt at ease.
Tip 6: Wipe the mud off, baby!
Wear something that can get very dirty. This includes a pair of boots, not some pretty new sneakers. My second climb down I completely ate it into a mud pile, but wiped it off and kept going! A little mud never hurt anybody.
Tip 7: Full cooler, full belly
I was starving towards the end, so bring a cooler with a bunch of snacks and a lot of water. It’s what all the cool kids do. Cliff bars and cheese crackers are my personal favorite.
Tip 8: Climbing indoors ≠ climbing outdoors
It’s not easier or harder in my opinion. It is a completely different mental experience, besides the basic climbing rules and guidelines. Indoors, you know there is a floor and you can clearly see that. When you are outdoors, you can’t always see the bottom. There is that slight fear of the unknown and potentially not knowing where to place your feet next.

Pete on “Chloe’s Breakfast Special”
Tip 9: Experienced climbers are your friend, not your enemy
More likely than not, a majority of the people around you are more experienced than you are. That is not a bad thing or something to be embarrassed about! They are a huge help for getting you going on your feet! (Besides when I fell in the mud..) Climbing is about setting personal goals and achieving them. Even experienced climbers have to start somewhere, how do you think they got to where they are now? Everyone has been in your La Sportivas. ;)
Pete gets ready to belay Jackson on “No Money Down”
Tip 10: Enjoy a victory meal with your fellow climbers
Know that a burrito with a side of beer is the “climbing” thing to order, but get whatever you want! You deserve it. This meal is a complete guilt-free type of meal, so eat up and enjoy it.
Tip 11: Take a nap
We all know first climbers lose a lot of sleep the night before, so take a nap on the ride home from your journey. You earned it! Unless you're the driver, then you’re out of luck.
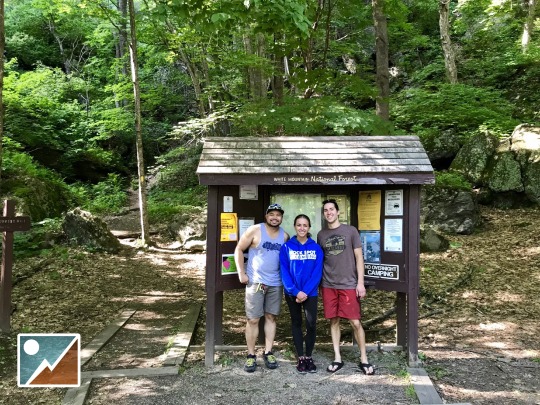
Pete, myself and Jackson in front of the iconic trail head at Rumney, NH
Overall, my trip was amazing. One regret I have is not going on certain climbs as much as I possibly could. Time flies by so fast and before you know it, it’s time to leave. After I got used to climbing outside it was a great experience and I would do it again in a heartbeat.
So for all the first timers who are nervous to climb outdoors, I have been in your shoes. It is not as terrifying as it sounds and make sure you take complete advantage of the opportunity given to you.
After all… what's life about if you're not living it on the edge ;)
Jess Merritt is the Rhode Island Marketing & Sales Associate
Try climbing outside with us with our great outdoor guiding programs:
http://RockSpotClimbing.com/Guiding
#11#tips#climbing#outside#newbie#jess#merritt#2017#july#rumney#nh#rock#spot#rockspot#rockspotclimbing
1 note
·
View note
Text
Climbing Trip Report: Rainbow Wall, NV
Article by Tim Wolsonovich
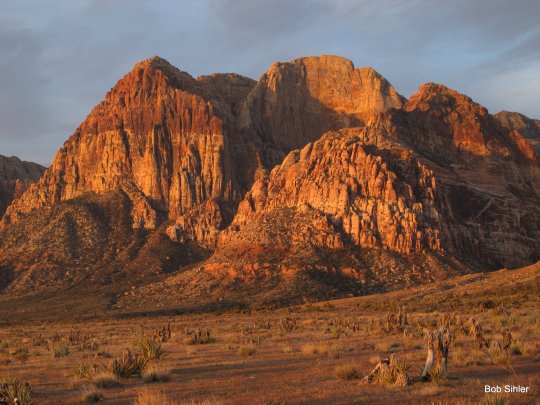
Photo by Bob Sihler of Rainbow Mountain, Rainbow Wall and Juniper Peak
Around New Year's last year, my buddy Josh Squire asked me if I'd be interested in heading to Vegas with him for a climbing trip. After I'd agreed, I asked what his goals were and he said, "How do you feel about getting on a big wall?" Without thinking very long I agreed, and this was how our Rainbow Wall adventure began. The Regular Route on the Rainbow Wall climbs a corner and crack system for 1000 feet up the middle of a curved rock feature at the back of Juniper Canyon. Originally an aid route (where climbers would pull on gear they placed in the wall rather than just the rock) the route was finally sent free (without aid) almost twenty years after the first ascent. I had never attempted anything nearly this difficult but Josh told me I could, "probably pull through most of it" whatever that means. He had also never climbed the route.
When the day finally came, we headed into the canyon at 6am. We would have liked to start earlier, but didn't have the overnight permit to camp in the park. Instead, we were first in line waiting for the gate to open listening to the 90s grunge rock my partner is addicted to.
In the book, the approach is listed at about 2 hours, but Red Rocks is famous for confusing climbers with a poor sense of direction. We started hiking at 630am with a single 70 meter rope, a light rack (doubles up to 1inch, single to three, a single set of nuts, and 14 draws), 4 liters of water, some snack bars and two peanut butter sandwiches. We arrived at the base of the climb just after 8am. The sun was up, but Rainbow Wall is famous for remaining shaded all day. At the base of the climb there was a large pile of unmelted snow. After a short snowball fight, we dropped our packs, and set up for the climb. Josh was taking the first 3 pitches, and I would take the middle five before he would finish the last 4. At least, that was the plan.
Tim Wolsonovich cleaning a route on Rainbow Wall
For the first pitch, we did the easier 5.11b variation. It was the hardest pitch I'd ever climbed anywhere. I got to the anchor, out of breath and exhausted. The next pitch was harder (11.d), and the third wasn't easy either (11c). Josh had to lead two more pitches (10c/10a) before I was recovered enough to take the middle three (5.7, 5.9, 5.8) including a long traverse that was interesting to protect on flaky hollow rock.
Tim Wolsonovich signing the summit register of Rainbow Wall
At 2:30 in the afternoon, we arrived at the base of the crux pitch, a blank looking 5.12a corner with no handholds and an equal number of footholds. It was beyond us. I was exhausted and Josh was only slightly better. He aid climbed the last four pitches and I jugged after him, ascending the rope. Before setting out for the day, we agreed to bail at 4pm no matter where we were on the cliff so that we could make it back to the car before the park closed. We topped out at 4pm exactly. I signed the summit log while Josh set up for rappels. We spent the next 3 and a half hours rappelling the cliff and hiking back to the car. Our total time, car to car, was 13 hours.
Tim flaking his rope on Rainbow Ledge with his climbing partner, Josh
In most of the pitches, there were moments I knew I couldn't progress without falling, but made the attempt anyway (often without falling). The experience completely changed my expectations of myself and elevated all my goals when it comes to the sport. Overall, the route was impossibly hard, but I have a different understanding of how hard "hard" is, what I'm capable of, and what my goals will be going forward.
All photos besides the full shot of the range by Bob Sihler were provided by Tim Wolsonovich; the Gym Manager of our South Boston location
#climbing trip#report#Tim Wolsonovich#april#2017#rock spot#climbing#rockspotclimbing#rainbow wall#nevada#nv#las vega
0 notes
Text
B3 Competition Strategy
Article by Doug Page
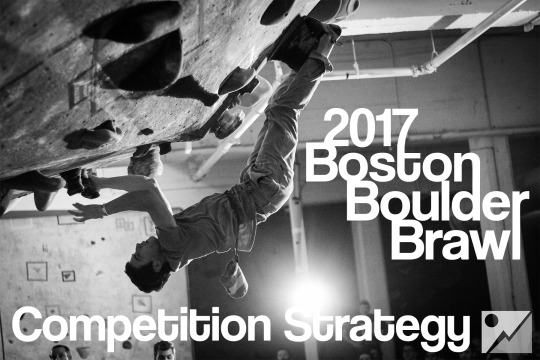
Hope you’re all getting as psyched for the 2017 Boston Boulder Brawl (B3) as we are at Rock Spot Climbing! If you are, then you are probably training your faces and finger tips off in anticipation at the greatness you will undoubtedly achieve in this test of wits, will and pure rock climbing prowess. Trusting that you have the rock climbing prowess thing covered, I’m going to give you a few tips to power up your mental game so you can be ready for victory come the Day of Glory: Saturday, April 8th!
I’m going to make a few assumptions here as you come with me on this journey of discovery:
You’re psyched for the comp!
You want to get the edge over your fellow competitors (let’s hope they’ll miss this blog post, and that deadpoint that you’re totally going to nail first try!) [Get it? ‘Cause it’s a competitive “edge” but also an “edge” like the climbing hold! Do you get it?]
You’re a little confused over the finer points of competition strategy.
So let’s break this down into more manageable chunks, just like the day of the comp will be broken into two parts: Qualifiers and Finals.
Qualifiers will be a red-point format competition. In real talk that means you will have 3 hours to climb as many climbs as you need to in order to rack up the 5 best scores you can manage. These 5 scores, if they are better than a bunch of other people’s 5 best scores, will land you in Finals.
Finals is an on sight format competition which means you will not be able to watch others climb and you will have only 4 minutes to get as high on the boulder problem as you can. If you don’t make it to the top, fret not, for your highest hold controlled determines your score on the climb. Get higher than everyone else (whether you send or not) and you get the best score for that single climb. Do that on all 6 climbs and you become the Champion of the World!
Redpoint Format Strategy
Warm up well before your climb time begins. You will have to wait in line for the climbs you want to do, so being well warmed up before the competition begins will allow you to jump right into harder climbs.
Choose climbs that suit your strengths. If you’re really good at slabs, and you can flash hard slab climbs, then try and flash the higher scoring climbs in that style!
Establish a range. Find your Goldilocks flash range which will be somewhere between a climb that didn’t challenge you too much and one that was really hard for you, but you trounced swiftly (in a couple of burns!) Once you have gotten 5 scores in this range you can move on to bumping up lower scores by projecting some harder climbs that will take you a few more tries to send.
Watch your competition. See what other people in your division are climbing and sending. Try to keep a mental tally of who is in the top 6 around you.
Manage your time wisely. Try not to waste time projecting early on in the competition, and give yourself plenty of rest, water and snacks to fuel your sending.
Develop your lower scores. If the range that you have built is between #18 and #36, before you start projecting #40, go and climb #23 and #27 first. That will get rid of #18 and #19 (your lowest scores in this theoretical account) and set you up with a much better base score before you start projecting harder climbs.
Here’s an example:
Jasper the Crushenator (JtC) has 5 scores. His lowest score is climb #18 at 1800 points and his best score is climb #36 at 3600 points. He knows from watching his competition that he needs to bump up #18 in order to beat out Rob Bob Bumpkins, who has done similar climbs but whose lowest score is #19. JtC has been trying #40 for a long time and he is getting really tired, but is just soooooo close to sending. There are 20 minutes left in the comp.
Should he….
a) Keep trying #40 because the line’s really short and he’s really just so darn close even though he might not send and it’s sapping his strength because he’s not resting in between?
b) Go and wait in line for #30 which he thinks he will get first try but the line is really, really, really long?
c) Climb #21 and #25 real quick, since the lines are short, they’re totally his style and he’ll flash them no problem? At this point, his victory over Rob Bob is all but assured and then he can go back to trying #40.
If you said (c) then Rob Bob is ultra mega bummed because he’s not going to get into finals and get that shot to win some sweet swag (like crash pads and shoes and chalk pots, oh my!) by placing well in finals!
Stay tuned next week for a more in depth exposé on Finals Strategy!
Doug Page is Team Rock Spot - MA’s Head Coach and one of our main setters “DIG”
For more info on the Boston Boulder Brawl, visit the website:
http://RockSpotClimbing.com/B3
Check out the video!
youtube
#training#redpoint#preliminary#Boston Boulder Brawl#B3#2017b3#doug page#rock spot#climbing#rock spot climbing#team rock spot#Boston#South#tips#South Boston#mental#strategy#competition
0 notes
Text
Tips for Hip & Shoulder Mobility
Article by Forrest Kolaski

When it comes mobility it all starts with the hips and shoulders. For general mobility work, refer back to the exercises to do before you climb, as these are an excellent starting point. The interesting thing about mobility is people often don’t realize they can’t reach something if they had better mobility. Oftentimes, things out of reach remain out of reach.
Hip Mobility Tests
Here are some milestones for hip mobility. For many, these types of positions are seemingly impossible at first and there are ways to get within reach of these maneuvers. But first, it might be worth thinking about them.
Can you:
Keep your hips against the wall while one foot is on a hold around knee height? Can you do the same on both sides?
Can you match foot to hand?
Can you match heel to hand?

These are interesting challenges and a good test for finding your baseline in your climbing hip mobility.
Shoulder Mobility Tests
Shoulders can articulate in a much more complex range and for simplicity sake, an assessment of shoulder mobility will be more easily performed while not climbing.

https://youtu.be/ms9LVvtB-p0
In order of difficulty:
Wall supine
Can you keep your chest against the wall or even have space between your hands and the wall?
Wall prone
Can you make contact with the wall all the way through the movement?
Floor supine
Can you make contact with the floor all the way through the movement?
Floor prone
Can you create space between your hands and the floor all the way through the movement?
Mobility Stretches
Both the hip and shoulder assessments seen so far are ways to find hard to reach positions and look for movement’s that are challenging. Now let’s look at some ways to improve these challenging ranges of movement.
Breztel Stretch
youtube
Scorpion
youtube
Reverse Scorpion
youtube
Squat & Reach
youtube
Twisted Bridge
youtube
If you have great range of motion these assessments and movements may not be hard for you at all, if that is the case chances are there are other, lower hanging fruit like strength or technique. Stay tuned for tips on strength!
Forrest Kolaski is a local climber and personal trainer based out of Pawtucket, RI. Learn more about his business on his website: http://ForrestFitnessRI.com
You can also read his “Climbers of Rock Spot” feature here.
0 notes
Text
The Mobility-Strength-Technique Paradigm
Article by Forrest Kolaski
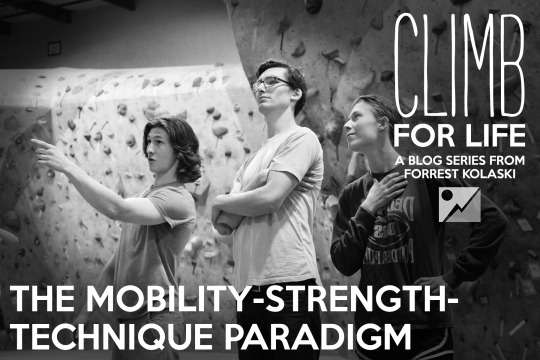
Up to this point we have talked about being prepared, having a plan and troubleshooting fatigue. Now we are going to dig a little deeper, talk about finding the low hanging fruit and how to develop as a balanced climber.
There are three major categories for improvement within a the sport of climbing that you can focus on are:
Mobility - Strength - Technique
Mobility will allow you to reach further, save energy by not having to fight your own range of motion and open doors to positions on the wall. It will also reduce cramping, hot spots in the muscles and muscle imbalance over time. Mobility is also one of the great reasons to climb as part of a healthy lifestyle. Climbing forces you to move your body in ways that it’s not accustomed to.
Strength is a little more straightforward. By being stronger you can hold on longer, perform harder movements and endure overhangs and more challenging positions. When it comes to climbing strength, most people will need to start with grip strength.
Technique improves overall efficiency which can save energy. Technique is one thing I will not cover on here, but must mention because being mobile and strong is helpful, but technique is how you utilize your strength and mobility. In order to build technique, you need to climb mindfully and/or get coached on technique.
These three elements when developed in unison will work synergistically to accelerate your learning, improvement and enjoyment while climbing. Start thinking about how you climb and where you excel and where you can improve.
Forrest Kolaski is a local climber and personal trainer based out of Pawtucket, RI. Learn more about his business on his website: http://ForrestFitnessRI.com
You can also read his “Climbers of Rock Spot” feature here.
This is the third part of an 12 part blog series. Use the following outline here to follow along as posts are made every Saturday.
0 notes
Text
Competition Throwback
The Competitive climbing scene has come a long way in America.
Check out this incredible throwback to a simpler time. While the music and apparel are definitely of a different era, it could be argued that some things never change.
http://www.climbingbusinessjournal.com/flashback-to-the-beginning/?utm_source=CBJ+Weekly+Newsletter&utm_campaign=1aee0fc1f4-RSS_WEEKLY_EMAIL&utm_medium=email&utm_term=0_efd331ccc5-1aee0fc1f4-98021773&mc_cid=1aee0fc1f4&mc_eid=68b826a8e4
For more info our own competition, the 2017 Boston Boulder Brawl (B3) on Saturday, April 8, visit:
http://RockSpotClimbing.com/B3
#rock spot climbing#rock spot#climbing#bouldering#competition#throwback#1980s#Boston Boulder Brawl#b3#2017b3
0 notes
Text
Tips for Forearm Fatigue & Muscle Cramps
Article by Forrest Kolaski

If you’ve climbed once or regularly for years, you have probably experienced forearm pump and fatigue in your fingers. Climbing builds great grip strength, but sometimes your body speaks up and says enough is enough. There are a couple quick tips you can do in a moment or two that will help. Let’s call these the instant relief techniques.
youtube
Holding your arms overhead for up to 3 minutes and then swinging them below your body is a way of refreshing the blood to your forearms and fingers. While your hands are up there you can extend you fingers, stretching the flexor muscles that work so hard while you are climbing.
If you find yourself cramping often while climbing, another thing to consider is your hydration and nutrition. If climbing for less than an hour, water should be enough to replenish you during your session. If you know you’ll be active for more than an hour, you might want to consider replenishing your electrolytes about 30-45 minutes into your session.
Water keeps your blood flowing, literally. It helps transport the necessary nutrients to your muscles and helps clear waste. 2-3 liters a day is a good baseline, when increasing your exercise you’ll want to increase your water intake (up to 5 additional liters if say you were running a marathon on a hot summer day). People’s needs vary, so find what works for you.
Electrolytes help with muscle function. A cramping muscle during exercise is typically is due to overuse and under nourishment. There are four electrolytes: sodium, calcium, potassium and magnesium.
All that stuff your grandma told you about eating your fruits and vegetables and drinking water as a kid still apply. In a pinch a sports drink will do, but really your hydration and nutrition should start hours or even a day or more before your climbing session or exercise.
Forrest Kolaski is a local climber and personal trainer based out of Pawtucket, RI. Learn more about his business on his website: http://ForrestFitnessRI.com
You can also read his “Climbers of Rock Spot” feature here.
This is the third part of an 12 part blog series. Use the following outline here to follow along as posts are made every Saturday.
2 notes
·
View notes
Text
How to Properly Take Advantage of the Pyramid
Article by Forrest Kolaski
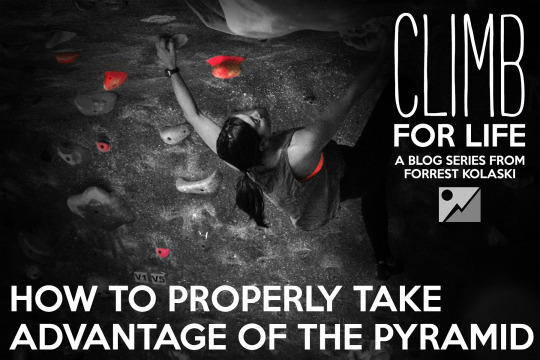
One of the best ways to make consistent progress is to use the pyramid technique or a ladder approach to your climbs. This simply means starting with easier climbs and progressing to harder climbs during the session and then regressing as you begin to fatigue.
Using this system will help you get in more climbs during a session which will open doors for opportunity in increasing your technique and you’ll build endurance by dialing back your climbs slowly instead of just stopping after burning out on a very hard climb. It will also help your body cool down and may increase your recovery time so you can climb more frequently.
Here is an example:
Say you are a climbing 5.7s and you want to progress to 5.8. A great way to approach this is to start with a 5.6, then a 5.7. At that point you are ready for your real challenge for the session and you go for a 5.8.
Keep challenging yourself with harder climbs until you begin to fatigue or can’t ascend, then work your way back down through a 5.7 and a 5.6. These final climbs, although not personal best attempts are crucial in building your endurance so that you’ll be able to climb longer in the future.
More experienced climbers may have a longer ladder of climbs to work through before they attempt a new challenge, but you’ll want to continue to work your way back down the ladder afterwards.
To break it down further, if you rate yourself 5.9, try these climbs in this order:
5.7 > 5.8 > 5.9 > 5.9+ > 5.8+ > 5.8 > 5.7
Warm up………..Peak………..Cool down
The exact pattern is not as important as the overall concept. Rest periods between climbs are important as well. I suggest a work to rest ratio of about 1:3 to 1:5, so if you climb for one minute take three to five minutes rest before your next attempt. Longer climbs require more rest.
We will go over more ways to increase climb time and reduce fatigue in next week’s post.
Forrest Kolaski is a local climber and personal trainer based out of Pawtucket. Learn more about his business on his website: http://ForrestFitnessRI.com
You can also read his “Climbers of Rock Spot” feature here.
This is the third part of an 12 part blog series. Use the following outline here to follow along as posts are made every Saturday.
0 notes
Text
7 Active Stretches to do Before Climbing
Article by Forrest Kolaski
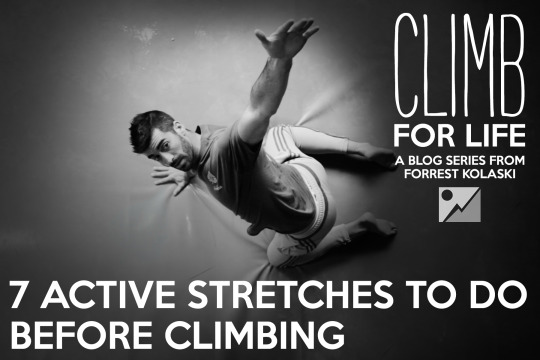
Active stretches are an important way to start any work out. Here are seven that you can easily integrate into your climbing routine to increase your flexibility and reduce your risk of injury while on the wall.
youtube
Deadbug
Basically you are a bug, scrambling to stay alive… This exercise wakes up your shoulders and hips, and activates your core.
Basic cues:
Elbows over shoulders
Knees over hips
Exhale as you reach with opposite hand and heel
Lengthen the body, while flexing the abs
Tuck chin slightly
Inhale as you return to starting position
The Table Top series
For efficiency you can do all the table top movements back to back. However, if this bothers your wrists you can split this up or take a rest in between.
youtube
Cat & Cow
This is a classic yoga movement and is excellent for waking up all the little muscles along your spine and between your shoulder blades. I like to initiate this movement at the hips because the hips are often harder for people to control than their necks.
Basic cues for cat:
Table top position: hands under shoulders, knees under hips
As if you had a tail, tuck your tail straight down
Draw in your belly button, lifting your abdomen high in the air
Spread your shoulder blades and exhale
Reach with arms into the floor
Tuck in your chin
Basic cues for cow:
Table top position: hands under shoulders, knees under hips
Imagine your hips (pelvis) as a bowl of water and pour it out below you, lifting your tail up
Reach to the floor with your belly button and open your rib cage
Squeeze your shoulder blades together, inhale and expand your chest
Lift your chin and press your tongue to the roof of your mouth
youtube
Handwork
Forearms are like the calf of the upper limb (arms). Handwork is very much like a calf raise or going up on your tippy toes. One of the keys to this exercise is getting the right amount of resistance. You can vary the amount of resistance by leaning back onto your knees (less resistance) or leaning on to your hands (more resistance). You might want to try this on a hard, flat surface at first or even against a wall.
Basic cues:
Table top position: hands under shoulders, knees under hips
Variation 1:
Lift the heel of the palms off the ground pressing into the largest knuckle of the hands
Descend slowly and in control
Variation 2:
Press the fingertips into the floor, lifting the entire palm.
Descend slowly and in control
youtube
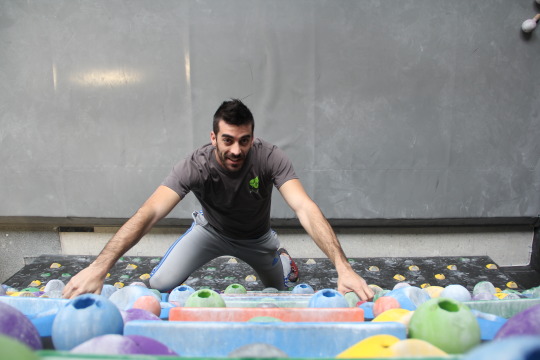
Bird Dog
Again a classic yoga and physical therapy movement, bird dog is great for opening up your hips and waking up the backs of your shoulder. It activates the glutes and shoulder stabilizers. You can modify your table top in this exercise to a more narrow base to challenge your balance, if you’re up for that.
Basic cues:
Table top position: hands under shoulders, knees under hips
Exhale as you reach with opposite hand and heel, while gripping the floor with base hand
Lengthen the body, while flexing the glutes and abs
Inhale as you return to table top
youtube
6 Point Zenith
This movement comes from a great trainer by the name of Dan John, the 6 point refers to the six points of contact you make with the floor while in table top and zenith refers to reaching as high as you can, directly above you. Zenith is the highest point reached by a celestial object and we are all made of star stuff… Anyways!
Basic cues:
Table top position: hands under shoulders, knees slightly wider than your hips
Lift one hand and reach under your body, keeping you base arm straight
Extending at your shoulder, keeping your hips level
Draw the reaching arm back through and up overhead
Keep your hips level and reach to zenith
Repeat or return to table top and switch sides

Due to Tumblr limitations, click here for the video
Superman
Also known as the back extension, this exercise is great for posture and strengthening the back (posterior chain). Better posture means increased confidence which might make you feel like a Superhero, be warned.
Basic cues:
Lay face down (prone position)
Place your arms overhead with your thumbs up for positivity (slip and slide position)
Lift your arms leading with your shoulders
Lift your legs using your glutes
Notice in the video that the lower back does not change position, it engages isometrically
Lower the arms and body simultaneously
Due to Tumblr limitations, click here for the video
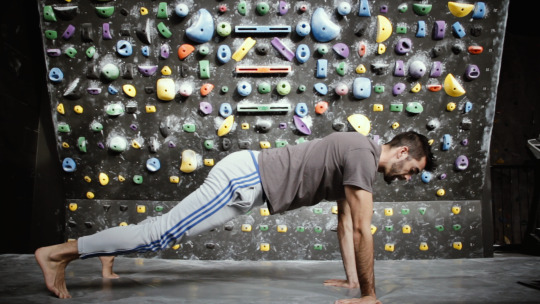
PUPP Hand Dials
Push Up Position Plank (PUPP) hand dials are an advanced version of the hand work. For some, simply the plank will be challenging enough. You can add in the hand dials if you are looking for more forearm and rotational core strength and warm up.
Basic cues:
Find PUPP, hands under shoulders with your legs out straight, on your toes
Widen stance between feet for more balance, narrow feet for greater challenge
Start with your thumbs facing each other
Shift your weight to one hand to rotate the opposite hand towards the outside (supinate)
Forrest Kolaski is a local climber and personal trainer based out of Pawtucket. Learn more about his business on his website: http://ForrestFitnessRI.com
You can also read his “Climbers of Rock Spot” feature here.
This is the second part of an 12 part blog series. Use the following outline here to follow along as posts are made every Saturday.
0 notes
Text
Climb for Life
Article by Forrest Kolaski

“Show up. Dive in. Stay at it.”
Obama said this in his farewell address this past week and those words took hold of me. Much of success is that simple. If you want to be a better climber it starts with showing up, diving in and staying with climbing for you to grow and meet more challenging and engaging problems.
There are some of us climbers that can find the whole thing daunting, others who have been showing up and still haven’t gotten where they want to be and then there are those who just want to soak up whatever little tips they can, to get to the top. My hope is that these posts will give at least a little something to everyone searching for more. With that, there are four fundamental elements to finding success in climbing.
Be Prepared
Being prepared can mean different things to you than your climbing partner. Sure you need to have your gear, and ideally you’re in a good head space to climb. Great athletes have ways to find this space. That stuff is on you. But do you warm up? Next week’s post will be the quick guide to warming up, so stay tuned.
Have a Plan
What is the goal of your first climb during a session? Having a plan not only will help you dial in consistent success, it also helps you build your own process that you can foster and develop session after session. In a couple weeks we will talk about why attacking your hardest problem first might not be the best approach.
Troubleshoot Weak Spots
A climb that you can’t complete will always come down to one thing. That might be strength, flexibility, technique or fear. Finding the weak spots in your climbing will make you better. That’s your homework. Find something you can improve, and then we can find ways to improve it.
Which brings me to my last point.
Develop a Lifelong Passion
If you climb with intention it will be more engaging. Following the ideas above will help in this process. You get what you put into it, so let’s dive in.
Forrest Kolaski is a local climber and personal trainer based out of Pawtucket. Learn more about his business on his website: http://ForrestFitnessRI.com
You can also read his “Climbers of Rock Spot” feature here.
This is the first part of a 12 part blog series. Use the following outline to follow along as posts are made every Saturday. The bullets will be replaced with links as the posts go live.
Increasing Climbing Durability
7 Active Stretches to do Before Climbing
How to Properly Take Advantage of the Pyramid
Tips for Climbing Forearm Fatigue & Muscle Cramps
Climbing Fundamentals
The Mobility-Strength-Technique Paradigm
Tips for Hip & Shoulder Mobility
3 Keys to Climbing Strength
Climbing Relief Guide
Common Climbing Training Injuries
How Climbers can Avoid Muscle Imbalance
What Climbers Don’t Know About Their Tissues and Joints
Training Progression for Climbers
0 notes
Text
Climbers of Rock Spot: Forrest Kolaski
Article by Pete Sancianco
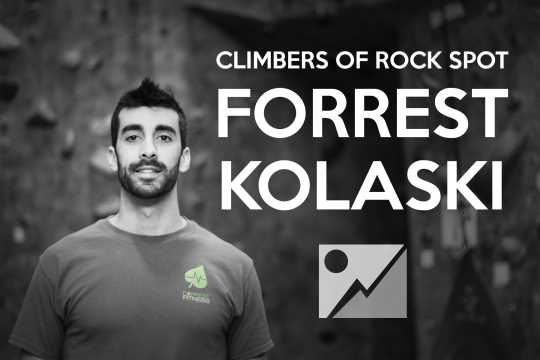
Training is such an important part of climbing fitness. Starting Saturday, January 14, 2017 we’ll be featuring a blog series written by personal trainer, Forrest Kolaski of Forrest Fitness that is designed to help you identify your climbing goals and construct a training regimen to achieve them. Forrest is determined to give climbers the tools they need to, “climb for life,” so we sat down with him to learn more.
What do you love the most about being a personal trainer?
Every day that I step into the gym, I am met with people from diverse stages in life, fitness levels, and experience with training. I get to witness the struggle, the roadblocks, and the triumphs that each of my clients meets. It helps me have perspective on what training is, why we do it and how important it is. My clients inspire me.
How did you get into climbing and what is it about the sport that motivates you to climb more?
I’m a lover of puzzles, riddles, and physical challenges. Climbing is the best combination of physical challenge and problem solving that I’ve come across.
What advice can you give to someone who is interested in becoming a personal trainer?
My first question to anyone that wants to be a personal trainer is: why? Oftentimes, a person’s response is that they love to work out. In my experience that is not enough, nor is it the strongest foundation to build a successful training career on. Traits that I feel are important to develop or have, to be a good trainer are:
Passion for helping people
An interest in how things work - especially human anatomy and human habits
Consistency, routine, and dedication
The recognition that it’s not about you. At all…
What certifications should someone pursue?
The National Academy of Sports Medicine (NASM) Certified Personal Trainer (CPT) is a great place to start. They are the gold standard for personal training. The programming and knowledge base will certainly get you on the right track. I’m also a big fan of Mark Rippetoe and Dan John for the no-nonsense practical elements of training, programming, and technique. There is so much information and misinformation out there. I think the more anatomy, physiology, and physics (understanding movement) you can get, the better.
How important is goal setting when someone starts to consider any type of training and is there a correct way to set these goals?
The SMART goals acronym is perfect for this (see below). The best goals are ones that you can reach and build on. It’s all about momentum! Your goals should be:
Specific
Measurable
Attainable
Realistic
Timely
Do you have any specific climbing goals that you’re currently working on?
Since I’ve started climbing, I’ve always used strength as way to get through problems. My current goal is to develop more technique and broaden my ability.
You frequent our location in Lincoln, RI. Do you have any favorite setters or types of climbs? If so, what is it about these climbs that engages you the most?
If you asked me this question last year, I would have said anything with a dyno or big powerful moves. Lately, I’ve really enjoyed climbs that force my hips to the wall and rely on interesting maneuvers that force me to perform differently. I don’t have any specific climbs that I like, because they are always changing. My favorite climb is one that I know I can do, but haven’t figured out how. That is perhaps the best moment for me in climbing. When I can feel it, it’s there and I might get it this time. Sometimes it takes a couple attempts, sometimes it takes multiple sessions.
What are you hoping climbers will learn from your upcoming training series on our blog?
Life is full of distractions and climbing can be full of them too, nagging joint pain or burning muscle ache. The less you have to worry about that stuff when you are on the wall, the more you will enjoy the experience. My biggest hope is that climbers will connect with their bodies more, stay healthy, and climb for as long as they remain interested.
How can people contact you if they have questions regarding training or the information in our series?
I can be reached via email at: [email protected]. I have a website: http://forrestfitnessri.com. You can also text me at 603-726- 6544. Don’t hesitate, I’m happy to help if I can!
Thanks to Forrest for taking the time to answer all our questions! Check back here on Saturday, January 14, 2017 when we’ll be starting Forrest’s “Climb for Life,” blog series!
Pete Sancianco is our Media Producer
0 notes
Video
youtube
Once a month, we'll pick a few problems of a recent reset at one of our gyms and give you some beta to try out. While there are multiple ways to crush a problem, if these are giving you a hard time, try this beta on for size.
In this episode, we take a nostalgic look back at the Problems of the SET series with new problems going up in Peace Dale.
If there are any other problems you'd like to see beta for, please let us know in the comments below and we will try our best to get you beta before the next reset posted to your local gym Facebook page.
To follow our blog, visit: http://RockSpotClimbing.Tumblr.com/
For general info or for contact info, visit: http://RockSpotClimbing.com/
Music: "Time to Pretend" - MGMT "Electric Feel" - MGMT
#rock spot#climbing#bouldering#Problems of the SET#problem of the SET#season 3#episode 12#so long#2016#bloopers#danny howard#Peacedale
0 notes
Text
New Boulder Grade Recommendation Cards in Lincoln
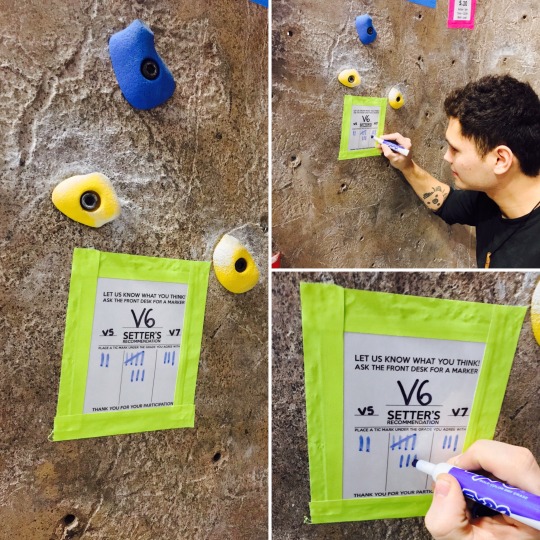
This week, the Lincoln, RI boulder is being reset, and we're trying something new with our ratings.
Rating a problem or route is one of the trickier things the setters must do, mainly because it's so subjective, and can vary from region to region, gym to gym, and even climber to climber. Our setters work together to rate things as close to outdoor climbing grades as possible, so that as our members make the transition to outdoors, they can confidently know which climbs they should attempt. Sometimes, the grade the setters determine for a problem becomes a topic of debate among our members, though. We've read your feedback and knew that the best holiday gift we could give our members was direct input. That's right, you, our members, will get to have your say on the rating of the new boulder set!
Here's how it's going to work: Last night (12/21), we be stripped the boulder walls and gave the holds a nice bath. Today and tomorrow (Thurs 12/22 & Fri 12/23) our setters will be hard at work filling the walls with 50 new problems for you to enjoy. For the first week (through Wednesday, 12/28) all problems will have special temporary route cards. Each card will feature the setter's rating, and spots left and right for the grades above and below. During that first week, once you climb a problem, we ask that you make a tick mark under the grade that you feel the climb should be rated. Your feedback is important no matter if you agree or disagree with the setter. Markers will be available at the front desk for your convenience.
After Wednesday, our setters will replace the voting labels with the regular grade cards, taking your votes into consideration. We want to thank you in advance for your participation, and for helping us to always set the best routes for you.
We're excited about this set, and look forward to your feedback on the routes as well as the system!
1 note
·
View note
Video
youtube
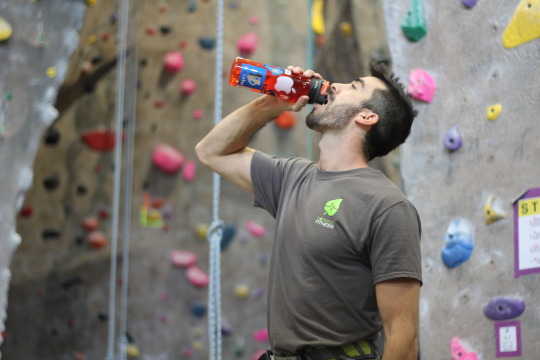
Every Rock Spot Climbing location has a full service pro shop dedicated to providing all our customers with the climbing gear they need.
Take advantage of our end of year inventory reduction sale currently happening across all our retail locations. Until December 30, 2016 all in-stock items over $5 are on sale with the discount being equal to the date. So on the last day of the sale (12/30), the discount will be 30%! There are no holds and you can’t combine this special with any other deals so don’t wait too long to take advantage of the sale or else your item might become out of stock!
As new products come in, we'll be producing content to showcase and explain the features that will help you decide whether the product fits your climbing style.
Retail Manager, Paul Heppner shows off the AVEX Freeflow Autoseal Water Bottles at our Rock Spot Climbing - Lincoln location.
Let us know what you think of these water bottles and be sure to subscribe!
http://www.rockspotclimbing.com
0 notes