
sashimeid
Sashimei'd
Rosanne (Mei)'s adventures in cooking and baking
25 posts
Don't wanna be here? Send us removal request.
Last Seen Blogs

amamorixx1
あまやどり

ary0na
Сборная солянка

rexrexrex
icarusastronaut

omaniena
omaniena

moreaboutcablingcontractoraustin
Untitled
Photo

Herbed garlic knots
This is another one of those recipes that I’ve had on my list for A Very Long Time. It certainly looked and sounded scrumptious in the original recipe, but alas, either I didn’t put enough seasoning, or this just wasn’t meant to be that strongly flavoured at all. Even with a sprinkling of parmesan, it tasted... okay.
For next time, I will:
Make shorter ropes—these turned out kinda gigantic haha
Add more salt and fat to the dough (maybe cheese and/or butter)
Bake longer! (these were underbaked and didn’t have any colour)
The recipe also makes a lot of knots—around 20—which took my roommates and me 2-3 days to finish. We ended up eating the rest of it with shakshuka; that was a good call :)
(original recipe from Use Real Butter)
1 note
·
View note
Photo

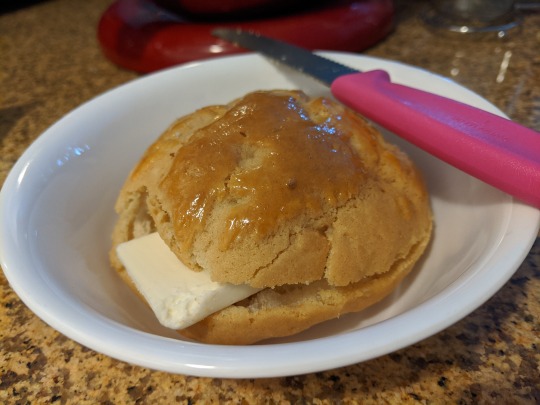
Hokkaido milk bread dinner rolls
My roommates made tri-tip steak and coleslaw+potato salads for 4th of July (YUM) so I decided to contribute these Hokkaido milk bread buns :) I still don’t have a 9x9 baking pan so I just stuffed all the dough into an 8x8, baked for a little over 30 mins, and they turned out real poufy hehe C: I wasn’t super-satisfied with my last milk bread attempt so I was wary about this recipe (not to mention all my subpar attempts at the Joshua Weissman croissant recipes hahaha), but I needn’t have worried since they turned out SO GOOD! Tall and fluffy with a substantially chewy bite and sweet flavour, these were *perfect*.
We actually had quite some garlic butter left over after we polished these buns, which I later used for herbed garlic knots (post to come!).
(original recipe from Joshua Weissman)
(and someone on Reddit very kindly transcribed it :))
4 notes
·
View notes
Photo
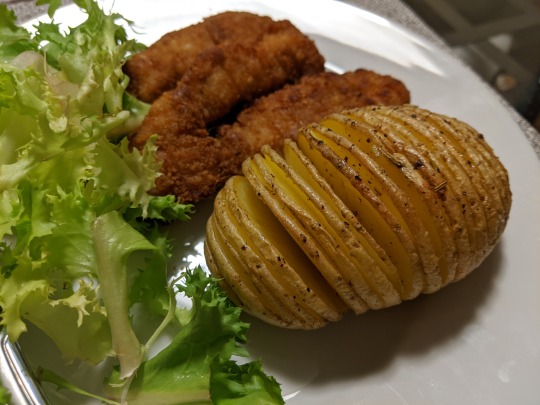
Hasselback potatoes
Wow, I’ve had this on my backlog for literal years—no idea what took so long. All the photos and videos I’ve seen online depict them as crisp, tasty, savoury, melt-in-your-mouth delicious. So I tried them...
... and was kinda disappointed :(
Maybe it was because I didn’t use Russets, but these weren’t as crispy as I thought they’d be. Maybe I’d just underbaked them. Or maybe they really are never meant to be as crisp as, say, fried potatoes. Oh well :( I might try it one last time with Russets, but if that doesn’t meet expectations either, then I think it’s time to throw in the towel haha.
(original recipe from Seasaltwithfood)
0 notes
Photo
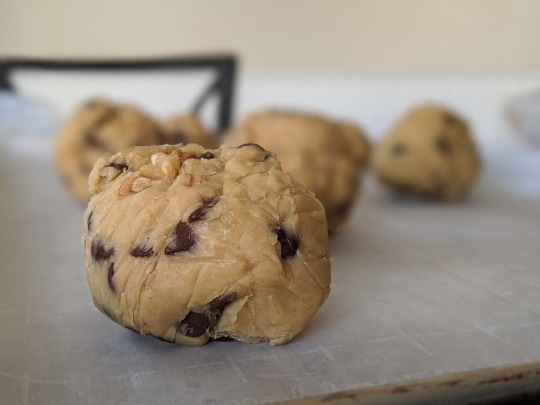

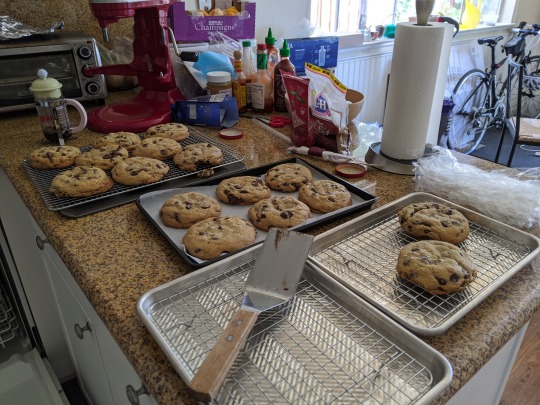


Levain-style (giant) chocolate chip walnut cookies
First week of June: The George Floyd protests take place. All the news is a bit much for me, so I take a break from social media.
June 12: A protest takes place in my city; roommate expresses regret for missing it. I begin to wonder if maybe the protests are more urgent than I’d thought.
June 16: After making myself return to Instagram to be more informed about the news, I stumble upon @bakersagainstracism, which is hosting a virtual bake sale the coming weekend to raise funds for organizations supporting the Black Lives Matter movement. It looks cool. I decide to follow their account.
June 17: I think about what I could do in response to the movement, especially as a Christian.
June 17, afternoon: I realize I could be doing the #bakersagainstracism bake sale too.
June 18: I start thinking about which baked good would be easy to bake but bring in enough revenue to raise substantial funds. I decide that cookies would be good—and that Levain cookies would be perfect.
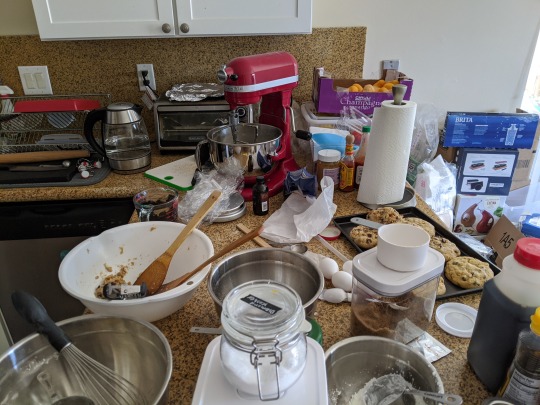
June 19: Juneteenth. I deliberate on pricing and fund recipients, and decide on the orgs supported by Google to maximize donation matching. I #yolo and open orders on Instagram and Facebook. Orders eventually start trickling in, I make the first few batches, and by the time midnight rolls around, I realize I need to pick up more groceries in order to fulfill all the orders.
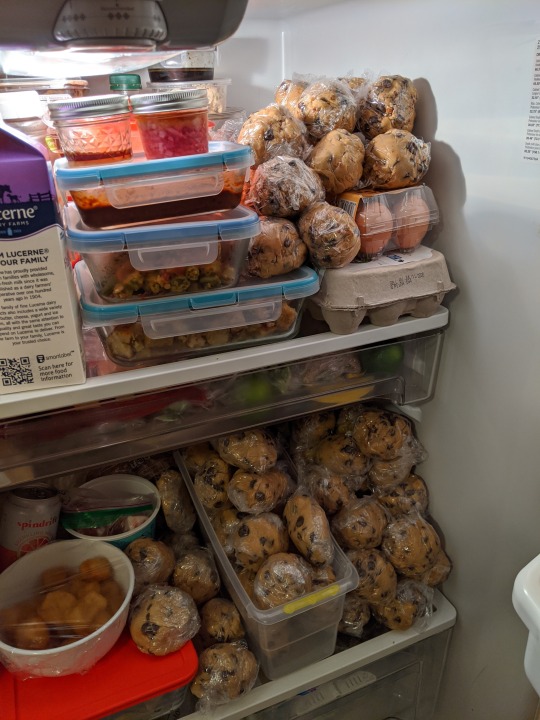
June 20: I make a grocery run early in the morning, and spend the rest of the day making ALL the cookie dough. Some come up to pick up their orders, and I deliver a few more by night.
June 21: By this time I’ve gotten so many orders that I’d need to make yet another grocery run to fulfill orders. When my roommates find out that I hadn’t closed orders yet, they become indignant and tell me to do so. I do so. I take the rest of the afternoon to make the rounds and drop off cookies.
June 22: I finish picking up the last of the groceries and baking the last of the batches.
June 24: My aunt picks up the last of the baked batches, bringing the total number of cookies ordered to 128.
What an adventure. I learned a lot and baked more than I ever had in one weekend. I have so much more respect for people who do this for a living lol. Most of all, though, the experience challenged me to rethink my views on race and dig deeper into current news and systemic racial injustice. This bake sale is really just the beginning.
*
Some baking notes:
I made double batches in my stand mixer, which had the happy by-product of having some easier (whole number) measurements.
I tried some batches with room-temperature butter, and did not notice a marked difference. (definitely saves time on cutting butter)
When making this recipe, I usually measure out 6-oz mounds of cookie dough, wrap individually in plastic wrap, and refrigerate overnight. I baked the cookies for 26 minutes (rotating halfway) when baking straight from the fridge.
I finished the cookies with flaky sea salt.
I found that when making larger batches, you can get away with fewer chocolate chips and walnuts than called for in the recipe (haha). If I weren’t so constrained on ingredients I wouldn’t have skimped on them.
Costco will always be my go-to for bulk flour, white sugar, eggs, butter and chocolate chips, but Trader Joe’s is a great back-up for chocolate chips and walnuts. Smart & Final is a decent Costco alternative.
(original recipe from Sweet Tea + Thyme)
0 notes
Photo

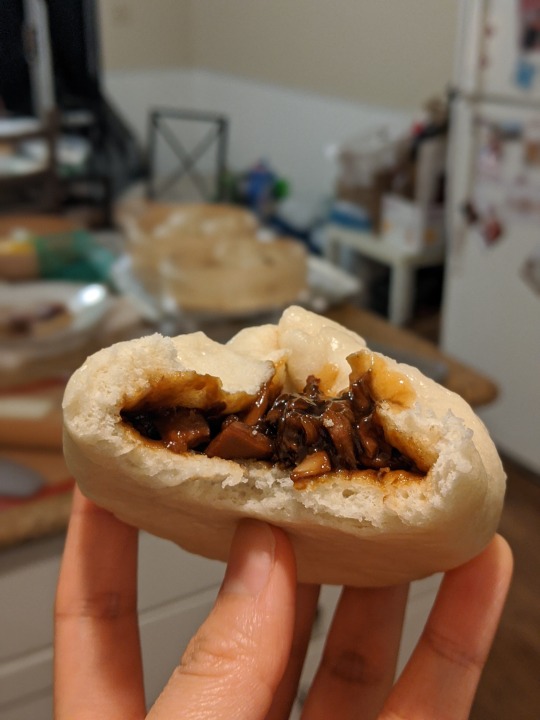
Cha siu bao (叉燒包) a.k.a. siopao asado
I made too much filling so I made the other (steamed) kind too after all :)
My notes:
I made just half the recipe (6 buns) since I didn’t have that much filling; even then there were too many buns so I ended up using some of the soy sauce chicken (see last post) to make more filling haha.
I let the buns rise a lot longer than the recipe indicated because I got busy with calls; turned out fine.
I have a long way to go w.r.t. pleating steamed buns hahaha. Should probably roll out thinner next time.
The texture of the buns was so soft and nice, even after reheating in the microwave! *__* Definitely will make again! Maybe will try nikuman or 菜肉包 next time hehe.
(original recipe from The Woks of Life)
0 notes
Photo
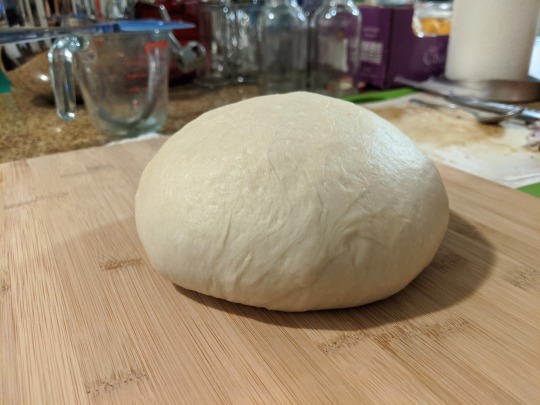
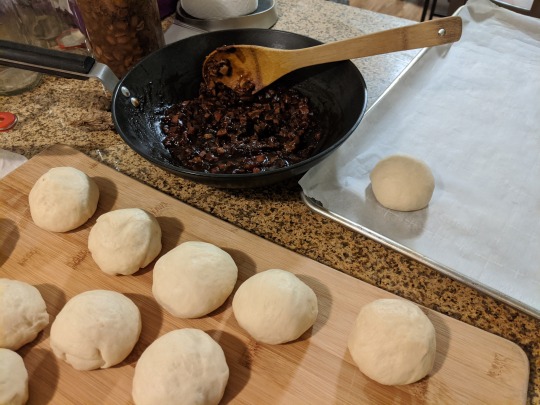

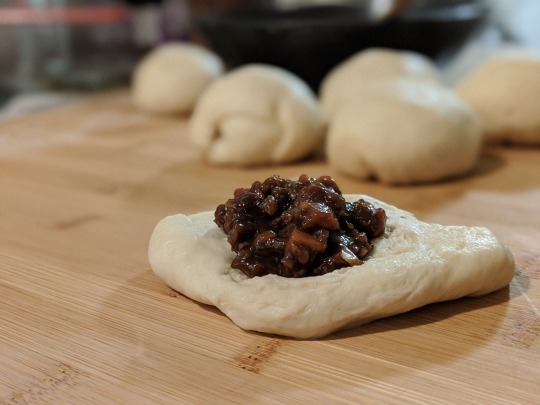


Cha siu pineapple buns (叉燒菠蘿包/菠蘿叉燒包)
A few weeks ago, I realized that I was getting enough coupons from 99 Ranch that I should actually be using them (lol), so I went ahead and did that. Because I’d somehow managed to get $36 (!!) worth of coupons to spend at the steam table/BBQ counter, I was able to buy some youtiao, a whole soy sauce chicken (醬油雞), and a ginormous hunk of cha siu for a grand total of $4!!! My inner Asian/Cantonese person was happy :’) (slash, why have I been wasting these coupons all these years?!)
Cha siu bao have been on my mind for years now, almost as long as I’ve been thinking of making cha siu. I remember asking a good friend whether I should start with steamed or baked ones first, and he recommended the former because it was more classic. But when I saw friends making pineapple buns during SIP, I knew that that was the one I was going to pick too. It was a good choice.
So yes, I ended up using storebought cha siu for the filling, but honestly it just made the work that much easier (not to mention, why wouldn’t you if you’d gotten it for almost-free??). The bun itself was straightforward too; using a weighing scale to divide them definitely made them look nice and even! Altogether, the taste was spot-on, and with the generous portion sizes, they were very satisfying indeed :) I’d make these again, though maybe would try other bun variations to see if I can get an even fluffier texture :D
(bun recipe from Tasty Cooking Studio)
(filling recipe from The Woks of Life)
0 notes
Photo


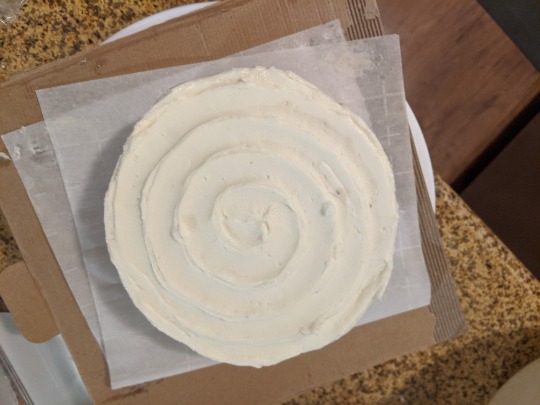
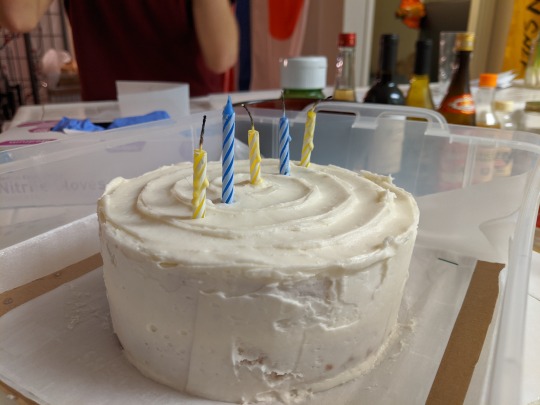

Vanilla Cake
I made a thing :)
Notes:
I made 1/2 the cake recipe and 1/3 the frosting recipe (see links below).
Used two 6″ cake tins to make a 2-layer cake; worked perfectly!
The cake layers turned out really moist, which tasted great, but made them stick a bit to the wire rack overnight. I might try baking longer next time, or placing some parchment paper underneath when cooling.
I only did minimal cake leveling; mixed the cake bits with some leftover frosting to make a single cake pop ahaha.
Would top/fill with strawberries next time!
Serves ~8 people.
(cake recipe from The Perfect Cake by America’s Test Kitchen)
(frosting recipe from Sally’s Baking Addiction)
0 notes
Photo
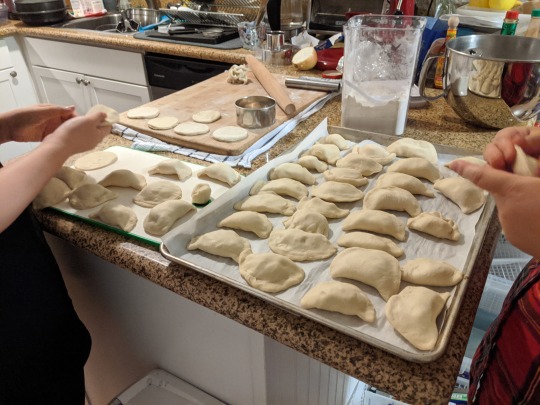
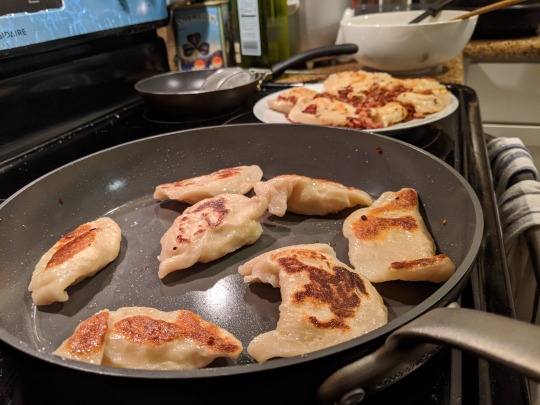
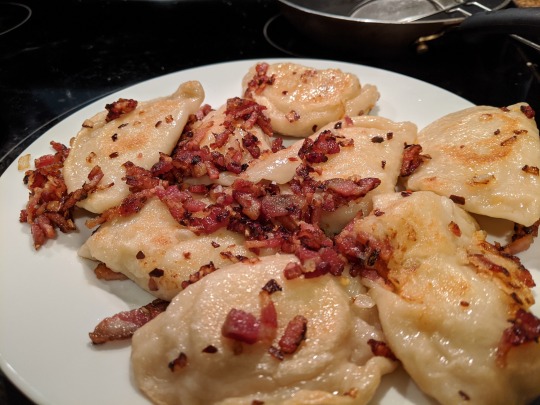
Pierogies/Perogies
One evening a few weeks ago, while I was video-chatting with old friends from Vancouver, one of them suddenly excused herself to get her dinner and then proceeded to eat it while chatting. It didn’t look immediately clear to me what it was, so I asked her. When she said it was “perogies!”, I realized why I hadn’t recognized them: it was because I couldn’t remember the last time I’d had them or even so much as heard anyone mentioning them since moving to the US!!!!! This was a travesty. I remembered when I used to live with those Vancouver friends and our routine Costco grocery list included bags of perogies, which we would boil and then sauté in butter and bacon, and then no one really made a fuss about it because it was the most normal thing ever. And in my very European high school, the Polish and Ukranian kids would bicker all the time over who really invented perogies (also is it spelled perogies in Canada but pierogies in the US?? who knows). But no one does that in Silicon Valley. At least not in my circles here—I’ve never even heard any of my friends here speak of the dish. I immediately strove to correct that by putting it on my 2020 list.
The entire thing was a bit time-consuming to make—lol I definitely worked the dough a lot more than I kneaded to (haha)—but the process was straightforward enough, and OH MAN the final result was so. so. good. Carbs on carbs on carbs, what more could you want in a dish? For the cheese component in the filling, I was originally just gonna use all shredded Dubliner cheese (because that was what we had on hand), but I decided to follow the recipe’s lead and did 2/3 cream cheese, 1/3 Dubliner. That was a great decision :) The stand mixer also helped make the filling extra-creamy. All in all, a delightful recipe that is fun to make with friends (I’m grateful that my roommates knew what perogies were and did pretty much all the assembling haha! and as you can see in the first photo, they decided to try folding some empanada-style LOL). Highly, highly recommend. I also would recommend watching the YouTube video of the recipe: this Jenny person is so chill and her videos are quite relaxing to watch :)
(original recipe from Jenny Can Cook)
0 notes
Photo
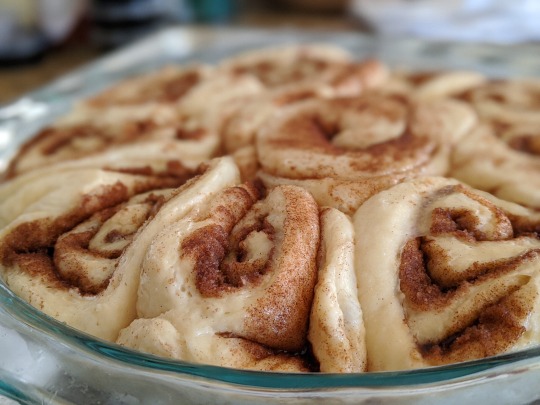


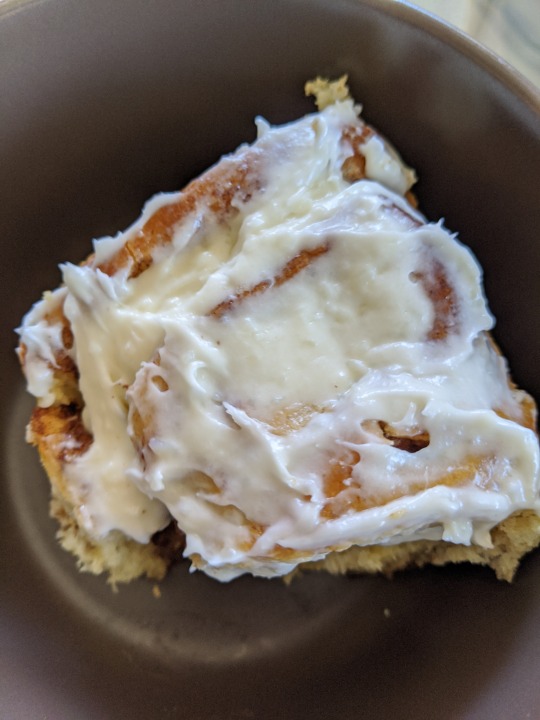
Cinnamon rolls
Can we just pause for a moment and appreciate the splendour that is the simple cinnamon roll/bun? Warm, sweet cinnamon aroma meets rich cream cheese frosting meets chewy bread flavour... mmmmm :)
Alright we’re done here.
(original recipe from Ambitious Kitchen) (true to the recipe title, it was indeed the best cinnamon rolls I’d ever eaten or made. I am definitely gonna make this again and again during quarantine.)
My notes:
I made the overnight version of this: preparing and rolling the dough on a Saturday evening, popping it in the fridge overnight, pulling it out and letting it sit on the counter on Sunday after church service, and then baking it off for after-lunch dessert :)
As recommended by some blogs, I added a splash of half-and-half right before baking, and it was *so worth it*.
Rolling this tightly was a mission and a half. It’s not the prettiest, but who cares... it was delicious.
The amount of cinnamon sugar that the recipe indicates will seem staggering at first, but trust the recipe and just use it all up haha.
Baked using a 9.5″ pie plate—turned out great.
Since I was using a glass baking vessel and our oven kinda runs cooler than advertised, I baked it ~5 mins longer than the recipe mentioned, making sure it didn’t get too dark.
Keep the cream cheese frosting separate if planning on refrigerating/freezing afterwards. The rolls taste great reheated in a toaster oven. (microwaving is fine too, but depending on how long you baked it originally, it might be end up too gloopy) Ours didn’t make it to the freezer as they were finished in a few days :D
0 notes
Photo
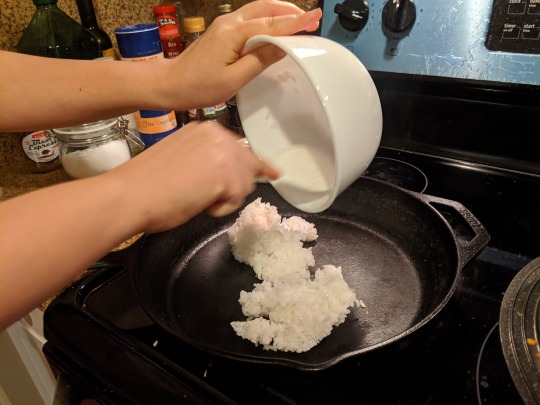

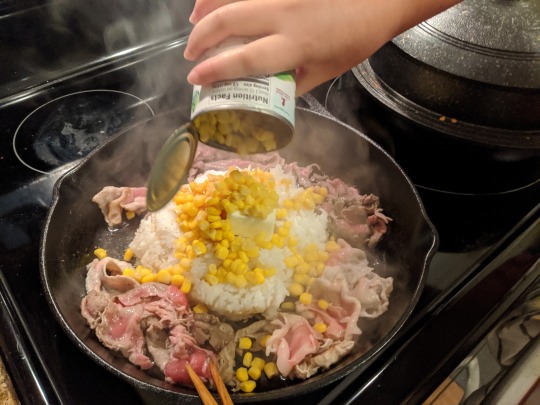


Pepper Lunch (copycat)
I’m not really sure how I came across the idea of recreating the classic Pepper Lunch sizzling plate—maybe I was looking for ways to use up leftover sliced meat from hotpot haha. All I know is that I started watching some YouTube videos on how to make the sauces, and the next thing I knew, I had added it to my list of foods to cook during quarantine. I guess it doesn’t matter; it was so simple to make yet was so luxuriously good! It also brought back fond memories of my childhood friend Ate K. bringing me to Pepper Lunch during my internship in Singapore :) And this one time over Christmas break 2018, when I reconnected with another childhood classmate over Pepper Lunch outside our old elementary school. Good times :)
(Note: try not to raise the stovetop temperature too high, or the rice might burn! Made that mistake during the first batch ^^;)
(original recipe from Simple Bakes)
Ingredients:
Honey garlic sauce
1/8 onion, chopped (enough to make ~1/3 cup) (we used yellow onion)
2-3 cloves garlic, minced
1/3 cup honey
1/4 cup Japanese soy sauce
1/3 cup water
1/2 tbsp cornstarch
Garlic soy sauce
1/4 cup Japanese soy sauce
1/4 cup Chinese (light) soy sauce
5-6 cloves garlic, minced
1 tbsp sugar
1/2 cup water
1/2 tbsp cornstarch
Main
1.5-2 lb sliced meat (traditionally beef, but we used lamb and pork)
3-4 cups rice (2-3 cups uncooked rice)
1 can corn
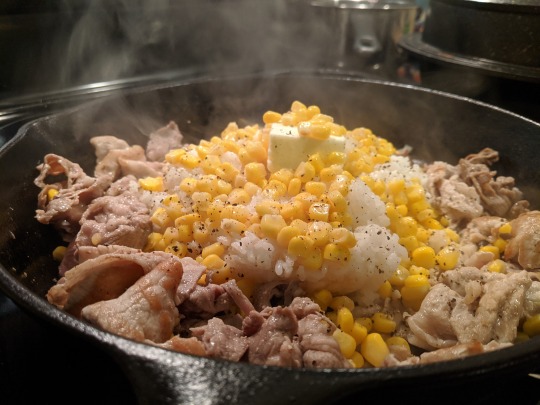
2 tbsp butter
handful chopped green onions
black pepper, to taste
Instructions:
Mix honey garlic sauce ingredients in a saucepan, then cook over medium heat for 5 minutes or until onions and garlic are soft. Blend with an immersion blender (or in a normal blender). Set aside in a beaker or easy-to-pour vessel.
Do the same with the garlic soy sauce ingredients.
Heat a cast iron skillet over medium heat, adding oil if necessary.
When it starts getting warm, place half the rice into the centre of the skillet.
Once the skillet is ripping hot, arrange half the meat all around the rice, then pour half the canned corn and half the chopped green onion on top of the rice mound. Pour sauce over the rice and some of the meat and season with freshly-ground black pepper to taste.
Mix all the ingredients as desired.
Repeat with the other half of the ingredients.
Enjoy :)
Makes 3 large servings.
0 notes
Photo

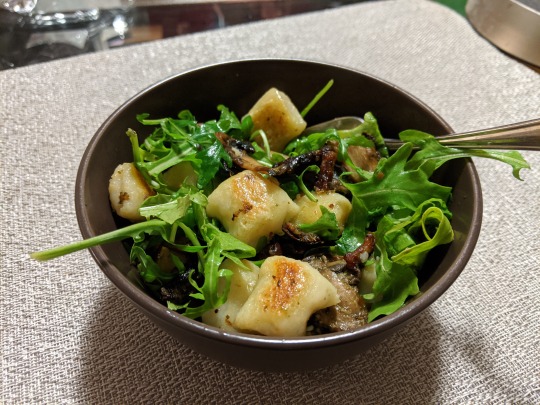
Gnocchi
Gnocchi is my favourite kind of pasta ♥︎ They sold it at our high school’s cafeteria (my high school was pretty Italian—heck, it was even named after an Italian, Giovanni Caboto or John Cabot), so I was aware (and fond) of it early on (because how can you not be fond of potatoes??). It wasn’t until after university, though, that I started seeing more hype about it. That was probably also around the time I had my first taste of non-high-school-cafeteria gnocchi, and yes, pillowy is exactly the word to describe its soft, light texture. Fried with butter and sage, tossed in a tomato- or cream-based sauce, crisped with bacon-y bits: gnocchi tasted great to me in any kind of dressing, and my only complaint about it was that they never served enough of it at restaurants. Thankfully, I learned last week that gnocchi is pretty doable at home—requires few ingredients, hard to mess up (I had uncooked potato chunks in my dough LOL and it turned out fine), and easy to freeze for later. It just takes a bit of time and manpower (if you don’t have a potato ricer lol).
(original recipe from Fine Cooking)
Note to myself:
Ingredients:
4 large-ish Russet potatoes (roughly the same size)
1-1/2 cups all-purpose flour
1 tsp kosher salt
1 egg
Don’t overboil the potatoes! Put in ice water after boiling to help with peeling skin; do not cut in pieces before boiling.
Mix flour/salt in first, then mix in egg
Dressing used here: bacon (cut into lardons), garlic, sliced mushrooms, pesto, parmesan cheese, fresh arugula on top.
Set aside 2-2.5 hours to make, if you’re slow at cooking like me :)
0 notes
Photo
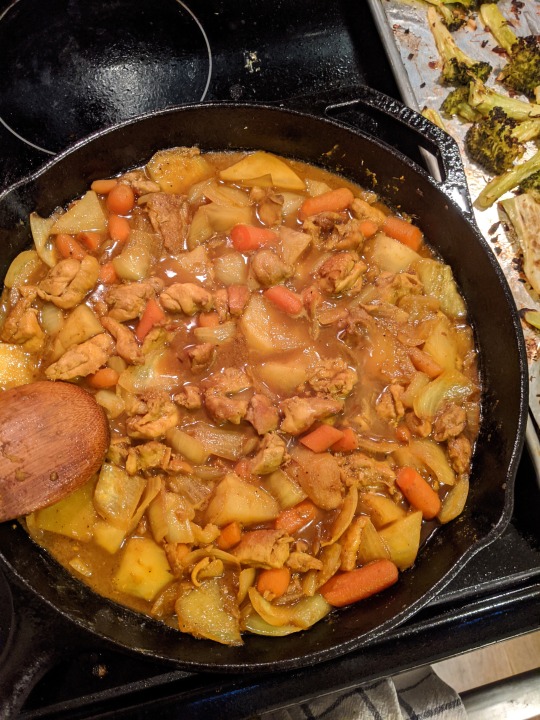

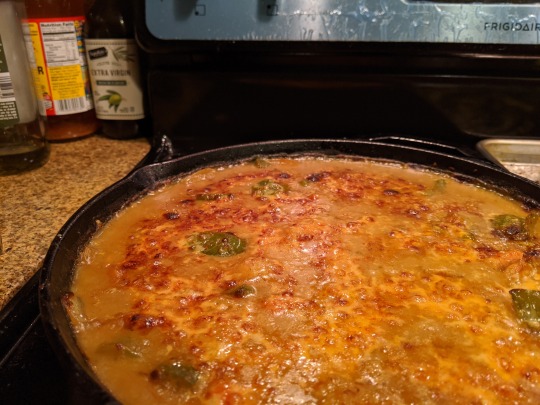
Baked Portuguese chicken rice (焗葡國雞飯)
This is my go-to order at HK-style cafes (茶餐廳) along with some milk tea! :D Although... I feel like none of the baked Portuguese chicken dishes I’ve had have ever compared to that very first one I had back at Bubble Tease at the UW plaza hahaha. I just very clearly remember visiting Waterloo during a co-op term one evening, eating dinner there, and my one friend (who was doing co-op at RIM at the time) telling me that he had been ordering that particular dish like once a week LOL. Being unfamiliar with HK-style cafes, I didn’t really know what to order, so it made sense that if my friend enjoyed it so much then I should get it too. And who knows how good it really was (especially since Bubble Tease is, well, Bubble Tease), but at the time, I thought it was AMAZING. It must have had copious amounts of melted cheese in it haha! That’s how it became my favourite 茶餐廳 dish.
It never occurred to me that I could try making this at home until a couple weeks ago, when I was looking for more recipes to make. Thanks to my friend Samantha(’s mom) for sending a legit recipe for this! :D It was actually pretty easy to make, albeit a bit time-consuming because you have to let the potatoes and carrots soften. I’m already looking forward to retrying this recipe and tweaking some parts! :)
(original recipe from Christine’s Recipes)
Ingredients:
3 lbs. (6 pcs) chicken thigh (boneless/bone-in both work, and usually skin-on; I removed the bone and kept most of the skin on), cut into large-ish chunks
Marinade
2 tbsp light soy sauce
1 tbsp cornstarch
1 tbsp sugar
1 tbsp Shaoxing wine
1/2 tsp salt
1 tbsp freshly grated ginger
pepper, to taste
Veggies
4-5 cloves garlic, minced
1 yellow onion, cut into chunks
2 Russet potatoes, cut into chunks
1 carrot, cut into chunks
1 green pepper, cut into chunks
1/2 lb (?) green beans (optional), chopped
Sauce
1 tbsp turmeric powder
1/2 tbsp cumin powder
2-2.5 cups chicken stock
1 can coconut milk
1 tbsp cornstarch + 2-3 tbsp cold water (for thickening)
Fried rice/white rice
Shredded cheese, for melting
Instructions:
Marinate the chicken in the marinade for 20 minutes. (If you, like me, forgot this step, then go to step 2. Otherwise, skip ahead to step 3.)
In a large wide pot, or a cast iron skillet, heat a small amount of high-heat oil and brown the chicken thigh pieces, starting with the skin side down. Fry in batches if necessary. Set aside.
Saute the garlic, and then the onions, until onions are translucent.
Add the chicken, and (if you haven’t already) fry until golden brown. Add the marinade seasonings here if you forgot them lol.
Add the potatoes and carrots, then add the turmeric and cumin. Fry until aromatic.
Add the chicken stock, and let the mixture simmer until the potatoes and carrots are fork-tender. Make sure the liquid covers them—if not, add some water.
Preheat the oven to 400°F, or set the broiler to high. Add the coconut milk, then make a slurry with the cornstarch and water and add it in. Stir and simmer briefly to thicken. Season with more salt and pepper to taste.
Pack rice into the bottom of a casserole dish, then pour chicken/coconut sauce on top (unless you used a cast iron skillet like I did, in which case, ignore that). Top with cheese, then broil or roast for 5-10 minutes until cheese is melted and charred to your liking.
Makes 6 servings.
0 notes
Photo
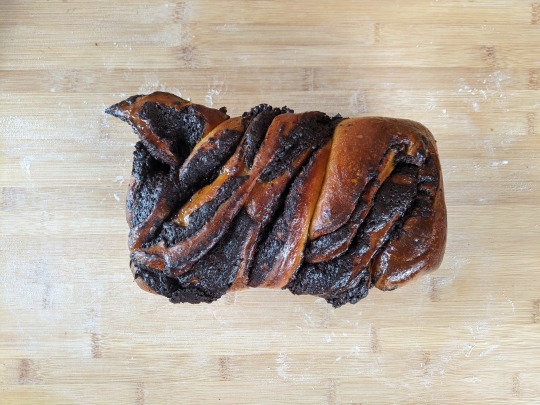
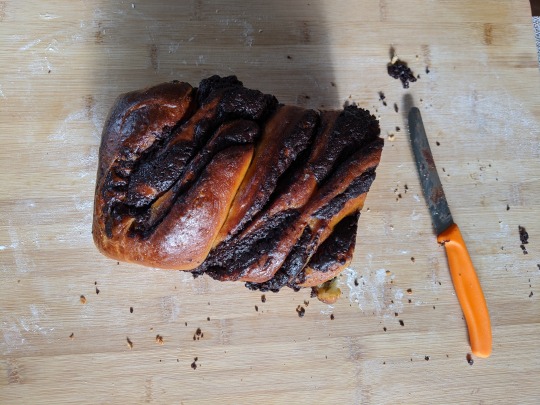


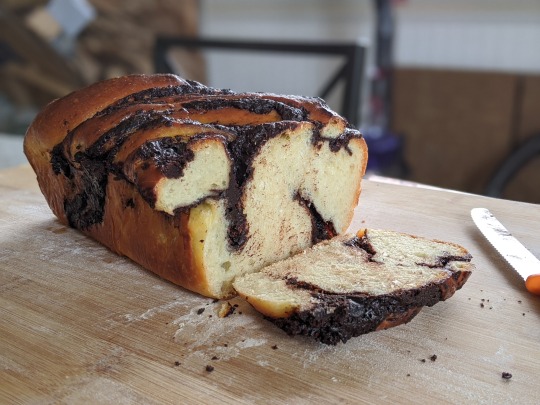
Sourdough chocolate babka
I have been waiting *so long* to make this. I don’t know why I did; I guess in university and post-university days I rarely ever baked with yeast and had some apprehension about the rising and the rolling parts. But whenever it was that I first learned about babkas (maybe from Smitten Kitchen?), even without having ever eaten it before, I knew in my heart that it would blow my mind away. And boy was I right, i.e., I should have made this sooner lol.
I already had some sourdough starter so I decided to use that instead of fresh yeast (inspired by I am a Food Blog’s small batch recipe). Protips that I learned along the way:
If you usually refrigerate your starter, take it out, feed it, and let it sit out in room temperature for at least a day before starting this/any other recipe that requires a mature starter! It gets a lot bubblier that way.
I let my dough rest longer between turns than indicated in the recipe (got busy) and it was still OK.
I used a standard short loaf pan for this (vs. a Pullman loaf pan) and it still turned out great.
This makes *a ton* of babka; you can probably wrap some for freezing. I gave some away to friends.
Checking for a temperature of 200°F inside was key to success.
You don’t need that much syrup for brushing on top. I used some syrup that I had leftover from attempting Boba Guys’ matcha latte LOL.
tl;dr—highly recommend the recipe below (it’s so thorough and organized and speaks to my engineer brain). It just takes two days to make :P
(original recipe from The Perfect Loaf)
0 notes
Photo
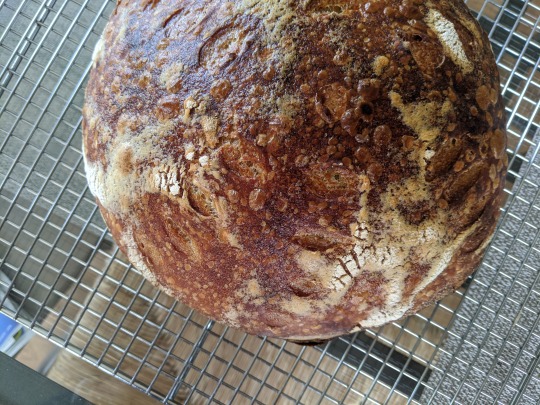
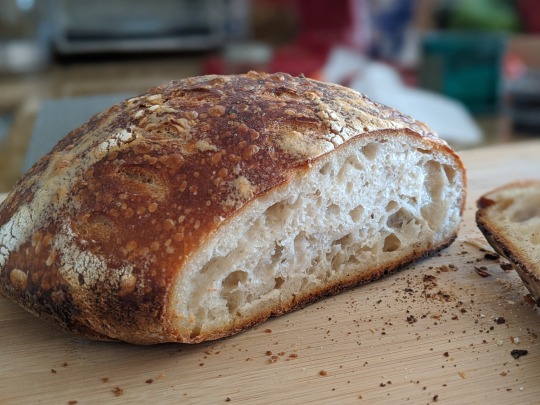
Sourdough bread
... because everyone else and their grandma is also making it :P
A friend had told me about a local bakery that was selling baking supplies, and before I knew it, I was buying sourdough starter from them as well. Fast-forward a month later; when I learned that one of the high school students I was discipling was making some really quality-looking sourdough loaves at a very proficient pace (i.e. once or twice a day!!), I knew that it was time. She sent over the recipe she was using, which turned out to be really, really thorough and approachable. And a few days later... this loaf was born.
For a first loaf, this definitely turned out way better than I’d expected. Like honestly, I was shocked haha. It’s probably thanks to the thorough recipe!
Notes for next time:
Try waiting a little longer (half a day or so) so that the starter can be more active before making the levain.
Make deeper scores so that they don’t disappear when the loaf expands. Maybe try using a serrated knife instead (I used scissors this time).
Don’t forget to turn down the heat after the first 20ish minutes!! I had forgotten to do so, and thought the crust was a bit too hard as a result.
Finish eating the loaf more quickly LOL.
Verdict: Did this make me a sourdough lover? No. This one loaf took up a lot of time to make (I basically had to go over every 15-30 minutes to stretch and fold it in between reading a book), so I’m not sure if I’ll be doing this regularly. But my roommates really enjoyed it so even if not regularly, I’ll definitely be trying this again sometime in the future!
(original recipe from A Beautiful Plate)
0 notes
Photo
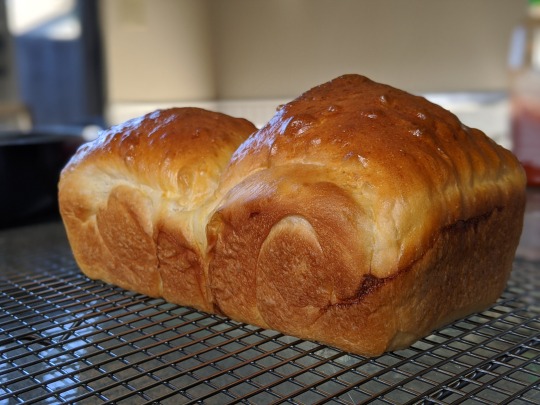
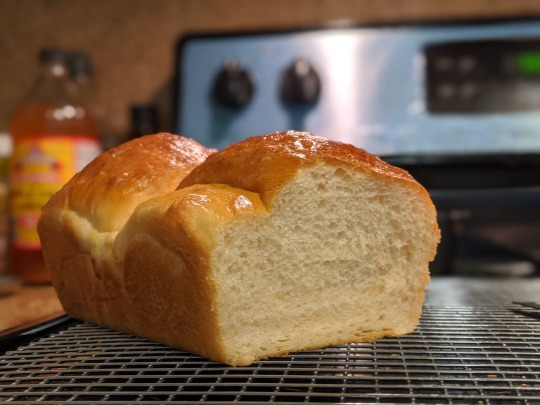
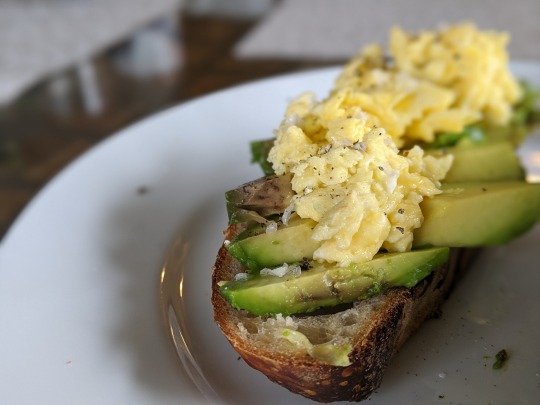
Milk Bread/Shokupan (食パン)
During my last co-op term, as I was shopping for groceries to cook throughout the week, I discovered that the T&T across from where I lived sold this thing called “milk bread”. It was very square and looked sweet and came in red bean and matcha varieties, so, intrigued, I bought it to use for sandwiches. It was DELICIOUS. Hands down one of the best decisions I’d made that term. I would toast two slices, slather on some Japanese mayo (another great decision), and layer on ham and cheese and spinach, and my lunches that day would turn out glorious. There was just something about the thickness of each slice and the sweetness of the bread that felt so luxurious to me. Some people’s favourite bread is crusty bread or French baguettes or seeded whole-wheat loaves. My favourite bread is pretty much Asian white bread :P
Recipes abound online for milk bread or shokupan, and it seems like different people have different interpretations of what “milk bread” means (I guess in some Chinese bakeries, milk bread refers to the bread they use for pineapple buns and such?). In any case, I just wanted to recreate the sandwich bread I had from that T&T in Metrotown 8 years ago. Here is my recent attempt at following a Japanese shokupan recipe—the photos in the original recipe seemed promising, but my loaf turned out shorter and less fluffy and more yellow than that. But it sure tasted amazing toasted with some tuna salad on top <3 I’ll definitely be trying my hand at this again—maybe next time with an actual Pullman loaf pan, or trying out the NYT recipe version—but for now, I am going to content myself with enjoying some dense, slightly sweet white bread for breakfasts the coming week :)
(original recipe from Chopstick Chronicles)
0 notes
Photo

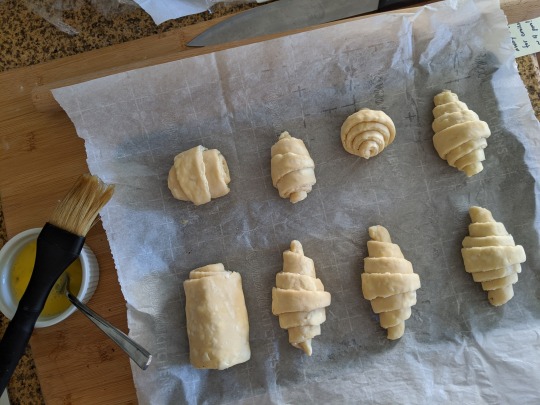

Croissants, take 2
I finally got fresh yeast lol and tried my hand at croissants again. Notes from this time around:
I forgot to chill the butter right after beating it into a square, so it ended up melting too quickly—this caused the layers to stick together and not be distinct D:
Dunno if my yeast is just too active, but the croissants turned out soft and bready LOL. At least they were lighter than last time! And the crusts were still flaky and buttery :) just the insides that were too soft.
I made 1.5 pains au chocolat, stuffing each with a square’s worth (~125 g) of 70% chocolate. I basically just broke a square into smaller pieces and placed the pieces at intervals while rolling. It tasted really good! I would probably add even more chocolate next time!
I baked them for exactly 25 minutes at 400F, but I think our oven runs a bit cold so I will bake them longer next time (to make them even crisper).
Verdict: still quite tasty, especially toasted the day after! We also got some Nutella so that pairing was fantastic :D ... but I think I might try another recipe next time hehe.
(original recipe from Joshua Weissman)
0 notes
Photo
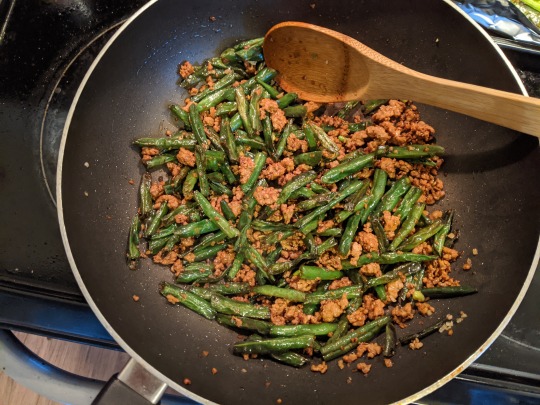
Dry-fried green beans with pork (乾煸四季豆)
One of my family’s favourite Chinese takeout spots is this place near where I grew up that had 三和菜 specials (sam wo choi/san he cai/three dish combo). We would always get crispy Calgary beef (younger bro’s fave), lemon chicken, and dry-fried green beans with hot and sour soup on the side. And all for CAD 20 + tax!!! Agh so good. The dry-fried green beans were always so bomb: crispy, spicy, savoury, meaty (but not overly so) and juicy. I remember trying to recreate it at home sometime in high school or university, but I didn’t know that you had to fry the green beans separately, so I ended up with something super sub-par haha. Now I know better :D From this experience, I learned:
Green beans take so long to fry!! I guess patience and multiple batches are key to success haha
Either use less pork/more green beans next time, or mince the pork more finely (I used 1/2 lb of ground pork to 1 lb of green beans—good for a main dish but doesn’t have to be as meaty for a side dish)
DEFINITELY add some chillies!!
(original recipe from The Woks of Life)
0 notes