
Hi! I’m Scott Biffin 👨🏻🍳, a passionate chef from Australia. I believe that food is not just about flavor but about creating moments of joy at the table. 🍴🤗 Join me as I share my favorite recipes, kitchen tips, and culinary inspiration to help make your cooking journey both delicious and memorable. Let's create happiness, one dish at a time!
Don't wanna be here? Send us removal request.
Statistics
We looked inside some of the posts by scottbiffinchef and here's what we found interesting.
Average Info
Notes Per Post
3
Likes Per Post
2
Reblog Per Post
1
Reply Per Post
0
Time Between Posts
2 days
Number of Posts By Type
Text
11
Video
6
Last Seen Tumblr Blogs


Fun Fact
The “We are the 99%” Tumblr blog became the slogan for the Occupy Wall Street movement.
Text
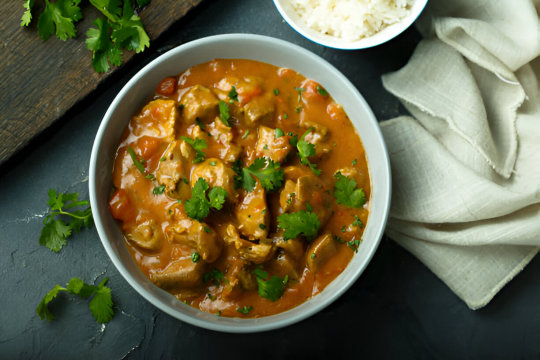
How to Make Authentic Chicken Tikka Masala at Home
Chicken Tikka Masala is more than just a dish—it's a global comfort food, a flavorful fusion of Indian spices and creamy tomato-based sauce that has found a place in the hearts and kitchens of millions worldwide. If you’ve ever craved the rich, smoky, and aromatic flavors of this dish from your favorite restaurant and wondered if you could recreate it at home, you’re in the right place. In this post, we’ll guide you through every step of making authentic Chicken Tikka Masala at home, complete with tips, techniques, and a foolproof recipe that even beginners can master.
What Is Chicken Tikka Masala?
Chicken Tikka Masala is a British-Indian classic—grilled or roasted marinated chicken pieces (tikka) simmered in a luxurious tomato-based sauce spiced with garam masala, cumin, coriander, turmeric, and cream. The result? A smoky, sweet, and tangy dish that’s perfect when paired with basmati rice or garlic naan.
Though its exact origins are debated, Chicken Tikka Masala has become a national dish in the UK and a global favorite. According to culinary legend, it may have been created in a British curry house to satisfy the local craving for a saucier version of chicken tikka. Either way, it's a winning combination that brings out the best of Indian spices and western preferences for rich, creamy gravies.
Ingredients You’ll Need
To get that authentic taste, the ingredients you use matter. Here's what you'll need:
For the Chicken Marinade:
500g boneless chicken thighs or breasts, cut into chunks
1 cup plain Greek yogurt
1 tablespoon lemon juice
1 tablespoon ginger-garlic paste
1 teaspoon chili powder
1 teaspoon ground cumin
1 teaspoon ground coriander
½ teaspoon turmeric
Salt to taste
For the Sauce:
2 tablespoons vegetable oil or ghee
1 large onion, finely chopped
1 tablespoon ginger-garlic paste
2 teaspoons garam masala
1 teaspoon ground cumin
1 teaspoon paprika
½ teaspoon chili powder (adjust to taste)
1 teaspoon sugar
400g (1 can) crushed tomatoes
½ cup water or chicken stock
1 cup heavy cream (or coconut cream for dairy-free option)
Salt to taste
Fresh cilantro for garnish

Step-by-Step: How to Make Authentic Chicken Tikka Masala
Step 1: Marinate the Chicken
The first key to authentic flavor is in the marination. Combine all marinade ingredients in a large bowl and coat the chicken pieces thoroughly. Cover and refrigerate for at least 4 hours, preferably overnight. The yogurt tenderizes the meat, while the spices penetrate it deeply.
Pro Tip from Chef Scott Biffin: “If you can, use a charcoal grill or a smoking method during cooking to get that authentic smoky tandoor flavor without an actual tandoor.”
Step 2: Cook the Chicken
Traditionally, tikka is grilled. If you're indoors, you can use an oven or stovetop.
Option 1: Oven/Grill Method
Preheat your oven to 220°C (430°F).
Line a baking tray with foil and arrange the marinated chicken pieces.
Bake for 15–20 minutes, turning halfway through. Finish with a broil or grill setting to char the edges slightly.
Option 2: Stovetop Method
Heat a non-stick pan or cast-iron skillet with a little oil.
Add chicken pieces in batches and sear until golden and slightly charred.
Set aside once cooked.
Step 3: Make the Masala Sauce
This sauce is the heart of the dish, rich in spices and flavor.
In a large pan, heat oil or ghee over medium heat.
Add the chopped onions and sauté until golden brown—this adds sweetness and depth.
Add the ginger-garlic paste and cook for 1–2 minutes.
Stir in the garam masala, cumin, paprika, and chili powder. Fry the spices for a minute to release their aroma.
Pour in the crushed tomatoes and sugar. Simmer for 10–15 minutes until the mixture thickens and deepens in color.
Add water or chicken stock to adjust consistency.
Slowly stir in the cream and simmer for another 5 minutes.
Step 4: Combine and Simmer
Add the cooked chicken tikka into the sauce and let everything simmer for another 10 minutes. This allows the flavors to meld together and the chicken to absorb the masala.
Taste and adjust seasoning with salt, sugar, or additional garam masala if desired.
Optional Step: Smoke It for Authentic Flavor
Want to elevate your Chicken Tikka Masala?
Try the “Dhungar” method (coal smoking technique):
Heat a piece of charcoal until red hot.
Place it in a small bowl or foil cup inside the pan.
Drizzle with a drop of ghee and cover the pot for 2 minutes.
This trick adds that authentic smoky flavor found in tandoor-cooked dishes.
Serving Suggestions
Rice: Basmati rice is ideal to soak up the sauce.
Naan or Roti: Serve warm with a brushing of ghee or butter.
Garnish: Fresh cilantro, a drizzle of cream, or a wedge of lemon can enhance both the look and taste.
Tips for the Perfect Chicken Tikka Masala
Use dark meat (thighs) for juicier chicken, though breasts work too.
Toast your spices briefly before adding liquids to unlock maximum flavor.
For a lighter version, substitute cream with Greek yogurt or coconut milk.
You can make the sauce ahead of time—it tastes even better the next day.
Variations You Can Try
While the classic recipe is beloved, there are a few twists you can experiment with:
Paneer Tikka Masala – Great vegetarian alternative using Indian cottage cheese.
Vegan Tikka Masala – Use tofu or chickpeas and replace dairy with coconut cream.
Spicy Version – Increase chili powder or add fresh green chilies for a fiery kick.
Low-Calorie Version – Use air-fried chicken and substitute cream with cashew paste.
Why This Recipe Works
Unlike watered-down takeout versions or overly sweet imitations, this recipe strikes a balance between the boldness of Indian spices and the creaminess that defines the dish. By marinating the chicken thoroughly and cooking it separately before combining it with the sauce, you ensure that each element stands out while harmonizing perfectly.
Chef Scott Biffin, known for his passion for elevating home-cooked dishes, emphasizes simplicity and authenticity. “You don’t need fancy gadgets—just good ingredients, patience, and a love for bold flavors,” he says.
FAQs About Chicken Tikka Masala
1. Can I freeze Chicken Tikka Masala?
Yes! This dish freezes very well. Just cool it completely, store in airtight containers, and freeze for up to 2 months.
2. Can I make this dairy-free?
Absolutely. Swap yogurt for coconut yogurt and cream for coconut milk or cashew cream.
3. What can I do with leftovers?
Leftovers are great over baked potatoes, in wraps, or even as a filling for savory pies.
4. Is Chicken Tikka Masala the same as Butter Chicken?
Not quite. Butter Chicken (Murgh Makhani) tends to be milder, sweeter, and uses more butter and cream. Chicken Tikka Masala is bolder with a heavier spice profile and a tomato-forward sauce.
Final Thoughts
Making authentic Chicken Tikka Masala at home is not only possible—it’s incredibly rewarding. From marinating the chicken to building a deep, flavorful sauce, every step brings you closer to that rich restaurant-quality taste, right in your own kitchen.
Whether you're a seasoned cook or trying this dish for the first time, this recipe brings warmth, flavor, and a touch of global cuisine to your dinner table. So light your stove, gather your spices, and let the aroma of Chicken Tikka Masala transform your kitchen tonight.
#Easy Chicken Tikka Masala#Traditional Chicken Tikka Masala recipe#Chicken Tikka marinade#Tikka Masala sauce recipe#Chicken Tikka Masala with cream#Chef Scott Biffin recipes#How to make Chicken Tikka Masala#Chicken Tikka Masala
0 notes
Text
From Kitchen to Table- The Best Homemade Chicken Curry in Australia
There’s something truly magical about the aroma of a homemade chicken curry simmering on the stove. Whether it's the scent of fragrant spices wafting through the kitchen or the promise of a comforting meal shared with loved ones, chicken curry has a timeless allure. In Australia, where diverse culinary traditions merge into a rich tapestry of flavors, this dish stands out as a favorite in homes across the country.
In this blog post, we’ll take you on a flavorful journey from kitchen to table, guiding you through everything you need to know about making the best homemade chicken curry in Australia. From the essential ingredients and step-by-step instructions to secret tips, serving suggestions, and the cultural significance of this dish — it’s all here. And if you’re inspired by renowned culinary figures like Chef Scott Biffin, you’ll find his approach to balance and boldness echoed in every spoonful.
The Heart of the Dish: Why Chicken Curry Captivates Australians
Australia’s love for chicken curry isn't just about taste — it’s about comfort, community, and cultural celebration. With a strong influence from Indian, Thai, Malaysian, and Sri Lankan cuisines, Australians have embraced curry as a staple in modern kitchens. Whether mild or spicy, creamy or tomato-based, chicken curry satisfies all palates and adapts to any occasion.
But what sets homemade chicken curry in Australia apart? It’s the freshness of local produce, the blend of family traditions, and a spirit of experimentation. Unlike store-bought or restaurant versions, homemade curry allows for customization. Want it extra spicy? Add chilies. Prefer it rich and creamy? Use coconut cream or Greek yogurt. This flexibility is what makes cooking curry at home such a rewarding experience.
The Essentials: Ingredients for the Best Chicken Curry
While there are countless ways to prepare chicken curry, certain ingredients remain constant in creating a bold, aromatic flavor. Here’s what you’ll need to make a classic Australian-style chicken curry that’s both authentic and easy to prepare:
Primary Ingredients:
1 kg chicken thighs or breast (boneless, skinless, cut into chunks)
2 tablespoons vegetable oil
2 medium onions, finely chopped
4 garlic cloves, minced
1 tablespoon fresh ginger, grated
2–3 ripe tomatoes or 1 cup canned crushed tomatoes
1 cup coconut milk or cream
Salt to taste
Fresh coriander for garnish
Spice Mix:
2 teaspoons ground turmeric
1 teaspoon chili powder (adjust to taste)
2 teaspoons ground cumin
2 teaspoons coriander powder
1 teaspoon garam masala
Optional: 1–2 fresh green chilies (slit lengthwise)
These spices form the heart of the curry. Toasting them gently in oil releases their essential oils and deepens the flavor.
Step-by-Step: Cooking the Best Homemade Chicken Curry
Let’s walk through the process of creating this flavorful masterpiece from scratch.
Step 1: Prepare the Base
Heat vegetable oil in a heavy-bottomed pot over medium heat. Add chopped onions and sauté until golden brown (about 10–12 minutes). This is the flavor foundation, so don’t rush it.
Step 2: Add Garlic and Ginger
Stir in the minced garlic and grated ginger. Sauté for another 1–2 minutes until aromatic.
Step 3: Toast the Spices
Add turmeric, chili powder, cumin, and coriander powder to the pot. Stir continuously to prevent burning. Toasting the spices enhances their complexity.
Step 4: Build the Sauce
Add chopped tomatoes or crushed canned tomatoes. Cook until the mixture thickens and oil starts to separate, about 8–10 minutes.
Step 5: Add Chicken
Stir in the chicken pieces and coat them well with the spice mixture. Cook for 5–7 minutes until the meat begins to brown slightly.
Step 6: Pour in Coconut Milk
Add the coconut milk and bring the mixture to a gentle simmer. Cover and cook for 20–25 minutes or until the chicken is fully cooked and tender.
Step 7: Final Touches
Sprinkle in garam masala and adjust salt. Simmer uncovered for a few more minutes to let the flavors blend beautifully.
Step 8: Garnish and Serve
Turn off the heat and garnish with fresh coriander leaves. Serve hot with steamed basmati rice or warm naan bread.
Tips from the Pros: Elevating Your Chicken Curry
The difference between a good curry and a great one often lies in the little details. Here are some expert tips — many of which align with techniques used by Chef Scott Biffin, one of Australia’s celebrated culinary artists.
Use Fresh Ground Spices: Toast and grind your own spices if possible. The aroma and depth are far superior to pre-ground options.
Marinate the Chicken: For deeper flavor, marinate the chicken in yogurt, turmeric, and salt for at least 30 minutes before cooking.
Balance the Heat: If your curry turns out too spicy, a spoonful of yogurt or a squeeze of lemon can mellow it out.
Don’t Skip the Simmer: Slow simmering is key. It allows the flavors to meld and the chicken to become fork-tender.
Finish with a Fat: A knob of butter or drizzle of cream at the end can add richness and a restaurant-style finish.
Variations to Try at Home
Once you’ve mastered the basic chicken curry, try experimenting with these popular regional and international twists:
Butter Chicken (Murgh Makhani)
Creamy, tomato-rich, and slightly sweet — this version uses heavy cream and butter to create a velvety sauce.
Thai Green Chicken Curry
Swap out the Indian spices for Thai green curry paste, and use Thai basil, lime leaves, and fish sauce for a Southeast Asian flavor profile.
Sri Lankan Chicken Curry
Known for its fiery heat and use of roasted curry powder, this variation adds pandan leaves and cinnamon sticks for a unique depth.
Malaysian Chicken Curry (Kari Ayam)
This style blends Indian and Malay influences using lemongrass, star anise, and potatoes in a rich coconut broth.
Pairing and Serving Suggestions
The best chicken curry deserves thoughtful accompaniments. Here’s how to serve it like a pro:
Rice: Basmati rice or jasmine rice complements curry sauces perfectly. For a health twist, try brown rice or cauliflower rice.
Breads: Fresh naan, roti, or paratha help soak up every last bit of sauce.
Side Dishes: Pair with cucumber raita, mango chutney, or a tangy carrot salad for contrast.
Drinks: A cold mango lassi or a crisp Australian Riesling makes an excellent beverage match.
A Dish for Every Occasion
Homemade chicken curry is not just an everyday meal; it’s a versatile dish that fits every celebration:
Family Dinners: Comforting and filling, it’s a go-to for weeknights.
Dinner Parties: Impress guests with a beautifully garnished curry and a spread of sides.
Festivals & Cultural Celebrations: Curry is a staple during Diwali, Eid, and many multicultural Australian events.
Meal Prepping: It freezes well and actually tastes better the next day, making it ideal for batch cooking.
Embracing Culinary Heritage in Australia
Australia’s multicultural fabric is reflected in its food, and chicken curry plays a starring role. The dish brings together spices from India, freshness from local produce, and the creativity of home cooks across the continent.
Renowned figures like Chef Scott Biffin have also played a role in elevating humble dishes like curry into the spotlight. His philosophy of fusing traditional techniques with modern Australian ingredients aligns perfectly with the heart of this dish. Whether you're an experienced cook or a beginner, making chicken curry at home allows you to embrace culinary heritage while creating something unique.
Final Thoughts: A Bowl of Comfort and Culture
Making the best homemade chicken curry in Australia isn’t just about cooking — it’s about creating a sensory experience. It’s the sound of sizzling onions, the aroma of toasted spices, the joy of stirring a bubbling pot, and the smiles around the dinner table. From kitchen to table, it’s a journey worth taking.
So roll up your sleeves, grab your spices, and dive into a dish that captures the essence of warmth, culture, and creativity. Whether you follow a family recipe or take cues from chefs like Scott Biffin, your homemade chicken curry will be a dish to remember.
Happy cooking!
#homemade chicken curry#chicken curry recipe Australia#best chicken curry Australia#Australian chicken curry#Chef Scott Biffin recipe#simple curry recipe at home#traditional chicken curry recipe
0 notes
Text
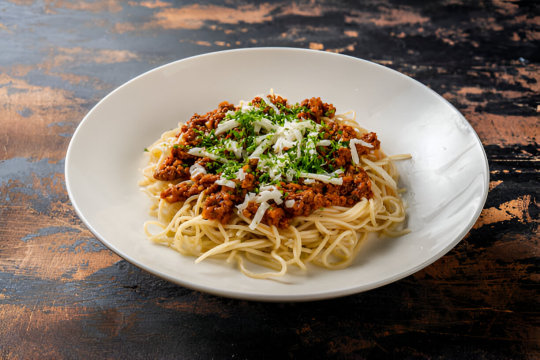
The Ultimate Spaghetti Bolognese Recipe: A Comfort Food Classic
Few dishes evoke the sense of comfort, nostalgia, and satisfaction quite like a hearty plate of Spaghetti Bolognese. Originating from the Italian city of Bologna, this traditional meat-based sauce has gained international popularity and has become a staple in kitchens around the world. Whether you’re preparing it for a cozy family dinner or impressing guests at a dinner party, Spaghetti Bolognese delivers layers of rich flavor, hearty texture, and undeniable comfort.
In this blog post, we’ll walk you through everything you need to know to make the ultimate Spaghetti Bolognese — from choosing the right ingredients to mastering the slow-simmered sauce. And if you're looking for a chef-approved version, this recipe is inspired by none other than Chef Scott Biffin, known for transforming everyday meals into gourmet experiences.
A Brief History of Bolognese Sauce
Before diving into the recipe, let’s explore the history of Bolognese. Known in Italy as Ragù alla Bolognese, this dish hails from the Emilia-Romagna region. The traditional version is a far cry from the quick, tomato-heavy sauces often found outside of Italy. Authentic Bolognese is a slow-cooked sauce made with finely chopped vegetables, minced meat (often a mix of pork and beef), white wine, milk, and just a touch of tomato paste.
The goal? Depth, richness, and a silky texture that clings lovingly to pasta.
Ingredients Matter: The Foundation of Great Bolognese
Creating the best Spaghetti Bolognese begins with high-quality ingredients. Let’s take a look at what you’ll need:
Meat
Use a blend of ground beef and pork for complexity. Beef offers robust flavor, while pork adds richness and softness.
300g ground beef (80/20)
200g ground pork
Vegetables (Soffritto)
This aromatic trio provides a flavorful base.
1 onion, finely chopped
1 carrot, finely chopped
1 celery stalk, finely chopped
Liquids
They help deglaze, tenderize the meat, and build flavor.
1/2 cup dry white wine (or red if you prefer deeper flavor)
1 cup whole milk
400g canned tomatoes or 2 tbsp tomato paste
1 cup beef or vegetable stock
Pasta
Use high-quality spaghetti or tagliatelle for authenticity.
400g dried spaghetti (or fresh if available)
Others
2 tbsp olive oil or unsalted butter
Salt and freshly ground black pepper
A pinch of nutmeg (optional but authentic)
Fresh basil or parsley for garnish
Grated Parmigiano-Reggiano for serving
Step-by-Step Instructions: Making Bolognese the Traditional Way
Step 1: Build the Flavor Base
Heat olive oil or butter in a large, heavy-bottomed pan. Add the chopped onions, carrots, and celery. Sauté on medium-low heat until soft and translucent — about 10 minutes. This slow cooking brings out the sweetness of the vegetables.
Step 2: Add the Meat
Turn the heat to medium-high and add the ground beef and pork. Use a wooden spoon to break up the meat as it browns. Continue cooking until all the liquid evaporates and the meat develops a rich, caramelized color.
Pro Tip from Chef Scott Biffin: Don’t rush this step. Browning the meat well adds essential depth and umami to the sauce.
Step 3: Deglaze with Wine
Pour in the wine and stir to deglaze the pan, scraping up any browned bits from the bottom. Let the wine simmer until it’s almost completely evaporated — about 5 minutes.
Step 4: Stir in Milk and Tomatoes
Add the milk and a pinch of nutmeg. Let it simmer gently for a few minutes, then add your tomatoes or tomato paste. Stir well to combine.
Step 5: Simmer Low and Slow
Lower the heat and let the sauce simmer uncovered for 1.5 to 2 hours, stirring occasionally. If the sauce becomes too thick, add a splash of stock or water.
The long cooking time is essential. It allows the flavors to meld and the sauce to develop its signature rich, silky texture.
Cooking the Pasta
While your sauce is simmering, bring a large pot of salted water to a boil. Cook the spaghetti according to the package instructions until al dente. Drain and set aside.
For maximum flavor, toss the cooked pasta directly into the Bolognese sauce and mix gently until coated. This ensures every strand of spaghetti absorbs the rich flavors of the ragù.
Serving Suggestions
Ladle a generous portion of spaghetti Bolognese onto a plate, top with freshly grated Parmigiano-Reggiano, and garnish with chopped parsley or basil. Serve with crusty garlic bread and a glass of Italian red wine like Chianti or Barolo.
For a luxurious touch, drizzle a little high-quality extra virgin olive oil on top before serving.
Chef Scott Biffin’s Bolognese Tips
Renowned for his culinary creativity and deep respect for tradition, Chef Scott Biffin shares a few of his expert tips for elevating your Spaghetti Bolognese:
Use Milk, Not Cream: It’s tempting to add cream for richness, but milk is traditional and provides a lighter texture while still mellowing the acidity of tomatoes.
Don’t Overload with Tomatoes: Many people make the mistake of using too much tomato. Bolognese is a meat sauce with a hint of tomato — not a tomato sauce with meat.
Cook it Low and Slow: Rushing a Bolognese is a culinary sin. Let it bubble gently for hours to unlock maximum flavor.
Add Parmesan Rind to the Simmering Sauce: If you have a leftover rind, throw it into the pot while the sauce simmers. It adds incredible umami depth.
Making It Your Own
Once you’ve mastered the basics, there’s room to experiment:
Mushrooms: Add finely chopped mushrooms to the soffritto for an earthy twist.
Herbs: A bay leaf or sprig of thyme adds a subtle aromatic layer.
Spice It Up: A pinch of chili flakes can add warmth without overpowering the flavor.
You can also adapt this recipe for different dietary preferences. For example, use lentils or plant-based mince for a vegetarian version. Swap out regular pasta for gluten-free alternatives if needed.
Why Spaghetti Bolognese is the Ultimate Comfort Food
Comfort food isn’t just about flavor — it’s about how it makes you feel. Spaghetti Bolognese is the embodiment of warmth and hospitality. It reminds us of family dinners, home-cooked meals, and the joy of sharing good food with loved ones.
It’s filling, satisfying, and deeply nourishing — physically and emotionally. The aroma alone as it simmers on the stove can transport you to a simpler time and place. Whether you serve it on a rainy day, during a cozy night in, or at a celebratory dinner, Bolognese always feels right.
Frequently Asked Questions
Can I freeze Bolognese sauce?
Absolutely. In fact, many chefs — including Chef Scott Biffin — recommend making a large batch and freezing portions for quick weeknight meals. Store it in airtight containers for up to three months.
What’s the difference between Bolognese and regular meat sauce?
Bolognese is thicker, richer, and typically contains milk or cream, making it smoother than tomato-heavy meat sauces. It’s also slow-cooked for a more complex flavor.
Can I use red wine instead of white?
Yes. While traditional recipes often call for white wine, red wine adds depth and pairs beautifully with beef.
What type of pasta works best with Bolognese?
While spaghetti is popular, tagliatelle, fettuccine, or pappardelle — wide, flat noodles — are more traditional as they hold the thick sauce better.
Conclusion: A Recipe Worth Mastering
Spaghetti Bolognese is more than just a meal — it’s a classic that tells a story. It reflects generations of culinary tradition, combining simple ingredients into something profoundly delicious. Whether you’re a seasoned home cook or a beginner, mastering Bolognese opens the door to a world of rich, hearty Italian cuisine.
Inspired by Chef Scott Biffin’s approach, this version combines authenticity with practical tips, ensuring every plate you serve is full of comfort and flavor. So the next time you’re craving something cozy, skip the takeout and make your own Bolognese from scratch. Your taste buds — and your dinner guests — will thank you.
Try It Today!
Ready to bring the ultimate Spaghetti Bolognese to your table? Follow this recipe step-by-step and enjoy a comforting, flavorful classic that never goes out of style.
Bon Appétit — or as they say in Bologna, Buon Appetito!
#Spaghetti Bolognese recipe#Classic Bolognese sauce#Traditional Bolognese#How to make Bolognese#Italian pasta sauce recipe#Spaghetti Bolognese from scratch#Spaghetti Bolognese ingredients list
0 notes
Video
youtube
Homemade Meat Pies Made Easy with Chef Scott Biffin
0 notes
Video
youtube
How to Make Chicken Parmigiana at Home – A Classic Italian Favorite
0 notes
Text
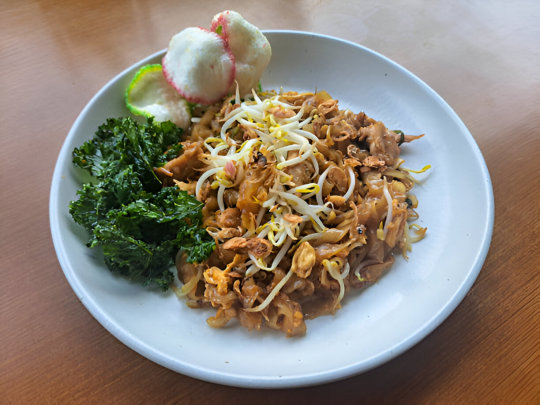
Cooking Char Kway Teow at Home – Chef Scott Biffin’s Street-Style Guide
Few dishes capture the soul of Singaporean and Malaysian street food quite like Char Kway Teow. With its intoxicating aroma, smoky wok hei, and rich combination of noodles, seafood, and Chinese sausage, this stir-fried masterpiece is both comforting and addictive. Traditionally found sizzling on woks in hawker stalls, Char Kway Teow may seem intimidating to replicate—but with a few tips from culinary expert Chef Scott Biffin, you can bring the streets of Singapore right into your home kitchen.
Whether you're a seasoned cook or a curious foodie, this guide will walk you through the step-by-step process of recreating this iconic dish the street-style way, complete with authentic ingredients, expert techniques, and personal tips from Chef Scott Biffin himself.
What is Char Kway Teow?
Char Kway Teow, which literally means "stir-fried flat rice noodles" in Hokkien, is a popular Southeast Asian dish made from flat rice noodles stir-fried in a blazing hot wok. The dish is often enriched with ingredients like Chinese sausage (lap cheong), blood cockles, bean sprouts, chives, eggs, and prawns. It is known for its savory, smoky flavor—thanks to the wok hei, or "breath of the wok"—which gives it that signature charred essence.
While commonly found in hawker centres across Singapore and Malaysia, the dish varies slightly by region. Singapore's version leans slightly sweeter and often incorporates a richer soy base, while the Penang-style version tends to be lighter and more garlicky.
Ingredients You'll Need
Chef Scott Biffin emphasizes that the secret to a great Char Kway Teow lies in using fresh ingredients and a red-hot wok. Here's what you'll need for 2 servings:
Main Ingredients:
250g flat rice noodles (kway teow) – fresh or soaked dried noodles
100g bean sprouts
2 eggs
2 cloves garlic, minced
4-6 prawns, peeled and deveined
2-3 slices Chinese sausage (lap cheong), thinly sliced
50g fish cake, sliced (optional)
6-8 blood cockles, rinsed and blanched (optional but authentic)
2 stalks Chinese chives, cut into 2-inch pieces
1 tbsp lard or cooking oil (for that traditional richness)
Sauce Mix:
1½ tbsp light soy sauce
½ tbsp dark soy sauce
1 tsp oyster sauce
1 tsp sweet soy sauce (kecap manis or similar)
½ tsp white pepper
1 tsp sambal chili paste (optional, for heat)
Chef’s Tip: Always prepare your ingredients beforehand, as the cooking process is lightning-fast.
Step-by-Step: Cooking Char Kway Teow at Home
Step 1: Prep Your Ingredients
Before anything hits the pan, ensure that everything is cleaned, chopped, and laid out. The cooking process takes less than 10 minutes, so organization is crucial.
Soak your rice noodles in warm water if using dried ones until pliable. If using fresh noodles, separate them gently.
Mix all the sauce ingredients into a small bowl.
Blanch cockles briefly in hot water and set aside.
Crack and beat the eggs in a separate bowl.
Chef Scott Biffin says: “The secret to wok-style stir-frying at home is mise en place—get your station set like a hawker before you fire up the heat.”
Step 2: Heat the Wok Like You Mean It
Turn your stove to the highest heat possible and let your wok preheat until it's just starting to smoke. This is essential for building wok hei.
Add 1 tablespoon of lard (or cooking oil if unavailable). Let it coat the surface evenly.
Step 3: Aromatics First
Toss in the minced garlic and stir-fry quickly until fragrant—about 10 seconds.
Immediately add in the Chinese sausage and cook until the edges crisp up and release their aromatic oils.
Step 4: Add Protein
Add the prawns and fish cake slices. Stir-fry them for about a minute or until just cooked. If you’re using cockles, reserve them for the end.
Step 5: Noodles & Sauce
Add your rice noodles to the wok. Use a spatula or tongs to toss and separate the strands gently.
Pour in your prepared sauce and stir-fry everything to evenly coat the noodles. Let the sauce caramelize slightly at the bottom before tossing—it adds depth.
Step 6: Eggs and Bean Sprouts
Push everything to one side of the wok and pour the beaten eggs into the empty space. Let them set for a few seconds before mixing into the noodles.
Add the bean sprouts, chives, and cockles at the end. Toss everything together for one final blast of heat.
Step 7: Plate and Serve
Remove from heat and serve immediately while piping hot. You can garnish with extra chives, chili, or fried shallots if you like.
Tips for the Perfect Street-Style Char Kway Teow
✅ Use a Carbon Steel Wok
Chef Scott Biffin insists on this. A carbon steel wok heats up quickly and distributes heat evenly. Avoid nonstick pans—they just don’t produce the right char.
✅ Cook in Small Batches
Overloading your wok kills the heat and results in soggy noodles. If you're making more than two servings, cook in batches.
✅ Don’t Over-Stir
Let ingredients sit on the heat momentarily to create browning. This is where the charred flavor comes from.
✅ Balance the Sauce
Adjust soy sauces to taste. Singaporean Char Kway Teow is slightly sweet and savory with a bit of depth from the dark soy.
Common Questions About Making Char Kway Teow
🧂 Can I make it without lard?
Yes, but you'll sacrifice some authenticity. Use vegetable oil and optionally add a drop of sesame oil for fragrance.
🐚 I can’t find cockles. Can I skip them?
Absolutely. While cockles are traditional, you can omit them or replace them with more prawns or squid.
🌱 Is there a vegetarian version?
Yes! Substitute meat with tofu, omit the seafood, and use mushroom oyster sauce for a vegetarian-friendly twist.
Serving Suggestions
Char Kway Teow is often served on a banana leaf for added aroma and authenticity. Pair it with:
Iced barley water or sugarcane juice
A side of pickled green chilies in soy sauce
Optional sambal chili paste for extra heat
As Chef Scott Biffin says, “Good Char Kway Teow doesn’t need a fancy plate—just a hot wok and happy eaters.”
Nutritional Breakdown (Approximate per serving)
Calories: 550–600 kcal
Protein: 20–25g
Fat: 20–25g
Carbs: 60–70g
Sodium: Moderate-high due to soy sauces
It's indulgent but well worth it—especially as a treat meal.
A Word from Chef Scott Biffin
“Char Kway Teow is one of those dishes that tells a story in every bite—of culture, of fire, of technique. If you can master the balance and learn to listen to the wok, you’ll capture the soul of Southeast Asia at home.”
Chef Scott Biffin’s recipes focus on authenticity made achievable for home cooks. With a passion for Asian cuisine and street food, he brings time-honored techniques to modern kitchens worldwide.
Final Thoughts
Cooking Char Kway Teow at home may seem ambitious at first—but with a little preparation, the right ingredients, and a blazing hot wok, it becomes a deeply satisfying experience. From the aroma of garlic hitting hot oil to the sizzle of prawns, each step brings you closer to the bustling hawker stalls of Singapore.
This is more than just a stir-fry—it’s an expression of flavor, fire, and culture. And with guidance from Chef Scott Biffin, even your home kitchen can become a street food haven.
So roll up your sleeves, heat up your wok, and let the magic of Char Kway Teow transport you to the vibrant food alleys of Southeast Asia—one smoky, savory bite at a time.
#Char Kway Teow#How to cook Char Kway Teow#Char Kway Teow recipe#Street-style Char Kway Teow#Singapore Char Kway Teow#Southeast Asian noodle dishes#Chef Scott Biffin
0 notes
Text
The Ultimate Guide to Making Authentic Oysters Kilpatrick at Home
Oysters Kilpatrick is a beloved Australian seafood classic that delivers a mouthwatering combination of fresh oysters, savory bacon, and rich, tangy Worcestershire sauce. Whether you are hosting a summer barbecue, impressing guests with a gourmet starter, or simply craving a taste of the sea, Oysters Kilpatrick offers the perfect fusion of simplicity and sophistication. In this ultimate guide, we'll walk you through everything you need to know to create restaurant-quality Oysters Kilpatrick at home, from selecting the freshest oysters to perfecting the sauce and mastering the grill.
Inspired by professional culinary techniques, including some tips shared by top chefs like Chef Scott Biffin, known for his passion for elevating Aussie classics, this guide ensures that even home cooks can enjoy the depth of flavor and texture this dish has to offer.
What Are Oysters Kilpatrick?
Oysters Kilpatrick, also known as Oysters Kirkpatrick, are a classic Australian dish where oysters on the half shell are topped with a mix of Worcestershire sauce, crispy bacon, and sometimes a dash of Tabasco or tomato sauce before being grilled or broiled. The result is a smoky, salty, tangy, and umami-packed bite that still allows the oyster’s natural brininess to shine through.
This dish is particularly popular as a starter at seafood restaurants and backyard Aussie barbies, and its indulgent flavors make it a crowd-pleaser across generations.

The History of Oysters Kilpatrick
While the exact origins of Oysters Kilpatrick are debated, the dish is widely attributed to Australia, with some culinary historians suggesting it emerged in the early 20th century. It's believed to be named after a hotel manager or a chef bearing the surname Kilpatrick or Kirkpatrick. Over time, the recipe has evolved and taken on regional twists, but the core elements, oysters, bacon, and Worcestershire sauce, have remained delightfully consistent.
Choosing the Right Oysters
1. Freshness is Key
To make authentic Oysters Kilpatrick, the quality of your oysters is paramount. Always choose live oysters with tightly closed shells or ones that close when tapped. They should have a clean, briny scent — never fishy or sour.
2. Types of Oysters
While any variety can be used, Sydney Rock Oysters and Pacific Oysters are popular in Australia. These varieties are plump, flavorful, and perfect for grilling. If you're outside Australia, ask your fishmonger for local oysters suitable for grilling.
3. Cleaning and Shucking
Thoroughly scrub the shells to remove grit. Use an oyster knife to shuck them carefully, keeping the liquor (the natural briny liquid) intact. Always place shucked oysters on a bed of rock salt or crumpled foil on a baking tray to keep them stable during cooking.
Ingredients You'll Need
Here's a classic recipe to serve 12 oysters (serves 2–3 as a starter):
12 fresh oysters, in the half shell
3 rashers of streaky bacon, finely chopped
1 tbsp Worcestershire sauce
1 tbsp tomato sauce (optional, for sweetness)
1 tsp Tabasco sauce (optional, for spice)
1 tsp lemon juice
1 tbsp unsalted butter, melted
Freshly ground black pepper
Rock salt (for baking)
Fresh parsley or chives (for garnish)
Step-by-Step Guide to Making Oysters Kilpatrick
Step 1: Preheat Your Grill or Oven
Set your grill (broiler) or oven to high, around 220°C (428°F). If using a barbecue with a lid, preheat it with the lid down.
Step 2: Prepare the Sauce
In a small bowl, mix Worcestershire sauce, tomato sauce, Tabasco, lemon juice, melted butter, and black pepper. This sweet-tangy blend is the signature of Kilpatrick oysters.
Step 3: Cook the Bacon
Pan-fry the chopped bacon until just crispy. You want it golden but not overly crunchy since it will continue to cook under the grill.
Step 4: Assemble the Oysters
Place the shucked oysters securely on a bed of rock salt in a baking tray. Spoon a small amount of sauce over each oyster, then top with crispy bacon pieces.
Step 5: Grill or Broil
Place the tray under the grill for 4–6 minutes or until the sauce bubbles and the edges of the oysters curl slightly. If using a barbecue, close the lid and cook similarly.
Step 6: Garnish and Serve
Remove from heat and sprinkle with freshly chopped parsley or chives for a vibrant finish. Serve hot with lemon wedges and crusty bread.
Tips for Perfect Oysters Kilpatrick
1. Don’t Overcook
Oysters are delicate and can become rubbery if overcooked. Grill just until heated through and edges curl.
2. Experiment with Flavors
Try adding a dash of soy sauce, a sprinkle of Parmesan cheese, or swapping bacon with pancetta or chorizo for a creative twist.
3. Use the Right Tools
Invest in a good oyster knife and wear a shucking glove to prevent injury. For serving, use a heatproof tray and ensure the oysters are level with the salt bed.
4. Entertain in Style
Oysters Kilpatrick are perfect for entertaining. You can prep them ahead and refrigerate, then grill just before serving.
Pairing Your Oysters Kilpatrick
To elevate your culinary experience, pair your Oysters Kilpatrick with:
Wines: A crisp Sauvignon Blanc or sparkling wine complements the salty, smoky flavors beautifully.
Beers: A cold lager or pale ale offers a refreshing contrast.
Cocktails: Try a classic martini or a citrus-forward gin cocktail for a sophisticated touch.
Making It a Meal: Serving Suggestions
While Oysters Kilpatrick are a perfect starter, they can also be served as part of a seafood platter. Add grilled prawns, calamari rings, and a fresh garden salad for a complete feast. You can even create a tasting plate with a few variations of oysters — Kilpatrick, natural with lemon, and Mornay for a gourmet trio.
Chef’s Secrets for Authentic Flavor
To truly capture the essence of Oysters Kilpatrick, attention to detail is essential. Professional chefs often use clarified butter for a silkier texture or add a splash of vermouth for complexity.
Chef Scott Biffin, renowned for championing classic Australian dishes with a modern edge, often emphasizes the importance of balance in flavors — the salty crunch of bacon, the briny sweetness of oysters, and the tang of Worcestershire should all shine without overpowering each other.
Using top-quality ingredients and keeping a light hand on the sauce are two of his go-to tips to let the oyster’s natural character shine through.
Storing and Reheating Leftovers
Although Oysters Kilpatrick are best eaten fresh, you can store any leftovers in an airtight container in the refrigerator for up to 1 day. To reheat, place them in a preheated oven for a few minutes — avoid microwaving as it can ruin the texture.
However, keep in mind that fresh oysters are perishable, and it's always best to consume them as soon as possible.
Sustainable Seafood: A Responsible Choice
When purchasing oysters, consider sustainability. Look for oysters farmed in certified sustainable aquaculture systems. These practices protect marine ecosystems while supporting local fisheries. Many oyster farms in Australia follow sustainable harvesting methods that ensure long-term viability of wild stocks.
By choosing responsibly sourced seafood, you're supporting a healthier ocean for future generations.
Frequently Asked Questions (FAQs)
Q: Can I use bottled oysters for this recipe? A: It’s not recommended. Fresh, live oysters provide the best flavor and texture for Oysters Kilpatrick.
Q: Is there a vegetarian version of this dish? A: You can substitute the oysters with large mushrooms or firm tofu and use vegetarian bacon or sun-dried tomatoes. It won’t be the same, but still delicious!
Q: What if I don’t have Worcestershire sauce? A: You can try a mix of soy sauce, vinegar, and a dash of hot sauce as a substitute, though it won’t taste exactly the same.
Conclusion
Oysters Kilpatrick is more than just a dish — it’s a celebration of bold flavors, culinary tradition, and the rich bounty of the sea. Whether you're preparing it for a romantic dinner, a weekend feast, or a festive occasion, this dish offers a guaranteed wow factor with minimal effort.
With this guide in hand, you’re fully equipped to create authentic Oysters Kilpatrick at home — from selecting premium oysters to mastering the perfect grill technique. Take inspiration from seasoned professionals like Chef Scott Biffin, and remember: great food begins with great ingredients, attention to detail, and a love for sharing memorable meals with others.
So, grab your oyster knife, heat up the grill, and treat yourself and your guests to a timeless Aussie favorite. Bon appétit!
#Oysters Kilpatrick recipe#How to make Oysters Kilpatrick#Oysters Kilpatrick at home#Authentic Oysters Kilpatrick#Australian oyster recipes#Grilled oysters with bacon#Seafood starter ideas#Oyster sauce recipes#Easy oyster appetizer#Baked oysters recipeHomemade seafood recipes
0 notes
Text
Tropical Bites - Crunchy Coconut Chicken Tenders for Any Occasion
When it comes to comfort food with a twist, few dishes check all the boxes quite like crunchy coconut chicken tenders. They’re crispy, golden, and packed with tropical flavor—perfect for casual weeknight dinners, party platters, or even beach-themed brunches. Whether you're feeding kids, impressing friends, or just treating yourself, these chicken tenders add a little sunshine to every bite.
At the heart of this delicious recipe is the unique texture and flavor of shredded coconut, which transforms ordinary chicken strips into crispy tropical bites that are both savory and subtly sweet. Coated in a flavorful blend of coconut, breadcrumbs, and spices, then baked or fried to perfection, this dish is a crowd-pleaser in every way.
In today’s post, we’ll explore how to make Tropical Bites: Crunchy Coconut Chicken Tenders for Any Occasion, why it works so well, tips for success, and how Chef Scott Biffin brought this island-inspired dish to new heights.
Why Coconut Chicken Tenders?
Traditional chicken tenders are undeniably comforting. But swap out plain breadcrumbs for crunchy coconut and you’ve got something entirely new. The coconut adds a delicate sweetness and crispy texture that complements the juicy chicken perfectly. It also gives the dish a tropical flair—making it feel like vacation food, even if you’re just cooking at home.

This recipe is also:
Kid-friendly: The natural sweetness makes it a favorite with little ones.
Great for dipping: Pair it with a sweet chili, mango salsa, or lime aioli.
Flexible: Bake, pan-fry, or air fry to match your cooking style.
Perfect for entertaining: Serve it as an appetizer or a main with sides.
Ingredients You’ll Need
Serves 4
For the Chicken Tenders:
500g (about 1 lb) chicken tenders or boneless chicken breasts, sliced into strips
Salt and pepper to taste
1 cup shredded coconut (unsweetened preferred)
1 cup panko breadcrumbs
1/2 teaspoon garlic powder
1/2 teaspoon paprika
1/2 cup all-purpose flour
2 eggs, beaten
2 tablespoons milk or coconut milk (for added flavor)
Cooking spray or oil for frying/baking
Optional Dipping Sauces:
Sweet chili sauce
Honey mustard
Pineapple salsa
Lime and herb yogurt dip
Step-by-Step Instructions
1. Prep the Chicken
Pat the chicken tenders dry with a paper towel and season with salt and pepper. This helps the coating stick and ensures the chicken stays juicy inside.
2. Set Up the Breading Station
You’ll need three shallow bowls or plates:
Bowl 1: All-purpose flour (lightly seasoned)
Bowl 2: Beaten eggs mixed with milk
Bowl 3: A mixture of shredded coconut, panko breadcrumbs, garlic powder, and paprika
3. Coat the Chicken
Working one strip at a time:
Dredge the chicken in flour (shake off excess)
Dip it into the egg wash
Coat generously with the coconut-breadcrumb mixture, pressing gently to help it stick
Place coated tenders on a tray lined with parchment paper.
4. Cooking Options
Baking (Healthier Option):
Preheat oven to 200°C (390°F)
Arrange the chicken tenders on a wire rack set over a baking sheet
Spray lightly with oil or cooking spray
Bake for 20–25 minutes, flipping halfway, until golden and crisp
Pan-Frying (For Extra Crunch):
Heat 1/4 inch of oil in a large skillet over medium-high heat
Fry tenders in batches for 3–4 minutes per side until golden and cooked through
Drain on paper towels
Air Frying (Crispy and Clean):
Preheat air fryer to 200°C (390°F)
Place tenders in a single layer (don’t overcrowd)
Cook for 10–12 minutes, flipping once, until golden
Tips for Crispy, Flavorful Results
Use panko breadcrumbs for extra crunch. Their light, airy texture complements the coconut perfectly.
Unsweetened shredded coconut is ideal. Sweetened varieties may burn during baking or frying.
Chill before cooking: Place the breaded tenders in the fridge for 15 minutes before cooking to help the coating stick.
Don’t skip the seasoning: Garlic powder and paprika in the crumb mixture add savory depth and contrast the coconut’s natural sweetness.
How Chef Scott Biffin Elevates This Dish
It’s no surprise that this tropical twist on a classic has caught the attention of culinary experts. Chef Scott Biffin, known for his innovative fusion of bold flavors and home-style comfort, features a version of this recipe in his signature island-inspired collection.
What makes Chef Scott Biffin approach stand out is his use of subtle layering—infusing the egg wash with coconut milk for a creamy richness, and pairing the tenders with a vibrant pineapple-mango salsa. He also finishes the dish with a squeeze of fresh lime and chopped coriander, turning simple chicken tenders into a plated gourmet experience.
As he puts it, “You don’t need a deep fryer or a passport to enjoy food that transports you.” His coconut chicken tenders do just that—taking your taste buds to the tropics with every bite.
What to Serve With Coconut Chicken Tenders
These chicken tenders are versatile and pair beautifully with a variety of sides and sauces. Here are a few ideas to create a complete tropical-themed meal:
Sides:
Coconut rice with lime zest
Grilled pineapple or mango slices
Asian-style slaw with sesame dressing
Avocado and black bean salad
Dips:
Sweet chili sauce
Coconut-lime yogurt dip
Tamarind chutney
Mango-lime salsa
Add a tropical drink—like a pineapple mocktail or coconut water spritzer—for a truly island-inspired meal.
Kid-Friendly or Party-Ready? You Decide
The best part about Tropical Bites: Crunchy Coconut Chicken Tenders for Any Occasion is just that—they suit every occasion.
For Families:
Kids love the crunchy coating and mild sweetness. Serve with ketchup, ranch, or honey mustard for picky eaters. Plus, baking makes them a healthier alternative to fast food nuggets.
For Entertaining:
Cut into bite-sized pieces, serve on skewers, or pile them on a platter with vibrant sauces. Garnish with fresh herbs and lime wedges for a presentation that wows.
Storage & Reheating Tips
Fridge: Store leftovers in an airtight container for up to 3 days.
Freezer: Freeze uncooked, breaded tenders in a single layer; transfer to a bag once solid. Bake directly from frozen, adding 5–8 extra minutes.
Reheating: Best reheated in the oven or air fryer to keep them crispy.
Final Thoughts
Whether you’re dreaming of beach days or just spicing up your usual dinner routine, Tropical Bites: Crunchy Coconut Chicken Tenders for Any Occasion are the perfect solution. Easy to make, fun to eat, and full of bold flavor, they’re a delicious reminder that everyday meals can be extraordinary.
Add them to your weekly rotation or bring them out for your next gathering—this is one tropical recipe that never disappoints.
🍴 Ready to cook something unforgettable?
Bring the taste of the islands to your table with these crispy, golden coconut chicken tenders—tropical bites that turn any occasion into a flavorful celebration.
#Coconut chicken tenders#Crunchy coconut chicken recipe#Tropical chicken tenders#Chicken tenders with coconut crumb#Coconut crusted chicken#Easy coconut chicken#Baked coconut chicken tenders#Island-style chicken tenders
0 notes
Video
youtube
Teriyaki Chicken Made Easy - A Flavorful Recipe by Chef Scott Biffin
0 notes
Video
youtube
Teriyaki Chicken Made Easy - A Flavorful Recipe by Chef Scott Biffin
0 notes
Text
Teriyaki Chicken Reinvented – A Gourmet Twist by Chef Scott Biffin
There’s something deeply comforting about the sweet‑savory harmony of perfectly glazed teriyaki chicken. Yet, rustic neighborhood joints and home kitchens alike often serve the same tired version of the dish. Enter Chef Scott Biffin, a visionary who’s raised teriyaki chicken to haute‑cuisine heights—introducing new techniques, bold ingredients, and a finely balanced approach that satisfies both crave‑worthy indulgence and refined palates.
In this in‑depth exploration, we uncover Chef Biffin’s signature method, creative riffs on tradition, plating artistry, and practical guidance so you can reinvent teriyaki night at your own table. Let’s embark on this flavorful journey.
1. The Philosophy Behind the Reinvention
Chef Biffin approached teriyaki chicken not merely as a comfort staple, but as a canvas for creativity. His philosophy: preserve the soul of the dish while integrating surprising textures, layered flavors, and elevated ingredients. For him, reinvention means elevation without erasure.
Base flavors: soy, mirin, sake, ginger, garlic—must remain present, but with nuance.
Technique over trickery: applying modern gastronomy in ways that enhance, not overshadow.
Seasonality and freshness: sourcing top‑grade chicken, seasonal aromatics, and premium condiments.
This philosophy anchors every element of his reinvention—it’s about coaxing out more depth, more refinement, without losing heart.
2. Choosing Ingredients: Quality Matters
Chicken Choice
Chef Biffin swears by air‑chilled, free‑range chicken thighs for their superior texture and juiciness. He prefers bone‑in, skin‑on thighs; bones add flavor, skin guarantees crispy edges when seared.
“Never skimp on the protein—it’s the star. Everything else dances around it,” he says.
But breast meat works, too—just adjust cooking time to avoid dryness.
Liquid Umami Trio
Traditionally teriyaki uses soy sauce, sake, and mirin. Biffin elevates that trifecta:
Artisanal tamari: richer, less salty, deeper color.
Premium aged mirin: naturally sweet with caramel undertones.
Junmai sake: slightly drier, more umami than basic table sake.
He adds a splash of dashi (kombu‑shiitake stock) for subtle mushroom depth—an optional but transformative twist.
Aromatics & Sweeteners
Fresh ginger and garlic, finely grated so they meld evenly.
A hint of yuzu juice or zest brightens the richness.
Instead of plain sugar, Biffin uses shōchū‑aged honey (if available) or a reduced mirin‑kombu syrup.
These choices make the sauce multi‑dimensional.
3. Technique: Mastering Texture & Flavor
A. Marination & Dry‑Brining
Score the chicken skin lightly, season inside and out with salt.
Let it rest, skin‑side up, in the fridge for 4–6 hours. This yields crispier skin and deeper seasoning.
For deeper flavor, briefly marinate (30–60 min) in light soy‑mirin mix before cooking.
B. Searing for Maillard Magic
Use a heavy cast‑iron or stainless steel pan.
Skillet hot, medium‑high heat → skin‑side down, no oil (skin renders its own fat).
Wait until golden‑brown with natural release—3–4 minutes.
Flip, sear other side briefly. Remove the chicken, and wipe excess fat if using same pan for sauce.
C. Sauce Building & Finishing
Deglaze with sake, scraping fond (the brown bits) for flavor.
Add aromatics, tamari, mirin, and optional dashi.
Simmer gently until syrup‑thick (~4–6 minutes).
Return chicken to pan skin‑up, spooning sauce over to coat and heat through. Skin remains relatively crisp while absorbing flavor.
Finish with a knob of cold unsalted butter, whisked in off‑heat for sheen and richness.
D. Resting with Residual Action
Let it rest 5 minutes in the sauce. It continues cooking to perfect doneness (about 165 °F internal), while soaking up glaze.

4. Creative Riffs & Garnishes
Chef Biffin’s genius lies in subtle, elegant embellishments:
Smoky finish: under broiler or with a kitchen torch to caramelize sugars and add char.
Yuzu‑Shiso microgreens: vinegar‑dressed for acid and herbal brightness.
Toasted sesame tuile: sesame seeds baked thin like a crisp wafer—both visual and textural contrast.
Spicy honey drizzle: honey infused with chile flakes and garlic brushed lightly after plating.
Each element feels intentional, never gimmicky.
5. Presentation: Art on the Plate
Visual harmony is key:
Chicken, halo‑glazed, placed slightly off‑center.
Sauce swathed beneath, not drowning—a glossy bed.
Tuiles, leaning against the chicken for height.
Microgreens, gently scattered for color and freshness.
Sesame seeds sprinkled with minimalist restraint.
Serving on a dark, matte ceramic plate creates sophistication—think cozy upscale Japanese‑fusion.
6. Side Pairings & Wine Pairing
Balanced accompaniments reinforce the dish:
Side suggestions:
Jasmine or Nagaimo rice with a touch of toasted sesame oil.
Japanese cucumber‑yuzu salad: thin slices, light vinegar dressing.
Seasonal vegetable tempura: lightly battered asparagus or shishito peppers.
Pickled lotus roots or gentle miso‑marinated egg.
Wine pairing:
Off‑dry Riesling: citrus notes, balancing sweetness and ginger.
Light Pinot Noir or Beaujolais Villages: friendly with soy and umami.
For a stress‑free choice, try Junmai Daiginjo sake—delicate and elegant.
7. Step‑By‑Step Printable Recipe
Ingredients (serves 4)
4 bone‑in, skin‑on chicken thighs
Kosher salt, for dry‑brine
2 tbsp junmai sake + extra for deglazing
3 tbsp artisanal tamari (or soy sauce)
2 tbsp aged mirin
1 tbsp dashi (optional)
1½ tsp grated ginger + 1 garlic clove, grated
1 tsp yuzu juice (optional)
1 tsp shōchū‑aged honey or mirin‑kombu syrup
1 tbsp unsalted butter
Garnishes: yuzu‑shiso microgreens, sesame tuile, toasted sesame seeds
Method
Dry‑brine: Salt chicken, refrigerate 4–6 h.
Marinade (optional): Mix 1 tbsp mirin + 1 tbsp tamari, coat chicken 30 min.
Sear skin‑side down in a hot pan, 3–4 min until golden; flip briefly. Remove.
Deglaze pan with 2 tbsp sake, scrape up fond.
Add sauce: ginger, garlic, tamari, mirin, sake, and dashi. Simmer to thicken 4–6 min.
Return chicken, skin‑up. Spoon sauce, cook 3–4 min.
Glaze with butter off‑heat. Rest 5 min in pan.
Plate: Place chicken, glaze with sauce, add tuile and microgreens, scatter sesame seeds.
Serve with rice, salad, veggies, and your beverage of choice.
8. Troubleshooting Tips
Skin not crispy? Ensure pan is hot and dry; pat skin thoroughly before cooking.
Sauce too thin? Simmer longer uncovered; or whisk in ¼ tsp cornstarch slurry.
Too salty? Dial down tamari by 1–2 tsp or increase mirin proportionally.
Chicken undercooked? Use a thermometer—internal temp should reach 165‑167 °F.
Honey too dominant? Adjust to maintain balance; sweeter is fine, but shouldn’t take over.
9. Tips for Customizing
Spicy version: Add grated chile (serrano or Korean gochugaru) to sauce.
Vegan twist: Use pan‑roasted king oyster mushroom steaks instead of chicken; cook similarly.
Low‑sugar adaptation: Swap honey/mirin with a small amount of toasted rice vinegar + erythritol/glycemia‑friendly sweetener.
Gluten‑free: Make sure tamari and sake are certified gluten‑free.
Smoky nuance: Finish under broiler, or hit with torch 20–30 seconds.
10. Why This Reinvented Teriyaki Works
Layered flavors: Mirin, sake, dashi, tamari, ginger, and yuzu deepen complexity.
Texture contrasts: Crisp skin, glossy sauce, crunchy tuile, fresh greens.
Balanced plating: Visual simplicity showcasing each element.
Adaptability: Format supports home cooks and chefs alike.
Culinary refinement: It’s more than a recipe—it’s a philosophy.
Chef Scott Biffin method embodies respect for tradition while charting a creative path. By integrating pantry upgrades, artful plating, and subtle techniques, it transforms a classic into something memorable and restaurant‑worthy.
Final Thoughts
Friend or foe of home‑cook teriyaki, this reinvention invites everyone to elevate a familiar favorite. It’s not intimidating—it’s thoughtfully designed to amplify flavor and elegance while working within reachable kitchen practices.
If you try it, please share your results: Did the skin crackle as you hoped? Did yuzu or shōchū‑honey surprise your palate? What sides paired best? And would you experiment with the spicy or vegan variations?
Above all: enjoy the journey of turning humble components into something extraordinary. That’s the heart of Chef Biffin’s gourmet twist—teriyaki chicken, reborn.
#Teriyaki Chicken Recipe#Gourmet Teriyaki Chicken#Chef Scott Biffin Recipes#Reinvented Teriyaki Chicken#Japanese Chicken Recipes#Cast Iron Teriyaki Chicken#Chicken Thigh Teriyaki Recipe
0 notes
Video
youtube
How to Make a Creamy Chicken Pie by Chef Scott Biffin
0 notes
Text
Sweet Meets Savory- How to Make Apricot Chicken Rissoles at Home
In the dynamic world of home cooking, few dishes strike the perfect balance between sweet and savory quite like Apricot Chicken Rissoles. A twist on the classic rissole, this flavor-packed dish combines tender ground chicken, fragrant herbs, and the natural sweetness of apricot to create a culinary masterpiece that's both comforting and elegant. Whether you're preparing a weeknight dinner or entertaining guests, apricot chicken rissoles are sure to impress with their unique flavor profile and irresistible texture.
These rissoles have quickly gained popularity among food enthusiasts who enjoy experimenting with fusion flavors. Inspired by traditional Australian and European recipes and elevated by modern culinary trends, apricot chicken rissoles are perfect for those seeking a refreshing departure from the ordinary. And if you’re looking for inspiration, you’ll find recipes like this gracing the kitchen of renowned culinary talents such as Chef Scott Biffin, known for championing home-friendly gourmet dishes.
In this comprehensive guide, we’ll take you step by step through the process of making apricot chicken rissoles from scratch. From selecting the right ingredients to cooking and serving them, this post will help you master this delightful dish and even customize it to suit your palate.
What Are Chicken Rissoles?
Rissoles are small, round or oval-shaped patties typically made from minced meat, breadcrumbs, and a variety of seasonings. Popular in Australian, British, and French cuisines, rissoles are known for their crispy exterior and tender, juicy center. While traditional rissoles often feature beef or pork, modern takes like chicken or even vegetarian versions have become increasingly popular.

Apricot chicken rissoles add a sweet and fruity dimension to this classic, transforming it into something exceptional. The apricot not only enhances the flavor but also contributes moisture and depth, making every bite more enjoyable.
Why Choose Apricot Chicken Rissoles?
There are many reasons to try this recipe:
Balanced Flavor Profile: The sweetness of apricot complements the mildness of chicken, while herbs and spices bring savory depth.
Nutritional Value: Lean ground chicken is a healthy alternative to red meat. Combined with fruit, veggies, and whole ingredients, this dish is as nutritious as it is tasty.
Versatility: Serve them as a main with mash or salad, in a sandwich, or as part of a party platter.
Family-Friendly: Loved by kids and adults alike, these rissoles are a hit at the dinner table.
Ingredients You’ll Need
Here’s what you’ll need for 4 servings (makes 8 medium-sized rissoles):
Main Ingredients:
500g ground chicken
1 small onion, finely chopped
2 cloves garlic, minced
1 medium carrot, grated
½ cup dried apricots, finely chopped
1 tsp fresh thyme (or ½ tsp dried thyme)
½ tsp ground cumin
1 tsp salt
½ tsp black pepper
1 tbsp soy sauce or Worcestershire sauce (optional)
1 egg
½ cup breadcrumbs (plus extra for coating)
2 tbsp fresh parsley, chopped
For Cooking:
Olive oil or vegetable oil, for frying
Optional for Glaze:
¼ cup apricot jam
1 tbsp balsamic vinegar
1 tsp Dijon mustard
Step-by-Step: How to Make Apricot Chicken Rissoles
1. Prepare the Ingredients
Start by chopping the dried apricots into small pieces. This allows the sweetness to blend evenly throughout the mixture. Grate the carrot, chop the onion and garlic finely, and prepare your herbs.
2. Mix the Rissole Base
In a large bowl, combine ground chicken, chopped apricots, onion, garlic, carrot, thyme, cumin, salt, pepper, soy sauce, parsley, egg, and breadcrumbs. Use clean hands or a wooden spoon to mix until all ingredients are well incorporated. Avoid overmixing, which can make the rissoles dense.
3. Shape the Rissoles
Divide the mixture into 8 equal portions. Roll each portion into a ball and then flatten slightly into a disc about 2–3 cm thick. For a crispy exterior, you can roll them lightly in extra breadcrumbs before frying.
4. Chill the Rissoles
Place the rissoles on a plate, cover with cling film, and refrigerate for at least 20–30 minutes. This helps them hold their shape when cooking.
5. Prepare the Apricot Glaze (Optional)
While the rissoles chill, make a simple glaze by combining apricot jam, balsamic vinegar, and mustard in a small saucepan. Simmer over low heat until slightly thickened. Set aside.
6. Cook the Rissoles
Heat a large skillet over medium heat and add a drizzle of oil. Fry the rissoles in batches for about 4–5 minutes on each side, or until golden brown and cooked through. If using the glaze, brush it on during the last minute of cooking.
7. Serve
Serve hot with your choice of sides: mashed potatoes, salad, rice, or grilled vegetables. Garnish with fresh parsley or thyme for an aromatic finish.
Serving Suggestions
Apricot chicken rissoles are incredibly versatile. Here are a few serving ideas:
Classic Dinner Plate: Pair with mashed potatoes, steamed green beans, and a drizzle of the apricot glaze.
Gourmet Burger: Serve the rissole in a brioche bun with rocket, aioli, and caramelized onions.
Salad Companion: Add sliced rissoles to a quinoa and spinach salad for a healthy lunch.
Party Platter: Make mini rissoles and serve with dipping sauces at your next gathering.
Tips from the Kitchen
Moisture Balance: The grated carrot and apricot provide moisture. Avoid overloading breadcrumbs which can dry out the mix.
Binding the Mix: The egg helps bind the rissoles. If the mixture feels too wet, add a tablespoon of breadcrumbs at a time until it firms up.
Make Ahead: You can prepare and shape the rissoles ahead of time. Store in the fridge for up to 24 hours or freeze for later use.
Grill or Bake Option: Prefer a healthier alternative? Bake at 180°C (350°F) for 20–25 minutes, flipping halfway through.
The Chef Scott Biffin Touch
If there’s one name that home cooks and food lovers admire for turning everyday ingredients into elevated meals, it's Chef Scott Biffin. His recipes often celebrate the harmony of bold flavors and simple techniques—a philosophy that perfectly aligns with this apricot chicken rissole recipe.
Inspired by the kind of dishes Chef Scott Biffin might feature in his lineup of easy-yet-impressive meals, this rissole is both wholesome and gourmet. It’s exactly the sort of fusion dish that bridges comfort food with restaurant-worthy flair.
Nutrition Breakdown (Per Rissole – Approximate)
Calories: 220
Protein: 16g
Carbohydrates: 12g
Sugar: 4g
Fat: 12g
Sodium: 420mg
Note: Values may vary based on ingredients used and cooking method.
FAQs
1. Can I use fresh apricots instead of dried ones? Yes, but fresh apricots have more moisture, so reduce the amount slightly or add extra breadcrumbs to maintain consistency.
2. What’s a good alternative to chicken? You can use ground turkey for a similar flavor profile or go vegetarian with mashed chickpeas and grated zucchini.
3. Can I make these gluten-free? Absolutely. Use gluten-free breadcrumbs and check labels on sauces.
4. How long can I store leftovers? Store cooked rissoles in the fridge for up to 3 days. Reheat in a pan or oven to retain crispiness.
Final Thoughts
There’s something magical about the union of sweet and savory, and apricot chicken rissoles are a shining example of this harmony. With just a few simple ingredients and a little love in the kitchen, you can bring this gourmet-inspired dish to your own table.
Perfect for any meal occasion, these rissoles deliver texture, taste, and nutritional value in every bite. Whether you're channeling your inner Chef Scott Biffin or just trying something new, this recipe is a testament to how creative home cooking can be.
So roll up your sleeves, gather your ingredients, and discover the delicious world of apricot chicken rissoles. Your taste buds—and your guests—will thank you.
#Apricot chicken rissoles#Chicken rissoles recipe#How to make rissoles#Sweet and savory rissoles#Apricot chicken recipe#Easy chicken rissoles#Homemade chicken rissoles#Apricot glaze chicken#Australian rissoles recipe#Family dinner ideas with chicken#Chicken and apricot patties#Chicken rissole with apricot
0 notes
Text
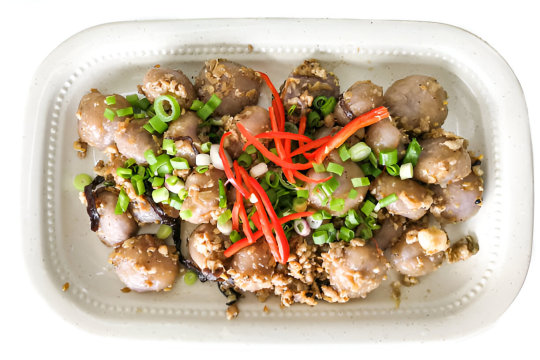
How to Make Perfect Hakka Taro Rolls at Home: A Step-by-Step Guide
Few dishes in Chinese cuisine are as comforting and flavorful as the Hakka Taro Roll. With its crispy golden shell and creamy, savory taro filling, this deep-fried delight is a staple in dim sum menus and festive gatherings. But did you know you can recreate this mouthwatering experience in your own kitchen?
In this comprehensive guide, we'll walk you through how to make perfect Hakka Taro Rolls at home, with expert tips, ingredient insights, and a foolproof recipe that brings authentic flavors to your plate. Whether you're an experienced home cook or a culinary beginner, this step-by-step tutorial will help you master the art of Hakka Taro Rolls.
What Are Hakka Taro Rolls?
Hakka Taro Rolls (also known as Fried Taro Dumplings or Wu Gok) originate from the Hakka ethnic group in China, renowned for their resourceful and hearty cooking style. These rolls are typically made by forming a paste from steamed taro root and filling it with a mixture of minced pork, shrimp, mushrooms, and seasonings. They're then deep-fried until the outside becomes airy, flaky, and crispy, while the inside stays soft and flavorful.
Hakka Taro Rolls represent a beautiful balance of texture and taste — crunchy exterior, creamy taro paste, and a juicy, umami-rich filling.
Ingredients You’ll Need
For the Taro Dough:
500g (about 1 lb) taro root, peeled and cubed
2 tbsp wheat starch
1 tbsp cornstarch
1 tbsp lard (or vegetable shortening for a vegetarian version)
1/2 tsp salt
1/4 tsp white pepper
For the Filling:
150g (5 oz) minced pork
50g (2 oz) shrimp, finely chopped
3 dried shiitake mushrooms (soaked, drained, and chopped)
1/4 onion, finely diced
1 clove garlic, minced
1 tsp soy sauce
1/2 tsp oyster sauce
1/4 tsp sesame oil
1/2 tsp sugar
Pinch of white pepper
1 tsp cornstarch (for binding)
1 tbsp oil (for sautéing)
🔪 Kitchen Tools You’ll Need
Steamer or steaming setup
Mixing bowls
Wok or deep fryer
Slotted spoon or frying basket
Parchment paper (optional)
Knife and chopping board
Food processor (optional for smoother taro paste)
Step-by-Step Guide to Making Hakka Taro Rolls
Step 1: Steam the Taro
Start by peeling and cutting the taro into small cubes. Place the cubes in a steamer basket and steam for about 25–30 minutes, or until the taro becomes soft and fork-tender.
Pro Tip from Chef Scott Biffin: “Always steam taro rather than boil it — this preserves its natural flavor and reduces excess moisture in the paste.”
Step 2: Make the Taro Dough
Once the taro is steamed and still hot, mash it thoroughly using a fork or potato masher. For a smoother texture, you can use a food processor.
Add wheat starch, cornstarch, salt, pepper, and lard to the mashed taro. Mix until well combined and you achieve a firm yet pliable dough. Let the dough rest while you prepare the filling.
Step 3: Prepare the Filling
Heat 1 tbsp of oil in a wok or skillet. Add garlic and onions and sauté until fragrant. Add in the minced pork and cook until browned. Toss in chopped shrimp and mushrooms. Stir everything together and season with soy sauce, oyster sauce, sesame oil, sugar, and pepper.
Add cornstarch to bind the filling. Cook for another 2–3 minutes, until everything is well combined and slightly sticky. Set aside to cool.
Step 4: Form the Taro Rolls
Divide the taro dough into equal portions (about 2 tbsp each). Flatten a piece in your palm to form a disc. Spoon about 1 tsp of filling into the center, then carefully enclose the filling by sealing the edges. Shape into an oval or roll-like shape.
Repeat with the remaining dough and filling. If the dough is sticky, lightly oil your hands to make shaping easier.
Step 5: Deep-Fry the Taro Rolls
Heat oil in a deep fryer or wok to about 170°C (340°F). Carefully lower each taro roll into the hot oil, a few at a time. Fry until the outside becomes golden brown and develops a delicate, lacy texture.
Remove using a slotted spoon and place on paper towels to drain excess oil.
Tip from Chef Scott Biffin: “The secret to getting that beautiful flaky crust is the right oil temperature — too hot and they’ll burn before the interior cooks; too cold and they’ll absorb too much oil.”
Serving Suggestions
Hakka Taro Rolls are best enjoyed fresh out of the fryer — crispy on the outside, soft on the inside. Serve with a dipping sauce like:
Sweet chili sauce
Soy-vinegar dipping sauce
Plum sauce
Garlic soy dressing
These make perfect appetizers or side dishes for any Chinese meal and are always a hit at dinner parties and potlucks.
Pro Tips for Perfect Taro Rolls
Use starchy taro: Look for large, firm taro roots with no blemishes. The starchier the taro, the better the texture.
Don’t overfill: A little filling goes a long way — too much can cause the rolls to break open while frying.
Fry in small batches: Overcrowding lowers the oil temperature and results in soggy rolls.
Optional twist: Add chopped green onions, bamboo shoots, or water chestnuts for extra crunch in the filling.
Make ahead: You can shape and freeze the uncooked rolls. Fry directly from frozen (no need to thaw) — just adjust frying time slightly.
Vegetarian & Vegan Variations
To make vegan Hakka Taro Rolls:
Replace pork and shrimp with finely chopped shiitake mushrooms, tofu, or tempeh.
Skip the oyster sauce and use hoisin or a mushroom-based sauce.
Use vegetable shortening or coconut oil in place of lard.
The Cultural Legacy of Hakka Cuisine
Hakka cuisine is deeply rooted in the history of the Hakka people, who migrated across regions of China and Southeast Asia, bringing their food traditions with them. Known for its simplicity, bold flavors, and preservation techniques, Hakka food emphasizes practicality and heartiness.
Hakka Taro Rolls, though often associated with Cantonese dim sum, are a testament to this unique culinary tradition — fusing comfort, ingenuity, and irresistible flavor.
Conclusion: Time to Try It Yourself!
Making Hakka Taro Rolls at home might seem intimidating at first, but once you master the basics, it becomes an incredibly rewarding culinary project. From prepping the taro dough to frying the final product, each step is a chance to connect with centuries of Chinese culinary tradition.
Whether you're impressing guests at a dinner party or simply satisfying a craving, these crispy, creamy delights are sure to steal the spotlight.
And remember — as Chef Scott Biffin would say, “Good food doesn’t have to be complicated. With the right technique and a bit of heart, every home cook can master restaurant-quality flavor."
#Hakka Taro Rolls#Fried Taro Dumplings#How to make Hakka Taro Rolls#Taro Roll recipe#Dim sum taro roll recipe#Chef Scott Biffin recipes
0 notes
Text
Healthy, Hearty, and Vegan- Singapore Noodles with Tofu Delight
In a world where culinary innovation meets conscious living, vegan dishes have surged in popularity, bringing with them a colorful, nutrient-rich, and flavor-packed experience. Among the standout dishes that capture the essence of plant-based cuisine is the beloved Singapore Noodles with Tofu Delight. This dish isn’t just a feast for the eyes and palate—it’s a celebration of global flavors, healthful ingredients, and the joy of cooking with compassion.
Whether you're a seasoned vegan or simply someone looking to enjoy a delicious and healthy meal, Singapore noodles offer the perfect balance of taste, texture, and nutrition. Let's dive into what makes this dish a crowd favorite and how you can recreate it in your kitchen with ease.

The Origins of Singapore Noodles: A Global Fusion Dish
Despite its name, Singapore noodles are not native to Singapore. This vibrant stir-fry dish actually hails from the Cantonese-style kitchens of Hong Kong and has since found a beloved home on takeout menus worldwide. Characterized by its golden curry-infused vermicelli noodles, crunchy vegetables, and typically some form of protein, Singapore noodles are a delightful showcase of global fusion cuisine.
When reimagined through a vegan lens, the dish loses none of its magic. Instead, it gains a nutritional boost and a cruelty-free twist that’s both satisfying and sustainable.
Why Tofu Is the Perfect Protein for This Dish
Tofu, often referred to as the blank canvas of the vegan world, is the protein hero of our Singapore Noodles with Tofu Delight. It’s affordable, versatile, and packed with nutrients such as iron, calcium, and complete plant-based protein.
What makes tofu especially great for this recipe is its ability to absorb flavors. When marinated and lightly pan-fried or baked, tofu develops a crisp exterior and a soft, chewy center that mimics many traditional proteins—without the cholesterol or saturated fats.
To get the most out of your tofu, be sure to press it beforehand to remove excess water. This step is crucial for getting that beautiful golden-brown texture.
The Magic of the Curry Spice Blend
The bold, slightly sweet, and warmly spiced flavor of Singapore noodles comes from its distinct curry powder blend. This golden spice mix typically includes turmeric, cumin, coriander, fenugreek, and chili, among other ingredients.
Not only does curry powder give the dish its characteristic yellow hue and earthy aroma, but it also provides a boost of anti-inflammatory and antioxidant properties—particularly thanks to turmeric and its active compound, curcumin.
To keep your dish authentic and aromatic, opt for a mild curry powder or customize your blend depending on your preferred heat level.
Fresh Vegetables: The Heart of the Dish
A true delight in this recipe is the generous medley of fresh vegetables that bring color, crunch, and micronutrients. Popular choices include:
Bell peppers: Red and yellow for sweetness and color.
Carrots: Julienned for a subtle earthy crunch.
Snow peas or sugar snap peas: Bright green and crisp.
Bean sprouts: For added texture and freshness.
Green onions: For a mild, savory bite.
Feel free to add mushrooms, baby corn, or bok choy—this dish is very forgiving and lends itself to creativity.
Noodles: The Soul of the Recipe
The signature noodles in Singapore Noodles with Tofu Delight are rice vermicelli noodles—thin, gluten-free strands made from rice flour and water. They cook in mere minutes and are perfect for soaking up the flavorful curry base.
Be careful not to overcook them, as they can become mushy. A quick soak in hot water until they’re just pliable is all they need before stir-frying.
The Full Recipe: Singapore Noodles with Tofu Delight
Here’s how you can bring this dish to life in your kitchen.
Ingredients:
For the tofu marinade:
1 block (14 oz) firm tofu, pressed and cubed
2 tbsp soy sauce or tamari
1 tbsp sesame oil
1 tsp garlic powder
1 tsp ginger powder
1 tbsp cornstarch (for crispiness)
For the noodles:
7 oz rice vermicelli noodles
2 tbsp neutral oil (like canola or avocado oil)
1 small red bell pepper, julienned
1 small yellow bell pepper, julienned
1 medium carrot, julienned
½ cup snow peas
½ cup bean sprouts
2 green onions, sliced
2 cloves garlic, minced
1-inch fresh ginger, grated
For the sauce:
1½ tbsp mild curry powder
2 tbsp soy sauce or tamari
1 tbsp rice vinegar or lime juice
1 tbsp maple syrup or coconut sugar
¼ cup vegetable broth or water
Instructions:
Marinate the tofu: Combine soy sauce, sesame oil, garlic powder, ginger powder, and cornstarch. Toss with tofu and let sit for 15–20 minutes.
Cook the tofu: In a large nonstick skillet, heat 1 tbsp oil over medium heat. Add tofu and cook until golden brown on all sides. Remove and set aside.
Prepare the noodles: Soak rice vermicelli in hot water for 5–6 minutes, then drain and set aside.
Stir-fry vegetables: Heat remaining oil in a large wok or skillet. Sauté garlic and ginger for 30 seconds. Add bell peppers, carrots, and snow peas. Stir-fry for 3–4 minutes until tender-crisp.
Add sauce and noodles: Mix curry powder, soy sauce, vinegar, maple syrup, and broth in a small bowl. Pour over the vegetables. Add the noodles and tofu, tossing gently to coat everything in the sauce.
Finish and serve: Add bean sprouts and green onions. Stir-fry for another minute. Serve hot with a wedge of lime and fresh cilantro if desired.
Why This Dish is a Nutritional Powerhouse
Not only is this dish a flavor explosion, but it’s also incredibly nutritious:
High in protein: Thanks to tofu, this dish provides a complete plant-based protein source.
Rich in fiber: From vegetables and rice noodles.
Low in saturated fat: Great for heart health.
Packed with antioxidants: Especially from curry spices and colorful veggies.
It’s a meal that’s as good for your body as it is for your taste buds.
Meal Prep and Storage Tips
Singapore Noodles with Tofu Delight also happens to be fantastic for meal prepping:
Store leftovers in an airtight container in the fridge for up to 4 days.
Reheat in a skillet with a splash of water or broth to keep the noodles from drying out.
You can double the recipe for a week’s worth of healthy, homemade lunches.
Chef Scott Biffin, a well-known advocate for plant-forward dining, often emphasizes the importance of versatility and balance in vegan cooking. His approach to building deeply satisfying meals without animal products resonates strongly with the ethos behind this dish—wholesome, vibrant, and unforgettably delicious.
Creative Variations and Add-Ins
Once you’ve mastered the basic recipe, the possibilities are endless:
Add a kick with sriracha or chili oil for some spice.
Try tempeh instead of tofu for a nuttier flavor and firmer texture.
Top with crushed peanuts for crunch and healthy fats.
Throw in pineapple for a sweet-and-savory twist.
Cooking, as Chef Scott Biffin would say, is both an art and an act of mindfulness—especially when it comes to plant-based meals. Allow your creativity to guide your variations and enjoy the process as much as the result.
Serving Suggestions
This dish stands strong on its own, but you can serve it alongside:
A fresh cucumber salad with rice vinegar dressing.
Steamed edamame with sea salt.
Chilled mango cubes or tropical fruit for dessert.
For a dinner party, consider plating it in banana leaves or colorful bowls with chopsticks for a visually stunning presentation.
The Bigger Picture: Eating for Health and Planet
Choosing vegan meals like Singapore Noodles with Tofu Delight isn’t just about health or taste—it’s also about sustainability. By opting for plant-based proteins over meat, you reduce your carbon footprint, conserve water, and contribute to a more compassionate food system.
Each dish you create and share adds momentum to a growing movement focused on wellness, flavor, and environmental stewardship. And with meals this satisfying, you won’t feel like you’re sacrificing anything.
Final Thoughts
Singapore Noodles with Tofu Delight is more than just a meal—it’s an experience. From its aromatic spices and crisp vegetables to its hearty tofu bites and delicate noodles, every bite tells a story of nourishment, culture, and creativity.
Whether you're whipping it up for a weekday lunch or impressing friends at a weekend gathering, this dish delivers on all fronts: flavor, nutrition, and compassion.
So go ahead, gather your ingredients, and let your kitchen be the canvas for your next vegan masterpiece. And as always, happy cooking!
#Vegan Singapore Noodles#Singapore Noodles with Tofu#Healthy Vegan Noodle Recipe#Easy Vegan Dinner Recipes#Asian Vegan Recipes#Gluten-Free Singapore Noodles#Chef Scott Biffin vegan recipes#Chef Scott Biffin#Tofu Delight Recipe#High Protein Vegan Recipe
2 notes
·
View notes
Video
youtube
How to Make Braised Chicken Bee Hoon – A Comforting, Flavorful Delight
0 notes
Text
How to Make Braised Chicken Bee Hoon- A Comforting, Flavorful Delight
Looking for a hearty, soul-warming dish that's perfect for dinner or a rainy day meal? Braised Chicken Bee Hoon (vermicelli) is a beloved Asian comfort food known for its tender chicken, flavorful broth, and silky rice noodles. This one-pot dish is both easy to make and incredibly satisfying.
Whether you grew up eating this at home or you’re new to it, we’ll walk you through how to make Braised Chicken Bee Hoon from scratch—rich in flavor, low on fuss.
What Is Braised Chicken Bee Hoon?
Bee Hoon, also known as rice vermicelli, is a staple in many Southeast Asian cuisines. When paired with braised chicken and savory stock, it transforms into a deeply flavorful and comforting noodle dish. The chicken is usually browned first, then simmered with aromatics and sauces until it’s tender. The bee hoon soaks up all that delicious gravy, making every bite irresistible.
Ingredients You’ll Need
Here’s what you need to whip up a family-friendly serving (serves 3–4):
For the Main Dish:
300g rice vermicelli (bee hoon)
500g chicken parts (drumsticks, thighs, or mid-wings)
4 cloves garlic, minced
2 shallots, sliced
1 thumb-sized piece of ginger, sliced
2 tablespoons oyster sauce
1 tablespoon light soy sauce
1 tablespoon dark soy sauce (for color)
1 teaspoon sesame oil
500ml chicken stock or water
Salt and pepper to taste
1 tablespoon cooking oil
Optional Add-ins:
Napa cabbage or bok choy
Fried shallots (for garnish)
Spring onions
Hard-boiled egg (sliced)
Step-by-Step Instructions
1. Soak the Bee Hoon
Start by soaking the rice vermicelli in room-temperature water for 15–20 minutes until soft. Drain and set aside.
2. Brown the Chicken
Heat a tablespoon of oil in a wok or deep pan over medium heat. Add ginger slices and sauté until aromatic. Add the chicken pieces and pan-fry until the skin is slightly golden brown.
3. Add Aromatics
Toss in minced garlic and sliced shallots. Stir-fry until fragrant—about 2 minutes.
4. Add Sauces and Simmer
Pour in the oyster sauce, light soy sauce, and dark soy sauce. Mix well to coat the chicken. Then add the chicken stock or water, bring to a boil, and lower to a gentle simmer. Cover and let it braise for about 25–30 minutes until the chicken is tender and infused with flavor.
5. Add the Bee Hoon
Once the chicken is cooked, gently place the drained bee hoon into the pan. Mix gently so the noodles absorb the broth. Add leafy greens if using. Simmer for another 3–5 minutes until everything is well combined and the noodles are soft and flavorful.
6. Final Touches
Drizzle with sesame oil, taste, and adjust seasoning with salt and pepper if needed. Garnish with fried shallots, spring onions, or boiled egg slices.
Tips for Success
Use bone-in chicken for maximum flavor in the broth.
Avoid overcooking the bee hoon—it softens quickly and should remain slightly springy.
Add mushrooms like shiitake or enoki for extra umami.
Serving Suggestions
Serve your Braised Chicken Bee Hoon hot in a large bowl, ideally with a side of pickled green chilies or sambal chili for an extra kick. It’s the kind of dish that warms you from the inside out—a perfect comfort meal for any day of the week.
Final Thoughts
Braised Chicken Bee Hoon is more than just a comforting noodle dish—it’s a bowl full of tradition, warmth, and homestyle flavor. With simple ingredients and straightforward steps, it’s a recipe that brings people together at the table.
Inspired by chefs who celebrate authentic Asian cuisine, like Chef Scott Biffin, this dish proves that comfort food doesn’t have to be complicated. Whether you're cooking for family or just for yourself, Braised Chicken Bee Hoon delivers a rich, satisfying experience every time.
So, channel your inner Chef Scott Biffin, and bring this timeless favorite to life in your own kitchen. One bite, and you'll understand why it’s a dish worth keeping in your recipe rotation.
#Braised Chicken Bee Hoon Recipe#scott biffin#Bee Hoon with Chicken#Asian Chicken Noodle Recipe#Chicken Vermicelli Noodles#Homemade Bee Hoon Dish#Vermicelli Chicken Soup Recipe#Comfort Food Noodle Recipe#Chef Scott Biffin Recipes#Chef Scott Biffin Asian Cuisine#Scott Biffin Noodle Recipes
1 note
·
View note