sewing sideblog to share what i've learned and what i'm making; specializing in clothes for gender euphoria and adapting historical fabrics and styles to contemporary needs; not a nsfw blog by any means but there will likely be cussin and inappropriate jokes
Last active 4 hours ago
Don't wanna be here? Send us removal request.
Statistics
We looked inside some of the posts by seamsterslocal and here's what we found interesting.
Average Info
Notes Per Post
502K
Likes Per Post
279K
Reblog Per Post
222K
Reply Per Post
402
Time Between Posts
28 days
Number of Posts By Type
Text
17
Last Seen Tumblr Blogs


Fun Fact
Tumblr has a 66 index score for customer satisfaction in the US.
Text
I cannot stress enough that all those things in sewing pattern instructions that seem pointless are actually very important
Yes, how you fold your fabric before putting down the pattern pieces and cutting matters, because it influences how the fabric drapes, and ignoring that can cause fit issues in ways you wouldn't expect
Yes, cutting an entire separate piece to sew to the edge to finish it is going to be better than turning the edge and stitching it on its own, because there are geometry issues in play that make it actually harder to just fold a curve to the inside.
Yes, cutting clips or notches into the seam allowance around curves should always be done, because those geometry issues will work on the seam allowances and keep the curve from laying flat (remember, clip when the curve goes in, notch when the curve goes out)
Yes, interfacing may seem completely superfluous and frustrating and an extra step to work with, but it adds rigidity and stability to areas that need it (especially under buttons)
Yes, using a fun quilting cotton print for lining looks nice, but the point of lining isn't to make the inside pretty as much as it is to make the inside slip smoothly over the layer under it, and quilting cotton is going to instead be prone to grabbing everything under it, so you really should use those annoyingly slippery lining fabrics
Yes, in general, you should use the kind of fabric the pattern tells you to use, because there have been centuries, if not millennia, of people throughout the entire world figuring out what fabric best suits what kind of garment, for reasons beyond aesthetics
I know that a lot of people new to sewing see these things and feel like they're things that just aren't necessary, because they skip them when they sew and the item ends up just fine. And if you don't mind the idea of your clothes looking homemade, then it is fine. But...if you're consistently skipping these things and end up unhappy with how homemade your items look, please consider that that result is at least partly because you're not following the entire directions
"Sewing" involves so much more than just the stitches
9K notes
·
View notes


Text
Free Pattern Wednesday: DIY Mask Patterns For Covid-Safe Cosplayers!
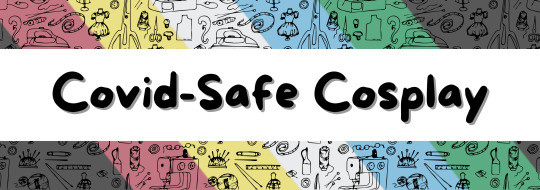
Handmade cloth face masks are no replacement for a medical-grade mask, but using them over medical masks can be a snazzy way to better incorporate your COVID-19 safety measures into your costume! This list contains links to several different styles of mask, so you can choose what works best for you!
Note: blog admin has not personally tested all of these patterns. Please thoroughly read each pattern to determine which will work best for your health, costume, and aesthetic preferences. For information on selecting a proper medical-grade face mask, please see this guide from the People's CDC.
Mood Fabrics: How to Add Some Couture Details to Your Face Masks – Free Template
Japanese Sewing Books: Free Mask Pattern Download – Contoured 3D Face Mask
CraftPassion: Face Mask Sewing Pattern – 4 Sizes
The Spruce: How to Sew a Basic Face Mask
Sweet Red Poppy: How to Sew a Surgical Face Mask
See Kate Sew: 3d mask template – the most comfortable face mask
Shannie Makes: Simple Surgical Style 3 Pleats Face Mask Pattern
Shannie Makes: 2 Piece Style Face Mask Pattern
Shannie Makes: Duckbill Style Face Mask Pattern
Do you have a favorite face mask pattern? Share in the comments or via a reblog! Bonus points for those that are free, include image descriptions, or contain detailed tutorials for newbies to follow.
#have not clicked through all these links btw#and i am aware that home sewn masks are not going to offer the protection of an n-95#but i know many people are struggling to find masks that fit or are sensorily/aesthetically something they can handle
333 notes
·
View notes
Text
tragedy! at the thrift store
the flannel you bought to do Gay Lil Crafts with its novelty bear print fabric in exactly the colors of the bear flag is so incredibly well constructed and finished you can't bring yourself to seamrip it apart
#i am going to permanantly french the cuffs so i can steal some fabric out of the sleeves#and im debating taking it in with long vertical tucks for more of a shirtwaist dress look than a flirtatiously stolen clothes look#i want to get enough fabric for a small stuffed bear and a striped flag pillow#but i am vvv partial the flirtatiously stolen clothes look#thus the tragedy
13 notes
·
View notes
Text
Starting September 23, 2024, U.S. households are eligible to order 4 free COVID-19 tests at
www.COVIDTests.gov
The COVID-19 tests will detect current COVID-19 variants and can be used through the end of the year.
3K notes
·
View notes
Text
reusing craft supplies is all fun and games until your reclaimed zipper breaks 3 minutes after installation
#it's FOUR FEET long fml#this was meant to be a lil one day project#i found a longer more durable zipper that works with a couple easy modifications but fuck i'm annoyed
20 notes
·
View notes
Text
I think one of the Worst Things about wanting to find period clothing from other cultures, is trying to find fucking casual/work clothes. Like no, I do not want to see all these fancy intricate kimonos, I want to see jinbei, and field work outfits so I don't put a damn obi on this poor boy so he has a belt to hang his knife from.
87K notes
·
View notes
Text
Do you need affordable sewing supplies? Do you want to help cut down on waste and fast fashion?
Do yourself a favor and check out Swanson's Fabrics! The physical location is in Turners Falls, Massachusetts, USA, but the online shop will ship to you!
I can't remember who first told me about Swanson's, but they're a textile thrift shop that collects and repurposes donations of unused sewing supplies. Their physical location, The Stash House, offers community sewing resources and a studio. For non-locals (such as myself), their online shop offers fabrics, patterns, and notions. The shop restocks on Thursdays, and they have a constantly-rotating collection of items. If you like thrifting secondhand craft materials, Swanson's is for you!
Via their official "about" page:
Swanson’s Fabrics and notions are gifts from retired sewing stashes. They are the fabrics and supplies that sewers and fiber-artists naturally accumulate. I had a suspicion that the reason we all collect so much is that we didn’t have a place “good enough” to take it. So I made the place. Turns out I was right, and thanks to my community (and yours) of makers and crafters, I can resell these fine materials at a low, approachable cost. ALL FABRICS ARE $5.00/yd, NO MATTER WHAT THEY ARE MADE OF. REALLY. I MEAN IT. I KNOW. UNBELIEVABLE BUT TRUE! As we come to grips with the climate crisis, interrupted supply lines, and our dependency on slave-labor in far away countries to produce our cotton and fiber goods, we need another way to approach the fabrics in our lives. We have a massive resource of textile goods in our country and it is time to tap into it. Our attics, basements, thrift-store donation bins, and dumpsters are brimming with discarded fabrics. It is time to start making and trading for the things we need, and stop buying so much new stuff we don’t. We need to see ourselves as trash-rich. Customers at Swanson’s can pay for goods and services with goods and services. I accept trade of sewing and fiber supplies/materials, and trade for help in the shop. I hope to inspire you to make your own clothes, to mend the ones you have, to shop second-hand and alter things to your taste. There is a lot of power in dressing yourself. Custom is king, and you can’t have a revolution in your master’s clothes…. ❤️💪🏻 -Kathryn
The CovidSafeCosplay blog and its admin are unaffiliated with Swanson's Fabrics, and are simply sharing the resource.
Do you have a favorite place to get your crafting supplies? Share in the comments or via a reblog! Bonus points for those that prioritize sustainability, accessibility, community, and trade.
4K notes
·
View notes
Text
Resources for Mending Clothes
We toss out over 80 pounds of textiles each year. These textiles are often made of plastic materials (polyester, nylon), made in unethical conditions, dyed with harsh dyes that often get put into the rivers, etc. Even a single cotton shirt releases carbon emissions and uses tons of water.
So the best thing to prevent the unsustainable growth of the fashion industry is to make sure that your clothing lasts as long as possible. To do so, mending clothing is a must. So here are some resources to help you learn how to do various things, such as sewing a button, to tailoring clothes, or even upcycling old clothing into new styles.
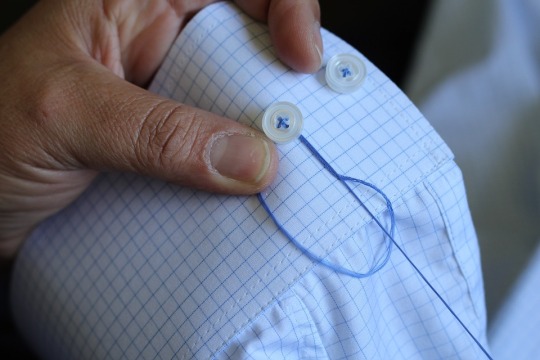
* How to sew on three different types of button
* How to hand sew on a patch on a torn pair of jeans
* How to sew up a hole in an old shirt
* How to sew a simple T-shirt
* How to upcycle old clothing into new clothing
* More upcycle and sewing techniques
* How to repair a damaged sock
* How to do an invisible stitch
* 3 different stitches to work with for different results
* How to make a T-shirt smaller so it fits you better
* How to make repairs to your shoes
These are just a few of the things that you can do in order to make sure that your clothing lasts for a long time. Nobody wants to keep buying new clothing, as it is expensive and wasteful.
So making alterations to your clothing, or fixing small holes hen you see them can be hugely beneficial to your wallet, to garment workers, and to the environment in the long term.
106K notes
·
View notes
Text
THRILLED to report the dress i can only describe as "the flannel grace kelly" is 99% done
except for the wildly complicated embroidery i decided to add 2 days ago of course
#i assume there are more disorganized sewists than me but i have yet to meet them#i have 1 buttonhole left to bind off#this dress is so comfortable i wore it unhemmed until it got sprayed with ground beef juice and i had to wash it unhemmed#and then i KEPT WEARING it unhemmed until this week when i hemmed it very stinky#now it smells like beautiful borax#flannel grace kelly
13 notes
·
View notes
Text
knitting tutorial made by a twenty-something knitting influencer: 18 min long, 12 of those minutes being the intro and a sponsor plug, they show the first few steps of the tutorial at the slowest speed known to man, they show the most important steps at a neck-break speed, they stop every five seconds to talk about what they just did, 40,000 comments filled with questions ranging from insightful to “how do i knit”, filmed with a camera that costs more than a car, the tutorial is incorrect.
knitting tutorial made by a seventy-something grandmother: two min long, filmed 17 years ago, shows you what you want with the skilled patient hands of a beloved deity, made with the world’s shittiest camera, the best video on the fucking internet, four comments and 30 views, you lose the video and never find it again.
88K notes
·
View notes
Text


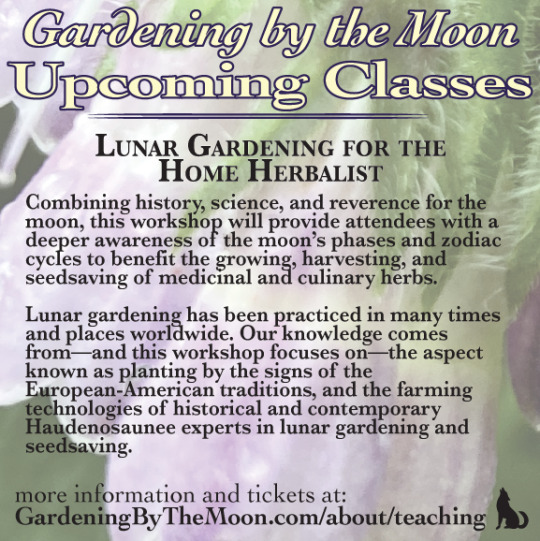

One of the first things we ever bonded over was our shared love of teaching, and this past fall we taught our first lunar gardening workshop together. We got so much positive feedback and requests for more that we’ve decided to start offering online lunar gardening classes. We’ve scheduled several sessions so that we can keep class sizes small, and have plenty of space for questions and conversation. We’re starting this spring session with four different classes: Introduction to Lunar Gardening: Built on a foundation of science, traditional knowledge, and reverence for the moon, this workshop gives attendees an overview of the moon’s phases and zodiac cycles and their impact on the growing, harvesting, and seedsaving of vegetables, fruit, flowers, and herbs. Planning Your Lunar Gardening Year: Lunar Gardening should always be an enticement to work with our gardens and tend to the plants in our care, rather than a burden or a scold. Even for the chronically disorganized (hi…), there are ways to bring our lives more in tune with the natural rhythms of the world around us—without weighing ourselves down with unmanageable to-do lists that invite guilt and shame. This workshop will outline several methods of timing the cycles of your planting and harvesting to the cycles of the moon, making it easier and more intuitive to bring your monthly & yearly routines in tune with the moon. Lunar Gardening for the Home Herbalist: Combining history, science, and reverence for the moon, this workshop will provide attendees with a deeper awareness of the moon’s phases and zodiac cycles to benefit the growing, harvesting, and seedsaving of medicinal and culinary herbs. Companion Planting by the Signs: It’s easy to get overwhelmed by a wall of facts and figures when you start looking deeper into planting by the signs. This class will go through commonly recommended companion planting pairs & guilds, and discuss the simplest ways to incorporate lunar gardening to support healthy plants and bountiful harvests. Like our calendar, all of our classes draw from a combination of European-American and Turtle Island, particularly Haudenosaunee, sources.
All classes are offered at a sliding scale. We invite you to reflect on your own financial situation and consider paying more if you experience such financial security as owning your own home, taking regular vacations, or earning a guaranteed salary; pay less if you experience financial instability such as renting or shift/gig work. If you live around or below the poverty level, please contact us about scholarship tickets.
20 notes
·
View notes
Text
this is a sideblog but i am returning your boops silently inside my heart
2 notes
·
View notes
Text
Pancake’s Guide to Basic Handsewing (with pictures!)
Aka things you could find elsewhere on the internet but here’s my own take. Note that while the running and back stitches are historically accurate, my felling stitch is not done how you would find it taught to a Victorian schoolgirl.
Holding the needle and fabric:

Modern sewing guides often overlook this because it’s sort of intuitive if you’ve been doing this since childhood. For beginners it might not be so obvious. I hold the needle between my thumb and index finger of my dominant hand. For running and backstitch I keep the worked (already sewn) fabric pinched between my index and middle fingers of my dominant hand, and the working (to be sewn) fabric pinched between my thumb and index or index and middle fingers of my non-dominant. I leave only about an inch gap between my hands. This keeps the fabric nice and taut while I work, and helps me keep an even stitch tension as well.
Construction stitches:
Running stitch:

This is the *most* basic stitch. You poke the needle down, you poke the needle up, you pull the needle through. It is a very efficient stitch because you can poke in and out multiple times and pull the thread through all at once, as I have in the above photos. This is the stitch you use for most hand-gathers and for some seams. For seams, use it where there won’t be any strain, like a vertical skirt seam.
Backstitch:
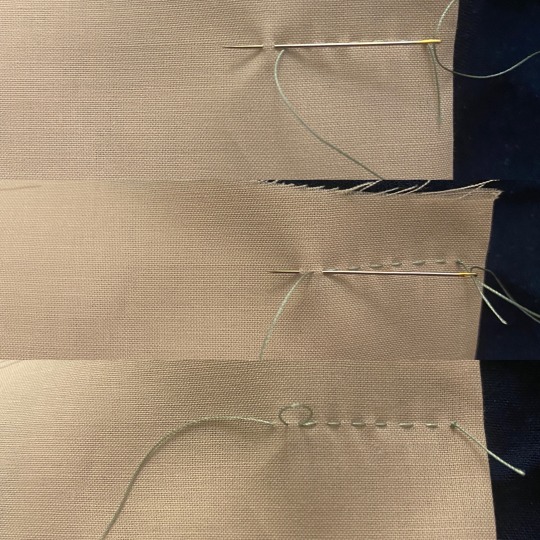
Insert needle, come up as if doing a single running stitch. Insert the needle back towards your dominant hand, and come up past the end of the current stitch. A continuous backstitch will insert the needle in the same hole as the end of the previous stitch. A spaced backstitch will take up more fabric coming up and leave a gap between the current and previous stitch when inserting. The specific size of the gap is dependent on your needs. I typically insert halfway. This is your workhorse stitch for seams that need to be strong.
Finishing stitches:

Finishing stitches are usually for hems and seam allowances. These are also the stitches you might use to take up a skirt hem or shorten a sleeve. To start I usually anchor my thread by taking a tiny stitch through both the folded-up hem or seam allowance and the main fabric. Reinsert through the same spot and tighten. Depending on how slick your thread is, you may want to repeat this a couple times, shifting over a bit each time.
Felling (fold on the outside):
For felling where the fold is the only side that will be visible, take a long, slightly diagonal stitch across the back, barely catching the edge of the fold in the way up. Insert your needle next to the fold close to where you just came up and repeat. This is the fastest and easiest type of felling. This is also what I use for attaching lace.
Felling (fold on the inside):
When the fold will be on the inside and not visible, like a standard double-fold hem, you will want to take a tiny stitch across the “back”, either slightly diagonal or nearly vertical, catching the edge of the fold. You will end up with long stitches along the fold and tiny stitches on the other side. Note that the “back” in this case is actually the right side of the fabric.
Slip stitch:


This is for a finish that you want minimally visible on both sides. It is also the slowest finish. Insert your needle into the fold and exit the edge of the fold, catching a tiny bit of the outer fabric. Pull through. Insert your needle in the same spot or close to the same spot you exited the fold. Repeat. It’s called a slipstitch because you have to slip the needle inside the fold. You will have tiny stitches visible on both sides, which will be basically invisible if you match your thread to your fabric.
Decorative stitches:
Stem stitch:

This is basically the inverse of a backstitch. Like, in the most literal sense. It is worked toward the dominant hand, though you still insert the needle away from the dominant hand. You start by coming up from the wrong (back/under) side of the fabric then inserting the needle towards the dominant hand, about two backstitch lengths away from your start. Then you come up at the halfway point between where you started and where you just inserted the needle. Pull through. Insert the needle one back stitch length away from the end of the previous stitch, and come up in the same or close to the same spot as the end of the previous stitch. Pull through, repeat. This is my usual embroidery stitch for outlining.
(Reverse) Chain stitch:

I almost never use a regular chain stitch because it’s annoying and fiddly as hell. A reverse chain stitch is structurally identical but it worked completely differently. To start, make a single running stitch and come up one stitch-length away. Then slide your needle under the previous stitch and insert the needle into the same hole as the current stitch. Come up one stitch-length away. Continue sliding the needle under the previous stitch. I work it towards the body or away from my dominant hand, but I find working towards the body makes it easier to slide the needle under. It also does not matter from which direction you go under the previous stitch as long as it’s the same for every stitch in each continuous section. Make sure to catch both “legs” of each loop. I sometimes use this for decorative topstitching. It is very inefficient both in terms of time and thread, but it looks really nice when you get it right.
Those are all the basic stitches I use for my hand-sewing!
2K notes
·
View notes
Text
If your tummy itches when you wear jeans, you have a nickel allergy and should paint the back of the buttion with nail polish. Okay I am going into the woods forever now. I love you.
74K notes
·
View notes
Text
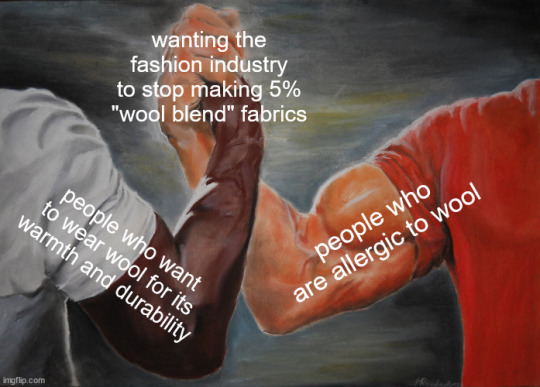
What's up, I made a meme that I'm sure is extremely broad-audience and relatable
38K notes
·
View notes
Text
繕い (;゚Д゚) ナントォ Mending a sweater
(Reddit:r/oddlysatisfying u/thegupeeman)
44K notes
·
View notes