
Don't wanna be here? Send us removal request.
Statistics
We looked inside some of the posts by ss-3dproject and here's what we found interesting.
Average Info
Notes Per Post
5
Likes Per Post
5
Reblog Per Post
0
Reply Per Post
0
Time Between Posts
2 days
Number of Posts By Type
Text
17
Last Seen Tumblr Blogs


Fun Fact
Tumblr was the first site to host the blog for President Barack Obama in 2011.
Text
Performing more research !
The title is correct. As I will be looking at some examples of weird weapons within popular games that seemingly do not fit the vibe of the rest of the game.
These weapons include Mr Toots from Red Faction: Armageddon, The Dubstep Gun from Saints Row 4 (I remember there used to be a Minecraft mod based around this), the Grooviton from Ratchet and Clank (2016), Mutated Milk from Team Fortress 2, The Cluckshot from Gears of War 3, The Hand Cannon from Dead Space 2, and finally the Super Sheep from Worms - The DIrectors Cut (1997).
That's a lot of weapons and games with no information about them, but I'll get through it.
Mr Toots - Red Faction: Armageddon:
This weapon is an interesting one. (I apologise for the low quality image.)

According to the wiki, this weapon is believed to be based off of the popular Nyan Cat meme, and I can certainly see where they're coming from. Especially because in the game, when you 'fire' him, rainbows seem to shoot out of his rear end. (There was not much on the Wiki, I'm sorry.)
The Dubstep Gun - Saints Row IV
This is another very strange example of a weapon that does not fit the games theme.

It is a very powerful weapon in which while it is firing, as the name implies, there is accompanying dubstep along with it (very 2013).
Groovitron - Ratchet and Clank (2016)

The Groovitron is another interesting weapon that acts similar to the Fortnite Boogie Bomb (though fortnite released after this, so that would probbaly be based off of this, if anything.) It is a recurring item in the Ratched & Clank franchise in which it first appeared as a usable weapon in the 'A Crack in Time' game, released in 2009.
Mutated Milk - Team Fortress 2

Added in the 'Love & War' update of June 2014, the Mutated Milk is an item which seems to be a reskin of a pre-existing item, the Mad Milk, as it does the exact same thing, with only a few cosmetic changes. Out of every weapon in this list, this is the least 'weird' in my opinion as Team Fortress 2 has a wide variety of odd and wacky weapons.
The Cluckshot - Gears of War 3

According to the Wiki (I know none of these weapons except the Dubstep Gun from Saints Row 4, so all of the information I get is from the Wiki's of the respective games), the Cluckshot is identical to an already existing weapon in the game, the Boomshot Grenade Launcher. However, rather than firing grenades, it shoots explosive chickens.
The Hand Cannon - Dead Space 2
Within Dead Space 2 is a weapon called the Hand Cannon. Now, if you've played any game with a gun before, you'd be thinking 'Oh okay it's like a Desert Eagle or something like in Fortnite?'. No.
It is a giant foam finger, a literal 'hand' cannon.

The weapon seems to be very overpowered within the game, though it is only unlockable after beating the game on Hard Core mode, or on Impossible mode in the 2023 remaster.
As it one-shots every single enemy it comes in to contact with, it is definetly one of the more overpowered weapons on this list, being able to rapid fire it with an unlimited ammo capacity and a fast rate of fire.
Super Sheep - Worms: The Directors Cut

As you can tell, this is a very weird weapon, because this is literally just a sheep with a cape.
Interestingly, it isn't even that weird in Worms, considering the fact that is has weapons from the Holy Hand Grenade, to just a literal sheep, not to be confused with this Super Sheep.
This shows that no matter what setting or environment your game has, there can always be funny and unique weapons that don't have to fit the environment.
Obviously, this has to be done in moderation because it could ruin the immersion.
#research#red faction#saints row iv#ratchet and clank#team fortress 2#gears of war 3#dead space 2#worms armageddon
0 notes
Text
Catch-Up 1 (How I Created a Jump Pad, Double Jump using Triggers and Casting)
(Note that some of this is taken directly from my Day 2 post, but I'm condensing it all here)
My first task to make me used to using Unreal again after a long break was to make a jump pad from memory.
This would be done by making an blueprint class of the actor type, and naming it whatever (I chose BouncePad). Then I open it and immediately, I want to place a box so that it has some form of mesh. So I add the box with the Add button and choose cube. Then underneath that, I add a cube collision and resize both the box and collision to my liking.

After placing it in the world, I realised it was tiny.

So I raised the scale up and now it looks good.

Afterwards, I would enter the Event Graph and place down the node of 'On Component Begin Overlap'. Then from the top white arrow, I make a connecting node to a new node of 'Cast To BP_FirstPersonCharacter' and connect those up in the Other Actor node connector. Then after this, from the white arrow on the right of Cast To BP_FirstPersonCharacter, I connect it to the node of 'Launch Character' and also connect the 'As BP First Person Character' to the 'Target' of the new node.

Now here, you can see that I am able to choose what the launch velocity I would like to use can be. I want to go quite a ways up, so I'll set the Z axis to have a Launch Velocity of 1000.
And now, for testing.
It works, but I think the bounce is a bit small (There is no screenshot due to how insignificant the bounce was). I forget numbers have to be quite large in Unreal to actually have a big impact so I will try adding an extra 0 to the end.

Certainly works.
After tweaking the number, I arrived at a value which I was happy with.

Another thing I could do if I wanted is make it so that each bounce pad has a seperate value by connecting an empty Vector variable to the Launch Velocity node connector under 'Launch Character'.
0 notes
Text
Day 17
A lot of things happened and I forgot to document them so I will put them here now.
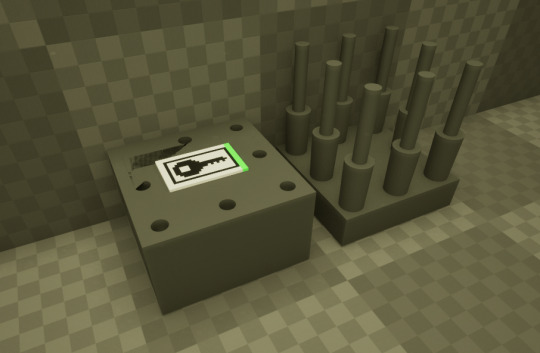
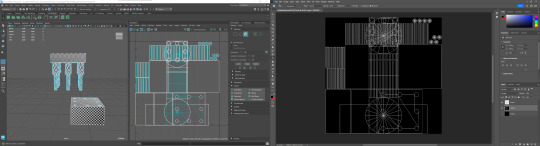
I now have a proper texture for my Cell Container, so rather than it all just being a solid flat colour, it actually has differing colours.
For some reason, Maya did not like me applying the texture within the program, because it somehow inverted textures in a way that's really hard to describe. It somehow made the outermost layer completely transparent so the only things you would see was the inside textures of the cell, no matter what angle you looked at it, so I had to instead apply the textures within Unreal.
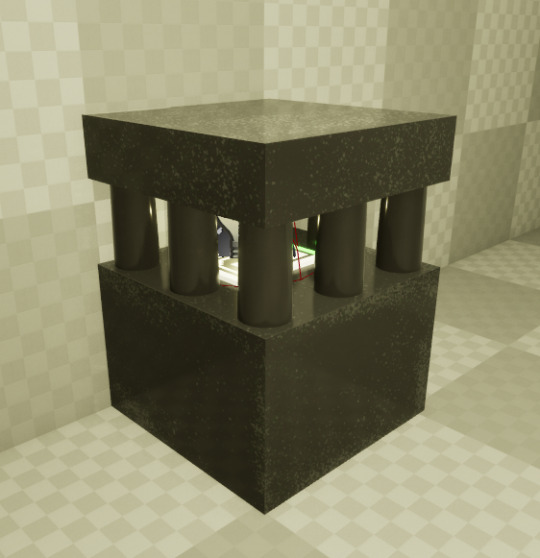
2. I managed to fix the weird glitchy texture on the bottom half. How did I fix it? I just made the bottom half again. For some reason doing the exact same thing twice can lead to a variety of results. But now it looks how it is actually meant to look so I am happy nonetheless.
3. The animation now works in Unreal...sort of. I couldn't get the actual animation to export, as it would crash EVERY time, because for some reason the FBX I exported did not agree with Unreal so I instead had to make it an OBJ and do the animation within Unreal instead, utlising physics to make it do what I want. I'm not going to walk through the process because it would require me to retrace my steps and do it again, but I will show the final product.
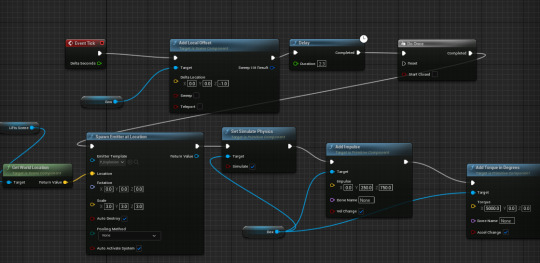
Just know that it took a while to make sure all of the different yellow node connectors had the exact correct values, which now leads to this.
0 notes
Text
Day 16 (Part Two)
I got the model in, but not the animation.
I'll just stick with the obj.
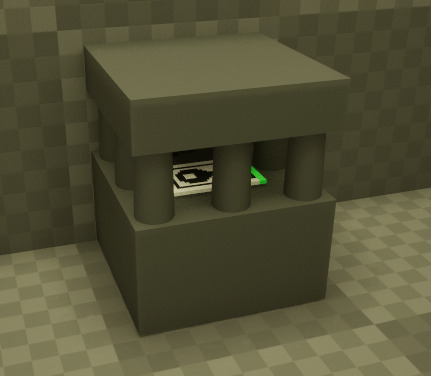
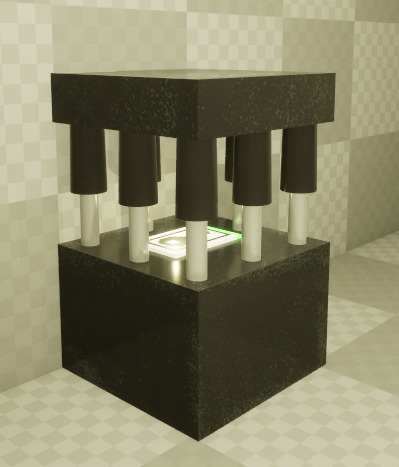
This is how it would look ingame.
The keycard is inside of the cell container, and you'd interact with the container to have the animation play (linked below) so that you can gain access to the keycard.
youtube
I've had to do it manually, but this is how it would look when the animation finishes.
(Yes, the glitchy texture is still there, and no, I don't know how to fix it.)
1 note
·
View note
Text
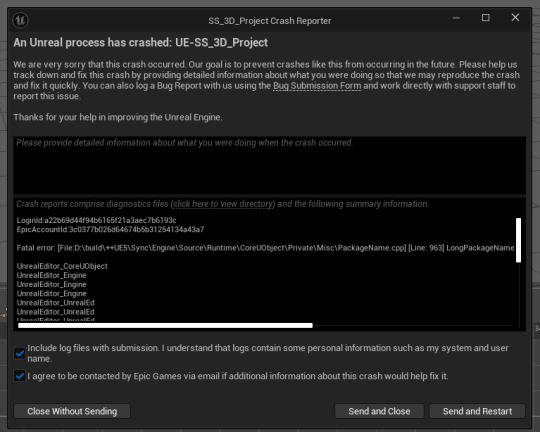
Day 16
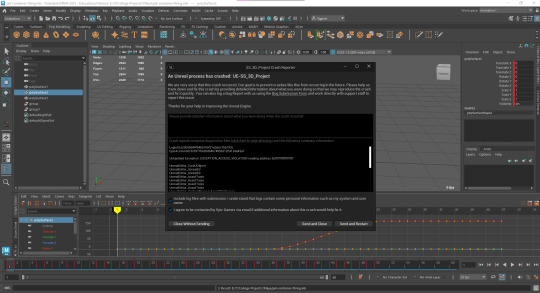
I cannot get my object imported into Unreal.
It still crashes and I don't know what to do.
Everything the internet says is to do something that either doesn't exist, or something I'm already doing. And then whenever it recommends something I haven't done yet, it still crashes.
The only thing I can think of is to remake the model.
But I've spent like 3 weeks on this, and I really do not want to go through all of that again.
Apparently, my animations were in the wrong FPS.
So I need to redo my animations.
That wasn't too difficult, I just happened to remember the exact location values for each part of the animation.
It seems I just forgot to remove the animations from the static object which were still using the 24fps animations and not 30fps.
Nevermind that, as even removing the animations fixed nothing.
It still crashes.
I imported it as an OBJ. But it's very glitchy with some of the textures not working.
Either I live with this, or I try import the fbx.
0 notes
Text
Day 15
I need to lock in and actually do the UV Map of my container thing.
Ok I am very confused and it is not working the way I want it to.
I make a texture. I apply the texture. Then the texture doesn't show up, so where is it?
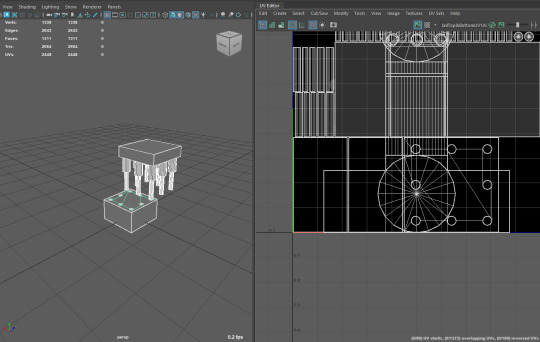
The textures seem to show up only at a certain angle, at another angle the texture is gone.
here it is.

and oh, it's gone.

This is very confusing to me.
Okay, I think I sorted it
For some reason, I just had to re-do the process in the exact same way as I did it before, except it then worked.

I am thinking, I do not like this.
The UV Map is way too confusing.
I don't think I can deal with adding more to this. I might just import it into Unreal as it is, even if it is abysmal.
Every single time I try to import it, it just crashes.
Even importing with animations turned off just doesn't work. I seriously don't know what I've done wrong.
0 notes
Text
Day 14
I hope today goes well. It'll just be more independant develpoment but I hope it goes well.
I need to turn this:
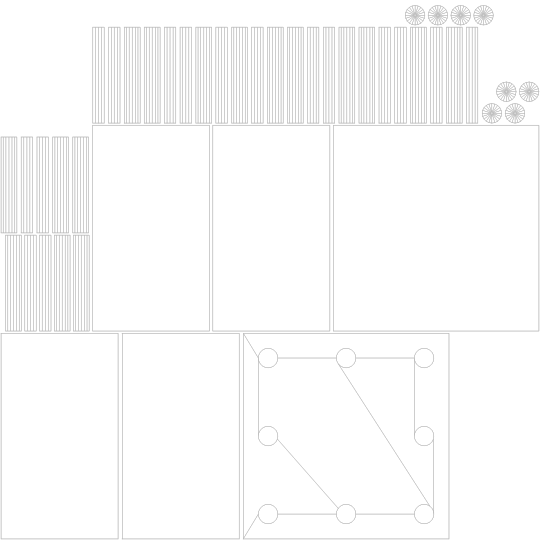
into an actual UV map.
I forgot I need to have both UV maps be in the same image so I now have to deal with this:

Awesome.
It's either I texture the UV map with it unedited or I do it after I used the automatic button.
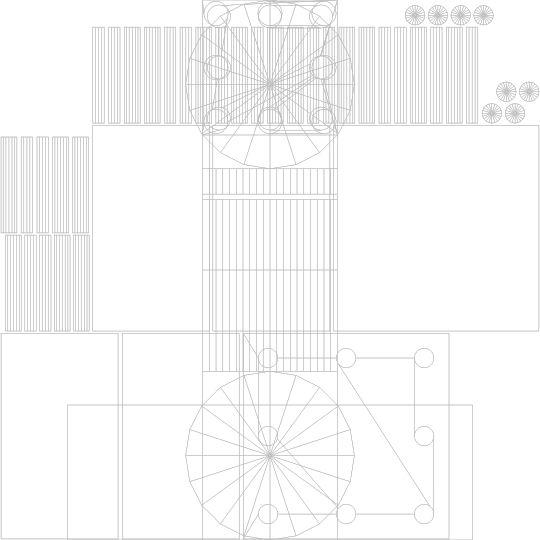
These both look unappealing.
It has been 20 minutes and I have not made a start yet.
This is not very appealing to my brain.
1 note
·
View note
Text
Day 13
More independant development which means using more Maya.
Using an old blog post as reference as I cannot remember exactly how to do animation stuff.
I haven't seen this screen in a long time (It's been about a month).

I didn't think to write down my process of doing this, but if you want to know how to do this, there's a link to a previous blog post of mine here <<<< (I'm surprised that that worked.)
It's not much, but here it is.
The only thing I can think of to do next is put something inside of the jail cell thingy, and then texture it.
Unless. What if I put my keycard from MagicaVoxel into Maya and have that be the item inside of the jail container chest thing.
What I need to do is re-export my MagicaVoxel project as a .obj rather than a .vox.
Unfortunately, it did not work as expected as it imported purely white.
I'm not sure why this always seems to happen. I have an idea, I try to do it, and then it does not work. Then I will look it up and it will seem as though nobody else on the internet has had this issue as I look up how to apply the correct colour to it, and there will be no results as it seems to import correctly for everybody else.
0 notes
Text
Research!!!
This is about sound in games! More specifically, the Emotional Impact, Cognitive Processing, Cross-Cultural Sound, Game Soundscapes and Player Experience, and the Influence on Player Behaviour in games when it comes to using sound.
The Emotional Impact in Games:
In video games, the way that the sound is presented can drastically change how a player may view a situation or scene. This can best be shown depending on which type of game you're playing, whether it be a horror game, puzzle game, or an adventure game. For example, 'Slender: The 8 Pages' is a horror game which uses a slight sound to indicate to the player where the pages they need to collect are, while also playing an increasingly loud staticy noise the closer you are to the enemy.
youtube
Meanwhile, in other games, such as puzzle games like Candy Crush, they give off sound cues whenever you clear 3 or pass a stage which grants the player that sense of dopamine that they find addicting, so they come back for more.
youtube
The Cognitive Processing in Games:
In games, you are able to indirectly guide players to where they need to head by utilising nothing but sound. Well, you still have to use the environment and other such necessities of course as sound alone won't cut it. Sound can be used in many ways, whether it be to give the players handy clues or hints, or maybe warning them about a potential danger up ahead. One example of this is in Metal Gear Solid with the Alert noise. This sound plays whenever you have been spotted by an enemy so gives the player a hint about to quickly make yourself hidden or to hastily dismantle them.
youtube
The Influence on Player Behaviour in Games:
Inside of games, the way that the sound may be placed or used could influence their decisions. This could be the noise of a container nearby that would draw you in as you'd most likely want to open it, or the hum of a generator you may need to turn off to progress.
One example of this would be in Fortnite in which, as you're playing through the battle royale (or playing the save the world mode), you'll occasionally hear the hum of chests which will influence you to stop whatever you're currently doing in order to find and search the container.
youtube
Another example of this could be in Minecraft. If you're digging underground and hear a zombie groan nearby, that could indicate that there may be a cave in your area so you may stop whatever you're doing in order to head to that noise.
The Cross-Cultural Sound Design in Games:
In the games, depending on which country you're from and what region of the game you play is, the sound that plays during the game may vary widely. This could be due to a variety of reasons, such as Western Players and Japanese Players responding differently when it comes to the same sounds playing so they may change it up in order to invoke the response that they want.
An instance of this is in the Superman game, in which the Japanese copy includes the superman theme song either as a leitmotif or just outright there, while the American copy does not include it at all.
youtube
The Game Soundscapes and Player Experiences in Games:
Within video games, the way that ambient sound and noises are used can drastically impact how a player reacts to and traverses through a world. The world could be beautiful and immaculately designed, but if it is silent then that doesn't matter. Take this video for example (I know it's fortnite again, I'm sorry.) You can hear the wind rustling the leaves and blowing the grass. All these little additions which some may deem unnecessary to include in a battle royale may be why this game blew up as it did.
youtube
2 notes
·
View notes
Text
Day 12 (Part Two)
Doing Decals in unreal.
I make a new materal and open it. In the details panel in the corner, we change the Materal Domain to Deferred Decal and the Blend Mode to Translucent.
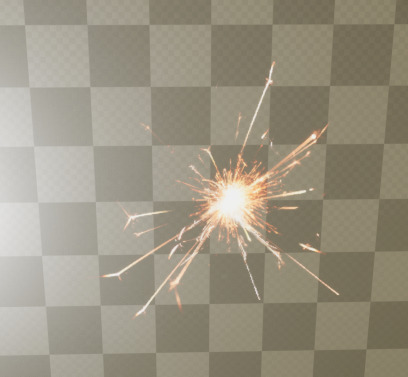
Now we want a new node of Texture Sample. Change the texture in the detail panel on the left to whatever (I chose T_Spark_Core). Now connect the RGB of the Texture Sample to the Emissive Color of the other node (I named mine decal1).
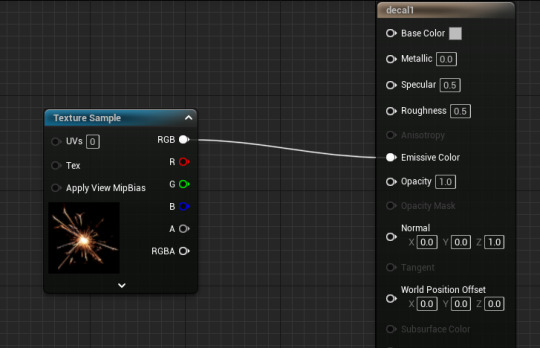
Now you can place it in game, but make sure that the green bounding box is rotated the same as the surface you want the decal on.
This is what we want.

This is not.
We can now attach this to our bullets. Off of Event Hit in the BP_FirstPersonProjectile blueprint, we want to make a Spawn Decal Attached node. Then connect the Attach to Component to the Ohter Comp of the Event Hit node. Additionally, you want to connect the Hit Location of the Event Hit node to the Location of the Spawn Decal Attached node, then do the same with the Hit Normal of Event Hit to Rotation of Spawn Decal Attached. It came up with a pop up but it's fine to accept it as it's required to make it do its thing.
We change the Location Type to Keep World Position and the Decal Size to whatever scale we want (I chose 30, 30, 30). Then finally, change the Decal Material to the Decal we made earlier.
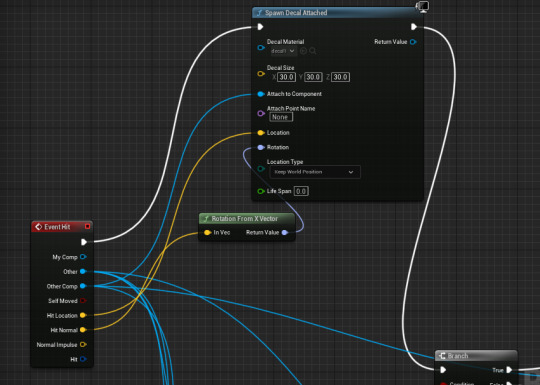
And now your bullets should leave decals in the map.

0 notes
Text
Day 12 (Part One)
I have taken a weekend off, I still do not like Maya. But apparently last week I forgot to mention that I fixed the mesh, and now both boxes are of equal length and width.
But now I'm doing Niagra Particles I think.
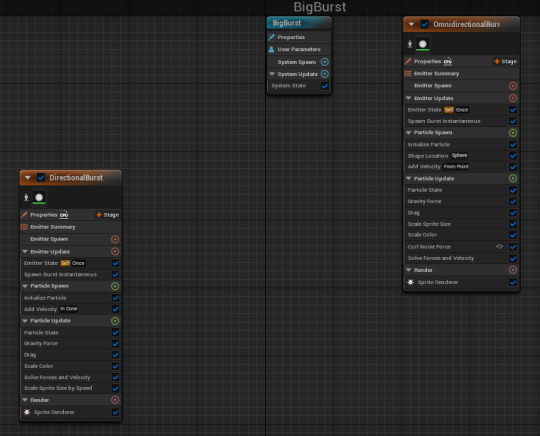
I make a new folder and make a new Niagra System blueprint. Then choose the Omnidirectional Burst.

We open the blueprint we made and we're greeted with this.
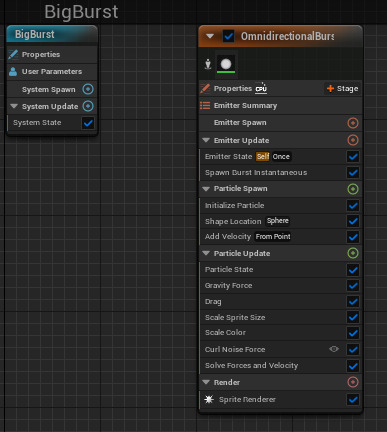
We can change any of these tabs to whatever we want. So for example, I set the 'Initalize Particle' tab to be purple and to spawn 10,000 particles instead of 100, then selected 'Gravity Force' and set all 3 values to 0. Then I added another particle via the 'Add' button just below the timeline. This time I chose Directional Burst and tweaked with that one also.
Then we go into BP_FirstPersonCharacter and make a new node (I did Q Key (not the debug one) to make it so I could spawn the particles at any time.)

Did something different. Either ended up getting lost somewhere or my thing isn't working the same as everybody elses because mine is not working as intended, but everyone else's is.

Now I'm making a cinematic
First we make a new actor, a level sequence this time.
Then you have a sequence
And add keyframes to where you want the camera to be.

Now we open level blueprint. And inside, get an Event BeginPlay node, then connect a Create Level Sequence Player node and then connect a Play node to it with both the white arrow and the Return Value into the Target node connector.
0 notes
Text
Day 11
I still don't know what I'm doing. I resized the bottom cube of the container thing to be of equal size to the top cube.
I'm realising I should probably make a landmass for my map level thing to reside on, rather than be just floating.

After a little while, I added more texture and such to the landscape.

0 notes
Text
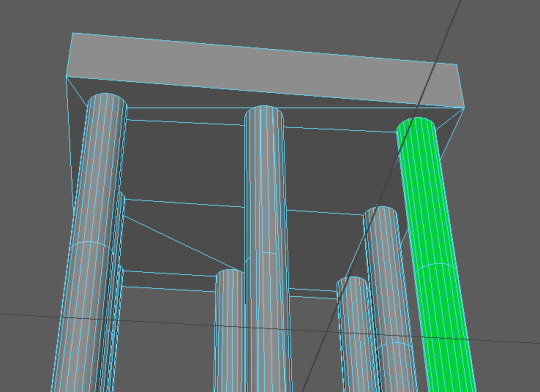
Day 10 (Part Two)
I would put here all that I worked on so far, if I had anything. I do not think I am the biggest fan of 3D modelling but I will make it work.
Not too sure why it isn't cutting through these pillars fully.

And as to why a random pillar is fully green.
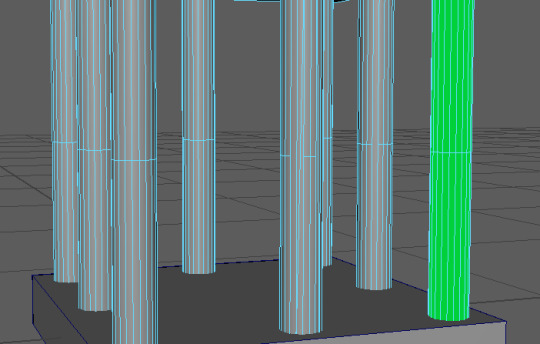
Then when I unionised it all, an additional 10 lines or so were added to the roof.
I much prefer MagicaVoxel, though Maya is still a great program. I would probably be great with utilising Maya if I kept using it once initially introduced to it, but because I left it for a month or so and switched to MagicaVoxel, I now open Maya and I am completely lost to my own fault.
While I'm working on this container, I can think about what I want the rest of my map to be.
I know it's going be something prison themed, and my brain is remembering back in 2015 or so, there was this minecraft map that was a prison and some of the set design seems interesting so I may base it off of that in some aspects.
Anyways, maybe I just need to make the mesh again and split the cylinders before unionising them with the ceiling and floor.
I made the top half of the cylinders big and shoved the small part into the ground.
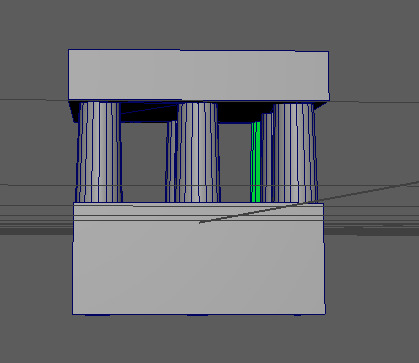
Still no clue why that one pillar is green but it will work.
Not to mention, the cut I did is lopsided, so I need to undo about 20 minutes of work (which could be done easily by a professional in about 30 seconds) just to fix this issue.
Remaking that took about 2 minutes. This makes me realise that I really have done nothing today, but it's okay because with practice, Maya will be a very helpful program to use.

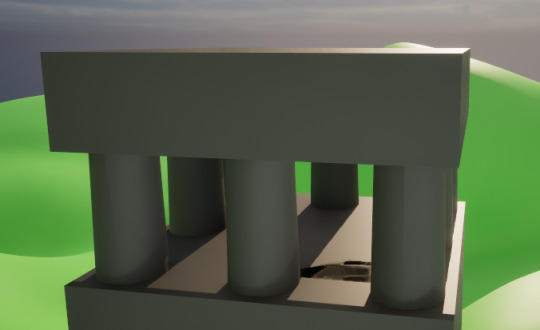
I have made holes in the lower cube so it doesn't look like the top half is sliding into/out of nothing.
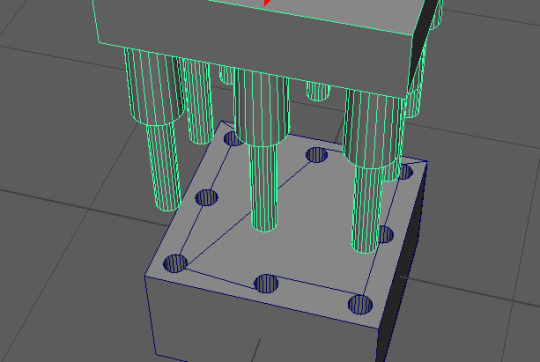
Still not sure what's up with the wireframe.
Another thing I've just encountered and I'm not too sure how it's happened. The bottom box is smaller than the top box, and I didn't realise this until already making the holes, but I can just remake one of these boxes, so it is really a nothing issue.
0 notes
Text
Day 10 (Part One)
I need to make an idea for some form of chest, or loot crate, or container that opens and holds something inside.
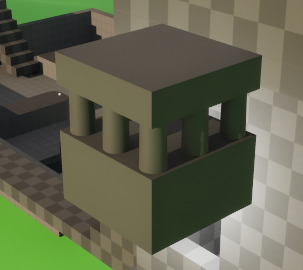
Because of what my map is like, I'm thinking about making some form of mini jail cell, with bars connected to a square concrete roof and floor, with it opening either in a twist-like motion or coming up and the bars disconnecting with maybe smaller cylinders inside each bar that is used to connect the two.
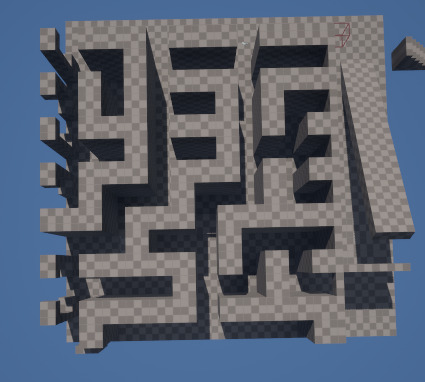
Anyways, I managed to (basically) replicate the maze I made in Unreal into Magica Voxel.

Anyways, now I need to make that jail container thing, but it has to be in Maya, which will conflict with the rest of my 'art style'. Hopefully, I can make it look close enough.

This is what I've got at the minute.
0 notes
Text
Day Nine (Part Two)
Thinking about it, I may be in over my head. I'm realising that I'm not sure if I'm meant to make my level using the built in cubetool, or if I'm meant to build it using a program like MagicaVoxel.
Anyways, I think I should try work on making a lamp in MagicaVoxel.

I made this.
I think it works well in game.
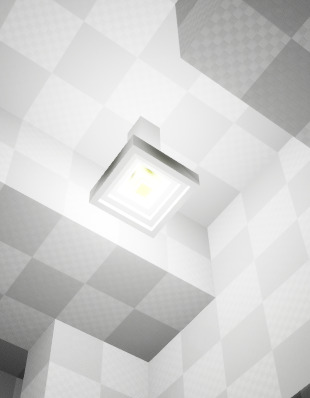
I think it was worth while doing this.

I am realising that I should probably make my level in MagicaVoxel and import it.
It's not going too bad at the minute, I like the black outlines around everything, though I know it won't export with them so that's fine.
For some reason I'm having a hardtime getting the actual measurements correct and I'm not too sure why, but this is what I have.

0 notes
Text
Day Nine (Part One)
Continuing developing my level thingy.
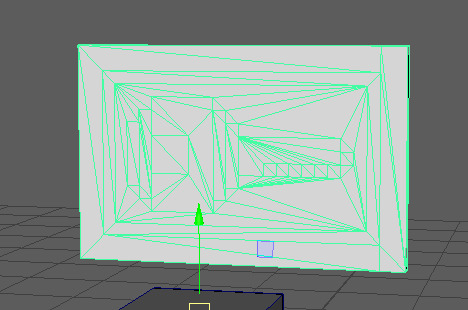
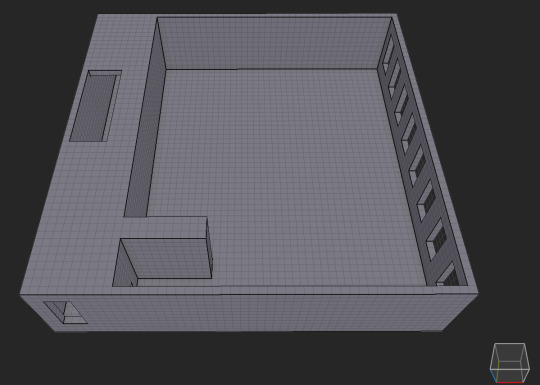
I forgot what I was doing before hand, but then I remembered upon opening the level. I'm pretty sure I was attempting to do a maze of some kind.

This is what I have so far, I took off the roof (which seemed to have also been connected to the walls) so that I could better track out a path.)
And now this is what I have.
From the top down, it is very clear which path(s) you have to take, but hopefully it will be atleast a tiny bit difficult when playing.
Well that's not good.
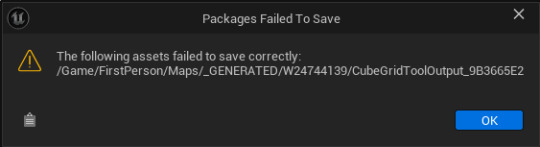
Oh nevermind, it's been fixed. For some reason it opened two instances of Unreal Engine, which was seemingly cause it to bug out as it had one version of the asset open with a more updated version of it trying to overwrite it (probably.)
Anyways, the roof has been placed back onto the maze. It's a bit dark inside, might need to make it so the pillars are carved out in a way that light can always get though.
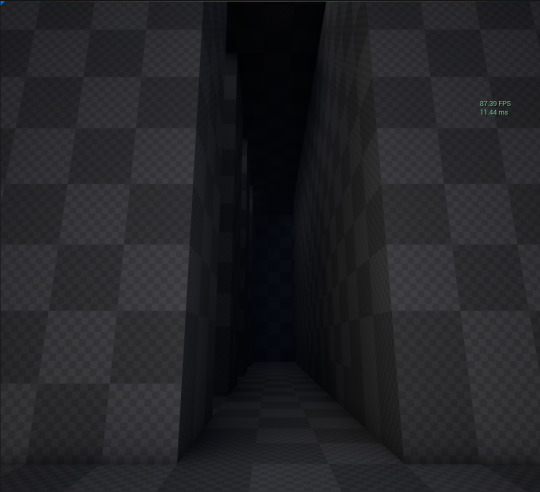
I made holes for the light to go through, and it got darker. I am not sure how this is possible.

I added some lights inside, but this feels cheap so might instead do one directional light rather than 6 point lights.
Works a bit better, but still seems like it's coming from nowhere. I can't really fix this unless I make the natural light come in through the roof, or I make some form of ceiling light in MagicaVoxel, similar to this.

I think I'll stick with the standard point lights.
But now I'm making a landscape material to use with the landscaping tool. Make a material and open it. First, you want a Landscape Layer Blend node. Make one and connect it to the Base Color of the node that was already in the Material Graph (For me, it was simply titled 'landscape') Now, in the black square of the 'Landscape Layer Blend', you want to open it, and make 3 layers (You can make many as you want, but I'll be making 3.)
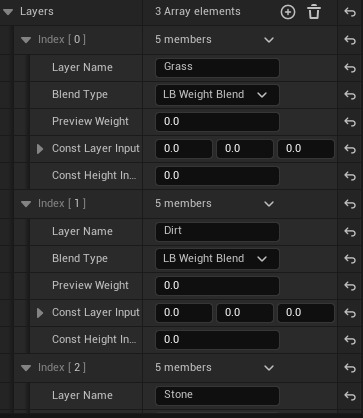
Now in the Material Graph, hold down '3' on your keybaord and click 3 times. This should make three 0,0,0 nodes. Change each one to the color you want. Once you've done so, connect them up to the 'Landscape Layer Blend' node.
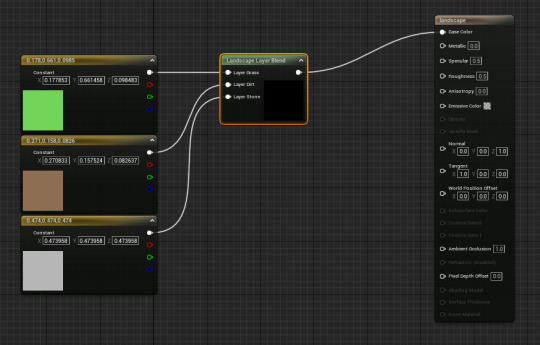
And that should be it.
Now, in your actual map, you can open the landscaping tool, which should spawn a plane. You can use the tools you're given in the Sculpt tab, and then when you're done, you can then select the ENTIRE landscape in the Outliner panel (not just one small portion of it), and make sure to assign the 'Landscape Material' to be the material we made just minutes ago. Once this has been done, we go to the Paint tab in the Landscaping panel on the left, and then we should have our three colors.
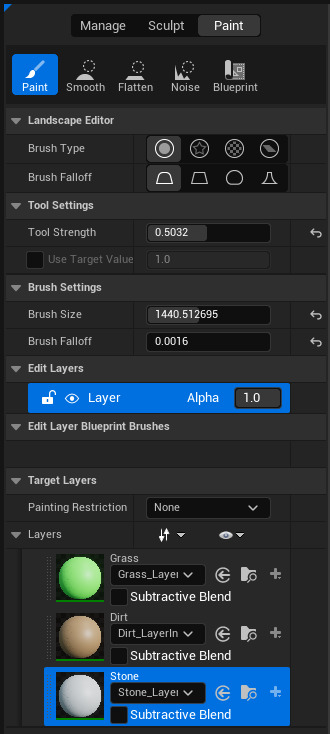
Now you can get painting!
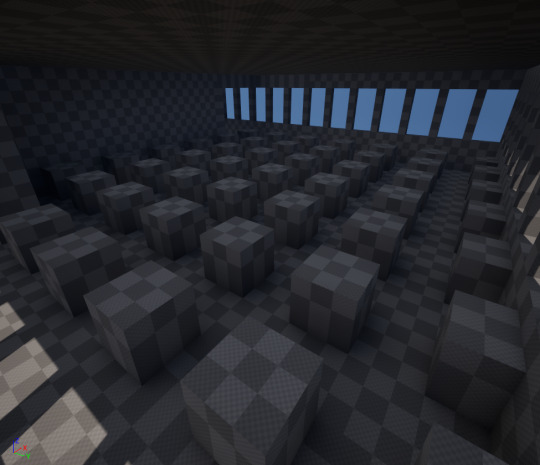
And after a while, I made this. It's nothing more than a pit but I made the pit so I'm proud.

1 note
·
View note
Text
Day Eight
Continuing what I was doing yesterday!
After using Maya and MagicaVoxel, I have decided I am not too great with using Maya, but if I practice, it would be great fun to use. The UV Maps and the whole modelling aspect really confuses my brain, unfortunately. I'm sure it'd be easier to use if I used it more, but as of right now, I much prefer Magica Voxel.
Anyways, I am going to make a moodboard to figure out how I want my keycard to look like, to use on the locked doors.

It took me a little while, but I made something.

It took me the longest time to figure out what design I want to have in the middle of it but I think this works.
And here it is in the game.

And here you can see that I've continued the main first part more.
It's going to be some sort of maze, I think.
0 notes