
Don't wanna be here? Send us removal request.
Statistics
We looked inside some of the posts by ss-arcade-project and here's what we found interesting.
Average Info
Notes Per Post
12
Likes Per Post
11
Reblog Per Post
1
Reply Per Post
0
Time Between Posts
4 days
Number of Posts By Type
Text
17
Last Seen Tumblr Blogs


Fun Fact
Celebrities use Tumblr as well.
Text
Day Twelve
It's been a while, but I need to finish this project this week. Get the UI done, make the lighting less primative, maybe add some sound too.

I had a look at this site.
I have just realised I don't actually have to continue this project anymore.
Awesome, here is the final video of it.
0 notes
Text
Day Eleven
I think my groove is back.
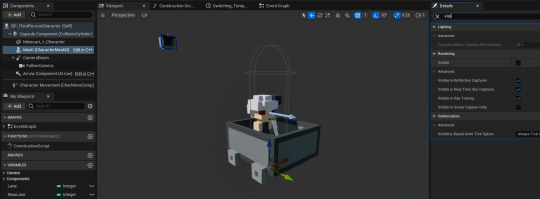
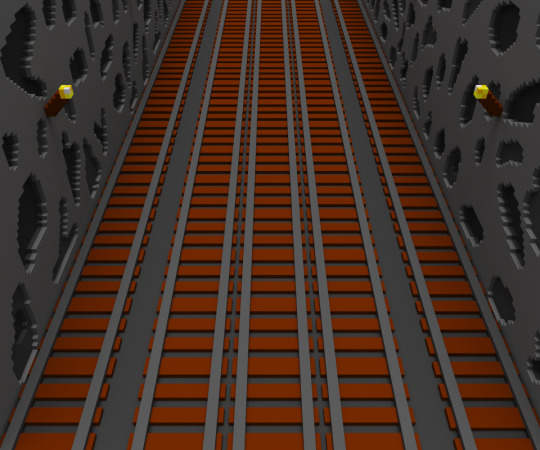
Today I added my MagicaVoxel models to the game, which makes it look better.
Additionally, I fixed a bug where my points wouldn't work properly but now they work as intended. I also tweaked the movement speed of the player character, where you now start off faster and the maximum speed is faster too.
From my previous Arcade Project, I need to re-add the whole UI.
But as of right now, here is gameplay of the game.
1 note
·
View note
Text
Day ten
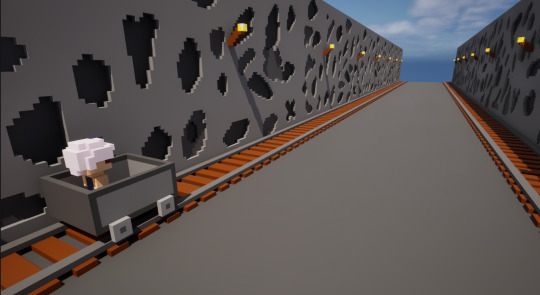
I made a few hazards that you need to avoid.
Minecart, but without the cart.

Rock.
Hole. (It isn't actually a hole, it's just a black circle.)
I'm now also making the collectable. Because this is all underground, I thought of making it a gold ore, or something. I need to NOT steal from Minecraft or Terraria but I'll definetly use them as inspiration.

They both seem to share a similarity of being chunks of yellow mineral, so I will probably do the same.
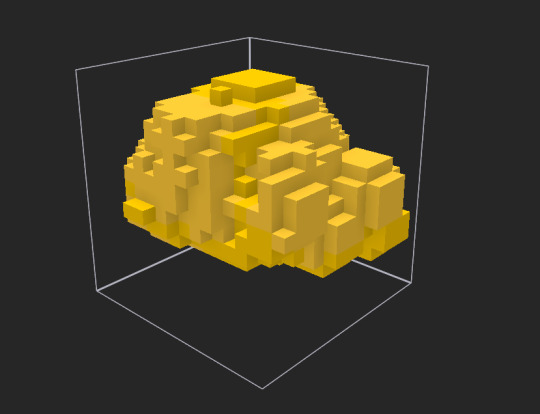
It's abysmal, but it'll do.

0 notes
Text
Day Nine
I don't want to give up yet, so I'll keep trying.
I couldn't remember how to make an imported mesh use complex collision so I used this video to help. (It was very simple, I was just forgetting.)
youtube
I can't figure out how to resize the capsule component to fit the player character so I feel like I've done something incorrectly.
0 notes
Text
Day Eight (Even even more Independant Development)
I need to figure out how to import MagicaVoxel to Unreal again.
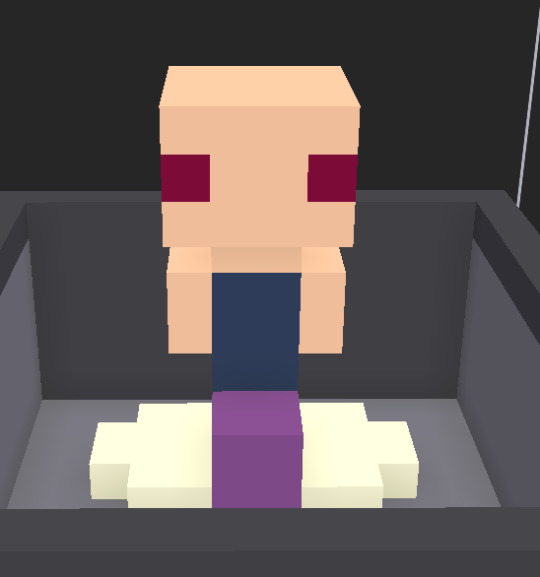
I looked at my character I made last week and I think I don't like it with the hat on. Or I just don't like it in general.

Like why does it look like that. Abysmal.

I much prefer it without the helmet, so I think I'll go with this.
I do not remember how to put MagicaVoxel models into Unreal.

Why is it white?

I got the colour back.
Again, whenever importing anything, they're always tiny and need to be rotated 90 degrees on the X and Z axis.

I haven't gotten it correctly bound to any characters or platformer thing yet, but this is a quick overview as to what it'd look like.
2 notes
·
View notes
Text
Day Seven (Even More Independant Development)
I'm very stuck. I don't know whether to choose to make it fully 3D, or to have everything but the character be 3D.
Because I cannot make the minecart as seen from behind and at an angle as well as I would be able to just make one within MagicaVoxel.
But then there's the issue of how do I do my character?
Do I make it a merge of the two, with the 2D art inside of the 3D mincart. Or do I make the character also 3D.
I can attempt to make the character and then make the Minecart around that. But I need to remember to make the cart small enough to fit on the pre-established rails which I already created.
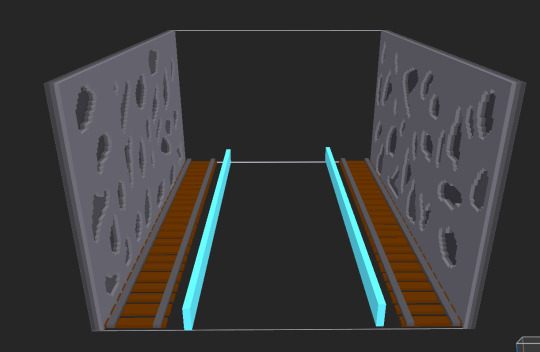
In other news, I completed the repeating background that the player will be subjected to while playing the game.
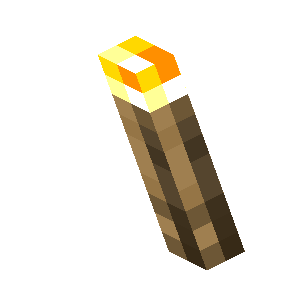
It could probably use a bit more work, such as torches and other such assortments of random items on the walls.
But I think this is good for the most part.
I am, once again, using Minecraft as inspiration.
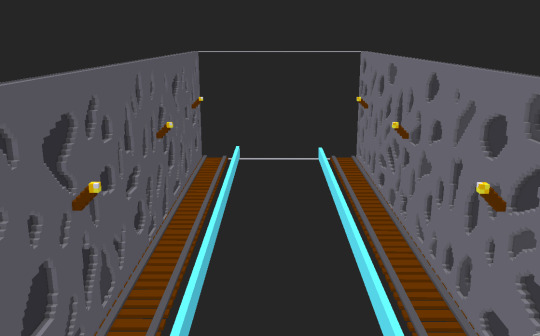
It isn't the best but it will do.
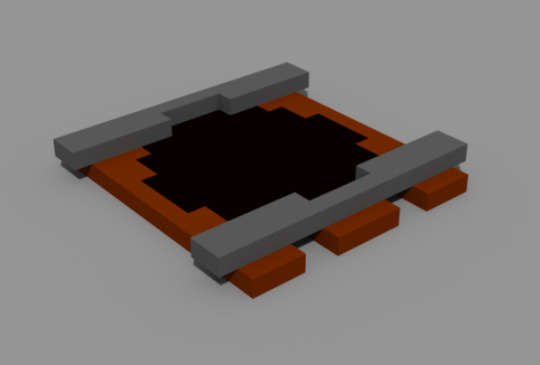
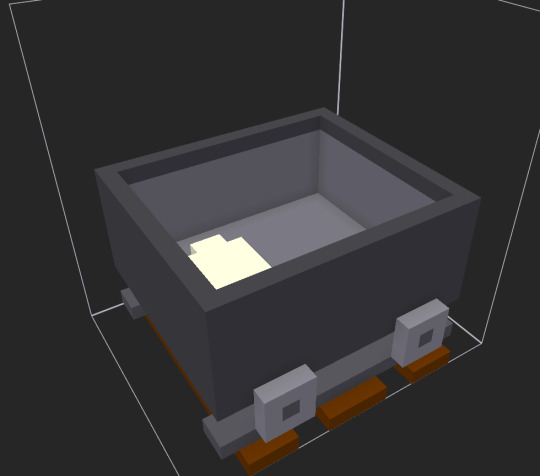
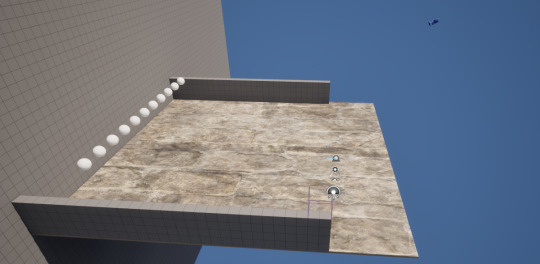
I have made the ground visible. It isn't going to be majorly detailed but that is due to the fact that the rails will be on it.
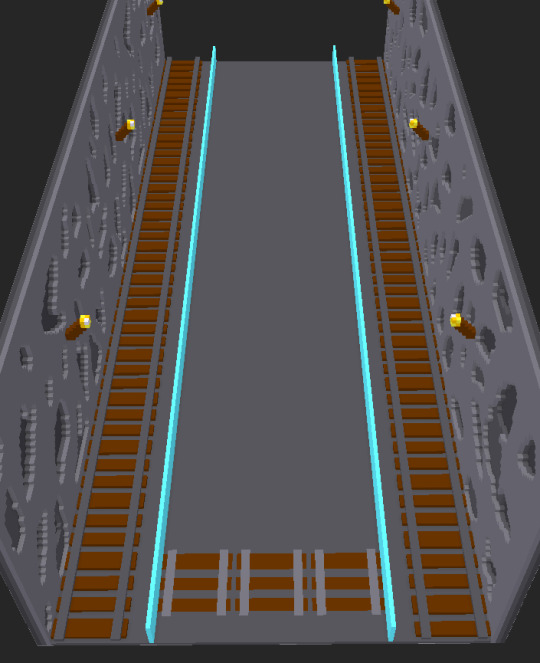
Additionally, I left some indents in the floor to show where the actual minecart tracks that the player will ride on will go.
At second glance, I think I'll change the floor to be darker so you can differentiate the rails from the floor more easier.
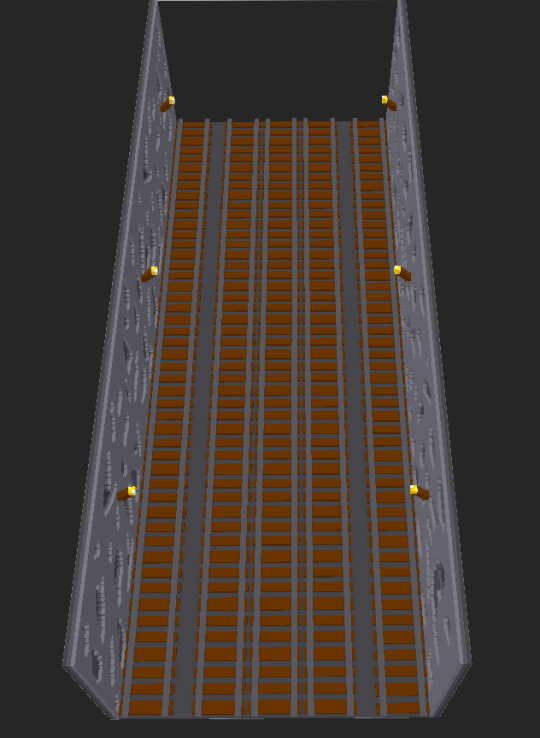
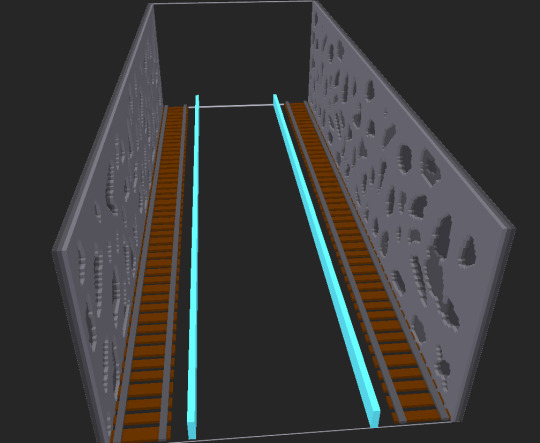
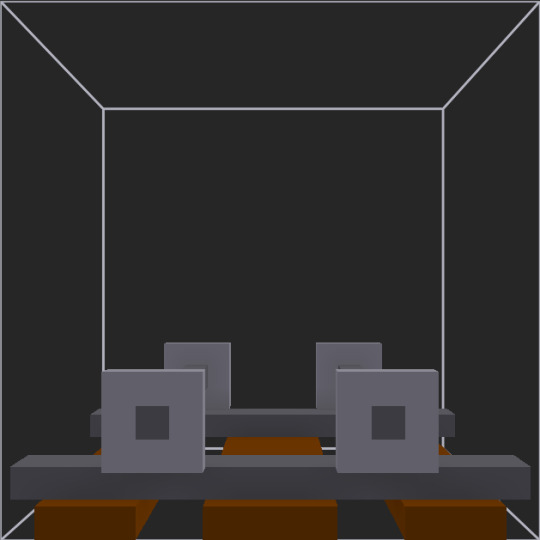
And here is a mock up of how it would look from above.
Andusing MagicaVoxel's built-in renderer.
I think the gap from the outermost rails is significant enough to tell players that they can't go there.
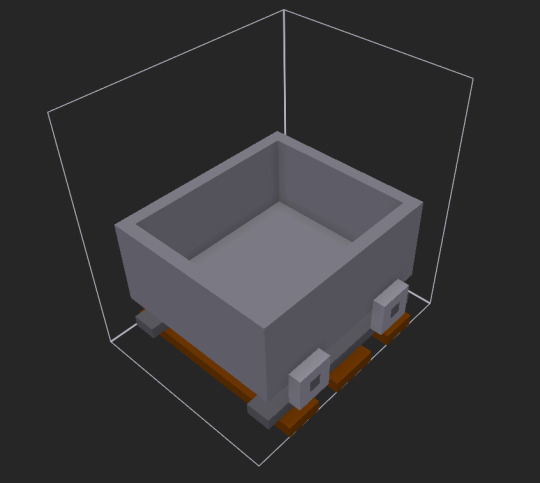
Minecart being created.
I wish this is how it looked from all angles, but when you paint a pixel it paints all 6 sides. I'll still see if I can go for this look though. However, it may mean that the inner minecart is more cramped.
I've realised that you're only really going to be seeing it from the back so the sides and front do not matter.
I thought I'd give my minecart a license plate too, purely for the comedic factor.

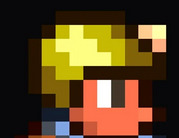
(Using this as reference.)
I'm realising there is not enough space so this idea has been scrapped.
I made a little character to sit in the minecart.
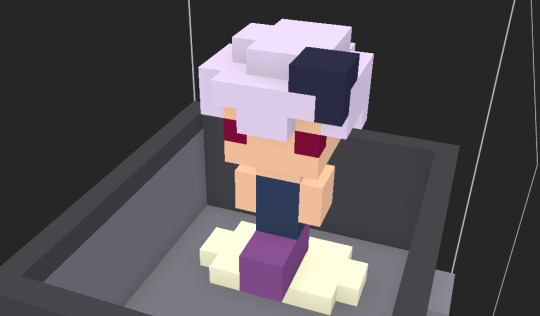
I'm going to give it a hardhat so that it fits the vibe more.
Yes I'm now using terraria as a reference. I truly am branching out with square based, mining and crafting based video games.
SHE'S BALD.

That will do.
I could definetly tidy up the design of the helmet, but I can't do anything without having the helmet remove parts of the characters skull.
Okay, so I removed a part of its skull and flattened the top of the helmet because it looked very bulky from the players perspective.

This is how it looks from the back.
I'm thinking I could definetly make the character bigger, which is most likely what I'll work on next.
0 notes
Text
Day Six (More Independant Development)
I made the spawner orbs hidden in game so that they don't show up during gameplay to make the whole experience seem smoother.
I should probably focus on working on my assets though.
I'll most likely re-use this asset to make most of my level.
If i have there be only 3 playable lanes but theres one more on either side in which the player cannot go on might be good.
But as I'm writing that I just realised that that would just confuse the player so maybe not.
Well that doesn't look too bad? Maybe?
I'm not too great at this.
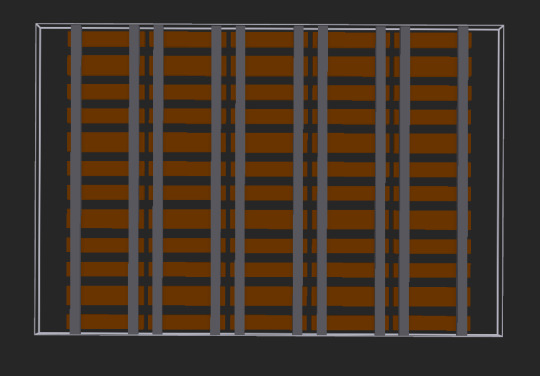
I spaced out the rails a bit to see if that would help. It didn't and if anything just makes it look worse because it's drawing attention to the one thicker plank of wood every 3 planks in the same place on every single rail. Unless I move it so that it alternates between which plank is the thicker one.
Okay so I've moved the two outer rails further away from the middle 3, while simultaneously pushing the middle 3 closer together to hopefully differentiate to the player which rails they can and can't go on.
Now I need to figure out the walls for this. There most likely won't be a ceiling because you're going to need to see the player character.
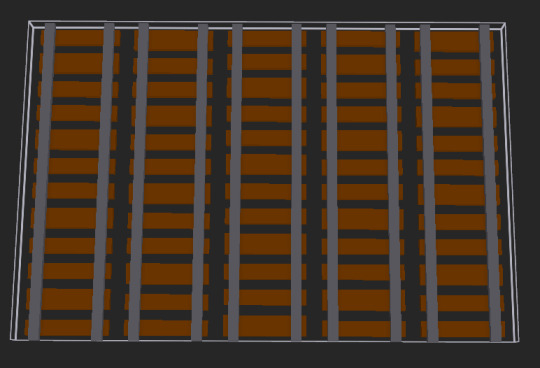
I did some more work. You'll notice that I got rid of the middle 3 tracks which is due to the fact that that is where the game will place the tiles itself.
I'm proud of what I've achieved this morning. So I think I will work on the actual game itself for a little while too, so that that doesn't get too left behind.
I'm going to make a new project entirely as I feel the one I had already was starting to get a bit cluttered with every thing done with workshops, where as I'm now following the instructions of an Endless Runner Tutorial meaning that the only thing I do in this specific project will be related to the Endless Runner.
Moving to the new project, I'm opening up the Content Drawer and, as usual, going into the blueprint for the Third Person Character.
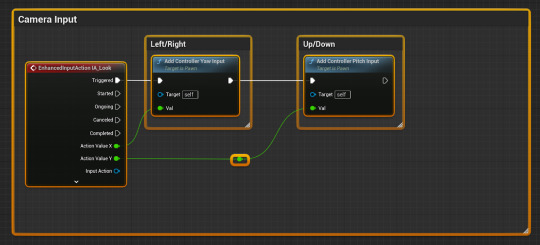
In the Event Graph, I delete all of the Camera Input.
Then I go down to the Movement Input. I remove every connecter there is from the Event Tick to the Forward/Backward movement. Then I moved this up to where I deleted the Camera Input, then attaching an Event Tick node to the Add Movement Input node.
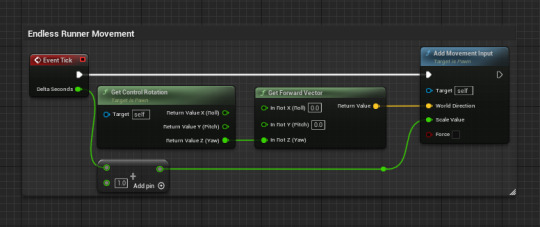
What this does is forces the game to always make the player character go forwards, meaning that the only thing that the player is able to do to control their character is by moving left and right.
Without thinking, I went through the whole guide without updating the blog so there are a lot of parts that I have just forgotten to note down.
But now that I'm at the end, I'm thinking 'Should I have made a new project for this? Why didn't I just put it on the original Project File?'
I have a feeling this is going to end up like the previous project and I hope it doesn't because I was having high hopes about this earlier today.
0 notes
Text
Day Six (More Independant Development)
Looking at Minecarts now.

They all seem pretty similar. Two wheels near the center while the rest of it is made out of metal with some parts replaced with wood in some iterations.
Hopefully this goes well, I'm just doing it on the same minecart track model so I can get a good size.
Though, this would be hard with a 2D character and 3D minecart. I might have to rethink this and make my minecart 2D.
Could definetly use this as some sort of hazard to avoid during gameplay though, like an old rotted away minecart, leaving just the axles.
The real question is how will I do it in Photoshop. Will the player and minecart be seperate. Will they be the same drawing? Will they be side-on or with the back facing the camera.
I want the camera angle in the game to be similar to when you go into third person mode in Minecraft.


Once again, I realise that art is NOT my strong point.

(The 2x2 in the top left are just the colors I've used so far, pay it no notice.)
5 notes
·
View notes
Text
Pegi Ratings
When a game is released, it is required to be rated by Pegi. That is the Pan European Game Information.
All information comes from this site:
A game can be rated from a PEGI 3, which means a game is for anybody and includes no offensive or consequential imagery, to PEGI 18 which means a game is only for adults as it includes many acts of unwarranted violence, a large variety of strong expletives, and other such offensive and consequential imagery.
The arcade game I am making in this project is aiming to be at the rating of a PEGI 12.
And as you can see from below, those are the ratings I have to abide by.
This rating includes some games such as Terraria, Fortnite, and Persona Q.
Terraria is rated PEGI 12 due to the fact that it includes Violence. However, the reason why it isn't rated higher like other violent games such as Grand Theft Auto is due to the fact that none of the characters within the game are depicted realistically. When you're damaged, you make video gamey 'oof!' type noises as opposed to exclaiming in pain such as in GTA with damage being shown by numbers on the screen with a health bar in the top right. When you kill an enemy, they either disappear immediately or collapse into little chunks that despawn after about 2-5 seconds. While you do explode into pieces when you die, it is in a more similar aspect to lego than an actual body being dismembered and as stated prior, none of the characters are realistically proportioned so it isn't as gory or scary as if they were.
youtube
Fortnite is also rated PEGI 12 for similar reasons, which is violence. But there is an additional warning about in-game purchases, something which Fortnite is very famous for. When it comes to violence, it is on a similar level as Terraria. Damage is again represented by numbers and your health is showcased by a bar in the bottom left of the screen though your character doesn't seemingly react to any of the damage in any way, be that through noise or how they move, until you run out of health. While the guns in Fortnite are more realistic with them resembling actual guns rather than something you might see in the Worms franchise, the characters dying are similarly unrealistic, with them simply falling over in an exaggerated fashion before quickly disappearing into blue particles as opposed to collapsing into bloody pieces.
youtube
Persona Q is rated PEGI 12, though it is a drastically different game than the previous 2. This is because rather than the combat happening in real time and having to move and adapt on the fly, Persona is a Turn-Based RPG.
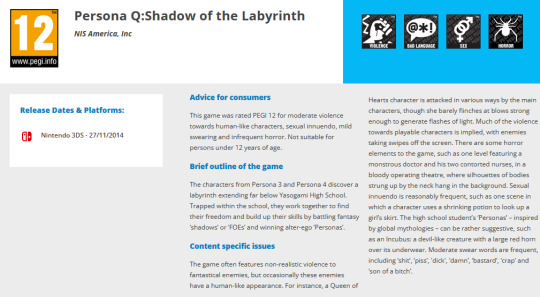
Additionally, the way fights go in this game are a lot different to the main line games as, in order to fit it all on the 3DS' hardware, there are no actual player models and only those of the enemy. This means that there's no visible damage actually seen being taken by the player or their team as it's always numbers on the screen whilst the enemies are able to be seen taking damage but they are almost always designed in a non-human way.
youtube
2 notes
·
View notes
Text
Day Five (Independant Development)
As the title suggests, today and every day after today is going to be fully independant development.
I think first I need to start working on the spawning of the enemies. Additionally, I should note that from my Initial Arcade Game Ideas, I went for the second one mostly, because it's the one I had the best idea on how to do it though some part of it may still change as it could be a shark escaping fishing boats or a squirrel dodging traffic or even something similar to the club penguin minigame of a minecart.
I am transfering my movement controls from a test map I used on Day 1 to my actual game as they are vital in order to make sure my creation works as intended on an arcade machine.
From what I can see, I have a lot of Input Actions bound to different buttons on my controller.
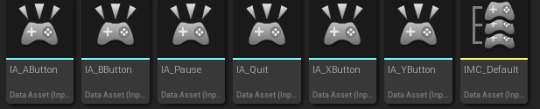
To refresh myself, this is how to make a new Input Action
I named it IA_LeftShoulder as I'm going to be binding this to the Left Bumper on my controller. Then I'm opening the IMC_Default shown in two images above and click the + next to Mappings. This created a new dropdown titled 'None' which I opened and selected the Input Action I created. This then made another drop down which I opened and then actually bound the input action to the correct button.
Repeated about 8 times and now the input controlls are in my main game.
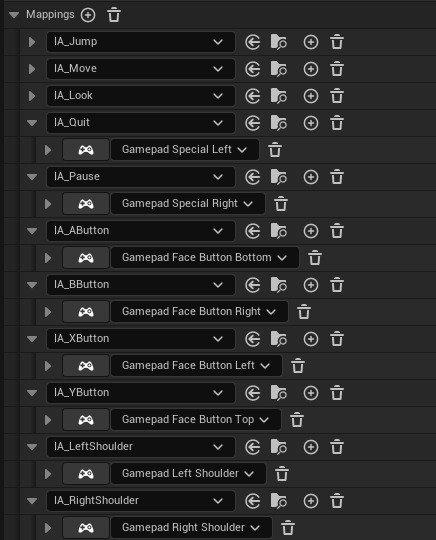
(Jump, Move, and Look are there by default.)
Now I can bind the 'Gamepad Special Right' (button with 3 lines on an Xbox controller) to being the Pause button as opposed to it being space bar.

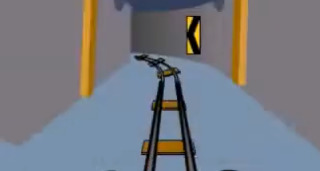
Looking at Club Penguin minecart minigame as inspiration and for research.
youtube
There's a lean left and right. Implementing turning may be too difficult but I can definitely include some form of lane switching. Additionally, there are some tricks which you can perform for bonus points such as running on the track or actually surfing on the minecart.
Anyways, after being distracted by Club Penguin for 20 minutes, I think I should start making the assets for my game. Not sure whether to use MagicaVoxel or Photoshop so I'll make a few test models and see which I prefer.
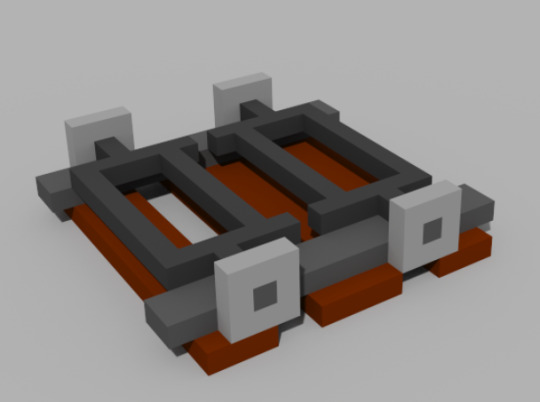
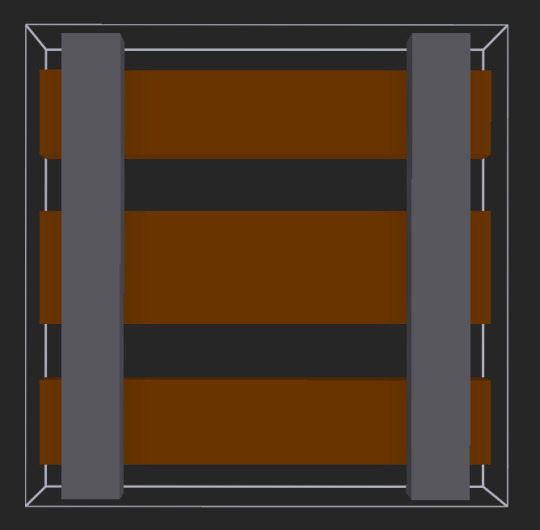
First, I'm making a moodboard for minecart tracks to try and base my own design off of it.

There aren't many here but there's a few and I can see they all have a similar design. Multiple wooden pallets placed underneath and connecting two metal rails together.
Struggling to pick between the two, especially as if I did it in 2D, I'd have to draw the minecart tracks at an angle as the player would always be going head on and would have to see a decent amount infront of themselves, where as in 3D, it wouldn't be that difficult as you can just use the usual camera for this.
Looking at this for ideas. Not because I'm going to implement turning in my game, but for how to actually make the minecart track.

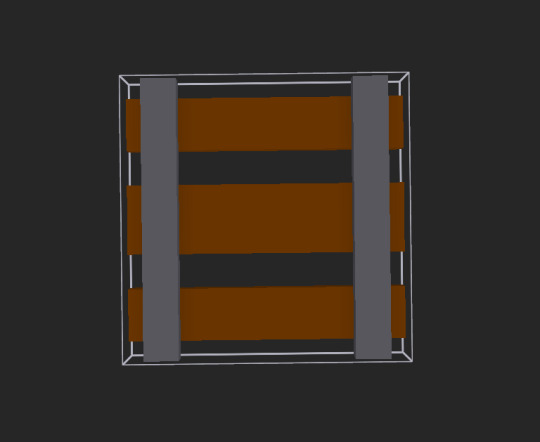
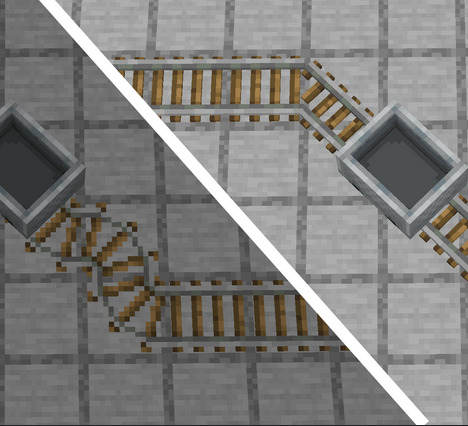
Right now I have this. And I'm realising that it's just copying Minecraft even though that wasn't my intention.
I think I fixed it. The rail and wood are darker, and the wood is thicker too.
The reason why the top and bottom wood is 3 tiles wide, while the middle one is 4 tiles is simply due to the fact that that's the only way I could get this to work and eventually loop without it being wholy obvious where one track stops and the next starts.
0 notes
Text
3 Initial Arcade Game Ideas
Idea 1:
Type of Arcade Game:
The arcade game is one where you move side to side, collecting as many fruit as you can in the time limit before it runs out and you lose. (I don’t know what this genre is called)
Game Concept:
As said in the box above, you move side to side while fruit worth different points fall down with the amount of points granted representing how healthy they are and you have to move onto their path in order to gain points.You don’t win, you lose by running out of time which will always happen no matter what.
The replayability factor comes solely from the fact that there’s a big flashing number on screen at all times, taunting the player making them want to achieve the high score and get a higher score than that.
Theme:
The game links to Goal 2 and 3 of No Hunger and Good Health and Well-Being.
The elements of this that I’m using are the fact that way too many people nowadays eat solely fast food and extremely unhealthy foodstuffs, so this game promotes that you gain points (feel better) the more healthier you eat (the more fruit you collect).
Competitors / Inspiration:
An inspiration would be Fruit Ninja but rather than you destroying fruit, you collect it.
Another game similar to this about fruit is Suika Game, in which you have to make two of the same fruit collide and they merge into a bigger fruit.


Idea 2:
Type of Arcade Game:
Moving side to side as a shark trying to avoid incoming boats and eat little fish, similar to an Infinite Runner.
Game Concept:
You don’t win, as that takes away from the replayability you lose by getting hit by one of the boats. There will be a larger boat behind the player that will always get you and make you lose after a minute or two.
Theme:
It links to Goal 14 of the UN of Life under Water. There is an issue with overfishing, so hopefully this game showcases how common it is due to the fact that you will never win and will always get caught and fished up by the big boat behind you. Sharks need to eat fish to survive, but with a lack of them due to overfishing, they struggle to survive and then they themselves get fished up.
Competitors / Inspiration:
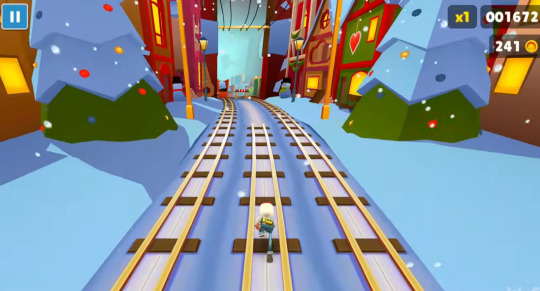
One of the inspirations would be Subway Surfers or Jetpack Joyride, as they’re both infinite runners, though in this game you’re guaranteed to lose within two minutes, unlike in the previous two games I mentioned in which you can run for as long as you can until you get caught.

Idea 3:
Type of Arcade Game:
A platformer, of sorts.
Game Concept:
You need to travel across cities and water locations as a compost truck in which you lose by running out of fuel (an arbitrary timer) or hitting an obstacle (tipped bin, oil spills, etc).
Theme:
It’s most closely based on UN Goal 13 in which it’s trying to show the player the issue of climate change and pollution by which you’re controlling someone trying to keep the environment clean but are constantly stopped by inconveniences caused by those who don’t.
Competitors / Inspiration:
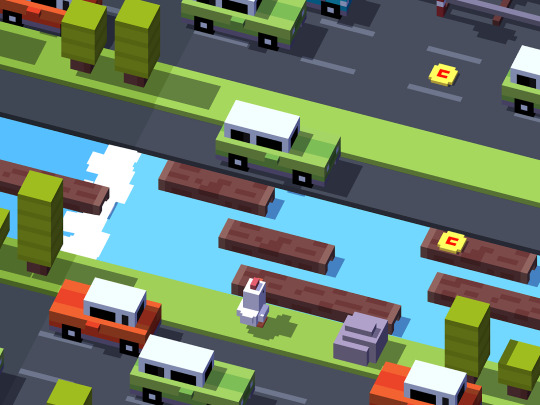
This is very inspired by Frogger and Crossy Road, in which you must traverse across a large thing of land while trying to avoid any obstacles and danger that may be in the way.

0 notes
Text
Day Four (Part Two) Arcade Ideas
I need to get ideas and make them based off of the 17 Goals of the UN.
Off topic, but I've worked on the game a little more. I made the deletion of the cubes work properly, so that it no longer just phases through the map whether you touch it or not, now deleting themselves when it comes into contact with either the player or the floor. This was done by simply adding a destroy actor node with a delay of 0.1 seconds once it overlaps with the player, so there's no longer any confusion as to wether you got the cube or not.

And as for the floor, it turns out that I managed to completely forget to tag the floor with the tag 'Floor', hence why the cubes weren't deleting as inteded.
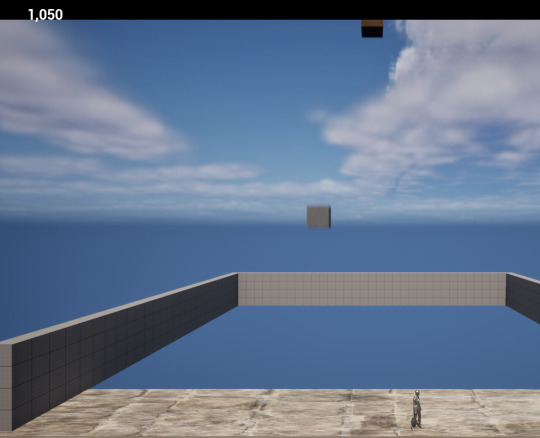
Additionally, I made the moving High Score counter now change colour too. Here is some gameplay of it! (I have additionally adjusted where it is on the screen and lowered both it and the score counter as it kept going into the black box at the top.)
And finally, I have added a timer of 60 seconds to end the game once it's started so that people can't just play forever. I will need to add this timer to be visible on screen via a widget, but for now it'll be fine.
And finally finally, I've made more cube spawners.

From 5 to 11. I think because there's now more, I'll make them spawn more frequently, from 1 per second to 1 per half-second.
0 notes
Text
Day Four (Part One) Animated UI's
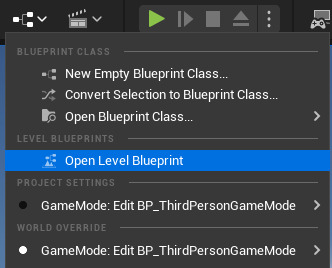
First I opened Unreal (it is very slow today.) Then going to the BP_ThirdPersonCharacter blueprint.
I then made a new variable of CurrentUI and set it as a User Widget, with the Object Reference type.

Now, I'm dragging it into the Event graph and clicking 'Set Current UI' then putting it between 'Create Player UI Widget' and 'Add to Viewport' and connecting it up.

Then I'm going to my actual PlayerUI widget. I want to animate my high score number so that the players will always see it, maybe to a distracting level in order to make sure it's harder to get a good score, incentivising more replayability.
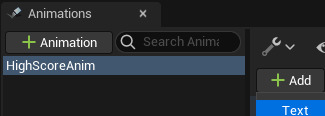
Opening the Animations tab at the bottom of the screen, making sure my High Score text box is selected and then clicking the '+ Animation' button and naming it something. (I called it HighScoreAnim just so I know what it's animating.)
Then the '+ Add' button in the tab to the right of the button we clicked before and select 'Text'.
You can check if it's the correct one by, now that it's made 'TextBlock_2' (for me atleast), you click the very grey + symbol, and select Transform. This gives a drop down, and in my case I changed the translation, so that it moves across the screen.
Adding keyframes with the specfic movement I wanted, I am now done.
And it seems I made a mistake earlier.
I didn't need to make a 'Current UI' variable. I just had to make a node comming off of the blue Return Value pin on 'Create Player UI Widget' and then, in the pop up that shows, select 'Promote to Variable' and make it that way.
And now a way to pause the game, if you wanted to pause.
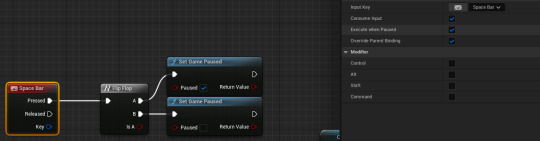
Making a Space Bar key, and then connecting it to a Flip Flop node. Off of the Flip Flop node, from the A pin, attach a 'Set Game Paused' node with the red Paused pin checkbox ticked. Then from the B pin, do the same, but I'm not checking the Paused pin this time. And to make sure this works, I right click the Space Bar node and make sure that the Execute when Paused checkbox is ticked.
0 notes
Text
Day Three (Part Two) More of the same!
Starting a new blog post simply because I ran out of images that I could add onto the previous one, and I also had a lunch break inbetween.
Now widgets are being made. Making a Widget Blueprint, and I named it PlayerUI. Opening it up and I make a Canvas Panel 1920x1080.
Now I make a text box and write whatever in it. (I put Score because that's what the UI is for.)

In the details panel of the Text box, under the Content drop down, there is another dropdown called Bind.
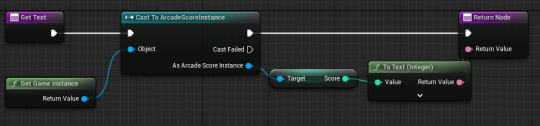
Clicking it opened a new menu. I disconnect the 'Get Text' node from the 'Return Node' node as I am slotting things in the middle of it. I connect 'Get Text' with 'Cast To ArcadeScoreInstance' and then connect that to 'Return Node'. Now, off of the blue Object pin on 'Cast To [...]', there is a 'Get Game Instance' node. The other side, off of the blue As Arcade Score Instance pin, I put a 'Get Score' node, and then connected that to the pink Return Value pin on the 'Return Node'.
In BP_ThirdPersonCharacter, I removed the testing nodes of printing the score directly onto the screen every tick, and connected up the actual UI Widgets. Off of 'Adding Mapping Context', I made 'Create Player UI Widget' and edited the Class drop down to be the Player UI I created. And off of that, connecting 'Add to Viewport' to it.

And now the score shows in a cleaner way than just spamming the number on screen every tick.
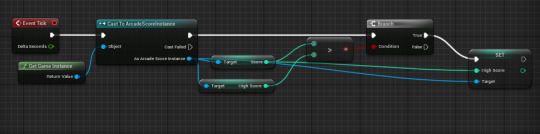
And now to make the system for the high score. It wont work yet, but it's just to make sure it's in the right place on the screen.

The way to do it was identical to the score, just replacing the 'Get Score' node with a 'Get High Score' node.
In order to get the high score to actually update, I have to do a little more work. In BP_ThirdPersonCharacter, [...]
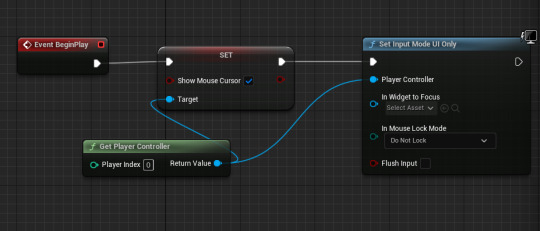
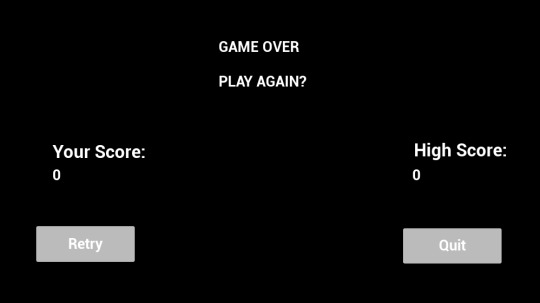
Now making a death screen!
Make a Pawn, and I called it MenuPawn, because it's the Menu.
Now onto making Save States.
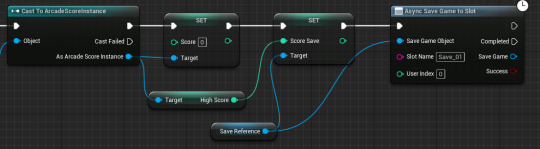
In the EndScreenWidget event graph, I made a custom event and called it SavedGame, because this will be used for my game save states.
I have encountered an error. Following the instructions, the Save Reference variable I made somehow does not work as intended and I'm not sure why. It is refusing to connect to the Set High Score node.
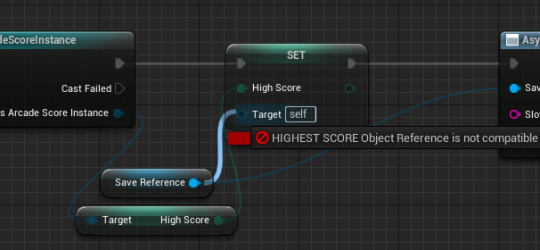
It works now.
I just had to put a variable inside of the HIGHEST_SCORE Blueprint.

And they all work.
And the scores work too!

0 notes
Text
Day Three (Part One) Arrays, High Scores, and Saving Systems
Workshop for the first part of today.
(There is a LOT, so if there's a lack of screenshots in some areas, it's because I hit the limit of 30 screenshots.)
Opening a new ThirdPersonMap within Unreal, and removing a wall and all inside objects as instructed.

Then, the character camera and jump mappings from inside of the BP_ThirdPersonCharacter blueprint are deleted.

And lastly, the white pin connecting the Left/Right movement input to the Forward/Backward movement input is disconnected.
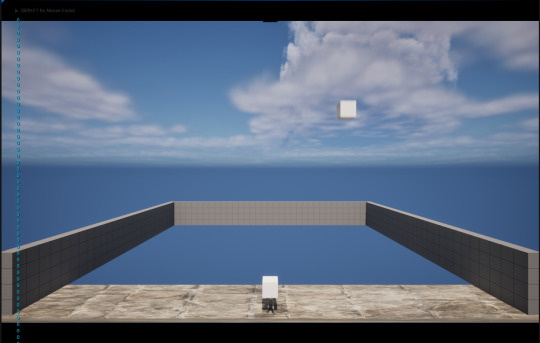
To make this work properly, we are making a fixed camera again. Adding a camera actor and pulling it back so that the level fills the bottom of the CameraActor preview.
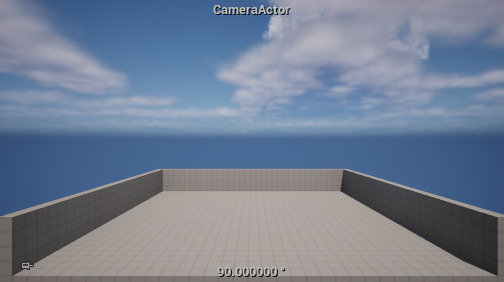
I have to make this CameraActor the main camera that the game uses though. So I open the ThirdPersonMap blueprint editor.
And I do basically the exact same as I did yesterday, so I won't tread over the same details, but this is the end result.

Now I look at how it looks ingame, and adjust it slightly so that it is even on both sides.

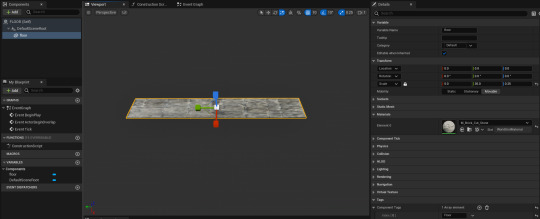
Not sure what's happening next, but I think we're now working on the spawn system, so I tag the floor tile with the tag 'Floor'.
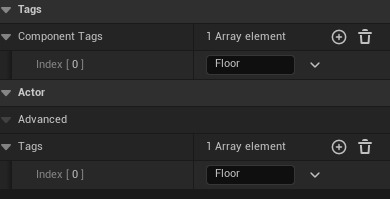
(Double tagged to be extra safe.)
Making a new Actor Blueprint, called 'Score System.'
Inside of this, I make a new scene called SpawnPointMID (because this will be the most middle spawn point I'll have. Then I made four more scenes, indicating the spawn points around the middle. These will be named SpawnPointLeft, SpawnPointMIDLeft, etc. For visualising sake, I also made a sphere for each SpawnPoint scene just so I know what's going on.

Now to actually make these do something.
In the event graph, I imported each sphere as a variable and slotted them each into an array. (I renamed the Sphere's so that, again, I can easily identify which one belongs where.)
Off of the Array pin, I made two nodes. One was LENGTH, and the other was GET. From the LENGTH node, I added on an additional 'Random Integer' node, and then connected that node back to GET. Confusing, I know. And then finally, off of GET, there is a Get World Location node.
Meanwhile, up above, there are more nodes to create and join together. First making a CustomEvent node that I named 'Spawn', and then connecting that to a new node of 'SpawnActor Item Parent'. Then connecting the previously mentioned 'Get World Location' node to the 'Spawn Transform Location' pin on the 'SpawnActor Item Parent' completes this mildly confusing tree.
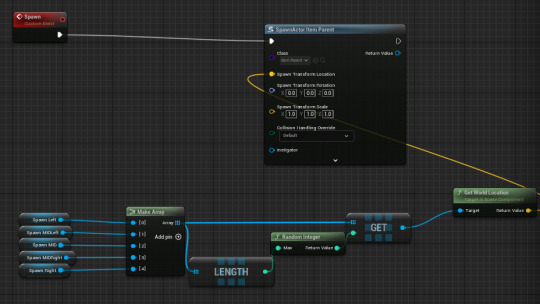
And lastly, up above, I add an 'Event Tick' node so that the points spawn on a regular interval. I set it to 1 second per spawn.

Now I need to actually spawn something from the spheres. So the most logical thing to spawn are cubes.
So that's what I did, making a new Actor Blueprint titled 'item_parent'.
This is where, when you overlap with the cube, it will add +1 to your score.

Not too sure why, but the default floor didn't seem to like being tagged with 'Floor', so I replaced it with a hastily made ActorBlueprint with the tag Floor which seems to work.
I also gave it a new Material so I could differentiate it from the falling cubes as they were originally both white, making it hard to tell what was happening.
Additionally, the cubes seem to be only spawning in the middle currently, so I will need to fix that.
Okay, so it turns out that my scenes were all stacked ontop of one another, so I had to move them to the same positions as my spheres.

And now it works properly!

Bad news though. If you ALT+Tab, it can make it spawn a lot more than it is meant to as it is still spawning every second, even though Unreal Engine runs a lot slower when it isn't in focus to save resources I assume.
Oops.
An easy fix for this is to just tab back into Unreal, as it will quickly fix itself in no time. And there won't be any way to ALT+Tab when playing on an actual arcade machine, so this is a nothing issue that will only occur on regular PC hardware.
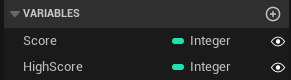
I need to make a new Game Instance that I called 'ArcadeScoreInstance.' Within this, I made two Integer variables of 'Score' and 'High Score'
I need to change the Game Instance to the Game Instance I made so that it works properly. Accessing this menu by going to Edit, Project Settings, searching Game Instance and changing the drop down to the one I made.

Not too sure why, but it isn't adding anything to my score, as when I overlap with a cube, the score stays at 0.
Okay nevermind, I am a bit silly as I managed to miss the singular option in the one tab I didn't check to actually change the value from 0 to 1. Not sure why I didn't check here, I think I just assumed that it would be within the cube itself rather than the variable details. But it is fixed now, so it is fine.

Now I'm making a child actor. Right-clicking the blueprint of the item_parent gives me the option to create a Child Blueprint Class.
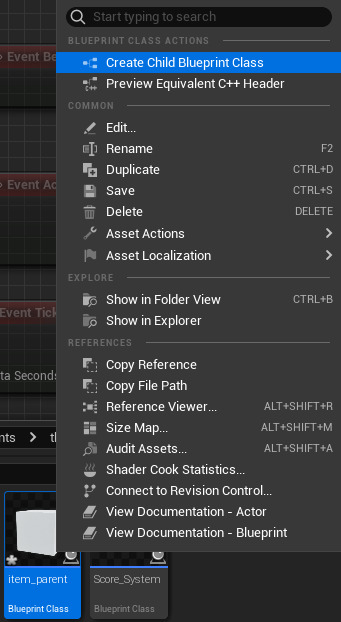
I made four child actors. In one of them, I select the Cog icon in the My Blueprints tab, and make sure that Show Inherited Variables is turned on.

Now I want to change the score values on these. Because I have 4 of them, I make them worth 1, 5, 10, and 25 points respectively.
And to make sure that I can differentiate these actors from one another, I apply different materials to each of them. I use the default built in Metal materials as I feel this would be the easiest to tell them apart rather than something like 4 different types of stone.
Now, in my Score_System blueprint, I make a new variable.
I search up Actor (as it isn't one of the default variables.) and make sure to select the variable just simply titled Actor. But before clicking it, I need to hover over it and make sure that I make it with a Class Reference.

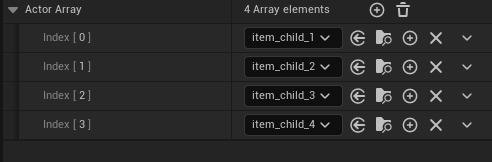
Now in the details panel, I see that the Variable Type for actor is Single, but I can open the drop down and change it to Array.
At the bottom of the details panel, I added 4 Indexs to the Actor Array tab and assigned each one to one of the childs.
Then I put the Actor Array into the Event Graph and select 'Get Actor Array'. Now what I'm doing is like earlier, where I have a LENGTH and a GET off of the Actor Array, before linking LENGTH to GET with a Random Integer node. Then finally, I connect GET to the previous SpawnActor node I made earlier.
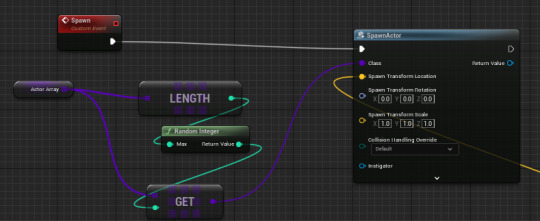
And now it should work!
Such a high score. This game is so easy.
0 notes
Text
Day Two (Opening Unreal for the First Time)
So I'm using the First Person template in Unreal to start this project.
I'm going to be attempting to implement things like Custom Inputs, Directional Movements and a Fixed Camera.
First is the Custom Inputs.
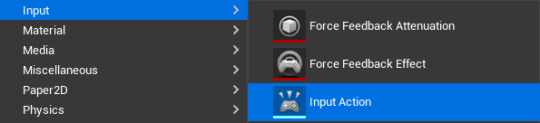
So I'm opening my content drawer and I'm heading to All > Content > ThirdPerson > Input.
Made an Input and named it IA_Quit, as instructed.

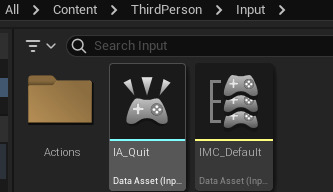
I opened it up, check if the Value Type is Digital (bool)
I open up IMC_Default (It should be stored in the same folder as IA_Quit) and I get greeted with a whole load of buttons.
Before getting overwhelmed, I clicked the + button next to Mappings.
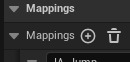
This makes this appear at the bottom of the list.

I change the None dropdown to the IA_Quit input action that I made. Then underneath that, there was another None dropdown, next to a keyboard icon. I clicked on it and, because I had an Xbox controller connected, clicked the button with two squares.

However, if I had no controller on hand, I would type into the dropdown menu 'Gamepad Special Left'.

For testing purposes, or if I ever don't have a controller on hand, I will add a keyboard input too so I can still play. This will be bound to the Escape key for obvious reasons.
I will need to bind every other controller button which will be done later and I will include a photo below when that is done, but for now I will go on to the next part.
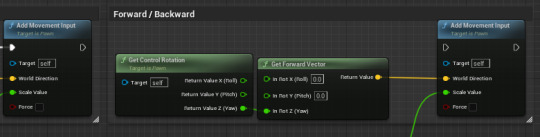
Opening up the BP_ThirdPersonCharacter blueprint, I head to the Event Graph and make my way to the Movement Input section.

I'm disconnecting the white pin from EnhancedInputAction IA_Move and making my own node of the same name.
I pull out the white pin on the new node and spawn an 'Add Movement Input' at the end of that. Then, on 'Add Movement Input, there is a yellow World Direction node connector. Go back from that and make a 'Vector Snapped to Grid' node. I right clicked on the yellow 'In Vect' node connector and selected Split Struct Pin. This left me with two green node connectors of In Vect X and In Vect Y.
Oddly, because of how Unreal works, we have to connect the Action Value X to In Vect Y and vice versa.

However, right now, it doesn't like cooperating with the camera. However however, I made it so the default Movement Input works like this too, though it required a bit more work.
For one, I held down the B button on my keyboard then clicked in the Event Graph to quickly made a Branch node. Then I connect
Now for the Camera. Currently it is able to move in 360 directions, and I don't want this.
So I go to the Camera Input section of the Event Graph and disconnect the white pin connecting 'EnhancedInputAction IA_Look' to the rest of the sequence.

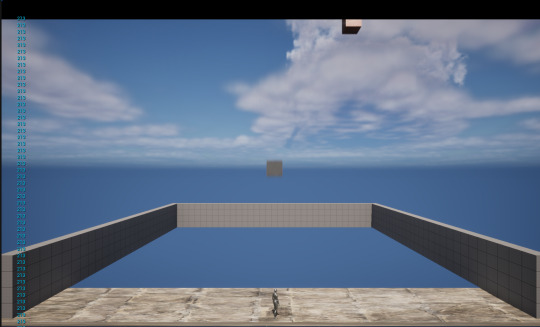
Then I make a completely new actor and name it anything but Camera_Actor.

Opening it up, I placed down a Camera component, then made sure that the camera was the default scene root.

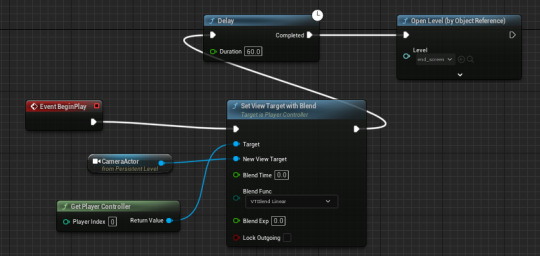
Then in the Event Graph, off of the Event BeginPlay node, I connected it to a new 'Set View Target with Blend' node. Back off of the Target node connector, I made a Get Player Controller node. And then off of the New View Targer node connector, I connected a Self node.
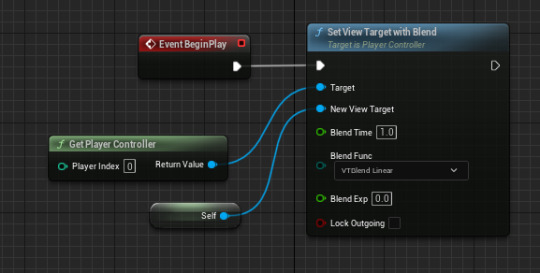

However, if I wanted my game to play somewhat like The Binding of Isaac where the camera pans to a different fixed camera upon entering a new room or whatnot, I'd want to change it up slightly.
In the Viewport, I added a Box Collision, and then did nothing with it and returned to the Event Graph. Selecting the Box from the Components tab opens it up on the Details panel. Scrolling down gave me the option to add an 'On Component Begin Overlap' node. Off of the Other Actor blue node connector, I made a 'Cast To BP_Third PersonCharacter' node and then connected the white pin from that to the 'Set View Target' white pin.
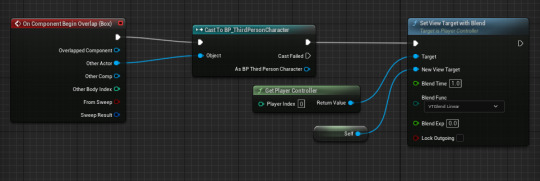
This would be useful if my arcade game was going to be similar to games such as Resident Evil and The Binding of Isaac with the camera being fixed in the sky, with it moving every time you change rooms or areas.
However, for what I have in mind (which is nothing right now.) I don't think this will be useful to me. Though it IS useful to know in general if I ever do decide to do something like this!
2 notes
·
View notes
Text
Checking out my Carbon Footprint!
By going on the WWF Footprint Calculator, I can see what my carbon footprint is.

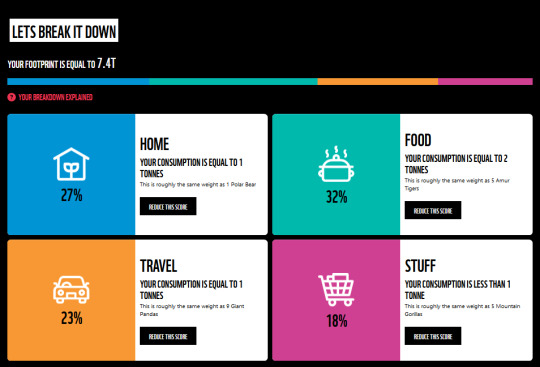
0 notes