
Don't wanna be here? Send us removal request.
Statistics
We looked inside some of the posts by ssfox549 and here's what we found interesting.
Average Info
Notes Per Post
1
Likes Per Post
1
Reblog Per Post
0
Reply Per Post
0
Time Between Posts
1 minute
Number of Posts By Type
Text
3
Last Seen Tumblr Blogs


Fun Fact
Premium Tumblr themes are available from anywhere between $9 to $49.
Text
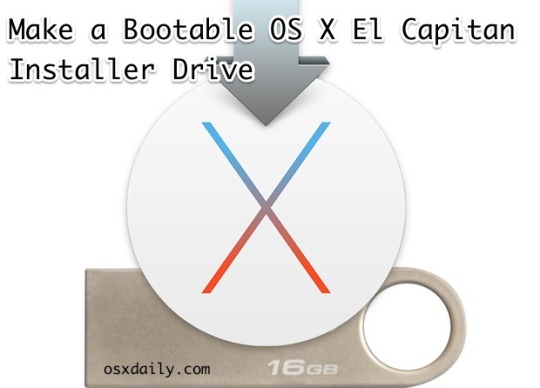
Create Usb El Capitan

Create Usb Installer El Capitan
El Capitan Os X Download
El Capitan Usb Boot
Warning: Please follow these instructions at your own risk. I am not responsible for any damage or information loss that could result from following this guide. Also, note that installing OS X on PC is illegal. Please buy a real Mac if you're satisfied with your Hackintosh. This guide is for evaluation purposes only.
Rename the USB Flash Drive to Become the OS X El Capitan Bootable Installer: The. The following steps can be used to create a USB installer for El Capitan. Use instructions on the Apple website How to get old versions of macOS to download InstallMacOSX.dmg. Use the Disk Utility to erase a 16 GB or larger flash drive. If the Disk Utility window has a View pulldown menu, make sure Show All Devices is selected.
Requirements
An Intel-based PC with UEFI bios
A USB flash drive with at least 16GB capacity
A dedicated hard drive (SSD highly recommended)
A computer running OS X (10.9 or later) for preparing the installation USB flash drive
I chose to avoid the UniBeast installer (by Tonymacx86) because of its commercialized nature, as described here. Here is a vanilla guide to installing El Capitan on your PC!
Preparing the USB Installation Drive
First things first. We need to prepare a USB thumb drive that will contain the installation files as well as the bootloader and custom kexts for our specific Hackintosh build.
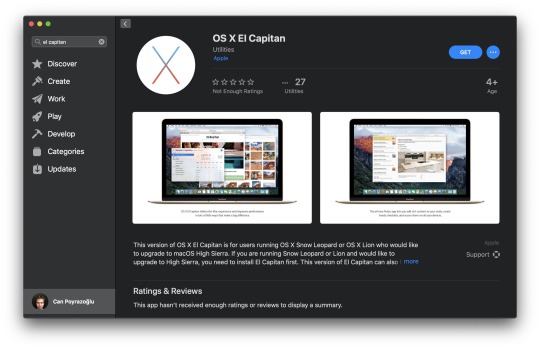
Download El Capitan from the Mac App Store
Head over to your existing OS X environment running 10.9 or later and open the Mac App Store.
Search for 'El Capitan' and click Download. The download is completely free if you're running OS X 10.9+.
Wait for the download to finish (this could take some time).
Format the USB Drive
Open Disk Utility in Applications/Utilities and locate your USB device. Make sure you've backed up anything important on that drive as it will be erased forever.
Select it, and then on the right, click the partition tab.
Click Curent Layout and change it to 1 Partition.
Set the Name to USB.
Set the Format to Mac OS Extended (Journaled).
Click Options and select GUID Partition Table.
Click Apply to format the drive.
Copy the Installation Files to the USB Drive
Now that we've downloaded the installation files from the Mac App Store and formatted our USB drive, let's copy the installation files to it.
Run the following command in the Terminal (Applications/Utilities):
The command will run a script inside the Install OS X El Capitan application that will copy the installation files to the USB drive.
This process takes about 15 minutes. Go out for a quick run, or a hamburger, or both. When you come back, it should have finished.

Installing a Bootloader
If you tried to boot from the USB drive as is after the previous step on a PC, it wouldn't work. We need a bootloader that makes it possible to boot OS X on x86 and x86_64 PCs.
There are 3 popular bootloaders to choose from.
Clover
Chameleon
Chimera
I went with Clover as it seems to be the most popular choice among other El Capitan installers, mostly for the following reasons:
Clover is an open-source EFI-based bootloader created on Apr 4, 2011. It has a totally different approach from Chameleon and Chimera. It can emulate the EFI portion present on real Macs and boot the OS from there instead of using the regular legacy BIOS approach used by Chameleon and Chimera. For many, Clover is considered the next-gen bootloader and soon it will become the only choice since BIOS in being replaced by UEFI in every new motherboard. One big feature of Clover is that iMessage, iCloud, the Mac App Store works along with Find My Mac, Back To My Mac and FileVault since Clover can use the EFI partition. (Read more)
Install Clover on Your USB Drive
Installing Clover on your USB drive is relatively easy. It involves running an installation wizard and selecting some options.
Download the latest Clover installer from here.
Run the installer.
Click Continue twice.
Click Change Install Location and set it to your formatted USB drive.
Click Customize and check the following options:
(x) Install for UEFI booting only
(x) Install Clover in the ESP
( ) Drivers64UEFI
(x) OsxAptioFixDrv-64 - fixes memory map created by AMI Aptio EFI. Booting OS X is impossible otherwise.
Click Install and wait for the installation to finish. It shouldn't take more than a minute.
Copy Essential Kexts to the USB Drive
Next, we'll need to copy some kexts (kernal extensions, similar to drivers on Windows) to the USB drive.
FakeSMC.kext - open source SMC device driver/emulator developed by netkas. Tricks OS X into thinking it's installed on Apple hardware. Absolutely required for Hackintosh installation.
NullCPUPowerManagement.kext - disables AppleIntelCPUPowerManagement.kext which may cause kernel panics when you try to boot from the USB drive. It's optional, copy it only if you get an AppleIntelCPUPowerManagement-related kernel panic.
ApplePS2Controller.kext and AppleACPIPS2Nub.kext - adds support for PS2 devices (such as PS2 keyboard/mouse). They're optional, copy them only if you still use PS2 devices.
Download these files from here and copy them to the EFI mounted volume at /EFI/Clover/kexts/10.11/.
Now that the installation USB drive is ready, let's install OS X El Capitan!
Boot from the USB Drive
Restart your computer and boot from the USB drive (Press Esc/F8/Del to access the boot selection menu).
Use the arrow keys to select Boot OS X Install from Install OS X El Capitan (It should be selected by default). Press the spacebar and select Boot Mac OS X in verbose mode. Verbose mode means that you'll be able to see exactly what's going on under the hood as OS X attempts to boot up its installer. You'll be able to see the exact error message if booting fails.
Press Enter and cross your fingers. Clover will now boot the installer from your USB drive. This could take some time, in my case, it takes around 5 minutes (Don't worry -- the startup time is around 5 seconds after installing on an SSD).
Did it fail?
It's more than likely that the boot will fail. Don't panic (ha-ha), as kernel panics usually mean that you forgot to copy an essential kext to the EFI partition. Look up the exact error you're getting before the boot log comes to an end and search Google for a solution.
Once you find an additional kext that your system needs, you'd attempt to copy it to the EFI volume, only to discover that it's gone! Not to worry, it's just unmounted and hidden. Follow this guide to mount the hidden partition, and then, follow the Copy Essential Kexts section above to copy it to the USB drive's EFI partition.
Format the Target Hard Drive
Once the installation wizard boots, the next step is to prepare the hard drive that you want to install OS X on.
Click Continue, followed by Disk Utility.
Create Usb Installer El Capitan
Select the target drive to install to (not the USB drive!) and click the Erase button. Make sure to back up anything important on that drive, as it will be deleted forever.
Set the Name to El Capitan.
Set the Format to OS X Extended (Journaled).
Set the Scheme to GUID Partition Map.
Click Erase to format the drive.
El Capitan Os X Download
Install OS X to the Target Drive
Exit the Disk Utility and click Install OS X.
Click Show All Disks and select the drive you just formatted to install OS X on it. Finally, click Install.
The process takes about 25 minutes. Be patient. For me, it hung at the end ('1 second remaining') for around 5 minutes. Don't be tempted to reset or cancel the installation.
When that's done, the system will reboot. Make sure to boot from the USB device again, and select Boot OS X Install from Install OS X El Capitan once again, in verbose mode. The installation is a two-part process that continues once you re-boot into the USB drive.
Finally, after about 25 more minutes, OS X El Capitan should be successfully installed on the target drive.
Boot into El Capitan via the USB Device
After the second reboot, boot from the USB device once again, but this time, select Boot OS X from El Capitan, and select verbose mode.
Press Enter and cross your fingers again. If all goes well, you'll be presented with the setup wizard:
Take a minute to set up your new Hackintosh. Once you're done, there are a few things you need to do to finish off the installation.
Reinstall Clover on the Hackintosh Drive
In the previous step, we used Clover on our USB drive to boot our Hackintosh. This is fine, but most of us aren't going to keep that USB drive plugged in forever. Let's make it possible to boot El Capitan independently by reinstalling Clover on it.
Go back up to the Install Clover on Your USB Drive section and follow the steps again, but this time, select your El Capitan volume instead of the USB drive.
Once again, copy the essential kexts to the EFI partition that shows up after installing Clover.
Finally, make sure to add Clover EFI boot options which is possible by pressing Clover Boot Options in the Clover boot window (if there are 2 boot options -- find the one for your SATA drive). I literally spent 3 hours figuring out why Clover would not boot when I disconnected the USB drive before I figured out that I need to manually add the EFI boot options.
Now you'll be able to boot directly from the El Capitan hard drive, as it should be!
Audio and Networking
If you're lucky, audio and networking will work right out of the box. If not, you're on your own from here. You'll need to research your exact hardware (by using System Information in Applications/Utilities) and searching Google to find the right kext or installer to make it work on El Capitan.
Clover Themes
The default Clover theme is pretty ugly (no offense). Check out this theme database to improve Clover's appearance.
This is YosemiteLogin by xenatt:
Enjoy!
That's it! Enjoy your new Hackintosh, and if you absolutely love it, consider buying a Mac!
In this article, I will show you How to create Bootable USB for Mac OS El Capitan on Windows using Transmac. Therefore, you can create bootable USB for your Mac using Transmac on windows 10/7/8/8.1 here you will learn the easiest method of creating bootable USB. As you know that Mac OS EL Capitan is the newest version among Mac. In here just follow my steps to create a bootable USB installer for your Mac. is the twelfth major of the Mac operating system. Therefore, it has outstanding features that the previous version of Mac doesn’t have that. It is better now that we should create a bootable USB installer drive to install Mac OS.
You all have the information about “Transmac” software about its function that how it works, or how to download “TransMac” and how to install that on your Windows PC? However, you need the following requirements to create a great bootable USB installer for Mac OS El Capitan.
Why we use TransMac to Create bootable USB for mac os el Capitan?
TransMac is a simple application to open hard drives disk, Flash drives, CD/DVD high-density floppy disk on Windows 10/7/8/8.1 or lower version of other Windows. to use this application you just need to insert the drive you need, and one of the great function is this that it will automatically read the drives, TransMac is a great tool that you can access the Mac file on Windows operating system using TransMac.
TransMac Features
You are allowed to use the TransMac for 15 days trial, and after that, if you want to use that more then 15 days then you need to purchase that. All the features are the same for Mac.
The system requirements are you need Windows 10/7/8/8.1 or Windows Vista and XP.
The users can buy TransMac for $59.00 with the license.
Apple files system (APFS) are only supported.
Open Mac APFS/HFS/HFS+ format disk drives, flash drives, CD/DVD/Blu-ray media, HD floppies, dmg, dmg part, sparse bundle, and sparseimage files.
Copy files to Mac and image file
Format HFS to Mac
Save and restore image files to disk and USB flash.
Create, compress image files for Mac
Burn your ISO file and dmg file directly to CD/DVD Blu-ray.
View the partition layout
Now Create bootable USB for Mac OS El Capitan on Windows
Now it is the time to create a bootable USB installer using TransMac, To install Mac OS El Capitan on VirtualBox on Windows 10 you need a Bootable USB here you will learn the steps of creating a bootable USB installer for Mac OS El Capitan on Windows.
Step #1. Before going to create a bootable USB for Mac OS El Capitan you need to download TransMac. Therefore, you can download TransMac from the given link. After that, you are download TransMac now install that on your computer, the installation process is too much easy everyone can install that on their PC/Computer with a simple procedure. Just click on the setup file and with some click, the installation will finish. After that, Launch TransMac when TransMac is launched you will see the list of Flash drives or local disk. Then Right-click on that flash you want to create bootable USB for Mac OS El Capitan then select Restore with Disk Image.
Restore with the Disk image
Step #2. Now a warning message will pop-up after you select Restore with Disk Image, and in this step, select Yes.
Step #3. After that, you clicked on yes now a dialogue box will come just click on that and browse for VMDK file and select the file and click Open.
select Mac OS EL Capitan VMDK file
Step #4. After that, you clicked on Open in here your file will be ready to copy on USB drive click on “OK”.
Copying your File VMDK file to USB
Step #5. After that, you clicked OK now in this step, your Mac OS EL Capitan VMDK file will copy to your USB drive. Have patience and wait for some minutes that should copy your file.
Copying Mac OS EL Capitan File to USB
Conclusion
El Capitan Usb Boot
That’s all about it,Now you are totally done with creating the USB drive. Therefore, if you faced any problem regarding this you can comment on below comment box and share your ideas. Furthermore, we will discuss that and don’t forget to subscribe our website with your email address and have a notification about our latest post.
0 notes
Text
Unsupported Mac High Sierra
Mac Os High Sierra Beta
Unsupported Mac High Sierra Iso
Mac Os High Sierra Problems
While the yearly major macOS update system is free to install, it is still limited to Macs that Apple deems compatible, and every year a generation of Macs essentially becomes obsolete. This is despite the fact that Apple is eager to emphasize that macOS is a widely compatible operating system.
Install macOS High Sierra on unsupported Mac. Also, Mac models’ owners officially supported by the macOS High Sierra operating system may face the fact that installing the system imposes a new APFS file system, which may be undesirable for the user for various reasons. Important Note: If you have a machine that supports High Sierra natively. When the operation completes, boot your target unsupported Mac off the USB drive you just created by holding down the Option key while turning on the machine, and selecting the drive. Note: Only perform steps 5 and 6 if you intend to do a clean install.
If your Mac isn't compatible with the latest macOS, you might still be able to upgrade to an earlier macOS, such as macOS Catalina, Mojave, High Sierra, Sierra, or El Capitan. To get the latest features and maintain the security, stability, compatibility, and performance of your Mac, it's important to keep your software up to date. A step by step guide to installing macOS High Sierra on an unsupported mac. I wanted to teach you how I updated my MacBook Pro to High Sierra, even though my specific MacBook isn’t supported.

As it happens, there are still people with close to ten-year-old Apple desktop computers still in use on a daily basis, likely performing a range of lighter tasks.
Download CleanMyMac X from MacPaw’s website and clean up to 500MB of junk data from your computer while enjoying all the features of the software without major limitations.
Which Macs Don't Support High Sierra
For some reason Apple doesn't want to allow these Macs to run one of its latest operating systems, namely macOS 10.13 High Sierra. This leaves the following Macs on macOS 10.11 El Capitan:
MacBook Pro – late-2009 or earlier models
MacBook – late-2008 or earlier models
MacBook Air – 2009 or earlier models
iMac – late-2008 or earlier models
Mac Mini – 2009 or earlier models
Mac Pro – 2009 or earlier models.
These machines are considered obsolete and vintage by Apple. The company defines vintage products as those that have not been manufactured for more than five years but less than seven years ago. Obsolete products are those discontinued more than seven years ago.
How To Install macOS High Sierra on Unsupported Macs
Though Apple doesn't support the above hardware officially, someone has thought about sharing the love for these older machines. A developer known as DOSDude1 has written a patch that works on Macs with the Penryn architecture. Using this still imposes certain limitations, but at least makes it possible to install macOS High Sierra on the following Macs:
Early-2008 or newer Mac Pro, iMac, or MacBook Pro (MacPro 3,1 and 4,1, iMac 8,1 and 9,1, MacBook Pro 4,1, 5,1, 5,2, 5,3, 5,4, and 5,5).
Late-2008 or newer MacBook Air or Aluminum Unibody MacBook (MacBook Air 2,1, MacBook 5,1).
Early-2009 or newer Mac Mini or white MacBook (Mac Mini 3,1, MacBook 5,2)
Early-2008 or newer Xserve (Xserve 2,1, Xserve 3,1).
If you happen to own any of the Penryn Macs mentioned above, the macOS High Sierra Patch Tool written by DOSDude1 will make running the latest software possible. But remember, with High Sierra you will also migrate to the Apple File System, and it is highly recommended that you first disable SIP because it may prevent the patch from working at all.
Installing the operating system on any of these Macs will require some technical knowledge, so it is not recommended for novice users. Also, a backup of your data is always a good idea in case anything goes wrong.
While there is a full step-by-step tutorial and video tutorial available on DOSDude1's website, it’s good to get a summary of the basics, which start with downloading the macOS High Sierra Installer app from the Mac App Store:

Format a USB drive as Mac OS Extended (Journaled) via Disk Utility.
Open the macOS High Sierra Patcher tool, navigate to the High Sierra Installer App, then select your pen drive and click “Start Operation”.
Boot from the USB drive by holding down the option key after reboot.
Install macOS normally, reboot back on the installer drive, and then open the “macOS Post Install” application.
From the options, select the Mac model you own. This step is important, because it contains the optimal patch for that specific model.
Click the “Patch” button, and after the process has finished, click “Reboot”.
The Reason Not To Install macOS High Sierra on an Unsupported Mac


As you may have already experienced with other types of officially unsupported machines, the probability of having issues is much higher. The same applies in this case, too, since the macOS High Sierra Patcher will render your iMac 8.1 Broadcom Wi-Fi chip useless for certain models.
Macs that use the Broadcom BCM4321 Wi-Fi module will not have functional Wi-Fi when running High Sierra. Another issue that has been highlighted by the developer is that the trackpad in the MacBook 5,2 isn't fully supported in this version of OS.
Mac Os High Sierra Beta
These are just a few of the possible issues that could arise, and this is before even mentioning the various potential software errors that you can run into by using out-of-date hardware. Without getting the proper knowledge beforehand, you'll need to revert back to the previous state of the Mac, which won't be an easy process, especially not without a Time Machine backup.
Best Mac Optimization Software of 2021
RankCompanyInfoVisit
User-friendly client
Deep, effective cleaning options
Versatile, user-oriented customer support
30-day money back guarantee
Full review…
Personalized, remote assistance
Unique optimization tools
Anti-theft tracking
Built-in antivirus
Full review…
Fast scanning
User-friendly UI
Virus and malware scan
Great cleaning features
Full review…
Unsupported Mac High Sierra Iso

Get the Best Deals on Mac Optimization Software
Mac Os High Sierra Problems
Stay up to date on the latest tech news and discounts on Mac optimization software with our monthly newsletter.
0 notes
Text
How To Play Xbox On Imac
Connect the mini display side of your mini-display-to-HDMI adapter to the back of. Jul 15, 2021 If you want to play Microsoft Xbox games on your Mac there are two easy ways to do so on your desktop. One is by running Windows on your Mac using Parallels and the other is via an app called OneCast. If you just want a cloud solution, you can also use Microsoft’s Xbox Game Pass service. As for Xbox One, it supports to play media files through the USB stick. So here we just need to download Audible to USB and then move them to Xbox One for listening directly. But to do that, we need help from the DRmare Audio Converter for Mac/Windows to convert Audible books to plain audios. It is because the audios from Audible are protected.
Updated 06/28/21: Xbox Cloud Gaming through the browser is now available to all Game Pass Ultimate subscribers. This article has been updated throughout with the latest information from Microsoft.
Last year, we wrote about how Apple’s restrictive App Store rules would cause millions of gamers to miss out on Microsoft’s Xbox Cloud Gaming service (née xCloud). Microsoft later updated the Xbox app to stream games over your local network from your own Xbox, but that’s not the same thing as a cloud gaming service where you don’t need to download or install games at all.

After months of hand-wringing and probably back-room negotiations, Microsoft finally announced that it would build a web-based solution for devices on which it can’t provide an app, like iPhone and iPad. After a short invite-only beta period, Microsoft has announced that all Xbox Game Pass Ultimate subscribers can now enjoy Xbox Cloud Gaming on Mac, iPhone, or iPad. To play, simply visit xbox.com/play using Edge, Chrome, or Safari browsers on your Apple device.
Most games are made to be played with a controller, but Apple’s devices support modern Xbox controllers just fine. Just sync it to your Mac as you would any Bluetooth device, or plug in via USB. On iPhone or iPad, we have a guide to pairing your Xbox One or Xbox Series X/S controller.
In addition to the broad availability of Xbox Cloud Gaming (formerly code-named xCloud) to all subscribers, Microsoft has upgraded the servers that run the games in the cloud to new hardware based on the Xbox Series X. This means faster performance, much quicker loading times, and better visual quality. Games will stream at 1080p and 60fps, but the company says that “Going forward we’ll continue to innovate and add more features to enhance your cloud gaming experience.”
On Xbox, all saved games are always synced to the cloud, as is other user data like friends lists and achievements. So everything you do on a console will be there waiting for you in the cloud, and vice-versa.

The Xbox Cloud Gaming expansion comes along with an expansion of Xbox-ready game accessories for iPhones. The popular Razer Kishi controller, originally only for Android phones, now has an MFi-certified version for iPhones. The new Backbone One controller for iPhone features a dedicated button to launch the Xbox Cloud Gaming web app. For a limited time, Microsoft is offering three-month free trial to new Xbox Game Pass Ultimate members with the purchase of either controller.
iPhotos.com/Photos.com/Getty Images
When you have the large LCD screen that comes with the iMac, it's no surprise that you'd want to take advantage of it for such things as gaming or watching movies. If you want to connect your Xbox to your iMac to play your games on the large screen, it can be done. While it's a task that does require extra hardware, rest assured that if you follow instructions carefully, you can accomplish this task.
How To Play Xbox On Mac 2021
Step 1
Connect the mini display side of your mini-display-to-HDMI adapter to the back of your iMac.
Step 2
Connect the other side of the mini display cord to the corresponding port in your adapter box.
Step 3
Connect your HDMI cable from your Xbox HDMI port to the HDMI port of your adapter.
Step 4
Plug in the adapter box and turn on any power buttons, if applicable. Turn on the Xbox.
Step 5
How To Play Xbox On Macbook Screen
Press 'Command-F2' to switch from the iMac display mode to the Xbox display mode. Your Xbox interface should now appear on your iMac screen.
References
How To Play Xbox On Imac Pc
Tips
There are multiple mini-display-to-HDMI adapter boxes on the market; before you purchase one, check any available reviews to make sure it is compatible with the iMac, or use Apple's 'About Mini DisplayPort to HDMI Adapters' page to find out if the adapter you want to use will work with your iMac.
How To Play Xbox On Imac Pro
Writer Bio
How To Play Xbox On Macbook Air
Nicole Vulcan has been a journalist since 1997, covering parenting and fitness for The Oregonian, careers for CareerAddict, and travel, gardening and fitness for Black Hills Woman and other publications. Vulcan holds a Bachelor of Arts in English and journalism from the University of Minnesota. She's also a lifelong athlete and is pursuing certification as a personal trainer.
1 note
·
View note