
Musings on FanFic Binding from an amateur bibliopegist
Don't wanna be here? Send us removal request.
Statistics
We looked inside some of the posts by starblightbindery and here's what we found interesting.
Average Info
Notes Per Post
31K
Likes Per Post
19K
Reblog Per Post
13K
Reply Per Post
76
Time Between Posts
20 days
Number of Posts By Type
Photo
1
Text
15
Note
1
Last Seen Tumblr Blogs


Fun Fact
In 2020, Tumblr had 29.4 million users in the US.
Photo

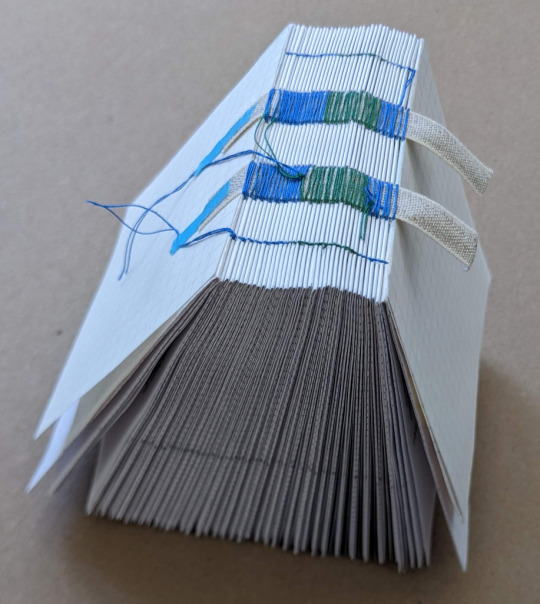
Text Block Dance Party: Tension. Demonstration of how loose I stitch on tapes when planning on backing, using the 1/3 page size w/ 3 folio per signature imposition. It can actually move further but this shows as far as it’ll go at ‘rest’ w/o active pressure being applied. ~440 pages w/ thread changes around the 70 & 250 page marks.
240 notes
·
View notes
Text


My personal goal is to try and make fanfic binding as accessible to everyone as possible, so here are some resources on how to make a fanfic hardcover for under $25.
This is a barebones bind for the broke college students and such. Happy to field questions, too!
Here's a proposed budget breakdown:


Loosely organized thoughts:
Fanfic bookbinders often share typesets amongst each other. Never pay for a typeset for a fanfic.
You'll hear a lot about grain direction for your printer paper, but as a newbie on a budget without your own printer, settle for some nice 92 bright or cream colored paper. If you like the hobby, splurge after but expect to pay at least 2-3x more for short grain paper.
Printing is a pain because some copy shops won't let you print intellectual property smut, and it's very expensive. You are better off bartering instead or looking for a free printer on Buy Nothing.
You know the thick paper wrapping that comes with online orders? It's a good weight for endpapers if you need to scrounge. Paper grocery bags or gift bags (birthday presents) might work, too.
Ask your local library to give you covers from books they are throwing out. Ask for outdated textbooks (those covers are built like tanks) or three-ring binders that are too busted to be binders anymore.
Obtain a used book that was mass produced (so your destruction of it does not impede anyone's access) and maybe even become a little vindictive with it.
If you can afford it, I recommend the Olfa SVR knife (~$10)
If you can afford it, upgrade your ruler to a t-square.
(Links to Amazon products above are affiliate links)


I really hope this resource is helpful! I want to stress how possible this is and encourage people to cherish what they love through art.
If you are interested in fanfic binding and have a little more disposable income, I have an affordable Fan Fiction Bookbinding Starter Pack that I carry on my site. I pack them myself and drop them 1x/month on the 15th.
12K notes
·
View notes
Text
It was a pleasure to bind this The Folk of the Air fan fiction for the author.
(And yes, it had to be purple!)
had an out-of-body experience this morning as i unwrapped my fic in book form!! @starblightbindery reached out a few months ago asking if i'd like an author copy, and of course i said yes! i'm so honored by all the time and thought that went into making this.
it's stuff like this that makes me love fan spaces so much. we need spaces of mutual generosity, creativity, and enthusiasm to stay sane in this world. @starblightbindery & @renegadeguild do this work out of their own time, money, and resources, which is so rad. okay, i'll stop being sappy, but thank you times a thousand <3


"Then I blinked and—purple everywhere. I hadn't even seen them blooming." (the fic in question 🖤)
214 notes
·
View notes
Text
This is how I feel about every Renegade Guild meet up. Community is inspiring and nourishing during challenging times.
California Renegade meet-up
If ever you're given the chance to meet fellow bookbinders in person, do it. Don't hesitate. The experience of sitting amid a group of individuals who are as wholly obsessed about a hobby as you are was, frankly, fucking awesome.

I'm still floating on a happy cloud of endorphins from this weekend's @renegadeguild Cali server meet-up. It was a small melting pot of fandoms and ships, age ranges and skill levels, and an established ethos about sharing knowledge without reserve or judgment.
Even with the (very) early morning alarm, a long drive, and nerves about meeting everyone for the first time, it was the best experience. I learned how to marble paper and book edges. I tried my hand at paste papers. I held other binders' books (!!!!) and was properly gobsmacked by their skill, listening as they openly shared how they achieved an edge, an endband, a leather cover, a difficult technique.


At one point, when the day was winding down and just a few of us were left standing inside @duran-binding's kitchen, a passionate discussion ensued about the history and origins of a fandom I'd never heard of. And in that moment, my mind took a snapshot from above: the five of us animatedly discussing fanfiction and how our favorite fandoms could potentially intersect. It left me feeling intensely grateful for being invited into this community of fanfiction binders.
So yeah. 10/10 recommend.


174 notes
·
View notes
Text
so, you wanted to start bookbinding?
so @princetofbone mentioned on my post for "factory settings" about wanting to know more about the binding style that i used for it. so i thought i might make a post about it.
i was as terrible as i always am for taking in progress shots, but i can link you to the resources i used in order to make my book. i would also like to point out that "factory settings" is my 120th bind, and i have been doing bookbinding as a hobby for just over 3 years now. unfortunately this means some of the methods that i used for that bind aren't particularly beginner friendly, just in terms of the tools and methods i have used, but i would love to point you in the right direction when it comes to resources. i dont say this to sound pretentious which i fear i might come across, just so that youre fully informed. getting into this hobby is fun and rewarding, but it can definitely be intimidating.
with that caveat, heres a list of links and resources that i have used for bookbinding in general, with additional links to methods i used specifically in regards to this bind.
ASH's how to make a book document. it gives you a great introduction into typesetting fics (where you format the text of fics to look like a traditionally published books) and then turning them into a case-bound book (the style i used for "factory settings"). it is comprehensive, and explains how to use microsoft word to do your bidding. it was invaluable to me when i was just starting out! currently i use affinity publisher to typeset/format my fics for printing, but i only bought and learned how to use that after i had been binding books for a year and a half. i made some beautiful typesets with word, and some of my close friends use it still and design stuff that i never would be able to in my wildest dreams (basically anything by @no-name-publishing)
DAS Bookbinding's Square Back Bradel Binding. a great style to do your first bind in! this method requires, when making the case, to attach the cover board and the spine board to a connecting piece of paper, which makes it so much easier to match the size of the case to the size of the text block (your printed out and sewn fic). using this method is what allowed me to get much more accurately fitting cases, and made me much more confident with the construction of the books i was making. a well-made book is something that is so wonderful to hold in your hands!
DAS Bookbinding's Rounded and Backed Cased Book. This is the specific method that i used to create my bind for "factory settings"! even before i could back my books, i found that watching DAS's videos in particular helped me see how books were traditionally made, and i was able to see different tips and tricks about how to make nicer books.
Book Edge Trimming Without... i trim the edges of my text block using my finishing press and a chisel i have sharpened using a whetstone and leather strop with buffing compound on it. i follow the method for trimming shown in this video!
Made Endpapers. i follow this method for my endpapers, as i used handmade lokta endpapers, and they can be quite thin, but they look beautiful! i used "tipped on" endpapers (where you have your endpaper and then put a thin strip of glue on the edge and attach it to your text block) i used for a very long time before this, but these feel like they are much more stable, as they are sewn with your text block.
Edge Sprinkling. this is the method that i used for decorating the edges of my text block. but the principle is basically clamping your text block tight and then sprinkling the edges. i do not believe you need to trim the edges in order to do sprinkles on the edges, and that's what makes it accessible! i personally just use really cheap acrylic paint that i water down and then flick it onto the edges with my thumb and a paint brush.
Double-Core Endbands. i sew my own endbands, which i followed this tutorial for. that being said, it's kind of confusing, and this video is a bit easier to follow, but it is a slightly different type of endband.
Case decoration. i used my silhouette cameo 4 to cut out my design for "factory settings" in htv (heat transfer vinyl). i also used my cameo 4 to cut out the oval of marbled paper on the front, as i honestly didn't want to try my hand at cutting an oval lol. i also glued some 300 gsm card with an oval cut out of the centre of it onto the cover before covering it with bookcloth, to get a kind of recess on the cover. i then glued the oval of marbled paper onto the top of the recessed area once it was covered with bookcloth, so that it was protected. the images i used were sourced from a mix of rawpixel, canva and pixabay. a more accessible way to get into cover decoration is by painting on a design for your cover as described in @a-gay-old-time's tutorial just here. or even doing paper labels, which look classy imo.
physical materials. sourcing these will depend on your country. i am located in australia, and have compiled a list with some other aussie bookbinders of places to buy from. here is a great post describing beginning materials for getting started binding.
@renegadepublishing. this tumblr is great! its what got me started bookbinding, and being in the discord has been inspiring, motivating, and honestly just one of the best online experiences i have ever had. it is full of resources, and most people in there are amateur bookbinders, with a couple of professionals thrown in. the discord is 18+, and anyone can join!
i'm sorry this post got so long, but i hope that this has a lot of information for you if you would like to get started bookbinding. its one of the best hobbies ive ever had, and i genuinely believe i will have it for the rest of my life.
4K notes
·
View notes
Text
Book Decoration: AKA All The Ways I Don't Use a Cricut
(this post is for people who don't want to buy an expensive cutting tool, or for those that do have an expensive cutting tool that would like to mix things up a little)
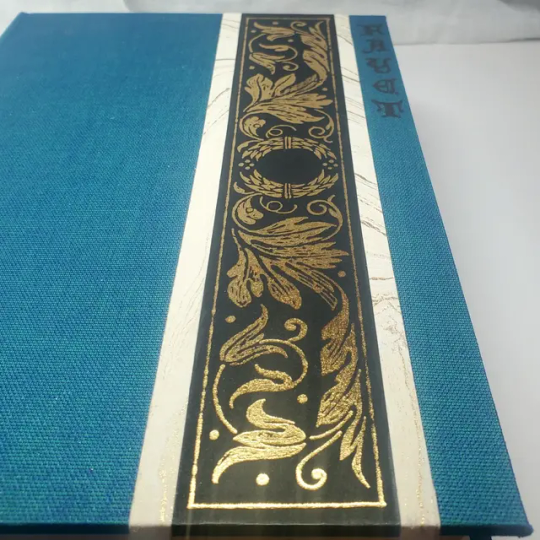
1. Print That Shit
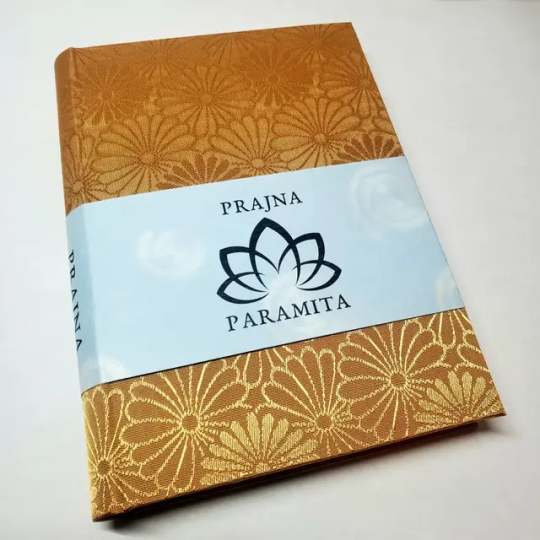
If you're already printing your own textblocks, an easy step for titles is to print them. Above is a title printed onto an "obi" of decorative paper. I measured out where I wanted things on the finished book and laid it out in Affinity, then printed it on a full sheet & trimmed it down to wrap around the book. A more simple method is to print & glue on the label into a slight indent in the cover (to protect it). A third option is to do the spine in bookcloth, while you print on paper for the cover and then glue that paper onto the boards (this usually looks even better when it is a three-piece bradel bind).
2. Foil Quill / Heat Pens
The heat pen is one of my go-to tools, but it can be a bit touchy about materials. The most popular version is the We R Memory Keepers' Foil Quill (which is one of the most ergonomic), but other pens exist that can get you to a higher heat temp, finer lines, or more consistent foil. For example, I have a pen created by a local Japanese bookbinding studio that fares way better on leathers than the WRMK quill & with a finer tip, but it's hell to control. Best results in general are on paper or smooth bookcloth (starched linen, arrestox, colibri - even duo will work but its less solid). The fuzzier a bookcloth is, the less your foil quill wants to deal with it. This means the heat n bond method of making bookcloth does not play nice with a heat pen usually, but there are two solutions: 1) use this tutorial on paste + acrylic medium coated bookcloth instead that will get you a perfect surface for the heat pen, or 2) use the pen on paper & then glue onto the cloth. I did a video tutorial for both foil quill use and this type of homemade bookcloth for @renegadeguild Binderary in 2023.
You get the most consistent results by tracing through a printed template that is taped in place, as I do in the video above.
3. Paint That Shit
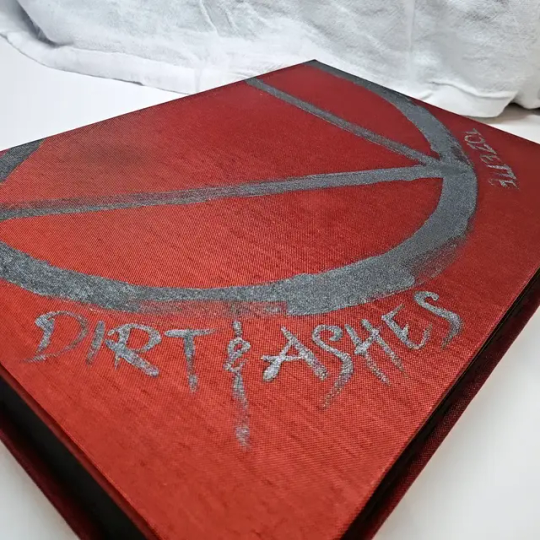
Acrylic paints will do you fine! The above is free-handed with a circle template, because I wanted that vibe. If you need straight lines that won't seep, lay them down with tape first & then paint over it first with a clear Acrylic medium, then your color. Same goes for stencils. Two more examples of painted bookcloth:
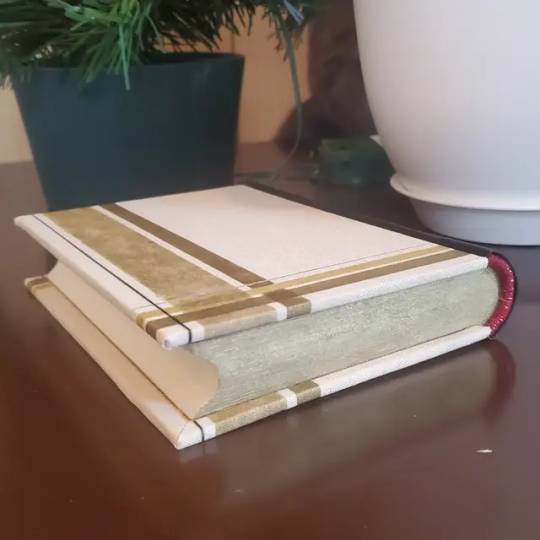
4. IT'S GOT LAYERS

By using layers of thinner boards, you can create interesting depths & contrasts on your cover. You can also make cutouts that peep through to the decorative paper behind. The most important part to this technique is the order in which each edge is wrapped. To get a good wrapped inside edge, you will split the turn in into tabs to get them to conform to a curve. You can also layer multiple colors of bookcloth without multiple layers of board, as seen below left, so long as you mind your cut edges for fraying.
5. Inlaid... anything
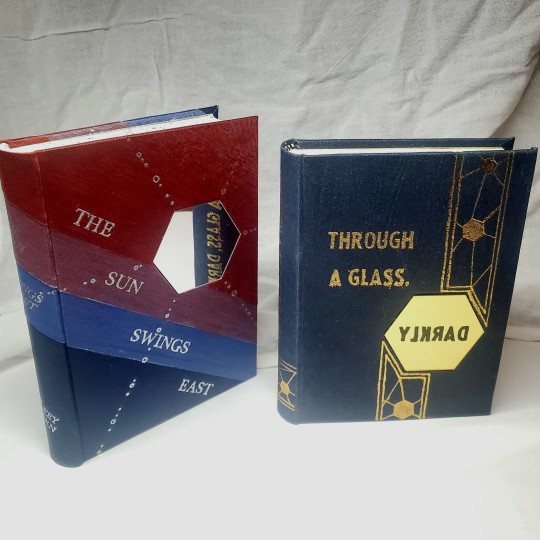
Mirrors! Marbled paper! I saw someone do a pretty metal bookmark once! The key is creating a little home for it to live in, which is pretty similar to the above layering method. On one layer you cut the shape, & glue that layer onto the bottom solid board before covering. You can do the top layer as an entire 1 mm board (like I did for the mirrors) or a sheet of cardstock, like I would use for inlaid paper.
6. Decorative Paper
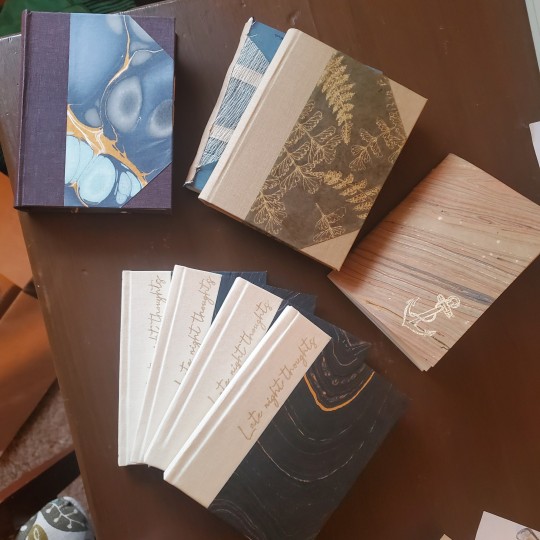
Decorative paper is always helpful & adds to the paper hoard... & its effects can be layers with other techniques, as below. Marbles, chiyogami, momi, or prints & maps of all kinds can be great additions. Some papers may need a protective coating (such as wax or a sealer).
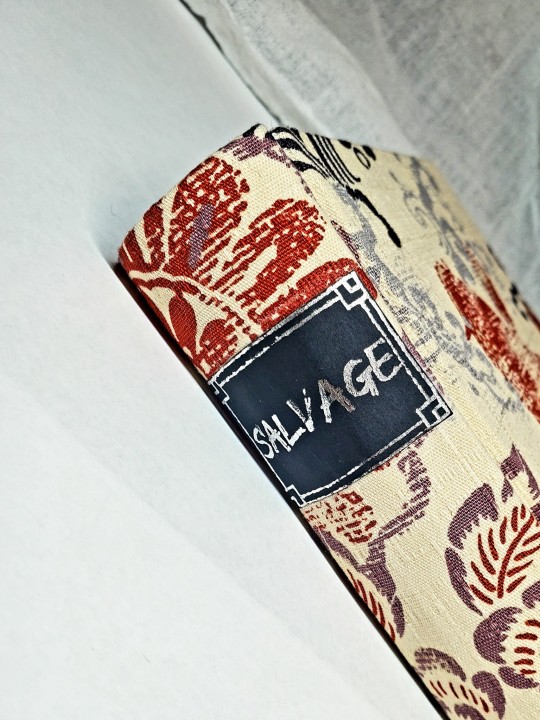
7. Stamps (with optional linocut)
While I've not used many more regular rubber stamps, I do know some who have, successfully! And I've used one once or twice with embossing powder (see photo 3 up, the gold anchor on the little pamphlet bind). What also works is to carve your own linocut or stamp, & then use block printing ink to ink it onto your fabric (as i did above). A bit time intensive, but it was nice how easily reproducible it was, and I liked the effect I got for this particular bind.
These methods are not exhaustive, just ones I've used, and there are of course many others. I haven't gone too into detail on any of these for the sake of length (& post photo limits) but feel free to ask about more specifics. Usually I'm using them in combination with other options.
1K notes
·
View notes
Text
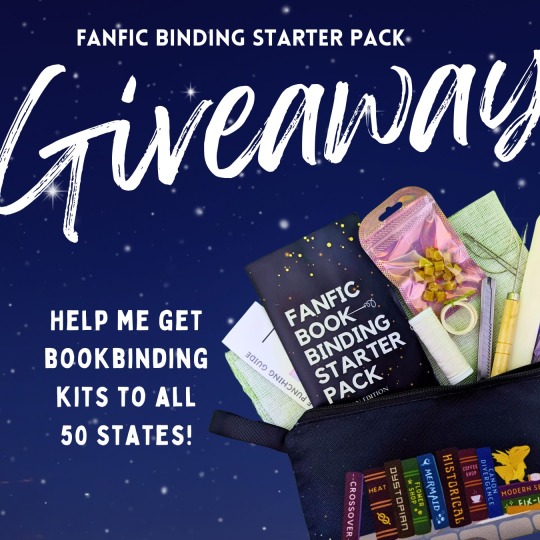

Fan Fiction Bookbinding is an act of liberation and self-determination.
So this is me trying to keep a 🕯️ in the dark. Something I can control--make the hobby of fan fiction bookbinding more accessible in United States. Archive the stories you love, tell the stories you want to tell, and feel empowered to keep creating.
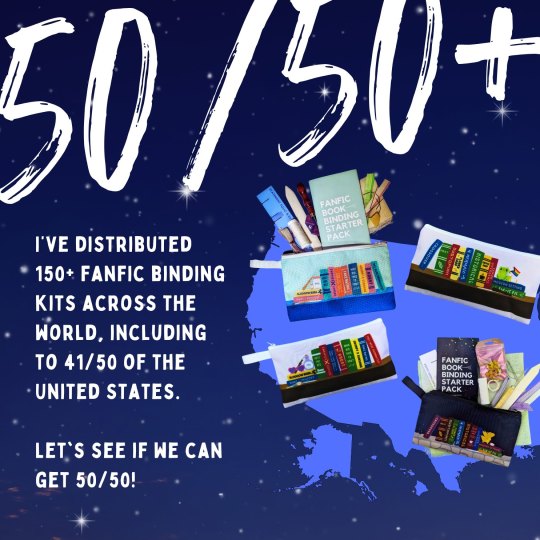
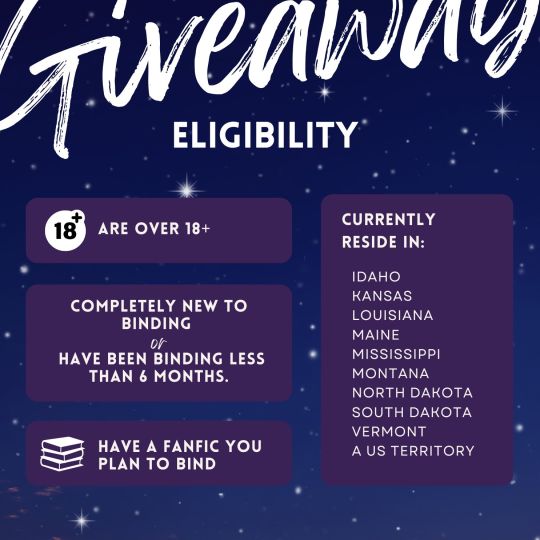
This is a giveaway to try and reach folks in states who may have more difficulty accessing bookbinding supplies. There are 9 eligible states + US territories. The intention is to help folks who otherwise wouldn't be able to afford or access. (If you can afford a kit or are not in one of the states listed, you can consider buying a kit the next time they drop on Feb 14/15--proceeds are used for initiatives like this one.)
I will not charge anyone any money for this (I will cover shipping) so if you get any messages asking for money to ship, etc. be skeptical (scam!) Tumblr Legal Disclaimer/Rules Thing By entering this promotion, each participant fully releases Tumblr from any and all liability related to this giveaway, and acknowledges that this promotion is in no way sponsored, endorsed, administered by, or associated with Tumblr.
98 notes
·
View notes
Text
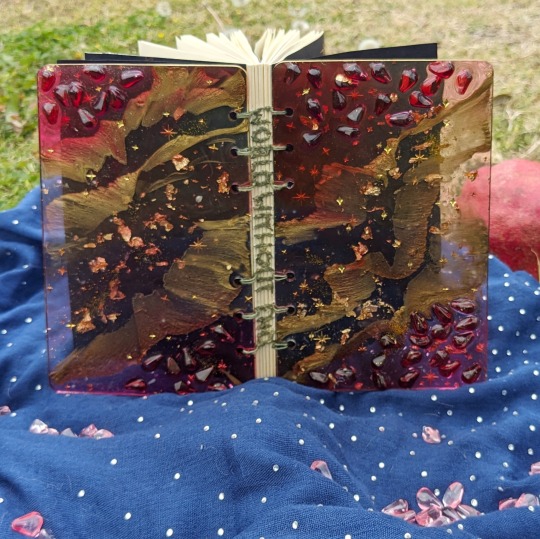
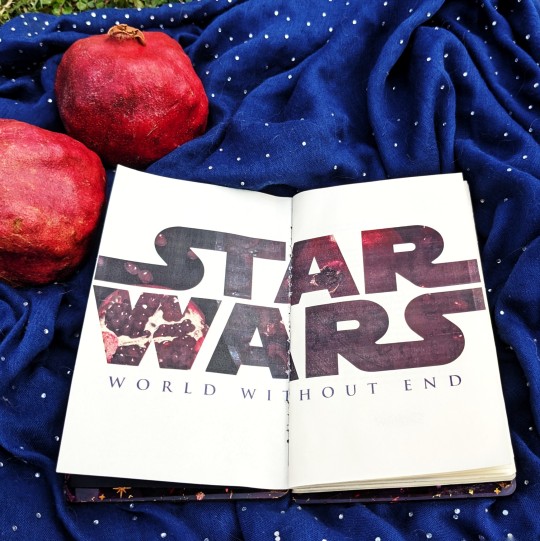
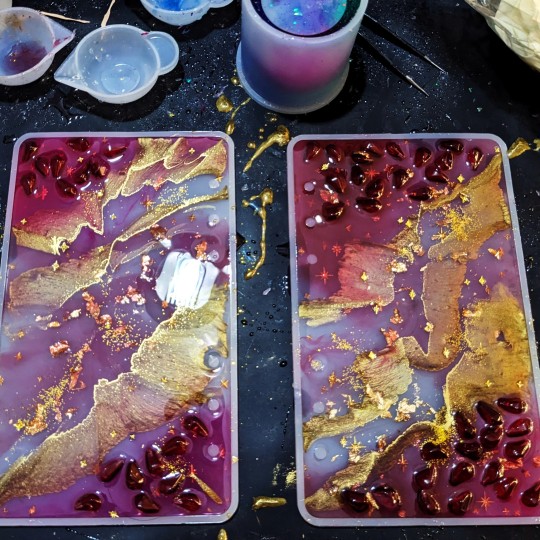
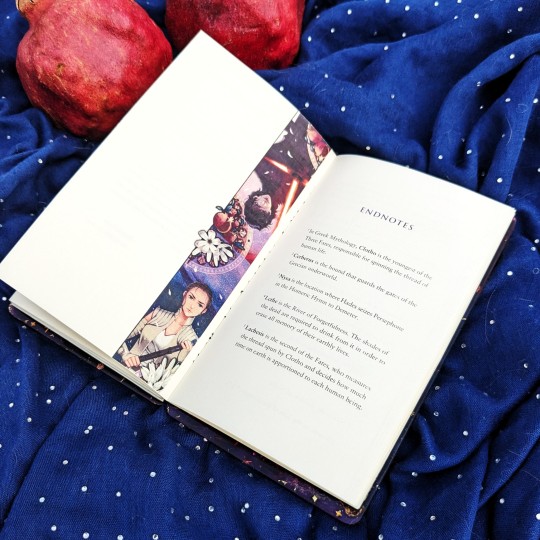

World Without End by diasterisms aka @therestofyourstory
There was a pile of pomegranates sitting on the sidewalk when I went outside to take these photos. Go figure.
World Without End is a 2016 (pre TLJ) fan fic based on the Hades and Persephone myth with one of the most er, memorable, uh, fornication scenes I have ever read.
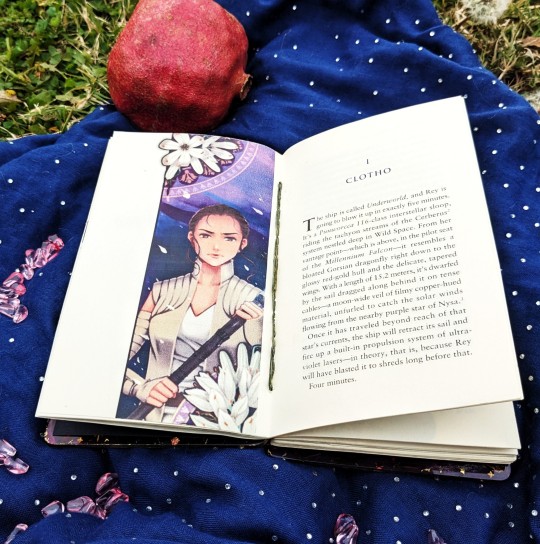
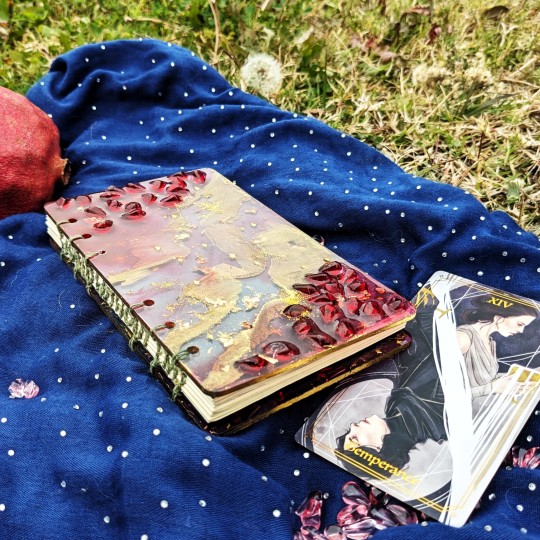
So I tried something completely different for this one. This is my first ever Coptic-style bind. Nonadhesive! Held together by linen thread and tears. I really wanted to challenge myself to get the book title onto the spine, so it's sewn on. The covers were cast in resin with resin pomegranate seeds and gold embellishments. It's see-through!
The endpapers are toner-reactive foiled versions of art drawn and generously provided by Janaina Medeiros. Artwork on the interior of the book was illustrated by @nemling originally for an excerpt of this story in the Keeping the Stars Apart @reyloanthology.
All of the Greek references and Sith translations are in the endnotes.
#fanbinding#bookbinding#coptic binding#resin book cover#reylo#ficbinding#fanfic binding#diasterisms#book design
59 notes
·
View notes
Text
Let's talk about our fanbinding mistakes
Based on the responses of 135 fanbinders, my very informal consultation indicates that the most common errors we make are
Taking the wrong measurements. 23.7%
Messing up the case in. 20%
Finding a typo after all is said and done. 20%
Staining the book with adhesive. 17.8%
Plus, a 4,4% that said Case upside down (after making the inquiry I realized that it should be part of item n° 2 and not an independent item; duh my fault. So it is plausible to think that "messing up the case in" might be a 24,4%).
Now, let's talk about these mistakes and share our strategies to prevent them.
From my amateur experience:
To get the measurements right, in addition to measuring two or three times, I use an awl, a ruler and a square: I mark what I will cut with a fine pencil or with the awl. When I have used a thick lead pencil, sometimes I fail in a mm. The square is to make sure the angles are straight before cutting. My mistake is not always that I score wrong, but that it is not necessarily straight. Another very obvious tip is to make sure you have good lighting when measuring.
For the adhesive stains, it has helped me to always have two clean wipes within reach, one wet and one dry. I also have a Residue Eraser Rubber Cement Cleaner for when I discover it late.
And you? What helps you to overcome these mistakes? (or make fewer of them)
@renegadeguild
124 notes
·
View notes
Text
Oh yeah, it's definitely not restorative justice as defined by consensus.
It's restorative justice in that it restores mana and waters my crops.


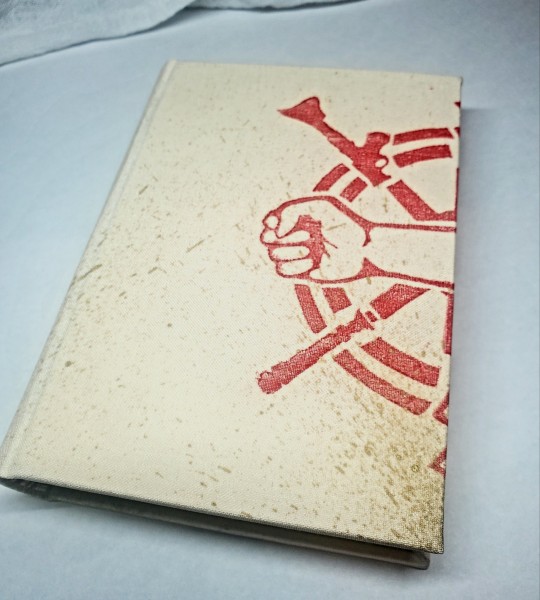
"Gritty Kills Tony Stark" by Copulation Matrix.
Bound in April 2023
❤️🔥A very short fic about restorative justice. ❤️🔥 Cased in orange faux fur with guillotine pendant decoration ❤️🔥 The signs held up by the people on the endpapers are the original tags on Ao3, and they are waving banners with the Flyers logo and Ao3 logo on them. ❤️🔥 Modified artwork of "La mort de Maximilien de Robespierre" by Giacamo Alprandi c.1799)
3K notes
·
View notes
Text
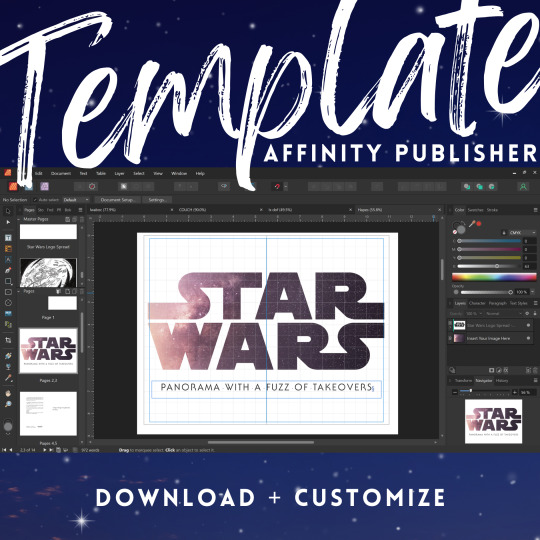
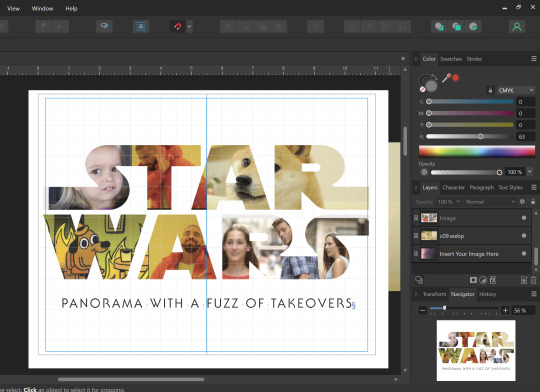
Star Wars Fanfic Template for Affinity Publisher
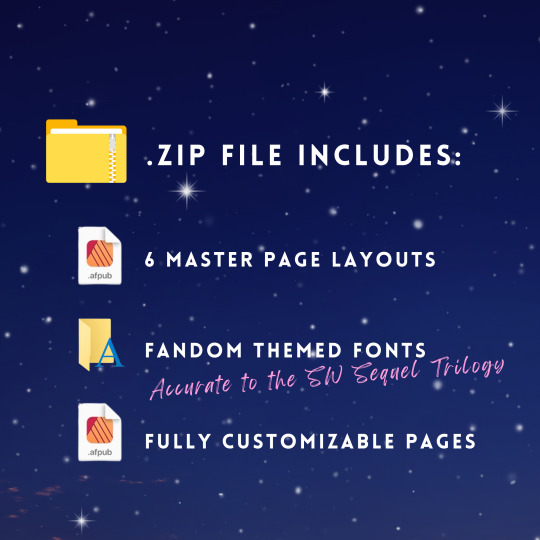
Affinity Publisher really intimidated me until @mourningmountainsbindery shared a sample typeset template for me to try out. It helped so much. I’m paying it forward, by sharing my own templates for Star Wars binding.
If you’ve been hesitant to learn Affinity Publisher, I hope this template helps you dive on in. This typeset template is perfect for fans of Reylo, Kylux, Stormpilot and other Star Wars sequel trilogy fanfic.
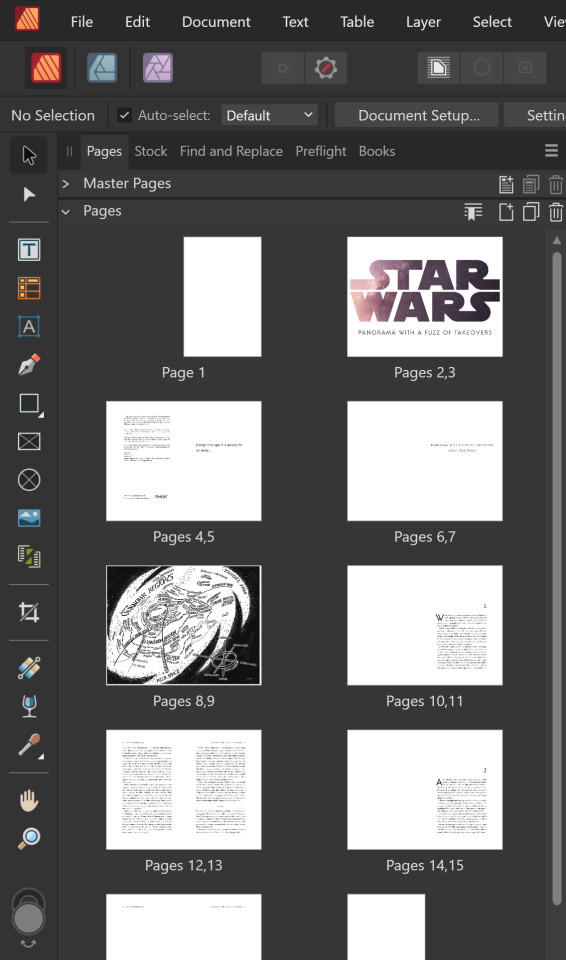
My favorite part of this template is the Star Wars title page, which you can customize with whatever images you want to fit your fic!
This template is intended for personal, not-for-profit, transformative use ONLY.
It has been made available at no cost to the fanbinding community to help make home bookbinding more accessible for everyone.
Affinity Publisher is owned by Serif Europe. Star Wars is owned by a company that has decided to cater to alt-right dudebros. The licenses for the fonts are owned by their respective publishers.
If you’d like to support my work, please consider keeping the attribution, share widely, and do not monetize what has been made freely available. Also, check out my online shop for fanfic bookbinding supplies!
Thank you and happy fanfic binding!
Visit my LinkTree to grab the template!
#fanbinding#fanfic binding#fanfic bookbinding#affinity pu#typesetting template#typesetting#ficbinding#star wars fanfic
33 notes
·
View notes
Text
As a woman and as a fangirl, watching the Star Wars franchise feels like being invited, then disinvited to a party.
The Last Jedi : "Welcome to Star Wars !"
The Rise of Skywalker : "We're sorry to inform you that most of the previous storylines have been canceled, this movie is for dudes."
The Acolyte Season 1 : "Welcome to Star Wars !"
The Acolyte Season 2 : "We're sorry to inform you that the entire show has been canceled, please leave."
330 notes
·
View notes
Text
Happy (early) Fanfic Writer's Appreciation Day!
Got a new addition to my extraordinary collection, so I thought I would share.
Words fail me, trying to express how much these mean to me.

83 notes
·
View notes
Note
Hi! I know it's out of stock right now, but what's the price difference in the beginner binding kid (linen) + olfa knife vs the same kit without the knife? it's extremely awesome that you've put together such kits!
Thank you for your interest in the Fanfic Bookbinding Starter Pack!
It's $10 extra for the knife, so $46 instead of $36 (cost of the kit.) That's the MSRP of the Olfa SVR-2, though you can also use coupons at art supply stores or search around for a better price. I put the kits up as quickly as I can pack them! There are a lot of steps, including winding and cutting tape, weighing beeswax, measuring mull, etc. I am currently putting together the ones for September 15th, so you can set a calendar reminder for 12am EST.
9 notes
·
View notes
Text
"Gritty Kills Tony Stark" by Copulation Matrix.
Bound in April 2023
❤️🔥A very short fic about restorative justice. ❤️🔥 Cased in orange faux fur with guillotine pendant decoration ❤️🔥 The signs held up by the people on the endpapers are the original tags on Ao3, and they are waving banners with the Flyers logo and Ao3 logo on them. ❤️🔥 Modified artwork of "La mort de Maximilien de Robespierre" by Giacamo Alprandi c.1799)
3K notes
·
View notes
Text
As promised! I wrote about the illegal fanbinding that's led to writers deleting their works recently, how that connects to the current pull-to-publish wave, and what happens when the rapidly expanding sphere of fic readers starts to get disconnected from *fandom*:
The ever-increasing reach of fanfiction has inched the practice away from text-written-in-community to a more traditional author-reader relationship—and the context collapse that’s come with viral works being treated like any other romance novel has spurred clashes between different types of readers with different sets of expectations. In the past few years, fic authors across all corners of fandom have increasingly complained about shifting attitudes from readers who treat them like any other content creator, demanding the next chapter as you might demand your favorite influencer’s next video. But unlike on creative platforms like TikTok and YouTube, the fic writer doesn’t get revenue from their new installment.
We'll also talk about this in some capacity on the next episode of @fansplaining! (In contrast with today's episode, on the non-monetized, gift-economy practices of many fanbinders, whose hobby is also imperiled by the people selling and buying fic.)
7K notes
·
View notes
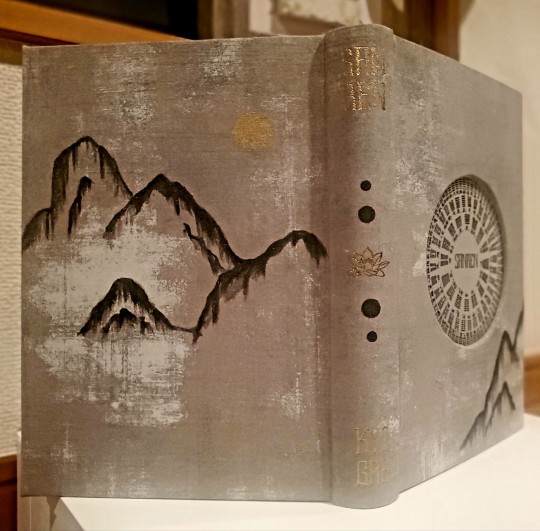
Text


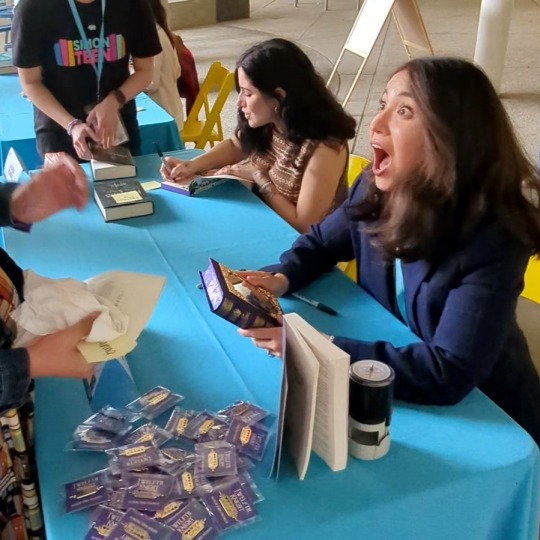
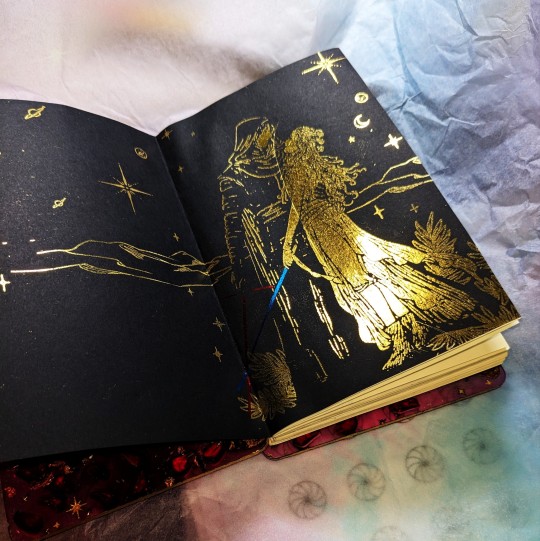
𝓗𝓸𝔀 𝓛𝓪𝓭𝔂 𝓥𝓮𝓷𝓰𝓮𝓪𝓷𝓬𝓮 𝓣𝓪𝓴𝓮𝓼 𝓗𝓮𝓻 𝓣𝓮𝓪 by olivieblake
Fᴀᴄᴇᴅ ᴡɪᴛʜ ᴛʜᴇ sᴇᴄʀᴇᴛs ᴏꜰ ʜᴇʀ ɴᴇᴡ ʜᴜsʙᴀɴᴅ’s ᴄᴜʀsᴇ, ᴀɴ ᴜɴᴡɪʟʟɪɴɢ qᴜᴇᴇɴ ꜰɪɴᴅs ʜᴇʀsᴇʟꜰ ᴡɪᴛʜ ᴀɴ ɪᴍᴘᴏssɪʙʟᴇ ᴄʜᴏɪᴄᴇ﹕ ᴋɪʟʟ ʜɪᴍ ᴛᴏ sᴀᴠᴇ ʜᴇʀ ʟɪꜰᴇ, ᴏʀ ʀɪsᴋ ʜᴇʀ ᴏᴡɴ ᴛᴏ sᴀᴠᴇ ʜɪs.
I loved Spinning Silver, and had a blast reading Blake's fanfic spin on it. Mirrors play an important role in the story, and I couldn't shake the idea of embedding a mirror into the front cover of the book.
To make a bind as extravagant and lush as befits the story, I etched the mirror with fluoride salts using a stencil and foiled the rest of the silktex moire cover. I vector edited decorative lettering from a font by Alit Design for the title page and used full bleed spreads in the typeset. With careful coaching from Duran binding, I marbled the textblock edges.
I was so happy to gift this book to the author at yallwest this weekend.
#fanbinding#bookbinding#fanfic binding#ficbinding#dramione#olivie blake#author copy#howladyvengeancetakeshertea
115 notes
·
View notes