
Statistics
We looked inside some of the posts by stevinj-blog and here's what we found interesting.
Average Info
Notes Per Post
2
Likes Per Post
2
Reblog Per Post
0
Reply Per Post
0
Time Between Posts
2 hours
Number of Posts By Type
Text
17
Last Seen Tumblr Blogs


Fun Fact
Tumblr has 4 main sources of revenue.
Text
Blog Post 2 – Setting Up the Landscape, Trees, and Water
After planning the scene for Place of Mind, I began shaping the landscape in Unreal Engine using the sculpt tool. I created small hills around the edges to frame the scene and left a flat area in the center for the lake and temple.
Next, I added trees to bring the environment to life. I used a mix of natural tree models and placed them in a way that surrounded the scene while keeping the center open. The trees helped break up the space and added colour and depth to the overall look.
For the middle of the scene, I created a lake using Unreal's water system and added reflective materials to give it a calm and peaceful surface. The lake became the main visual anchor for the environment.
To support the idea of a quiet, hidden retreat, I brought in a temple asset from the FAB library. It fit nicely into the scene and gave structure and meaning to the center of the landscape. The temple added to the overall mood I was aiming for a quiet space for thought or meditation.
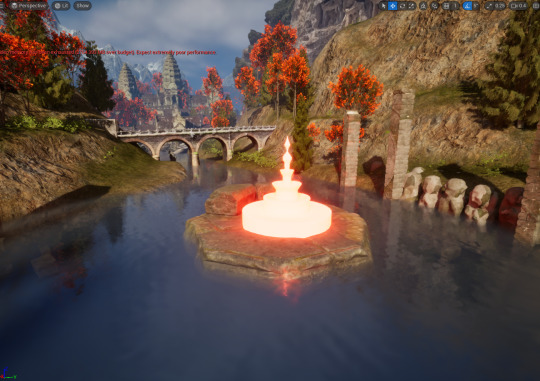
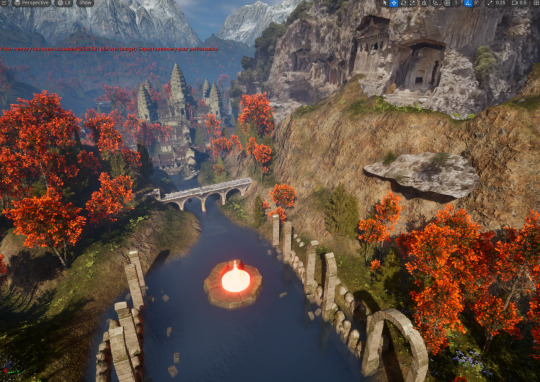
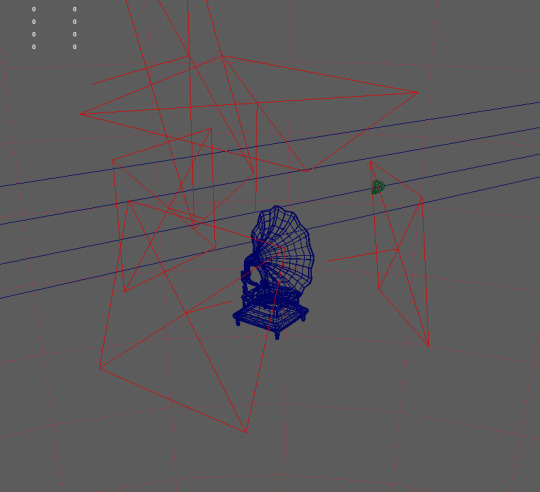
This my render out of the scene:

Refrences
Epic Games (n.d.) Unreal Engine Marketplace. Available at: https://www.unrealengine.com/marketplace
0 notes
Text
Blog Post 1 – Planning My Environment: “Place of Mind”
For this assignment I am planning to create an environment called “Place of Mind.” The idea is to design a peaceful nature-based scene that feels calm and emotionally grounding.
I want to build a setting that includes a lake, a small temple, natural hills, trees, and a glowing artifact fountain in the center. The environment will have a calm mood, using soft natural light and reflection to help express the theme of inner peace.
As part of my process, I’ll be following the Unreal Sensei open-world workflow tutorial on YouTube. This will help guide how I structure my environment, handle lighting, and manage performance as the scene develops.
Reference:
Unreal Sensei (2023) Create a Massive Open World in Unreal Engine 5. Available at: https://www.youtube.com/watch?v=k-zMkzmduqI
0 notes
Text
Blog Post 6 – Final Reflection: What I Improved
This Development 2 project helped me improve my understanding of Unreal Engine environment creation, with a strong focus on mood, lighting, and atmosphere.
The initial inspiration for this piece came from Alireza Akhbari’s ruined city project on ArtStation. His cinematic use of lighting and mood helped me shape the emotional tone of my own scene and inspired the idea of creating a destroyed city at night.
I improved at placing assets thoughtfully in a scene, making sure they felt natural and contributed to storytelling. Using Kitbash3D Cargo assets, I learned how to break symmetry and guide the viewer’s eye using layout, light and object placement.
Working with Niagara was a key part of this project. I used Niagara systems to add smoke in buildings and fire in barrels, which added motion and realism. I also learned to flicker lights using blueprints, which added more life to the environment, especially in a night-time setting.
Creating a road spline helped me shape the flow of the scene, and I used that as a visual guide for placing other key elements. Through this, I also improved my spline editing and scene blocking skills.
Finally, I gained confidence in lighting and rendering, learning how to create a moody red-lit atmosphere that supports the theme of destruction. Setting up the lighting and rendering in Unreal gave me a better grasp of how to control tone and depth in an environment.
This project pushed me to think beyond just placing assets. It helped me build a complete cinematic environment with a strong emotional tone.

References:
Akhbari, A. (n.d.) Ruined City. Available at: https://www.artstation.com/artwork/nE3PQr
KitBash3D (n.d.) Cargo - Download 3D World Building Kits. Available at: https://kitbash3d.com/pages/cargo
0 notes
Text
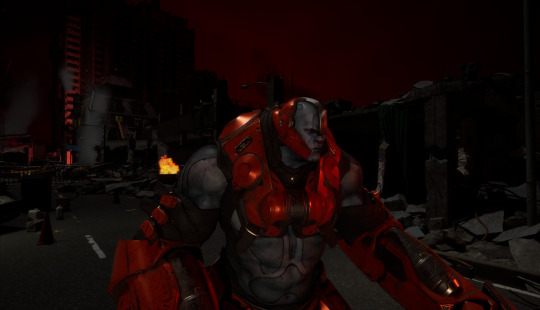
Blog Post 5 – Adding a Character to Create Focus and Story
After building most of the destroyed city environment I felt like something was missing a sense of narrative or presence in the space. I wanted the viewer to feel like something had caused this destruction and that someone was still connected to it.
To help build that story I added a character from the Unreal Marketplace and placed them in the scene. This gave the viewer a clear focal point and made the space feel more alive. The way the character is positioned facing into the destruction adds a sense of mystery and makes the viewer wonder what happened.
The addition of the character helped me think more about visual storytelling and how to use composition, lighting and scale to draw attention and emotion.


References
Epic Games (n.d.) Unreal Engine Marketplace. Available at: https://www.unrealengine.com/marketplace
0 notes
Text
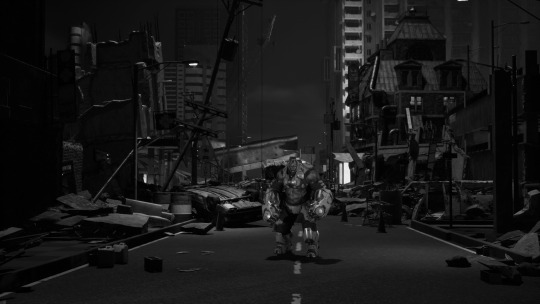
Blog Post 4 – Lighting, Fire, and Smoke for Night Mood
To push the mood and atmosphere of the destroyed city I focused on creating a night-time scene with red lighting, smoke and fire effects.
I added several point lights around the scene, especially near the destroyed petrol pump and scattered barrels. To make the scene feel alive I made one of the lights flicker, using a simple method I learned from a YouTube tutorial by VR Division.
I also used Niagara systems to add fire inside metal barrels and smoke rising from buildings. The smoke helped break the silhouette of the buildings and added depth and motion to the scene. I placed them carefully to keep the view cinematic and readable.
All the lighting was designed to highlight the destruction and guide the viewer's eye through the environment while keeping a dark, moody feel. The red glow adds intensity and supports the theme of chaos and abandonment.
I’ll be adding screenshots showing the fire, smoke and lighting in action.


0 notes
Text
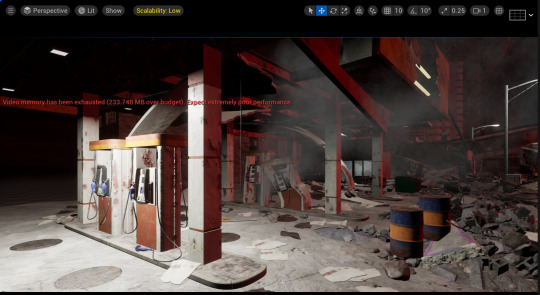
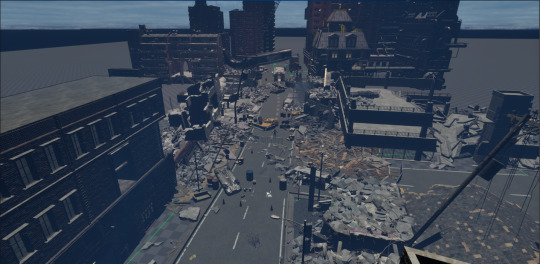
Blog Post 3 – Adding Kitbash3D Assets to Build the City
With the landscape and road in place, I started populating the scene using Kitbash3D’s Cargo assets. These assets were perfect for building a ruined urban environment quickly while keeping the visuals detailed and consistent.
I added damaged buildings, street lights, road curbs, and rock debris to set the tone. I also placed a destroyed petrol pump to help tell the story of abandonment and chaos. To support the feel of destruction, I added smaller elements like metal barrels, scattered props, and broken environment pieces across the scene.
The placement of each asset was done carefully to avoid symmetry and to make the destruction look natural. I focused on leading the viewer’s eye along the road and into the city space using object placement and scene depth.
References
KitBash3D (n.d.) Cargo - Download 3D World Building Kits. Available at: https://kitbash3d.com/pages/cargo
0 notes
Text
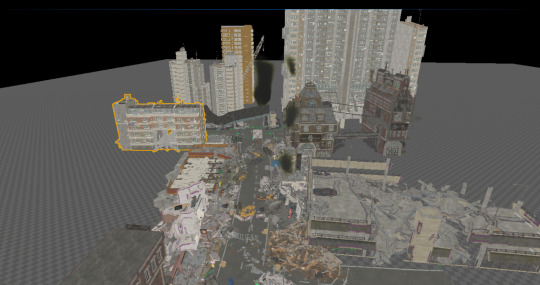
Blog Post 2 – Setting Up the Landscape and Road Spline in Unreal Engine
To begin building the destroyed city environment, I first set up a basic landscape in Unreal Engine. I kept the terrain flat and simple to match an urban setting and make it easier to place modular assets.
Next, I created a road using a spline, which allowed me to shape it smoothly across the scene and guide the visual flow. I followed a YouTube tutorial by UNF Games that demonstrated how to create roads using spline components and mesh deformation in Unreal Engine 5.
Tutorial used: UNF Games (2022)
This step helped me understand how to plan environments using roads and pathways as visual anchors. I adjusted the spline to add slight curves and breaks to match the ruined city concept.
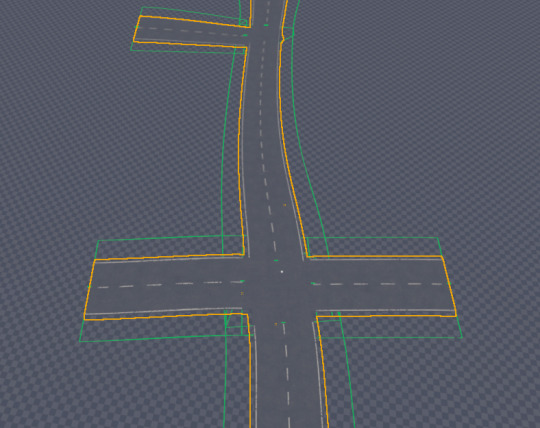
Reference:
UNF Games (2022) Unreal Engine 5 - Spline Road Tutorial (With Mesh Deformation). Available at: https://www.youtube.com/watch?v=eO2HUsC7dHY
0 notes
Text
Blog Post 1 – Planning a Ruined City Environment in Unreal Engine
For my Development 2 assignment, I decided to create a destroyed city environment in Unreal Engine, focusing on the theme of light and shadow.
The main inspiration for this piece came from a project by Alireza Akhbari, titled "Ruined City" on ArtStation: 🔗 https://www.artstation.com/artwork/nE3PQr

His use of lighting, atmosphere and detail really captured the feeling of a destroyed and abandoned world, and I wanted to create something in a similar direction.
My goal was to improve my skills in:
Setting up environments in Unreal Engine
Lighting and rendering cinematic scenes
Using assets from Kitbash3D's Cargo collection
Experimenting with mood, smoke and fire effects using Niagara
0 notes
Text
Blog Post 7 – Final Reflection: What I Improved
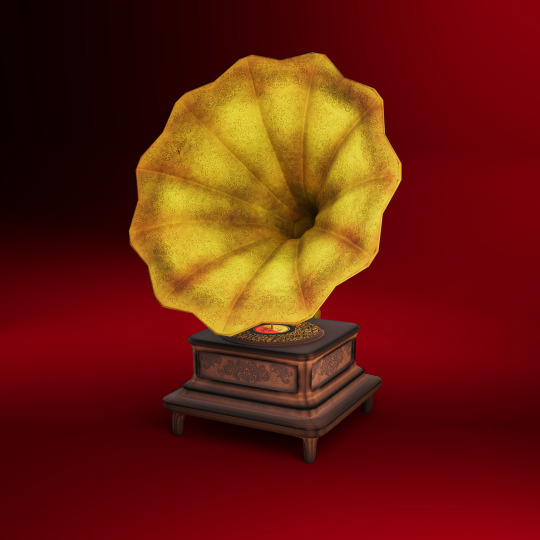
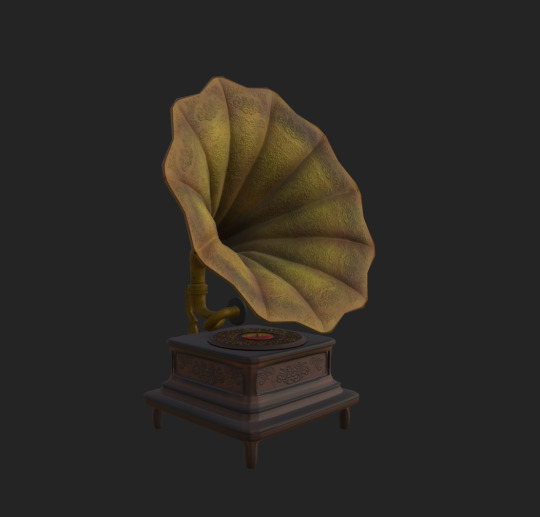
Creating this stylised gramophone for my Practice 1 assignment helped me improve my understanding of the 3D asset creation pipeline, especially for stylised art.
I improved at sculpting forms in ZBrush, learning to control the surface detail and enhance the shape without overcomplicating it. I also got better at using polypainting for color ID mapping, which made material setup easier in Substance Painter.
My baking workflow also improved, especially in preparing clean UVs and managing high to low poly transfers. I paid more attention to mesh organisation and naming to avoid errors and speed up the process.
In Substance Painter I focused on improving stylised texturing, experimenting with soft color tones and subtle surface wear to fit the nostalgic theme. I used 4K textures to preserve quality and detail.
In Maya, I improved my ability to connect maps properly and create clean high-quality renders using Arnold. I also explored lighting setups to present the asset clearly and professionally.
Overall, this project helped me build confidence in creating a fully stylized 3D asset, from modeling to final render.

0 notes
Text
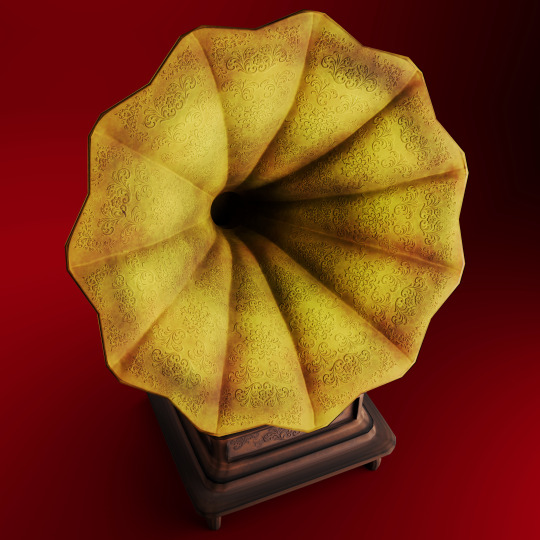
Blog Post 6 – Scene Setup and Rendering in Maya
After exporting the texture maps from Substance Painter I moved into Maya to set up the scene for final rendering.
I imported the low poly model and assigned all the texture maps using the Arnold Standard Surface Shader. I connected the base color, roughness, metalness, normal and ambient occlusion maps to match the look from Substance Painter.
Next I focused on the lighting setup. I used a three-point lighting system to highlight the shape and surface of the gramophone. This helped bring out the stylised details and gave the model a more finished and presentable look.
To ground the asset I added a simple plane surface and adjusted shadows and reflections to keep the focus on the asset itself.
This setup gave me clean, well-lit renders that showcase the textures and forms clearly.

0 notes
Text
Blog Post 5 – Stylised Texturing in Substance Painter
After baking the maps successfully I began the texturing process in Substance Painter to give the gramophone a stylised and nostalgic look.
I used the ID map to separate different materials and applied custom layers for wood, brass and fabric. I experimented with colour combinations that felt warm and aged while keeping the overall style simple and clean. I also added light edge wear and soft highlights to enhance the shapes from the sculpt.
Throughout the process I focused on colour harmony and used subtle roughness variation to give the surface more character. I kept the materials stylised instead of realistic to match the emotional tone of the project.

0 notes
Text
Blog Post 4 – UV Mapping and Baking Before Texturing
Before starting the texturing stage I first completed the UV unwrapping for the low poly gramophone model in Maya. I organised the UV shells clearly and ensured everything had even texel density with no overlaps. This made the model clean and ready for baking and texturing.

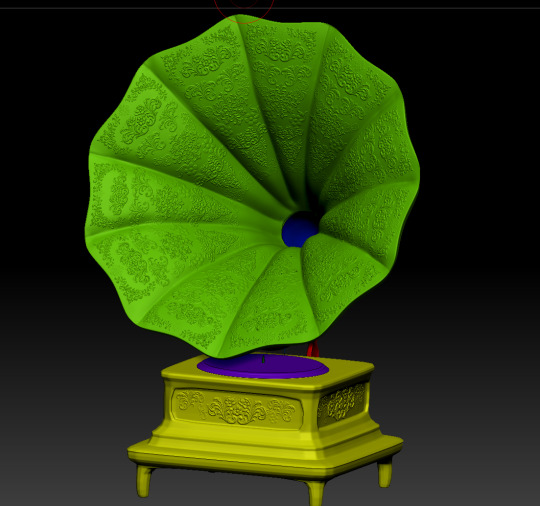
After the UVs were complete I exported the low poly mesh and brought it along with the high poly sculpt into Substance Painter. I then baked all the required texture maps including Normal, Ambient Occlusion, Curvature and ID maps.

I used the polypaint from ZBrush to generate ID maps, which helped me later during the masking and material setup process.
This step was important for setting a clean foundation before applying any textures. The bakes turned out well and preserved the stylized details from the sculpt.
0 notes
Text
Blog Post 3 – Sculpting the Gramophone in ZBrush
After finishing the low poly base model in Maya I imported it into ZBrush to sculpt extra detail and give the asset a more stylised feel.
I focused on shaping the horn, base, and small parts using brushes like TrimDynamic, Move, and DamStandard to add a soft, hand-crafted look. I wanted the curves and forms to feel slightly exaggerated but still elegant and clean.
Once I completed the sculpting pass I also used polypainting in ZBrush to create color ID maps directly on the high poly model. This helped prepare the model for easier material masking and organization during texturing in Substance Painter.
The sculpting stage allowed me to push the style while keeping the overall shape true to the original gramophone form.

0 notes
Text
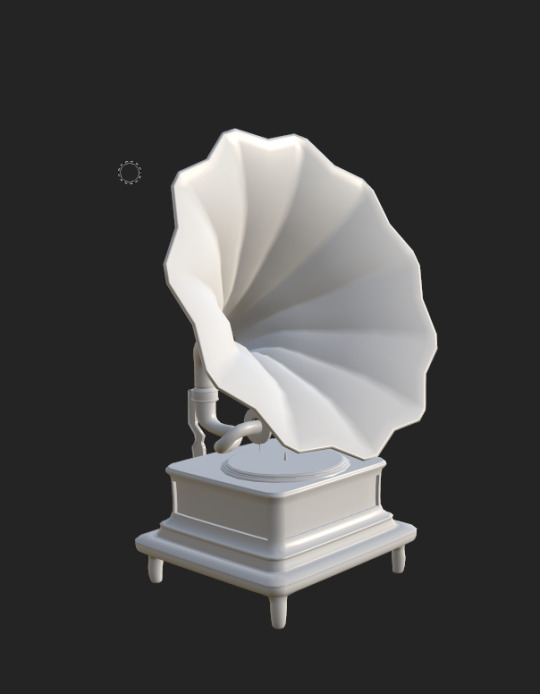
Blog Post 2 – Modeling the Base in Maya
After planning the stylised gramophone, I started by building the low poly model in Maya. I focused on keeping the shapes clean and stylised with smooth curves and soft bevels instead of sharp edges.
I broke the model down into key parts like the horn, turntable, arm and base box. For each piece I kept the geometry simple and clean so it would be ready for sculpting and texturing later.
Once the model was complete I checked the scale and proportions. I also made sure it was ready for UV unwrapping in the next step. I avoided adding too much detail in Maya so I could sculpt extra form in ZBrush.


0 notes
Text
Blog Post 1 – Planning a Stylised Gramophone (Nostalgia and Memories)
For my Practice 1 assignment titled "Nostalgia and Memories" I planned to create a stylised gramophone as my main 3D asset. I chose this object because it reminds me of older times, vintage music and fits the emotional theme of memory and nostalgia.
My goal was to design it in a stylised way with soft shapes, a warm colour palette and hand-painted-like materials that feel aged but inviting. I will follow this full pipeline:
Modeled and UVunwrapped in Maya
Sculpted in ZBrush
Textured and baked in Substance Painter
Rendered in Maya
These are my concepts i will be using

Refrences
Esman & Busrantiques. (n.d.) Gramophone Records. Available at: https://esmandbusrantiques.weebly.com/gramaphonerecords.html
Punjab Kesari. (n.d.) Mohammad Rafi’s evergreen songs which Gen Z also hums. Available at: https://www.punjabkesari.com/ampstories/web-stories/mohammad-rafis-evergreen-songs-which-genz-also-hums
0 notes
Text
Blog Post 17 – Reflective Summary: Learning the AAA Game Character Workflow
This project gave me a full experience of working through an AAA game character workflow from start to finish. Looking back, I’ve learned a lot, not just technically but also in terms of planning, problem solving and adapting my process to match industry standards.
One of the biggest highlights was learning Marvelous Designer for the first time. It helped me create realistic clothing and understand how fabric behaves. I learned to simulate garments properly and prepare them for sculpting. Moving into ZBrush, I focused on body sculpting, detailing clothing and trying new things like hair sculpting based on online tutorials. I also did all the accessory sculpting in ZBrush, from boots to belts, pouches and ranks.
After sculpting, I used Maya for retopology. This part of the process taught me how important clean topology and edge flow are, especially for animation or game use. I also learned how to organize my files better by grouping, naming and combining mesh parts in a smart way that helped later in baking and texturing.
Baking in Marmoset Toolbag was another key step where I learned how to match high and low poly models correctly and adjust cage settings. I used the baked maps in Substance Painter to texture the character, where I learned about material layering, using ID maps and adding realistic surface detail with roughness and grunge maps.
Finally, I imported everything into Unreal Engine where I learned how to assign materials, set up lighting and use the rendering tools to get clean, high-quality output. Setting up the scene helped me understand the importance of presentation and how lighting affects the final look.
Through this whole workflow, I also improved my problem-solving skills. I faced challenges like mesh clipping, UV stretching, baking errors and material mismatches, but I figured out how to fix them through research and testing.
Overall, this project helped me learn a full pipeline from sculpting to rendering and gave me a solid foundation in the tools used by AAA character artists including ZBrush, Maya, Marvelous Designer, Substance Painter, Marmoset Toolbag and Unreal Engine.
This journey has helped me grow not just as a student but as an aspiring game artist ready to take on more complex characters in the future.


1 note
·
View note
Text
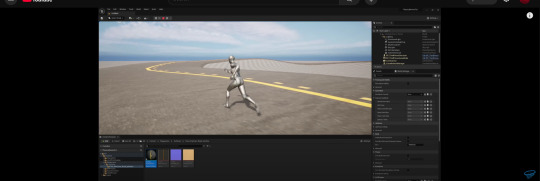
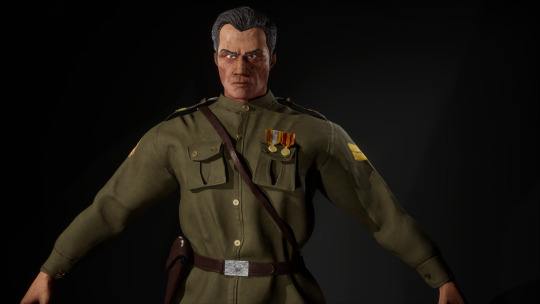
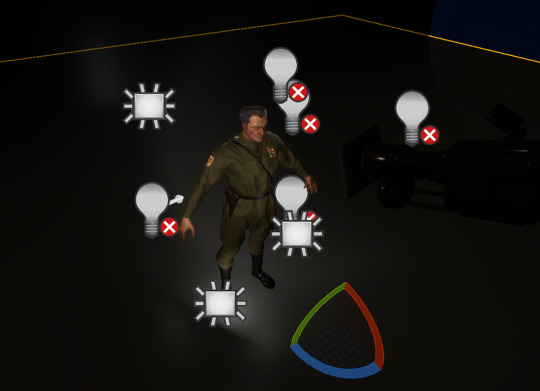
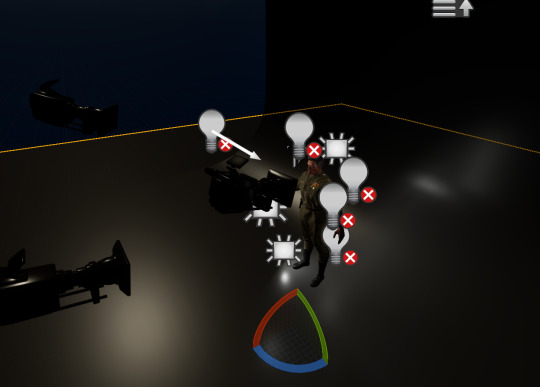
Blog Post 15 – Importing, Assigning Materials and Lighting Setup in Unreal Engine
I imported my low poly character into Unreal Engine along with all the texture maps exported from Substance Painter. Because I had clearly named all the mesh parts and texture files earlier, it was easy to assign the right materials to each part of the model.
In the material editor, I set up the Base Color, Normal, Roughness, and Ambient Occlusion maps for each part like the boots, shirt, belt and gear. The materials showed up correctly and looked close to what I had in Substance Painter.
After assigning the materials, I worked on the lighting setup. I used a Directional Light, Sky Light and a Post Process Volume to control the look of the scene. I adjusted the light angle and intensity to highlight the character’s textures and form. This helped bring out the details in the fabric, leather, and metal.
1 note
·
View note