
A personal favorite is working with entrepreneurs to create a clear vision, set intention and goals, and plan and execute the strategies that will get them to the next level. Being an entrepreneur puts you face to face with yourself- both the patterns and beliefs that serve you and those that don't. Coaching done well, creates a mindset for success. As a former CPA and business consultant, I combine a strong business and finance background with personal experience in successfully managing transition and an intuitive coaching style.
Don't wanna be here? Send us removal request.
Statistics
We looked inside some of the posts by suzanneshannon and here's what we found interesting.
Average Info
Notes Per Post
0
Likes Per Post
0
Reblog Per Post
0
Reply Per Post
0
Time Between Posts
10 hours
Number of Posts By Type
Text
17
Last Seen Tumblr Blogs


Fun Fact
Tumblr’s website traffic is steadily declining.
Text
How to Implement and Style the Dialog Element
A look from Christian Kozalla on the <dialog> HTML element and using it to create a nice-looking and accessible modal.
CodePen Embed Fallback
I’m attracted to the <dialog> element as it’s one of those “you get a lot for free” elements (even more so than the beloved <details> element) and it’s so easy to get modal accessibility wrong (e.g. focus trapping) that having this sort of thing provided by a native element seems… great. ::backdrop is especially cool.
But is it too good to be true? Solid support isn’t there yet, with Safari not picking it up. Christian mentions the polyfill from Google, which definitely helps bring basic functionality to otherwise non-supporting browsers.
The main problem is actual testing on a screen reader. Scott O’Hara has an article, “Having an open dialog,” which has been updated as recently as this very month (October 2021), in which he ultimately says, “[…] the dialog element and its polyfill are not suitable for use in production.” I don’t doubt Scott’s testing, but because most people just roll-their-own modal experiences paying little mind to accessibility at all, I wonder if the web would be better off if more people just used <dialog> (and the polyfill) anyway. Higher usage would likely trigger more browser attention and improvements.
The post How to Implement and Style the Dialog Element appeared first on CSS-Tricks. You can support CSS-Tricks by being an MVP Supporter.
How to Implement and Style the Dialog Element published first on https://deskbysnafu.tumblr.com/
0 notes
Text
Testing Vue Components With Cypress
Cypress is an automated test runner for browser-based applications and pages. I’ve used it for years to write end-to-end tests for web projects, and was happy to see recently that individual component testing had come to Cypress. I work on a large enterprise Vue application, and we already use Cypress for end-to-end tests. Most of our unit and component tests are written with Jest and Vue Test Utils.
Once component testing arrived in Cypress, my team was all in favor of upgrading and trying it out. You can learn a lot about how component testing works directly from the Cypress docs, so I’m going skip over some of the setup steps and focus on what it is like to work with component tests — what do they look like, how are we using them, and some Vue-specific gotchas and helpers we found.
Disclosure! At the time I wrote the first draft of this article, I was the front-end team lead at a large fleet management company where we used Cypress for testing. Since the time of writing, I’ve started working at Cypress, where I get to contribute to the open source test runner.
All the examples mentioned here are valid at the time of writing using Cypress 8. It’s a new feature that’s still in alpha, and I wouldn’t be surprised if some of these details change in future updates.
If you already have a background in testing and component tests, you can skip right to our team’s experiences.
What a component test file looks like
For a simplified example, I’ve created a project that contains a “Privacy Policy” component. It has a title, body, and an acknowledgment button.
When the button is clicked, an event is emitted to let the parent component know that this has been acknowledged. Here it is deployed on Netlify.
Now here’s the general shape of a component test in Cypress that uses some of the feature’s we are going to talk about:
import { mount } from '@cypress/vue'; // import the vue-test-utils mount function import PrivacyPolicyNotice from './PrivacyPolicyNotice.vue'; // import the component to test describe('PrivacyPolicyNotice', () => { it('renders the title', () => { // mount the component by itself in the browser 🏗 mount(PrivacyPolicyNotice); // assert some text is present in the correct heading level 🕵️ cy.contains('h1', 'Privacy Policy').should('be.visible'); }); it('emits a "confirm" event once when confirm button is clicked', () => { // mount the component by itself in the browser 🏗 mount(PrivacyPolicyNotice); // this time let's chain some commands together cy.contains('button', '/^OK/') // find a button element starting with text 'OK' 🕵️ .click() // click the button 🤞 .vue() // use a custom command to go get the vue-test-utils wrapper 🧐 .then((wrapper) => { // verify the component emitted a confirm event after the click 🤯 expect(wrapper.emitted('confirm')).to.have.length(1) // `emitted` is a helper from vue-test-utils to simplify accessing // events that have been emitted }); }); });
This test makes some assertions about the user interface, and some about the developer interface (shoutout to Alex Reviere for expressing this division in the way that clicked for me). For the UI, we are targeting specific elements with their expected text content. For developers, we are testing what events are emitted. We are also implicitly testing that the component is a correctly formed Vue component; otherwise it would not mount successfully and all the other steps would fail. And by asserting specific kinds of elements for specific purposes, we are testing the accessibility of the component — if that accessible button ever becomes a non-focusable div, we’ll know about it.
Here’s how our test looks when I swap out the button for a div. This helps us maintain the expected keyboard behavior and assistive technology hints that come for free with a button element by letting us know if we accidentally swap it out:
A little groundwork
Now that we’ve seen what a component test looks like, let’s back up a little bit and talk about how this fits in to our overall testing strategy. There are many definitions for these things, so real quick, for me, in our codebase:
Unit tests confirm single functions behave as expected when used by a developer.
Component tests mount single UI components in isolation and confirm they behave as expected when used by an end-user and a developer.
End-to-end tests visit the application and perform actions and confirm the app as whole behaves correctly when used by an end-user only.
Finally, integration testing is a little more of a squishy term for me and can happen at any level — a unit that imports other functions, a component that imports other components, or indeed, an “end-to-end” test that mocks API responses and doesn’t reach the database, might all be considered integration tests. They test more than one part of an application working together, but not the entire thing. I’m not sure about the real usefulness of that as a category, since it seems very broad, but different people and organizations use these terms in other ways, so I wanted to touch on it.
For a longer overview of the different kinds of testing and how they relate to front-end work, you can check out “Front-End Testing is For Everyone” by Evgeny Klimenchenko.
Component tests
In the definitions above, the different testing layers are defined by who will be using a piece of code and what the contract is with that person. So as a developer, a function that formats the time should always return the correct result when I provide it a valid Date object, and should throw clear errors if I provide it something different as well. These are things we can test by calling the function on its own and verifying it responds correctly to various conditions, independent of any UI. The “developer interface” (or API) of a function is all about code talking to other code.
Now, let’s zoom in on component tests. The “contract” of a component is really two contracts:
To the developer using a component, the component is behaving correctly if the expected events are emitted based on user input or other activity. It’s also fair to include things like prop types and validation rules in our idea of “correct developer-facing behavior,” though those things can also be tested at a unit level. What I really want from a component test as a developer is to know it mounts, and sends the signals it is supposed to based on interactions.
To the user interacting with a component, it is behaving correctly if the UI reflects the state of the component at all times. This includes more than just the visual aspect. The HTML generated by the component is the foundation for its accessibility tree, and the accessibility tree provides the API for tools like screen readers to announce the content correctly, so for me the component is not “behaving correctly” if it does not render the correct HTML for the contents.
At this point it’s clear that component testing requires two kinds of assertions — sometimes we check Vue-specific things, like “how many events got emitted of a certain type?”, and sometimes we check user-facing things, like “did a visible success message actually end up on the screen though?”
It also feels like component level tests are a powerful documentation tool. The tests should assert all the critical features of a component — the defined behaviors that are depended on — and ignore details that aren’t critical. This means we can look to the tests to understand (or remember, six months or a year from now!) what a component’s expected behavior is. And, all going well, we can change any feature that’s not explicitly asserted by the test without having to rewrite the test. Design changes, animation changes, improving the DOM, all should be possible, and if a test does fail, it will be for a reason you care about, not because an element got moved from one part of the screen to another.
This last part takes some care when designing tests, and most especially, when choosing selectors for elements to interact with, so we’ll return to this topic later.
How Vue component tests work with and without Cypress
At a high level, a combination of Jest and the Vue Test Utils library has becomes more or less the standard approach to running component tests that I’ve seen out there.
Vue Test Utils gives us helpers to mount a component, give it its options, and mock out various things a component might depend on to run properly. It also provides a wrapper object around the mounted component to make it a little easier to make assertions about what’s going on with the component.
Jest is a great test runner and will stand up the mounted component using jsdom to simulate a browser environment.
Cypress’ component test runner itself uses Vue Test Utils to mount Vue components, so the main difference between the two approaches is context. Cypress already runs end-to-end tests in a browser, and component tests work the same way. This means we can see our tests run, pause them mid-test, interact with the app or inspect things that happened earlier in the run, and know that browser APIs that our application depends on are genuine browser behavior rather than the jsdom mocked versions of those same features.
Once the component is mounted, all the usual Cypress things that we have been doing in end-to-end tests apply, and a few pain points around selecting elements go away. Mainly, Cypress is going to handle simulating all the user interactions, and making assertions about the application’s response to those interactions. This covers the user-facing part of the component’s contract completely, but what about the developer-facing stuff, like events, props, and everything else? This is where Vue Test Utils comes back in. Within Cypress, we can access the wrapper that Vue Test Utils creates around the mounted component, and make assertions about it.
What I like about this is that we end up with Cypress and Vue Test Utils both being used for what they are really good at. We can test the component’s behavior as a user with no framework-specific code at all, and only dig into Vue Test Utils for mounting the component and checking specific framework behavior when we choose to. We’ll never have to await a Vue-specific $nextTick after doing some Vue-specific thing to update the state of a component. That was always the trickiest thing to explain to new developers on the team without Vue experience — when and why they would need to await things when writing a test for a Vue component.
Our experience of component testing
The advantages of component testing sounded great to us, but of course, in a large project very few things can be seamless out of the box, and as we got started with our tests, we ran into some issues. We run a large enterprise SPA built using Vue 2 and the Vuetify component library. Most of our work heavily uses Vuetify’s built-in components and styles. So, while the “test components by themselves” approach sounds nice, a big lesson learned was that we needed to set up some context for our components to be mounted in, and we needed to get Vuetify and some global styles happening as well, or nothing was going to work.
Cypress has a Discord where people can ask for help, and when I got stuck I asked questions there. Folks from the community —as well as Cypress team members — kindly directed me to example repos, code snippets, and ideas for solving our problems. Here’s a list of the little things we needed to understand in order to get our components to mount correctly, errors we encountered, and whatever else stands out as interesting or helpful:
Importing and using Vuetify
Adding some attributes that Vuetify depends on to the __cy_root element
Using .spec files placed along side component files, not in a separate test folder
Dealing with a custom command import conflict between component tests and end-to-end tests
Accessing the Vue wrapper easily in a Cypress context
Importing Vuetify
Through lurking in the Cypress Discord, I’d seen this example component test Vuetify repo by Bart Ledoux, so that was my starting point. That repo organizes the code into a fairly common pattern that includes a plugins folder, where a plugin exports an instance of Veutify. This is imported by the application itself, but it can also be imported by our test setup, and used when mounting the component being tested. In the repo a command is added to Cypress that will replace the default mount function with one that mounts a component with Vuetify.
Here is all the code needed to make that happen, assuming we did everything in commands.js and didn’t import anything from the plugins folder. We’re doing this with a custom command which means that instead of calling the Vue Test Utils mount function directly in our tests, we’ll actually call our own cy.mount command:
// the Cypress mount function, which wraps the vue-test-utils mount function import { mount } from "@cypress/vue"; import Vue from 'vue'; import Vuetify from 'vuetify/lib/framework'; Vue.use(Vuetify); // add a new command with the name "mount" to run the Vue Test Utils // mount and add Vuetify Cypress.Commands.add("mount", (MountedComponent, options) => { return mount(MountedComponent, { vuetify: new Vuetify({});, // the new Vuetify instance ...options, // To override/add Vue options for specific tests }); });
Now we will always have Vuetify along with our components when mounted, and we can still pass in all the other options we need to for that component itself. But we don’t need to manually add Veutify each time.
Adding attributes required by Vuetify
The only problem with the new mount command above is that, to work correctly, Vuetify components expect to be rendered in a certain DOM context. Apps using Vuetify wrap everything in a <v-app> component that represents the root element of the application. There are a couple of ways to handle this but the simplest is to add some setup to our command itself before it mounts a component.
Cypress.Commands.add("mount", (MountedComponent, options) => { // get the element that our mounted component will be injected into const root = document.getElementById("__cy_root"); // add the v-application class that allows Vuetify styles to work if (!root.classList.contains("v-application")) { root.classList.add("v-application"); } // add the data-attribute — Vuetify selector used for popup elements to attach to the DOM root.setAttribute('data-app', 'true'); return mount(MountedComponent, { vuetify: new Vuetify({}), ...options, }); });
This takes advantage of the fact that Cypress itself has to create some root element to actually mount our component to. That root element is the parent of our component, and it has the ID __cy_root. This gives us a place to easily add the correct classes and attributes that Vuetify expects to find. Now components that use Vuetify components will look and behave correctly.
One other thing we noticed after some testing is that the required class of v-application has a display property of flex. This makes sense in a full app context using Vuetify’s container system, but had some unwanted visual side effects for us when mounting single components — so we added one more line to override that style before mounting the component:
root.setAttribute('style', 'display: block');
This cleared up the occasional layout issues and then we were truly done tweaking the surrounding context for mounting components.
Getting spec files where we want them
A lot of the examples out there show a cypress.json config file like this one for component testing:
{ "fixturesFolder": false, "componentFolder": "src/components", "testFiles": "**/*.spec.js" }
That is actually pretty close to what we want since the testFiles property accepts a glob pattern. This one says, Look in any folder for files ending in .spec.js. In our case, and probably many others, the project’s node_modules folder contained some irrelevant spec.js files that we excluded by prefixing !(node_modules) like this:
"testFiles": "!(node_modules)**/*.spec.js"
Before settling on this solution, when experimenting, we had set this to a specific folder where component tests would live, not a glob pattern that could match them anywhere. Our tests live right alongside our components, so that could have been fine, but we actually have two independent components folders as we package up and publish a small part of our app to be used in other projects at the company. Having made that change early, I admit I sure did forget it had been a glob to start with and was starting to get off course before popping into the Discord, where I got a reminder and figured it out. Having a place to quickly check if something is the right approach was helpful many times.
Command file conflict
Following the pattern outlined above to get Vuetify working with our component tests produced a problem. We had piled all this stuff together in the same commands.js file that we used for regular end-to-end tests. So while we got a couple of component tests running, our end-to-end tests didn’t even start. There was an early error from one of the imports that was only needed for component testing.
I was recommended a couple of solutions but on the day, I chose to just extract the mounting command and its dependencies into its own file, and imported it only where needed in the component tests themselves. Since this was the only source of any problem running both sets of tests, it was a clean way to take that out of the the end-to-end context, and it works just fine as a standalone function. If we have other issues, or next time we are doing cleanup, we would probably follow the main recommendation given, to have two separate command files and share the common pieces between them.
Accessing the Vue Test Utils wrapper
In the context of a component test, the Vue Test Utils wrapper is available under Cypress.vueWrapper. When accessing this to make assertions, it helps to use cy.wrap to make the result chain-able like other commands accessed via cy. Jessica Sachs adds a short command in her example repo to do this. So, once again inside commands,js, I added the following:
Cypress.Commands.add('vue', () => { return cy.wrap(Cypress.vueWrapper); });
This can be used in a test, like this:
mount(SomeComponent) .contains('button', 'Do the thing once') .click() .should('be.disabled') .vue() .then((wrapper) => { // the Vue Test Utils `wrapper` has an API specifically setup for testing: // https://vue-test-utils.vuejs.org/api/wrapper/#properties expect(wrapper.emitted('the-thing')).to.have.length(1); });
This starts to read very naturally to me and clearly splits up when we are working with the UI compared to when we are inspecting details revealed through the Vue Test Utils wrapper. It also emphasizes that, like lots of Cypress, to get the most out of it, it’s important to understand the tools it leverages, not just Cypress itself. Cypress wraps Mocha, Chai, and various other libraries. In this case, it’s useful to understand that Vue Test Utils is a third-party open source solution with its own entire set of documentation, and that inside the then callback above, we are in Vue Test Utils Land — not Cypress Land — so that we go to the right place for help and documentation.
Challenges
Since this has been a recent exploration, we have not added the Cypress component tests to our CI/CD pipelines yet. Failures will not block a pull request, and we haven’t looked at adding the reporting for these tests. I don’t expect any surprises there, but it’s worth mentioning that we haven’t completed integrating these into our whole workflow. I can’t speak to it specifically.
It’s also relatively early days for the component test runner and there are a few hiccups. At first, it seemed like every second test run would show a linter error and need to be manually refreshed. I didn’t get to the bottom of that, and then it fixed itself (or was fixed by a newer Cypress release). I’d expect a new tool to have potential issues like this.
One other stumbling block about component testing in general is that, depending on how your component works, it can be difficult to mount it without a lot of work mocking other parts of your system. If the component interacts with multiple Vuex modules or uses API calls to fetch its own data, you need to simulate all of that when you mount the component. Where end-to-end tests are almost absurdly easy to get up and running on any project that runs in the browser, component tests on existing components are a lot more sensitive to your component design.
This is true of anything that mounts components in isolation, like Storybook and Jest, which we’ve also used. It’s often when you attempt to mount components in isolation that you realize just how many dependencies your components actually have, and it can seem like a lot of effort is needed just to provide the right context for mounting them. This nudges us towards better component design in the long run, with components that are easier to test and while touching fewer parts of the codebase.
For this reason, I’d suggest if you haven’t already got component tests, and so aren’t sure what you need to mock in order to mount your component, choose your first component tests carefully, to limit the number of factors you have to get right before you can see the component in the test runner. Pick a small, presentational component that renders content provided through props or slots, to see it a component test in action before getting into the weeds on dependencies.
Benefits
The component test runner has worked out well for our team. We already have extensive end-to-end tests in Cypress, so the team is familiar with how to spin up new tests and write user interactions. And we have been using Vue Test Utils for individual component testing as well. So there was not actually too much new to learn here. The initial setup issues could have been frustrating, but there are plenty of friendly people out there who can help work through issues, so I’m glad I used the “asking for help” superpower.
I would say there are two main benefits that we’ve found. One is the consistent approach to the test code itself between levels of testing. This helps because there’s no longer a mental shift to think about subtle differences between Jest and Cypress interactions, browser DOM vs jsdom and similar issues.
The other is being able to develop components in isolation and getting visual feedback as we go. By setting up all the variations of a component for development purposes, we get the outline of the UI test ready, and maybe a few assertions too. It feels like we get more value out of the testing process up front, so it’s less like a bolted-on task at the end of a ticket.
This process is not quite test-driven development for us, though we can drift into that, but it’s often “demo-driven” in that we want to showcase the states of a new piece of UI, and Cypress is a pretty good way to do that, using cy.pause() to freeze a running test after specific interactions and talk about the state of the component. Developing with this in mind, knowing that we will use the tests to walk through the components features in a demo, helps organize the tests in a meaningful way and encourages us to cover all the scenarios we can think of at development time, rather than after.
Conclusion
The mental model for what exactly Cypress as whole does was tricky for me to when I first learned about it, because it wraps so many other open source tools in the testing ecosystem. You can get up and running quickly with Cypress without having a deep knowledge of what other tools are being leveraged under the hood.
This meant that when things went wrong, I remember not being sure which layer I should think about — was something not working because of a Mocha thing? A Chai issue? A bad jQuery selector in my test code? Incorrect use of a Sinon spy? At a certain point, I needed to step back and learn about those individual puzzle pieces and what exact roles they were playing in my tests.
This is still the case with component testing, and now there is an extra layer: framework-specific libraries to mount and test components. In some ways, this is more overhead and more to learn. On the other hand, Cypress integrates these tools in a coherent way and manages their setup so we can avoid a whole unrelated testing setup just for component tests. For us, we already wanted to mount components independently for testing with Jest, and for use in Storybook, so we figured out a lot of the necessary mocking ideas ahead of time, and tended to favor well-separated components with simple props/events based interfaces for that reason.
On balance, we like working with the test runner, and I feel like I’m seeing more tests (and more readable test code!) showing up in pull requests that I review, so to me that’s a sign that we’ve moved in a good direction.
The post Testing Vue Components With Cypress appeared first on CSS-Tricks. You can support CSS-Tricks by being an MVP Supporter.
Testing Vue Components With Cypress published first on https://deskbysnafu.tumblr.com/
0 notes
Text
On Browser-Specific URL Schemes
We’ve covered URL schemes:
A URL Scheme is like “http://…” or “ftp://…”. Those seem like a very low-level concept that you don’t have much control over, but actually, you do!
I’d call it non-trivial, but developers can register new URL schemes in apps that users install. Back in 2017, Microsoft Edge did this:
microsoft-edge://
If you use that, the behavior is to open the URL in Microsoft Edge — even if you’ve chosen a different default browser. So if I, as a blogger, wanted to essentially force you to use Edge for this site, I could, by starting every single URL with this URL scheme. I won’t, but I could. And so could Microsoft.
At the time, Daniel Aleksandersen wrote a program called EdgeDefelector to circumvent that behavior and explained:
I don’t hate Microsoft Edge — maybe you do! — but I do believe users who have bothered to configure a different default web browser should be allowed to keep using that default web browser.
This has come back into the public eye a bit as the Brave browser now supports the microsoft-edge:// URL scheme. Apparently, not only does an app need to register a URL scheme, but other apps that support clicks-on-links need to honor it too. Firefox is also thinking of adding it. I think the risk of not supporting the URL scheme is that clicks on links like that could do nothing instead of actually opening the URL.
A lot of the talk is about Windows 11. But here on my Mac, I see this URL scheme do what it intends across all these browsers.
Safari
Chrome
Firefox
Brave
Daniel goes further:
So, how did we get here? Until the release of iOS version 14 in September 2020, you couldn’t change the default web browser on iPhones and iPads. Google has many apps for iOS, including a shell for its Chrome browser. To tie all its apps together, Google introduced a googlechrome: URL scheme in February 2014. It could use these links to direct you from its Search or Mail app and over to Chrome instead of Apple’s Safari browser.
Here’s my iPhone 13 opening googlechrome://css-tricks.com with and without Google Chrome installed.
iOS Safari with Google Chrome installed
iOS Safari without Google Chrome installed
Seems like that would be Google’s sin, but it is apparently Apple that allowed it on iOS. Daniel once more:
The original sin was Apple’s, but Microsoft is gulping the juice of the apple with gusto.
I’m not as boned up on all this as I should be, but I think if I made software that was involved here, I’d be tempted to intercept these URL schemes and have them open in the browser the user is already in. The web is the web, there should be no reason any given URL has to open in any specific browser.
The post On Browser-Specific URL Schemes appeared first on CSS-Tricks. You can support CSS-Tricks by being an MVP Supporter.
On Browser-Specific URL Schemes published first on https://deskbysnafu.tumblr.com/
0 notes
Text
In-Page Filtered Search With Vanilla JavaScript
If you have a page that includes a lot of information, it’s a good idea to let users search for what they might be looking for. I’m not talking about searching a database or even searching JSON data — I’m talking about literally searching text on a single rendered web page. Users can already use the built-in browser search for this, but we can augment that by offering our own search functionality that filters down the page making matching results easier to find and read.
Here’s a live demo of what we’re going to build:
CodePen Embed Fallback
I use this same technique on my real project: https://freestuff.dev/.
Meet JavaScript!
Well, you might know JavaScript already. JavaScript is going to handle all the interactivity in this journey. It’s going to…
find all the content we want to search through,
watch what a user types in the search input,
filter the innerText of the searchable elements,
test if the text includes the search term (.includes() is the heavy lifter here!), and
toggle the visibility of the (parent) elements, depending on if they include the search term or not.
Alright, we have our requirements! Let’s start working.
The basic markup
Let’s assume we have a FAQ page. Each question is a “card” which has a title and content:
<h1>FAQ Section</h1> <div class="cards"> <h3>Who are we</h3> <p>It has survived not only five centuries, but also the leap into electronic typesetting, remaining essentially unchanged. It was popularized </p> </div> <div class="cards"> <h3>What we do</h3> <p>It has survived not only five centuries, but also the leap into electronic typesetting, remaining essentially unchanged. It was popularized </p> </div> <div class="cards"> <h3>Why work here</h3> <p>It has survived not only five centuries, but also the leap into electronic typesetting, remaining essentially unchanged. It was popularized</p> </div> <div class="cards"> <h3>Learn more</h3> <p>Want to learn more about us?</p> </div>
Imagine there are a lot of questions on this page.
To get ready for the interactivity, we’ll have this one line of CSS. This gives us a class we can add/remove depending on the search situation when we get to the JavaScript:
.is-hidden { display: none; }
Let’s add a search input with an event that fires when it is interacted with:
<label for="searchbox">Search</label> <input type="search" oninput="liveSearch()" id="searchbox" >
The JavaScript baseline
And here’s the JavaScript that does everything else!
function liveSearch() { // Locate the card elements let cards = document.querySelectorAll('.cards') // Locate the search input let search_query = document.getElementById("searchbox").value; // Loop through the cards for (var i = 0; i < cards.length; i++) { // If the text is within the card... if(cards[i].innerText.toLowerCase() // ...and the text matches the search query... .includes(search_query.toLowerCase())) { // ...remove the `.is-hidden` class. cards[i].classList.remove("is-hidden"); } else { // Otherwise, add the class. cards[i].classList.add("is-hidden"); } } }
You can probably go line-by-line there and reason out what it is doing. It finds all the cards and the input and saves references to them. When a search event fires, it loops through all the cards, determines if the text is within the card or not. It the text in the card matches the search query, the .is-hidden class is removed to show the card; if not, the class is there and the card remains hidden.
Here is the link to the demo again.
Adding a delay
To make sure our JavaScript doesn’t run too much (meaning it would slow down the page), we will run our liveSearch function only after waiting an “X” number of seconds.
<!-- Delete on Input event on this input --> <label for="searchbox">Search</label> <input type="search" id="searchbox">
// A little delay let typingTimer; let typeInterval = 500; // Half a second let searchInput = document.getElementById('searchbox'); searchInput.addEventListener('keyup', () => { clearTimeout(typingTimer); typingTimer = setTimeout(liveSearch, typeInterval); });
What about fuzzy searches?
Let’s say you want to search by text that is not visible to user. The idea is sort of like a fuzzy search, where related keywords return the same result as an exact match. This helps expand the number of cards that might “match” a search query.
There are two ways to do this. The first is using a hidden element, like a span, that contains keywords:
<div class="cards"> <h3>Who are we</h3> <p>It has survived not only five centuries, but also the leap into electronic typesetting, remaining essentially unchanged. It was popularized</p> <!-- Put any keywords here --> <span class="is-hidden">secret</span> </div>
Then we need to update our liveSearch function. Instead of using .innerText we will use .textContent to includes hidden elements. See more detail about the difference between innerText and textContent here
for (var i = 0; i < cards.length; i++) { if(cards[i].textContent.toLowerCase() .includes(search_query.toLowerCase())) { cards[i].classList.remove("is-hidden"); } else { cards[i].classList.add("is-hidden"); } }
Try typing “secret” on a search box, it should reveal this card, even though “secret” isn’t a displayed on the page.
CodePen Embed Fallback
A second approach is searching through an attribute. Let’s say we have a gallery of images. We can put the keywords directly on the alt attribute of the image. Try typing “kitten” or “human” in the next demo. Those queries are matching what’s contained in the image alt text.
CodePen Embed Fallback
For this to work, we need to change innerText to getAttribute('alt') since we want to look through alt attributes in addition to what’s actually visible on the page.
for (var i = 0; i < cards.length; i++) { if(cards[i].getAttribute('alt').toLowerCase() .includes(search_query.toLowerCase())) { cards[i].classList.remove("is-hidden"); } else { cards[i].classList.add("is-hidden"); } }
Depending on your needs, you could put your keywords in another attribute, or perhaps a custom one.
Caveat
Again, this isn’t a search technology that works by querying a database or other data source. It works only if you have all the searchable content in the DOM on that page, already rendered.
So, yeah, there’s that. Just something to keep in mind.
Wrapping up
Obviously, I really like this technique, enough to use it on a production site. But how else might you use something like this? An FAQ page is a clear candidate, as we saw, but any situation that calls for filtering any sort of content is fit for this sort of thing. Even a gallery of images could work, using the hidden input trick to search through the alt tag content of the images.
Whatever the case, I hope you find this helpful. I was surprised that we can get a decently robust search solution with a few lines of vanilla JavaScript.
Have you used this technique before, or something like it? What was your use case?
The post In-Page Filtered Search With Vanilla JavaScript appeared first on CSS-Tricks. You can support CSS-Tricks by being an MVP Supporter.
In-Page Filtered Search With Vanilla JavaScript published first on https://deskbysnafu.tumblr.com/
0 notes
Text
Userwell is for Managing Customer Feedback
(This is a sponsored post.)
Building products for users is a balance between your vision of what your product can do for them, and refining that vision based on their feedback. If you’re really a customer-focused company, you’re listening. And more, you’re making it easy for customers to talk to you.
A good user feedback pipeline takes software — but you aren’t building user feedback software too, that would mean lost focus on your real product. That’s where Userwell comes in. Userwell is already good user feedback software. You focus on building your own product and let Userwell be your project feedback management software.
Gather feedback from all channels
Being picky about how you receive feedback doesn’t exactly send the right signal to customers. Just like the ol’ Robustness Principle: you should be liberal in what you accept. Userwell can accept customer feedback from anything.
They offer customizable Feedback Pages (which can be as public or private as you need) where feedback can be collected and viewed. They also offer a widget that can be easily integrated into any page for collecting feedback.
But it’s not limited to that! There are loads of direct integrations from other apps, like Slack and Salesforce. Imagine you have a #feedback channel in a Slack with your customers that can be fed into Userwell from there.
Plus they have an API, meaning literally anything can push feedback data into Userwell.
Analyze the feedback to make good product decisions
Now that you have all your customer feedback funneled into Userwell all together, you can triage it, respond to it, and even open it up to voting.
This takes guesswork the guesswork out of prioritizing work on user facing features. Nothing justifies a feature sprint like clearly looking at a dashboard showing you the top requests of active customers.
You can add internal-only information as well. Because of course, not all feature work is equal. For example, you can rate the effort level of features and then cross-reference it with the impact it will have. Low effort and high impact features are no brainers! Or cross references the features with how valuable the customer is providing the feedback.
Doing the work
Userwell can also be used to show those users (or any stakeholder) the progress and plan for all these features.
That might a faithful representation of your high-level project management overview. But say you use other software for project management. No problem! You can push tasks from Userwell into that software too, as Userwell’s API and direct integrations open things up to loads of other apps.
Go forth and build products that users love!
Try Userwell for Free
The post Userwell is for Managing Customer Feedback appeared first on CSS-Tricks. You can support CSS-Tricks by being an MVP Supporter.
Userwell is for Managing Customer Feedback published first on https://deskbysnafu.tumblr.com/
0 notes
Text
The Greatest CSS Tricks Vol. I eBook (PDF and EPUB)
When I wrote the “book” The Greatest CSS Tricks Vol. I, I put “book” in quotes because there wasn’t anything terribly book-like about it. The only way you could read it was online, logged into this website, with an MVP supporter membership. No printed version, not even digital copies you might expect from a digital book.
I’ve changed that now and offer PDF and EPUB versions of the book. They are free downloads for members — just add them to your cart and check out.
All this book-writing stuff was and is an experiment. I like writing on this website in a blog-post-like format where all the content is at URLs and can have interactive content. Being digital, I can control the access and such. It means I can write in a way that is comfortable to me, and maybe-just-maybe, I can be more prolific about it. Maybe I can get a Vol. II done that I already have a ton of ideas for. Maybe I can write some other books I’ve been thinking about. Now I have a system! A place to write, multiple places to publish to, and a way to sell it.
Grab the Vol. 1 eBook
Producing the digital versions
When I originally made the choice to write the book online, I figured PDF would be incredibly simple. I’d output the content on a “raw” template (just as a clean starting point that will last and is easy to preview), apply nice print-like CSS, then quite literally, just ⌘P (Print) and “Save as PDF.” Done.
That actually kinda works. You can fiddle with the settings (e.g. “✔ Print Background Graphics” in order to have white text on a dark background on things like code blocks) and get it fairly nice. But there are issues — like you can’t control the header or footer of each page very well. Not to mention it’s not programmatic, but a very manual process.
Doing things programmatically is what I was shooting for. Then I happened across this blog post from Baldur Bjarnason in which he was looking for work:
• Do you need to make a site or sites that walks like a book, talks like a book, and reads like a book but everything you make looks like a blog?
• Are you having trouble dealing with file formats such as PDF, DOCX, or EPUB using web tech?
• Are you trying to produce PDFs or ebooks from your website or your CMS?
Yes, yes, yes!
Programatically creating an eBook
I reached out to Baldur and he was able to help me work on all this. He created an automated system for me that accepts a local .html file and automatically produces PDF, EPUB, and MOBI formats from that single file. Essentially, I can run make from the command line and it’ll do all the work, leveraging open source tools.
I still needed near-perfect HTML ready for the machine, though, which took some work. Fortunately, I was already somewhat ready to produce this, as I have a special URL that outputs the raw content (you can still see this if you’re not a member, just with truncated content) with the light print styles I wanted.
The tools
With the raw HTML and a programmatic approach in hand, here are the tools that make up the stack:
For PDF creation, we tried both Paged.js and WeasyPrint. They both had their quirks and did things worse/better than each other. We ultimately landed on Paged.js.
For EPUB creation, we used pandoc.
For MOBI creation (which we did not focus on at all), we used Calibre. It’s a native Mac app, but it has an ebook-convert tool buried within it that can be called from the command line.
To get to the point where we could use these tools over the command line, all sorts of other software have to be installed and ready to use, like Python, pango, libffi, and more. Baldur’s script made managing this easy, which was awesome.
It looks like there is a new player on the block called Percollate) for this stuff, but we did not explore that.
An Public Repo Combining all this Tooling for HTML-to-eBook Creation
After we got through this process together, Baldur generously created an open-source trimmed down public repo (book-tricks) for all y’alls reference. There is a lot of useful magic in this Makefile that I’d be shocked if it wasn’t useful for someone in the same position I was in: needing to create eBooks from simple HTML.
Previewing builds
PDFs are easy to view, of course (you can even just use a web browser), but I generally popped it open in Preview.app.
EPUB is similarly easy on a Mac because you can just pop it into Books.app to view it.
For MOBI, Calibre’s main function is viewing those, so that’s the trick there:
The most painful part is the feedback loop. There is a whole process of updating code (mostly CSS) and then running the whole build to see how it all looks. I’m sure I did it 100 or more times to get things right. There really should be a better story for this, with live previews.
Web-only vs. eBook-only content
Early in the book-writing process, I had given up on both paper and digital versions. I stopped leaning on images in the text as much and started using embedded CodePen demos to show off output and code. That’s the ideal experience for the web anyway. But I can’t use embedded Pens in eBooks. eBooks can do some interactive things (e.g. EPUB supports animated GIFs and links, of course), but running JavaScript and using <iframe>s are things I didn’t want to count on. If I had proper images for everything, then just maybe it’s more ready for paper someday anyway.
It’s easy enough to hide things from the eBook output with display: none, so that’s what I did for all embedded Pens. (They are a bit of HTML before they transform into the iframe.) Then to have “alternate” content that is only for the eBook version, I essentially just wrapped that stuff in <div class="print-only"> which is hidden online and shown in the print CSS. I made custom blocks in the WordPress block editor to make authoring those blocks easier. That way, I could really see what I was doing.
One interesting bit is that because I was shooting for eBook-only here, I didn’t have to do the sort of CSS trickery I’m used to for things like print stylesheets where the output is likely some computer paper. For example, in a print stylesheet, I’d probably normally do:
main a[href]::after { content: " (" attr(href) ") "; }
That way, people can see the URLs of links in content. But with these digital eBooks, I just make sure the links are blue and they’ll be clickable in any of the digital formats.
This was a fun journey! I’m mostly excited to have climbed the ladder of understanding a bit on all this, especially because rendering things on digital canvases is kinda my wheelhouse. I’m only a couple of rungs up though, as this stuff has a pretty steep learning curve!
Grab the Vol. 1 eBook
The post The Greatest CSS Tricks Vol. I eBook (PDF and EPUB) appeared first on CSS-Tricks. You can support CSS-Tricks by being an MVP Supporter.
The Greatest CSS Tricks Vol. I eBook (PDF and EPUB) published first on https://deskbysnafu.tumblr.com/
0 notes
Text
Parallel.ForEachAsync in .NET 6
Great tweet from Oleg Kyrylchuk (follow him!) showing how cool Parallel.ForEachAsync is in .NET 6. It's new! Let's look at this clean bit of code in .NET 6 that calls the public GitHub API and retrieves n number of names and bios, given a list of GitHub users:
using System.Net.Http.Headers; using System.Net.Http.Json; var userHandlers = new [] { "users/okyrylchuk", "users/shanselman", "users/jaredpar", "users/davidfowl" }; using HttpClient client = new() { BaseAddress = new Uri("https://api.github.com"), }; client.DefaultRequestHeaders.UserAgent.Add(new ProductInfoHeaderValue("DotNet", "6")); ParallelOptions parallelOptions = new() { MaxDegreeOfParallelism = 3 }; await Parallel.ForEachAsync(userHandlers, parallelOptions, async (uri, token) => { var user = await client.GetFromJsonAsync<GitHubUser>(uri, token); Console.WriteLine($"Name: {user.Name}\nBio: {user.Bio}\n"); }); public class GitHubUser { public string Name { get; set; } public string Bio { get; set; } }
Let's note a few things in this sample Oleg shared. First, there's no Main() as that's not required (but you can have it if you want).
We also see just two usings, bringing other namespaces into scope. Here's what it would look like with explicit namespaces:
using System; using System.Net.Http; using System.Net.Http.Headers; using System.Net.Http.Json; using System.Threading.Tasks;
We've got an array of users to look up in userHandlers. We prep an HttpClient and setup some ParallelOptions, giving our future ForEach the OK to "fan out" to up to three degrees of parallelism - that's the max number of concurrent tasks we will enable in one call. If it's -1 there is no limit to the number of concurrently running operations.
The really good stuff is here. Tight and clean:
await Parallel.ForEachAsync(userHandlers, parallelOptions, async (uri, token) => { var user = await client.GetFromJsonAsync<GitHubUser>(uri, token); Console.WriteLine($"Name: {user.Name}\nBio: {user.Bio}"); });
"Take this array and naively fan out into parallel tasks and make a bunch of HTTP calls. You'll be getting JSON back that is shaped like the GitHubUser."
We could make it even syntactically shorter if we used a record vs a class with this syntax:
public record GitHubUser (string Name, string Bio);
This makes "naïve" parallelism really easy. By naïve we mean "without inter-dependencies." If you want to do something and you need to "fan out" this is super easy and clean.
Sponsor: Make login Auth0’s problem. Not yours. Provide the convenient login features your customers want, like social login, multi-factor authentication, single sign-on, passwordless, and more. Get started for free.
© 2021 Scott Hanselman. All rights reserved.


Parallel.ForEachAsync in .NET 6 published first on https://deskbysnafu.tumblr.com/
0 notes
Text
The Semantics of Jamstack
The past year has seen a healthy debate around the term ‘Jamstack’ as the definition gets stretched to include new use cases. I recently posted my take on a Jamstack definition in “Static vs. Dynamic vs. Jamstack: Where’s The Line?” In this article, I want to look at the evolution of Jamstack and what that means for the term.
Developers have been creating static sites long before the term Jamstack was coined. The most common use case was an easy way for developers to host their blog or open-source documentation on GitHub Pages. Some pioneers were pushing larger, commercial projects on static sites, but it certainly wasn’t as common as it is today.
Static sites had been perceived as limited — old technology from the 90s. Why would forward-looking companies want to use this ancient way of building websites? Phil Hawksworth hit it right on the button in his IJS talk about static being a loaded term:
Are we talking about a static experience, or are we talking about a static architecture?
The potential for ambiguity is incredibly confusing, especially to non-developers. The static websites of the 90s are not the same as modern static sites. There are new technologies that warrant giving static sites a second look:
JavaScript has evolved into a powerful language for building applications in the browser. Gmail launched in 2004 and was the first mainstream application to make heavy use of Ajax.
Static Site Generators (SSGs) have brought many dynamic site advantages such as layouts and separating content from code. Jekyll was the first widely popular SSG, launching in 2008.
CDNs used to be a technology that only large enterprises could afford. When AWS Cloudfront launched in 2008, you could set up a CDN in minutes, and at a small scale, it would only cost you a few dollars.
Git workflows, and the CI/CD tools built around it, have made error-prone FTP deployments a thing of the past.
Ecosystem — there’s a growing number of standalone tools you can drop into a static site to enable extra functionality, from search and eCommerce to databases, comments and more.
Jamstack helped change people’s perception of static websites. And the shifting winds on static were what lead Matt Biilmann to coin the term Jamstack itself in 2016. Suddenly, we had a word that captured the benefits of modern static sites without the baggage of static. Cassidy Williams does a fantastic job of capturing the essence of Jamstack:
Jamstack is about building web applications in the same style as mobile applications: the UI is compiled, and then data is pulled in as needed.
Jamstack struck a chord with many WordPress developers in particular. Coming from the world of intricate theming and plugin APIs, the simplicity and control you got with an SSG was refreshing. The movement had begun, and a community formed around Jamstack’s decoupled approach.
As Jamstack grew in popularity, so did the size and complexity of projects. We saw the principles of Jamstack move beyond websites, and as they made their way into web applications, we soon reached the technical limits of what a static site was capable of doing. Platforms added new features and workflows to expand Jamstack principles, allowing larger and more complex applications to take a Jamstack approach.
I’m excited to take part in this evolution with CloudCannon. We’re seeing a significant shift in how developers build software for the web. There’s a flourishing ecosystem of specialty tools and platforms enabling front-end developers to do more, and for sophisticated applications to live at the edge.
My concern is we can’t agree on what Jamstack actually means. We have succinct definitions that paint a clear boundary of what is and isn’t Jamstack. Many of my favorites are in this article. We’re seeing the term Jamstack used for more and more dynamic behavior. Some of the community is on board with this usage, and some aren’t. Ambiguity and perception were the original reasons for coining the term, and we’re at risk of coming full circle here.
It’s a difficult problem the Jamstack community faces because there is so much cross-over between the original meaning of “Jamstack” and the new, evolved, more dynamic-ish usage of the word. I’m conflicted myself because I love the idea of applying Jamstack principles to more dynamic approaches. I briefly considered the idea of using “Jamstack” to describe static usage, and “Jamstack++” the more dynamic usage. But quickly realized that would probably create more confusion than it solves.
Matt Biilmann nailed it with Netlify’s announcement of Distributed Persistent Rendering (DPR):
For any technology, the hardest part is not establishing simplicity, but protecting it over time.
This perfectly captures my thoughts. It’s reassuring to know I’m not limited if I build a new project with a Jamstack approach. If my site gets enormous or I need dynamic behavior, I have options. Without these options, Jamstack would be seen as a limited technology for small use cases. On the other hand, the more we emphasize these more dynamic solutions, the further we get from the elegant simplicity that created the Jamstack movement in the first place.
DPR is an exciting new technology. It’s an elegant solution to the painful limitation of prebuilding large sites. For a 100k page site, would I make the tradeoff of prebuilding a subset of those pages and have the rest build on demand the first time they’re requested, thus reducing build time significantly? Heck yes, I would! That’s a tradeoff that makes sense.
I’ve been doing a lot of thinking about where DPR fits into the Jamstack picture, mostly because it’s right on the edge. Whether you include it or exclude it from the Jamstack umbrella has rippling ramifications.
Sean Davis has a Jamstack definition I’m a fan of:
Jamstack is an architecture for atomically building and delivering precompiled, decoupled front-end web projects from the edge.
This resonates with what I believe Jamstack is all about. If we’re to include DPR in this definition, it needs some work:
Jamstack is an architecture for atomically building and delivering precompiled (or on-demand generated webpages, but only if it’s the first request and then it’s persisted), decoupled front-end web projects from the edge.
The official Jamstack definition works better for DPR:
Jamstack is the new standard architecture for the web. Using Git workflows and modern build tools, pre-rendered content is served to a CDN and made dynamic through APIs and serverless functions.
DPR either delivers content using a serverless function or as static file through a CDN so it fits the definition.
It’s interesting to see how the definition has changed over time. Before late 2020, the official Jamstack definition, posted directly on Jamstack.org at the time, was as follows:
Fast and secure sites and apps delivered by pre-rendering files and serving them directly from a CDN, removing the requirement to manage or run web servers.
Technology evolves over time, as does language, so it’s great to see the definition tweaked to keep up with the times. Introducing “serverless” into the definition makes sense on one hand as the technology is becoming more approachable to front-end developers, who are the predominant Jamstack audience. On the other hand, it goes against the core Jamstack principles of pre-rendering and decoupling. Do we need to update these core principles too?
I’m still processing all of these thoughts and ideas myself. I’m a big fan of Jamstack, it has served as a major catalyst for the growth in static site generators, and given us a language to talk about the approach of pre-rendering and decoupling websites. Looking ahead, I can see five directions Jamstack can go:
Jamstack is cemented in its original meaning, prerendering and decoupling. The more dynamic, Jamstack-inspired approaches get their own name.
Jamstack evolves and the definition and principles are expanded. As a result, the meaning likely becomes more ambiguous.
Jamstack is the name of the community. It’s a set of guidelines and there are no hard and fast rules.
Jamstack has lifted the baggage of static, and we can talk about static vs. hybrid vs. dynamic websites.
Jamstack becomes mainstream enough that we can simply call it modern web development.
There are people in all of these camps pulling in different directions, leading to much confusion and discussion in the community. What is clear is that this community of people is deeply passionate about this approach to building websites. Frankly, I couldn’t be more excited about the innovations happening in this space. What we need is consensus and a path forward. Without this, I believe, for better or worse, we’re going to end up with a mix of options 3, 4 and 5.
The post The Semantics of Jamstack appeared first on CSS-Tricks. You can support CSS-Tricks by being an MVP Supporter.
The Semantics of Jamstack published first on https://deskbysnafu.tumblr.com/
0 notes
Text
Command Line trash
One of the first commands you learn when experimenting with command line is rm, the utility for deleting files and directories. Deletion is a core computer UI operation but operating systems use a “Trash” paradigm, where files are stored before truly deleted. With the rm utility, however, files are immediately, permanently deleted.
If you’re like me and afraid to automate permanent file deletion, you can opt for a utility named trash. This nice Node.js library moves files to the trash instead of instant deletion.
// Install with `yarn add trash` // Move a file to trash const trash = require('trash'); await trash('bug-report.jpg');
There’s also a trash-cli package for using the utility from command line:
yarn add trash-cli # Usage trash unicorn.png rainbow.png trash '*.png' '!unicorn.png'
rm can be really harsh so having a trash utility is helpful in providing users a file deletion paradigm that they’re used to.
The post Command Line trash appeared first on David Walsh Blog.
Command Line trash published first on https://deskbysnafu.tumblr.com/
0 notes
Text
Can Include (a Certain HTML element within another Certain HTML Element)
A single-serving website from Alexander Vishnyakov for testing if it’s valid to put any particular HTML element within another type of HTML element. Kinda neat to have a quick reference for this.
Some combinations feel fairly obvious: can you put a <video> inside an <input>? Uh, no. Some are trickier: can you put a <div> inside an <h1>? Nope — that one bit me this week (derp). Some are a little confusing, like <div> is an invalid child of an <ol> but a valid child of a <dl>.
Direct Link to Article — Permalink
The post Can Include (a Certain HTML element within another Certain HTML Element) appeared first on CSS-Tricks. You can support CSS-Tricks by being an MVP Supporter.
Can Include (a Certain HTML element within another Certain HTML Element) published first on https://deskbysnafu.tumblr.com/
0 notes
Text
Exploring the CSS Paint API: Rounding Shapes
Adding borders to complex shapes is a pain, but rounding the corner of complex shapes is a nightmare! Luckily, the CSS Paint API is here to the rescue! That’s what we’re going to look at as part of this “Exploring the CSS Paint API” series.
Exploring the CSS Paint API series:
Part 1: Image Fragmentation Effect
Part 2: Blob Animation
Part 3: Polygon Border
Part 4: Rounding Shapes (you are here!)
Here’s what we’re aiming for. Like everything else we’ve looked at in this series, note that only Chrome and Edge support this for now.
Live Demo
You may have noticed a pattern forming if you’ve followed along with the rest of the articles. In general, when we work with the CSS Paint API:
We write some basic CSS that we can easily adjust.
All the complex logic is done behind the scene inside the paint() function.
We can actually do this without the Paint API
There are probably a lot of ways to put rounded corners on complex shapes, but I will share with you three methods I’ve used in my own work.
I already hear you saying: If you already know three methods, then why are you using the Paint API? Good question. I’m using it because the three methods I’m aware of are difficult, and two of them are specifically related to SVG. I have nothing against SVG, but a CSS-only solution makes thing easier to maintain, plus it’s easier for someone to walk into and understand when grokking the code.
Onto those three methods…
Using clip-path: path()
If you are an SVG guru, this method is for you. the clip-path property accepts SVG paths. That means we can easily pass in the path for a complex rounded shape and be done. This approach is super easy if you already have the shape you want, but it’s unsuitable if you want an adjustable shape where, for example, you want to adjust the radius.
Below an example of a rounded hexagon shape. Good luck trying to adjust the curvature and the shape size! You’re gonna have to edit that crazy-looking path to do it.
CodePen Embed Fallback
I suppose you could refer to this illustrated guide to SVG paths that Chris put together. But it’s still going to be a lot of work to plot the points and curves just how you want it, even referencing that guide.
Using an SVG filter
I discovered this technique from Lucas Bebber’s post about creating a gooey effect. You can find all the technical details there, but the idea is to apply an SVG filter to any element to round its corners.
CodePen Embed Fallback
We simply use clip-path to create the shape we want then apply the SVG filter on a parent element. To control the radius, we adjust the stdDeviation variable.
This is a good technique, but again, it requires a deep level of SVG know-how to make adjustments on the spot.
Using Ana Tudor’s CSS-only approach
Yes, Ana Tudor found a CSS-only technique for a gooey effect that we can use to round the corner of complex shapes. She’s probably writing an article about it right now. Until then, you can refer to the slides she made where she explain how it works.
Below a demo where I am replacing the SVG filter with her technique:
CodePen Embed Fallback
Again, another neat trick! But as far as being easy to work with? Not so much here, either, especially if we’re considering more complex situations where we need transparency, images, etc. It’s work finding the correct combination of filter, mix-blend-mode and other properties to get things just right.
Using the CSS Paint API instead
Unless you have a killer CSS-only way to put rounded borders on complex shapes that you’re keeping from me (share it already!), you can probably see why I decided to reach for the CSS Paint API.
The logic behind this relies on the same code structure I used in the article covering the polygon border. I’m using the --path variable that defines our shape, the cc() function to convert our points, and a few other tricks we’ll cover along the way. I highly recommend reading that article to better understand what we’re doing here.
First, the CSS setup
We first start with a classic rectangular element and define our shape inside the --path variable (shape 2 above). The --path variable behaves the same way as the path we define inside clip-path: polygon(). Use Clippy to generate it.
.box { display: inline-block; height: 200px; width: 200px; --path: 50% 0,100% 100%,0 100%; --radius: 20px; -webkit-mask: paint(rounded-shape); }
Nothing complex so far. We apply the custom mask and we define both the --path and a --radius variable. The latter will be used to control the curvature.
Next, the JavaScript setup
In addition to the points defined by the path variable (pictured as red points above), we’re adding even more points (pictured as green points above) that are simply the midpoints of each segment of the shape. Then we use the arcTo() function to build the final shape (shape 4 above).
Adding the midpoints is pretty easy, but using arcTo() is a bit tricky because we have to understand how it works. According to MDN:
[It] adds a circular arc to the current sub-path, using the given control points and radius. The arc is automatically connected to the path’s latest point with a straight line, if necessary for the specified parameters.
This method is commonly used for making rounded corners.
The fact that this method requires control points is the main reason for the extra midpoints points. It also require a radius (which we are defining as a variable called --radius).
If we continue reading MDN’s documentation:
One way to think about arcTo() is to imagine two straight segments: one from the starting point to a first control point, and another from there to a second control point. Without arcTo(), these two segments would form a sharp corner: arcTo() creates a circular arc that fits this corner and smooths is out. In other words, the arc is tangential to both segments.
Each arc/corner is built using three points. If you check the figure above, notice that for each corner we have one red point and two green points on each side. Each red-green combination creates one segment to get the two segments detailed above.
Let’s zoom into one corner to better understand what is happening:
We have both segments illustrated in black. The circle in blue illustrates the radius.
Now imagine that we have a path that goes from the first green point to the next green point, moving around that circle. We do this for each corner and we have our rounded shape.
Here’s how that looks in code:
// We first read the variables for the path and the radius. const points = properties.get('--path').toString().split(','); const r = parseFloat(properties.get('--radius').value); var Ppoints = []; var Cpoints = []; const w = size.width; const h = size.height; var N = points.length; var i; // Then we loop through the points to create two arrays. for (i = 0; i < N; i++) { var j = i-1; if(j<0) j=N-1; var p = points[i].trim().split(/(?!\(.*)\s(?![^(]*?\))/g); // One defines the red points (Ppoints) p = cc(p[0],p[1]); Ppoints.push([p[0],p[1]]); var pj = points[j].trim().split(/(?!\(.*)\s(?![^(]*?\))/g); pj = cc(pj[0],pj[1]); // The other defines the green points (Cpoints) Cpoints.push([p[0]-((p[0]-pj[0])/2),p[1]-((p[1]-pj[1])/2)]); } /* ... */ // Using the arcTo() function to create the shape ctx.beginPath(); ctx.moveTo(Cpoints[0][0],Cpoints[0][1]); for (i = 0; i < (Cpoints.length - 1); i++) { ctx.arcTo(Ppoints[i][0], Ppoints[i][1], Cpoints[i+1][0],Cpoints[i+1][1], r); } ctx.arcTo(Ppoints[i][0], Ppoints[i][1], Cpoints[0][0],Cpoints[0][1], r); ctx.closePath(); /* ... */ ctx.fillStyle = '#000'; ctx.fill();
The last step is to fill our shape with a solid color. Now we have our rounded shape and we can use it as a mask on any element.
That’s it! Now all we have to do is to build our shape and control the radius like we want — a radius that we can animate, thanks to @property which will make things more interesting!
Live Demo
Are there any drawbacks with this method?
Yes, there are drawbacks, and you probably noticed them in the last example. The first drawback is related to the hover-able area. Since we are using mask, we can still interact with the initial rectangular shape. Remember, we faced the same issue with the polygon border and we used clip-path to fix it. Unfortunately, clip-path does not help here because it also affects the rounded corner.
Let’s take the last example and add clip-path. Notice how we are losing the “inward” curvature.
CodePen Embed Fallback
There’s no issue with the hexagon and triangle shapes, but the others are missing some curves. It could be an interesting feature to keep only the outward curvature — thanks to clip-path— and at the same time we fix the hover-able area. But we cannot keep all the curvatures and reduce the hover-able area at the same time.
The second issue? It’s related to the use of a big radius value. Hover over the shapes below and see the crazy results we get:
CodePen Embed Fallback
It’s actually not a “major” drawback since we have control over the radius, but it sure would be good to avoid such a situation in case we wrongly use an overly large radius value. We could fix this by limiting the value of the radius to within a range that caps it at a maximum value. For each corner, we calculate the radius that allows us to have the biggest arc without any overflow. I won’t dig into the math logic behind this (😱), but here is the final code to cap the radius value:
var angle = Math.atan2(Cpoints[i+1][1] - Ppoints[i][1], Cpoints[i+1][0] - Ppoints[i][0]) - Math.atan2(Cpoints[i][1] - Ppoints[i][1], Cpoints[i][0] - Ppoints[i][0]); if (angle < 0) { angle += (2*Math.PI) } if (angle > Math.PI) { angle = 2*Math.PI - angle } var distance = Math.min( Math.sqrt( (Cpoints[i+1][1] - Ppoints[i][1]) ** 2 + (Cpoints[i+1][0] - Ppoints[i][0]) ** 2), Math.sqrt( (Cpoints[i][1] - Ppoints[i][1]) ** 2 + (Cpoints[i][0] - Ppoints[i][0]) ** 2) ); var rr = Math.min(distance * Math.tan(angle/2),r);
r is the radius we are defining and rr is the radius we’re actually using. It equal either to r or the maximum value allowed without overflow.
CodePen Embed Fallback
If you hover the shapes in that demo, we no longer get strange shapes but the “maximum rounded shape” (I just coined this) instead. Notice that the regular polygons (like the triangle and hexagon) logically have a circle as their “maximum rounded shape” so we can have cool transitions or animations between different shapes.
Can we have borders?
Yes! All we have to do is to use stroke() instead of fill() inside our paint() function. So, instead of using:
ctx.fillStyle = '#000'; ctx.fill();
…we use this:
ctx.lineWidth = b; ctx.strokeStyle = '#000'; ctx.stroke();
This introduces another variable, b, that controls the border’s thickness.
CodePen Embed Fallback
Did you notice that we have some strange overflow? We faced the same issue in the previous article, and that due to how stroke() works. I quoted MDN in that article and will do it again here as well:
Strokes are aligned to the center of a path; in other words, half of the stroke is drawn on the inner side, and half on the outer side.
Again, it’s that “half inner side, half outer side” that’s getting us! In order to fix it, we need to hide the outer side using another mask, the first one where we use the fill(). First, we need to introduce a conditional variable to the paint() function in order to choose if we want to draw the shape or only its border.
Here’s what we have:
if(t==0) { ctx.fillStyle = '#000'; ctx.fill(); } else { ctx.lineWidth = 2*b; ctx.strokeStyle = '#000'; ctx.stroke(); }
Next, we apply the first type of mask (t=0) on the main element, and the second type (t=1) on a pseudo-element. The mask applied on the pseudo-element produces the border (the one with the overflow issue). The mask applied on the main element addresses the overflow issue by hiding the outer part of the border. And if you’re wondering, that’s why we are adding twice the border thickness to lineWidth.
Live Demo
See that? We have perfect rounded shapes as outlines and we can adjust the radius on hover. And can use any kind of background on the shape.
And we did it all with a bit of CSS:
div { --radius: 5px; /* Defines the radius */ --border: 6px; /* Defines the border thickness */ --path: /* Define your shape here */; --t: 0; /* The first mask on the main element */ -webkit-mask: paint(rounded-shape); transition: --radius 1s; } div::before { content: ""; background: ..; /* Use any background you want */ --t: 1; /* The second mask on the pseudo-element */ -webkit-mask: paint(rounded-shape); /* Remove this if you want the full shape */ } div[class]:hover { --radius: 80px; /* Transition on hover */ }
Let’s not forget that we can easily introduce dashes using setLineDash() the same way we did in the previous article.
Live Demo
Controlling the radius
In all the examples we’ve looked at, we always consider one radius applied to all the corners of each shape. It would be interesting if we could control the radius of each corner individually, the same way the border-radius property takes up to four values. So let’s extend the --path variable to consider more parameters.
Actually, our path can be expressed as a list of [x y] values. We’ll make a list of [x y r] values where we introduce a third value for the radius. This value isn’t mandatory; if omitted, it falls back to the main radius.
.box { display: inline-block; height: 200px; width: 200px; --path: 50% 0 10px,100% 100% 5px,0 100%; --radius: 20px; -webkit-mask: paint(rounded-shape); }
Above, we have a 10px radius for the first corner, 5px for the second, and since we didn’t specify a value for the third corner, it inherits the 20px defined by the --radius variable.
Here’s our JavaScript for the values:
var Radius = []; // ... var p = points[i].trim().split(/(?!\(.*)\s(?![^(]*?\))/g); if(p[2]) Radius.push(parseInt(p[2])); else Radius.push(r);
This defines an array that stores the radius of each corner. Then, after splitting the value of each point, we test whether we have a third value (p[2]). If it’s defined, we use it; if not, we use the default radius. Later on, we’re using Radius[i] instead of r.
Live Demo
This minor addition is a nice feature for when we want to disable the radius for a specific corner of the shape. In fact, let’s look at a few different examples next.
More examples!
I made a series of demos using this trick. I recommend setting the radius to 0 to better see the shape and understand how the path is created. Remember that the --path variable behaves the same way as the path we define inside clip-path: polygon(). If you’re looking for a path to play with, try using Clippy to generate one for you.
Example 1: CSS shapes
A lot of fancy shapes can be created using this technique. Here are a few of them done without any extra elements, pseudo-elements, or hack-y code.
CodePen Embed Fallback
Example 2: Speech bubble
In the previous article, we added border to a speech bubble element. Now we can improve it and round the corners using this new method.
CodePen Embed Fallback
If you compare with this example with the original implementation, you may notice the exact same code. I simply made two or three changes to the CSS to use the new Worklet.
Example 3: Frames
Find below some cool frames for your content. No more headaches when we need gradient borders!
CodePen Embed Fallback
Simply play with the --path variable to create your own responsive frame with any coloration your want.
Example 4: Section divider
SVG is no longer needed to create those wavy section dividers that are popular these days.
CodePen Embed Fallback
Notice that the CSS is light and relatively simple. I only updated the path to generate new instances of the divider.
Example 5: Navigation menu
Here’s a classic design pattern that I’m sure many of us have bumped into at some time: How the heck do we invert the radius? You’ve likely seen it in navigation designs.
CodePen Embed Fallback
A slightly different take on it:
CodePen Embed Fallback
Example 6: Gooey effect
If we play with the path values we can reach for some fancy animation. Below an idea where I am applying a transition to only one value of the path and yet we get a pretty cool effect
CodePen Embed Fallback
This one’s inspired by Ana Tudor’s demo.
Another idea with a different animation
CodePen Embed Fallback
Another example with a more complex animation:
CodePen Embed Fallback
What about a bouncing ball
CodePen Embed Fallback
Example 7: Shape morphing
Playing with big radius values allows us to create cool transitions between different shapes, especially between a circle and a regular polygon.
CodePen Embed Fallback
If we add some border animation, we get “breathing” shapes!
CodePen Embed Fallback
Let’s round this thing up
I hope you’ve enjoyed getting nerdy with the CSS Paint API. Throughout this series, we’ve applied paint() to a bunch of real-life examples where having the API allows us to manipulate elements in a way we’ve never been able to do with CSS — or without resorting to hacks or crazy magic numbers and whatnot. I truly believe the CSS Paint API makes seemingly complicated problems a lot easier to solve in a straightforward way and will be a feature we reach for time and again. That is, when browser support catches up to it.
If you’ve followed along with this series, or even just stumbled into this one article, I’d love to know what you think of the CSS Paint API and how you imagine using it in your work. Are there any current design trends that would benefit from it, like the wavy section dividers? Or blobby designs? Experiment and have fun!
CodePen Embed Fallback
This one’s taken from my previous article
Exploring the CSS Paint API series:
Part 1: Image Fragmentation Effect
Part 2: Blob Animation
Part 3: Polygon Border
Part 4: Rounding Shapes (you are here!)
The post Exploring the CSS Paint API: Rounding Shapes appeared first on CSS-Tricks. You can support CSS-Tricks by being an MVP Supporter.
Exploring the CSS Paint API: Rounding Shapes published first on https://deskbysnafu.tumblr.com/
0 notes
Text
What if… you could use Visual Studio Code as the editor of in-browser Developer Tools?
It’s not uncommon for my front-end workflow to go something like this:
Work on thing.
See that thing in an automatically refreshed browser.
See something wrong with that thing.
Inspect and correct the thing in DevTools.
Apply the correct code in my code editor.
See that correct code automatically refreshed in the browser.
I know, it’s not always great. But I’d bet the lint in my pocket you do something similar, at least every now and then.
That’s why I was drawn to the title of Chris Hellman’s post: “What if… you could use Visual Studio Code as the editor of in-browser Developer Tools?”
The idea is that VS Code can be used as the editor for DevTools and we can do it today by enabling it as an experimental feature, alongside Microsoft Edge. So, no, this is not like a prime-time ready universal thing, but watch Chris as he activates the feature, connects VS Code to DevTools, gives DevTools access to write files, then inspects the page of a local URL.
youtube
Now, those changes I make in DevTools can be synced back to VS Code, and I have direct access to open and view specific files from DevTools to see my code in context. Any changes I make in DevTools get reflected back in the VS Code files, and any changes I make in VS Code are updated live in the browser. Brilliant.
I’m not sure if this will become a thing beyond Edge but that sort of cross-over work between platforms is something that really excites me.
Direct Link to Article — Permalink
The post What if… you could use Visual Studio Code as the editor of in-browser Developer Tools? appeared first on CSS-Tricks. You can support CSS-Tricks by being an MVP Supporter.
What if… you could use Visual Studio Code as the editor of in-browser Developer Tools? published first on https://deskbysnafu.tumblr.com/
0 notes
Text
The CSS-in-React Landscape
(This is a sponsored post.)
I only half-jokingly refer to the CSS-in-JS world as CSS-in-React. Many of the libraries listed below theoretically work in non-React situations — they generally call that “framework-agnostic”) — but I’d guess the vast majority of their usage is on React projects. That’s because React, despite being a UI-focused library, has no particular blessed styling solution. Vue has style tags built right into Single File Components. Same with Svelte. Angular also has a built-in component-scoped styles solution. With React, it’s bring-your-own.
Perhaps not venturing too far out of their core strengths is a strength of React. I dunno. But you do have to make a choice on how to style things on your React projects. For example, you can simply write (and there is literally no problem with this), regular ol’ flat-file vanilla CSS to style your React projects. I’d recommend that over using inline style= on everything any day. But truth be told, there are some pretty nice advantages to choosing a library to help with styles. Things like:
Co-locating styles and components
Scoping styles to components
Using props in styling variations
Using JavaScript abilities within CSS syntax
Theming
Each library has its own set of fancy things that might be variations on the above, or might be totally unique to that library.
It’s also notable that by using a library where you author styles in your JavaScript, it’s not a 100% guarantee that you have to ship your styles in JavaScript. The libraries that use the term “zero runtime” are typically referring to the idea that the styles are compiled to CSS during a build process, so you use that CSS like any other, which is likely better for performance.
This research is brought to you by support from Frontend Masters, CSS-Tricks’ official learning partner.
Need front-end development training?
Frontend Masters is the best place to get it. They have courses on all the most important front-end technologies, including a Front-End Developer Learning Roadmap that can help you on your journey, which includes a section on CSS in JavaScript.
A couple of caveats before we go through the list:
I’m not deeply experienced in every single one of these libraries. I’ve used several of them on real projects, most heavily CSS Modules. I can’t quite speak to the nuances of each. The demos below are basic demonstrations of basic styntax.
If I get any facts wrong or you want to add more detail, hit me in the comments or via our contact form and I’ll improve things.
The point of this, partially, is to have a working code example of each for easy reference.
Included frameworks
styled-components
CSS Modules
Emotion
Stitches
vanilla-extract
JSS
Linaria
Styled JSX
Goober
styled-components
Super popular — probably the most-used option.
Popularized the possibilities of dynamic styling and the magic of using props for variations.
Template literal syntax feels comfortably CSS-like. It seems like it really encourages using it that way, but it is possible (docs) to use Object syntax.
Supports SSR, but it’s not the same as “zero runtime” libraries (which means “compiles to static CSS.” It still ships a JavaScript runtime for any dynamic styles.
CodePen Embed Fallback
CSS Modules
Very simple. All it does is scope styles and encourage co-location of styles and components.
It’s fancy feature is composition, which is basically mixins based on existing classes.
Not a runtime thing at all — it requires a build process. But it still works with HMR and such. You can ship it with styles in JavaScript, or extract them into static CSS files. It does nothing dynamic, so it’s extremely “zero runtime” if you extract the CSS.
Can be combined with Sass.
Built into Next.js
Emotion
Emotion is a library designed for writing css styles with JavaScript. It provides powerful and predictable style composition in addition to a great developer experience with features such as source maps, labels, and testing utilities. Both string and object styles are supported.
It doesn’t seem terribly different than styled-components, TBQH, but this podcast gets into some of the performance differences.
Supports SSR, but is not zero-runtime.
Glamorous is totally deprecated (and I suppose Glam and Glamor as well?) in favor of Emotion, so that’s something.
CodePen Embed Fallback
Stitches
The Variants API is very useful and well done.
The TypeScript editor experience¹.
Supports theming and encourages using a design token approach.
Utilities allow you to build your own custom shorthands for styling.
Supports SSR — and it’s closer to zero-runtime, though not entirely. Also doesn’t seem to actually generate CSS files, rather it has a function that spits out CSS so you can use SSR via a <style> tag (which I can’t imagine is ideal for caching).
Here’s a Twitter thread with an honest review. Also see all the reactions to this.
CodePen Embed Fallback
vanilla-extract
I’d say vanilla-extract supports SSR but it’s more than that because that’s the only way it is used, unless you opt into specific “runtime” features, like dynamic theming. That’s the meaning of “zero runtime”: it only compiles to static CSS files.
The TypeScript editor experience¹. (Also see our recent article.)
Variants API, including a Recipes API that is like like the Stiches framework above.
Supports a theme and utility-class-like approach via Sprinkles
I was gonna put Aphrodite on this list, but the creators of it are moving to vanilla-extract, so it probably isn’t a great choice these days, even though it seems to do pretty much all the same stuff as these other libraries.
JSS
Has a React-specific integration
Has an extend syntax
Plugin architecture
CodePen Embed Fallback
Linaria
The OG of “Zero Runtime” CSS-in-JS libraries.
Compiles to actual CSS files, but still has a runtime if you do dynamic things (at least I think so).
Feels similar to styled-components API-wise.
Supports Critical CSS.
Styled JSX
Babel plugin, so definitely a build-process thing.
Using a <style jsx> tag right in the component at the level of nesting you want to scope to is a clever API.
Lack of nesting isn’t great — you have to repeat the selector name a lot.
Goober
Goober is notable because it has an awesome name and is a mere 1.25KB, which is like an order of magnitude smaller than anything else.
Pretty much the same feature set of styled-components and Emotion.
CodePen Embed Fallback
Interesting resources:
Shopify’s research on which library they wanted to switch to.
Facebook has something cooking (conference video), but hasn’t open-sourced anything. It’s apparently called “StyleX” — and there is already a library called “Style9” that attempts to match the features, including near-zero runtime, atomic CSS output, and the TypeScript experience.
If you’re into authoring in the atomic style, a lot of people think that using Tailwind (probably with just-in-time mode) is the way to go.
Probably a more React-y version of Tailwind is Styled System, which provides styles as a bunch of preconfigured props.
Twin is along the lines of authoring with atomic styles in a React-y way.
I could not get Compiled to work for me. I’m sure it was just me, but I gave up. It looks exactly like the styled-components API to me, except the output is atomic CSS classes, which does seem kinda cool.
The site CSS in JS Playground shows a bunch of examples, including a few libraries not mentioned here, like Fela, Radium, and more. My god, are there a lot of these things.
By “the TypeScript editor experience,” I mean the library is written in TypeScript to take advantage of one of TypeScript’s best features: help autocompleting code in code editors. For example, if you’re using VS Code as your code editor, and you write a set of “color” variants, then type <Button color=" in your JSX file, you should get a list of your own compatible variants in the contextual VS Code autocomplete menu to choose from.
The post The CSS-in-React Landscape appeared first on CSS-Tricks. You can support CSS-Tricks by being an MVP Supporter.
The CSS-in-React Landscape published first on https://deskbysnafu.tumblr.com/
0 notes
Text
How to Create a Contact Form With Next.js and Netlify
We’re going to create a contact form with Next.js and Netlify that displays a confirmation screen and features enhanced spam detection.
Next.js is a powerful React framework for developing performant React applications that scale. By integrating a Next.js site with Netlify’s technology, we can quickly get a working contact form up and running without having to write any server-side code.
Not only is it a relatively fast process to set up forms to be processed by Netlify, but it’s also free to get started (with up to 100 free submissions/per site hosted on Netlify). Form submissions automatically go through Netlify’s built-in spam filter which uses Akismet and there are also options that can be configured to increase the level of spam detection.
Creating the contact form
Within the Next.js application we should create a ContactForm component to render the contact form inside of the contact page. If you’d like for this form to render at /contact, then the ContactForm component below with labels and input fields should be used within the pages/contact.js file.
const ContactForm = ( <form name="contact-form" method="POST" action="contact/?success=true" > <label htmlFor="name">Name *</label> <input id="name" name="name" required type="text" /> <label htmlFor="company">Company *</label> <input id="company" name="company" required type="text" /> <label htmlFor="email">E-mail Address *</label> <input id="email" type="email" name="email" required /> <label htmlFor="message">Message *</label> <textarea id="message" name="message" required></textarea> <button type="submit">Submit</button> </form> );
The above markup is required to render a form with a field for Name, Company, Email address and message with a submit button. When submitting the form, based on the value of the form’s action, it should redirect to contact/?success=true from /contact. Right now there is not yet a difference between the page’s appearance with and without the success query parameter, but we will update that later.
Our Contact.js file looks like this so far:
import React from "react"; const ContactPage = () => { const ContactForm = (/* code in above code sample*/) return ( <div> <h1>Contact Us</h1> {ContactForm} </div> ); }; export default ContactPage;
Now that we have the basic form set up, the real magic will happen after we add additional information for Netlify to auto-recognize the form during future site deployments. To accomplish this we should update the form to have the attribute data-netlify="true" and a hidden input field that contains the name of our contact form. In Netlify, once we navigate to our site in the dashboard and then click on the “forms” tab we will be able to view our form responses based on the name that we’ve put in our hidden field. It’s important that if you have multiple forms within a site that they have unique names so that they are recorded properly in Netlify.
<form method="POST" name="contact-form" action="contact/?success=true" data-netlify="true" > <input type="hidden" name="form-name" value="contact-form" />
After successfully deploying the site to Netlify with the data-netlify attribute and the form-name field then we can go to the deployed version of the site and fill out the form. Upon submitting the form and navigating to https://app.netlify.com/sites/site-name/forms (where site-name is the name of your site) then our most recent form submission should appear if we have successfully set up the form.
Redirect to confirmation screen
In order to improve the user experience, we should add some logic to redirect to a confirmation screen on form submission when the URL changes to /contact/?success=true. There is also the option to redirect to an entirely different page as the action when the form is submitted but using query params we can achieve something similar with the Next Router. We can accomplish this by creating a new variable to determine if the confirmation screen or the form should be visible based on the query parameter. The next/router which is imported with import { useRouter } from "next/router"; can be used to retrieve the current query params.
const router = useRouter(); const confirmationScreenVisible = router.query?.success && router.query.success === "true";
In our case, the confirmation screen and form can never be visible at the same time; therefore, the following statement can be used to determine if the form is visible or not.
const formVisible = !confirmationScreenVisible;
To give users the option to resubmit the form, we can add a button to the confirmation screen to reset the form by clearing the query params. Using router.replace (instead of router.push) not only updates the page but replaces the current page in the history to the version without query params.
<button onClick={() => router.replace("/contact", undefined, { shallow: true })}> Submit Another Response </button>
We can then conditionally render the form based on whether or not the form is visible with:
{formVisible ? ContactForm : ConfirmationMessage}
Putting it all together, we can use the following code to conditionally render the form based on the query params (which are updated when the form is submitted):
import React, { useState } from "react"; import { useRouter } from "next/router"; const ContactPage = () => { const [submitterName, setSubmitterName] = useState(""); const router = useRouter(); const confirmationScreenVisible = router.query?.success && router.query.success === "true"; const formVisible = !confirmationScreenVisible; const ConfirmationMessage = ( <React.Fragment> <p> Thank you for submitting this form. Someone should get back to you within 24-48 hours. </p> <button onClick={() => router.replace("/contact", undefined, { shallow: true })}> Submit Another Response </button> </React.Fragment> ); const ContactForm = (/* code in first code example */); return ( <div> <h1>Contact Us</h1> {formVisible ? ContactForm : ConfirmationMessage} </div> ); }; export default ContactPage;
Adding a hidden bot field
Now that the core functionality of our form is working, we can add additional spam detection to our form in addition to the base spam detection because Akismet is included with all Netlify Forms by default. We can enable this by adding data-netlify-honeypot="bot-field" to our form.
<form className="container" method="POST" name="contact-form" action="contact/?success=true" data-netlify="true" data-netlify-honeypot="bot-field" >
We also need to create a new hidden paragraph that contains a label named bot-field that contains the input. This field is “visible” to bots, but not humans. When this honeypot form field is filled, Netlify detects a bot and then the submission is flagged as spam.
<p hidden> <label> Don’t fill this out: <input name="bot-field" /> </label> </p>
Further customizations
We could explore another spam prevention option that Netlify supports by adding reCAPTCHA 2 to a Netlify form.
We could update the form to allow uploaded files with input <input type="file">.
We could set up notifications for form submissions. That happens over at https://app.netlify.com/sites/[your-site-name]/settings/forms where we can include a custom subject field (which can be hidden) for email notifications.
Full code
The code for the full site code is available over at GitHub.
Bonus
The following code includes everything we covered as well as the logic for setting a custom subject line with what was submitted in the name field.
import React, { useState } from "react"; import { useRouter } from "next/router"; const ContactPage = () => { const [submitterName, setSubmitterName] = useState(""); const router = useRouter(); const confirmationScreenVisible = router.query?.success && router.query.success === "true"; const formVisible = !confirmationScreenVisible; const ConfirmationMessage = ( <React.Fragment> <p> Thank you for submitting this form. Someone should get back to you within 24-48 hours. </p> <button onClick={() => router.replace("/contact", undefined, { shallow: true })}> Submit Another Response </button> </React.Fragment> ); const ContactForm = ( <form className="container" method="POST" name="contact-form" action="contact/?success=true" data-netlify="true" data-netlify-honeypot="bot-field" > <input type="hidden" name="subject" value={`You've got mail from ${submitterName}`} /> <input type="hidden" name="form-name" value="contact-form" /> <p hidden> <label> Don’t fill this out: <input name="bot-field" /> </label> </p> <label htmlFor="name">Name *</label> <input id="name" name="name" required onChange={(e) => setSubmitterName(e.target.value)} type="text" /> <label htmlFor="company">Company *</label> <input id="company" name="company" required type="text" /> <label htmlFor="email">E-mail Address *</label> <input id="email" type="email" name="email" required /> <label htmlFor="message">Message *</label> <textarea id="message" name="message" required/> <button type="submit">Submit</button> </form> ); return ( <div> <h1>Contact Us</h1> {formVisible ? ContactForm : ConfirmationMessage} </div> ); }; export default ContactPage;
The post How to Create a Contact Form With Next.js and Netlify appeared first on CSS-Tricks. You can support CSS-Tricks by being an MVP Supporter.
How to Create a Contact Form With Next.js and Netlify published first on https://deskbysnafu.tumblr.com/
0 notes
Text
How to Sell UX Research with Two Simple Questions
Do you find yourself designing screens with only a vague idea of how the things on the screen relate to the things elsewhere in the system? Do you leave stakeholder meetings with unclear directives that often seem to contradict previous conversations? You know a better understanding of user needs would help the team get clear on what you are actually trying to accomplish, but time and budget for research is tight. When it comes to asking for more direct contact with your users, you might feel like poor Oliver Twist, timidly asking, “Please, sir, I want some more.”
Here’s the trick. You need to get stakeholders themselves to identify high-risk assumptions and hidden complexity, so that they become just as motivated as you to get answers from users. Basically, you need to make them think it’s their idea.
In this article, I’ll show you how to collaboratively expose misalignment and gaps in the team’s shared understanding by bringing the team together around two simple questions:
What are the objects?
What are the relationships between those objects?
A gauntlet between research and screen design
These two questions align to the first two steps of the ORCA process, which might become your new best friend when it comes to reducing guesswork. Wait, what’s ORCA?! Glad you asked.
ORCA stands for Objects, Relationships, CTAs, and Attributes, and it outlines a process for creating solid object-oriented user experiences. Object-oriented UX is my design philosophy. ORCA is an iterative methodology for synthesizing user research into an elegant structural foundation to support screen and interaction design. OOUX and ORCA have made my work as a UX designer more collaborative, effective, efficient, fun, strategic, and meaningful.
The ORCA process has four iterative rounds and a whopping fifteen steps. In each round we get more clarity on our Os, Rs, Cs, and As.
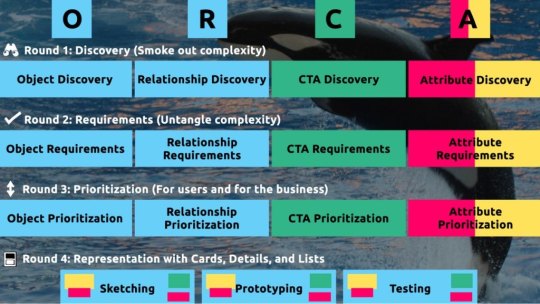
The four rounds and fifteen steps of the ORCA process. In the OOUX world, we love color-coding. Blue is reserved for objects! (Yellow is for core content, pink is for metadata, and green is for calls-to-action. Learn more about the color-coded object map and connecting CTAs to objects.)
I sometimes say that ORCA is a “garbage in, garbage out” process. To ensure that the testable prototype produced in the final round actually tests well, the process needs to be fed by good research. But if you don’t have a ton of research, the beginning of the ORCA process serves another purpose: it helps you sell the need for research.

ORCA strengthens the weak spot between research and design by helping distill research into solid information architecture—scaffolding for the screen design and interaction design to hang on.
In other words, the ORCA process serves as a gauntlet between research and design. With good research, you can gracefully ride the killer whale from research into design. But without good research, the process effectively spits you back into research and with a cache of specific open questions.
Getting in the same curiosity-boat
What gets us into trouble is not what we don’t know. It’s what we know for sure that just ain’t so.
Mark Twain
The first two steps of the ORCA process—Object Discovery and Relationship Discovery—shine a spotlight on the dark, dusty corners of your team’s misalignments and any inherent complexity that’s been swept under the rug. It begins to expose what this classic comic so beautifully illustrates:

The original “Tree Swing Project Management” cartoon dates back to the 1960s or 1970s and has no artist attribution we could find.
This is one reason why so many UX designers are frustrated in their job and why many projects fail. And this is also why we often can’t sell research: every decision-maker is confident in their own mental picture.
Once we expose hidden fuzzy patches in each picture and the differences between them all, the case for user research makes itself.
But how we do this is important. However much we might want to, we can’t just tell everyone, “YOU ARE WRONG!” Instead, we need to facilitate and guide our team members to self-identify holes in their picture. When stakeholders take ownership of assumptions and gaps in understanding, BAM! Suddenly, UX research is not such a hard sell, and everyone is aboard the same curiosity-boat.
Say your users are doctors. And you have no idea how doctors use the system you are tasked with redesigning.
You might try to sell research by honestly saying: “We need to understand doctors better! What are their pain points? How do they use the current app?” But here’s the problem with that. Those questions are vague, and the answers to them don’t feel acutely actionable.
Instead, you want your stakeholders themselves to ask super-specific questions. This is more like the kind of conversation you need to facilitate. Let’s listen in:
“Wait a sec, how often do doctors share patients? Does a patient in this system have primary and secondary doctors?”
“Can a patient even have more than one primary doctor?”
“Is it a ‘primary doctor’ or just a ‘primary caregiver’… Can’t that role be a nurse practitioner?”
“No, caregivers are something else… That’s the patient’s family contacts, right?”
“So are caregivers in scope for this redesign?”
“Yeah, because if a caregiver is present at an appointment, the doctor needs to note that. Like, tag the caregiver on the note… Or on the appointment?”
Now we are getting somewhere. Do you see how powerful it can be getting stakeholders to debate these questions themselves? The diabolical goal here is to shake their confidence—gently and diplomatically.
When these kinds of questions bubble up collaboratively and come directly from the mouths of your stakeholders and decision-makers, suddenly, designing screens without knowing the answers to these questions seems incredibly risky, even silly.
If we create software without understanding the real-world information environment of our users, we will likely create software that does not align to the real-world information environment of our users. And this will, hands down, result in a more confusing, more complex, and less intuitive software product.
The two questions
But how do we get to these kinds of meaty questions diplomatically, efficiently, collaboratively, and reliably?
We can do this by starting with those two big questions that align to the first two steps of the ORCA process:
What are the objects?
What are the relationships between those objects?
In practice, getting to these answers is easier said than done. I’m going to show you how these two simple questions can provide the outline for an Object Definition Workshop. During this workshop, these “seed” questions will blossom into dozens of specific questions and shine a spotlight on the need for more user research.
Prep work: Noun foraging
In the next section, I’ll show you how to run an Object Definition Workshop with your stakeholders (and entire cross-functional team, hopefully). But first, you need to do some prep work.
Basically, look for nouns that are particular to the business or industry of your project, and do it across at least a few sources. I call this noun foraging.
Here are just a few great noun foraging sources:
the product’s marketing site
the product’s competitors’ marketing sites (competitive analysis, anyone?)
the existing product (look at labels!)
user interview transcripts
notes from stakeholder interviews or vision docs from stakeholders
Put your detective hat on, my dear Watson. Get resourceful and leverage what you have. If all you have is a marketing website, some screenshots of the existing legacy system, and access to customer service chat logs, then use those.
As you peruse these sources, watch for the nouns that are used over and over again, and start listing them (preferably on blue sticky notes if you’ll be creating an object map later!).
You’ll want to focus on nouns that might represent objects in your system. If you are having trouble determining if a noun might be object-worthy, remember the acronym SIP and test for:
Structure
Instances
Purpose
Think of a library app, for example. Is “book” an object?
Structure: can you think of a few attributes for this potential object? Title, author, publish date… Yep, it has structure. Check!
Instance: what are some examples of this potential “book” object? Can you name a few? The Alchemist, Ready Player One, Everybody Poops… OK, check!
Purpose: why is this object important to the users and business? Well, “book” is what our library client is providing to people and books are why people come to the library… Check, check, check!

SIP: Structure, Instances, and Purpose! (Here’s a flowchart where I elaborate even more on SIP.)
As you are noun foraging, focus on capturing the nouns that have SIP. Avoid capturing components like dropdowns, checkboxes, and calendar pickers—your UX system is not your design system! Components are just the packaging for objects—they are a means to an end. No one is coming to your digital place to play with your dropdown! They are coming for the VALUABLE THINGS and what they can do with them. Those things, or objects, are what we are trying to identify.
Let’s say we work for a startup disrupting the email experience. This is how I’d start my noun foraging.
First I’d look at my own email client, which happens to be Gmail. I’d then look at Outlook and the new HEY email. I’d look at Yahoo, Hotmail…I’d even look at Slack and Basecamp and other so-called “email replacers.” I’d read some articles, reviews, and forum threads where people are complaining about email. While doing all this, I would look for and write down the nouns.
(Before moving on, feel free to go noun foraging for this hypothetical product, too, and then scroll down to see how much our lists match up. Just don’t get lost in your own emails! Come back to me!)
Drumroll, please…
Here are a few nouns I came up with during my noun foraging:
email message
thread
contact
client
rule/automation
email address that is not a contact?
contact groups
attachment
Google doc file / other integrated file
newsletter? (HEY treats this differently)
saved responses and templates

In the OOUX world, we love color-coding. Blue is reserved for objects! (Yellow is for core content, pink is for metadata, and green is for calls-to-action. Learn more about the color coded object map and connecting CTAs to objects.)
Scan your list of nouns and pick out words that you are completely clueless about. In our email example, it might be client or automation. Do as much homework as you can before your session with stakeholders: google what’s googleable. But other terms might be so specific to the product or domain that you need to have a conversation about them.
Aside: here are some real nouns foraged during my own past project work that I needed my stakeholders to help me understand:
Record Locator
Incentive Home
Augmented Line Item
Curriculum-Based Measurement Probe
This is really all you need to prepare for the workshop session: a list of nouns that represent potential objects and a short list of nouns that need to be defined further.
Facilitate an Object Definition Workshop
You could actually start your workshop with noun foraging—this activity can be done collaboratively. If you have five people in the room, pick five sources, assign one to every person, and give everyone ten minutes to find the objects within their source. When the time’s up, come together and find the overlap. Affinity mapping is your friend here!
If your team is short on time and might be reluctant to do this kind of grunt work (which is usually the case) do your own noun foraging beforehand, but be prepared to show your work. I love presenting screenshots of documents and screens with all the nouns already highlighted. Bring the artifacts of your process, and start the workshop with a five-minute overview of your noun foraging journey.
HOT TIP: before jumping into the workshop, frame the conversation as a requirements-gathering session to help you better understand the scope and details of the system. You don’t need to let them know that you’re looking for gaps in the team’s understanding so that you can prove the need for more user research—that will be our little secret. Instead, go into the session optimistically, as if your knowledgeable stakeholders and PMs and biz folks already have all the answers.
Then, let the question whack-a-mole commence.
1. What is this thing?
Want to have some real fun? At the beginning of your session, ask stakeholders to privately write definitions for the handful of obscure nouns you might be uncertain about. Then, have everyone show their cards at the same time and see if you get different definitions (you will). This is gold for exposing misalignment and starting great conversations.
As your discussion unfolds, capture any agreed-upon definitions. And when uncertainty emerges, quietly (but visibly) start an “open questions” parking lot. 😉
After definitions solidify, here’s a great follow-up:
2. Do our users know what these things are? What do users call this thing?
Stakeholder 1: They probably call email clients “apps.” But I’m not sure.
Stakeholder 2: Automations are often called “workflows,” I think. Or, maybe users think workflows are something different.
If a more user-friendly term emerges, ask the group if they can agree to use only that term moving forward. This way, the team can better align to the users’ language and mindset.
OK, moving on.
If you have two or more objects that seem to overlap in purpose, ask one of these questions:
3. Are these the same thing? Or are these different? If they are not the same, how are they different?
You: Is a saved response the same as a template?
Stakeholder 1: Yes! Definitely.
Stakeholder 2: I don’t think so… A saved response is text with links and variables, but a template is more about the look and feel, like default fonts, colors, and placeholder images.
Continue to build out your growing glossary of objects. And continue to capture areas of uncertainty in your “open questions” parking lot.
If you successfully determine that two similar things are, in fact, different, here’s your next follow-up question:
4. What’s the relationship between these objects?
You: Are saved responses and templates related in any way?
Stakeholder 3: Yeah, a template can be applied to a saved response.
You, always with the follow-ups: When is the template applied to a saved response? Does that happen when the user is constructing the saved response? Or when they apply the saved response to an email? How does that actually work?
Listen. Capture uncertainty. Once the list of “open questions” grows to a critical mass, pause to start assigning questions to groups or individuals. Some questions might be for the dev team (hopefully at least one developer is in the room with you). One question might be specifically for someone who couldn’t make it to the workshop. And many questions will need to be labeled “user.”
Do you see how we are building up to our UXR sales pitch?
5. Is this object in scope?
Your next question narrows the team’s focus toward what’s most important to your users. You can simply ask, “Are saved responses in scope for our first release?,” but I’ve got a better, more devious strategy.
By now, you should have a list of clearly defined objects. Ask participants to sort these objects from most to least important, either in small breakout groups or individually. Then, like you did with the definitions, have everyone reveal their sort order at once. Surprisingly—or not so surprisingly—it’s not unusual for the VP to rank something like “saved responses” as #2 while everyone else puts it at the bottom of the list. Try not to look too smug as you inevitably expose more misalignment.
I did this for a startup a few years ago. We posted the three groups’ wildly different sort orders on the whiteboard.

Here’s a snippet of the very messy middle from this session: three columns of object cards, showing the same cards prioritized completely differently by three different groups.
The CEO stood back, looked at it, and said, “This is why we haven’t been able to move forward in two years.”
Admittedly, it’s tragic to hear that, but as a professional, it feels pretty awesome to be the one who facilitated a watershed realization.
Once you have a good idea of in-scope, clearly defined things, this is when you move on to doing more relationship mapping.
6. Create a visual representation of the objects’ relationships
We’ve already done a bit of this while trying to determine if two things are different, but this time, ask the team about every potential relationship. For each object, ask how it relates to all the other objects. In what ways are the objects connected? To visualize all the connections, pull out your trusty boxes-and-arrows technique. Here, we are connecting our objects with verbs. I like to keep my verbs to simple “has a” and “has many” statements.

A work-in-progress system model of our new email solution.
This system modeling activity brings up all sorts of new questions:
Can a saved response have attachments?
Can a saved response use a template? If so, if an email uses a saved response with a template, can the user override that template?
Do users want to see all the emails they sent that included a particular attachment? For example, “show me all the emails I sent with ProfessionalImage.jpg attached. I’ve changed my professional photo and I want to alert everyone to update it.”
Solid answers might emerge directly from the workshop participants. Great! Capture that new shared understanding. But when uncertainty surfaces, continue to add questions to your growing parking lot.
Light the fuse
You’ve positioned the explosives all along the floodgates. Now you simply have to light the fuse and BOOM. Watch the buy-in for user research flooooow.
Before your workshop wraps up, have the group reflect on the list of open questions. Make plans for getting answers internally, then focus on the questions that need to be brought before users.
Here’s your final step. Take those questions you’ve compiled for user research and discuss the level of risk associated with NOT answering them. Ask, “if we design without an answer to this question, if we make up our own answer and we are wrong, how bad might that turn out?”
With this methodology, we are cornering our decision-makers into advocating for user research as they themselves label questions as high-risk. Sorry, not sorry.
Now is your moment of truth. With everyone in the room, ask for a reasonable budget of time and money to conduct 6–8 user interviews focused specifically on these questions.
HOT TIP: if you are new to UX research, please note that you’ll likely need to rephrase the questions that came up during the workshop before you present them to users. Make sure your questions are open-ended and don’t lead the user into any default answers.
Final words: Hold the screen design!
Seriously, if at all possible, do not ever design screens again without first answering these fundamental questions: what are the objects and how do they relate?
I promise you this: if you can secure a shared understanding between the business, design, and development teams before you start designing screens, you will have less heartache and save more time and money, and (it almost feels like a bonus at this point!) users will be more receptive to what you put out into the world.
I sincerely hope this helps you win time and budget to go talk to your users and gain clarity on what you are designing before you start building screens. If you find success using noun foraging and the Object Definition Workshop, there’s more where that came from in the rest of the ORCA process, which will help prevent even more late-in-the-game scope tugs-of-war and strategy pivots.
All the best of luck! Now go sell research!
How to Sell UX Research with Two Simple Questions published first on https://deskbysnafu.tumblr.com/
0 notes
Text
Some Typography Links VIII
Do you know what to use the @ sign for something other than email addresses and Twitter handles? I do! — Pawel Grzybek notes how some old physical typewriters had an “Arroba” on them which was represented with the @ sign.
Atkinson Hyperlegible Font — The Braille Institute is giving away this font that “focuses on letterform distinction to increase character recognition, ultimately improving readability.” The page itself is set in it so you can get a taste for it just by going there. Looks nice to me. Sorta evokes a slab serif without actually being one?
Marvel Character or Font? — 14/20 and I think I fat-fingered one. Proxima Midnight?! C’mon!
Firefox 92 — Ruth John notes that Firefox now supports font-size-adjust in CSS, as well as size-adjust (which you can only use within a @font-face rule). The point is jiggering your fonts such that if a user sees FOUT at all, there is little reflow jank when the custom font loads. In theory, it makes perfect font fallbacks easier.
Typography for Data — Michael Yom has to re-evalute the type styles in a design system to accomodate some some components with fairly dense/complex type needs.
Improving the New York Times’ line wrap balancer — Daniel Aleksandersen: “A text wrapping balancer is a program that tries to more evenly distribute words over multiple lines. There are at least two dozen algorithms used to achieve this.” This new one is faster than Adobe’s popular one.
Line length revisited: following the research — Mary Dyson goes deep. Apparently most of the older research on this was based on print, which, I hope we all know by now, just ain’t the same as a digital screen. We might be able to go a little longer, but as with anything, it depends.
The post Some Typography Links VIII appeared first on CSS-Tricks. You can support CSS-Tricks by being an MVP Supporter.
Some Typography Links VIII published first on https://deskbysnafu.tumblr.com/
0 notes
Text
Creating Your Own Bragdoc With Eleventy
No matter what stage you’re at as a developer, the tasks we complete—whether big or small—make a huge impact in our personal and professional growth. Unfortunately, those tasks aren’t always recognized because they can easily get lost in the sea of other things that need to get done.
The unnoticed tasks we do fall under what is known as “invisible work,” a concept I stumbled across from a talk titled “Getting Credit for Invisible Work” by Ryan T. Harter. This type of work seeps into the cracks because our brains are not wired to remember things. Yet come review time, we find ourselves repeatedly stuck when trying to recall what we did over the past 6 or 12 months.
To solve this long-established problem, Julia Evans wrote an article suggesting that we keep our own “brag document.” A brag document is exactly what it sounds like. It’s a document where you give yourself permission to brag about all the valuable work you did. Whether it be:
How you contributed to a project
Helping others
Improving existing processes
Giving talks or running workshops
What you learned
Extra-curricular activities (e.g. blogging, talks, personal projects)
Awards and career progression
There is no one way to write a brag document, but that didn’t stop Jonny Burch and the team at Progression from building bragdocs.com.
Using their site to build one is a great idea, but what better way to brag about your work than to create your own brag document from scratch?
Today I want to show you how I re-created bragdocs.com using the static site generator Eleventy. With a little bit of JavaScript and CSS, you can get your own up and running!
What are we going to build?
Below is the end result of following this tutorial. You can find the live demo here. It imitates bragdocs.com as a starting point for you to create one from scratch and make it your own.
Requirements
Installing packages in Node.js (version 10 or higher)
General understanding of HTML and CSS
Markdown, Nunjucks templating, and JavaScript (all are optional, but helpful)
Basic programming concepts, including if statements, loops, and accessing variables in JSON
What is Eleventy?
Eleventy is a static site generator. This means that rather than building a full-stack website (front-end and back-end), you have flexibility to write content in any of the following templating languages accepted by Eleventy: HTML, Markdown, Liquid, Nunjucks, Mustache, etc. The content is then processed (using custom templates if you like) to generate static HTML pages, ready for hosting as a fully functioning site.
Setting up our “Hello, World!” Eleventy project
In this tutorial, the repository I’ll be referring to is eleventy-bragdoc, and the final product we’re working towards will be referred to as a “bragdoc.”
With a GitHub repository created with a README.md and .gitignore file for Node, I started setting up an Eleventy project.
Creating a new project
Inside eleventy-bragdoc, I began with the following files:
eleventy-bragdoc ├── README.md └── .gitignore // .gitignore for node
With the terminal navigated inside of eleventy-bragdoc, I initialized the project by running the following command:
npm init -y
This created a package.json file for my node packages.
eleventy-bragdoc ├── package.json // new file ├── README.md └── .gitignore
Next, I installed Eleventy.
npm install @11ty/eleventy
This gave me the following list of files and folders:
eleventy-bragdoc ├── node_modules // new folder ├── package.json ├── package-lock.json // new file ├── README.md └── .gitignore
Configuring the Eleventy project
With Eleventy installed, I updated the scripts in the package.json file to include the following commands:
The start command serves the project during development which runs Browsersync for hot reload.
The build command creates production ready HTML files so that it can be hosted onto a server.
{ // ... "scripts": { "start": "eleventy --serve", "build": "eleventy" }, // ... }
Next, I created the required configuration file called .eleventy.js to specify the custom input and output directories.
eleventy-bragdoc ├── .eleventy.js // new file ├── node_modules ├── package.json ├── package-lock.json ├── README.md └── .gitignore
Inside .eleventy.js, I told Eleventy that it’s going to reference what’s inside of the src folder to build the HTML files. The output is then stored inside a folder called public:
module.exports = function(eleventyConfig) { return { dir: { input: "src", output: "public" } } }
Creating front-facing content
To make my first page, I created the src folder that I declared as the input directory in .eleventy.js . Inside it, I added my first page, a Markdown file called index.md
Eleventy works with many templating languages that you can mix and match: HTML, Markdown, Liquid, Nunjucks, JavaScript, Handlebars, Mustache, EJS, Haml, Pug.
eleventy-bragdoc ├── src │ └── index.md // new file ├── .eleventy.js ├── node_modules ├── package.json ├── package-lock.json ├── README.md └── .gitignore
In Eleventy, any key value pairs written between the dashes (---) above and below is considered front matter.
In index.md , I included a title property with the value “11ty x Bragdocs” and some test content underneath the front matter.
--- title: "11ty x Bragdocs" --- This is the home page.
Building templates
Next, I created a folder which Eleventy expects, called _includes inside of src. This is where the templates, or what Eleventy refers to as layouts, must live. Within that folder, I created a subfolder called layouts for my first template, base.njk
The .njk filetype refers to the templating language Nunjucks.
eleventy-bragdoc ├── src │ ├── _includes // new folder │ │ └── layouts // new folder │ │ └── base.njk // new file │ └── index.md ├── .eleventy.js ├── node_modules ├── package.json ├── package-lock.json ├── README.md └── .gitignore
I added an HTML5 boilerplate inside base.njk:
<!DOCTYPE html> <html lang="en"> <head> <meta charset="UTF-8"> <meta name="viewport" content="width=device-width, initial-scale=1.0"> <title>Document</title> </head> <body> </body> </html>
Creating pages with templates and front matter
In base.njk , between the <title> tags, I wanted to pull in the title property defined in the front matter of index.md, so I used double curly braces, i.e. , to access this variable. Similarly, in the body, I added <h1> tags and set it with the same title property.
Next, I brought in the rest of the body content from index.md using the content property. Using the provided safe filter, I told Eleventy to render instead of escape any HTML that lives inside the content of the Markdown file.
<!DOCTYPE html> <html lang="en"> <head> <meta charset="UTF-8"> <meta name="viewport" content="width=device-width, initial-scale=1.0"> <title></title> </head> <body> <h1></h1> </body> </html>
I then jumped back to index.md and added a layout property to the front matter and referenced base.njk
--- title: "11ty x Bragdocs" layout: "layouts/base.njk" --- This is the home page.
To give you an idea of what happens when we run the build, the template specified in the layout front matter property is used to wrap the Markdown content. In this example, the compiled HTML will look like what is shown below:
<!DOCTYPE html> <html lang="en"> <head> <meta charset="UTF-8"> <meta name="viewport" content="width=device-width, initial-scale=1.0"> <title>11ty x Bragdocs</title> </head> <body> <h1>11ty x Bragdocs</h1> <p>This is the home page.</p> </body> </html>
Connecting CSS and image folders in build
While this part might not be necessary for all Eleventy projects, CSS and self-hosted images are always good features to add. So, I created two folders in the src directory: css and images.
eleventy-bragdoc ├── src │ ├── css // new folder │ ├── images // new folder │ ├── _includes │ │ └── layouts │ │ └── base.njk │ └── index.md ├── .eleventy.js ├── node_modules ├── package.json ├── package-lock.json ├── README.md └── .gitignore
Then, in .eleventy.js, since I wanted the content inside these folders to be accessible when hosted, I referenced these folders by adding the following configurations:
addWatchTarget tells Eleventy that it should recompile when we make a change to a file in this directory (e.g. styles.css in the css folder).
addPassthroughCopy tells Eleventy that once the files are compiled, to take the contents of the directory and pass it through to the public directory.
You can read more about how passthrough file copy works in the documentation.
Since I was using the Nunjucks templating system, I added the markdownTemplateEngine property and set it to njk to make sure that it knows to go through Nunjucks first before anything else.
module.exports = function(eleventyConfig) { eleventyConfig.addWatchTarget("./src/css/") eleventyConfig.addWatchTarget("./src/images/") eleventyConfig.addPassthroughCopy("./src/css/") eleventyConfig.addPassthroughCopy("./src/images/") return { dir: { input: "src", output: "public" }, markdownTemplateEngine: "njk" } }
Then I created a styles.css file in the css folder and gave it something to test with to make sure it worked.
* { color: teal; }
Since I already configured the css and images folders in .eleventy.js, I was able to reference these files using Eleventy’s URL filter.
To access these self-hosted files I used Eleventy’s URL filters in the href and src property of the css and image tags, respectively.
<!DOCTYPE html> <html lang="en"> <head> <meta charset="UTF-8"> <meta name="viewport" content="width=device-width, initial-scale=1.0"> <title></title> <link rel="stylesheet" href="/css/styles.css"> </head> <body> <h1></h1> <img src="/images/test_image.jpg"> </body> </html>
Now I was ready to serve my Eleventy project.
Serving Eleventy in development
Since I had already defined the custom development scripts in package.json, I was able to run the following command:
npm start
This compiled index.md in the src directory and generated a HTML file in the public folder. Additionally, it launched a hot reload server through Browsersync where I could see the result at http://localhost:8080/
The result so far
With Eleventy running in development, I could start building the rest of the bragdoc.
Building the bragdoc system
With a base Eleventy project in a folder structure similar to what’s shown below, I began building out my bragdoc.
eleventy-bragdoc ├── src │ ├── css │ │ └── styles.css │ ├── images │ │ └── test_image.jpg │ ├── _includes │ │ └── layouts │ │ └── base.njk │ └── index.md ├── .eleventy.js ├── node_modules ├── package.json ├── package-lock.json ├── README.md └── .gitignore
Creating a collection for bragdoc entries
Eleventy has the ability to create collections that group similar content together. Therefore, I created a folder called posts for my bragdoc entries. Inside that folder, I created multiple Markdown files to represent each entry.
The filenames post-1.md, post-2.md, post-3.md don’t affect anything that is rendered on the webpage
eleventy-bragdoc ├── src │ ├── posts │ │ ├── post-1.md // new file │ │ ├── post-2.md // new file │ │ └── post-3.md // new file │ ├── css │ │ └── styles.css │ ├── images │ │ └── test_image.jpg │ ├── _includes │ │ └── layouts │ │ └── base.njk │ └── index.md ├── .eleventy.js ├── node_modules ├── package.json ├── package-lock.json ├── README.md └── .gitignore
The custom properties that I thought would be useful to include:
Title
Date (by default, posts are sorted chronologically)
Categories (a list of values to organize entries)
Public / Private (a boolean value—true or false—to determine whether you want to show it on the bragdoc )
Icon (a Notion-inspired design element to visually organize entries)
I decided that the description for each entry would be the body content of the Markdown file, as this would give me freedom to add paragraphs, images, code blocks, etc. Additionally, I was not limited to Markdown elements as I could also include HTML and style it using CSS.
Below is an example of a bragdoc entry in a Markdown file:
--- title: Build my own Bragdoc using Eleventy date: 2021-09-19 categories: - Learning - Eleventy public: True icon: 🎈 --- I learned how to use Eleventy to build my own bragdoc!
Some things to note:
Links written in Markdown by default do not open in a new blank window. So after some research, I stumbled upon a snippet by Mark Thomas Miller, which I added just before the closing <body> tag in base.njk. This might not be your thing (it’s definitely not Chris’ thing) but just in case you need it:
<script> // Making all external links open in new tabs // Snippet by Mark Thomas Miller (function () { const links = document.querySelectorAll("a[href^='https://'], a[href^='http://']") const host = window.location.hostname const isInternalLink = link => new URL(link).hostname === host links.forEach(link => { if (isInternalLink(link)) return link.setAttribute("target", "_blank") link.setAttribute("rel", "noopener") }) })() </script>
The date front matter property must be written in YYYY-MM-DD format.
You can assign as many custom front matter properties as you’d like. Just make sure that if you plan on accessing the property in the template, that the property exists in all of the Markdown files using the same template; otherwise it may break the build.
Lists in front matter can be written in multiple ways (e.g. an array or single line).
Assigning front matter properties to a collection
Instead of repeatedly assigning front matter properties with the same value in each Markdown file, I created a data directory JSON file to assign the same key-value pair only once across a collection.
To create a data directory file, it must have the same name as the collection, i.e. posts.json. Additionally, the file must also be placed inside the collection folder, i.e. the posts folder.
eleventy-bragdoc ├── src │ ├── posts │ │ ├── posts.json // new file │ │ ├── post-1.md │ │ ├── post-2.md │ │ └── post-3.md │ ├── css │ │ └── styles.css │ ├── images │ │ └── test_image.jpg │ ├── _includes │ │ └── layouts │ │ └── base.njk │ └── index.md ├── .eleventy.js ├── node_modules ├── package.json ├── package-lock.json ├── README.md └── .gitignore
At this point, the posts for the bragdoc had not been defined as a collection yet. To do this, I added the tags property in posts.json. Here I assigned the value “posts” to that property so that I could access the collection by calling collections.posts
And since I didn’t need each post to have its own page, i.e. http://localhost:8080/posts/post-1/, I switched off it’s auto-generated permalink.
{ "tags": "posts", "permalink": false }
Listing bragdoc entries
Simply put, the bragdoc is a page made up of the entries in the posts collection. To access the front matter properties and body content of the Markdown files, the entries are looped through via Nunjucks.
To do this, I went back to index.md and changed the filetype from Markdown to Nunjucks, i.e. index.njk
eleventy-bragdoc ├── src │ ├── posts │ │ ├── posts.json │ │ ├── post-1.md │ │ ├── post-2.md │ │ └── post-3.md │ ├── css │ │ └── styles.css │ ├── images │ │ └── test_image.jpg │ ├── _includes │ │ └── layouts │ │ └── base.njk │ └── index.njk // changed filetype ├── .eleventy.js ├── node_modules ├── package.json ├── package-lock.json ├── README.md └── .gitignore
Next, I replaced the content of index.njk with a Nunjucks for loop.
A Nunjucks function (for loop, if statement, etc.) must include start and end tags.
Since the order of posts by default was in chronological order (oldest first), I added the reverse filter to show the most recent at the top.
To access front matter and render it in HTML (such as the date and title of a post), I had to go through another “data” layer. Accessing properties in front matter requires double curly braces.
--- title: "11ty x Bragdocs" layout: "layouts/base.njk" ---
A little more progress
Filtering bragdoc entries
To filter certain entries, I used the front matter data to check if the public property was set to True. If the property was set to False, the entry did not appear in the bragdoc.
Similarly, when accessing front matter properties, such as public through a Nunjucks function, I again needed to go through another “data” layer.
--- title: "11ty x Bragdocs" layout: "layouts/base.njk" ---
The posts are ordered with the title.
Adding custom data filters
By default, the date property renders something that we’re generally unfamiliar with. So, after some research, I found a custom filter written by Phil Hawksworth. To use the filter, I created a file called dates.js and placed it in a new folder called _filters
eleventy-bragdoc ├── src │ ├── _filters // new folder │ │ └── dates.js // new file │ ├── posts │ │ ├── posts.json │ │ ├── post-1.md │ │ ├── post-2.md │ │ └── post-3.md │ ├── css │ │ └── styles.css │ ├── images │ │ └── test_image.jpg │ ├── _includes │ │ └── layouts │ │ └── base.njk │ └── index.njk ├── .eleventy.js ├── node_modules ├── package.json ├── package-lock.json ├── README.md └── .gitignore
Then, inside dates.js, I added the following:
/* A date formatter filter for Nunjucks Written by Phil Hawksworth */ module.exports = function(date, part) { var d = new Date(date); if(part == 'year') { return d.getUTCFullYear(); } var month = [ "January", "February", "March", "April", "May", "June", "July", "August", "September", "October", "November", "December" ]; var ordinal = { 1 : "st", 2 : "nd", 3 : "rd", 21 : "st", 22 : "nd", 23 : "rd", 31 : "st" }; return month[d.getMonth()] + " " + d.getDate() + (ordinal[d.getDate()] || "th") + " " +d.getUTCFullYear(); }
To access the date filter in the project, I added a new filter in .eleventy.js where I can call it using the custom name dateDisplay
module.exports = function (eleventyConfig) { // Add filter eleventyConfig.addFilter("dateDisplay", require("./src/_filters/dates.js") ); eleventyConfig.addPassthroughCopy("./src/css/") eleventyConfig.addPassthroughCopy("./src/images/") eleventyConfig.addWatchTarget("./src/css/") eleventyConfig.addWatchTarget("./src/images/") return { dir: { input: "src", output: "public" }, markdownTemplateEngine: "njk" } }
In index.njk, I assigned the dateDisplay filter to the date variable, rendering it in a human-readable format.
--- title: "11ty x Bragdocs" layout: "layouts/base.njk" ---
The server needs to be restarted every time you change something in the configuration file.
The posts with updated date formatting.
To return the body content of a post, I called templateContent and added the safe filter so that it rendered any HTML in the Markdown file rather than escaping it.
--- title: "11ty x Bragdocs" layout: "layouts/base.njk" ---
The posts with body content.
Finally, I included another for loop to list the values in the categories front matter property.
--- title: "11ty x Bragdocs" layout: "layouts/base.njk" ---
Having finished extracting data from the posts collection, it was time to build out the HTML structure.
Structuring the bragdoc
Partials in Eleventy allow us to repeatably use bits of HTML or templating. This also simplifies the code from one massive template file to manageable pieces that fit together.
Inside the <body> tags of base.njk , I removed everything except the content and snippet.
<!DOCTYPE html> <html lang="en"> <head> <meta charset="UTF-8"> <meta name="viewport" content="width=device-width, initial-scale=1.0"> <title></title> <link rel="stylesheet" href="/css/styles.css"> </head> <body> <script> (function () { const links = document.querySelectorAll("a[href^='https://'], a[href^='http://']") const host = window.location.hostname const isInternalLink = link => new URL(link).hostname === host links.forEach(link => { if (isInternalLink(link)) return link.setAttribute("target", "_blank") link.setAttribute("rel", "noopener") }) })() </script> </body> </html>
Next, I created bragdoc-entry.njk which lives inside a new folder called partials
eleventy-bragdoc ├── src │ ├── _filters │ │ └── dates.js │ ├── posts │ │ ├── posts.json │ │ ├── post-1.md │ │ ├── post-2.md │ │ └── post-3.md │ ├── css │ │ └── styles.css │ ├── images │ │ └── test_image.jpg │ ├── _includes │ │ ├── partials // new folder │ │ │ └── bragdoc-entry.njk // new file │ │ └── layouts │ │ └── base.njk │ └── index.njk ├── .eleventy.js ├── node_modules ├── package.json ├── package-lock.json ├── README.md └── .gitignore
Inside bragdoc-entry.njk, I brought over the content that make up the bragdoc entry, written in index.njk. Notice that it doesn’t require any front matter since it is treated as a snippet.
Partials do not extend a template, so they do not need any front matter.
<p> - <br/> </p> <br/>
Then, between the if statement in index.njk, I added an include tag that references the bragdoc-entry.njk partial. By doing this, the content inside bragdoc-entry.njk is repeatably added until the for loop finishes.
--- title: "11ty x Bragdocs" layout: "layouts/base.njk" ---
Next, I wrapped the entire for loop with some custom HTML, including a header, profile container and footer. At this point, I also included a profile picture in the images folder and referenced it in the custom HTML using Eleventy’s URL filter.
--- title: "11ty x Bragdocs" layout: "layouts/base.njk" --- <div class="bragdoc__section" id="bragdoc__section"> <h1 class="bragdoc__header"></h1> <div class="bragdoc__container"> <div class="bragdoc__profile"> <img class="bragdoc__photo" src="/images/profile_picture.jpg"> <h1 class="bragdoc__name">Emily Y Leung</h1> <div class="role">Computational Designer</div> </div> </div> <footer> <div><a target="_blank" href="https://www.bragdocs.com/">Bragdocs</a> inspired theme built with <a target="_blank" href="https://www.11ty.dev/">11ty</a></div> <div>Made with ♥ by <a target="_blank" href="https://emilyyleung.github.io/">Emily Y Leung</a></div> </footer> </div>
Then, inside bragdoc-entry.njk, I updated the HTML structure and included classes for styling:
<div class="bragdoc__entry"> <div class="bragdoc__entry-milestone"></div> <div class="bragdoc__entry-block"> <span class="bragdoc__entry-date"> </span> <br/> <h2 class="bragdoc__entry-title"><span class="bragdoc__icon"></span> </h2> <div class="bragdoc__entry-content"> </div> </div> <div class="bragdoc__taglist"> </div> </div>
Accessing global data
A good way to understand global data is to imagine building a HTML template that someone could use as a base for their website. Rather than searching for specific HTML tags to replace the text, they only need to replace certain values in an external file which then updates the content. This is one of the many things a global data file can do for us.
Eleventy can access global data files written in JSON when they are placed in a folder called _data. So, I created a data.json file that is accessible when I call and then pick out whatever properties I had provided in the JSON object.
eleventy-bragdoc ├── src │ ├── _data // new folder │ │ └── data.json // new file │ ├── _filters │ │ └── dates.js │ ├── posts │ │ ├── posts.json │ │ ├── post-1.md │ │ ├── post-2.md │ │ └── post-3.md │ ├── css │ │ └── styles.css │ ├── images │ │ ├── profile_picture.jpg │ │ └── test_image.jpg │ ├── _includes │ │ ├── partials │ │ │ └── bragdoc-entry.njk │ │ └── layouts │ │ └── base.njk │ └── index.njk ├── .eleventy.js ├── node_modules ├── package.json ├── package-lock.json ├── README.md └── .gitignore
Inside data.json, I included properties that were reused throughout the project:
{ "mywebsite": "https://emilyyleung.github.io/", "myname": "Emily Y Leung", "myrole": "Computational Designer" }
One great use case was to replace the content in the profile and footer in index.njk
<!-- Profile --> <div class="bragdoc__profile"> <img class="bragdoc__photo" src="/images/profile_picture.jpg"> <h1 class="bragdoc__name"></h1> <div class="role"></div> </div> <!-- Footer --> <footer> <div><a target="_blank" href="https://www.bragdocs.com/">Bragdocs</a> inspired theme built with <a target="_blank" href="https://www.11ty.dev/">11ty</a></div> <div>Made with ♥ by <a target="_blank" href=""></a></div> </footer>
Styling the bragdoc
With the bragdoc structure completed, I updated the styling in styles.css
To imitate bragdocs.com, I selected some of their colors and stored them in a root variable.
Additionally, I wanted to create multiple themes, so I added a custom data-theme property on top of the :root variable. In this case, the default color theme is “light” regardless of whether data-theme is assigned to the <html> tag. But that also means that if I wanted to create a “dark” theme, I could create a new selector html[data-theme="dark"] in my CSS, and assign alternative colors to the same variables as specified in :root
:root, html[data-theme="light"] { --logo: black; --name: black; --entry-title: black; --date: #BDBDBD; --text: #676a6c; --entry-line: #f1f1f1; --entry-circle: #ddd; --background: white; --text-code: grey; --code-block: rgba(0,0,0,0.05); --link-text: #676a6c; --link-hover: orange; --quote-block-edge: rgba(255, 165, 0, 0.5); --quote-block-text: #676a6c; --table-border: #676a6c; --footer: #BDBDBD; --tag: #BDBDBD; }
To reference root variables, call var() where the argument is the name of the property.
Here is an example of how we can use root variables to style the color of text in a <p> tag:
:root { --text: teal; } p { color: var(--text) }
For fun, I added a dark version inspired by Google Material.
html[data-theme="dark"] { --logo: #FFF; --name: #FFF; --entry-title: #dedede; --date: rgba(255,255,255,0.3); --text: #999999; --entry-line: rgba(255,255,255,0.2); --entry-circle: rgba(255,255,255,0.3); --background: #121212; --code-text: rgba(255,255,255,0.5); --code-block: rgba(255,255,255,0.1); --link-text: rgba(255,255,255,0.5); --link-hover: orange; --quote-block-edge: rgb(255, 165, 0); --quote-block-text: rgba(255, 165, 0,0.5); --table-border: #999999; --footer: rgba(255,255,255,0.3); --tag: rgba(255,255,255,0.3); }
To control what theme you want to use, add the data-theme property to the <html> tag in base.njk. From there, assign the value associated to the corresponding CSS selector, i.e. “light” or “dark.”
<!DOCTYPE html> <html lang="en" data-theme="light">
Next, I added styling to the <body>, <footer>, bragdoc section, and logo.
body { font-family: "open sans", "Helvetica Neue", Helvetica, Arial, sans-serif; font-size: 13px; color: var(--text); background-color: var(--background); margin: 0; height: 100vh; } footer { margin: 0 auto; max-width: 500px; padding-bottom: 1.5em; text-align: center; color: var(--footer); padding-top: 2em; margin-top: 2em; } /* Bragdoc Logo */ .bragdoc__header { margin: 0; padding: 1em; font-size: 1.5em; color: var(--logo) } /* Bragdoc Body */ .bragdoc__section { height: 100%; display: grid; grid-template-rows: auto 1fr auto; margin: 0; padding: 0; }
At this point, the custom tags and classes in the HTML made it simple to replicate the bragdoc layout.
/* Bragdoc User Profile */ .bragdoc__profile { padding-top: 3em; padding-bottom: 2em; } .bragdoc__photo { width: 8em; border-radius: 100%; padding: 0; height: 8em; object-fit: cover; } .bragdoc__name { color: var(--name); margin-bottom: 0.25em; } .bragdoc__icon { font-family: "Segoe UI Emoji", Times, serif; } .bragdoc__container { max-width: 800px; margin: 0 0 0 30em; height: 100%; } .bragdoc__profile-role { margin: 0; }
Next, I styled the entries to replicate the bragdocs.com timeline design.
/* Individual Bragdoc Entry Blocks */ .bragdoc__entry { position: relative; } .bragdoc__entry:first-child { margin-top: 0; } .bragdoc__entry:before { height: 100%; position: absolute; background-color: var(--entry-line); width: 2px; content: ""; top: 30px; } .bragdoc__entry:last-child:before { background-color: var(--background); } .bragdoc__taglist { margin-left: 1em; padding: 1em; } .bragdoc__taglist > * { border: 1px solid var(--tag); padding: 0.25em 0.5em 0.25em 0.5em; border-radius: 0.5em; margin-right: 1em; } /* Entry Content */ .bragdoc__entry-block { margin-left: 1em; padding: 1em; } .bragdoc__entry-title { margin-top: 4px; color: var(--entry-title); font-size: 1.5em; } .bragdoc__entry-date { line-height: 3em; color: var(--date); } /* Bragdoc milestone circle */ .bragdoc__entry-milestone { position: absolute; height: 5px; width: 5px; border: 2px solid var(--entry-circle); background-color: var(--background); left: 0; top: 30px; margin-top: -2px; margin-left: -3px; border-radius: 100px; } /* Bragdoc Entry Content */ .bragdoc__entry-content > * { margin-bottom: 0.5em; margin-left: 0; } .bragdoc__entry-content > h1 { font-size: 1.15em; } .bragdoc__entry-content > h2, h3, h4, h5, h6 { font-size: 1em; color: var(--text); }
Using CSS media queries, I could also control the size of text as well as the positioning of HTML elements. This makes it work well when viewed on mobile.
/* Make it responsive */ @media only screen and (max-width: 1400px) { .bragdoc__container { /* Center the bragdoc*/ margin: 0 auto; } .bragdoc__entry-title { font-size: 1.25em; } } @media only screen and (max-width: 870px) { .bragdoc__container { padding-left: 2em; padding-right: 2em; } .bragdoc__entry-title { font-size: 1.15em; } }
The final touches to the design needed to account for the description (i.e. the Markdown body content) in each entry, which you can find in this Gist.
Given that the CSS has been structured with reference to root variables, we can continue to create more themes. Have a crack at exploring color palettes from Color Hunt or Cooolers.
Deploying the bragdoc to GitHub Pages
Building a project from scratch is fantastic, but sharing it with the world is even better!
While there are a myriad of ways to host a bragdoc, I decided to host it on GitHub Pages. This meant I could use the base URL of my GitHub account and add /eleventy-bragdoc/ to the end of it.
At this point, I had been working from the eleventy-bragdoc repository and had already created a gh-pages branch.
Follow this tutorial for information on how to set up GitHub Pages for your repository.
Configuring the URL path
To configure the URL path for deployment, I included a pathPrefix in .eleventy.js to define the route relative to the base URL.
Without specifying a pathPrefix, the value by default is /, which links to the base URL, i.e. https://emilyyleung.github.io/
Since I already had content on the base URL, I wanted to host it on a sub-page, i.e. https://emilyyleung.github.io/eleventy-bragdoc/
To set the pathPrefix for sub-pages, it must start and end with a slash:
module.exports = function (eleventyConfig) { // ... return { dir: { input: "src", output: "public" }, markdownTemplateEngine: "njk", pathPrefix: "/eleventy-bragdoc/" } }
Adding the GitHub Pages dependency
After configuration, I installed GitHub Pages using the terminal:
npm install gh-pages --save-dev
This automatically adds the dependency to package.json
{ // ... "devDependencies": { "gh-pages": "^3.2.3" }, // ... }
Adding a custom terminal script
To deploy the public folder, I added a deploy script and referenced the public folder:
{ // ... "scripts": { "start": "eleventy --serve", "build": "eleventy", "deploy": "gh-pages -d public" } // ... }
Running the build
Just like in development, I navigated my terminal to the eleventy-bragdoc folder. But this time, I ran the following command to rebuild the files into the public folder:
npm run-script build
Then, to deploy to GitHub Pages, I ran the following command:
npm run deploy
Granting access to deploy
At this point, the terminal may ask you to log in via the terminal or through the GitHub Desktop application. If the login fails, the terminal may ask you to generate a token of authentication to use instead of a password. Here is a guide on how to create one.
With a successful response from the terminal, I could see my bragdoc live!
Maintaining your bragdoc
Unlike reports and books, a bragdoc must be maintained continuously as a live record of your progress and achievements. Think of your bragdoc like a garden, where tending requires regular attention and care. While you may not see the benefits straight away, time invested in tending to your document will lead to far greater returns. Instant recall and the ability to share what you’ve done are some of the upsides in forming this habit.
While you may not be able to note down everything as it happens, Julia Evans suggests setting a block of time to review your progress and update the document. Perhaps even making it a bi-weekly group activity to celebrate all wins, big and small.
For many, the less time it takes to do something, the better. With this bragdoc setup, adding new entries and rebuilding the site doesn’t take long at all! Just to give you an idea of how simple this is, I’ll walk you through the process of adding another entry to round out the tutorial.
Add a new bragdoc entry
Continuing from my last deployment, I’ll first add a new Markdown file in my posts folder.
eleventy-bragdoc ├── src │ ├── _data │ │ └── data.json │ ├── _filters │ │ └── dates.js │ ├── posts │ │ ├── posts.json │ │ ├── post-1.md │ │ ├── post-2.md │ │ ├── post-3.md │ │ └── post-4.md // new entry goes here │ ├── css │ │ └── styles.css │ ├── images │ │ ├── profile_picture.jpg │ │ └── test_image.jpg │ ├── _includes │ │ ├── partials │ │ │ └── bragdoc-entry.njk │ │ └── layouts │ │ └── base.njk │ └── index.njk ├── .eleventy.js ├── node_modules ├── package.json ├── package-lock.json ├── README.md └── .gitignore
Inside post-4.md, I’ll add in my front matter and description content.
--- title: Working towards publishing my first article on CSS-Tricks date: 2021-10-02 categories: - Writing - Eleventy public: True icon: ✍🏻 --- Since re-creating [bragdocs.com](https://www.bragdocs.com/) using Eleventy, I am now in the process of writing the steps on how I did it.
Run the build
With the entries added and saved, I’m ready to tell Eleventy to reference my Markdown files from src to generate static HTML files in the public folder. So I navigate the terminal to eleventy-bragdoc where I run the following command:
npm run-script build
Run deploy
Since I’ve already deployed once before, my GitHub credentials should grant me immediate access for deployment when running the following command:
npm run deploy
Those changes are then reflected on my website at the same configured URL.
What’s next?
Well first off, congratulations on putting together your very own bragdoc from scratch! It’s yours to keep, to tend and to share.
While this tutorial has only scratched the surface of what’s possible with Eleventy, a small step can lead you to all sorts of directions. To fuel your curiosity, check out what others are doing with Eleventy.
Feel free to reach out, I’d love to see what you come up with!
The post Creating Your Own Bragdoc With Eleventy appeared first on CSS-Tricks. You can support CSS-Tricks by being an MVP Supporter.
Creating Your Own Bragdoc With Eleventy published first on https://deskbysnafu.tumblr.com/
0 notes