#AIstandardization
Explore tagged Tumblr posts
Visit Tumblr Blog
Explore Tumblr blogs with no restrictions, modern design and the best experience.
Last Seen Tumblr Blogs


Fun Fact
Tumblr Inc. has $15.1M in annual revenue.
Link
#AIstandardization#cross-regionalcollaboration#decentralizedAI#distributedcomputing#ethicalgovernance#neuralarchitecture#neuromorphicintegration#regulatoryinnovation
0 notes
Text

Stay updated on the latest in #AI standards! NIST's draft documents, released on April 29, 2024, provide essential insights into the future of #AI regulation. Learn how these resources enhance #NIST's AI Risk Management Framework and Secure Software Development Framework. Read our blog now.
0 notes
Text
Understanding The Keeper AI Standards Test: Making AI Better

In the world of AI, where new ideas mix with ethics, the Keeper AI Standards Test is really important. It’s like a big rock that keeps AI systems ethical. This special way of checking AI was made by a bunch of smart people working together. It helps make sure AI follows the rules and is used responsibly. In this article, we are going to take a close look on The Keeper AI Standards Test. Whether, what it stands for, it uses, what comes next, and more things.
The Story Behind the Keeper AI Standards Test
People had visualized that AI had some problems. We are all merely dependent on AI whether in healthcare, business development and e.t.c. But there were questions such as, fairness, responsibility, understanding, privacy integrity and reliability. Everybody realized that there must be a better and more appropriate way of addressing such issues. A selection of persons gather and developed the keeper artificial intelligence standards test.
What’s It Used For? Read More
0 notes
Text
Sword modelling - Gini Yaka's weapon
01/05/2025
For the sword, I want to keep it very simple since much of it won't be shown in the animation.
I was initially planning on modelling a sword similar to the kind used during the Kandyan period, but the designs are very intricate, and it would most probably take me more than a day to finish modeling it ToT
[Examples of Kandyan period sword designs]


So, I will be keeping the sword design very simple, and I will be adding some nice textures onto the final asset in substance painter!
Tutorial I will be following:-
youtube
Maya work in progress:-
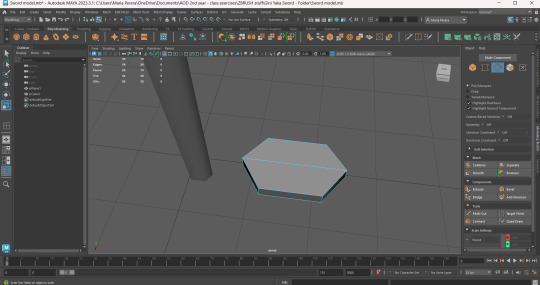


Before texturing in Substance painter, I decided to do some quick research into what weapons looked like during the Kandyan period! During this research, I came across an interesting article discussion about the origins of Kandyan artifacts!
This section of the article mentions the various weaponry used during the Kandyan period. The sword I've designed looks like a basic version of the 'Kasthane'.
The Kasthane mentioned in this article was described to have a Golden handle and a silver blade. Therefore, I will be texturing the Gini Yaka's sword in the same manner.
Update :-
It's currently 6.30pm and I 've finally textured my sword. I was struggling so much to texture a low poly sword because Maya kept crashing!
Maya crashed around 4 times while I was working on this ToT
But I fixed the issue. I basically deleted all the unwanted Maya Disk Cache files. I also exported the sword as an fbx, deleted it's original file, and textured it in a new scene. This time, it worked alright! No crashes!
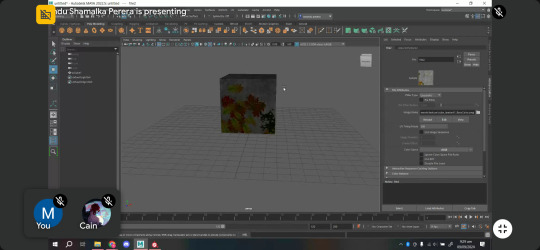
Substance painter work in progress :-
For a quick run through, I textured the sword dagger using silver pure, rusted steel (reducing the opacity) and I found an interesting blood stain texture. I decided to add it to the tip of the sword dagger since the camera will be focusing on that area of the sword while the Gini Yaka walks up to Madduma.
The blood stain add on was a last-minute addition that will add suspense to the animation!


For the sword handle, I added a damaged gold texture.
After saving the textures into their folders, I went back to Maya and I first selected the required mesh I wanted to texture, then I opened up hypershader and I deleted all the unused nodes. The next step was to select the mesh again, assign favorite material, blinn. Then when you open up hypershader, you will see the blinn node open.
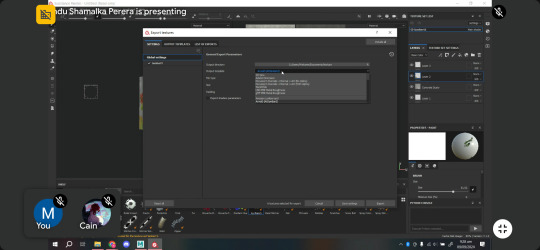
Then you have to go to substance, add in the texture maps, apply. Then the last step is the click on your mesh gain, shift click the aistandard surface node, right click assign material to viewport section. The texture will appear without any issues!


Renders :-


7 notes
·
View notes
Text
Playblast for my outer world
I added all the textures I wanted and added the lighting. My camera movements are also all mapped out so all I have to do render everything, edit both vids and add sounds.
Trying to add a more sandy texture.
Bruh tumblr being annoying when i want to upload.
For now have a look at me failing horribly on getting a sand texture.
This is when I tried to import the texture from Substance Painter. It just looked like I just changed the colour of the normal aistandard texture :/

Next attempt :
That one actually looks better than whatever this is
(This image is when I tried to directly apply an image to the base color setting)
Last attempt :
I followed this tutorial to get this texture
youtube
Looks the best out of the previous textures even though it looks stretched out.
Playing around with the stuff.
2 notes
·
View notes
Text
Shaders - AiToon shader | Hitchcockian Animation
Why I decided to go with AiToon shader
I liked the way the textures looked with this shader compared to the usual aiStandard surface shader.
Gives my animation a unique aesthetic.
I wanted to try out a different style for my animation.
Tutorials I followed
NOTE: get the youtube links and properly put them here!
Placing the rigs into my setting
Homeowner coordinates
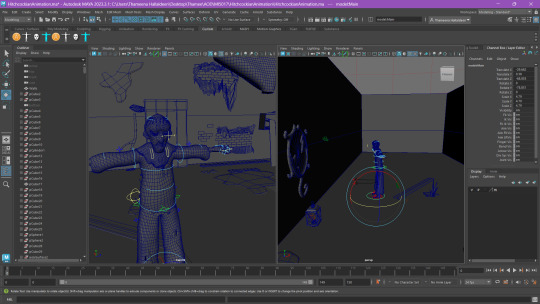

Camera coordinates
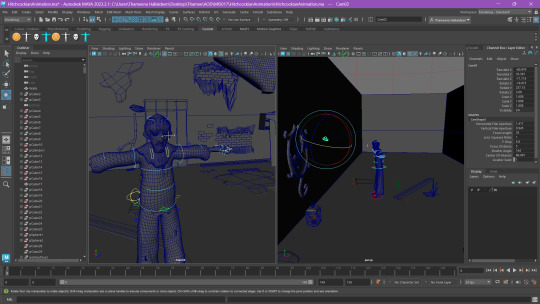
Some of the objects didn't match the proportions of the homeowner. The mirror and cabinet were too big so I adjusted those.
0 notes
Text
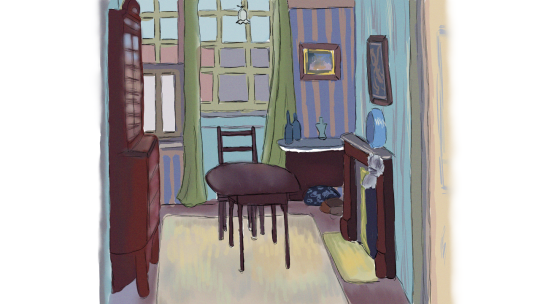
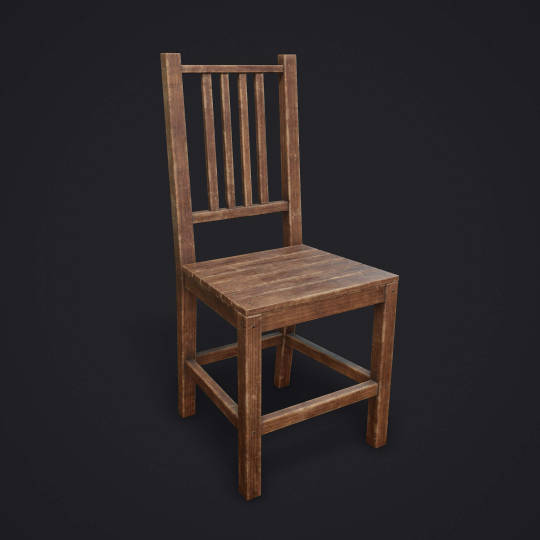
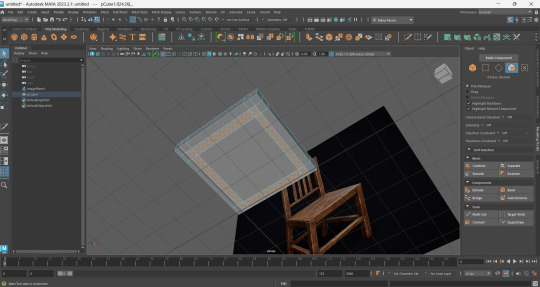
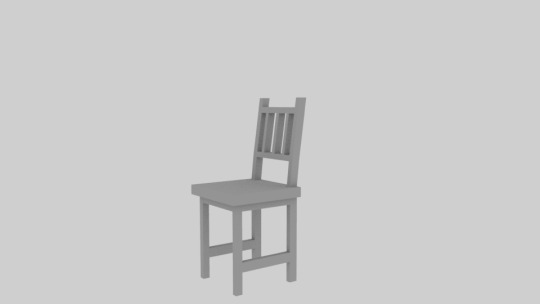
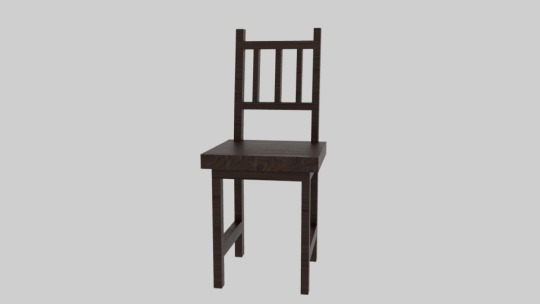
Modeling Game Asset 1 - Chair (Spencer Gore's apartment)
09/03/2025
Hi everyone! So, I'm back to start modeling my game assets since we need to have a decent amount of them for stage 2. Today I will be starting with the chair inside Gore's apartment.
Concept artwork for the assets in Gore's apartment vs Painting reference
Now, I noticed a small detail that I missed to had in the chair for my concept artwork that is the 'chair slat'. But no worries, I will be including it to my 3D model.
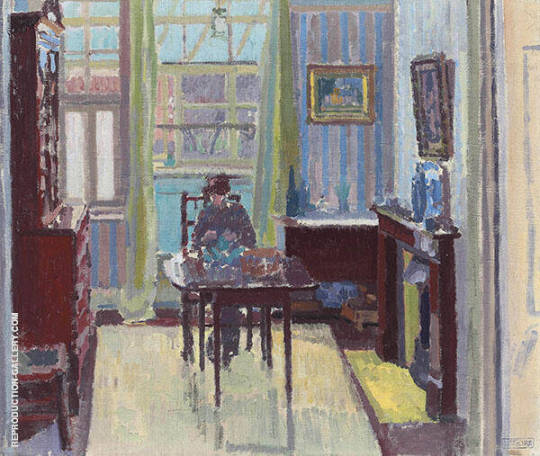
Reference: -
Tutorial: -
youtube
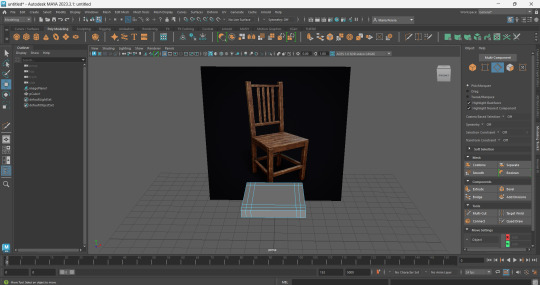
Work in progress: -
Maya -
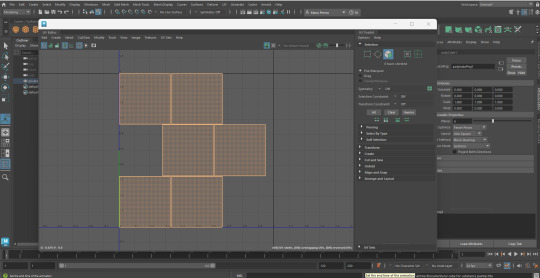
The tutorial that I found was quite simple and a quick one too. So, I was able to model this fast. I had to mainly made use of the modeling tool kit with the multi cut tool and the extrude tool.
I came across an issue when selecting the edges for the 'chair slat' because the edges moved oddly when I checked from the perspective view. But I figured out that you need to double click the edges on one side, then press shift and double click the other side. (It will sound much clearer in the screen recording I made down below)
Here are some screenshots of my work in progress in Maya!
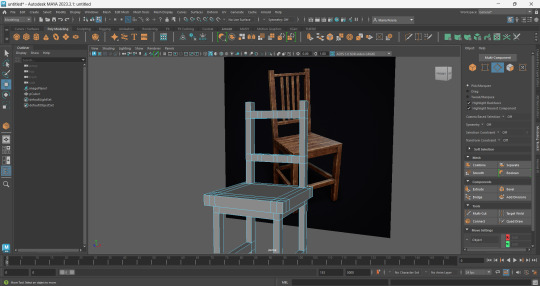
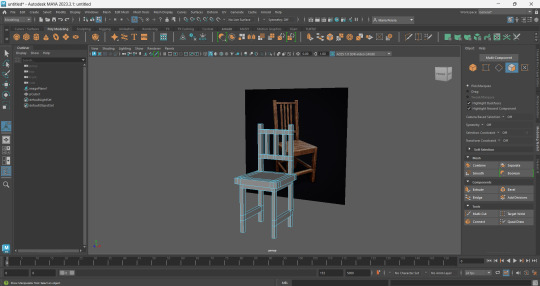
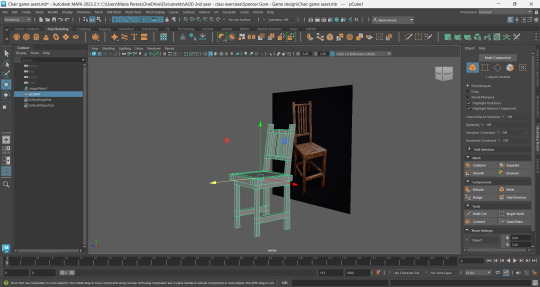
Render images of the chair -

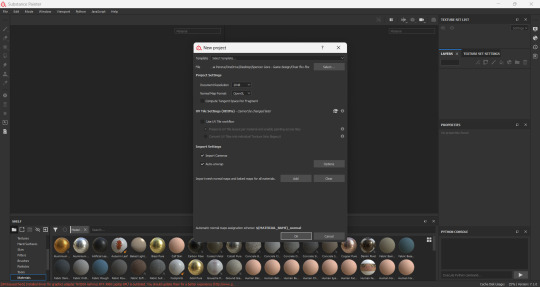
2. Substance Painter -
After you UV unwrap your mesh, you have to 'export selection' as a 'fbx' file. Then go to substance painter > File > New > Open the fbx file. (In my case, the chair fbx file)
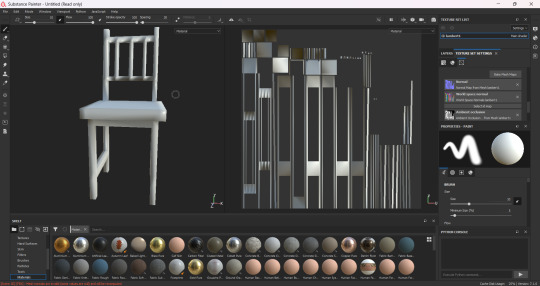
But, before adding in the texture, I decided to do a step called 'Baking'. This helps substance painter properly texture your mesh. I followed the tutorial down below to recap on how to do this step.
youtube
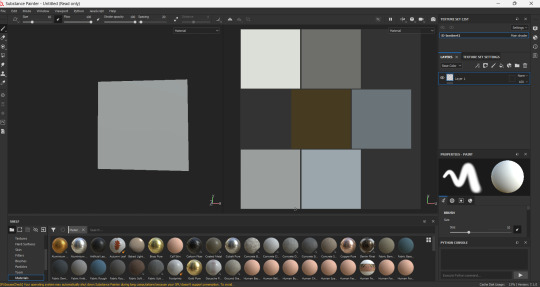
Below are some screen shots of my texturing process in Substance painter. I added the 'wood walnut' materil to the chair since it's similar in color to the furniture in Gore's painting of the Richmond Apartment.

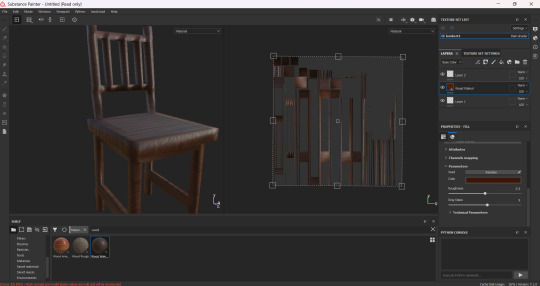
After wards, I exported the textures as pngs on the 'Arnold 'AiStandardSurface' output and save all the textures in a separate folder.
But there was a big issue in terms of adding in all the textures to the mesh in the usual method. Usually, I go to assign new materials > arnold > aistandardsurface > then I go to the color, roughness, metal, and normal individually and add in the textures. However, when I was working on this earlier, the 'BaseColor' texture was the only one I was able to apply. I probably tried to add in all the textures again at least 6 times before I decided to give up TOT
So, I decided to search for an alternate method of adding in the textures, and luckily, this tutorial saved me from the stress!
youtube
Now in this tutorial, before exporting to textures, the output should be in PBR Metallic Roughness and the format of saving the textures should be in png. Then you can save these textures and add them to Maya using a different method. (I made sure to delete the old textures I saved)

Once you go back to Maya, you should add in a substance plugin and select all the textures at once. Next you click on 'HyperShade' and you will see the textures as an AiStandard Surface. Then select the mesh, right click on the AiStandard icon and add the textures to the selected areas. And vala~ all the texture files have been added to the mesh without you having to individually add them using the AiStandardSurface!
Below are some screenshots I took while following the above linked tutorial.


Final Chair Design-

That's basically it for this post! I know I've explained in quite a lot of detail on how I created the asset, but it'll be the last post I make with this much detail. I explained everything in detail here because I've tried out a lot of different methods of exporting textures and such so, I need to make note of it to memorize the steps.
I will avoid future asset modeling posts with high detail for 2 main reasons:
I need to save time for modeling the rest of the assets and to try out more game features.
I will basically be using the same steps except for the modelling work in progress in Maya. (I will continue to explain those well.)
As always, thank you for reading! :3
0 notes
Text


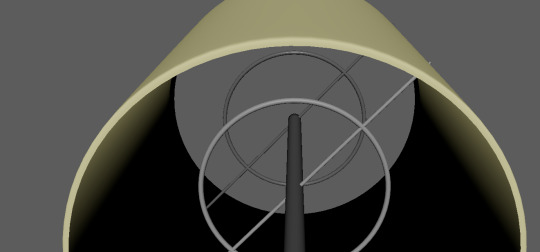
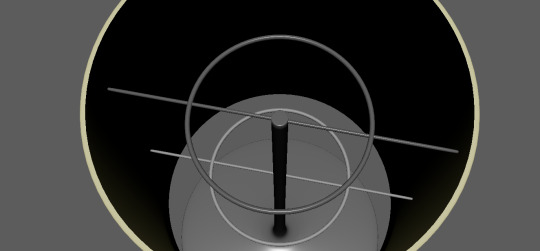
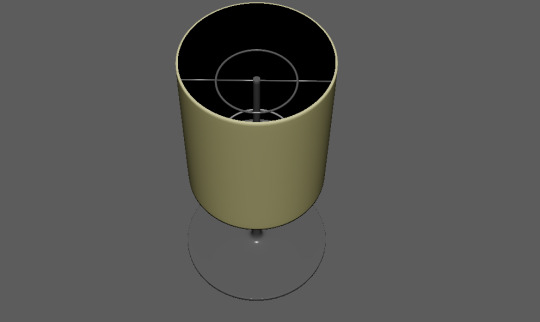
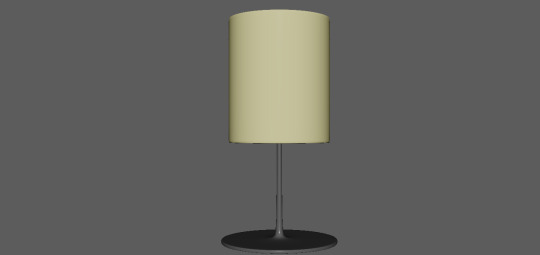
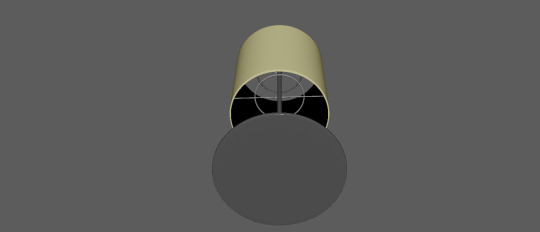
Created a 3D Prop Lamp from YouTube Modelling Guide throughout the whole video which has an optional part of it. Lamp has now added materials and colors. The Cover part has aiStandard Surface Color Light Yellow while everything else has Standard Surface Gray, speaking of everything else, you can see neat details inside the cover as well.
0 notes
Text
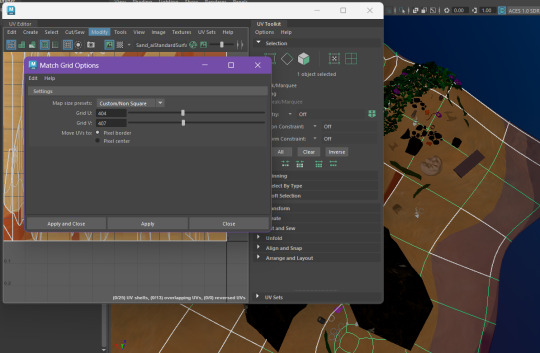
INTRODUCTION TO SUBSTANCE PAINTER


Tutorial Notes:
Start with UV > UV editor > (The other option being ‘automatic UV unwrapping’)
To save the UV unwrapping created on Maya:
File > Export selection > Save file as a .fbx > Export selection (click on the box)
To import the UV unwrapping onto Substance Painter:
File > New template > File > File select > Select item
Layers can be used like in Photoshop
Drag and drop the material/texture preferred
Change brush size to any size
Saving the textures made on Substance Painter:
File > Export textures > Create folder > Arnord AI from the output template selection
Importing textures onto Maya:
Arnord > AIstandard surface > Color > Checkbox > File > Find your texture file from Substance Painter
*(cr. to Maria for the notes)
0 notes
Text
Learning Substance Painter - UV unwrapping
09/09/2024
Morning zoom call with Ravindu -


Notes :-
UV > UV editor > (The other option is 'automatic UV unwrapping')
Saving the UV unwrapping created on Maya -
File > export selection > save file as a .fbx > export selection
Importing the UV unwrapping onto substance painter -
file > new template > file > file select > select item
You can create layers like in photoshop!
Drag and drop the material you want.
Change brush size
How to save the textures made on substance painter
file > export textures > create folder for it> Arnord ai from the output template
How to import the textures onto Maya -
Arnord > aistandard surface > color > checkbox > file > find your texture file > Click on 'textured' to add the texture onto the cube
Task for the day -
We have to UV unwrap an object on Maya and play around with the textures on substance painter.
Work in progress -
Attempt to add texture onto a cube!
I decided to create a concrete cube with cracks all over it.

I did all the steps correctly, but the texture isn't showing up on the cube!
I decided to add a sky dorm light, and I was finally able to see to concrete textures on the cube!

Okay....so basically, if you want to see the texture on the cube, you have to click on 'textured'. It's the white and black dotted sphere at the top. That's the final step.


0 notes
Text
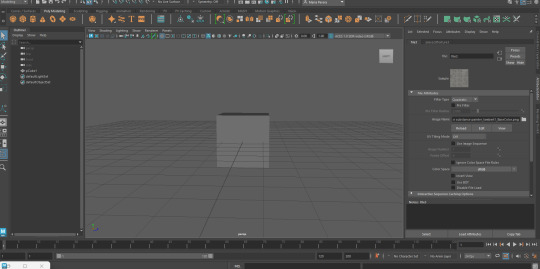
Adding displacement and roughness to a landscape.
Use a plane to create a landscape and apply chosen colour image to it.
Ctrl-u- unfold UV. Got to standard surface. File>place2Dtexture> change repeat UV to 5. Open hypershader.
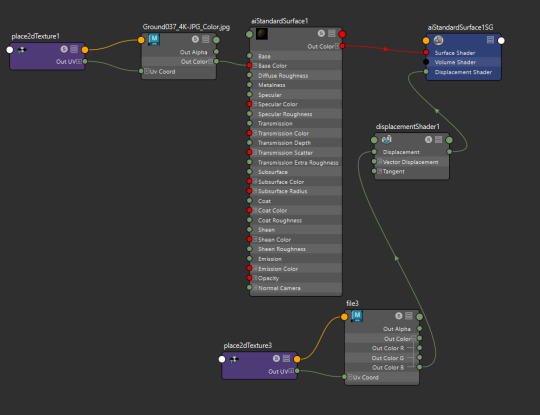
Tab- displace-displacement shader- plug into aistandard surface
Tab-file-filetexture
Connect displacement to file, Color b. Add displacement image
Adjust scale to desired level
Place2Dtexture- repeat UV 5
PlaneShape1>change type to catclark>change iterations to desired level

Roughness- specular>colour> file> add roughness image
Experimenting with Mash
Mash>mesh>scatter>connect to plane
0 notes
Text
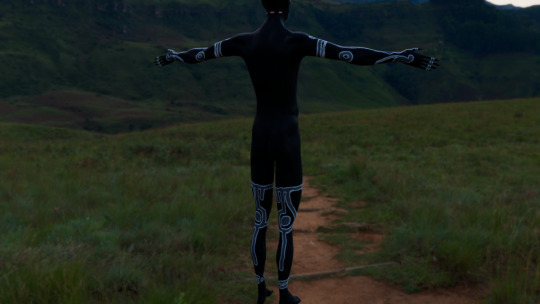
Texturing
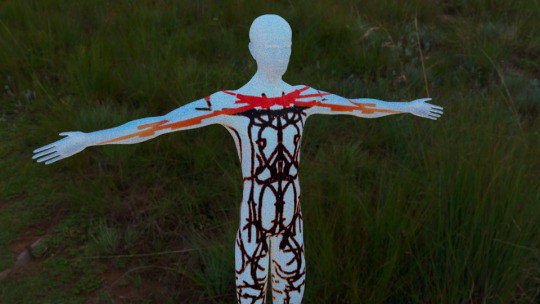
At last I have some result. I gave myself time till next week to play around textures and try to give him tattoos after all. I tried it in blender during the preproduction module but I thought this time I will use substance painter (because why not) than there was some uv problems and after few hours of trying to figure out the exact problems, I dont know why, I thought it would be better to return to blender. BUT then I couldnt export it properly neither to maya nor to houdini. Againg after few hours somehow I ended up back in substance painter and this time I was able (not without problems) to produce some decent result. I guess the reason for such a long and problematic journey was because the whole texturing process is still a mistery for me and Im basically groping in the dark.
I added aiStandard surface with skin preset. Than added the substance paintings to base color. It was black))))

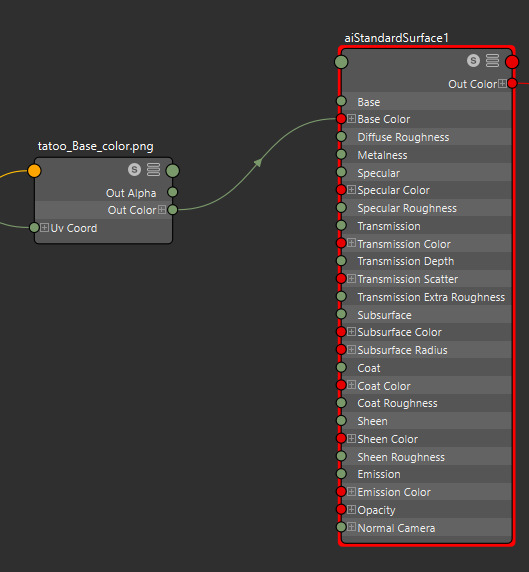
So I archived the result seen in first picture by randomly connecting what can be connected
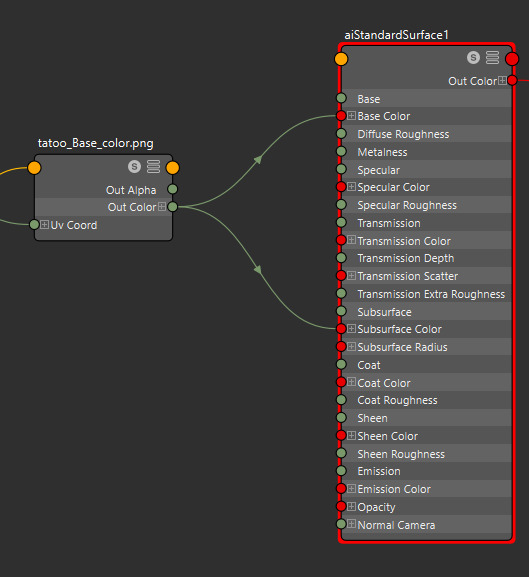
But somehow the same connection made the black tattoos yellow (although in the first one it remained black WT)


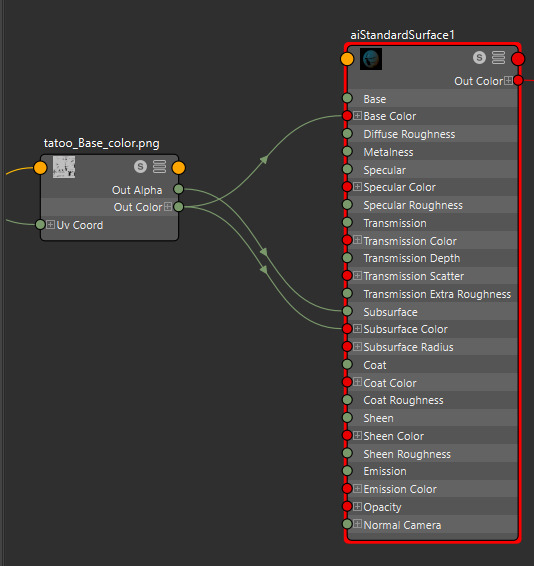
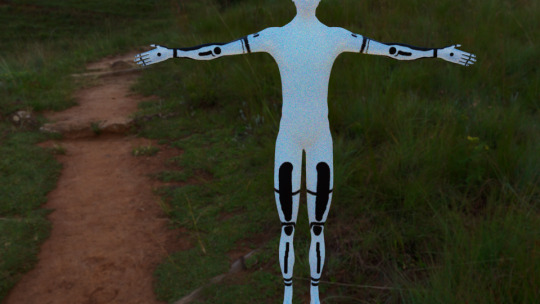
TA DA
Than just for art`s sake


MMM
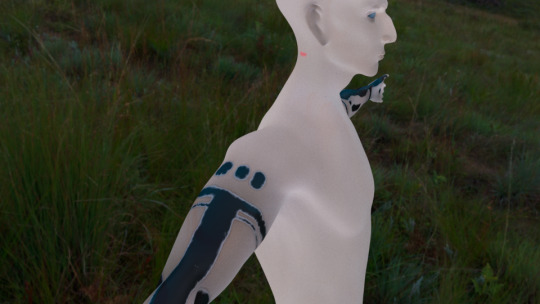
Tried to make skin texture more like skin but it probably not a good idea to do it intuitively. I can`t tell how it will behave in different lights, so will have to look into that and hopefully learn the right way
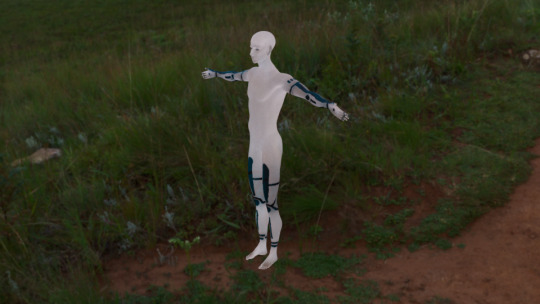
looks good but defo not human flesh
0 notes
Text

Stay informed about the latest advancements in #AI standards! On April 29, 2024, NIST released draft documents providing essential insights into the future of #AI regulation. Learn how these resources enhance #NIST's AI Risk Management Framework and Secure Software Development Framework. Check out our blog now.
0 notes
Photo

Because My black suit wasn’t very visible, even with light I added a aistandard velvet which gave it some light reflection that is reminiscent of a light reflection off a black suit
1 note
·
View note
Text
Texturing homeowner
03/05/2023
For the homeowner, I went with simple Maya textures! I tried to add in a texture to the jacket in Substance painter, but there were a few issues with the UV cuts....
Even though it's simple aistandard surface textures, the character looks good with the area lights!


Lighting [Area lights for the render view]:-
0 notes
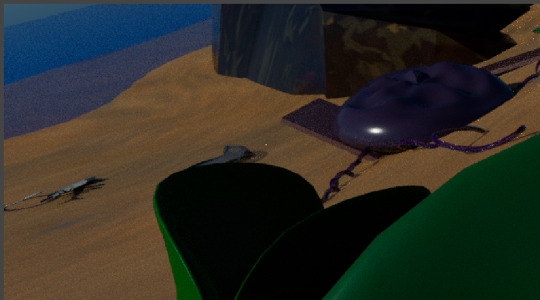
Text
I have created a BUBBLE

The smol sphere between the jelly and the planet is bubble.
I applied the "clear water" texture from "assign new material -> aistandard surface -> presets -> clear water -> blend 90%"
I want to make some bubbles uneven but it's kinda hard to make the uneven surface visible. I'll only do that if I have time....which I don't think I do. I'll just focus on getting everything modeled and the camera animation sorted.
1 note
·
View note