#Arduino Powered Temperature Controller
Explore tagged Tumblr posts
Visit Tumblr Blog
Explore Tumblr blogs with no restrictions, modern design and the best experience.
Last Seen Tumblr Blogs


Fun Fact
Tumblr’s reach among the 26-to-35-year-olds in the US is 11%.
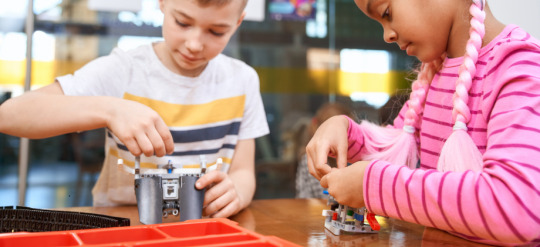
Text
Hopefully by March, we will be living in London, near to a lovely queer community. But we also find myself during this current social isolation we suffer, exiled from our tools, we miss taking on projects. This needs to change. Unfortunately said tools are currently packed up, awaiting out move.
So, after we have migrated from this dreary town, we will setup our little "lab" again and intend to work on various projects, including:
- A Raspberry Pi Compute Module 4 powered Linux phone with 4G connectivity (initially)
- A Steampunk meets Atompunk desk, based on a nuclear reactor console
- Setting up Home Assistant powered smart tech in the new home, from lights to temperature control, etc
Have any ideas? Let me know! My specialism is Python, though I'm always up for learning something new. Challenges inspire me.
2 notes
·
View notes
Text
Top 10 Projects for BE Electrical Engineering Students
Embarking on a Bachelor of Engineering (BE) in Electrical Engineering opens up a world of innovation and creativity. One of the best ways to apply theoretical knowledge is through practical projects that not only enhance your skills but also boost your resume. Here are the top 10 projects for BE Electrical Engineering students, designed to challenge you and showcase your talents.
1. Smart Home Automation System
Overview: Develop a system that allows users to control home appliances remotely using a smartphone app or voice commands.
Key Components:
Microcontroller (Arduino or Raspberry Pi)
Wi-Fi or Bluetooth module
Sensors (temperature, motion, light)
Learning Outcome: Understand IoT concepts and the integration of hardware and software.
2. Solar Power Generation System
Overview: Create a solar panel system that converts sunlight into electricity, suitable for powering small devices or homes.
Key Components:
Solar panels
Charge controller
Inverter
Battery storage
Learning Outcome: Gain insights into renewable energy sources and energy conversion.
3. Automated Irrigation System
Overview: Design a system that automates the watering of plants based on soil moisture levels.
Key Components:
Soil moisture sensor
Water pump
Microcontroller
Relay module
Learning Outcome: Learn about sensor integration and automation in agriculture.
4. Electric Vehicle Charging Station
Overview: Build a prototype for an electric vehicle (EV) charging station that monitors and controls charging processes.
Key Components:
Power electronics (rectifier, inverter)
Microcontroller
LCD display
Safety features (fuses, circuit breakers)
Learning Outcome: Explore the fundamentals of electric vehicles and charging technologies.
5. Gesture-Controlled Robot
Overview: Develop a robot that can be controlled using hand gestures via sensors or cameras.
Key Components:
Microcontroller (Arduino)
Motors and wheels
Ultrasonic or infrared sensors
Gesture recognition module
Learning Outcome: Understand robotics, programming, and sensor technologies.
6. Power Factor Correction System
Overview: Create a system that improves the power factor in electrical circuits to enhance efficiency.
Key Components:
Capacitors
Microcontroller
Current and voltage sensors
Relay for switching
Learning Outcome: Learn about power quality and its importance in electrical systems.
7. Wireless Power Transmission
Overview: Experiment with transmitting power wirelessly over short distances.
Key Components:
Resonant inductive coupling setup
Power source
Load (LED, small motor)
Learning Outcome: Explore concepts of electromagnetic fields and energy transfer.
8. Voice-Controlled Home Assistant
Overview: Build a home assistant that can respond to voice commands to control devices or provide information.
Key Components:
Microcontroller (Raspberry Pi preferred)
Voice recognition module
Wi-Fi module
Connected devices (lights, speakers)
Learning Outcome: Gain experience in natural language processing and AI integration.
9. Traffic Light Control System Using Microcontroller
Overview: Design a smart traffic light system that optimizes traffic flow based on real-time data.
Key Components:
Microcontroller (Arduino)
LED lights
Sensors (for vehicle detection)
Timer module
Learning Outcome: Understand traffic management systems and embedded programming.
10. Data Acquisition System
Overview: Develop a system that collects and analyzes data from various sensors (temperature, humidity, etc.).
Key Components:
Microcontroller (Arduino or Raspberry Pi)
Multiple sensors
Data logging software
Display (LCD or web interface)
Learning Outcome: Learn about data collection, processing, and analysis.
Conclusion
Engaging in these projects not only enhances your practical skills but also reinforces your theoretical knowledge. Whether you aim to develop sustainable technologies, innovate in robotics, or contribute to smart cities, these projects can serve as stepping stones in your journey as an electrical engineer. Choose a project that aligns with your interests, and don’t hesitate to seek guidance from your professors and peers. Happy engineering!
5 notes
·
View notes
Text
Essential Electronic Items for IoT and Electronics Enthusiasts
Are you diving into the world of Internet of Things (IoT) and electronics? Whether you are a seasoned engineer or simply beginning out, having a stable list of essential components is key to bringing your initiatives to existence. Here’s a curated list of electronic objects that each maker and tech enthusiast ought to have of their toolkit:
1. Microcontrollers
Arduino Uno: Great for novices and versatile for diverse projects.
Raspberry Pi: Ideal for more complex duties and going for walks complete operating structures.
ESP8266/ESP32: Perfect for wireless communication and IoT projects.
2. Sensors
DHT22: For temperature and humidity readings.
PIR Sensor: Useful for movement detection.
Ultrasonic Distance Sensor: Measures distances with high accuracy.
3. Actuators
Servo Motors: For unique manage in robotics and mechanical structures.
Stepper Motors: Ideal for applications requiring particular movement.
Solenoids: Good for growing mechanical actions and locks.
4. Displays
LCD Display: Useful for showing records and debugging.
OLED Display: Compact and clean for exact photographs and texts.
5. Connectivity Modules
Bluetooth Module (HC-05/HC-06): For short-range wi-fi communication.
Wi-Fi Module (ESP8266): Connects gadgets to the internet.
GSM Module: Enables verbal exchange over mobile networks.
6. Power Supplies
Battery Packs: Various types for transportable electricity.
Voltage Regulators: Ensure solid voltage ranges in your circuits.
Power Banks: Handy for charging and powering devices on the move.
7. Prototyping Tools
Breadboards: Essential for prototyping with out soldering.
Jumper Wires: For making connections on breadboards.
Soldering Kit: For everlasting connections and circuit meeting.
eight. Additional Components
Resistors, Capacitors, and Diodes: Fundamental for circuit design and stability.
Transistors: Key for switching and amplification tasks.
Connectors and Switches: For interfacing and controlling circuits.
By preserving these objects handy, you'll be nicely-prepared to address a huge range of IoT and electronics projects. Whether you're constructing smart domestic devices, wearable tech, or computerized structures, having the right additives can make all the difference.
#IoT#Electronics#Arduino#RaspberryPi#ESP32#Sensors#Actuators#Displays#ConnectivityModules#PowerSupplies#Prototyping#Tech#DIY#Makers#Engineering#ElectronicComponents#TechProjects
2 notes
·
View notes
Text
Top Innovative STEM Lab Solutions for Schools and Colleges in 2025

In the ever-changing academic environment of today, education has no longer stayed tethered to books and lectures. Because of the real world, schools, colleges, and training institutions are heavily investing in Innovative STEM Lab Solutions to provide a balance between theory and practice. These modern setups have allowed students to hone their scientific, technological, engineering, and mathematical abilities through experimentation, problem-solving, and design thinking.
For those teachers, administrators, or institutions willing to update their infrastructure, the following are the main STEM lab solutions that will make a difference in 2025.
Modular lab stations
A modern STEM lab is, by definition, very flexible. Modular lab stations are perfect in a school where the space must sometimes be used for robotics, sometimes for chemistry, and sometimes for electronics. These stations usually have moving workbenches, moving storage, and integrated power supplies, making them perfect for interdisciplinary learning.
Why it works:
Efficient use of space
Facilitates teamwork and solo work
Adapting to different grade levels and projects
Robotics & Automation Kits
Being widely accepted in industries, automation is the need of the hour for STEM kits. Robotics kits consist of Programmable Robots, Sensors, Servo motors, and AI Integration kits that allow students to build their robots, program them, and control them.
Our Top Picks:
Arduino-based Robotics Platforms
LEGO® Education SPIKE™ Prime
Raspberry Pi + sensor modules
The kits offer an excellent opportunity to market coding and engineering skills in a manner that is both entertaining and practical.
FDM 3D Printers and Rapid Prototyping Setup
3D printers are no longer a luxury—they remain a must-have. They enable students to build their prototypes, test their mechanical models, and engage in product design. Increasingly, schools are embedding 3D printing into STEM pedagogy so that students can apply their knowledge to solve real-world problems.
Benefits:
Enhances spatial and design thinking
Promotes iteration and creativity
Encourages integration across various subjects (science and art, for instance)
Interactive Digital Boards and Simulation Tools
Chalk and blackboards are a thing of the past. Digital smart boards and simulation software enliven the abstract concepts of STEM, such as chemical reactions or circuit UML diagrams. Teachers have real-time data at their fingertips, can draw on touch screens, and engage students in solving problems together.
Combined with Arduino simulators, circuit design software like Tinkercad, or tools for virtual dissection, it makes the lab intelligent and fun.
IoT- and AI-Based Learning Modules
In 2025, IoT- and AI-based experiments will be part of every competitive mainstream STEM education. Cutting-edge labs are equipped with sensors, cloud dashboards, and microcontrollers to help students build all kinds of smart projects, such as home automation projects, temperature monitoring systems, or AI chatbots.
The solutions prepare the students to think beyond conventional science and prepare tech jobs of the future.
Curriculum-Aligned STEM Kits
Curriculum-aligned STEM kits, thus, remain relevant for teaching. These kits are uniquely designed to meet the lesson plans, experiment manuals, safety instructions, and real-world problem-based learning content required by the curriculum. They are made for specific classes and subjects with which CBSE, ICSE, IB, or state boards can identify.
Features to look for:
Subject-specific kits (Biology, Physics, Chemistry)
Safety compliance (CE, ISO certifications)
Teacher guides and student workbooks
Cloud-Based Lab Management System
Heading into 2025, cloud-based lab management platforms are becoming more and more popular. This allows instructors to track inventory, log student experiments, manage schedules, and upload student reports onto the cloud, thereby cutting down the paperwork and boosting the efficiency of the lab as a whole.
STEM-Learning Corners in Classrooms
These STEM corners in regular classrooms find favor with many schools, especially for the many that do not have the funds for the full-blown labs. Here little places house essential kits, puzzles, experiment tools, and DIY stations where students can entertain themselves exploring topics on their own.
This makes the STEM field much more approachable and far more interesting from an early age.
Conclusion
The year 2025 marks a decision point for investing in Innovative STEM Lab Solutions: choosing to invest is no longer an option but really a must. Through robotics kits, IoT modules, and modular workstations, these solutions pre-emptively prepare students for the future by instilling critical thinking, creativity, and problem-solving abilities.
If your institute is planning a STEM lab upgrade, select the supplier who understands academic requirements and contemporary technology trends. Tesca Global has earned recognition as a name offering second-to-none, affordable, and curriculum-aligned STEM lab solutions customized for schools, colleges, and universities worldwide.
#laboratory equipment suppliers#developers & startups#educational lab equipments#business#news#photography#technology
0 notes
Text
Price: [price_with_discount] (as of [price_update_date] - Details) [ad_1] The Arduino is a cheap, flexible, open source microcontroller platform designed to make it easy for hobbyists to use electronics in homemade projects. With an almost unlimited range of input and output add-ons, sensors, indicators, displays, motors, and more, the Arduino offers you countless ways to create devices that interact with the world around you.In Arduino Workshop, you'll learn how these add-ons work and how to integrate them into your own projects. You'll start off with an overview of the Arduino system but quickly move on to coverage of various electronic components and concepts. Hands-on projects throughout the book reinforce what you've learned and show you how to apply that knowledge. As your understanding grows, the projects increase in complexity and sophistication.Among the book's 65 projects are useful devices like:– A digital thermometer that charts temperature changes on an LCD–A GPS logger that records data from your travels, which can be displayed on Google Maps– A handy tester that lets you check the voltage of any single-cell battery– A keypad-controlled lock that requires a secret code to openYou'll also learn to build Arduino toys and games like:– An electronic version of the classic six-sided die– A binary quiz game that challenges your number conversion skills– A motorized remote control tank with collision detection to keep it from crashingArduino Workshop will teach you the tricks and design principles of a master craftsman. Whatever your skill level, you'll have fun as you learn to harness the power of the Arduino for your own DIY projects.Uses the Arduino Uno board Publisher : No Starch Press; 1st edition (13 May 2013) Language : English Paperback : 392 pages ISBN-10 : 1593274483 ISBN-13 : 978-1593274481 Item Weight : 726 g Dimensions : 17.98 x 2.31 x 23.5 cm Country of Origin : USA [ad_2]
0 notes
Text
Embedded Controls Development: From Design to Deployment

Embedded controls development is a critical area in embedded systems engineering, involving the design, programming, and integration of control systems into hardware platforms. These systems are typically found in devices that perform dedicated functions, ranging from consumer electronics to industrial automation and automotive applications. The development process requires a combination of hardware knowledge, software engineering, and systems integration skills.
What Are Embedded Controls?
Embedded controls are computer-based systems that control specific functions within a larger mechanical or electrical system. They use microcontrollers, digital signal processors (DSPs), or microprocessors to monitor inputs from sensors, process data according to a control algorithm, and output control signals to actuators or other system components. These control loops can be simple (like turning on a fan when a sensor detects high temperature) or complex (like managing engine timing and fuel injection in modern vehicles).
Development Lifecycle
The development lifecycle for embedded controls typically follows several key stages:
Requirements Definition: Understanding what the control system needs to do. This includes identifying input/output interfaces, environmental constraints, performance requirements, and safety or compliance standards.
System Design: Creating a high-level architecture that defines how software and hardware will interact. This stage also involves choosing the right microcontroller or processor, selecting sensors and actuators, and outlining communication protocols.
Software Development: Writing code for the embedded control system, often in C or C++. Developers must consider memory limitations, real-time constraints, and hardware-specific details. This stage includes implementing control algorithms, handling interrupts, and developing communication interfaces such as I2C, SPI, UART, or CAN.
Hardware Integration: Integrating the embedded software with physical components. This includes setting up the development board, connecting sensors and actuators, and testing signal integrity and power consumption.
Testing and Validation: Rigorously testing the control system to ensure it functions as expected under various conditions. Unit testing, integration testing, and hardware-in-the-loop (HIL) simulations are commonly used to verify performance and reliability.
Deployment and Maintenance: After development and testing, the system is deployed into the final product. Ongoing maintenance may involve firmware updates, bug fixes, or performance improvements.
Tools and Platforms
A wide range of tools are used in embedded controls development, including:
Integrated Development Environments (IDEs): Tools like Keil µVision, MPLAB X, STM32CubeIDE, and Arduino IDE are popular for writing and debugging code.
Real-Time Operating Systems (RTOS): Systems such as FreeRTOS or VxWorks provide scheduling, task management, and synchronization capabilities for time-sensitive applications.
Version Control Systems: Git is widely used to manage code versions and support collaborative development.
Simulation and Modeling Tools: MATLAB/Simulink is frequently used in control systems design for simulation and code generation.
In-Circuit Debuggers/Programmers: Tools like JTAG or SWD interfaces allow developers to program and debug the target microcontroller directly.
Challenges in Embedded Controls Development
Developing embedded control systems presents several challenges:
Resource Constraints: Embedded systems often have limited CPU power, memory, and energy availability. Efficient coding and hardware optimization are essential.
Real-Time Requirements: Many control systems must respond within strict timing constraints. Missed deadlines can result in system failure or unsafe behavior.
Hardware Dependence: Embedded software is closely tied to specific hardware, requiring deep knowledge of the processor, peripherals, and electrical characteristics.
Debugging Complexity: Diagnosing problems in embedded systems can be difficult due to limited visibility into internal states and limited logging capabilities.
Safety and Reliability: In industries like automotive or medical devices, the control systems must meet rigorous safety standards such as ISO 26262 or IEC 62304.
Applications
Embedded controls are used in countless applications:
Automotive Systems: Engine control units (ECUs), anti-lock braking systems (ABS), adaptive cruise control, and infotainment systems.
Consumer Electronics: Smart thermostats, washing machines, and robotic vacuum cleaners all rely on embedded control systems.
Industrial Automation: PLCs and industrial controllers manage processes on factory floors, often integrating with SCADA systems.
Aerospace and Defense: Flight control systems, unmanned aerial vehicles (UAVs), and radar systems.
Medical Devices: Infusion pumps, pacemakers, and diagnostic equipment all include embedded control systems to ensure safe and accurate operation.
Trends and Future Directions
The field of embedded controls is rapidly evolving. Several key trends are shaping the future:
IoT Integration: Many embedded systems are now connected to the internet, allowing for remote monitoring, control, and firmware updates.
Edge Computing: More processing is being done on the device itself, reducing the need to send data to the cloud and improving response times.
AI and Machine Learning: Embedded systems are beginning to incorporate ML algorithms for pattern recognition, predictive maintenance, and adaptive control.
Model-Based Design: Tools like Simulink allow engineers to design control systems graphically and automatically generate embedded code.
Cybersecurity: As systems become more connected, securing embedded control systems against hacking and data breaches is becoming essential.
Conclusion
Embedded controls development by Servotechinc is a complex but vital discipline that sits at the heart of modern technology. From managing vehicle dynamics to enabling smart home features, embedded control systems play a crucial role in ensuring that machines operate efficiently, safely, and intelligently. As technology advances, the demand for skilled engineers in this domain will only continue to grow.
0 notes
Text
220 Ohm Resistor: Applications, Characteristics & Design Tips
In the world of electronics, resistors are among the most fundamental and widely used components. Among them, the 220 Ohm resistor holds a special place due to its versatility and ideal resistance value for many common applications. Whether you're just getting started with electronics or designing more advanced circuits, understanding the 220 Ohm resistor’s characteristics, typical applications, and best practices can help you design more reliable and efficient systems.

Characteristics of a 220 Ohm Resistor
A resistor with a value of 220 Ohms restricts the current in a circuit according to Ohm’s Law: V = IR, where V is voltage, I is current, and R is resistance.
For example, with a 5V supply, a 220 Ohm resistor will allow approximately 22.7 mA of current to pass through. This is a suitable current level for driving many LEDs or interfacing with logic-level components.
Key specs to consider:
Resistance: 220 Ohms (±1% for metal film, ±5% for carbon film)
Power rating: Commonly 1/4W, 1/2W, or 1W, depending on the use case
Tolerance: Defines how much the actual resistance can vary from the stated value
Common Applications
1. LED Current Limiting: The most frequent use of a 220 omega resistor is as a current-limiting resistor in LED circuits. LEDs typically require 10–30 mA of current. Using a 220 Ohm resistor helps prevent overcurrent that can burn out the LED, especially when powered by 5V sources like microcontrollers.
2. Microcontroller Interfaces: When interfacing LEDs or switches with microcontrollers (e.g., Arduino, Raspberry Pi, ESP32), 220 Ohm resistors are used to control current flow and protect I/O pins from excessive current draw.
3. Pull-down or Pull-up Resistors: While 220 Ohms is lower than typical pull-up/down resistor values, in high-speed or low-resistance applications, it can be used to ensure strong logic-level signals or to reduce signal noise.
4. Audio and Signal Circuits: In audio applications, 220 Ohm resistors can be used for impedance matching, signal attenuation, or current limiting in op-amp circuits.
Design Tips
1. Always Consider Power Rating: Use the formula P = I²R to ensure your resistor can handle the power it dissipates. For a 220 Ohm resistor carrying 25 mA, the power dissipated is about 0.14W—so a 1/4W resistor would be adequate, but higher wattage may be needed for safety or prolonged use.
2. Check Tolerance Based on Application: For precise analog circuits, opt for resistors with 1% or better tolerance. For general-purpose applications like LED limiting, 5% tolerance is usually acceptable.
3. Combine for Custom Values: Need a value close to but not exactly 220 Ohms? You can combine resistors in series or parallel. For example, two 110 Ohm resistors in series give 220 Ohms.
4. Mind the Temperature Coefficient: If your circuit operates in varying temperatures, choose resistors with low temperature coefficients to maintain stable resistance.
Conclusion
The 220 Ohm resistor is a simple yet indispensable tool in electronics. Whether you're lighting up an LED or protecting your microcontroller, understanding when and how to use it can elevate your circuit design. Keep it in your toolkit—it’s a small component with big impact.
ODG SNS:
Szxlxc: https://www.szxlxc.com
YouTube: https://www.youtube.com/@Origin_Data
Facebook: https://www.facebook.com/OriginDataGlobalLimited
Twitter: https://twitter.com/Origin_IC
Tiktok: https://www.tiktok.com/@origin_data
0 notes
Text
Getting Started with Embedded Systems Programming

Embedded systems programming is the backbone of modern electronics. From smartwatches to washing machines, embedded systems power the intelligent functions of countless everyday devices. This guide will introduce you to the basics of embedded programming, key tools, and how to begin building your own embedded applications.
What is an Embedded System?
An embedded system is a computer integrated into a larger system or device, performing dedicated functions. Unlike general-purpose computers, embedded systems are designed for specific tasks, often with constraints on power, memory, and processing.
Examples of Embedded Systems:
Microcontrollers in home appliances
Sensor-based devices (e.g., temperature sensors, motion detectors)
Medical equipment
Automotive control systems
IoT (Internet of Things) gadgets
Core Components of an Embedded System
Microcontroller or Microprocessor: The brain of the embedded system (e.g., Arduino, STM32, ESP32).
Memory: RAM and ROM to store instructions and data.
Input/Output Interfaces: Connects to sensors, displays, motors, and communication modules.
Software: Custom firmware developed for specific functions, typically in C or C++.
Popular Programming Languages
C: Most widely used due to its efficiency and low-level hardware access.
C++: Used when object-oriented design is required.
Assembly: For highly optimized or time-critical routines.
MicroPython: Python for microcontrollers (e.g., ESP8266, Micro:bit).
Getting Started with Embedded Programming
Select Your Platform:
Beginners: Arduino (easy setup, wide community support)
Advanced: STM32, Raspberry Pi Pico, ESP32
Set Up Your Development Environment:
Install IDEs like Arduino IDE, PlatformIO, STM32CubeIDE
Download necessary drivers and board support packages
Write and Upload Code: Create simple programs like blinking an LED, then expand to sensors, displays, and communication modules.
Example: Blink an LED with Arduino
void setup() { pinMode(13, OUTPUT); // Set pin 13 as output } void loop() { digitalWrite(13, HIGH); // Turn LED on delay(1000); // Wait for 1 second digitalWrite(13, LOW); // Turn LED off delay(1000); // Wait for 1 second }
Tools and Debugging
Serial Monitor: For real-time debugging and logging.
Oscilloscope & Logic Analyzer: For electrical signal inspection.
In-Circuit Debuggers: Like JTAG or ST-Link for low-level debugging.
Best Practices
Write modular and readable code.
Use debouncing for physical inputs like buttons.
Handle memory carefully to avoid overflows.
Optimize power usage in battery-powered devices.
Conclusion
Embedded systems programming is both fun and powerful, offering endless possibilities for innovation in hardware and software. Whether you’re building a home automation project or diving into the world of IoT, understanding the basics of embedded programming gives you the foundation to create smart, responsive devices.
0 notes
Text
Top 5 Home Automation Electronics Kits for Beginners in 2025
Home automation is changing the way we live, making everyday tasks easier and more efficient. From controlling lights to setting up security systems, smart technology is transforming our homes. If you're just starting to explore this exciting field, one of the best ways to dive in is with a home automation electronics kit. These kits give you the chance to learn and create your own smart home solutions.
In this article, we will explore the top 5 home automation electronics kits for beginners in 2025. Whether you’re new to electronics or just starting to get into home automation, these kits offer a great introduction to the world of DIY smart homes.
1. Arduino Starter Kit for Home Automation
What It Is:
Arduino is one of the most popular platforms for creating home automation projects. The Arduino Starter Kit includes an Arduino board, a variety of sensors, and all the necessary components to start building your first smart home devices.
Features:
Complete Kit: Includes the Arduino Uno board, wires, LEDs, temperature sensors, and more.
Easy Tutorials: Many beginner-friendly guides and projects are available online.
Open-Source: You can freely modify and improve your projects as you gain more experience.
Large Community: Lots of support and advice from other users.
Why It’s Great for Beginners:
Affordable: It’s one of the cheaper options for home automation kits.
Simple Programming: The programming language (C++) is beginner-friendly and well-documented.
Expandable: As you learn, you can add more sensors and devices to your projects.
Example Projects:
Automate lights with motion sensors.
Control a fan based on temperature.
Build a smart lock system using an RFID sensor.
2. Raspberry Pi 4 Home Automation Kit
What It Is:
The Raspberry Pi 4 is a small but powerful computer that can be used to control and manage your home automation system. With this kit, you’ll have the tools to run automation software and integrate smart devices.
Features:
Powerful Processor: The Raspberry Pi 4 has strong performance for handling complex tasks.
Versatile Software: It runs Raspberry Pi OS, which supports different home automation programs.
Connectivity: It includes Wi-Fi, Bluetooth, and Ethernet options to connect to your devices.
Complete Kit: Comes with a Raspberry Pi 4, power supply, pre-loaded SD card, and cooling accessories.
Why It’s Great for Beginners:
User-Friendly: Despite its power, the Raspberry Pi is beginner-friendly with lots of helpful tutorials.
Affordable: A powerful option that doesn’t cost a lot.
Expandable: You can add extra sensors, cameras, and devices as you go.
Example Projects:
Build a smart home dashboard to control all your devices.
Create a home security system using cameras and motion sensors.
Design a smart thermostat that adjusts the temperature based on the weather.
3. Sonoff DIY Smart Home Kit
What It Is:
Sonoff is known for offering simple and affordable home automation solutions. The Sonoff DIY Smart Home Kit includes smart plugs, switches, and a hub that can be easily controlled using a smartphone app.
Features:
Smart Plugs & Switches: Control your home appliances remotely through the eWeLink app.
Voice Control: Works with Alexa and Google Assistant for voice commands.
Cloud Control: Control devices from anywhere using the internet.
Wide Compatibility: It works with most home appliances.
Why It’s Great for Beginners:
Simple Setup: You don’t need to deal with complicated wiring—just plug in your devices and start using them.
No Programming Required: The app makes it easy to control devices without any technical skills.
Affordable: The kit is budget-friendly, making it an excellent entry point for beginners.
Example Projects:
Set up a lighting system that turns on based on motion or time.
Automate appliances like coffee makers and fans.
Use a motion sensor to trigger a lamp to turn on when someone enters the room.
4. Makeblock mBot Ultimate 2.0 Robotics Kit (with Home Automation Projects)
What It Is:
The Makeblock mBot Ultimate 2.0 is primarily a robotics kit but can also be used to create home automation projects. It’s a great option for beginners who want to learn both robotics and automation.
Features:
Includes Sensors: Comes with motion, temperature, and light sensors.
Visual Programming: Uses mBlock, a drag-and-drop programming tool based on Scratch, making it easy to learn coding.
Modular Design: You can add different parts to customize your projects.
App Control: The mBot can be controlled using a mobile app, allowing you to set up automated routines.
Why It’s Great for Beginners:
Educational: Combines fun robotics with practical home automation skills.
Easy to Program: The visual programming interface is beginner-friendly.
Customizable: You can build different types of projects, including home automation systems.
Example Projects:
Set up a security system with motion detection and video.
Build a smart pet feeder that can be controlled from your phone.
Create a lighting system that turns on or off based on occupancy.
5. Tinkr Home Automation Kit
What It Is:
The Tinkr Home Automation Kit is a beginner-friendly kit designed for easy setup and control of smart home devices. It comes with various sensors, smart plugs, and a user-friendly app.
Features:
Complete Kit: Includes motion, light, and temperature sensors, as well as smart plugs and switches.
Easy-to-Use App: The Tinkr app makes it simple to control your devices and set up automation routines.
Cloud Control: Allows you to control your devices from anywhere using the internet.
Wireless: Uses Wi-Fi or Zigbee for easy connections with smart devices.
Why It’s Great for Beginners:
Plug-and-Play: No complex wiring—just follow the instructions in the app.
Simple Interface: The app’s interface is designed to be easy for beginners.
Affordable: It’s a great value for those just getting into home automation.
Example Projects:
Set up smart lighting that adjusts based on room occupancy.
Automate your air conditioning system to turn on when the temperature reaches a certain level.
Build a smart garden irrigation system that activates when the soil is dry.
Conclusion
As home automation becomes more popular, there are plenty of options for beginners to explore. The kits listed here offer an accessible and hands-on way to learn about smart technology and electronics. Whether you choose a simple option like the Sonoff DIY Smart Home Kit or a more powerful solution like the Raspberry Pi 4, each of these home automation electronics kits provides a great starting point for your smart home projects.
By diving into home automation, you’ll not only be able to make your home smarter and more efficient, but you’ll also gain valuable skills in electronics, programming, and problem-solving. So, pick your favorite kit, get started, and enjoy the process of creating your own smart home!
0 notes
Text
Essential Equipment & Tools for a School Robotics Lab

Introduction
In today's fast-paced world, integrating robotics into education is more important than ever. A well-equipped school robotics lab fosters creativity, problem-solving, and technical skills among students. However, setting up an efficient and cost-effective robotics lab requires careful planning and selecting the right tools. This guide will explore the essential equipment and tools needed to establish a successful robotics lab setup in school.
1. Planning the Robotics Lab Setup in School
Before acquiring equipment, schools must define their objectives. The key factors to consider include:
The age group of students
The curriculum and learning goals
Available space and budget
Having a structured plan will help schools create a well-organized and effective robotic lab for school that meets the needs of students and educators alike.
2. Essential Robotics Kits
Robotics kits form the foundation of any school robotics lab. Some popular options include:
LEGO Mindstorms EV3 – Ideal for beginners and intermediate learners.
VEX Robotics – Best for advanced programming and mechanical engineering skills.
Arduino and Raspberry Pi Kits – Great for teaching coding and electronics.
These kits ensure hands-on learning and make robotics engaging for students.
3. Computers and Software
Every robotics lab needs high-performance computers with appropriate software to program and test robots. Some recommended software includes:
Scratch and Blockly – Perfect for younger students starting with block-based coding.
Python and C++ – Essential for advanced coding and real-world applications.
Robot Operating System (ROS) – A professional platform for designing robotic systems.
Providing access to modern software ensures that students learn industry-relevant skills.
4. 3D Printers and Prototyping Tools
3D printers are becoming an essential tool in robotics labs for schools. They allow students to design and print custom parts for their robots, enhancing their creativity and engineering skills. Some great choices include:
Creality Ender 3 – Budget-friendly and beginner-friendly.
Ultimaker 2+ – High-quality prints for advanced prototyping.
Prototyping tools like laser cutters and soldering kits can further improve hands-on learning experiences.
5. Sensors and Microcontrollers
Adding sensors to robots allows them to interact with their environment. Commonly used sensors include:
Ultrasonic sensors – For distance measurement.
Infrared sensors – For detecting obstacles.
Temperature and humidity sensors – Useful for science projects.
Microcontrollers like Arduino Uno and Raspberry Pi are great tools for coding and controlling robotic functions.
6. Mechanical and Electronic Components
To build fully functional robots, students need access to mechanical and electronic components, such as:
Motors and servos – To enable movement.
Wheels and gears – For mobility and precision.
Breadboards and circuit boards – For assembling electronic circuits.
Having these materials available ensures students can experiment and build various robotics projects.
7. AI and Machine Learning Integration
With AI becoming an integral part of robotics, integrating AI tools in school robotics labs can enhance student learning. AI-powered software such as TensorFlow and OpenCV can help students explore computer vision, automation, and intelligent robotics applications.
8. Collaboration and Safety Equipment
Creating a collaborative environment in the robotics lab is essential. Essential items include:
Workbenches and desks – To provide enough workspace.
Storage units – For organizing tools and components.
Safety gear – Including gloves, goggles, and fire extinguishers to ensure student safety.
Conclusion
A well-structured robotics lab setup in school opens doors for students to explore STEM education in an interactive and engaging way. Schools that invest in quality robotics kits, essential software, and advanced technology like AI will empower students with skills for the future. By implementing these tools and strategies, schools can create an innovative learning environment that prepares students for future tech careers.
0 notes
Text
How will AI Power the Next Generation of Healthcare Wearables?
Wearables have become one of the most sought-after tools for proactive healthcare and wellness management. Be it tracking heart rate, ECG, blood oxygen levels, and fall detection using the Apple Watch; monitoring blood glucose levels with Dexcom G6; gaining crucial insights into one’s sleep quality, heart rate, and body temperature with the Oura Ring; or using the iRhythm Zio Patch for extended ECG monitoring to diagnose heart conditions; wearables have become an integral part of our healthcare and wellness objectives.
Nevertheless, the future of these devices is even more promising, thanks to the integration of Artificial Intelligence in wearable app development. But how exactly will AI power the next generation of healthcare wearables? What should be the approach of healthcare and wellness providers? Let’s explore!
The Convergence of Wearables and AI
Artificial Intelligence has already made significant strides in healthcare, from diagnosing diseases with greater accuracy to predicting health trends. Wearable devices, which have traditionally focused on tracking physical metrics, are now set to evolve by incorporating AI algorithms. This convergence of AI and wearables will enable devices to do far more than simply collect data; they will offer actionable insights, personalized health recommendations, and even early warnings about potential health issues.
Key Drivers of Convergence
Miniaturization of Hardware: The development of compact sensors and processors enables wearables to host AI capabilities without compromising comfort.
Data Proliferation: Wearables generate vast amounts of biometric and activity data, fueling AI algorithms to deliver accurate insights.
Cloud and Edge Computing: These technologies empower wearables with the ability to process data locally (edge) or leverage extensive computational resources (cloud).
Emerging Trends
Devices like AI-integrated patches and smart glasses are becoming diagnostic tools, bridging the gap between home care and clinical settings.
AI dynamically adjusts wearable interfaces, enhancing accessibility and usability for diverse users.
AI wearables integrate seamlessly with smart home and IoT devices, creating a unified personal technology environment
Use Cases of AI-powered Wearables
Healthcare Monitoring
Early Diagnosis: AI-powered wearables monitor vital signs like heart rate, blood oxygen levels, and glucose levels, identifying anomalies indicative of conditions like arrhythmias or diabetes.
Chronic Disease Management: Continuous monitoring and AI analysis help patients manage chronic illnesses effectively, providing actionable feedback to users and healthcare providers.
Fitness and Lifestyle
Personalized Fitness Plans: AI in wearables interprets activity levels and fitness goals to design tailored workout regimens.
Sleep Analysis: Smart wearables analyze sleep patterns, suggesting interventions to improve rest quality.
c. Mental Health Support
AI-enabled wearables detect stress through biometric markers like heart rate variability and galvanic skin response. They offer real-time interventions, such as guided breathing or meditation exercises.
d. Enhanced Productivity
Smart Assistants: Voice-controlled AI assistants in wearables streamline task management and reminders.
Context-Aware Notifications: AI filters and prioritizes alerts based on user context to reduce distractions.
How to code an AI-powered Wearable?
1. Choose Your Wearable Hardware
Select a suitable platform for your wearable, such as:
Smartwatches (Fitbit Smartwatch, Apple Watch, Google Pixel Watch, etc.)
Fitness trackers (Fitbit, Garmin)
Custom hardware (using platforms like Arduino or Raspberry Pi with sensors)
Ensure your device has sensors like accelerometers, gyroscopes, heart rate monitors, or GPS, depending on the functionality you want.
2. Set Up Development Environment
Smartwatch/Phone Apps: Use SDKs for specific platforms like Apple's WatchKit, Google Fit, or other wearable APIs.
Custom Hardware: Use Arduino IDE, Raspberry Pi with Python, or ESP32 for Bluetooth connectivity.
3. Sensor Data Collection
Wearables collect various data types, such as:
Accelerometer data (motion, step count)
Heart rate (using sensors like PPG)
Temperature or humidity (depending on the wearable)
GPS data (for location tracking)
Use appropriate libraries or APIs to fetch sensor data. For example:
Apple Watch: Use HealthKit to retrieve health-related data.
Fitbit: Use Fitbit API for activity data.
Custom Hardware: Use libraries specific to sensors (e.g., Adafruit libraries for accelerometers or temperature sensors).
4. Preprocessing the Data
Before sending the data to your AI model, you'll often need to preprocess it:
Noise removal: Use filters to remove noise from sensor data.
Normalization: Normalize the sensor data for better model performance.
Feature extraction: Extract meaningful features (e.g., step count, movement patterns, heart rate variability).
5. Develop or Integrate AI Models
AI models can enhance the wearable’s functionality. Examples include:
Activity recognition: Detect types of activities (walking, running, etc.) using sensor data.
Health prediction: Predict heart health, stress levels, or sleep patterns.
Personalized feedback: Provide suggestions for exercise, rest, etc.
You can develop machine learning models in:
Python: Using frameworks like TensorFlow, Keras, or PyTorch.
Edge AI frameworks: For running models directly on the wearable (e.g., TensorFlow Lite for mobile/embedded devices).
You might need to train the models on large datasets (e.g., sensor data labeled with activities or health metrics). Once the model is trained, convert it into a format suitable for deployment on the wearable device.
6. Deploying the AI Model
On-device AI: For real-time AI processing, you can deploy the model directly onto the wearable’s hardware (using TensorFlow Lite, CoreML for Apple devices, etc.).
Cloud AI: Alternatively, send data to the cloud (via Bluetooth or Wi-Fi) for processing. This requires setting up APIs for data transmission and creating cloud-based AI models.
7. Integrating User Interface
Smartwatch Apps: Use UI frameworks like SwiftUI (for iOS) or Jetpack Compose (for Android) to display AI insights.
Feedback and Interaction: Depending on the application, give the user real-time feedback (e.g., "You're walking briskly, keep going!") or notifications for specific health metrics (e.g., "Your heart rate is high, take a break").
8. Testing and Optimization
Test your wearable AI application under real-life conditions to ensure it responds well to various user behaviors and sensor inputs.
Optimize power consumption, especially for battery-powered wearables.
Ensure that AI computations do not overburden the device's processor or memory.
9. Security and Privacy
Wearable devices handle sensitive personal data (health data, location, etc.), so it’s critical to ensure strong encryption for data storage and transmission.
Implement secure authentication methods, like two-factor authentication for cloud-based services.
Comply with privacy regulations like GDPR or HIPAA.
10. Continuous Improvement
Continuously gather more data and retrain your models to improve accuracy.
Collect user feedback to refine the AI’s predictive abilities and response.
By combining hardware with AI models, you can create a powerful wearable device that offers personalized, intelligent experiences to users.
Example Code Snippet (Activity Recognition with Python)
For custom hardware (e.g., Arduino with accelerometer):
import numpy as np
from sklearn.svm import SVC
# Collect and preprocess sensor data (e.g., accelerometer)
X_train = np.array([...]) # training data (sensor values)
y_train = np.array([...]) # corresponding activity labels
# Train a simple classifier
clf = SVC(kernel='linear')
clf.fit(X_train, y_train)
# Once trained, predict activity based on new sensor data
X_test = np.array([...]) # new data
activity = clf.predict(X_test)
print(f"Predicted activity: {activity}")
Challenges and Considerations
Data Privacy: The sensitive nature of health and biometric data requires stringent security measures and transparent policies.
Battery Life: Advanced AI processing demands significant power, pushing the need for innovations in battery technology.
Accuracy and Bias: AI models must be rigorously tested to ensure unbiased and precise outputs, particularly in healthcare applications.
Future Outlook
The next generation of healthcare wearables powered by AI is no longer a distant vision; it's on the horizon—and it’s going to change the way we approach healthcare app development forever. The convergence of AI and wearables is poised to redefine how humans interact with technology, transforming them into indispensable tools for health, productivity, and well-being. As technology advances, the integration of wearables with AI will likely expand into augmented reality (AR), virtual reality (VR), and neural interfaces, unlocking unprecedented possibilities.
0 notes
Text
Which Are the Most Advanced Electronic Laboratory Equipment for Education in India?

Electronic laboratory equipment is an integral part of educational institutions, where it allows the student to gain some practical experience regarding electrical and electronic concepts. Since technology is always under innovation, modern laboratories require good quality and innovative implements to enhance the learning experience in laboratories. Finding the right electronic laboratory equipment manufacturer and supplier in India is the right degree of precision, reliability, and durability. With advanced Electronic laboratory equipment, students learn technical skills along with a practical understanding of circuits, microcontrollers, and communication systems. In this blog, we mentioned some of the most advanced electronic laboratory equipment for education in India.
8 Most Advanced Electronic Laboratory Equipment for Education in India
Digital Oscilloscope
A digital oscilloscope is an essential measuring and analyzing device for electrical signals in real time. It has become a crucial teaching tool for students in many educational labs teaching waveforms, voltage levels, and signal analysis. Modern oscilloscopes are high bandwidth, touch screen, and with advanced triggering, making them quite efficient for the student to learn.
Function Generator
A function generator is an essential device used to generate different kinds of electrical waveforms, like sine, square, and triangular waves. The function generator is mainly used for circuit testing in educational laboratories or for research projects. Advanced models have frequency modulation, phase-locking capabilities, and digital control for precision.
According to Wikipedia, In electrical engineering, a function generator is usually a piece of electronic test equipment or software used to generate different types of electrical waveforms over a wide range of frequencies. Some of the most common waveforms produced by the function generator are the sine wave, square wave, triangular wave and sawtooth shapes.
Spectrum Analyzer
Spectrum analyzers measure the electric signal frequency spectrum. They teach students about signal strength, bandwidth, and distortion from communication systems. Modern spectrum analyzers include high-speed digital processing, a touchscreen interface, and wireless connectivity for remote monitoring.
Digital Multimeter
It is an essential tool used in measurements of voltage, current, and resistance. The modern Digital Multimeter offers high resolution, data logging, Bluetooth connectivity, and more, so it is a good educational tool.
Microcontroller Development Board
Embedded microcontroller development boards such as Arduino and Raspberry Pi are used in educational institutions to teach students the fundamentals of an embedded system. With this board, students will be able to develop real-time applications, offering a practical platform in terms of programming and integration of hardware into software.
Power Supply Unit
Testing and powering electronic circuits require a regulated power supply. In a modern power supply, digital displays along with programmable voltage settings and overcurrent protection safeguard the integrity of experiments in the laboratory.
Soldering and Desoldering Station
Soldering stations are the stations used to assemble and repair electronic circuits. A high-class soldering station, with highly sensitive temperature regulation and ESD-protected working features, includes high-speed heating for student learning through PCB designing and repairing techniques.
Wireless Communication Trainer Kit
A wireless communication trainer kit is intended to help the student understand a number of different wireless technologies such as Bluetooth, Wi-Fi, and RF communication. These kits make it possible to demonstrate complex wireless concepts with practical demonstrations and experiments.
Enhancing Engineering Education in India through Advanced Electronic Laboratory Equipment
In accordance with a research study done by Smart Learning Environments, adding high-technology Electronic laboratory equipment, including augmented reality (AR) systems in the educational process of engineering improves the level of practical skills and students' understanding of complex contents. The analysis showed that students trained by using AR tools improved their skills for working with laboratory instruments like an oscilloscope and a function generator and obtained better practice-based assessment results. This helped build not only confidence but also relieved the cognitive load of having their familiarization with equipment through virtual devices before the real experiment was undertaken. Such advanced tools in engineering curricula at Indian colleges help close that gap between the knowledge acquired and the moment of practical application, hence setting up an effective learning environment.
Why Choose Eduscope India?
Eduscope India is the leading electronic laboratory equipment manufacturer and supplier in India, that offers high-quality innovative and educational solutions for laboratories. Steady on precision and durability, products from Eduscope India address the latest industry standard.
This equipment helps in learner practice and real-time experiments to boost students' learning abilities. In addition, Eduscope India offers extended support by providing proper installation, training, and maintaining all its products.
Conclusion
Electronics Laboratory Equipment for students is something that needs to be chosen right to provide the students with practical experience and technical know-how. The advanced laboratory equipment mentioned above increases the efficiency of learning by providing the student with problem-solving skills and innovation. For any institution looking for the best electronic laboratory equipment manufacturer and supplier in India, Eduscope India is one of the finest, with its commitment to quality, reliability, and customer support. A laboratory investment in quality helps to prepare future-ready learning environments in electronics preparation for real-world applications.
#electronic laboratory equipment manufacturer and supplier in india#electronic laboratory equipment manufacturer and supplier#electronic laboratory equipment manufacturer
0 notes
Text
Arduino Projects
Arduino is a microcontroller platform made to facilitate hardware integration and programming. Each of its boards, including the Arduino Uno, Nano, and Mega, is designed to meet a distinct set of requirements. When used in conjunction with the Arduino IDE, users may easily write, upload, and execute code.
Users can design projects ranging from basic LED blinkers to intricate robotics and Internet of Things systems thanks to the platform's extensive library of sensors, modules, and components.
Top Arduino Project Ideas
System for Home Automation
An Arduino with a smartphone app can be used to control lights, fans, and other appliances. Your system can become more intelligent and energy-efficient by integrating sensors like temperature or motion detectors.
The weather station
Construct a personal weather station to track air pressure, temperature, and humidity. You can gather data using sensors like the DHT11 and BMP180, show it on an LCD screen, or post it online for remote access.
Robot That Avoids Obstacles
This well-liked project for robotics novices is teaching a robot to use ultrasonic sensors to navigate around obstacles.
Intelligent Plant Monitoring System
An Arduino-based monitoring system that measures temperature, light intensity, and soil moisture can help you keep your plants healthy. Even when it's time to water your plants, it may let you know.
Alarm System with Arduino
Create an Arduino-powered alarm system with a buzzer, keypad, and motion sensors to increase security. For workplace or home security, this project is perfect.
Pet Feeder with Automation
Construct a pet feeder that automatically delivers food depending on a weight sensor reading or at predetermined intervals.
Internet of Things Door Lock
Create a smart door lock that you can operate from a distance using Bluetooth or Wi-Fi by integrating an Arduino with an RFID scanner or fingerprint sensor.
Make Your Own Game Console
Convert an Arduino board with basic buttons and a display into a vintage game console.
How to Get Started with Arduino Projects
Select the appropriate board:
Choose an Arduino board based on the needs of your project. The Arduino Uno is an excellent place to start for the majority of novices.
Assemble the parts:
Determine the sensors, actuators, and other parts your project needs. A wide range of Arduino-compatible components are available on websites like Adafruit, SparkFun, and Amazon.
Set up the Arduino IDE:
Install the Arduino IDE by downloading it from Arduino.cc. You can develop code and upload it to your board using this software.
The universe of creativity and invention is unlocked by Arduino projects. Arduino offers the resources and network to realize your ideas, whether you want to study robotics, automate your house, or develop a ground-breaking technology.
Explore the world of Arduino now and unleash your creative side! Do you have a favorite idea for an Arduino project? Tell us about it in the comments section below.
To know more, click here.
0 notes
Text
Exploring the World of Electronics: A Comprehensive Guide

Exploring the World of Electronics: A Comprehensive Guide
The field of electronics is one of the most exciting and dynamic domains that has revolutionized the way people live, work, and communicate. Electrons have become the backbone of modern technology, from advanced smartphones to laptops and the latest robots and renewable energy systems.Well, with this in mind, any person who wants to venture into any electronics undertaking has to know the rudimental principles of the said project, acquire all required pieces of equipment, and find the appropriate platform on which the whole thing can be bought or sold. In this write-up, we will therefore guide you on how one can get the best results regarding his electronics project by exploring and using Classimonk as well as Chennai Free Classified Ads.
Why electronic Projects Matter
The project is not just for a professional or a student in an engineering degree but rather for a curious mind interested in innovation. It enables a fundamental understanding of the principles behind physics and electrical engineering, enhances problem-solving skills, and cultivates creativity. Whether you are creating a simple LED circuit or working on some complex IoT device, it is a priceless experience.
Sourcing Components for Your Electronics Project
The success of any electronics project highly depends on the quality and availability of its components. Long lists of essentials include resistors, capacitors, microcontrollers, sensors, and wires, and so on. It's a big task to find a reliable source for all of these, but not hard at all with the help of Chennai Free Classified Ads.
Chennai Free Classified Ads is a lively marketplace offering everything from electronic component sales to tool sales to entirely assembled products. This has enabled you to view comparative pricing and spec data along with user reviews so you can buy without needing any stress. This website is handy for students and hobbyists trying to get equipment without an added layer of hassle for expensive things.
Classimonk: A Platform for Electronics Enthusiasts
Classimonk is another good resource for electronics enthusiasts. This platform gives a friendly interface to buy, sell, and even exchange electronics-related items. Be it finding a rare microcontroller or selling excess components from the previous project, Classimonk simplifies the process. Its categorized listings and advanced search features help you find what you need quickly.
Classimonk is also community-driven, as it allows users to share tips, tutorials, and project ideas. This makes it more than just a marketplace; it is a hub for learning and collaboration. For example, if you are working on a project that involves Arduino programming, you may find helpful tutorials and discussions on Classimonk's forums.
Project Ideas to Kickstart Your Journey
If you’re unsure where to begin, here are a few electronics project ideas:
Smart Home Automation System: Use microcontrollers and sensors to create a system that controls lights, fans, and appliances remotely.
Portable Charger: Build a power bank using lithium-ion batteries and a charging circuit.
Weather Station: Use sensors like DHT11 and BMP180 to measure temperature, humidity, and atmospheric pressure.
Line-following robot: Design a robot that follows a predetermined path using infrared sensors.
Renewable Energy Model Device Powered by Solar Energy Design.
Benefits of Using Online Platforms
In both Chennai Free Classified Ads and Classimonk, several benefits come to electronics enthusiasts:
Inexpensive Solutions: Purchased second-hand or surplus components at economical prices.
An extensive variety: Access broad-based products from multiple sellers
Support from a community: Obtain advice and inspiration from the community of like-minded folks
Easy: Browse through and buy from home.
Conclusion
Electronics project work is one such rewarding journey that brings a blend of creativity, technical skills, and innovation in one. Chennai Free Classified Ads and Classimonk facilitate the journey by making these affordable components available to their customers, offering them worthwhile resources, and creating an interactive community that is essential for any kind of endeavor. Whether you are an expert or a curious amateur, these platforms can actually bring your ideas to reality.
So, get deep into the world of electronics, explore the limitless opportunities, and make your name in this dynamic field with the right tools, resources, and community support; tomorrow's breakthrough project could just be waiting for you.
0 notes
Text
Final Challenge...Iron Chef style 🍲
This week's challenge was to go completely solo and make our own code and wire the Arduino board but Iron Chef style, which meant there would be a "secret ingredient". I had to also include the DC motor using a sensor. Well...turns out my main dish was going to be getting the motor to work! I decided that I wanted the motor to be able to turn on using the temperature sensor. So, set the code for the motor to turn ON when the temp was 69 degrees or greater and turn OFF when the temperature was below that. IT'S BEEN 84 YEARS, but finally got it to work.
This is attempt 1...the motor would randomly work and I thought maybe the house was just too cold so I took it over by the fire and that was too HOT 🔥. BURN!!


youtube
Worked with the code and the wiring for what felt like FOR-EH-VER!!! Turns out the motor was causing issues and needed it's own power supply. This was after my computer turned off and the breaker flipped. WHOOPS!
youtube
Finally got the secret ingredient working! Praise sweet omnipotent baby Jesus! Now I could finally add an LED to "spice" it up a little bit 🌶️
youtube


Real-World Applications: Temperature-Controlled Cooling:
Electronics Enclosures: Keep electronic components within a safe operating temperature range by automatically turning on a cooling fan when the temperature rises. This is crucial for devices like 3D printer control boxes, gaming PCs, or audio amplifiers.
Server Rooms: Maintain optimal temperatures in server rooms or data centers by triggering fans to prevent overheating of servers and network equipment.
Greenhouses: Regulate the temperature inside a greenhouse by activating fans to exhaust hot air when the temperature exceeds a certain threshold.
After many many many many MANY attempts at the code and wiring, I was able to create a little sum'n sum'n. It may not be Iron Chef worthy, but it's a win in my kitchen. Literally. I did this at my kitchen table.
Me after all of this.

0 notes
Text
DIY Smart Garden with Automated Irrigation System
Introduction
Welcome to our DIY project guide on creating a Smart Garden with an Automated Irrigation System! This innovative project uses technology to optimize water usage, ensuring your plants receive the right amount of hydration while minimizing waste. Perfect for home gardens, greenhouses, or small farms, this automated system uses soil moisture sensors and weather data to control water valves efficiently.

Why Build a Smart Garden?
Traditional gardening methods often lead to over-watering or under-watering plants, which wastes water and can harm your garden. By integrating smart technology into your gardening routine, you can monitor and control your garden’s irrigation system remotely, allowing for efficient water management.
Benefits of a Smart Garden
Water Conservation: Reduces water waste by watering only when necessary.
Healthier Plants: Ensures optimal moisture levels for plant growth.
Remote Monitoring: Check and control your garden from anywhere.
Data Insights: Analyze watering patterns and make informed decisions.
Key Components and Technologies
To build your Smart Garden, you will need the following components:
Microcontroller: Choose either a Raspberry Pi or Arduino as the central processing unit for your system.
Soil Moisture Sensors: These sensors measure the moisture level in the soil.
Temperature and Humidity Sensors: Monitor the environmental conditions that affect plant watering needs.
Water Pump or Solenoid Valves: Control the water flow to your plants based on sensor data.
Wi-Fi Module: Enables remote monitoring and control through a web application or mobile app.
Cloud Service: Use Cloudtopiaa to store and analyze data over time. This cloud platform allows you to log sensor data, analyze trends, and remotely monitor your garden’s status.
Additional Tools:
Jumper wires and a breadboard
A power supply for the microcontroller
Tubing for water delivery (if using a pump)
Step-by-Step Guide
Step 1: Set Up the Microcontroller
Choose Your Microcontroller: For this guide, we’ll use a Raspberry Pi for its ease of use and capabilities. Install the latest version of Raspbian OS.
Connect the Components:
Connect the soil moisture sensors to the GPIO pins on the Raspberry Pi.
Connect the temperature and humidity sensors (DHT11 or similar).
If using a water pump, connect it to a relay module that can be controlled by the Raspberry Pi.
Step 2: Install Required Libraries
Open the terminal on your Raspberry Pi and install necessary libraries for sensor data collection and Wi-Fi connectivity:sudo apt-get update sudo apt-get install python3-pip pip3 install Adafruit_DHT
Step 3: Program the Sensors
Create a Python script to read data from the sensors. Here’s a basic example:import Adafruit_DHT import time import RPi.GPIO as GPIO
# Set GPIO mode GPIO.setmode(GPIO.BCM)
# Sensor setup DHT_SENSOR = Adafruit_DHT.DHT11 DHT_PIN = 4 # GPIO pin for DHT sensor MOISTURE_PIN = 17 # GPIO pin for soil moisture sensor
def read_sensors(): # Read temperature and humidity humidity, temperature = Adafruit_DHT.read_retry(DHT_SENSOR, DHT_PIN) # Read soil moisture level moisture_level = GPIO.input(MOISTURE_PIN) return temperature, humidity, moisture_level
while True: temp, humidity, moisture = read_sensors() print(f'Temperature: {temp}°C, Humidity: {humidity}%, Soil Moisture: {moisture}') time.sleep(10)
Step 4: Control the Water Pump
Expand the script to control the water pump based on the moisture level:WATER_PUMP_PIN = 27 # GPIO pin for the water pump relay GPIO.setup(WATER_PUMP_PIN, GPIO.OUT)
def water_plants(moisture): if moisture < 300: # Adjust threshold based on your sensor calibration GPIO.output(WATER_PUMP_PIN, GPIO.HIGH) # Turn on water pump print("Watering the plants...") time.sleep(10) # Watering duration GPIO.output(WATER_PUMP_PIN, GPIO.LOW) # Turn off water pump
while True: temp, humidity, moisture = read_sensors() water_plants(moisture) time.sleep(600) # Check every 10 minutes
Step 5: Remote Monitoring and Cloud Integration with Cloudtopiaa
To monitor your garden remotely, integrate it with Cloudtopiaa for real-time data logging, trend analysis, and remote control of your irrigation system. Here’s how:
Sign Up and Set Up Cloudtopiaa:
Create an account on Cloudtopiaa and set up a cloud project for your garden.
Obtain your API key and configure the project to receive data from your Raspberry Pi.
Install Cloudtopiaa SDK:
Install the Cloudtopiaa SDK for data transmission. In your Raspberry Pi terminal, install the SDK:pip3 install cloudtopiaa-sdk
Update Your Python Script to Log Data to Cloudtopiaa:
Use the Cloudtopiaa SDK to log sensor data, set alerts, and monitor trends.
from cloudtopiaa_sdk import Cloudtopiaa
cloudtopiaa = Cloudtopiaa(api_key='Your_Cloudtopiaa_API_Key')
while True: temp, humidity, moisture = read_sensors() # Log data to Cloudtopiaa cloudtopiaa.log_data({ "temperature": temp, "humidity": humidity, "moisture": moisture }) water_plants(moisture) time.sleep(600) # Check every 10 minutes
This integration enables you to monitor your garden’s conditions from anywhere, set up notifications when moisture levels are low, and analyze long-term data to optimize water usage.
Conclusion
Congratulations! You’ve successfully built a Smart Garden with an Automated Irrigation System using Cloudtopiaa. With this setup, you can efficiently manage your garden’s water needs, conserve resources, and monitor conditions from anywhere. As you refine your project, consider exploring additional features like integrating weather APIs for advanced irrigation control or adding more sensors to enhance functionality.
Additional Resources
Raspberry Pi Documentation
Arduino Project Hub
Cloudtopiaa Documentation
By applying these skills in IoT sensor integration, automation, and cloud data logging, you’re well on your way to mastering smart gardening techniques!
#cloudtopiaa #ITServices #SmartGarden #AutomatedIrrigation #DIYGarden #IrrigationTech #GrowWithTech
0 notes