#Artstudio pro basic tutorials
Explore tagged Tumblr posts
Visit Tumblr Blog
Explore Tumblr blogs with no restrictions, modern design and the best experience.
Last Seen Tumblr Blogs


Fun Fact
The KCSC sent more than 20K requests to delete posts related to prostitution and porn to Tumblr from January to June 2017.
Text
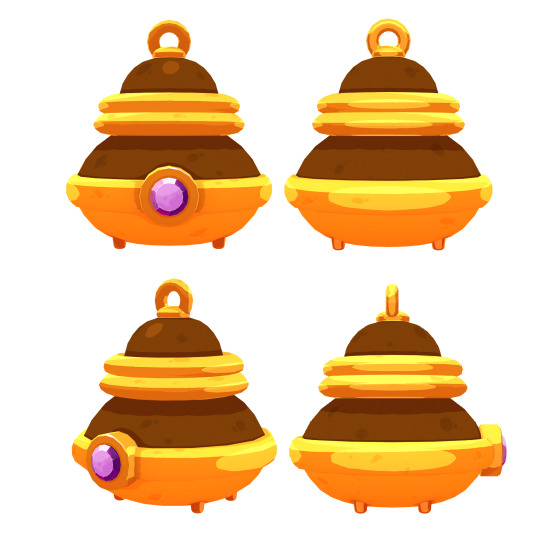


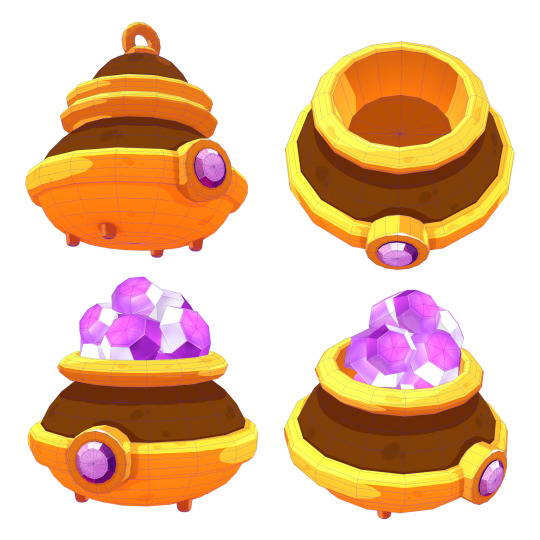

💎"Reward Pot" 💎
This is a companion piece to my Reward Vault. Meet its “younger sibling” --- Reward Pot.
Similar to the Reward Vault, the model was designed with Valence3D. Textured with Substance Painter. Rigged, animated and rendered with Autodesk Maya.
However, for this project, I tested a different approach to how I’ve been compiling and polishing up these squiggly iconimations I’ve been doing for fun. This rounds, I hopped over to my Ipad and worked with ToonSquid (and a bit of Artstudio Pro).
The main takeaway from this experiment for me was just how powerful ToonSquid for the Ipad was. I’ve lightly dabbled and played around with TS before.
I liked how straightforward and effortless ToonSquid was to learn. No time spent pulling teeth and hunting down tutorials just to get the basics. I was able to get the gist of ToonSquid’s very simple UI and figure out how to use it to suit my needs within a short minutes of poking around with the app. These are the types of apps that I tend to gravitate towards for my use.
I don’t care how powerful your app is or how many grand-spanking cool features you claim it has. If your app is too convoluted/confusing to use and/or makes the learning experience too much of a chore; made worse by lack of resources to help you understand the sheer BASICS of using the app, then it’s not going to be a fun time.
Thankfully this was bit not my experience with ToonSquid. It was already a pretty neat app from the jump and the recent 2.0 update with even more insanely useful features just made it even better.
This was my first time really pushing it to see if I can use ToonSquid in my work and for what it’s worth, the short answer is yes.
I had fun putting together the Maya animations for in TS and adding all the little effects you see in between. And I’m looking forward to testing it again for future projects.

Similar to Valence, ToonSquid has given me another incentive to fit it into my workflow and I’m looking forward to using it again going forward.
---
Tools Used: Valence3D (Ipad) | Maya 2024 | Adobe Substance 3D Painter | Artstudio Pro (Ipad) | ToonSquid (Ipad)
———————————————————————————————————
♦ SQUIGGLY ICONIMATIONS ♦ Reward Vault | HammerTime | BoomBoom
———————————————————————————————————
SC (2025)
#art of littlemissquiggles#squiggle 3d: prop project#squiggly 3d: mixed media project#squiggly iconimations#handpainted#game art animation
5 notes
·
View notes
Note
Hello, have you talker about your art process anywhere? I am very interested in how you got into glitch art/photomanipulation/however you’d call this, and i want to learn more. Do you have programs you use, plugins, do you use any physical media or scanography/scanner manipulation? I really want to hear about anything you wanna talk about regarding the creation process for your art. Thank you for sharing your work.
Yes! Unfortunately, I tried answering this question in a ton of detail but tumblr didn’t save it as a draft automatically - which was a frustrating experience to say the least - so this is my second attempt at answering this ask — you’ve asked a lot of really valuable questions here, I’ll do my best to be concise in my answers!
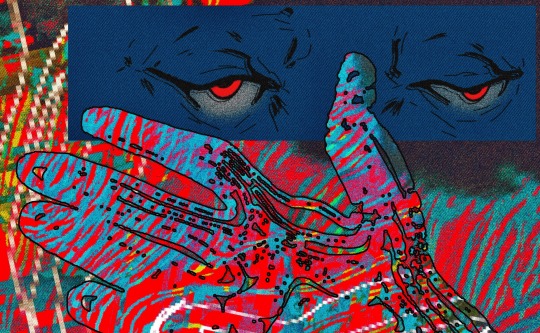
When I first began playing around with editing software, I was 16 and simply wanted to make memes and silly edits. This was around 2015-2016, whenever vaporwave was a fresh concept and Resonance was trending on Vine — which is a sentence that makes me feel fucking ancient. I was really entranced by vaporwave, which had this off-white nostalgia for post-consumerist 80s and 90s cultural trends. I later became interested in how many of those cultural trends persisted and evolved into Y2K culture and beyond.
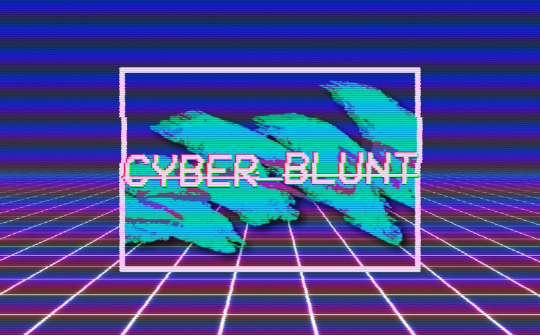
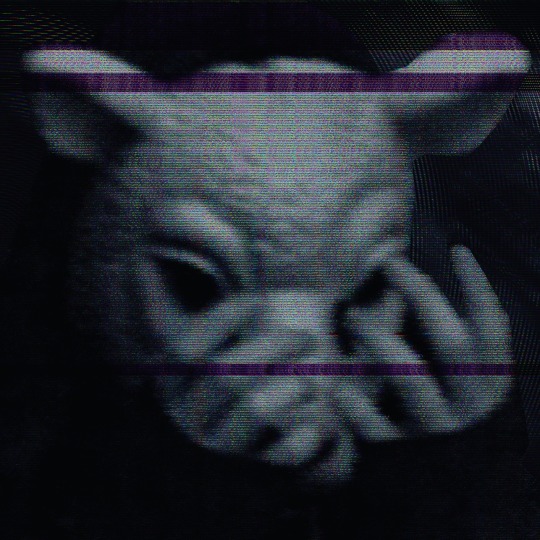

these are some of the images I was working on during that period of time, which were loosely inspired by indie horror and jazz cups and soundcloud rap. I was so proud of learning how to make my own scanlines using GIMP :)
Late 2016 I began my freshman year at a hoighty-toighty art school that I was too poor to attend, and quickly entered a mental health downward spiral — but I learned many valuable things, most of that info was painfully basic; my education prior to that was not anything special. I would not consider myself someone with exceptional aptitude for art — I just have a chronic compulsion to break things.
So, where to begin? My recommendation to anyone who’s newly interested in this style of artwork and editing:
Glitchet is a repository of info regarding many different styles and methods of distortion - from sonification to slipscans, there’s a ton of good info to comb through. Most of the techniques and tools covered are free to use, but there is some paid stuff out there too - but if you know your way around, virtually everything is free. More on that shortly :)
As for my process, programs, plugins, etc - there is a lot, and I don’t think I can cover everything. Primarily: Photoshop, After Effects, GIMP, ArtStudio Pro for iOS, Procreate, DestroyPix, and a number of other pieces of software that perform smaller, specific functions - such as BigJpg for AI-upscaling. I also employ analogue/physical distortion techniques like circuit-bending, slipscan, and more. These require additional hardware and knowledge; such as access to a copier/scanner, old CRT screens, and the ability to solder + work with low voltage electronics without accidentally shorting them out. Best part is that you can ✨layer✨ anything and everything, collage style — which is my favorite aspect, very playful and exploratory.
Now, if you’re like me and can’t afford fuck-all, but wholeheartedly believe that money should not be a limiting factor for creativity, I recommend installing the Adobe Creative Suite from downloadpirate(dot)com - which is also where I’ve gotten many of my plugins, although I do also pay for the plugins that I come to really appreciate, as they’re typically done by independent developers who could actually use the scratch. Same risks as any pirate cove: intrusive ads, popups, and redirect chains - use Ublock Origin to kill these annoyances. I recommend performing a scan with Malwarebytes after using any sketchy-looking-download site, but I was raised to be a bit paranoid so that’s purely preferential.
As for plugins:
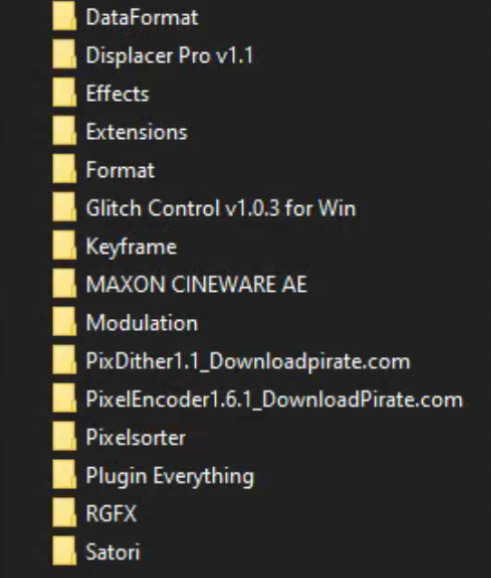
Filenames in this image may correspond with the developer of the plugin — you can just search the filename + ‘after effects plugin’ and you’ll almost certainly find your way.
Most commonly, I use Pixelsorter, Pixdither, Displacer Pro, Pixel Stretch, and Hacksaw — although some of the plugs that I use aren’t listed above, like Datamosher, which is a script-based solution that helps remove i-frames from a clip in After Effects, all without having to use VLC and any handwritten scripts (the ol’ fashioned way).
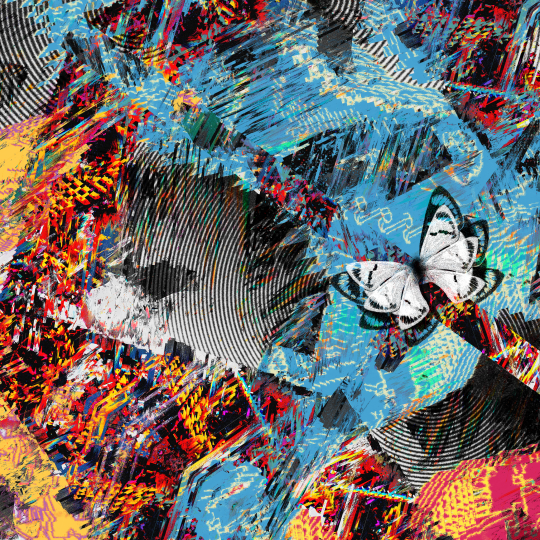
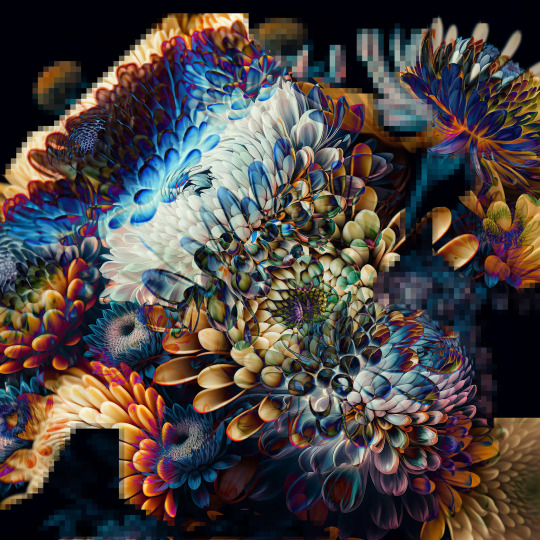

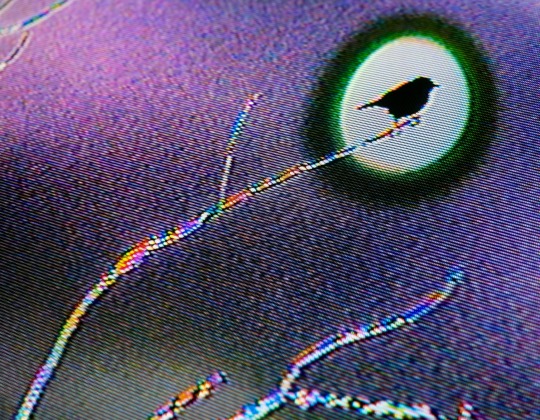
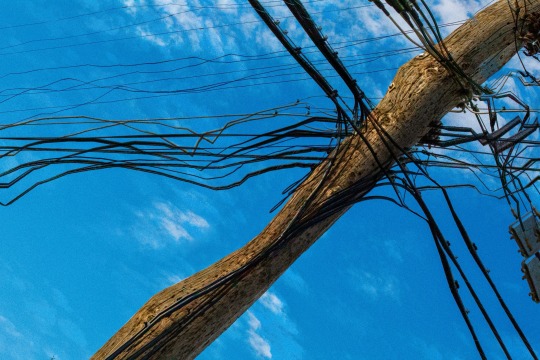
These are all from the last year or so, to show the relative growth I’ve experienced since my time spent as a creature of 16 years. Naturally, I’m also like, more of a person now - so the art is partly better because I’ve simply suffered more :p
When I started, I didn’t know any of the jargon or how to describe a specific effect I was trying to achieve - so I taught myself how to do stuff by googling around, and if I couldn’t find an answer (which was 90% of the time) I’d just try to figure shit out. Which rarely ever resulted in outright success, but was always a significant learning experience. That’s why I’m so quick to drop the link to Glitchet! Sometimes I can’t help but wonder what I’d be doing now if I had known there was an online library for info on how to produce different types of distortions - definitely would’ve spent less time trial-and-erroring my way through aesthetics.
In conclusion: there’s so much to try and you should try absolutely everything that interests you. It’s free if you’re cool enough to steal it; though some things (like hardware) are gonna cost. You don’t need talent or an exceptional education, though both of those things would certainly help — and you’ll never run out of things to learn because there are infinite ways to break shit. More so than anything else, you need a willingness to explore, experiment, and fail often. You’ll fail miserably at times, so a proclivity for humiliation is also a big plus. Eventually your failures will start looking like successes; but you’ll have forgotten the difference by then and will be free to make whatever the fuck you want :)
I’m glad that you enjoy the work! tumblr has always been the best place for me to share my lil jpegs and actually find a real sense of connection with others who are similarly jazzed. My life completely bottomed-out a few years ago and I was in a really bad place whenever I logged into my blog for the first time in half-a-decade and started posting again. My personal growth from then to now has been a strange and incredible experience, and I’m so glad that I had the art and the funny little gays on this website to help me through the toughest points and teach me valuable things about myself; so if I can give back a little knowledge, I’ll gladly take that opportunity! I hope these findings serve you as well as they’ve served me.
#my asks#THANK YOU!!#I hope this is formatted in a way that is easy to read - clarity and concision are not my strongest skills#godspeed!#documentation#reference
19 notes
·
View notes
Text
Artstudio pro basic tutorials

#Artstudio pro basic tutorials how to#
#Artstudio pro basic tutorials update#
#Artstudio pro basic tutorials full#
#Artstudio pro basic tutorials pro#
#Artstudio pro basic tutorials software#
#Artstudio pro basic tutorials how to#
It's done! However engrave effect is merged with background layer, read 'Engraved text advanced' to learn how to create engrave effect on a separate layer.
#Artstudio pro basic tutorials software#
Unfortunately I have no idea on how to effectively utilize all of it's various functions and I can find no tutorials that do not assume you already have a working knowledge of the software application.
#Artstudio pro basic tutorials pro#
ArtStudio Pro is more or less your Photoshop/Procreate on a budget. Artstudio Pro introduces a new layer system with grouping, non-destructive layer effects, and adjustment layers. My children gave me an iPad and I immediately bought the Artstudio app. Heres the top 10 digital art software for beginner and advanced creators to look. With it, you will be able to portray an object with a sense of dimension, so that it doesn’t lay flat like the surface it’s drawn or painted upon. It is what helps to create a believable sense of space in drawings, as well as paintings. Unhide and activate text layer, change its blending mode to "Overlay", set opacity to 50%.Ħ. And very out of touch with digital art applications. Perspective drawing gives a three dimensional feel to an otherwise 2D surface. Tap Filter->Stylize.->Bumpmap, set Bumpmap source: "Selection", Angle: 135, Strength: 15, Invert: ON. Hide text layer and activate layer with linen texture.Ĥ. You can also access our video tutorials, manual, character art and drawing tutorials, beginner comic and manga tutorials, animation tutorials, and see how. If you have any experience with Photoshop, ArtStudio Pro will probably feel more familiar, even down to things like menu items being in the same place. Not because Procreate is bad - it's outstanding - but because ArtStudio Pro is much better for me. Tap Select->Alpha to selection to get selection from a text then tap Select->Feather. I've basically stopped using Procreate in favor of ArtStudio Pro. Quick Tip - Artstudio Pro - iPad - How to quickly select layer. Type any text, we typed just big "X" with the following settings:ģ. Tutorials Pages: 1 2 Subject / Started by Replies / Views Last post. Set Color 1 to black, choose "Text" tool from left toolbar, and tap anywhere on canvas to create a text. Open downloaded linen texture as a new image - tap File->Import, choose "Create new image" option, and tap (if you saved it in Photos), or (if you copied it to clipboard).Ģ. ELASTIFY FILTER (aka Liquify) 8 modes: Smudge, Grow, Shrink, Twirl Right, Twirl Left, Shift, Smooth, Remove. We will use a linen texture created in "iOS Linen texture with embossed text" tutorial.ġ. With that said let’s get started with the first step in this watercolor painting tutorial – creating a pencil sketch.This tutorial shows how to create nice engraved text is a very simple way. The rectangle and ellipse tools help in creating basic shapes, which can be automatically filled with colour, and the aspect ratio can be locked to create.
#Artstudio pro basic tutorials update#
I will share with you how to mix your colors and use water to your advantage to create soft edges. The new FlipaClip Update with better performance and stability is now available Now you can organize projects into stacks, switch between light and dark. Painting lemons is fun due to their bright colors, which can help you learn a good deal about color mixing! In the classroom, teachers can use ArtStudio - Draw and Paint for a wide range of student learning experiences. We will be using lemons as our painting subject. This watercolor painting tutorial gives you step by step painting instructions to help make watercolor painting easy.
#Artstudio pro basic tutorials full#
The successor to our famous ArtStudio app has been redesigned, so many new features and improvements to the full advantage of the latest Metal technology, iCloud Drive, Apple Pencil and optimized. The successor to our famous ArtStudio app has been redesigned bringing many new features and improvements taking full advantage of the latest technologies Metal, iCloud Drive, and optimized for 64-bit multi-core processors to achieve the. When just getting started learning how to use watercolors, it can be a little daunting knowing how to to create a painting. Description: Introducing Artstudio Pro, the most powerful application for drawing and editing photos, is available for both iOS, and for the MacOS. Download 7-day free trial here: Free Trial Introducing Artstudio Pro, the most powerful painting and photo editing app available for both macOS and iOS. Completing the watercolor painting tutorial.Creating deeper shadow in the watercolor painting tutorial.Transitional Color between Shadow and Light.Starting the watercolor painting tutorial with the first spot of color.First I draw a pencil sketch of my painting.Getting started with watercolor painting.
0 notes
Link
Let's Color a Goblin with Procreate! Complete Color Process ##CouponUdemygratuit ##realdiscount #Color #Complete #Goblin #Lets #Process #Procreate Let's Color a Goblin with Procreate! Complete Color Process Hi! In this course, we'll be coloring a goblin! (The time-lapse in the promo video was created from the lessons of this course!) We'll go through coloring the entire illustration, step-by-step, from start to finish. I'll explain each part of the process throughout. I was inspired to create this course after someone paid me a wonderful compliment... "It reminds me of watching Bob Ross!" I think that's a reach, but I'll take it! :) I'll be showing you how I use Procreate to create rich colors all on one illustration! Procreate is a very powerful digital art application. I even use it in my professional work for comic book publishers like Image Comics and Top Cow. We'll cover flat colors, shadows, direct light sources, indirect lights, change the colors of the lines, and even add some special effects all on one illustration! I'll also include: A selection of Procreate brushes used in the course. My final layered file of the finished piece, so you can see how it all comes together! A version with only flat colors, so you can practice your lighting and shadows. An inked version to start with the flat colors. A sketch version if you want to ink it yourself. Important notes! Although I do explain what I'm doing throughout, this course assumes that you understand the most basic Procreate functions like where the brush and eraser tools are. This is not a "how to draw" course. The course will start with the ink drawing of the character. This course is focused on coloring this particular illustration. The lessons learned can be applied to almost any kind of art. This course uses the Procreate app for iPad. These principles can be applied to digital art apps that have layers, blending modes, and masks like Photoshop, Clip Studio Pro, ArtStudio Pro, Krita, etc, but only Procreate is used in this course. Who this course is for: Relatively new and intermediate digital artists. Students looking for a step-by-step course to complete an illustration. 👉 Activate Udemy Coupon 👈 Free Tutorials Udemy Review Real Discount Udemy Free Courses Udemy Coupon Udemy Francais Coupon Udemy gratuit Coursera and Edx ELearningFree Course Free Online Training Udemy Udemy Free Coupons Udemy Free Discount Coupons Udemy Online Course Udemy Online Training 100% FREE Udemy Discount Coupons https://www.couponudemy.com/blog/lets-color-a-goblin-with-procreate-complete-color-process/
0 notes
Text
[Udemy] Digital Coloring: Comic Style Light & Shadow Made Easy!
Render amazing highlights and shading with this step-by-step approach| From pro comic colorist K. Michael Russell Students will have a solid basis for rendering highlight and shadows. Students will learn a simple, step-by-step that creates complex-looking results. Students will learn an easily repeatable workflow for adding light and shadow. Requirements Students should understand the basic use of their preferred digital art app such as using brushes, selection tools, and layers. This course uses Photoshop & Procreate, but any art app with layers and blending modes will work. Students should have a digital drawing tablet & a digital art program. Description This in-depth, step-by-step course will teach you how & where to add highlights and shadows to line art in real-time! I’ll show you how to analyze the shapes of the forms in your drawings and correctly start thinking in three dimensions instead of two. We’ll be using the same techniques that I’ve used in my professional work in over 75 issues as a comic book colorist. You’ll learn: How to layer multiple types of lighting to create a stunning final image. Simple ways to think about your lighting colors. When to use harder and softer edges when rendering. How to edit your rendering colors to completely change the tone of a piece. Whether you are looking to color just for fun or for work, this course will teach you time-saving techniques and shortcuts that will allow you to create rich and beautiful colors without bogging down in a ton of color theory concepts. In additions to the hours of video lessons, the course also includes: Full resolution, layered PSD files of the exercises for practice. I even include one of the PSD files from my recent work on HACK/SLASH, so you can see this layering method in action! Work at your own pace!.There’s no need to rush, since there’s no time limits. I’ve created hundreds of hours of tutorials and taught thousands of students worldwide. You can expect top notch video & audio quality throughout. These lessons feature Photoshop CC and Procreate. You can use any art application that includes layers and blending modes. Some examples would include Clip Studio Paint, ArtStudio Pro, Krita, Sketchbook Pro, and Medibang to name a few. NOTE: This is not a rank beginner course. I will review some concepts, but if you are completely unfamiliar with coloring, I would consider one of my other coloring courses for the basics first. This course focuses on rendering light and shadow simply and effectively. It does not discuss storytelling or focus as a colorist, and I would consider enrolling in “A Pro Guide to Digital Comic Book Coloring” to understand the fundamentals of sequential color storytelling, adding mood and depth, separating planes, etc, if you are unfamiliar with those concepts. So join me! I hope to see you there, and I’d love to help you down the path to becoming a great colorist! Who is the target audience? Anyone looking to simplify how to add light to their line art. Anyone looking for an easily repeatable “formula” for easy rendering of light and shadow. Anyone looking to learn more about how to light their 2D artwork. source https://ttorial.com/digital-coloring-comic-style-light-shadow-made-easy
source https://ttorialcom.tumblr.com/post/179690519573
0 notes
Text
[Udemy] Digital Coloring: Comic Style Light & Shadow Made Easy!
Render amazing highlights and shading with this step-by-step approach| From pro comic colorist K. Michael Russell Students will have a solid basis for rendering highlight and shadows. Students will learn a simple, step-by-step that creates complex-looking results. Students will learn an easily repeatable workflow for adding light and shadow. Requirements Students should understand the basic use of their preferred digital art app such as using brushes, selection tools, and layers. This course uses Photoshop & Procreate, but any art app with layers and blending modes will work. Students should have a digital drawing tablet & a digital art program. Description This in-depth, step-by-step course will teach you how & where to add highlights and shadows to line art in real-time! I’ll show you how to analyze the shapes of the forms in your drawings and correctly start thinking in three dimensions instead of two. We’ll be using the same techniques that I’ve used in my professional work in over 75 issues as a comic book colorist. You’ll learn: How to layer multiple types of lighting to create a stunning final image. Simple ways to think about your lighting colors. When to use harder and softer edges when rendering. How to edit your rendering colors to completely change the tone of a piece. Whether you are looking to color just for fun or for work, this course will teach you time-saving techniques and shortcuts that will allow you to create rich and beautiful colors without bogging down in a ton of color theory concepts. In additions to the hours of video lessons, the course also includes: Full resolution, layered PSD files of the exercises for practice. I even include one of the PSD files from my recent work on HACK/SLASH, so you can see this layering method in action! Work at your own pace!.There's no need to rush, since there's no time limits. I've created hundreds of hours of tutorials and taught thousands of students worldwide. You can expect top notch video & audio quality throughout. These lessons feature Photoshop CC and Procreate. You can use any art application that includes layers and blending modes. Some examples would include Clip Studio Paint, ArtStudio Pro, Krita, Sketchbook Pro, and Medibang to name a few. NOTE: This is not a rank beginner course. I will review some concepts, but if you are completely unfamiliar with coloring, I would consider one of my other coloring courses for the basics first. This course focuses on rendering light and shadow simply and effectively. It does not discuss storytelling or focus as a colorist, and I would consider enrolling in “A Pro Guide to Digital Comic Book Coloring” to understand the fundamentals of sequential color storytelling, adding mood and depth, separating planes, etc, if you are unfamiliar with those concepts. So join me! I hope to see you there, and I'd love to help you down the path to becoming a great colorist! Who is the target audience? Anyone looking to simplify how to add light to their line art. Anyone looking for an easily repeatable "formula" for easy rendering of light and shadow. Anyone looking to learn more about how to light their 2D artwork. source https://ttorial.com/digital-coloring-comic-style-light-shadow-made-easy
0 notes