#Cursor/pointer Use To How Mouse Mouse pointer Mouse icon Cursor pointer Cursors Mobile app How to Tap pointer apk Mobile pointer Tap pointer
Explore tagged Tumblr posts
Visit Tumblr Blog
Explore Tumblr blogs with no restrictions, modern design and the best experience.
Last Seen Tumblr Blogs


Fun Fact
28.6 is the average number of monthly visits per US mobile user.
Text
My take on Windows 8
Now that I've gotten used to it, I like it.
For most of us, change occurs far too frequently.
When Microsoft or Apple releases a significant operating system update, some users are resistant to the transition. Why should I feel compelled to learn something fresh and unusual? I'd grown accustomed to doing things that way, and now I must learn to do things differently!
Bug fixes and added functionality are the two main reasons for upgrades. Fixing flaws can make the OS more secure and smoother to use. Hardware advancements like as touchscreens, faster and larger memory, and Cloud integration are all part of providing functionality.
On a Dell laptop from the Vista days, I first installed a pre-release (beta) version of Windows 8. I had some idea what to expect because I had done my homework.
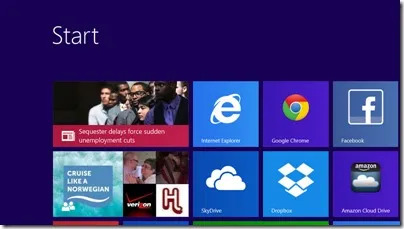
Where's My Start Button
Everyone was enthralled by the fact that the Start button was vanished! There was a new screen called the Start Screen, which was made up of tiles or rectangles that constantly refreshed. The original desktop display was also still present. So, what do I do now?
Relax. It's still Windows, though. If you choose, smart programmers can make the new User Interface look exactly like the old User Interface. I prefer to study and work with new materials. It is, without a doubt, a superior option for me. Listen to Jim and Chris discuss Windows 8 and the Start screen in our most recent Gabbing with the Geeks episode.
Find Your Corner
I've discovered that the screen's borders and corners conceal all of the answers and features. The new Start icon can be found by moving your mouse cursor to the lowest left corner of the screen. The Live Tiles Start Screen appears when you click it. This is where you begin! You can put the tiles in a logical arrangement if you want. Tiles can be made for nearly any purpose. They're the application shortcuts you've created. Once you get used to it, it's far superior to the previous start menu and desktop icons. To search for an application, simply start typing at the Start screen. You may get to the Start scree by clicking here.
On the right side of the screen, there is a special "Charms" option. Moving your mouse pointer to the bottom right corner and then up is one technique to get to it. The charms are available at all times. Search is the first charm. It's a potent tool that changes depending on the situation. You have the ability to look for anything, anyplace. Settings is the bottom charm. This is where you can turn the computer off or restart it.
Microsoft released two operating systems that used the same name. The first, Windows 8 RT, would be less expensive and run on tablets, similar to Android or iPad. It could run Microsoft applications, but not my older Windows ones. For many users, this may be sufficient.
Windows 8 Pro is designed to work on "real" machines. Desktops and laptops. And Microsoft was releasing a tablet that will run all of my old programs as well as a slew of new touch-screen apps. The Surface Pro is the device in question. It comes in two different configurations. One has a 64-gigabyte solid-state drive, while the other has a 128-gigabyte SSD. Micro SD cards or USB hard drives can be used to expand memory, although it is designed to work with Sky Drive in the cloud.
In my mobile office, I truly like how I've set up my workspace.
The 10.6" HD touch screen hides the entire computing equipment. My primary monitor is a 22" video monitor, and my secondary monitor is a smaller screen. A conventional keyboard, mouse, and local printer are connected through a USB hub, and I can add more peripherals and drives as needed. When I need to travel with my computer, I simply unplug the monitor and hub, snap in the keyboard/cover, and I'm ready to go. It's now my primary computer.
My Internet connection is normally provided by the FoxFi hotspot app on my Droid RAZR smartphone. The Surface Pro power supply includes a USB charging port.
There's still a lot to learn. We've developed a new Forum section dedicated solely to Windows 8. Anyone can read the Forums, but you must be a member of Geeks On Tour to ask a question.
On Windows 8, we might do some films. On June 30-July 5, we will be holding a Windows 8 lecture at the Escapade in Gillette, Wyoming. Meanwhile, we discovered The Missing Windows 8 Instructional Video on YouTube. It's about 25 minutes long and covers everything you need to know. edutech.
0 notes
Video
(via https://www.youtube.com/watch?v=BR6CI96Hx30)
0 notes
Text
"Chromebook accessibility tools for distance learning"
Around the world, 1.5 billion students are now adjusting to learning from home. For students with disabilities, this adjustment is even more difficult without hands-on classroom instruction and support from teachers and learning specialists.
For educators and families using Chromebooks, there are a variety of built-in accessibility features to customize students’ learning experience and make them even more helpful. We’ve put together a list of some of these tools to explore as you navigate at-home learning for students with disabilities.
Supporting students who are low vision
To help students see screens more easily, you can find instructions for locating and turning on several Chromebook accessibility features in this Chromebook Help article. Here are a few examples of things you can try, based on students’ needs:
Increase the size of the cursor, or increase text size for better visibility.
Add ahighlighted circle around the cursor when moving the mouse, text caret when typing, or keyboard-focused item when tabbing. These colorful rings appear when the items are in motion to draw greater visual focus, and then fade away.
For students with light sensitivity or eye strain, you can turn on high-contrast mode to invert colors across the Chromebook (or add this Chrome extension for web browsing in high contrast).
Increase the size of browser or app content, or make everything on the screen—including app icons and Chrome tabs—larger for greater visibility.
For higher levels of zoom, try thefullscreen or docked magnifiers in Chromebook accessibility settings. The fullscreen magnifier zooms the entire screen, whereas the docked magnifier makes the top one-third of the screen a magnified area. Learn more in this Chromebook magnification tutorial.
Helping students read and understand text
Features that read text out loud can be useful for students with visual impairments, learning and processing challenges, or even students learning a new language.
Select-to-speak lets students hear the text they choose on-screen spoken out loud, with word-by-word visual highlighting for better audio and visual connection.
With Chromevox, the built-in screen reader for Chromebooks, students can navigate around the Chromebook interface using audio spoken feedback or braille. To hear whatever text is under the cursor, turn on Speak text under the mouse in ChromeVox options. This is most beneficial for students who have significant vision loss.
Add the Read&Write Chrome extension from Texthelp for spelling and grammar checks, talking and picture dictionaries, text-to-speech and additional reading and writing supports- all in one easy to use toolbar.
For students with dyslexia, try the OpenDyslexic Font Chrome extension to replace web page fonts with a more readable font. Or use the BeeLine Reader Chrome extension to color-code text to reduce eye strain and help students better track from one line of text to the next. You can also use the Thomas Jockin font in Google Docs, Sheets and Slides.
Video tutorial of show to enable elect-to-speak
Guiding students with writing challenges or mobility impairments
Students can continue to develop writing skills while they’re learning from home.
Students can use their voice to enter text by enabling dictation in Chromebook accessibility settings, which works in edit fields across the device. If dictating longer assignments, students can also use voice typing in Google Docs to access a rich set of editing and formatting voice commands. Dictating writing assignments can also be very helpful for students who get a little stuck and want to get thoughts flowing by speaking instead of typing.
Students with mobility impairments can use features like the on-screen keyboard to type using a mouse or pointer device, or automatic clicks to hover over items to click or scroll.
Try the Co:Writer Chrome extension for word prediction and completion, as well as excellent grammar help. Don Johnston is offering free access to this and other eLearning tools. Districts, schools, and education practitioners can submit a request for access.
Video tutorial of voice typing in Docs
How to get started with Chromebook accessibility tools
We just shared a 12-part video series with training for G Suite and Chromebook Accessibility features made by teachers for teachers. These videos highlight teachers’ experience using these features in the classroom, as well as what type of diverse learner specific features benefit. For more, you can watch these videos from the Google team, read our G Suite accessibility user guide, or join a Google Group to ask questions and get real time answers. To find great accessibility apps and ideas on how to use them, check out the Chromebook App Hub, and for training, head to the Teacher Center.
We’re also eager to hear your ideas—leave your thoughts in this Google Form and help educators benefit from your experience.
Source : The Official Google Blog via Source information
0 notes