
Don't wanna be here? Send us removal request.
Statistics
We looked inside some of the posts by navitech and here's what we found interesting.
Average Info
Notes Per Post
1
Likes Per Post
1
Reblog Per Post
0
Reply Per Post
0
Time Between Posts
12 minutes
Number of Posts By Type
Text
3
Last Seen Tumblr Blogs


Fun Fact
In February 2021, Tumblr had 518.6 million blog accounts.
Text
Editing Facebook Pictures with Picnik

If you use Facebook, you've definitely shared some photos with your friends. I frequently use my Droid smartphone to shoot photos and then publish them to Facebook. That implies I won't have the chance to improve them first in Picasa. Horrors! My friends will view the photo as it was taken, not after it has been altered. So, how do I proceed? On Facebook, the sole built-in function for your images is to rotate them, which means it will take a horizontal photo and turn it vertical, and so on.
Picnik or Picasa are two popular photo editing programs.
I could save the photo to Picasa, alter it there, and then re-post it to Facebook. But what if I don't want that picture on my computer in the first place? What if I'm not even in front of my computer? Let's pretend I'm on vacation and all I want to do is use a computer at an Internet café.
You may do all of your editing online with Picnik.
Picnik is a free online picture editor that Google bought a few years ago and integrated into Picasa. To use all of the features in Picnik, select a photo in Picasa on your computer and click the Edit in Picnik button. You'll be back in Picasa when you're finished.
PIcnik App on the Web
Picnik, on the other hand, is a stand-alone website; you don't have to go via Picasa to get there. Simply visit www.Picnik.com. Many of Picnik's features operate great even if you don't register. Simply click on 'Get Started Now' to be directed to Picnik's main page. You'll find a link to Facebook as well as other online photo sharing services like Picasa Web Albums, Flickr, and Photobucket if you go to the Library tab. After that, select Facebook and then the Connect option. If you're already logged into Facebook on this computer, Picnik will show you all of your Facebook photo albums right away. Picnik will prompt you to complete the Facebook login screen if you aren't already logged in. When you log in, you'll be able to see all of the photos in your Facebook profile.
Double-click the image you want to alter to open it in a new window. This will bring it up in Picnik's photo editor. You now have a plethora of editing options at your disposal. 'Basic Edits,' which includes Auto-Fix, Crop, Exposure, Colors, and Sharpen, is the first tab. You can also use text and'stickers,' which are clipart pictures, to add to your image. Please keep in mind that some functions require a 'Premium' account. The cost of a premium account is $25 per year.
When you've finished editing your photo, go to the Save and Share menu and select 'Save this photo to Facebook.' This method does not replace your original photo; instead, it creates a new image in your Facebook album. Then, if desired, you can remove the old one using Facebook's tools.
Picnik App on Facebook
You can access the Picnik App in Facebook directly from your Facebook home page. When you connect your Facebook account to the app, it functions just like Picnik on the web, with the exception that the Facebook menu bar remains at the top. You may open any album in your Facebook photos, edit a photo in Picnik, and then upload it to Facebook. Simply keep in mind that you're saving a fresh copy of the image rather than overwriting the original. It will also be put as an update on your wall. If you don't want that, simply go to your wall and delete the post; the photo will remain on your profile in the Pictures section.
0 notes
Text
My take on Windows 8
Now that I've gotten used to it, I like it.
For most of us, change occurs far too frequently.
When Microsoft or Apple releases a significant operating system update, some users are resistant to the transition. Why should I feel compelled to learn something fresh and unusual? I'd grown accustomed to doing things that way, and now I must learn to do things differently!
Bug fixes and added functionality are the two main reasons for upgrades. Fixing flaws can make the OS more secure and smoother to use. Hardware advancements like as touchscreens, faster and larger memory, and Cloud integration are all part of providing functionality.
On a Dell laptop from the Vista days, I first installed a pre-release (beta) version of Windows 8. I had some idea what to expect because I had done my homework.
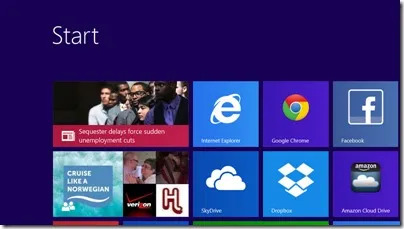
Where's My Start Button
Everyone was enthralled by the fact that the Start button was vanished! There was a new screen called the Start Screen, which was made up of tiles or rectangles that constantly refreshed. The original desktop display was also still present. So, what do I do now?
Relax. It's still Windows, though. If you choose, smart programmers can make the new User Interface look exactly like the old User Interface. I prefer to study and work with new materials. It is, without a doubt, a superior option for me. Listen to Jim and Chris discuss Windows 8 and the Start screen in our most recent Gabbing with the Geeks episode.
Find Your Corner
I've discovered that the screen's borders and corners conceal all of the answers and features. The new Start icon can be found by moving your mouse cursor to the lowest left corner of the screen. The Live Tiles Start Screen appears when you click it. This is where you begin! You can put the tiles in a logical arrangement if you want. Tiles can be made for nearly any purpose. They're the application shortcuts you've created. Once you get used to it, it's far superior to the previous start menu and desktop icons. To search for an application, simply start typing at the Start screen. You may get to the Start scree by clicking here.
On the right side of the screen, there is a special "Charms" option. Moving your mouse pointer to the bottom right corner and then up is one technique to get to it. The charms are available at all times. Search is the first charm. It's a potent tool that changes depending on the situation. You have the ability to look for anything, anyplace. Settings is the bottom charm. This is where you can turn the computer off or restart it.
Microsoft released two operating systems that used the same name. The first, Windows 8 RT, would be less expensive and run on tablets, similar to Android or iPad. It could run Microsoft applications, but not my older Windows ones. For many users, this may be sufficient.
Windows 8 Pro is designed to work on "real" machines. Desktops and laptops. And Microsoft was releasing a tablet that will run all of my old programs as well as a slew of new touch-screen apps. The Surface Pro is the device in question. It comes in two different configurations. One has a 64-gigabyte solid-state drive, while the other has a 128-gigabyte SSD. Micro SD cards or USB hard drives can be used to expand memory, although it is designed to work with Sky Drive in the cloud.
In my mobile office, I truly like how I've set up my workspace.
The 10.6" HD touch screen hides the entire computing equipment. My primary monitor is a 22" video monitor, and my secondary monitor is a smaller screen. A conventional keyboard, mouse, and local printer are connected through a USB hub, and I can add more peripherals and drives as needed. When I need to travel with my computer, I simply unplug the monitor and hub, snap in the keyboard/cover, and I'm ready to go. It's now my primary computer.
My Internet connection is normally provided by the FoxFi hotspot app on my Droid RAZR smartphone. The Surface Pro power supply includes a USB charging port.
There's still a lot to learn. We've developed a new Forum section dedicated solely to Windows 8. Anyone can read the Forums, but you must be a member of Geeks On Tour to ask a question.
On Windows 8, we might do some films. On June 30-July 5, we will be holding a Windows 8 lecture at the Escapade in Gillette, Wyoming. Meanwhile, we discovered The Missing Windows 8 Instructional Video on YouTube. It's about 25 minutes long and covers everything you need to know. edutech.
0 notes
Text
Solve Problems by Restarting your Smartphone or Tablet

The single most critical troubleshooting method you can master is restarting (or "Rebooting" for us old-timers) your computer. Is your mouse not working? Restart. Have your operations slowed to a halt? Restart. Strange things happening on your monitor? Restart. When you turn it back on, your problem is nearly always fixed.
What's more, guess what? Your smartphone or tablet functions similarly to a computer. My Android phone just quit working today. It said there was no SIM card, no Verizon service, and it wouldn't send or receive calls or emails — nothing! What?! I'd just finished a phone call. Why that would happen is a complete mystery to me; I've never seen that message before. I restarted before flipping out and contacting Verizon (from a different phone!). It's all fixed now.
One of the students' iPads became unresponsive last week during our iPad/iPhone session, and the screen was flickering like crazy. Pressing the home button, the power or wake/sleep button, or the power button while holding it down did nothing. It didn't stop blinking. What should I do?
How do you ShutDown/Restart a Smartphone or Tablet
Hold down the power button (also known as the Sleep/Wake button) on an iPhone or iPad until you see a red bar with the words "slide to power off." The screen should go dark and your smartphone will be turned off if you slide it in the direction suggested. Then you hold down the power button until you see something happen to turn it back on... On your screen, you should see an apple logo. Then you can release go, and your gadget should turn on again soon.
Before conducting the shutdown on the iPhone/iPad, it's a good idea to kill all apps in your Recently Used list. That is, double-tap on your device's home button (the round, physical button) to bring up a list of App icons at the bottom of the screen. You can also see a full depiction of the app in the middle of the screen on iOS7, which you can deactivate by swiping it up and off the screen. That should be done for all of the apps. Longpress on one of the bottom icons on iOS6 until they all start twitching and a red minus sign appears on each one. Tap each minus sign until all of them have vanished.
Hold down the power button on an Android device until you see options. Select the option to turn off the computer. When it's done and the screen is dark, press and hold the power button until you see anything on the screen, then let go and wait for the device to turn back on completely. On Android smartphones, this technique clears all recently used apps automatically.
What if it Doesn't Respond to ShutDown?
The power button is sometimes unresponsive, like in the case of the blinking iPad detailed above. You're in luck if your gadget has a replaceable battery. Take it out. It has no choice but to shut down! Most modern devices have sealed batteries that you can't remove, so you'll need to know how to force it to shut down and restart using the 2 or 3 button technique.
Hold down the power (sleep/wake) and Home buttons at the same time on an iPhone/iPad for several seconds... until the screen goes dark. This is the method we utilized to make the above-mentioned blinking iPad. The obnoxious blinking screen was eventually silenced by holding down the sleep/wake and home buttons together, and it calmly switched off. It turned itself back on automatically as a result of this process, and everything was back to normal.
With Android devices, I can force a shutdown by holding down the Power and Down Volume buttons at the same time for several seconds on my Motorola Droid Razr Maxx. It turns out that the same key combination is used to take a screen shot, so if you hear a click, just keep holding the keys down until it restarts. Because your Android phone or tablet is likely to be unique, you'll need to locate the user's manual for your exact model. You can also contact your service provider (Verizon, AT&T, etc.) for assistance.
Tutorial Videos to Watch
In our Smartphones and Tablets section, watch
mobl01a.Homescreens and Apps
mobl02.Rebooting your Droid Smartphone
1 note
·
View note