#DIYTileGuide
Explore tagged Tumblr posts
Visit Tumblr Blog
Explore Tumblr blogs with no restrictions, modern design and the best experience.
Last Seen Tumblr Blogs


Fun Fact
25% of US internet users with an annual income of $80-100K use Tumblr.
Text
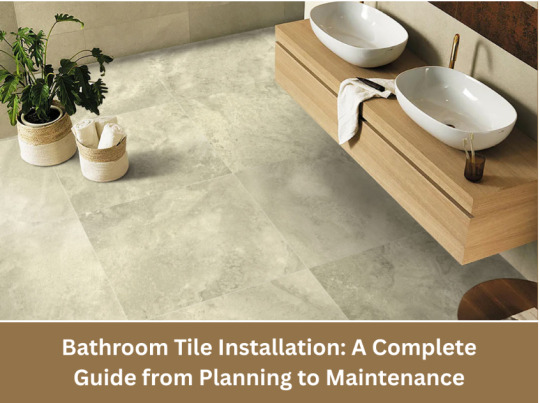
Bathroom Tile Installation: A Complete Guide from Planning to Maintenance
Bathroom tile installation plays a crucial role in creating a functional and long-lasting space. Due to constant moisture exposure, bathrooms require flooring and wall materials that resist water damage while maintaining their structural integrity. Proper tile selection and installation methods prevent common problems such as mold growth, grout deterioration, and surface cracking.
Understanding the process from start to finish helps in making informed decisions that improve durability and overall appearance. For those seeking professional floor installation, knowledge of best practices contributes to a successful project outcome.
Common Problems with Poor Bathroom Tile Installation
Moisture Damage and Mold Growth
Bathrooms are one of the most humid areas in a home, making moisture control essential. Poorly installed tiles or gaps in grout allow water to seep into the subfloor and walls, leading to mold growth and material deterioration. Over time, this can weaken the structure and cause costly repairs.
Tile Cracking and Loose Surfaces
Improper subfloor preparation, weak adhesive, or heavy foot traffic can result in cracked or loose tiles. Movement within the flooring or wall structure can also contribute to instability. Using the right underlayment and securing tiles correctly helps prevent these issues.
Grout Staining and Deterioration
Grout plays a vital role in holding tiles together and preventing water infiltration. However, if not properly sealed, grout can absorb moisture, leading to discoloration and breakdown over time. Choosing the right type of grout and maintaining it regularly extends the lifespan of a bathroom floor.
Choosing the Right Tiles for a Lasting Installation
Material Selection: Durability and Water Resistance
The best tiles for bathrooms resist moisture while offering strength and longevity. Porcelain and ceramic tiles are popular choices due to their low absorption rate and easy maintenance. Porcelain, in particular, has a dense structure that withstands heavy use and exposure to water.
Natural stone tiles, such as marble or slate, provide a sophisticated look but require regular sealing to prevent water damage. For those seeking a hassle-free option, glazed tiles add an extra layer of protection against stains and moisture absorption.
Size and Texture Considerations
Tile size and texture impact both aesthetics and functionality. Large-format tiles create a clean, modern look with fewer grout lines, reducing maintenance needs. Smaller mosaic tiles, commonly used in shower floors, offer better traction and slip resistance.
Matte finishes provide additional grip, reducing the risk of slipping on wet surfaces. Textured tiles enhance safety while maintaining an elegant design. Choosing the right size and finish helps achieve a balance between visual appeal and practicality.
Preparing for Bathroom Tile Installation
Step 1: Surface Preparation
A stable and dry surface is essential for a successful tile installation. Any cracks or uneven areas should be repaired before placing tiles. If tiling over an old floor, removing loose materials and applying a leveling compound creates a strong foundation.
For walls, using cement backer boards adds an extra layer of moisture resistance. This step prevents tiles from detaching due to water exposure. A properly prepared surface reduces the risk of movement and extends the lifespan of the installation.
Step 2: Waterproofing the Bathroom Floor and Walls
Applying waterproof membranes before tile installation protects against moisture-related damage. These barriers prevent water from seeping into subfloors and wall structures, reducing the risk of mold and rot.
Using waterproof bathroom flooring materials, such as vinyl-backed tiles or sealed porcelain, provides additional protection. Properly sealed grout lines and edges further enhance the water resistance of the space.
Step 3: Planning the Tile Layout
Measuring the space and arranging tiles before applying adhesive helps create a balanced design. Dry-fitting tiles allow adjustments to avoid uneven spacing or awkward cuts.
Starting from the center of the room and working outward provides a symmetrical layout. For wall tiles, beginning at the bottom and stacking upward prevents slipping. Planning confirms a smooth installation process.
Step-by-Step Tile Installation Process
Step 1: Applying Adhesive and Setting Tiles
Using the right adhesive is crucial for securing tiles in place. Thin-set mortar works well for most bathroom surfaces, providing a strong grip and moisture resistance. Spreading the adhesive evenly with a notched trowel creates ridges that improve bonding.
Placing each tile with firm pressure prevents air pockets. Spacers help maintain consistent gaps for grout application. Checking alignment frequently confirms straight and even placement.
Step 2: Grouting and Sealing for a Finished Look
Once the adhesive has dried, grout fills the spaces between tiles, securing the installation. Water-resistant grout, such as epoxy or polymer-based options, prevents moisture infiltration.
Applying grout with a rubber float and wiping excess with a damp sponge creates a clean finish. After drying, sealing grout lines enhances durability and reduces staining. Regular resealing maintains grout integrity over time.
Choosing the Best Flooring for a Waterproof Bathroom
Porcelain and Ceramic Tiles
Porcelain and ceramic tiles offer a balance of durability, style, and water resistance. They are ideal for floors and walls, providing a low-maintenance solution that withstands daily moisture exposure.
Natural Stone Tiles
Marble, slate, and travertine create a high-end look but require regular sealing. These materials add character but need careful maintenance to prevent water damage.
Vinyl and Waterproof Laminate
For those exploring alternatives to traditional tiles, waterproof bathroom flooring options like luxury vinyl tiles (LVT) and waterproof laminate provide cost-effective choices. These materials resist moisture while offering a softer feel underfoot.
Avoiding Common Mistakes During Tile Installation
Skipping Proper Surface Preparation
Installing tiles on an uneven or damp surface leads to adhesion issues and cracking over time. Ensuring a solid, level foundation prevents long-term problems.
Using Incorrect Adhesives or Grout
Different tile materials require specific adhesives and grout. Using the wrong products weakens the installation and can result in water damage. Checking manufacturer recommendations prevents costly mistakes.
Neglecting Expansion Gaps
Tiles expand and contract due to temperature and humidity changes. Leaving small gaps around the edges allows for natural movement, preventing cracks and buckling.
Long-Term Maintenance Tips for Bathroom Tiles
Daily and Weekly Cleaning Routines
Regular cleaning prevents the buildup of dirt and grime. Using a mild cleaner and a soft brush removes residue without damaging the surface. Avoiding harsh chemicals protects both tiles and grout.
Preventing Mold and Mildew Growth
Proper ventilation reduces humidity, minimizing the risk of mold. Using a squeegee on shower walls after use helps prevent water buildup. Keeping grout dry and applying sealants periodically further protects against moisture-related issues.
Repairing Chips and Cracks
Addressing small tile damage promptly prevents further deterioration. Repair kits fill minor chips, while replacing cracked tiles maintains the integrity of the installation. Matching grout color keeps repairs seamless.
Achieving a Long-Lasting Bathroom Tile Installation
A well-executed bathroom tile installation improves both function and appearance. From selecting durable materials to proper waterproofing and installation techniques, each step contributes to a long-lasting result.
For those considering professional floor installation, expertise in tile placement, waterproofing, and finishing details leads to a high-quality outcome. Whether using porcelain, ceramic, or natural stone, making informed choices and following best practices helps create a bathroom that remains stylish and resilient for years.
0 notes