#Design prototype and share with Adobe XD
Explore tagged Tumblr posts
Visit Tumblr Blog
Explore Tumblr blogs with no restrictions, modern design and the best experience.
Last Seen Tumblr Blogs


Fun Fact
Tumblr has 411 employees.
Text
Which tools every UIUX designer must master?
Gaining proficiency with the appropriate tools can greatly improve your workflow and design quality as a UI/UX designer. The following are some tools that any UI/UX designer has to know how to use:
1. Design Tools:
Figma: One of the most popular and versatile design tools today. It’s web-based, allowing real-time collaboration, and great for designing interfaces, creating prototypes, and sharing feedback.
Sketch: A vector-based design tool that's been the go-to for many UI designers. It's particularly useful for macOS users and has extensive plugins to extend its capabilities.
Adobe XD: Part of Adobe's Creative Cloud, this tool offers robust prototyping features along with design functionalities. It’s ideal for those already using other Adobe products like Photoshop or Illustrator.
2. Prototyping & Wireframing:
InVision: Great for creating interactive prototypes from static designs. It’s widely used for testing design ideas with stakeholders and users before development.
Balsamiq: A simple wireframing tool that helps you quickly sketch out low-fidelity designs. It’s great for initial brainstorming and wireframing ideas.
3. User Research & Testing:
UserTesting: A platform that allows you to get user feedback on your designs quickly by testing with real users.
Lookback: This tool enables live user testing and allows you to watch users interact with your designs, capturing their thoughts and reactions in real time.
Hotjar: Useful for heatmaps and recording user sessions to analyze how people interact with your live website or app.
4. Collaboration & Handoff Tools:
Zeplin: A tool that helps bridge the gap between design and development by providing detailed specs and assets to developers in an easy-to-follow format.
Abstract: A version control system for design files, Abstract is essential for teams working on large projects, helping manage and merge multiple design versions.
5. Illustration & Icon Design:
Adobe Illustrator: The industry standard for creating scalable vector illustrations and icons. If your design requires custom illustrations or complex vector work, mastering Illustrator is a must.
Affinity Designer: An alternative to Illustrator with many of the same capabilities, but with a one-time payment model instead of a subscription.
6. Typography & Color Tools:
FontBase: A robust font management tool that helps designers preview, organize, and activate fonts for their projects.
Coolors: A color scheme generator that helps designers create harmonious color palettes, which can be exported directly into your design software.
7. Project Management & Communication:
Trello: A simple project management tool that helps you organize your tasks, collaborate with team members, and track progress.
Slack: Essential for team communication, Slack integrates with many design tools and streamlines feedback, updates, and discussion.
8 notes
·
View notes
Text
A Quick Word About Prototyping 🛠️✨
Prototyping is a crucial step in the design process that allows you to visualize and test your ideas before final implementation. Let’s break down what a prototype is and why it’s essential!
What is a Prototype?
Interactive Mockup: A prototype is an interactive version of your design, showcasing how users will navigate through your website or application. It simulates the user experience without being the final product.
Not Final Design: Keep in mind that a prototype is not set in stone; it’s a tool for exploration, feedback, and iteration.
Why Prototype?
Test Functionality: Prototypes help you validate whether the functionality of your design works as intended. You can identify any usability issues early on.
User Feedback: By sharing prototypes with users or stakeholders, you can gather valuable feedback that informs improvements before diving into development.
Visualize User Journey: Prototyping allows you to map out the user journey, helping to ensure a seamless experience and identify any roadblocks.
Types of Prototypes
Low-Fidelity Prototypes: Often hand-drawn sketches or simple wireframes. Great for brainstorming and early feedback on layout and flow.
High-Fidelity Prototypes: More detailed and interactive, resembling the final design closely. Tools like Figma, Adobe XD, or InVision can help create these.
Best Practices for Prototyping
Keep It Simple: Focus on key features and flows rather than perfecting every detail.
Iterate Quickly: Don’t be afraid to make changes based on feedback. The prototyping stage is about refining your ideas.
Involve Users Early: Get input from real users to understand their needs and pain points.
Quick Tips:
Use prototyping tools that suit your workflow and team collaboration.
Document the feedback you receive to guide your next design iterations.
Share your prototypes in various formats (links, presentations) for wider accessibility.
Prototyping is an invaluable part of the web design process, allowing you to explore ideas and create better user experiences. Embrace it to enhance your web design journey! 🌟
What prototyping tools do you find most effective? Share your favorites below! 👇
4 notes
·
View notes
Text
How to Start a Career in UX/UI Design – Step-by-Step UX design roadmap
In today’s digitally driven world, the demand for intuitive, seamless digital experiences is skyrocketing. Companies are racing to provide the best user experience (UX) and user interface (UI) designs, making UX/UI design one of the most lucrative and rewarding career paths today. If you're wondering how to start a career in UX/UI design, this step-by-step UX design roadmap will guide you through building the skills, tools, and mindset needed to thrive in this fast-growing industry.

What is UX/UI Design?
Before diving into the roadmap, it’s important to understand what UX and UI design entail. UX (User Experience) design focuses on the overall experience a user has with a product — from ease of navigation to emotional satisfaction. UI (User Interface) design, on the other hand, zeroes in on visual layout — think buttons, icons, spacing, typography, and color schemes. These roles often overlap, requiring professionals to collaborate closely.
According to a 2024 report by the Nielsen Norman Group, demand for skilled UX/UI designers has grown by 22% year over year, particularly in industries like eCommerce, healthcare, fintech, and SaaS. Entry-level salaries for UX designers average $75,000/year in the U.S., with experienced designers earning well over $110,000/year.
Step 1: Understand the UX/UI Design Landscape
To begin your journey, immerse yourself in the UX/UI ecosystem. Learn about different job roles such as:
UX Designer
UI Designer
Interaction Designer
UX Researcher
Product Designer
Each role requires different competencies, but they all share a common goal: delivering optimal user experiences. Understanding this helps in aligning your strengths and interests with the right career trajectory.
Step 2: Learn the Core UX/UI Design Principles
Grasping the foundational principles of UX/UI design is non-negotiable. Start by learning:
Design thinking: Empathy-driven problem solving.
User-centered design: Focusing on the needs and behaviors of users.
Information architecture: Structuring content logically.
Usability heuristics: Making interfaces easy and intuitive.
Books like “Don’t Make Me Think” by Steve Krug and “The Design of Everyday Things” by Don Norman are excellent starting points.
Step 3: Master UX Research and User Personas
UX/UI design is not just about creating pretty interfaces — it’s about solving real user problems. Strong research skills are essential. Learn to conduct:
User interviews
Surveys
Competitive analysis
Usability testing
Tools like Hotjar, UserTesting, and Google Forms are commonly used for gathering qualitative and quantitative user data. Building personas based on this research helps define user goals and pain points clearly.
Step 4: Learn the Right Design Tools
Modern UX/UI designers rely on robust digital tools to create wireframes, prototypes, and final designs. Familiarize yourself with:
Figma (cloud-based collaborative design)
Adobe XD (interface and experience design)
Sketch (Mac-only interface design tool)
InVision (prototyping and collaboration)
Miro (collaborative whiteboard)
Figma, in particular, is a favorite among startups and enterprises due to its real-time collaboration features.
Step 5: Wireframing and Prototyping
Wireframes are the skeletal blueprint of your product, while prototypes bring it to life. Start by sketching your designs on paper before moving to digital tools. Use low-fidelity wireframes for layout planning and high-fidelity prototypes for interactive flows.
This phase focuses on visual hierarchy, consistency, and usability. Practicing regularly on fictional projects can accelerate your learning curve.
Step 6: Create a Design Portfolio
Your portfolio is your gateway into the UX/UI industry. Include 3–5 well-documented projects showcasing:
Problem statements
Research findings
Wireframes and user flows
Visual designs
Usability test results
Use platforms like Behance, Dribbble,UX/UI Open or create your own personal website using Webflow or WordPress. Remember: storytelling is key. Recruiters love case studies that show how you think, not just what you create.
Step 7: Follow UX/UI Trends and Keep Learning
The tech industry evolves rapidly, and so should you. Follow thought leaders and UX/UI blogs such as:
Smashing Magazine
UX Collective
NNGroup
A List Apart
Stay updated with emerging UI/UX trends like dark mode, micro-interactions, voice interfaces, and accessibility design. Consider enrolling in industry webinars or subscribing to UX newsletters.
Step 8: Gain Experience Through Internships and Freelancing
Getting real-world experience is crucial. Apply for internships, freelance gigs, or contribute to open-source projects. Sites like:
Upwork
Toptal
Fiverr
AngelList (Wellfound)
offer opportunities to work with startups and small businesses. This builds confidence and professional credibility.
Step 9: Prepare for UX/UI Job Interviews
Once your portfolio is strong and you’ve gained hands-on experience, it’s time to prepare for interviews. Common interview elements include:
Design challenges (often timed)
Behavioral questions (teamwork, conflict resolution)
Portfolio walkthrough
UX case study presentations
Practice articulating your thought process. Explain not just what you designed but why you made those decisions.
Step 10: Choose a UX/UI Career Path That Fits You
At this stage, you’ll be ready to pursue a defined UX/UI career path. Whether you lean more toward research, visual design, or product strategy, there’s a niche for everyone.
Some may choose formal education through a ux/ui design career bootcamp, while others may transition from graphic design or development backgrounds. The key is continuous learning and staying adaptable.
Data Insights: The Growth of UX/UI Design
According to LinkedIn's 2023 Emerging Jobs Report, UX design ranks among the top 10 most in-demand skills globally.
Google Trends shows a 65% increase in search volume for “how to become a UX designer” in the last 12 months.
Glassdoor lists over 45,000 job openings for UI/UX-related roles in the U.S. alone.
Design-centric companies like Apple, Airbnb, and IBM prioritize design thinking as core to their business model.
These trends make it clear: now is the best time to enter the world of user experience design.
Final Thoughts
Starting a career in UX/UI design isn’t about mastering a tool overnight. It’s a journey that requires empathy, curiosity, and practice. From learning the basics to building a standout portfolio, each step in this UX design roadmap brings you closer to becoming a successful designer.
Whether you pursue a structured ui ux designer career path, enroll in a ux/ui design career bootcamp, or self-learn through online resources, the key lies in consistency and problem-solving mindset. Follow the steps, use the right tools, apply user-first thinking — and watch your UX/UI career soar.
0 notes
Text
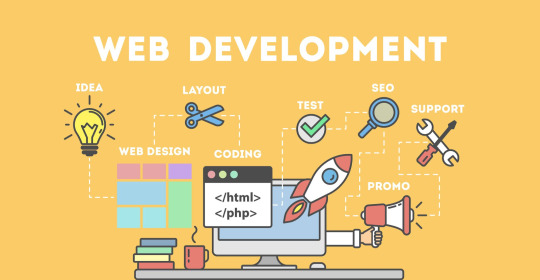
Tools Every Freelance Web Developer Should Know
Introduction
Being a freelance web developer isn’t just about writing code—it's about managing projects, clients, and your own time efficiently. To succeed in today’s competitive market, developers must equip themselves with the right tools. From code editors to project management platforms, each tool helps streamline different aspects of freelance work. Having a well-stocked digital toolbox can boost productivity, improve client satisfaction, and lead to higher earnings. The tools listed below are essential for developers looking to stay ahead in the freelance world. Whether you're a beginner or a seasoned pro, there's something here for everyone. Let’s dive into the essential tools that make a difference in a freelancer’s workflow.
1. Code Editors: The Developer’s Core Companion
A high-performance code editor is the most vital tool for any freelance web developer. Editors like Visual Studio Code, Sublime Text, or Atom offer robust functionality with extensive plugin support. VS Code stands out with its IntelliSense, Git integration, and built-in terminal. These editors improve speed and efficiency when writing HTML, CSS, JavaScript, and backend code. Customizable themes and extensions help create a personalized workflow. Freelancers benefit from tools that reduce bugs and save time. A quality editor can even support multiple languages. Choose one that aligns with your development stack and preferences.
2. Version Control: Git & GitHub
Understanding and using Git is non-negotiable for serious freelancers. Git tracks changes, manages code branches, and helps you revert back when things go wrong. GitHub acts as the online hub for your projects, offering version control in the cloud. It enables collaboration with other developers and easy sharing with clients. Freelancers can show progress and push updates seamlessly. It also serves as a portfolio to display work. Learning Git commands boosts professional credibility. GitHub Actions adds automation for testing and deployment workflows.
3. Design & Prototyping Tools
Before development starts, clients often want to see a prototype. Tools like Figma, Adobe XD, and Sketch are perfect for wireframing and UI design. Figma is a favorite due to its real-time collaboration features. These platforms allow developers to turn ideas into visual representations. You can gather feedback early, saving time in revisions later. Freelance web developers benefit from clearly defined interfaces. These tools also bridge the gap between designer and developer roles. Use them to align your vision with the client's expectations.
4. Task & Project Management Tools
Managing deadlines and deliverables is crucial in freelancing. Tools like Trello, Asana, or ClickUp help developers stay on track. Freelance web developer often juggle multiple clients and need clear organization. These tools allow you to break down tasks, assign due dates, and prioritize workloads. Notifications and dashboards make it easy to track progress. Time-blocking features ensure work is spaced out efficiently. They also help manage feedback and revisions. With visual boards, project workflows become less chaotic and more predictable.
5. Communication Platforms
Effective communication builds lasting client relationships. Slack, Zoom, and Google Meet are essential tools for keeping in touch. Freelance developers need to clearly discuss requirements, timelines, and updates. Slack allows instant messaging, file sharing, and integrates with other tools. Zoom and Google Meet make video calls seamless, especially for client walkthroughs. Using professional channels instead of casual messaging builds credibility. Communication tools also help with team collaboration in multi-developer projects. Strong communication leads to better project outcomes and higher client satisfaction.
6. Browser DevTools
All modern browsers come equipped with powerful development tools. Chrome DevTools is one of the most popular among freelance web developers. It allows inspection of HTML, CSS, and JavaScript in real time. You can debug issues, test responsiveness, and monitor performance. DevTools also include features like network activity logging and lighthouse audits. These help optimize websites for speed and SEO. For freelancers, faster diagnostics mean faster delivery. Mastering browser tools can help catch bugs before clients do. They are indispensable for frontend developers.
7. Website Performance & SEO Auditing Tools
Speed and visibility matter in web development. Tools like Google PageSpeed Insights, GTmetrix, and Lighthouse assess performance. These platforms identify what’s slowing a site down and how to fix it. Freelance web developers can use them to deliver SEO-friendly, fast-loading sites. Lighthouse also gives accessibility and PWA (Progressive Web App) reports. These insights help meet modern web standards and improve rankings. Providing audit reports boosts your value as a developer. Use them regularly to maintain top-notch quality in your work.
8. Hosting & Deployment Services
Getting the site live is the final step—and you need the right tools. Netlify, Vercel, and GitHub Pages make deployment a breeze. These platforms allow one-click deployments from Git repositories. They’re perfect for static and JAMstack websites, popular in modern development. Freelance developers save time and impress clients with instant previews. Netlify offers forms, serverless functions, and global CDN. Vercel integrates tightly with Next.js and supports custom domains. Choose based on project size, performance needs, and tech stack. Smooth deployment ensures client satisfaction.
9. Payment & Invoicing Tools
Getting paid smoothly is just as important as coding well. Tools like PayPal, Stripe, and Bonsai simplify invoicing for freelancers. These platforms allow you to send professional invoices and receive global payments. Freelance web developers can track payments, set due dates, and manage contracts. Bonsai also offers contract templates and time tracking features. Payment tools reduce friction in business transactions. They give you legal backing and a reputation for professionalism. Never let poor billing processes hinder your freelance success.
Conclusion
Being a successful freelance web developer requires more than just technical skills—it takes organization, communication, and business savvy. The right tools streamline your workflow, reduce errors, and help deliver better results for your clients. From coding and collaboration to design and invoicing, each category serves a vital role. Investing time in learning these tools can make you faster, more efficient, and more professional. As technology evolves, staying updated with the latest tools will set you apart from the competition. Build your freelance toolkit wisely, and you’ll be better equipped to thrive in the digital world.
FAQs
What is the best code editor for freelance web developers? Visual Studio Code is widely recommended due to its features, speed, and customization options.
Do I need Git as a solo freelance web developer? Yes, Git is essential even for solo projects—it helps manage versions and track your progress efficiently.
Which tool is best for website performance audits? Google PageSpeed Insights and Lighthouse are reliable for testing speed and providing improvement tips.
How do freelance developers communicate with clients? Most use platforms like Slack, Zoom, or Google Meet to hold meetings and send updates professionally.
Are invoicing tools really necessary for freelancers? Yes, they ensure you get paid properly and on time, and present a more professional front to clients.
#Freelance web designer#Freelance web developer#Outsource web design#wordpress virtual assistant#Web design virtual assistant
0 notes
Text
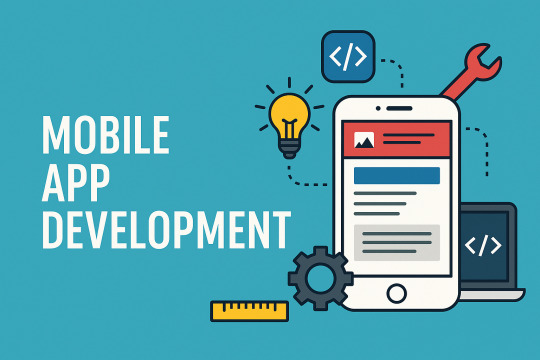
Cross-Platform Development: The Ultimate 2025 Guide to Building Apps That Work Everywhere
Introduction: Why Cross-Platform Development Matters More Than Ever
In the fast-paced digital world, businesses want apps that are fast to build, cost-effective, and work across Android, iOS, Windows, and the web. Enter cross-platform development—the solution that allows you to write code once and deploy everywhere.
If you’re a startup, business owner, or a developer exploring smarter ways to build applications in 2025, cross-platform development is a game-changer.
In this guide from diglip7.com, we’ll explore what cross-platform development is, its benefits and drawbacks, best tools and frameworks, real-life use cases, and how you can get started today.
What is Cross-Platform Development?
Cross-platform development is the process of creating software applications that are compatible with multiple operating systems using a single codebase.
Instead of building separate apps for Android, iOS, and web from scratch, developers can write the core logic once and reuse it across platforms.
��� Example:
Instagram, Facebook, and Skype are excellent examples of cross-platform apps—they work seamlessly across various devices and platforms using shared codebases.
Why Businesses Are Choosing Cross-Platform Development in 2025
The popularity of cross-platform development is skyrocketing for good reasons:
✅ Faster Time to Market
A single codebase means quicker development and deployment. You can launch on both iOS and Android simultaneously, saving time and energy.
✅ Reduced Development Costs
Why hire separate iOS and Android teams when you can build both using one tech stack? Cross-platform development cuts costs without compromising on performance.
✅ Consistent User Experience
Using the same design and logic ensures your brand looks and behaves consistently across platforms.
✅ Easier Maintenance and Updates
Updates or bug fixes are made once and pushed to all platforms, improving efficiency and consistency.
✅ Wider Audience Reach
With apps that run on multiple devices, your brand reaches a broader audience without additional development effort.
Popular Cross-Platform Frameworks in 2025
Here are the most widely used cross-platform frameworks in 2025, and why developers love them:
1. Flutter (by Google)
Language: Dart
Strengths: High performance, hot reload, beautiful UI, strong community
Use Cases: eCommerce apps, social networks, MVPs
2. React Native (by Meta)
Language: JavaScript
Strengths: Native-like performance, strong community, reusable components
Use Cases: Messaging apps, utility apps, startups
3. Xamarin (by Microsoft)
Language: C#
Strengths: Integrates with .NET ecosystem, strong enterprise support
Use Cases: Enterprise apps, internal business tools
4. Unity
Language: C#
Strengths: Best for gaming and 3D apps
Use Cases: Cross-platform games, AR/VR apps
5. Ionic + Capacitor
Language: JavaScript/TypeScript
Strengths: Web-first, fast prototyping, integration with Angular/React/Vue
Use Cases: Hybrid apps, quick prototypes, educational apps
Native vs. Cross-Platform: What's the Difference?
FeatureNative DevelopmentCross-Platform DevelopmentCodebaseSeparate for each platformSingle shared codebasePerformanceSlightly betterVery close with modern frameworksTime & CostHigherLowerUser ExperiencePlatform-specific UINear-native look and feelMaintenanceUpdate each platform separatelyOne update for all platformsIdeal ForComplex, hardware-intensive appsBusiness apps, MVPs, startups
Cross-Platform Development Process: Step-by-Step
Here’s how a typical cross-platform development cycle works:
Step 1: Define the App Requirements
Understand target audience and platforms
List core features and design expectations
Step 2: Choose the Right Framework
Based on budget, timeline, and performance needs
Flutter or React Native are top choices for most use cases
Step 3: Design the App UI/UX
Use Figma, Adobe XD, or Sketch
Ensure responsive design and consistent brand identity
Step 4: Develop the App
Write code using the chosen framework
Integrate APIs, third-party tools, and local databases
Step 5: Test on All Platforms
Use tools like Appium, BrowserStack, or in-built emulators
Perform unit, integration, and UI testing
Step 6: Deploy to App Stores
Prepare builds for Android and iOS
Follow Play Store and App Store guidelines
Step 7: Monitor and Maintain
Track app performance with tools like Firebase, Sentry, or Analytics
Push updates regularly to fix bugs and improve features
Pros and Cons of Cross-Platform Development
Pros:
✅ Single codebase = faster development
✅ Reduced development and maintenance costs
✅ Consistent UI and UX across devices
✅ Larger potential user base
✅ Great for MVPs and quick market entry
Cons:
�� Slightly lower performance for very complex apps
❌ Dependency on third-party plugins
❌ Limited access to some native features
❌ UI might not always feel “perfectly native”
Cross-Platform Development Trends in 2025
Stay ahead with these rising trends:
🔮 AI Integration
AI-powered features like chatbots, image recognition, and voice commands are now easily embedded across platforms using unified SDKs.
🔮 Cloud Backends
Integration with services like Firebase, Supabase, and AWS Amplify makes building scalable apps easier than ever.
🔮 Progressive Web Apps (PWAs)
PWAs continue to rise as a fast, app-like alternative to native apps.
🔮 Low-Code/No-Code Platforms
Platforms like OutSystems and FlutterFlow let non-developers build cross-platform apps visually.
Reviews from Developers and Businesses
👨💻 Developer Review
“Flutter has changed how I build apps. I can launch for both iOS and Android in weeks instead of months. Cross-platform saves time without sacrificing quality.” — Aman Gupta, Freelance App Developer
👩💼 Business Owner Review
“React Native allowed our startup to test our MVP quickly and affordably. We reached both Android and iPhone users without hiring two separate teams.” — Neha Sharma, Co-founder at a SaaS startup
Best Use Cases for Cross-Platform Development
Startups building MVPs
Businesses targeting both Android and iOS users
eCommerce and retail apps
Media, entertainment, and education apps
Apps with common UI across platforms
Common Mistakes to Avoid
❌ Ignoring platform-specific UI guidelines
❌ Choosing the wrong framework for your needs
❌ Skipping testing on real devices
❌ Overusing third-party libraries without vetting
❌ Not planning for long-term maintenance
How to Hire a Cross-Platform Development Team
Look for:
✅ Experience with React Native, Flutter, or your chosen framework
✅ Knowledge of both Android and iOS ecosystems
✅ Strong UI/UX design background
✅ Previous work on similar apps
Where to Find Developers:
Freelance platforms like Upwork, Toptal, Fiverr
Dedicated agencies
Tech communities like GitHub, Stack Overflow
FAQs About Cross-Platform Development
❓ Is cross-platform better than native?
It depends. For apps with general functionality and wide reach, cross-platform is better. For hardware-intensive apps (games, AR), native may be better.
❓ Which is the best cross-platform framework in 2025?
Flutter and React Native are leading in 2025 due to their large communities, excellent performance, and robust libraries.
❓ Can I convert a website into a mobile app using cross-platform tools?
Yes! Tools like Ionic and React Native Web allow you to reuse web components for mobile.
❓ How much does cross-platform development cost?
Depending on complexity, costs can range from $5,000 to $100,000+. It's usually 30-40% cheaper than building two native apps.
❓ Is it suitable for large enterprise apps?
Absolutely. With frameworks like Xamarin and Flutter, many large corporations have already adopted cross-platform for internal and consumer apps.
Conclusion: The Future is Cross-Platform
Cross-platform development is not just a trend—it's a powerful strategy for building efficient, scalable, and user-friendly apps in 2025.
By reducing costs, speeding up time to market, and maintaining consistency, it's ideal for businesses, startups, and developers alike.
Whether you’re planning your next big app or scaling an existing one, cross-platform technology offers the flexibility and reach you need.
Ready to build your next cross-platform app? Explore the latest frameworks, tutorials, and industry tips at diglip7.com—your trusted source for digital innovation.
0 notes
Text
How to Build a Calendar App from Scratch: Step-by-Step Guide

In today’s fast-paced digital world, time management is more crucial than ever. Calendar apps are no longer just for setting reminders—they're smart, integrated productivity tools that help individuals and teams organize, collaborate, and optimize their daily schedules. If you're an entrepreneur or developer wondering how to make a calendar app from scratch, you're in the right place.
Whether you're building a simple personal scheduler or a robust team collaboration tool, this step-by-step guide will walk you through everything from idea to launch. Let's dive in!
Step 1: Define the Purpose of Your Calendar App
Every successful app starts with a clear vision. Ask yourself:
What problem will your calendar app solve?
Who is your target audience—students, professionals, remote teams?
What sets your app apart from Google Calendar or Outlook?
Based on this, decide whether you want to build a personal calendar app, a shared team calendar, or an event scheduling app with advanced features like AI-based recommendations or smart alerts.
Step 2: List the Core Features
Once the purpose is clear, start listing down the must-have features. Here are some essentials:
User authentication (sign-up/login via email or social media)
Create, edit, delete events
Daily, weekly, and monthly views
Push notifications and reminders
Sync with external calendars (Google, iCloud, Outlook)
Recurring events
Color coding and tagging
Sharing and permissions
Advanced features may include:
AI-based scheduling assistant
Voice input (via Siri or Google Assistant)
Task integration (To-Do list)
Offline mode
Real-time collaboration
Step 3: Choose the Right Tech Stack
The technology you choose depends on whether you're building a native app (iOS or Android), a cross-platform app, or a web-based calendar.
Frontend Options:
iOS: Swift, SwiftUI
Android: Kotlin, Jetpack Compose
Cross-platform: Flutter, React Native
Backend Options:
Node.js, Django, Ruby on Rails
Firebase (for real-time syncing and authentication)
MongoDB or PostgreSQL for data storage
Don’t forget to use APIs like Google Calendar API or Apple Calendar API if you want your app to sync with existing platforms.
Step 4: Design the UI/UX
Calendar apps thrive on clean, intuitive design. The interface must be minimal yet powerful, allowing users to switch between views, add events, and get reminders with ease.
Design tips:
Use visual cues like color-coded events and icons.
Optimize for one-handed use on mobile devices.
Keep interactions simple—swipe to delete, tap to edit.
Tools like Figma, Sketch, or Adobe XD can help you prototype the UI before development begins.
Step 5: Estimate the Development Cost
Before writing a single line of code, you need to understand how much your project will cost. A mobile app cost calculator can give you a ballpark figure based on the features, platform, and complexity you choose.
Here’s a rough breakdown:
Simple calendar app: ₹1,00,000 – ₹3,00,000
Mid-level app with sync and sharing: ₹3,00,000 – ₹7,00,000
Advanced smart calendar app: ₹7,00,000 – ₹15,00,000+
Keep in mind that additional costs like app store fees, server hosting, and maintenance will also add up post-launch.
Book an Appointment with Our Experts
Not sure where to start or how to choose the best features for your calendar app? Our experienced team can help you build a roadmap tailored to your needs. Whether you have a complete idea or just a rough sketch, we’re here to bring it to life.
Book an Appointment today for a free 30-minute consultation and get expert advice on development, design, and launch strategy.
Step 6: Start Development – Frontend and Backend
Now it's time to get to the building.
Frontend tasks:
Implement calendar views (monthly, weekly, daily)
Enable event creation and editing
Integrate notifications
Backend tasks:
Create APIs for user management and event storage
Set up real-time data syncing
Ensure data encryption and security compliance (GDPR, CCPA)
Integration: Use third-party APIs like Google Calendar, Apple Calendar, or Microsoft Outlook to enable cross-platform syncing.
Step 7: Testing and QA
Before you launch, thorough testing is critical to ensure everything works smoothly.
What to test:
Event creation, editing, and deletion
Time zone handling
Notification accuracy
Cross-device syncing
Performance under high load
Use tools like TestFlight (iOS), Firebase Test Lab (Android), or BrowserStack for cross-platform testing.
Step 8: Launch and Gather Feedback
Once you're confident in your app’s stability and usability, it’s time to go live! Publish your app on Google Play and the App Store, and start collecting feedback from real users. Monitor usage through analytics platforms like Mixpanel or Firebase Analytics.
Encourage user reviews, gather suggestions, and plan updates accordingly.
Step 9: Post-Launch Support and Updates
Your app journey doesn’t end at launch. Keep your app relevant by regularly updating features, fixing bugs, and adapting to new OS updates.
You might also consider adding new functionalities like video meetings, task tracking, or integrations with Slack and Trello in future versions.
Final Thoughts
Building a calendar app from scratch is a rewarding project that, when done right, can truly improve how people organize their lives. With proper planning, the right tech stack, and a solid development partner, you can bring your idea to life in a matter of months.
If you're ready to take the next step and create a professional, scalable calendar app, consider partnering with a reliable mobile app development services company that understands your vision and can turn it into a user-friendly, feature-rich product.
0 notes
Text
Choosing The Right UI/UX Designing Services For Your Brand

In today’s digital-first world, your website or mobile app often serves as the first impression of your brand. This makes your User Interface (UI) and User Experience (UX) design crucial to your success. A well-thought-out UI/UX design not only enhances visual appeal but also improves usability, engagement, and conversions. With so many service providers available, choosing the right UI/UX designing services for your brand can be a game-changer.
Understanding UI and UX Design
Before selecting a service provider, it's important to understand the difference between UI and UX:
UI (User Interface) focuses on the look and feel of the product—colors, fonts, buttons, icons, and layout.
UX (User Experience) is about how users interact with the product, focusing on ease of use, efficiency, and overall satisfaction.
An effective UI/UX design blends form and function to create a seamless user journey.
Why UI/UX Design Matters
Here’s why investing in professional UI/UX design services is essential for your brand:
1. Creates a Positive First Impression
Users typically decide whether to stay or leave within seconds. A visually appealing and intuitive design encourages them to explore further.
2. Boosts User Engagement
Easy navigation, responsive elements, and user-friendly layouts improve user interaction, keeping users engaged longer.
3. Improves Conversion Rates
A streamlined user journey reduces friction, guiding users toward completing actions—whether it's making a purchase, signing up, or contacting you.
4. Builds Brand Credibility
A professionally designed interface reflects your brand’s identity and builds trust with your audience.
5. Enhances Customer Satisfaction
A seamless user experience reduces frustration, leading to higher customer satisfaction and retention.
Read More: A Comprehensive Guide to Mobile Application Development
What to Look for in UI/UX Designing Services
Choosing the right UI/UX design partner involves more than just browsing portfolios. Here are key criteria to consider:
1. Experience and Expertise
Look for agencies or freelancers with a proven track record in UI/UX design. Check if they have experience across different industries and platforms (web, mobile, desktop).
2. User-Centered Design Approach
Great design starts with understanding the user. Choose services that prioritize user research, personas, user journeys, and usability testing.
3. Customized Solutions
Every brand is unique. Avoid one-size-fits-all approaches. Opt for designers who tailor solutions to your brand’s goals, values, and target audience.
4. Comprehensive Process
Reliable design services follow a structured process, which may include:
Discovery & Research
Wireframing & Prototyping
Visual Design & Branding
Testing & Iteration
Final Handoff & Support
5. Portfolio and Case Studies
Review past projects to assess design quality, creativity, and functionality. Look for case studies that demonstrate real-world results.
6. Client Reviews and Testimonials
Check reviews on platforms like Clutch, GoodFirms, or Google. Satisfied clients often speak about professionalism, communication, and outcomes.
7. Collaborative Communication
Your chosen team should be open to feedback and maintain clear communication throughout the project. Collaboration ensures that the final design aligns with your vision.
8. Post-Launch Support
UI/UX design is not a one-time task. Choose services that offer continued support for updates, usability improvements, and new feature rollouts.
Questions to Ask Before Hiring
Asking the right questions can help you gauge compatibility and competence:
What is your design process?
How do you conduct user research?
Can you share relevant portfolio examples?
How do you handle feedback and revisions?
What tools do you use (e.g., Figma, Adobe XD, Sketch)?
Do you offer design-to-development handoff?
What is your typical project timeline?
Common Mistakes to Avoid
Choosing based solely on cost: Low prices may lead to poor design and costly redesigns.
Ignoring user testing: Assumptions without data can misguide the design process.
Lack of brand alignment: A design that doesn’t reflect your brand can confuse users.
Overcomplicating the interface: Simplicity enhances usability.
Benefits of the Right UI/UX Design Partner
Faster development cycles through clear design specifications
Reduced bounce rates and increased user retention
Higher ROI on marketing and user acquisition
A consistent and memorable brand identity across platforms
Final Thoughts
Selecting the right UI/UX designing services is an investment in your brand’s success. Great UI/UX design not only makes your product aesthetically pleasing but also ensures it functions seamlessly for your users. By focusing on user needs, brand identity, and business goals, the right design partner can transform your digital presence and set you apart from competitors.
Don’t settle for average. Take the time to evaluate your options and choose a UI/UX design team that shares your vision and commitment to excellence. The right partnership can redefine your brand’s digital journey.
0 notes
Text
web designer
Web design isn’t just about making things look pretty—it’s a mix of creativity, strategy, and problem-solving. A good web designer knows how to blend visual aesthetics with functionality, creating an experience that’s both beautiful and user-friendly.
🎨 Designing for the Web
Being a web designer means more than just picking cool fonts and colors. It’s about: ✔ User Experience (UX) – Making sure visitors can navigate easily. ✔ Responsive Design – Ensuring the site works on any screen size. ✔ Brand Identity – Creating a unique and recognizable style. ✔ Performance Optimization – Fast loading pages = happy users!
💻 The Tools of the Trade
Every designer has their go-to design and development tools. Some essentials include: 🖌 Figma / Adobe XD – For prototyping and UI/UX design. 🔧 HTML & CSS – The building blocks of any website. ⚙ WordPress / Webflow / Shopify – For managing dynamic websites. 🎭 Illustrator & Photoshop – For custom graphics and branding.
🚀 Why Web Design Is an Amazing Career
Being a web designer means constant learning and endless opportunities. Whether freelancing, working for an agency, or building your own brand, the internet is your playground. Plus, businesses always need websites, so the demand is huge!
Are you a web designer? Thinking of becoming one? Share your thoughts in the comments! 🚀✨
0 notes
Text
Also known as diagrams, user flow or UX flow defines a complete user journey or path when availing a service or product; all the way from the beginning. Each and every step a user takes is then mapped to the point of final integration based on all possibilities and challenges that may come across. All that said, a user flow is important to transactions or conversions with a complete process based on communication technology or platform that can be a website, mobile app, or any other. Because user flow has a direct impact on the overall experience, having a high-end, premium and authentic design is extremely important. Now that we have a basic understanding of user flow, let’s explore some of 2021’s best tools to help you out with the entire process that is also used by leading web design Dubai agencies. Wondershare Mockitt With a full suite of handy flowchart, design, and prototyping tools, Wondershare Mockitt takes the lead when it comes to super amazing user flows that may fall anywhere between simple to sophisticated and extreme pro-level. The platform also supports sharing the data with project managers as well as real-time implementation in the design of prototypes. This way, testing, and development can take place instantly to get the job done in a smooth and swift manner. Important Features A wide range of creative assets library including flowchart elements, connectors, and hundreds of supporting components. Editable user flow and flowchart templates. Drag-and-drop functions for quick and clean user flows Support Sketch design and prototype import for better user interaction Easy downloading as HTML packages and online sharing Weje With free infinite online whiteboards from Weje anyone can cope with framing user flows: from a sole entrepreneur or novice marketer to a salted salesman or creator. Design a user flow of varying complexity, either on your own or with the help of a team. Weje offers much for collaboration, including shareable canvases, named cursors, and chat. You can set connections between different elements with arrows or use a mind map-making tool - to comfort the process. Also, you can copy & paste media or figures right onto the board and after - edit and group these, as needed. Important Features Templates library and a built-in mind map maker. Online sticky notes, checklists, and a drawing tool that ease simultaneous editing. A convenient drag and drop tool for effortless work with text and images. An option to download the outcome or share it via email or socials. Figma Another famous design and prototyping platform as well as an effective user flow creating tool. When comparing cost with many other design tools, Figma is a bit expensive but totally worth it. With a large community of designers, creative agencies, and third-party users, Figma lets them contribute outstanding content in terms of a design system, plugins, UI kits, and much more. Plus, you can also import Sketch and Adobe XD files and prototype them. Important Features Massive asset repository that also includes third-party UI kits and user flows. Ready to deploy templates and components with the Flowchart Maker. A greater number of tools for developing creative designs, prototypes, and user flows. The convenience of Autoflow plugin for user flow creation. Additional option to embed flowcharts in Dropbox Paper. Miro Taking design to a whole new level is Miro; a digital whiteboard with ready-to-use diagramming and mapping tools, allowing you to brainstorm and proceed to create outstanding user flows, customer journey, flow charts, and much more. It’s quite a handy tool to let you collaborate on design flows with users, share each other's work, edit and implement in real-time as well as offline. Important Features Ready-to-use widgets and components. Frameworks and templates for a quick start. A complete package of commenting and annotation tools. Integrates with many other design tools such as Sketch, Slack, and more.
Overflow Claiming itself as the world's first user flow and diagramming tools customized specifically for product designs. It works differently from many other digital design tools in a way that lets you work and sync even in offline mode. Overflow also offers integration with many other design platforms letting you merge your designs with the least effort. Important Features Customized and comprehensive flowchart elements. Also, link design layers with app screens. Allow style editing for balancing fonts, text size, and other features with design. Different device skins. Able to split primary user flow into its subcomponents and further divide them into the individual artboard. Lucidchart Holding true to specifically being a flowcharting and workflow tool, Lucidchart lets you conveniently draw the shapes and style them the way you like as per the branding guidelines. With this, the tool also lets viewers follow the entire process for a more immersive and real-time presentation. Lucidchart comes with premium enterprise-grade features like converting CSV to the org chart, import OmniGraffle, Visio, and many others for easy enterprise and user management. Important Features Various style options for consistency between designs and user flows. For neat and clean diagrams, there’s an option for smart lines. For larger canvas, there’s an option to go full-screen. Handy containers for task management and separating them. Real-time annotation and commenting features to let you and others add notes. Wireflow As an online and open-source tool, Wireflow lets you create user flows without any Photoshop skills for maximum ease. In addition, it also offers users above a hundred built-in customized graphics. Like many other tools, Wireflow also allows real-time collaboration with users and friends to double up the speed and effort of creating and sharing amazing user flows in real-time. Important Features Allow designing project rooms/virtual chambers for better project management. The simple and user-friendly tool with high-end essential features to ensure a sure win user flow design. Timblee Works perfectly on both desktop devices as well as mobile, Timblee assists in developing user flow diagrams in the early stages of product development while eliminating the hassle of complex tools in between. On subscription, you’ll get a 14-day trial period. Many website design companies in Dubai, as well as worldwide, are using Timblee so that adds to the must-have factor. Important Features Convenient designing of the sitemaps. Excellent for beginners because of the drag-and-drop canvas. Real-time feedback on work without any restriction to have a Timblee account. There’re many different UX tools and more are expected to surface as we move ahead in the year. For now, you can try out any of the tools listed above to create amazing user flows and take the winning.
0 notes
Text

Master In UIUX & visual design with 100% placement support.The design world is vast and diverse, often leading to confusion about the roles and responsibilities of different design disciplines. Among these, Graphic Design and UX/UI Design are two of the most popular yet misunderstood fields. While they share commonalities, they are distinct in their objectives, processes, and tools. Let’s delve into the key differences between Graphic Design and UX/UI Design to help you better understand each domain.
1. Core Focus
Graphic Design: Graphic design is primarily concerned with visual communication. It focuses on creating visually appealing and impactful designs that convey a message or evoke an emotion. Graphic designers often work on branding, advertising, packaging, and print materials like brochures and posters.
Key Goal: Capturing attention and communicating messages effectively through visuals.
UX/UI Design: UX/UI design, on the other hand, is all about enhancing user experiences with digital products like websites, apps, and software. UX (User Experience) focuses on a product's functionality and flow, while UI (User Interface) emphasizes the design and layout of interactive elements.
Key Goal: Ensuring usability, accessibility, and seamless interaction for users.
2. Process and Approach
Graphic Design Process
Research: Understand the brand, target audience, and message.
Concept Development: Brainstorm and sketch ideas.
Design Creation: Use tools like Adobe Photoshop, Illustrator, or InDesign to create visuals.
Refinement: Finalize the design through feedback and revisions.
UX/UI Design Process
User Research: Conduct interviews, surveys, and usability tests to understand user needs.
Wireframing and Prototyping: Create low- and high-fidelity wireframes and prototypes using tools like Figma or Sketch.
Interaction Design: Plan how users will navigate and interact with the product.
Testing and Iteration: Continuously refine the product based on user feedback.
Key Difference: Graphic design focuses on creating static visuals, while UX/UI design is iterative, involving user feedback and testing at every stage.
3. Tools of the Trade
Graphic Design Tools Graphic designers primarily use tools tailored for creating static, high-quality visuals. Popular tools include:
Adobe Photoshop
Adobe Illustrator
CorelDRAW
InDesign
UX/UI Design Tools UX/UI designers rely on tools that support interactive design, prototyping, and user testing. Common tools include:.
Figma
Sketch
Adobe XD
InVision
Axure
Key Difference: Graphic design tools are optimized for creating images and layouts, while UX/UI tools focus on interaction design and prototyping.
4. Deliverables
Graphic Design Deliverables Graphic designers produce deliverables like:
Logos and brand guidelines
Marketing materials (flyers, posters, ads)
Social media graphics
Product packaging
UX/UI Design Deliverables UX/UI designers create deliverables such as:
User personas and journey maps
Wireframes and prototypes
High-fidelity mockups
Usability test reports
Key Difference: Graphic design outputs are often final products, while UX/UI outputs are iterative and guide the development process.
5. Skill Set
Graphic Designers Need:
Strong visual storytelling abilities.
Mastery of typography, color theory, and layout design.
Creativity and attention to detail.
UX/UI Designers Need:
Empathy and a deep understanding of user behavior.
Analytical thinking for usability testing and problem-solving.
Technical knowledge of responsive design and interaction principles.
Key Difference: Graphic designers excel in aesthetic design, while UX/UI designers focus on functionality and user-centricity.
6. Target Audience
Graphic Design Graphic designers primarily address the needs of businesses and marketing teams. Their designs are aimed at capturing attention and communicating a brand’s message effectively.
UX/UI Design UX/UI designers focus on end-users. Their goal is to understand and solve user problems while ensuring a seamless and enjoyable interaction with the product.
Key Difference: Graphic designers create for businesses and audiences, while UX/UI designers prioritize the needs of individual users.
0 notes
Text
14 Essential Tools For Designers – Infographic
Every web designer needs the right tools to bring their creative vision to life. In this blog post, we explore 14 essential tools that streamline workflows, enhance productivity, and elevate design quality, whether you’re a graphic, web, or UI/UX designer.

Download Infographic
Design Tools

Designers rely on powerful tools to streamline their creative processes, and three standout options are Figma, Adobe Suite, and Webflow.
Figma is a cloud-based design tool perfect for UI/UX designers, enabling real-time collaboration, prototyping, and seamless design handoff.
Adobe Suite, including Photoshop, Illustrator, and XD, is a powerhouse for graphic, web, and UI/UX design, offering advanced editing, vector creation, and layout tools.
Webflow bridges design and development, allowing designers to create responsive websites visually without coding while offering full control over interactions, animations, and CMS functionality, making it ideal for modern web design projects.
Operations

Efficient project management and organisation are essential for designers, and tools like Notion, Google Calendar, and Google Drive help streamline workflows.
Notion is a versatile workspace that combines note-taking, task management, and database functionality, making it ideal for organising design projects, tracking progress, and collaborating with teams.
Google Calendar ensures designers stay on top of deadlines, meetings, and project timelines with easy scheduling and reminders.
Google Drive offers secure cloud storage, allowing designers to store, share, and collaborate on files in real time, ensuring seamless access to assets from any device, enhancing productivity and teamwork.
Communication

Clear communication is crucial for designers working with teams and clients, and tools like Gmail, Discord, and Zoom make collaboration seamless.
Gmail is a reliable email platform that enables professional communication, file sharing, and integration with other Google Workspace tools, making it essential for client and team interactions.
Discord is a dynamic communication tool with voice channels, chat rooms, and screen-sharing features, perfect for real-time collaboration, brainstorming, and community engagement.
Zoom is a leading video conferencing tool that allows designers to conduct virtual meetings, share screens, and present ideas effectively, ensuring smooth project discussions and feedback sessions.
Automation

Automation tools like Zapier, Calendly, and MailerLite help designers streamline workflows, saving time and effort on repetitive tasks.
Zapier connects different apps and automates tasks, allowing designers to create workflows that sync tools like Gmail, Notion, and Slack without manual input.
Calendly simplifies appointment scheduling by letting clients and teams book meetings based on availability, eliminating back-and-forth emails and ensuring efficient time management.
MailerLite is an intuitive email marketing platform that helps designers automate newsletters, client updates, and promotional campaigns, making it easy to engage with audiences and manage email outreach with minimal effort.
Finances

Managing finances efficiently is crucial for designers, and tools like Rounded and Google Sheets help simplify accounting and budgeting.
Rounded is an intuitive accounting software designed for freelancers and small businesses. It streamlines invoicing, expense tracking, and tax reporting, making financial management stress-free for designers handling multiple clients. With automation features, it reduces admin time and improves cash flow management.
Google Sheets is a versatile tool for tracking expenses, budgeting, and creating financial reports. With cloud-based access and real-time collaboration, designers can maintain financial records, analyse trends, and share data with clients or accountants effortlessly, ensuring organised and transparent financial management.

0 notes
Text
Boost Your UX/UI Skills with These Must-Use Resources
In today’s digital landscape, having a strong foundation in UX/UI design is essential for designers looking to create seamless and engaging user experiences. Whether you're a beginner or a seasoned professional, leveraging the right UI design resources and UX design resources can significantly improve your skills. This guide will help you discover the best tools, courses, and communities to take your design expertise to the next level.

Why UX/UI Resources Matter
Understanding the latest trends, methodologies, and best practices is crucial in the fast-evolving world of UX/UI design. By using high-quality UI design resources and UX design resources, you can stay ahead of industry trends, improve your workflow, and create user-friendly designs that enhance user satisfaction.
Top UI Design Resources for Beginners and Experts
1. Figma
Figma is one of the most powerful UI design resources, allowing designers to create, prototype, and collaborate in real time. It’s browser-based, making it accessible from any device.
2. Sketch
Sketch remains a favorite among UI designers due to its intuitive interface and strong prototyping capabilities. It’s a great tool for building user interfaces and wireframes.
3. Adobe XD
Adobe XD is a top-tier UI design resource that integrates well with other Adobe products. It’s perfect for designing and prototyping interactive experiences.
4. Canva
For beginners looking for an easy way to create UI designs, Canva provides a simple interface with pre-made templates for quick design projects.
5. InVision
InVision helps designers prototype and collaborate on UI designs. It’s widely used in UX/UI projects and supports seamless client feedback integration.
Best UX Design Resources for Enhancing User Experience
1. Nielsen Norman Group (NNG)
NNG provides research-based insights on UX design, making it one of the best UX design resources for professionals looking to improve their usability knowledge.
2. Smashing Magazine
A valuable online resource for UX designers, Smashing Magazine covers topics like accessibility, interaction design, and usability best practices.
3. UX Design Institute
This platform offers structured UX design courses that help designers gain industry-recognized certifications.
4. Interaction Design Foundation (IDF)
IDF provides affordable UX design courses, covering topics from user psychology to design thinking.
5. Google’s Material Design
Google’s Material Design guidelines are essential for anyone working on Android applications or looking for structured UI/UX principles.
Books Every UX/UI Designer Should Read
Reading expert insights can enhance your knowledge of UI/UX design. Here are some must-read books:
"Don’t Make Me Think" by Steve Krug – A classic that teaches usability principles in a straightforward manner.
"The Design of Everyday Things" by Don Norman – Covers the psychology behind good design.
"Lean UX" by Jeff Gothelf – Teaches agile UX design principles.
"Hooked" by Nir Eyal – Explores how to create habit-forming digital products.
Online UX/UI Communities and Forums
Engaging with UX/UI communities allows designers to share knowledge, seek advice, and stay updated with the latest trends.
Dribbble – A great place for UI designers to showcase their work and gain inspiration.
Behance – Adobe’s platform for sharing design portfolios.
Reddit UX Design – A forum for discussing UX/UI design concepts and trends.
UX Stack Exchange – A Q&A site for professional UX designers.
Free and Paid UX/UI Courses to Improve Your Skills
Free Courses
Google UX Design Certificate (Coursera) – Covers the fundamentals of UX design.
Udacity’s Free UX Design Course – Provides introductory lessons in UX design.
HubSpot Academy’s Free UX Course – Teaches UX principles for marketing and web design.
Paid Courses
Interaction Design Foundation (IDF) Courses – Affordable and well-structured.
General Assembly UX Design Bootcamp – A comprehensive bootcamp for serious learners.
Coursera UX/UI Specialization (by the University of Michigan) – Covers design thinking, prototyping, and research methods.
UX/UI Open:- Learn Online UX & UI Design Course | UX UI Open
Tools to Enhance Your UX/UI Workflow
Wireframing Tools
Balsamiq – Ideal for quick wireframing.
Axure RP – Advanced wireframing and prototyping.
Usability Testing Tools
Hotjar – Provides heatmaps and user feedback.
UserTesting – Offers real-time user testing services.
Collaboration Tools
Slack – Great for team communication.
Notion – Helps with project documentation.
Conclusion
Leveraging the right UX/UI design resources can significantly boost your career and help you create user-friendly designs. Whether you’re looking for tools, courses, or community support, these resources will ensure you stay ahead in the competitive world of UX/UI design. Start exploring today and elevate your design skills to new heights!
0 notes
Text
A Day in the Life of a Web Design and Development Company in Brisbane

The bustling city of Brisbane is not only known for its cultural vibrancy and scenic beauty but also its thriving tech industry. Among the many contributors to this digital growth are the web design and development companies in Brisbane shaping business presence across the region. But what does a typical day look like for these innovative companies? Let’s take a closer look at a day in the life of a Web Design and Development Company in Brisbane.
Morning: Kickstarting the Day with Strategy and Planning
The day begins with a team huddle, where designers, developers, project managers, and content strategists gather to align priorities. In this meeting, project timelines are reviewed, goals are set, and any challenges are discussed.
For many Brisbane-based web design companies, collaboration is key. Whether brainstorming ideas for a new e-commerce website or refining the UX/UI for a mobile app, the morning hours are dedicated to strategy.
Key activities include:
Reviewing client briefs and feedback.
Setting daily goals for each team member.
Discussing updates on ongoing projects.
Mid-Morning: Creative Brainstorming and Design
The creative energy is at its peak during mid-morning. The designers dive into their tools, using platforms like Adobe XD, Figma, or Sketch to create wireframes, prototypes, and mockups.
One of the hallmarks of a Brisbane-based web design company is its focus on user-centric design. The team considers the unique needs of local businesses, ensuring websites are tailored for mobile and desktop users.
Typical tasks during this time include:
Sketching out website layouts and navigation flows.
Designing visually appealing graphics and branding elements.
Collaborating with developers to ensure feasibility.
Lunchtime: A Break to Recharge
After a busy morning, the team takes a well-deserved break to recharge. Brisbane’s food scene offers plenty of options, and it’s not uncommon to see team members grabbing a quick coffee at a local café or enjoying a meal together at one of the city’s vibrant eateries.
This downtime fosters camaraderie among team members, which is essential for the collaborative nature of their work.
Afternoon: Development and Technical Implementation
Post-lunch, the focus shifts to development. The coding team gets to work, transforming design prototypes into functional websites. Using technologies like HTML, CSS, JavaScript, and frameworks like React or Angular, developers ensure that the websites are both visually stunning and technically sound.
In Brisbane, web development teams often prioritize mobile-first design to meet the growing demand for responsive websites. Additionally, they integrate SEO best practices to ensure that websites rank well in search engine results.
Afternoon activities include:
Writing clean and efficient code.
Testing website functionality across various devices and browsers.
Debugging and troubleshooting any issues that arise.
Late Afternoon: Client Collaboration and Updates
Brisbane-based web design companies pride themselves on maintaining strong client relationships. Late afternoons are often reserved for client meetings and updates.
During these sessions, the team shares progress reports, presents prototypes, and gathers feedback. Clear communication ensures that the final product aligns with the client’s vision while meeting technical and aesthetic standards.
Evening: Wrapping Up and Planning Ahead
As the day comes to an end, the team revisits their morning goals to assess progress. Completed tasks are reviewed, and any pending work is carried over to the next day’s schedule.
A Web Design and Development Company in Brisbane thrives on continuous improvement, so the team reflects on what worked well and identifies areas for growth. This dedication to quality and innovation ensures they stay ahead in a competitive industry.
Conclusion
A Day in the Life of a Web Design and Development Company in Brisbane is a dynamic blend of creativity, technical expertise, and collaboration. From crafting user-friendly designs to implementing cutting-edge technologies, these companies play a pivotal role in helping businesses thrive in the digital age.
By partnering with a Brisbane-based company, businesses can tap into this expertise and ensure their online presence is as engaging as it is functional. For these teams, every day is an opportunity to innovate, solve problems, and deliver exceptional results for their clients.
#Web Design and Development Company in Brisbane#ios and android app development in Brisbane#web design services in Brisbane
0 notes
Text
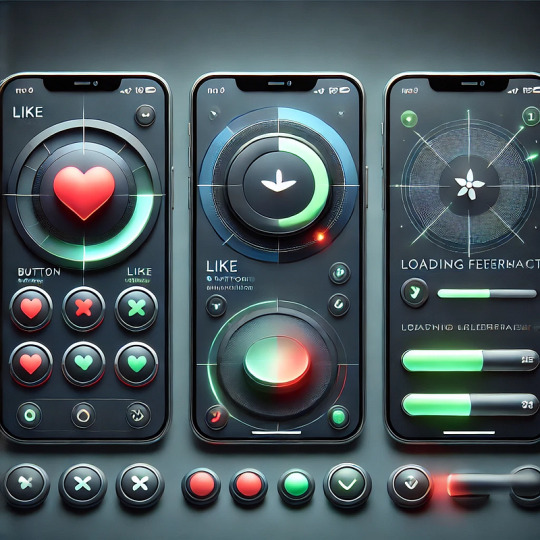
Micro-Interactions: How Small Details Enhance User Experience
Micro-Interactions: How Small Details Enhance User Experience
Micro-interactions are subtle animations and feedback mechanisms that make digital experiences more engaging, intuitive, and user-friendly. These small details significantly impact usability, engagement, and delight without overwhelming users.
1. What Are Micro-Interactions?
A micro-interaction is a small, functional animation that occurs in response to a user’s action. They guide users, provide feedback, and improve the overall UX.
🔹 Examples: ✅ A “like” button that animates when clicked ❤️ ✅ A password strength meter while typing 🔒 ✅ A loading spinner when fetching data ⏳
💡 Micro-interactions improve UX by making interfaces feel alive, intuitive, and responsive.
2. Key Components of Micro-Interactions
Every micro-interaction consists of four key parts:
1️⃣ Trigger — The user action or system event that initiates the micro-interaction. 2️⃣ Rules — Define what happens once the interaction starts. 3️⃣ Feedback — Provides real-time response (e.g., animation, vibration). 4️⃣ Loop & Mode — Determines if the interaction repeats or adapts based on context.
🔹 Example: Toggle Button Animation
Trigger: User taps the toggle switch.
Rules: The toggle state changes from “Off” to “On.”
Feedback: The switch smoothly slides and changes color.
Loop & Mode: The toggle remains in its new state until changed.
3. Why Micro-Interactions Matter in UX Design
✅ Enhance User Engagement: Makes the UI more interactive and fun. ✅ Provide Instant Feedback: Shows the result of an action in real time. ✅ Improve Usability: Helps guide users intuitively. ✅ Add Personality to a Brand: Creates a more human and relatable experience.
4. Common Micro-Interaction Examples
🔹 Loading Animations
🔄 Prevent frustration by keeping users informed. Instead of a boring “Loading…” message, a creative animation can improve perceived performance.
✅ Example:
Spinning loader (⏳)
Skeleton screens (gradually load content)
Progress bars (indicate completion)
🔹 Button Feedback & Hover Effects
📍 Enhances interactions and confirms user actions.
✅ Example:
Buttons change color or size when hovered.
A ripple effect when clicking a button.
cssCopyEditbutton:active { transform: scale(0.95); }
🔹 Form Validations & Input Feedback
✍️ Makes form-filling easier and error-free.
✅ Example:
Inline validation messages (✅ or ❌).
Password strength indicators.
Shake animation for incorrect input.
javascriptif (password.length < 6) { inputField.classList.add("shake"); }
🔹 Like, Share, & Favorite Animations
❤️ Encourages engagement and interaction.
✅ Example:
Clicking a heart icon makes it pop & change color.
Social media reactions (e.g., Facebook’s Like button).
javascriptheartIcon.addEventListener("click", () => { heartIcon.classList.add("animate-heart"); });
🔹 Toggle Switch & Dark Mode
🌗 Smooth transitions improve experience.
✅ Example:
A toggle switch animates when switching between light and dark modes.
Background and elements smoothly transition between themes.
javascripttoggleButton.addEventListener("click", () => { document.body.classList.toggle("dark-mode"); });
5. Best Practices for Designing Micro-Interactions
🎯 Keep it Simple — Subtle animations work best; avoid overuse. ⚡ Make it Fast — Animations should be quick (0.2–0.5s). 🎨 Match the Brand Personality — Ensure animations align with the app’s tone. 🎯 Provide Feedback — Always let users know what’s happening. 📱 Ensure Accessibility — Avoid relying only on color; support screen readers.
6. Tools to Create Micro-Interactions
🚀 For UI Designers:
Figma, Adobe XD, Sketch — For prototyping animations.
Lottie (Airbnb) — Lightweight animated SVGs & JSON-based animations.
💻 For Developers:
CSS Animations & Transitions — For simple hover and click effects.
JavaScript & GSAP — For dynamic and interactive animations.
Framer Motion (React) — For smooth UI animations.
7. Conclusion
Micro-interactions may seem small, but they greatly enhance user experience by making interfaces more engaging, intuitive, and fun. When used effectively, they improve usability, reduce friction, and add a human touch to digital products.
WEBSITE: https://www.ficusoft.in/web-designing-training-in-chennai/
0 notes
Text
Essential Tools Every Web Developer Should Use

In the ever-changing landscape of web development, having the right tools can make all the difference. Whether you’re a seasoned developer or just starting, equipping yourself with essential tools will not only save time but also improve the quality of your work. In this guide, we’ll cover some must-have tools for web developers and why they’re essential. If you're working with a website development company in India, chances are you’ll come across many of these tools in action.
Text Editors and IDEs
1. Visual Studio Code
Visual Studio Code (VS Code) is one of the most popular text editors among developers. It’s lightweight, customizable, and packed with features like syntax highlighting, intelligent code completion, and an integrated terminal. With a wide range of extensions, VS Code can adapt to almost any programming language or framework.
2. Sublime Text
Sublime Text is another favorite, known for its speed and simplicity. It’s perfect for developers who prefer a clean interface but still need powerful features like multi-line editing and a command palette.
Version Control Systems
3. Git
Git is a cornerstone of modern web development. It allows developers to track changes, collaborate on projects, and maintain a history of all modifications. Paired with platforms like GitHub or GitLab, Git becomes an indispensable tool for teamwork and project management.
4. GitHub
GitHub provides a collaborative space where developers can store code, manage projects, and review contributions. Its user-friendly interface and integration with Git make it a go-to platform for version control and team collaboration.
Browser Development Tools
5. Chrome DevTools
Every web developer needs a reliable way to debug and test their code. Chrome DevTools offers a suite of tools directly within the browser, enabling you to inspect elements, monitor performance, and troubleshoot issues in real time.
6. Firefox Developer Edition
Firefox Developer Edition is a browser specifically designed for developers. It includes tools for CSS grid debugging, responsive design mode, and JavaScript debugging, making it an excellent companion for front-end development.
Design and Prototyping Tools
7. Figma
Figma is a collaborative design tool that allows developers and designers to work together seamlessly. Its cloud-based platform ensures that everyone is working on the latest version of a design, reducing confusion and miscommunication.
8. Adobe XD
Adobe XD is another great tool for creating prototypes and wireframes. It’s user-friendly and integrates well with other Adobe products, making it ideal for teams already using the Adobe Creative Suite.
Task Runners and Package Managers
9. NPM (Node Package Manager)
NPM is the default package manager for Node.js, and it simplifies the process of managing dependencies in your projects. With a vast library of packages, NPM helps developers add functionality to their projects quickly and efficiently.
10. Gulp
Gulp is a task runner that automates repetitive tasks like minifying CSS, optimizing images, and bundling JavaScript files. It’s a great tool for improving your workflow and ensuring consistency across projects.
Testing and Debugging Tools
11. Jest
Jest is a JavaScript testing framework that helps developers ensure their code works as expected. With features like snapshot testing and a simple API, Jest makes writing tests more accessible.
12. Postman
Postman is essential for testing APIs. It allows developers to send requests, inspect responses, and debug issues effectively. Whether you’re working on front-end or back-end development, Postman simplifies the process of interacting with APIs.
Collaboration and Communication Tools
13. Slack
Communication is key in web development, especially when working with teams. Slack provides a platform for instant messaging, file sharing, and integrations with other tools, ensuring smooth collaboration.
14. Trello
Trello is a project management tool that uses boards and cards to organize tasks. It’s simple, flexible, and helps teams keep track of progress in an organized way.
The Role of a Website Development Company
If you’re looking to develop a website, collaborating with a professional website development company in India can be a game-changer. These companies not only bring technical expertise but also use many of the tools mentioned above to deliver high-quality websites. By leveraging their experience, you can focus on your business while they handle the technical aspects.
Conclusion
The right tools can significantly impact the efficiency and quality of web development. From text editors and design tools to version control systems and task runners, each tool serves a specific purpose in the development process. Whether you’re working independently or with a team, mastering these tools will set you up for success. And if you prefer to leave the technicalities to the experts, partnering with a reliable website development company in India ensures your project is in good hands.
#web design company in odisha#best web development agencies india#website development company in india#performance marketing agency#digital marketing agency in bhubaneswar
0 notes
Text
UI/UX Course in Nagercoil
jclicksolutions.in
#UI/UXCourseinNagercoil
Jclicksolutions: UI/UX Design Course in Nagercoil
In today’s digital age, user experience and user interface design have become critical to creating impactful digital products. Jclicksolutions in Nagercoil offers a top-notch UI/UX Design Course, equipping students with the skills to craft intuitive and visually appealing designs. This comprehensive course is perfect for aspiring designers and professionals looking to enhance their expertise in UI/UX.
Why Choose Jclicksolutions?
Jclicksolutions stands out as a leading training center due to its practical approach, experienced instructors, and industry-relevant curriculum. The UI/UX Design Course is structured to cater to both beginners and experienced professionals, ensuring everyone can thrive.
Comprehensive Curriculum: The course covers fundamental design principles, wireframing, prototyping, usability testing, and advanced tools like Figma, Adobe XD, and Sketch. Students learn to create user-friendly interfaces and enhance user experiences for websites and mobile apps.
Expert Trainers: Jclicksolutions’ instructors are seasoned industry professionals who provide personalized mentorship and share insights into real-world design practices.
Hands-On Projects: Practical learning is at the heart of the course. Students work on real-world projects, building user personas, creating wireframes, and designing prototypes to develop a strong portfolio that showcases their skills.
Key Features of the Course
Interactive Learning: The course emphasizes interactive workshops, design critiques, and group activities to foster a collaborative environment.
Flexible Schedules: Jclicksolutions offers flexible batch timings, making it easier for students and working professionals to balance their schedules.
Career Support: The center provides assistance with portfolio building, mock interviews, and job placements to help students launch successful design careers.
Success Stories
Jclicksolutions has a proven track record of producing skilled UI/UX designers who have secured roles in reputed companies. Alumni have praised the practical approach and real-world relevance of the course, with many successfully completing freelance and full-time projects for clients worldwide.
Why UI/UX Design?
UI/UX design is an essential component of the digital world, impacting everything from mobile apps to websites and software interfaces. Skilled UI/UX designers are in high demand as businesses prioritize user-centered design to enhance customer satisfaction and engagement. Mastering UI/UX design opens up diverse career opportunities in technology, marketing, and creative industries.
Affordable and Accessible
Jclicksolutions ensures that quality education remains accessible to all. The UI/UX Design Course is competitively priced, and the center’s location in Nagercoil makes it easily accessible to students from nearby areas.
Preparing for the Future
By joining the UI/UX Design Course at Jclicksolutions, students gain more than just technical skills. They develop creative problem-solving abilities, empathy for users, and a design-thinking mindset—attributes essential for excelling in the field.
Conclusion
For those passionate about design and eager to create meaningful digital experiences, Jclicksolutions in Nagercoil is the ideal destination. With its industry-aligned curriculum, expert trainers, and focus on hands-on learning, the UI/UX Design Course prepares students for thriving careers in the ever-evolving tech landscape.
Embark on your journey to becoming a skilled UI/UX designer with Jclicksolutions and shape the digital experiences of tomorrow.
0 notes