#FlutterTips
Explore tagged Tumblr posts
Visit Tumblr Blog
Explore Tumblr blogs with no restrictions, modern design and the best experience.
Last Seen Tumblr Blogs


Fun Fact
In Q3 of 2020, 31% of US users access the Tumblr app daily.
Text
0 notes
Text
Building beautiful Flutter apps? The right IDE can make all the difference.
Whether you're a seasoned Flutter developer or just starting out, using a powerful and feature-rich IDE can speed up development, catch bugs early, and make your coding journey a breeze.
📱 In this blog, we cover the top IDE tools for Flutter development that are trusted by global devs: ✅ IntelliJ IDEA ✅ Android Studio ✅ Visual Studio Code ✅ Emacs & more!
Each IDE comes with its unique strengths — dive in to discover which one suits your workflow best!
#FlutterDevelopment#MobileAppDevelopment#FlutterIDE#DeveloperTools#FlutterTips#KodyTechnolab#CrossPlatformApps#FlutterDev
0 notes
Text
Flutter App Development: Pros, Cons, and Tips
Flutter is swiftly carving out its niche in the bustling world of cross-platform application development. If your curiosity about Flutter led you here, you’re likely seeking clarity on the hype surrounding this framework and pondering its suitability for your needs.
This article serves as a beacon, illuminating the essence of Flutter and its applicability in app development. We delve into the compelling reasons that make Flutter an attractive choice, simultaneously laying out the framework’s advantages and drawbacks.
By juxtaposing Flutter with its contemporaries, we aim to clearly understand why a growing number of engineers are leaning toward it. This piece is crafted to answer your fundamental question: Why should you opt for Flutter, and what tangible benefits can you expect from employing this tool in your app development endeavors?
What is Flutter?
Flutter is an open-source UI software development kit created by Google which used to create natively compiled mobile, web, and desktop applications from a single codebase. Flutter stands out in the world of cross-platform development because of its unique rendering methodology, which enables developers to create extremely customizable and performant apps.
Architecture Overview: Flutter App Development
Flutter’s architecture is distinguished by its layered design. At the core is the Dart platform, which uses the Dart programming language and provides most of the system’s functionality. Above this lies the Flutter engine, written primarily in C++, providing low-level rendering support using Google’s Skia graphics library. The engine is the powerhouse of Flutter, handling all the heavy lifting of rendering and managing the app lifecycle.
The next layer, known as the Framework, embodies core UI/UX Design Principles by housing a wealth of reusable UI components (such as buttons, text inputs, sliders, etc.) written in Dart. This layer also includes libraries for navigation, state management, and animations, offering a comprehensive toolkit for building complex UIs.
How Cross-platform App Development Works with Flutter App Development
Flutter’s approach to Cross-Platform App Development is unique. Unlike other frameworks that rely on web view or native elements for rendering, Flutter uses its own high-performance rendering engine to draw widgets. This means that instead of translating the widget code into native components of each platform, Flutter paints every single widget on the canvas provided by the application. This results in consistent behavior and looks across all platforms while maintaining high performance.
Flutter’s widget-based architecture makes it highly customizable. You can easily create your own widgets or customize existing ones, which allows for creating highly individualized UIs that feel native to each platform. Moreover, the single codebase approach significantly reduces development time and resources, as the same code runs on multiple platforms without significant changes.
Additional Resources: Which Cross-Platform App Development Framework Is Right for You?
Flutter App Development: Pros and Cons
Flutter App Development, Google’s innovative framework for cross-platform app development, has gained substantial traction in the tech community. Its unique approach offers various advantages while posing certain challenges. Understanding these pros and cons is crucial for developers and businesses considering Flutter for their projects.
Pros of Using Flutter App Development
Single Codebase for Multiple Platforms: Flutter allows developers to write a single codebase that runs on both iOS and Android platforms. This significantly reduces development time and resources.
Rich Widget Library: Flutter provides a comprehensive set of pre-designed widgets that mimic native components, enabling the creation of visually appealing and natively performing applications.
Customizable and Flexible UI: The framework offers extensive UI customization capabilities, allowing for the creation of unique and sophisticated user interfaces.
High Performance: Flutter’s rendering engine (Skia) directly compiles native code, which enhances the performance of applications.
Hot Reload Feature: This feature enables developers to see the changes made in the code instantly in the app, greatly improving the development workflow.
Strong Community and Support: Being backed by Google, Flutter has a rapidly growing community and extensive documentation, providing good support for developers.
Cons of Using Flutter App Development
Large File Size: Flutter apps tend to be larger than native apps, which might be a drawback for simple applications.
Limited Third-Party Libraries: While growing, the collection of third-party libraries for Flutter is not as extensive as for native development, which might require writing more custom code.
Learning Curve: Developers unfamiliar with Dart, Flutter’s programming language, will face a learning curve. Moreover, understanding Flutter’s unique approach to UI rendering may require additional time.
Native Features Integration: While Flutter is excellent for UI, integrating some native features of iOS and Android can be challenging and might require native code.
Not Widely Used in Large-Scale Applications: Flutter is still gaining traction in large-scale applications, and there are concerns about its scalability and suitability for very complex projects.
Flutter offers a highly efficient and aesthetically flexible approach to app development, ideal for projects requiring a single codebase for both iOS and Android. However, considerations around app size, library availability, and integration of native features are essential when deciding whether Flutter is the right tool for your project.
Industry Giants Using Flutter App Development
Flutter’s appeal in the realm of cross-platform application development has caught the attention of numerous established companies. These organizations have leveraged Flutter’s capabilities to enhance their mobile app experiences, taking advantage of its efficiency, consistency, and high performance. Here are some prominent examples:
Google Ads: As a part of Google’s suite of products, Google Ads has adopted Flutter for its mobile application. This move illustrates the confidence Google has in its own framework, ensuring that its app provides a seamless and efficient user experience across multiple platforms.
Google Pay: Another significant application from Google, Google Pay, utilizes Flutter. This choice underscores Flutter’s ability to handle secure, high-transaction mobile applications while maintaining smooth performance and a user-friendly interface.
eBay Motors: eBay, a global leader in e-commerce, chose Flutter to develop the eBay Motors app. This decision reflects Flutter’s capability in dealing with large-scale applications that require a robust and scalable framework.
My BMW: The My BMW app, developed by the renowned automobile manufacturer, is another example of Flutter’s application in a diverse range of industries. BMW’s adoption of Flutter for its mobile app demonstrates the framework’s versatility and its ability to deliver a high-quality, native-like user experience.
These examples of established companies using Flutter for their mobile applications highlight the framework’s growing popularity and its effectiveness in meeting various business needs. From e-commerce and advertising to automotive and financial services, Flutter’s reach is expanding, offering a reliable and efficient solution for cross-platform mobile app development.
Future Predictions and Trends in Flutter App Development
Flutter’s rapid growth and adoption in the app development community suggest a bright and innovative future. Here are some predictions and trends that could shape the development of Flutter in the coming years:
Increased Adoption in Enterprise Solutions: As more companies recognize Flutter’s efficiency and performance benefits, its use in enterprise-level applications is likely to grow.
Greater Focus on Web and Desktop Apps: While Flutter has been predominantly mobile-focused, ongoing updates and support are enhancing its capabilities for web and desktop applications, expanding its utility across all platforms.
Integration with Emerging Technologies: Flutter may increasingly integrate with cutting-edge technologies like AI, IoT, and AR/VR, offering developers more tools to create sophisticated and interactive apps.
Expansion of Third-Party Libraries and Tools: The Flutter ecosystem will likely see a significant increase in third-party libraries and tools, enhancing its functionality and reducing the need for custom code.
Improved State Management Solutions: As the community grows, more state management techniques and solutions are likely to emerge, simplifying the development process and enhancing app performance.
Enhanced Support for Material Design and Cupertino Widgets: Continuous improvements in UI widgets, especially in terms of design systems like Material Design and Cupertino, will enable the creation of more visually appealing and intuitive user interfaces.
Tips and Hacks for Enhanced Flutter App Performance
Optimizing Flutter app performance involves more than just following best practices; several lesser-known tips and tricks can significantly enhance app performance:
Implement lazy loading for images to ensure that they are only loaded when needed, reducing initial load time and memory usage.
Proper management of Streams and Futures can prevent memory leaks and ensure that resources are released when no longer needed.
For complex UI elements, using custom paint and canvas can be more efficient than stacking multiple widgets.
Pre-compiling shaders can help avoid rendering jank in animations the first time they are run.
Declaring widgets as const where possible can improve performance, as const widgets are compiled at build time, not at runtime.
These techniques and strategies can help developers fine-tune their Flutter apps, ensuring they run smoothly, load quickly, and provide a seamless user experience.
End Remarks
Flutter App Development offers a strong and flexible solution for mobile app creation. This blog has explored Flutter’s strengths and limitations, highlighting its ability to deliver visually impressive, high-performance apps across various platforms. We’ve also examined future trends, noting Flutter’s increasing relevance in enterprise and tech integration.
With strong community support and ongoing updates, Flutter is an appealing choice for developers at all levels, setting the stage for future innovations in cross-platform app development. Businesses seeking innovation should consider the option to Hire Flutter App Developers given its growing significance and community backing.
Originally published by: Flutter App Development: Pros, Cons, and Tips
0 notes
Text
How to Display a Circular Timer in Flutter?
You can make stunning, native-looking apps for Android and iOS using the popular cross-platform Flutter mobile app programming framework. Circular timer creation is just one of the numerous things you can accomplish with Flutter. A countdown clock or a stopwatch are two examples of circular timers that are excellent for displaying the amount of time left on a job.
In Flutter, there are some different methods to build a circular timer. This article will teach you how to design a circular clock in Flutter. In addition, you will know how to change the timer’s look. You can learn more about displaying a circular timer in Flutter by reading the tutorial below. Also you can read this blog from our official website Circular Timer in Flutter.
Developing a Custom Circular Timer in Flutter
There are several methods in Flutter for displaying a circular timer outside the circular_countdown_timer package. As an illustration, you might make a circular progress bar using the RadialGauge widget. The circular_countdown_timer box, on the other hand, is a more specialized widget made just for showing countdown timers. You may make a customized circular timer by following the instructions in this article after installing Flutter:
import 'package:flutter/material.dart';
import 'package:circular_countdown_timer/circular_countdown_timer.dart';
void main() {
runApp(const MyApp());
}
class MyApp extends StatelessWidget {
const MyApp({super.key});
@override
Widget build(BuildContext context) {
return MaterialApp(
title: 'Flutter Demo',
theme: ThemeData(
primarySwatch: Colors.blue,
),
home: const HomePage(),
debugShowCheckedModeBanner: false,
);
}
}
class HomePage extends StatefulWidget {
const HomePage({super.key});
@override
State<homepage> createState() => _HomePageState();
}
class _HomePageState extends State<homepage> {
final int _duration = 10;
final CountDownController _controller = CountDownController();
@override
Widget build(BuildContext context) {
return Scaffold(
appBar: AppBar(
title: const Text("Circular Counter with countdown timer"),
),
body: Center(
child: CircularCountDownTimer(
// Countdown duration in Seconds.
duration: _duration,
// Countdown initial elapsed Duration in Seconds.
initialDuration: 0,
// Controls (i.e., Start, Pause, Resume, Restart) the Countdown Timer.
controller: _controller,
// Width of the Countdown Widget.
width: MediaQuery.of(context).size.width / 2,
// Height of the Countdown Widget.
height: MediaQuery.of(context).size.height / 2,
// Ring Color for Countdown Widget.
ringColor: Colors.blue,
// Ring Gradient for Countdown Widget.
ringGradient: null,
// Filling Color for Countdown Widget.
fillColor: Colors.red,
// Filling Gradient for Countdown Widget.
fillGradient: null,
// Background Color for Countdown Widget.
backgroundColor: Colors.amber,
// Background Gradient for Countdown Widget.
backgroundGradient: null,
// Border Thickness of the Countdown Ring.
strokeWidth: 20.0,
// Begin and end contours with a flat edge and no extension.
strokeCap: StrokeCap.round,
// Text Style for Countdown Text.
textStyle: const TextStyle(
fontSize: 33.0,
color: Colors.black,
fontWeight: FontWeight.bold,
),
// Format for the Countdown Text.
textFormat: CountdownTextFormat.S,
// Handles Countdown Timer (true for Reverse Countdown (max to 0), false for Forward Countdown (0 to max)).
isReverse: true,
// Handles Animation Direction (true for Reverse Animation, false for Forward Animation).
isReverseAnimation: true,
// Handles visibility of the Countdown Text.
isTimerTextShown: true,
// Handles the timer start.
autoStart: true,
// This Callback will execute when the Countdown Starts.
onStart: () {
// Here, do whatever you want
debugPrint('Started Countdown');
},
// This Callback will execute when the Countdown Ends.
onComplete: () {
// Here, do whatever you want
debugPrint('Ended Countdown');
},
// This Callback will execute when the Countdown Changes.
onChange: (String timeStamp) {
// Here, do whatever you want
debugPrint('Changed Countdown $timeStamp');
},
),
),
);
}
}
</homepage></homepage>
Function to format the text.
Allows you to format the current duration to any String.
It also provides the default function in case you want to format specific moments as in reverse when reaching ‘0’ show ‘GO,’ and for the rest of the instances, follow the default behavior.
Inside the CircularCountDownTimer we have to add these below lines:
timeFormatterFunction: (defaultFormatterFunction, duration) {
if (duration.inSeconds == 0) {
// only format for '0'
return "Start";
} else {
// other durations by it's default format
return Function.apply(defaultFormatterFunction, [duration]);
}
},
Add inside the scaffold widget to control the counter
floatingActionButton: Row(
mainAxisAlignment: MainAxisAlignment.center,
children: [
const SizedBox(
width: 30,
),
_button(
title: "Start",
onPressed: () => _controller.start(),
),
const SizedBox(
width: 10,
),
_button(
title: "Pause",
onPressed: () => _controller.pause(),
),
const SizedBox(
width: 10,
),
_button(
title: "Resume",
onPressed: () => _controller.resume(),
),
const SizedBox(
width: 10,
),
_button(
title: "Restart",
onPressed: () => _controller.restart(duration: _duration),
),
],
),
Function return button
Widget _button({required String title, VoidCallback? onPressed}) {
return Expanded(
child: ElevatedButton(
style: ButtonStyle(
backgroundColor: MaterialStateProperty.all(Colors.purple),
),
onPressed: onPressed,
child: Text(
title,
style: const TextStyle(color: Colors.white),
),
),
);
}
Example
import 'package:flutter/material.dart';
import 'package:circular_countdown_timer/circular_countdown_timer.dart';
void main() {
runApp(const MyApp());
}
class MyApp extends StatelessWidget {
const MyApp({super.key});
@override
Widget build(BuildContext context) {
return MaterialApp(
title: 'Flutter Demo',
theme: ThemeData(
primarySwatch: Colors.blue,
),
home: const HomePage(),
debugShowCheckedModeBanner: false,
);
}
}
class HomePage extends StatefulWidget {
const HomePage({super.key});
@override
State<homepage> createState() => _HomePageState();
}
class _HomePageState extends State<homepage> {
final int _duration = 10;
final CountDownController _controller = CountDownController();
@override
Widget build(BuildContext context) {
return Scaffold(
appBar: AppBar(
title: const Text("Circular Counter with countdown timer"),
),
body: Center(
child: CircularCountDownTimer(
timeFormatterFunction: (defaultFormatterFunction, duration) {
if (duration.inSeconds == 0) {
// only format for '0'
return "Start";
} else {
// other durations by it's default format
return Function.apply(defaultFormatterFunction, [duration]);
}
},
// Countdown duration in Seconds.
duration: _duration,
// Countdown initial elapsed Duration in Seconds.
initialDuration: 0,
// Controls (i.e., Start, Pause, Resume, Restart) the Countdown Timer.
controller: _controller,
// Width of the Countdown Widget.
width: MediaQuery.of(context).size.width / 2,
// Height of the Countdown Widget.
height: MediaQuery.of(context).size.height / 2,
// Ring Color for Countdown Widget.
ringColor: Colors.blue,
// Ring Gradient for Countdown Widget.
ringGradient: null,
// Filling Color for Countdown Widget.
fillColor: Colors.red,
// Filling Gradient for Countdown Widget.
fillGradient: null,
// Background Color for Countdown Widget.
backgroundColor: Colors.amber,
// Background Gradient for Countdown Widget.
backgroundGradient: null,
// Border Thickness of the Countdown Ring.
strokeWidth: 20.0,
// Begin and end contours with a flat edge and no extension.
strokeCap: StrokeCap.round,
// Text Style for Countdown Text.
textStyle: const TextStyle(
fontSize: 33.0,
color: Colors.black,
fontWeight: FontWeight.bold,
),
// Format for the Countdown Text.
textFormat: CountdownTextFormat.S,
// Handles Countdown Timer (true for Reverse Countdown (max to 0), false for Forward Countdown (0 to max)).
isReverse: true,
// Handles Animation Direction (true for Reverse Animation, false for Forward Animation).
isReverseAnimation: true,
// Handles visibility of the Countdown Text.
isTimerTextShown: true,
// Handles the timer start.
autoStart: true,
// This Callback will execute when the Countdown Starts.
onStart: () {
// Here, do whatever you want
debugPrint('Started Countdown');
},
// This Callback will execute when the Countdown Ends.
onComplete: () {
// Here, do whatever you want
debugPrint('Ended Countdown');
},
// This Callback will execute when the Countdown Changes.
onChange: (String timeStamp) {
// Here, do whatever you want
debugPrint('Changed Countdown $timeStamp');
},
),
),
floatingActionButton: Row(
mainAxisAlignment: MainAxisAlignment.center,
children: [
const SizedBox(
width: 30,
),
_button(
title: "Start",
onPressed: () => _controller.start(),
),
const SizedBox(
width: 10,
),
_button(
title: "Pause",
onPressed: () => _controller.pause(),
),
const SizedBox(
width: 10,
),
_button(
title: "Resume",
onPressed: () => _controller.resume(),
),
const SizedBox(
width: 10,
),
_button(
title: "Restart",
onPressed: () => _controller.restart(duration: _duration),
),
],
),
);
}
Widget _button({required String title, VoidCallback? onPressed}) {
return Expanded(
child: ElevatedButton(
style: ButtonStyle(
backgroundColor: MaterialStateProperty.all(Colors.purple),
),
onPressed: onPressed,
child: Text(
title,
style: const TextStyle(color: Colors.white),
),
),
);
}
}
</homepage></homepage>
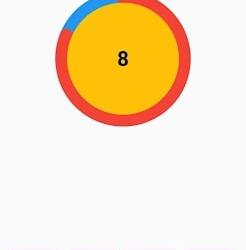
Output
Why Should You Display a Circular Timer in Flutter?
You can choose to show a circular timer in Flutter for various reasons. Here are some of the most typical causes:
1. To start the countdown to an upcoming event. The most typical application for circular timers is this. They help count down to the beginning of a presentation, the end of a timer, or any other event you wish to keep track of.
2. To provide user feedback. The user can receive feedback about the passing of time through circular timers. This is advantageous when performing duties like preparing meals or watching for a bus.
2. For a visual component for your app. Circular timers may provide an optical element to your app that will increase its aesthetic appeal and make it more engaging.
Hire Flutter developer to create a circular timer. It is an excellent alternative if you are searching for a way to show the passing of time in your Flutter project. They are versatile, easy to use, and serve several functions.
Conclusion
The article has shown how to display a circular timer in Flutter. First, you will set up the widget to show a circular countdown timer from the circular_countdown_timer package. It can also utilize the widget to exhibit a ten-second countdown timer by creating a simple example. By defining the colors, border width, and text style, the article also provided information on how to alter the timer’s visual look.
Connect with the top Flutter app development company for your project if you want to create mobile apps with the circular timer for your business. But if you’re still unclear and want more information about the Flutter framework, browse our blogs!
Frequently Asked Questions (FAQs)
1. How is a dart timer used?
The timer starts at the given duration and counts down to 0. The given callback function is called when the timer approaches zero. To repeatedly count down the same interval, use a periodic timer. The same rules apply to negative durations as to durations of 0.
2. How can I create a widget with a countdown timer?
Press the addition (+) sign in the top left corner to add a widget. A Countdown widget can be selected. Click Add Widget. Please tap on the widget once it shows on your Home Screen.
3. What does Flutter’s circle indicator mean?
The CircularProgressIndicator widget uses a circle to represent progress. It can be used as a progress indicator for determined and indeterminate work. The value attribute must be left empty or unspecified to create an indeterminate progress indicator in Flutter.
#flutter app development#flutter#hire flutter developers#flutter agency#hire flutter developer#flutter developers#flutter app developers#FlutterTips#FlutterTimer#CircularTimer
0 notes
Text
https://www.betaposting.com/?p=70987&preview=true
0 notes
Text
🚀 Boost Your Flutter App's Performance! 📱
🌟 Learn the best practices for Flutter performance optimization to build apps that are faster, smoother, and more efficient. This blog by Kody Technolab covers: ✅ Tips to reduce widget rebuilds ✅ Effective state management techniques ✅ How to optimize build methods for peak performance
💡 Whether you're working on a new project or improving an existing one, these tips will help you create Flutter apps that users love!
📲 Start optimizing your Flutter apps today.
#FlutterDevelopment#PerformanceOptimization#AppPerformance#FlutterTips#MobileAppDevelopment#KodyTechnolab#TechInsights
0 notes
Text
💡 Want to Master Flutter Widget Architecture? 💻
🌟 Dive into the fundamentals of Stateless and Stateful Widgets, the building blocks of Flutter development. This blog by Kody Technolab explores: ✅ The key differences between Stateless and Stateful Widgets ✅ When to use which widget for optimal performance ✅ Tips for building scalable and efficient Flutter apps
🚀 Whether you're a beginner or an experienced developer, this guide will elevate your Flutter skills and help you create dynamic, high-performance apps!
📲 Ready to level up your Flutter expertise?
#FlutterDevelopment#StatelessVsStateful#AppDevelopment#MobileAppDevelopment#FlutterTips#TechGuide#KodyTechnolab
0 notes