#HTTParty
Explore tagged Tumblr posts
Visit Tumblr Blog
Explore Tumblr blogs with no restrictions, modern design and the best experience.
Last Seen Tumblr Blogs


Fun Fact
28.6 is the average number of monthly visits per US mobile user.
Text
Building my first CLI scraping gem with Ruby
In this post I’ll talk about my experience building a gem with Ruby.
To start, I searched the web for any sites with posts on how to build a Ruby Gem. I watched Flatiron’s post and read several others, and was able to piece together enough to build one.
The first steps were pretty simple. I created a repository and initialized a simple gem in it. I created a new gem using the command bundle gem name_of_the_gem, and create a repository on Github.
One of the first challenges I encountered was the different patterns for requiring libraries, and after trying out several ones I came down with the following:
For my bin file:

For my environment file:
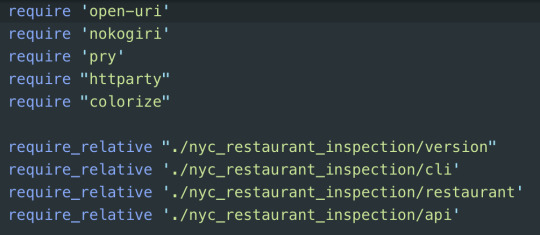
For my gemspec and dependencies:

After setting up my environment, and managing to have all my dependencies working, I went onto my next task - Scraping.
I decided to go with HTTParty, because I was need to parse information from json file and HTTParty looked like the easiest way to do that.
Parsing the data is a breeze with HTTPParty — all that you need to do is run the HTTParty get method on the API endpoint url we pulled above to get the page contents and store that into a variable. From here running the “getting_response” method on the page contents parses the contents into an array of Ruby hashes representing the records in the data file. I stored the array in a variable called responses.
Then I created new class inside the loop, so I can initialize my Restaurant class with hashes I need. See below the code I used:

Then I built my restaurant class, where I initialized my restaurant with hashes you see on the above picture. In the same class, I created methods, which gave me ability to search inside of my array of hashes “by zip code” or “by name”.
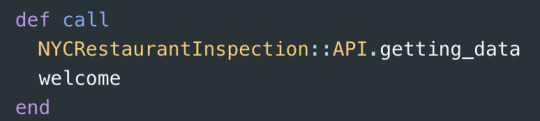
The last final step was building the logic, therefore I started my CLI class. Despite the fact that the organization of this class seemed rather easy, I ran into some difficulties.
For example, I missed the point that in order to get data from json file, you first need to call your data, otherwise you will get an empty results.
When everything was ready and work perfectly I installed colorize gem to make my CLI gem prettier and to give some color. In the end was very satisfying to see it working. Mission accomplished!
1 note
·
View note
Text
Ruby http client

Ruby http client how to#
Ruby http client code#
Please don't encroach on your team's happiness by choosing Net::HTTP. Ruby as a language was created to make developers happy. It comes as no surprise that this opinion is also shared by the Ruby toolbox. It has the best support, the biggest community, it is widely popular, shockingly-well maintained, fast and performant in terms of memory. You’ll need to send an HTTP request & then process the response. The most common need to alter the HTTP request is to connect and authenticate with an enterprise’s proxy. If you are working with the Twilio Ruby Helper Library, and you need to be able to modify the HTTP requests that the library makes to the Twilio servers, you’re in the right place. I've become so frustrated in doing simple Security.
Ruby http client how to#
Also see How to set SSLContext options in Ruby and How to set TLS context options in Ruby (like OpenSSL::SSL::SSLOPNOSSLv2). It is common because it comes with Ruby, and also many of the other gems run on it. It is perhaps the most common and the most cursed solution to making API requests. http 48,392,756 Downloads Last release on httprb/http Last commit on httparty Makes http fun Also, makes consuming restful web services dead easy. It uses a simple method chaining system for building requests, similar to Python's Requests.
Ruby http client code#
Now that I have provided an overview, code snippets, and metrics of all gems, as well as Ruby community updates connected to them, I would like to offer a quick suggestion: if you are wondering which gem to use for your code base or a passion side project, do go with Faraday. Custom HTTP Clients for the Twilio Ruby Helper Library. OpenSSL::SSL::SSLContext.new ('TLSv12client') At least that is what I'm using. A simple HTTP and REST client for Ruby, inspired by the Sinatra microframework style of specifying actions: get, put, post, delete. Ruby's standard library is already equipped with an HTTP client: the net/http gem. http An easy-to-use client library for making requests from Ruby. Not surprisingly, Net::HTTP is not leading the way in any of the categories. NOTE: The memory allocation comparison comes from this gist and concerns the memory allocation for download.Īs you see above, Faraday is leading the way in almost all respects: number of downloads (which indicates its popularity), issue closure rate (which indicates maintainer support) and POST performance. It uses a simple method chaining system for building requests, similar to Pythons Requests. Plain old ruby scripts and small console apps typically expose things globally, especially if you're only working in a file or two to grab some information, perform a quick search, etc. An easy-to-use client library for making requests from Ruby. You're on r/ruby, not r/rails, so you're likely going to get a different response depending on the commenter. Now that you have seen the five main Ruby clients, let's zoom out and compare them: Name There's a difference between Ruby and Rails. There seem to be no good reason to submit any developr to this monster of a gem, especially that is not not fast and has just a disastrous memory allocation rates (see the table in the next section). This is definitely a long-winded way to make a request. Subset) and provides a way to iterate through it, making pagination transparent.įileList objects can be created using Uploadcare::Entity.file_list method.Response = Faraday. Uploadcare::Entity::FileList represents the whole collection of files (or it's Copyright (C) 2000-2015 NAKAMURA, Hiroshi. Metadata of deleted files is stored permanently. store #stores file, returns updated metadata. Make a simple HTTP request using net/http Send SSL requests Submit data using a POST request Send custom headers Choose the best HTTP client for your. But often you want more than the HTML content. Here’s a net/http example: require 'net/http' Net::HTTP.get ('', '/index.html') This will return a string with the HTML content of the page. copy #copies file, returns a new (copied) file metadata. Ruby comes with a built-in http client, it’s called net/http & you can use it to send any kind of request you need.
0 notes
Text
literally the only reasons I touch code (the superior languages, libraries, etc)
HODOR: http://www.hodor-lang.org
CHICKEN: https://esolangs.org/wiki/chicken
COWSAY: https://en.wikipedia.org/wiki/Cowsay
HTTPARTY: https://github.com/jnunemaker/httparty
0 notes
Text
Build a chat app with Ruby on Rails
Not all web apps need chat, but if you want to communicate with your customers, or you want them to communicate with each other, you’re going to run into this problem quickly. CometChat Pro is a fantastic alternative to rolling your own chat service. You’ll see that you can easily insert chat into your application, without it getting in the way of other content you may be delivering.
Prerequisites
This tutorial doesn’t assume much knowledge at all. Ruby on Rails is an incredibly easy framework to get started with. If you’ve worked with other web technologies, you’ll probably find it very clear and very opinionated.
CometChat Pro itself needs to run in Javascript, so you’ll see a marriage between a Ruby-based framework and view manipulation through Javascript. There are many more complicated ways to handle this in Rails. For this tutorial, I kept everything in basic Javascript and the templating engine Rails ships with: erb. Rails enthusiasts will be able to easily translate these foundational tools into their specialized setups.
I assume you are able to run Rails applications – which means you already have Ruby and bundler installed. This application uses Ruby 2.5.3 and Rails 5.2.2 but nothing happening here is special for latest versions – you could plug these tools into any modern version of Rails.
Introduction
One of the hardest parts of building chat is dealing with concurrency – users need to see new messages without refreshing their browsers. CometChat Pro achieves this with very little code, as you will see.
CometChat Pro example running in two windows.
If you’ve ever tried to use Action Cable to achieve similar results, you will be very pleased with how quickly you can copy-paste your way to real-time updates in the browser.
You can jump right into the code on Github, or take this guy for a spin yourself. Let’s get it!
Setting up
Initialization
Grab yourself a terminal and fire up a new Rails app: rails new cometchatpro --skip-active-record -T. We don’t need a database for this, and the -T prevents Rails from creating test files for us. If you’ve already got an application, you can skip this step – it should be easy to pop this code into an existing project.
Environmental variables and CometChat credentails
Next, you’re going to need an API key and an App ID from CometChat Pro. Once you’ve logged in, head to the dashboard, create a new app, then generate an API key. You’ll need fullAccess, not just authOnly. Grab those credentials and add them to your .env file. You’ll need your file to look something like this:
COMETCHAT_APP_ID=23n2f2n3p2y3 COMETCHAT_API_KEY=av22g24ll
Next, add dotenv-rails to your Gemfile and bundle. Now your application can read your environmental variables. These are private credentials for your CometChat Pro account; do not commit this file to your version control!
Chat pages
Next we’ll add some boilerplate Rails views and routing so we can chat as a user with other users. Generate a new controller: rails generate controller Users. This will create a number of files, which we’ll get into shortly. You’ll also need to add a route to your new view in config/routes.rb. Here’s what my routes.rb looks like:
Rails.application.routes.draw do resources :users, only: %i[index show] root 'users#index' end
If you jump into the GitHub code or pop over to the hosted app, you’ll see that I have added user creation. I’ve left it in place because I already built it, but CometChat Pro comes with sample users baked into every account, so you can start testing right away without needing to set up user creation first. I’ve omitted discussion of user creation for this tutorial in the sake of brevity, but you can see the code needed for that in the Github repo.
You’ll also need to create a /views/users/show.html.erb file. We’ll fill it will content in a moment.
CometChat Service
Let’s get into the meat of our application – interacting with the CometChat API. I organized interactions with CometChat Pro into a service. Here’s what it looks like:
class CometChatService include HTTParty BASE_URI = 'https://api.cometchat.com/v1'.freeze def fetch_users response = HTTParty.get("#{BASE_URI}/users", headers: headers) response.dig('data') &.map { |user| {name: user['name'], id: user['uid']} } end private def headers { apikey: ENV['COMETCHAT_API_KEY'], appid: ENV['COMETCHAT_APP_ID'] } end end
CometChat Pro does a lot of things, and as we grow our app, we might want to fill this service with further interactions with their API. Here, all we need to do is fetch a list of users we can chat with. Note that no gem is needed to interact with CCP, you simply send your requests however you like (I used HTTParty) with the proper headers (from our .env file) and CCP sends back the information you requested.
I map the JSON response from CCP into the information my application needs – the user name and the user ID.
Working with the service in the users controller
Now that we have a protocol established for speaking with the CCP API, we can use it in our UsersController. Here’s what mine looks like:
class UsersController < ApplicationController def index @users = CometChatService.new.fetch_users end def show users = CometChatService.new.fetch_users @current_user = users.find { |user| user[:id] == params[:id] } @users = users.reject { |user| user[:id] == @user[:id] } end end
I’ve skipped over the index page for brevity, but it’s just a list of users who we may “chat as”. You can think of it as the most insecure, ridiculous login page imaginable. On both views, we fetch the users registered with our CometChat Pro app. We’ve already mapped the JSON response in the service, so on the index and show pages we loop through users to display them. On the show page, we are chatting “as” a user, so we don’t want him to show up in the list of possible people to chat with (line 9).
List of users in a CometChat Pro app
The user show view
Let’s walk through the sections of our user show page in turn. In a minute, we’ll discuss the Javascript necessary to make them run. I’ve also omitted discussion of styling. You can see full code for styling in the GitHub repo, or of course you could implement your own (surely much-better) styling.
Who is talking?
To make information about our “logged-in” user (the one whose show page we are on) available to the CometChat service, we’ll want to include an invisible div with the user name and id. You can put this anywhere on your page:
The user list
To display the list of users as shown above, here’s the erb code:
<ul class="list-group list-group-flush"> <% @users.each do |user| %> <li class="list-group-item user-select bg-light" id="<%= user[:id] %>" name='user-select'> <div class="d-flex w-100 justify-content-between"> <h5 class="mb-1"><%= user[:name] %></h5> </div> </li> <% end %> </ul>
There’s nothing special happening here – the only thing to note is that we are setting the user id as an id on the list-item. We’ll need it later to reference which user we are speaking to. Remember that our @users has come from the controller, where we gathered the list of users from the CometChat service.
Receiving and displaying messages
Next, let’s look at how we will display incoming messages. Our code starts as this:
<div id="messages" class="messages"> Messages loading... </div>
We need to supply a div for CometChat Pro to load messages into. I’ve called mine messages but you could call yours anything you like.
Sending messages
We’ll use Ruby’s form helpers to create our message form, but we don’t let Ruby handle any of the functionality here:
<%= form_for :message, remote: true do |f| %> <div class="col-xs-9"> Message : <%= f.text_area :text, class: "form-control" %><br/> </div> <div class="col-xs-3 capitalize"> <%= button_tag "Send Message", type: 'button', onclick: "javascript:sendMessage()", class: "btn btn-info btn-block" %> </div> <% end %>
When we click the “Send Message” button, we’ll be using Javascript to work our magic. The Rails form will just sit there, happily waiting for more input.
The heart of our application: Javascript methods
The CometChat Pro service runs on Javascript and we’ll be using their clear sample code to make the pieces of our app work.
We’ll need to take the following steps:
1. Initialization – set up a connection to the CometChat service.
2. Log in a current user.
3. Select a user to chat with and fetch message history with that person.
4. Add an event listener to pick up new messages from the other person.
5. Set up an action to send messages.
Initialization
First, we’ll need to get our app talking to the CometChat Pro service and log in. In application.html.erb, add this line between the <head> tags:
<script type="text/javascript" src="https://unpkg.com/@cometchat-pro/chat/CometChat.js"></script>
Add these lines to the bottom of /views/users/show.html.erb:
<% javascript_include_tag 'show', cache: 'myfiles' %> <script type="text/javascript"> setUserListeners(); document.addEventListener('turbolinks:load', initializeChat); </script>
We’ll look at the setUserListeners method in a second. Finally, we’re referencing a show.js.erb, which we’ll need to create and add to app/assets/javascripts.
Here’s our first Javascript method:
const initializeChat = () => { CometChat.init('').then( hasInitialized => { loginUser() }, error => { console.log("Initialization failed with error:", error); } )};
Because we loaded the CometChat Pro Javascript in our application.html.erb, we can now use CometChatmethods in our Javascript file. The first one we’ll use is .init, which requires us to send in our APP ID as a credential. We’re calling the loginUser method once our chat is initialized.
User login
After initialization, we need to log in the current user. This application includes no security whatsoever – anyone can chat as anyone else. Obviously you’d want to have something just a tiny bit more customized in a production app. Here’s how we log in our user on CometChat Pro:
const loginUser = () => { const userDiv = document.getElementById('user-id'); if (!userDiv) { return true } const id = userDiv.dataset.id; CometChat.login(id, '').then( User => { const messageDiv = document.getElementById('messages'); messageDiv.innerHTML = `<div class="whisper">Choose a user to start chatting</div>`; }, error => { console.log("Login failed with exception:", {error}); }) }
Remember that weird tag('div') that held our user information from show.html.erb? Here we use it to find out what user needs to log in. If something has gone wrong with that div, we just bail from this operation.
Next, we call our next CometChat method: .login. We take the id we got from the user div, and use our API credentials. If CometChat Pro sends back a User, we update the message div to say “Choose a user to start chatting”.
setUserListeners
Let’s hop back to the show.html.erb page where we called setUserListeners() at the bottom of the view. In order to know who we want to chat with, we’ll need to listen for clicks on the user list. Here’s what that code looks like:
const setUserListeners = () => { const userDivs = document.getElementsByName('user-select'); userDivs.forEach(user => user.addEventListener("click", e => { const id = e.target.id || e.target.offsetParent.id setUser(id); fetchMessages(id); })) }
userDivs is a node list of divs, one for each of the users we can chat with. We loop through them and add event listeners on each. If we click on a user, we want to first call setUser to tell our application who we want to talk to, and then fetchMessages for that user.
setUser and addMessageListener
Here’s where we really get some magic and CometChat Pro takes care of the heavy lifting for us. Once we log our user in and select someone to chat with, we want to see any new messages from that person in real time. With CometChat Pro, we don’t have to worry about keeping any websockets open or dealing with refreshing – the messages just appear as you would expect.
The setUser function is only concerned with making the active user blue in the list, so I’ve skipped it here. But it also calls the addMessageListener class, which is critical for receiving new messages as they come in:
const addMessageListener = id => { CometChat.addMessageListener( 'listener_id', new CometChat.MessageListener({ onTextMessageReceived: textMessage => displayNewMessage(id, textMessage) }) )}
This is taken almost directly from the CometChat Pro documentation. We call the CometChat addMessageListener method, then using incoming messages to update our message div. Fire up two different browsers to see this in action (or just check out the gif above).
displayNewMessage
When that new message comes in, we’ll need to update our view. Here’s the code:
const displayNewMessage = (currentChatterId, msg) => { const userDiv = document.getElementById('user-id'); const id = userDiv.dataset.id; if (![currentChatterId, id].includes(msg.sender.uid)) { return; } const newNode = document.createElement("div") newNode.innerHTML = newMessage(msg, id) const messageDiv = document.getElementById('messages') messageDiv.appendChild(newNode) messageDiv.scrollTop = messageDiv.scrollHeight }
First, if the incoming message isn’t between our logged-in user and the user we’re chatting with, we ignore it. Then, we need to process the new message – we construct a new div with the message, then we append it to the messages div, again scrolling to the bottom so we can see it.
newMessage
Our newMessage method will simply format the message – it’s a new bubble in our chat app. We check if the sender has the same id as the logged-in user so we can apply the self class to the div – making it pink for “self” and blue for everybody else.
const newMessage = (msg, id) => { return ( `<div class='message ${msg.sender.uid === id && 'self'}'> <div class='message-text'>${msg.text}</div> <div class='message-sender'>- ${msg.sender.name}</div> </div>` ) }
fetchMessages
Before we start chatting, we need to see the messages that have come before and anything that was exchanged when we weren’t chatting with that particular user. Our fetchMessages method will grab the messages between our logged-in user and our selected user.
const fetchMessages = id => { if (!id) { return; } const limit = 30; const messagesRequest = new CometChat.MessagesRequestBuilder().setUID(id).setLimit(limit).build(); messagesRequest.fetchPrevious().then( messages => { const messageDiv = document.getElementById('messages'); messageDiv.innerHTML = messages.length > 0 ? messages.map(msg => newMessage(msg, id)).join('') : `<div class="whisper">Start of message history</div>`; messageDiv.scrollTop = messageDiv.scrollHeight }, error => { console.log("Message fetching failed with error:", error); } ); }
If for some reason we don’t have an id, we’ll return so as not to get errors. First we construct our request, setting the ID of the user we want to talk to, and the limit of messages we want to receive. More complicated applications would want to automatically fetch results from further back in time as the user scrolls.
Once our message requester is set up, we can call fetchPrevious to grab a list of messages. This returns messages, which we can use to populate our messages div. Each message is a JSON object with a sender.uid, sender.name and a text. We map through the messages and return them as HTML objects and replace whatever is inside messages with our new message node list. Remember to .join('') them or you’ll see a bunch of commas between divs. If there were no messages, we want to show the user that this is the “start of message history”.
Last, we want to scroll to the bottom of the messages div to show the user the latest messages.
Sending new messages
We’re logging in, selecting a user to chat with, fetching all the old message history between these two, and receiving any new messages sent to us from that user. Finally, we want to be able to send messages. Here’s how we do it:
const sendMessage = () => { const recipient_id = document.getElementsByClassName('bg-info')[0].id; const message_text = document.getElementsByName('message[text]')[0].value; document.getElementsByName('message[text]')[0].value = '' const messageType = CometChat.MESSAGE_TYPE.TEXT; const receiverType = CometChat.RECEIVER_TYPE.USER; const textMessage = new CometChat.TextMessage(recipient_id, message_text, messageType, receiverType); CometChat.sendMessage(textMessage).then( message => displayNewMessage(recipient_id, message), error => { console.log("Message sending failed with error:", error); } ); }
First, we determine which user we are chatting with, based on the highlighted user in the list. Next, we read the message from the form, and clear the form so it’s ready for the next message.
Our textMessage object will call CCP’s TextMessage method, constructing a message to send based on the logged-in user, receiver id, message text, and the types of message and recipient. Then we just sendMessagewith our textMessage object, wait for a message response, and render the message in the same way we would an incoming message from another user.
And that, my friends, is everything we need to install chat in our Rails app!
Conclusion
If you’ve been following along, you now have a fully-functional one-to-one chat app in your project. You can start exploring the other functionalities available through CometChat Pro, or you can start refactoring with jQuery, Slim, or other tools you may wish to incorporate to pare down the code. Hopefully seeing everything in plain Javascript made it clear what we are accomplishing, even if you want to have more efficient code in your own application.
Best of luck installing chat in your own app and have fun!
Links
Github repository with this code + user creation
Heroku deployment so you can see it running quickly. Try two browsers!
CometChat Pro documentation
HTTParty gem
0 notes
Text
WDI: Week 1, Day 5
Today
More object-oriented programming today. Just my luck! The homework assignment for the long weekend is to build a trip planner app, pulling forecast data from an open weather API and telling the user how to dress for a hypothetical trip to any location. It’s going to be a long weekend… Today we learned about APIs (an application programming interface that the user uses to talk to a program on the web) and had a fun lab creating a movie app that pulls up info on any movie using an open movie database API.
What Did I Learn?
I learned how to make an API request and pull and parse the response. The method below is pretty basic but I think it’s pretty neat, and it uses JSON (a Javascript text tool) to break up the data received (as not all APIs are created nor organized equal):
response = HTTParty.get(‘http://[URL]’) result = JSON.parse(response.body)
Tomorrow
Lots of review for me this weekend. I want to go through the Ruby track on Codecademy (and Code School if there’s time), and also look over every piece of class and homework from Week #1 (wow, first week is over!).
1 note
·
View note
Text
Week 4, Day 4
The REAL web development has now begun. None of this command line shit in ruby. We are now being introduced to web development concepts that Rails will later utilise, starting with request routing.
Routing is used to control the flow of the application based upon the GET request made to the ruby web server.
Example 1
get '/calc/multiply/:x/:y' do @result = params[:x].to_i * params[:y].to_i erb :calc end
Expecting users to utilise the calculator by passing specific numbers as part of the URL (explicitly). For example www.domain.com/calc/multiply/2/3 is expected to display a webpage with the result 6.
Example 2
get '/calc' do @x = params[:x].to_f @y = params[:y].to_f @result = case params[:operator] when '+' then @x + @y when '-' then @x - @y when '*' then @x * @y when '/' then @x / @y end erb :calc end
The above example is a lot nicer because it means that the user doesn’t have to worry about the format of the URL. Instead, they fill out a form and on submission the form will make the GET request for them. In this case they would fill out a form with 3 text fields - number 1, operator and number 2. The name attribute on form elements directly correspond to what is populated in the params hash.
You might be wondering what the erb business is about. erb :calc tells ruby that a view needs to be rendered. :calc corresponds to the calc.erb file in the views directory. This introduces the concept of Controllers and Views. Our main ruby file is concerned with the business logic of the application. The view (or erb file) simply uses data that the controller prepared to display to the user.
When we get into Rails i’m pretty sure routes will be totally separate to controllers but in these simple cases they are conjoined.
Our homework tonight is to use the HTTParty gem to send a GET request to another API and analyse results. The OMDB (Open Movie Database) will be used to create a simple movie app.
0 notes
Text
How to make HTTParty pick Basic Auth credentials from the URL

0 notes
Link
Did you know that HTTParty gem provides built-in support for logging requests details? I didn't. Now I know and would like to share my findings. Maybe you will learn something new as well :-)
0 notes