#I miss this pen. the texture on it broke the last time that I updated CSP :<
Text
old saiki k (+beastars) sketch compilation!
#saiki k#saiki kusuo no psi nan#phew this is what. 4 years old at this point#I miss this pen. the texture on it broke the last time that I updated CSP :<#I cry.#man tbh these are cute even if theyre kinda wonky#my art#katha draws
53 notes
·
View notes
Text

After writing out the entire story of that segment of the comic, it is translated into script form:

Roughly planning all dialogue, composition, and action in the scene. This is how you make sure you have enough space to give all the information that you want and don’t end the scene on an awkward crowded or over-paced page because you didn’t plan ahead. You can deviate from this later!

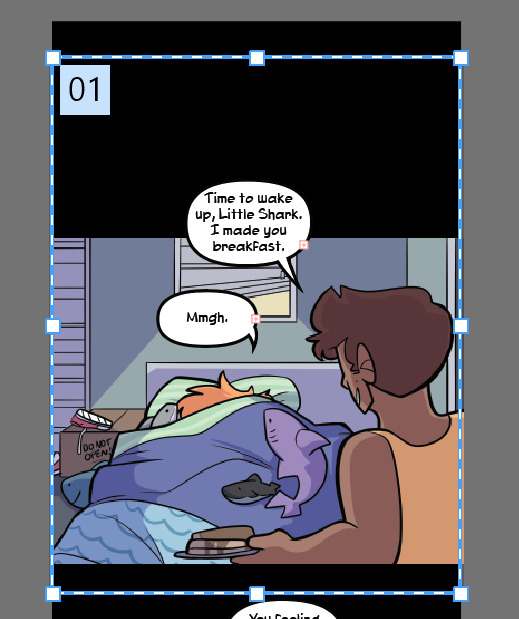
I begin in Clip Studio with the page border. It’s a transparent black rectangle that I copy/paste from the previous page so it stays consistent. Use this page for reference on page and border sizes.
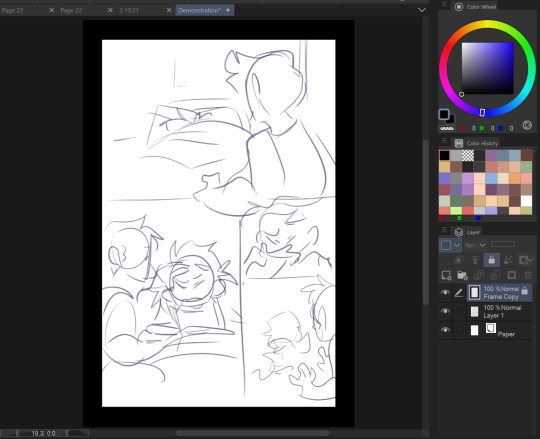
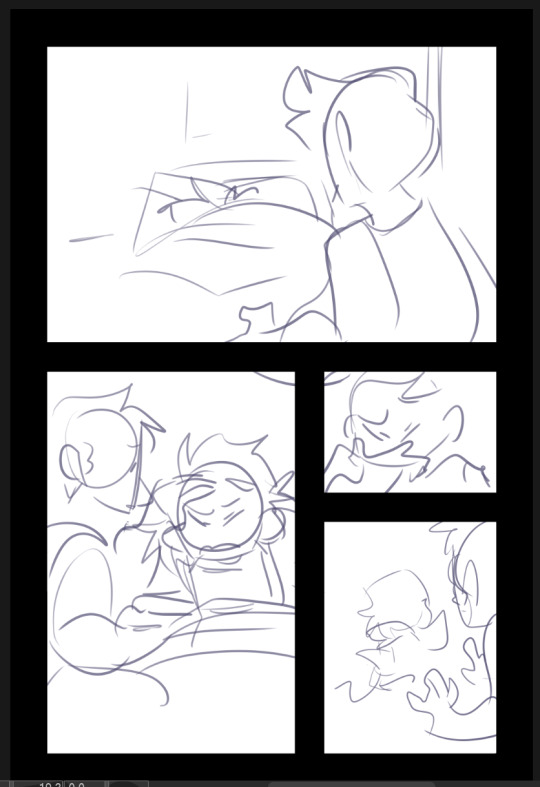
On a new layer, sketch out a thumbnail for your page. This is honestly more refined than most of mine look, usually just stick figures and border outlines. You can see that I cut out one of the panels from the script while drawing the thumbnail. Save this file as a clip file, then duplicate the file and save it as a PSD.
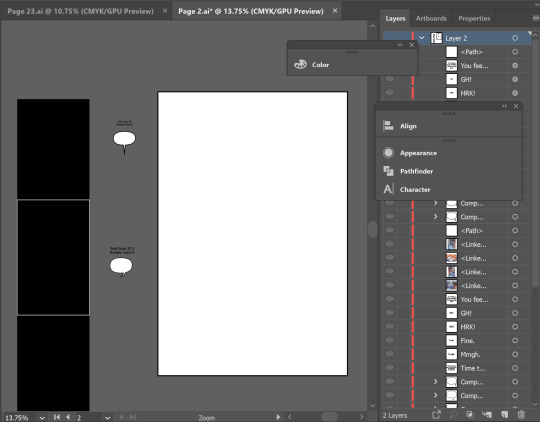
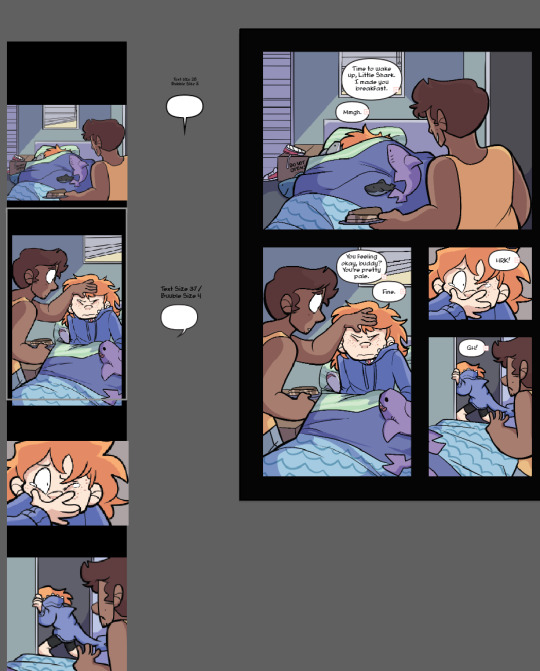
Pop on over to Adobe Illustrator. This is my template setup. The white artboard on the right is 2100x3150px, and the black bar on the right is 800px wide, with a second artboard that is 800x1280px, which is the maximum image size for Webtoon. The speech bubbles and text in the middle are just reference so I keep the bubble stroke width and character size consistent. (My print text size is 37, stroke size 4, and webtoon is text size 26, stroke size 5. Personally I find the print text size much bigger than necessary but for the sake of consistency I’m keeping it that way)

On a new layer, use File > Place to insert the PSD file onto the big artboard. It will snap into place to fill the entire board. Lock that layer by pressing the box next to the visibility toggle:

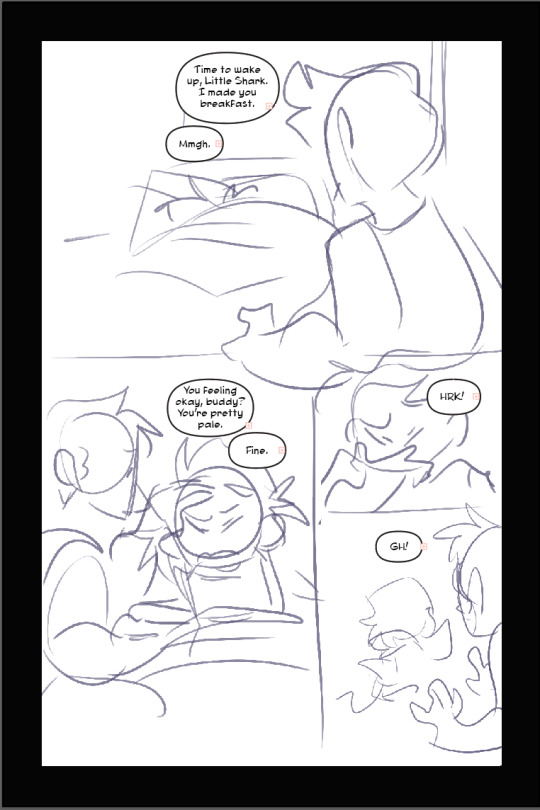
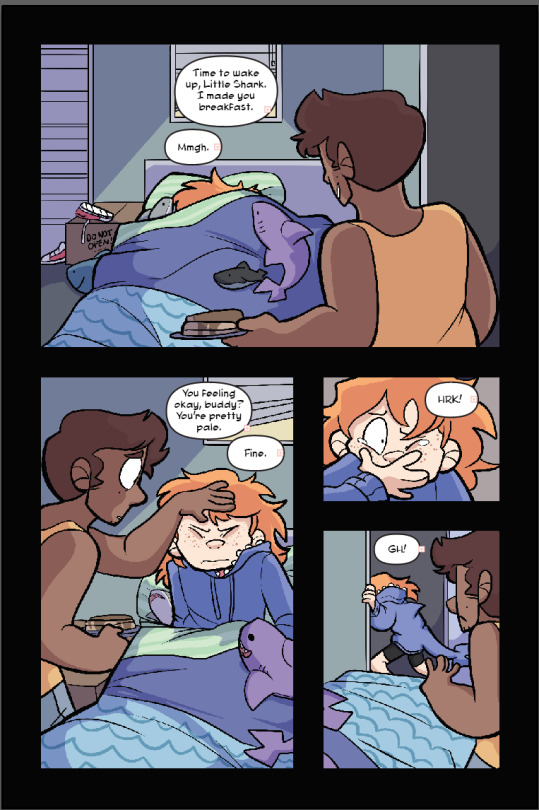
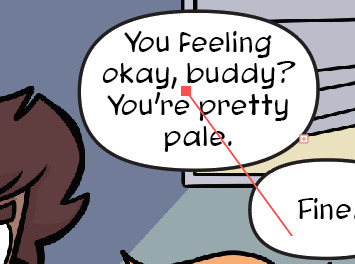
Use the oval tool to draw in speech bubbles and adjust the line width with the properties window. Using the text tool, click and drag to create a designated text box for each window, and copy/paste dialogue from the script. (Be sure to make a text box instead of just pasting the text, it’s a pain otherwise). Center the text. and if you have the text selected and hold control, it will let you round off the edges of the text box, making it fit better into the oval shape. Use the “align” window by selecting the text AND the bubble it fits in and press both the second and he second to last buttons in the top row to center the text on the bubble. (Fine tune this if necessary with the arrow keys)

You add the text this early on in the process because if you need to rearrange panels and make more room any where, this is the easiest way to do it. Head on back to Clip Studio and make any necessary changes.

Back in clip, once you’re happy with your layout, use the “create frame” tool to make one big frame around the entire drawing.

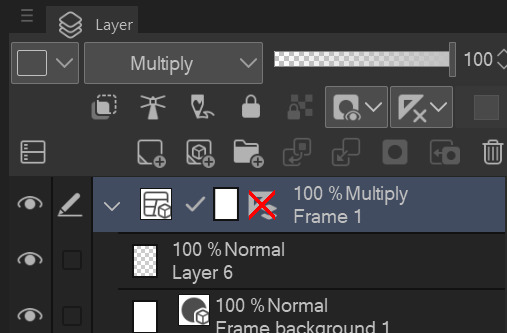
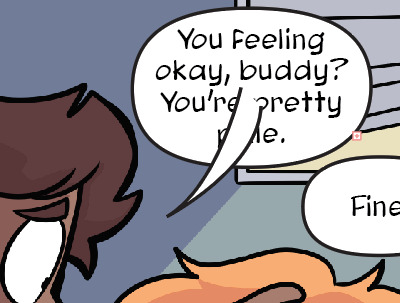
set the layer mode on the panel layer to “multiply” so you can see through it.
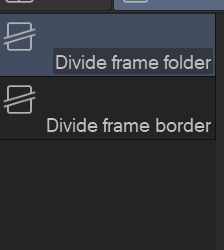
Then take the “cut frame” tool, right next to the create frame tool.

and adjust the size of however thick you’d like your frame borders to be. I work pretty large for my pages, so you probably won’t need them to be as broad as 155.
Using this tool, you can cut directly across the big panel you made and cut it up into smaller, even panels. If you hold the shift tool while using it, the lines will be perfectly straight vertically or horizontally. I broke up the first and second half of the page with my first stroke, and with the second, I further broke up the second half. It’s works very intuitively!
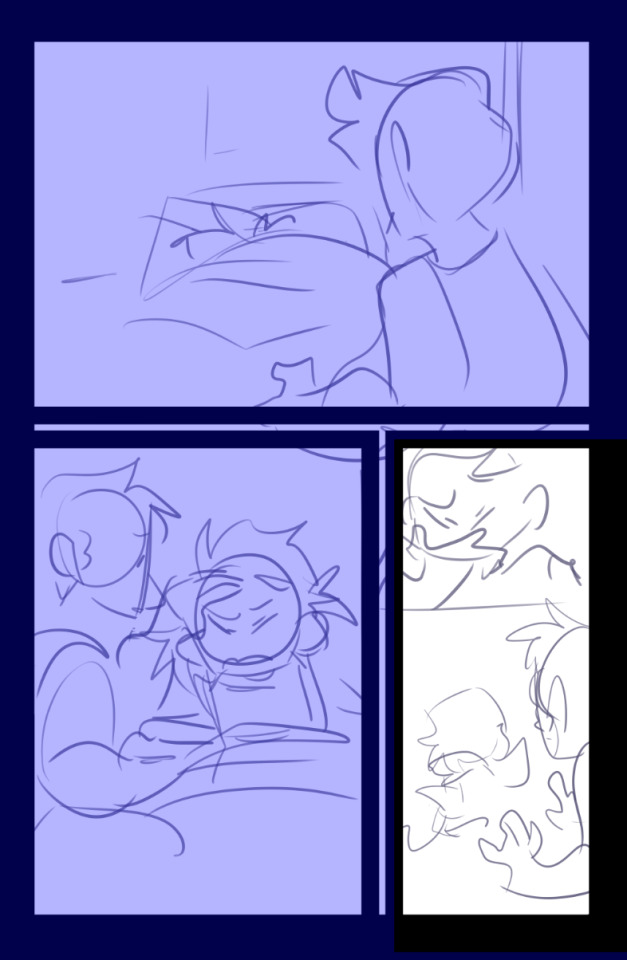
The end result leaves me with four border layers. Select all of them, right click, and press “merge selected layers”. Fill in the white space between the layer borders with black (if you want!) and press edit > convert brightness to opacity to get rid of the white and just leave the black. The end result should look like this:
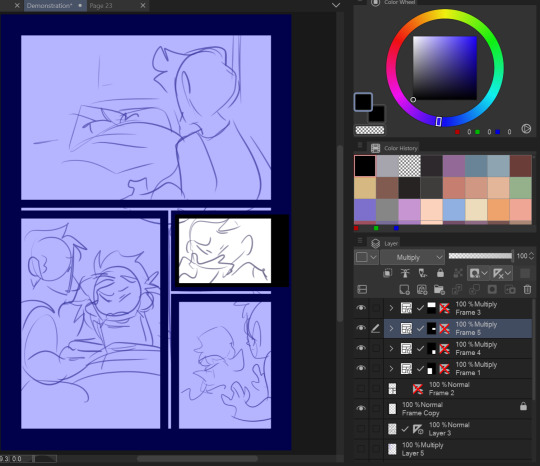
Killer moves! Now lower the opacity on your sketch and refine it on a new layer.

Save that baby and then overwrite your PSD document with the new sketch. It will automatically update itself in Illustrator.
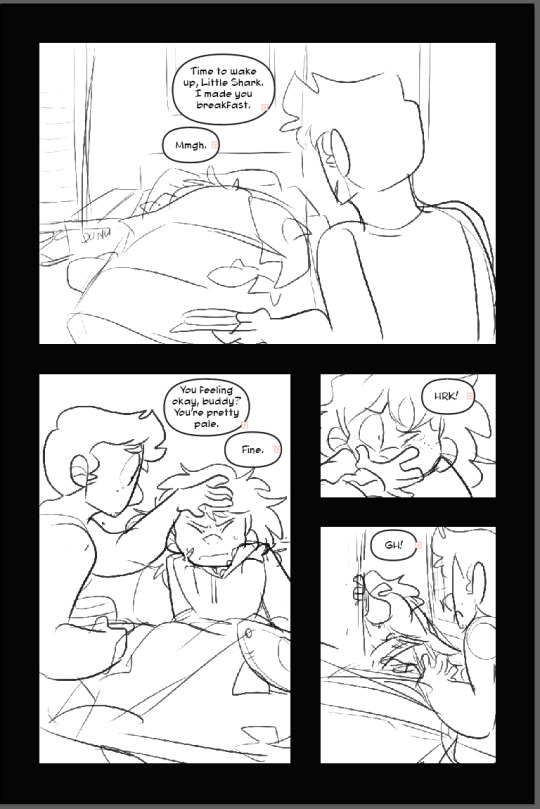
Check your work one more time in Illustrator, this is your last chance to move things around if you need to. (Looks good to me!)

Lineart in clip on a new layer!
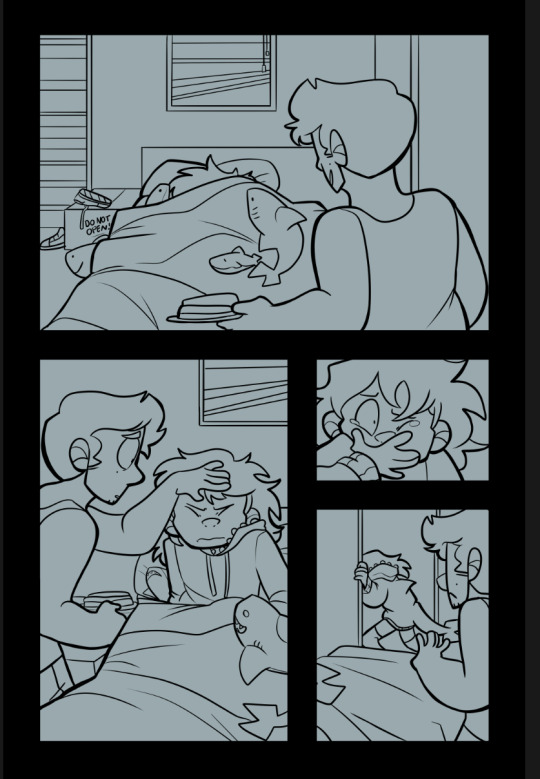
Fill in a new flats layer with a solid color (this ensures you won’t have any white spaces peeking through if you accidentally miss filling them in.
Unfortunately I don’t have separate images for flats/shading because I do them all on the same layer like a hooligan but hey! make it pretty.

Bucket tool is your friend! With “Refer other Layers” selected, and “Area scaling” enabled, you can fill in almost the entire flats section with the bucket tool! Saves a lot of time.
Using Select > Select Color Gamut, You can select all instances of a color on a canvas, and I use this all the time for shading or for quickly adjusting all instances of one color, and if you add “Show border of selected area” to your command bar, you can hide the border of the selection. (You’d have to google how to do that one i have no memory of how)
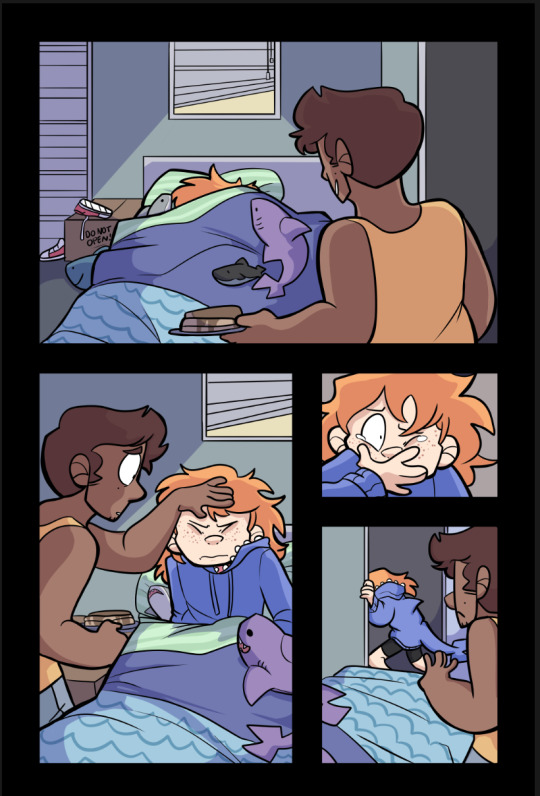
I shade with the same brush tool I use for lineart because I like the texture and I pick the colors by hand, but do feel free to use a multiply layer for shading!
Once you’re done, crop and export each one of your panels individually for webtoon. You can just save these as pngs!
Overwrite your Photoshop document once again with the full image and head back into Illustrator
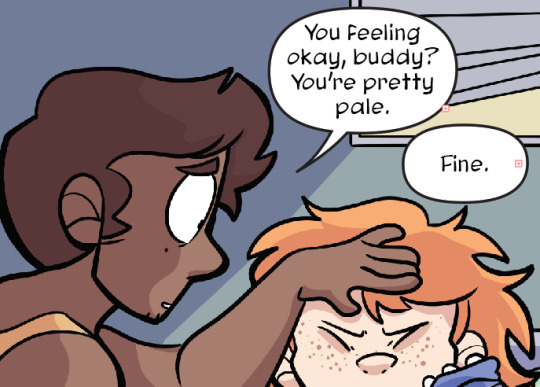
That’s lookin REAL FINE fellas gj
Using File > Place again, select all of your cropped webtoon size files and place them on the black bar you made earlier.
Like so! Copy the text and bubbles from the print page and resize them to whatever size you’d like for the webtoon format and arrange them on the strip.
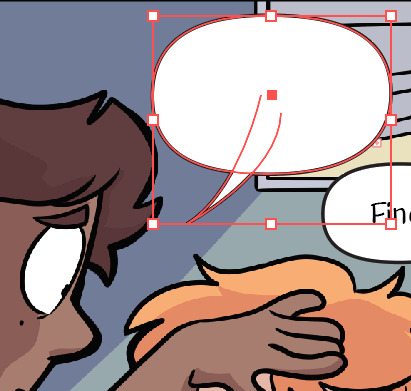
Now to add the tails to the bubbles. Click on one of the speech bubbles you’ve made to set those colors and stroke width as your current settings.
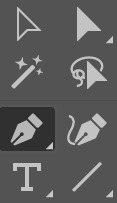
Pen tool
tap once inside the speech bubble

click where you want the tail to end and drag to create your desired curve. (straight tails are valid too!) Press Enter on your keyboard.

Tap the dot at the end of the tail you just placed, and click and drag back inside the bubble to curve your new line going back into the bubble.
Voila! It’s hideous. Click the bubble or the tail, then shift click to select the other half. Do not select the text!

In the pathfinder window, press the four lines in the top right corner to open a sub menu. Select “Make compound shape”
Goshdangit now your text is gone, thanks Em.

Not to be alarmed, the compound shape you made has just been moved to the top of the layer set. Just drag it back down under the text layer.
And you made a text bubble! Nice!

Repeat! And wow! You did it! You illustrated an entire comic page man!
Now to export. Using the artboard tool, you can select the artboards individually.

Select it and hit File > Export as

These are my settings. The image size can be set to whatever you want! I used to work with a much smaller canvas and scale up the webtoon strips as needed, but now I just make them the correct size in the canvas. Save that baby.
Repeat for the webtoon images, but remember, no bigger than 800x1280px. Once you export the first image, grab the top square to transform the artboard and drag it down over the next panel

If you drag from the top and don’t touch the bottom squares, it will make your cuts seamless because both Webtoon and Tapas will stitch your images together seamlessly. (Illustrator will show you how big your artboard is as you scale it so you won’t make it too big!)
And well.. that’s that! You did it! Uploading to Webtoon is super easy
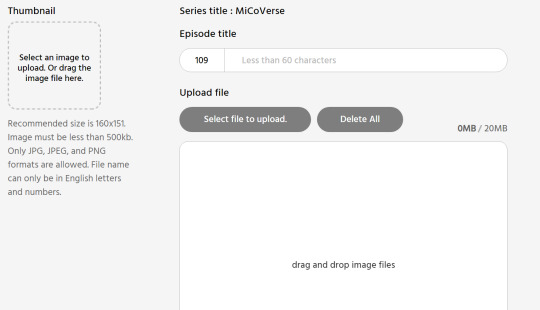
You just need a preview thumbnail, a title, and you can plop all the images onto the site in order!
38 notes
·
View notes
Last Seen Blogs

chorereliefsblog
Untitled

attiscus4pp
Atti’s thingz

tomaszjohn
Thomas J.Nemo

pi-ed-beta
Limp Addiction
