#I've already made things in blender before but not characters with complex stuff like one
Text
Model of One I'm making in Blender! Still need rigging! But she is working pretty fine, might make small animations in the future with her. Have this small render image of One I made for testing.
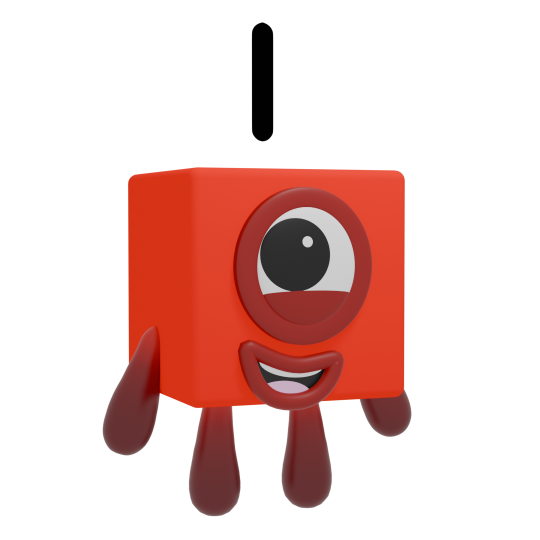
Also can someone tell my girly to please be patient, I ain't that good with bones, and shes getting irritated on me just cus I'm taking too long to place them...

#FriskDR#my models#my art#mi arte#numberblocks#numberblocks 1#numberblocks one#blender#3d model#I REALLY LOVE THIS MAN#I've never dare to make a detailed character by myself#but I finally did and she looks amazing#gotta say thanks to all those YT tutorials and reddit in a way for helping me figure out stuff#I've already made things in blender before but not characters with complex stuff like one#she isn't that hard but I had to do some trick here and there#also don't ask me if I will make this a public model#I've had people taking my art without credit and now a 3D model that cost me days?...#yeah idk about that lads srry!....
6 notes
·
View notes
Note
Hey! Big fan of your work - I've recently started delving into Blender animation, is there any way you could share the workflow u use when animating stuff?
Of course, but be warned that my workflow is highly idiosyncratic!
First off: Rigging. How I do it depends on exactly what I'm animating. If I'm rigging Sophodra, Gregorsa, or one of the humans, I'll use Rigify, which ships with Blender (though you'll have to enable it in add-ons). It's free, and for roughly human-shaped figures, it gets the job done.
For the other insects, and especially for the arachnids, it gets a little harder. See, arachnid limbs have a lot of joints, and most rigging add-ons aren't equipped to handle limbs more than three bones long--and I definitely wouldn't want to set up inverse kinematics for that many legs manually. So for those, I use an add-on called FreeIK, which you can get on Blender Market for only $30 (but be sure to read the docs!): https://blendermarket.com/products/freeik
FreeIK is amazing! It uses a method called "ephemeral rigging," which lets me pin any bone in place whenever I please, making it much more like animating a puppet and allowing a much finer level of control than traditional rigs. Sadly, that can be a little too much control on some model--hips on humanoid rigs will shoot out at random. For something like a spider, however, it's absolutely perfect! (I recommend using it in tandem with Selection Sets, another add-on that ships with Blender, to keep track of which bones you want pinned.)
Moving on from rigging, I also use an add-on called Onion Skin Tools. This one is only $10 on Blender Market: https://blendermarket.com/products/onion-skin-tools
As the name suggests, it lets you use onion skinning like in 2D animation. I couldn't imagine doing a walk cycle without it! With its help, I'm easily able to make a repeating walk cycle that loops in place while I move a parent empty around. (And if you're using FreeIK, you'll definitely want to be using a parent empty for placement. It's powerful, but bones can start behaving unpredictably if you get too far from the model's origin. I use two nested parent empties--one for walking, parented in turn to a master empty used for general placement.)
As of work on episode seven, I've also start incorporating Grease Pencil. Grease Pencil is an excellent tool all around, allowing you to do 2D animation in Blender! My style is cel-shaded enough that I can combine it with 2D. Not only do I use it for storyboard reference, but I also use it to draw on top of the scene, for where the 3D just isn't cutting it. I import the storyboards and other drawings with an add-on I made myself--Blender by default only lets you import black-and-white shapes, but my add-on imports as strokes, and can handle color: https://github.com/revereche/lineart_to_gp
I've also started incorporating AnimAll, which is fantastic (and also ships with Blender!). Shapekeys are already powerful tools, allow you to tweak the mesh manually when the rig isn't doing what you need. AnimAll lets you give each Shapekey multiple frames, so you don't need to set up a ton of Shapekeys to do one complex chain of movement. (Be warned it can cause file bloat, though, so use it wisely!)
As for the workflow itself, I go in this order, more or less (after writing the script and making any needed model adjustments, of course):
1.) Storyboarding. Since it's just me, they don't need to be great quality. The most important thing is making sure of the placements, getting the poses down in gestural strokes, and most importantly, getting the expressions just right.
2.) Recording voices. This can also be done before storyboarding, but I like to be sure of the scene flow before I commit. I used to start with rough placeholder voices, but ended up with awkward timing when the length of the final lines didn't match the original well enough. (Good thing none of my characters lip sync!) So, now I do the final audio on this step.
3.) Staging. Previously, this meant eyeballing the storyboard while I roughly placed the characters in the scene. Now, I import the storyboards in a Grease Pencil parented to the camera, so I can pose the characters to the storyboards more precisely. It preserves vivid gestures that would be easily lost in the CG stage otherwise!
4.) Props and backgrounds. Sometimes, I put this off until after animation, but it's really best to do it now. This can be mesh objects, planes I've painted on--or, often, planes I've painted on and extruded partially into mesh. I like to use Geometry Nodes for mesh wherever possible, especially when instancing many objects! It makes dealing with tons of vines (and humans) much easier. Also experiment with Shader Nodes, since generated textures are crisper than you would get with anything but very large texture images. (And if you're using Cycles, don't overlook displacement! Though you'll have to remember to turn that on in the sidebar preferences. That said, I mostly use Eevee, but am starting to look into Cycles for backgrounds.)
5.) Finally, final animation! I've already put the rough poses down, so I begin by cleaning those up, then adding any needed transitional poses. Then, I manually tweak the speed of the tweening, and offset the movements of parts that drag or bounce more than the rest (e.g. antennae). When a character needs to stand mostly still, I'll add a very slight bob for a moving hold, so they don't look like a mannequin.
After this, I render the image sequences, then put them all together in a video sequencing file. There, I add the citation blips, credits, and Gregorsa's Notes, as well as do some editing in post. Then, it's time to render the final video!
Hope that helps. I wish you luck in your future Blender endeavors!
34 notes
·
View notes
Last Seen Blogs

jugotdajuice
😎 as f*ck

greentrendsashoknagar
Untitled

kleoj1
Joel Sabuero Jr.

mysticalenemyinternet
Tanpa judul