#Installing Insulation Between Rafters
Explore tagged Tumblr posts
Visit Tumblr Blog
Explore Tumblr blogs with no restrictions, modern design and the best experience.
Last Seen Tumblr Blogs


Fun Fact
Premium Tumblr themes are available from anywhere between $9 to $49.
Text
The Benefits of Home Air Tightness Testing for Energy-Efficient Living

Air leaks may usually be unseen and they come about around the windows, doors, attic hatches as well as inside the building framework. Such leaks make your heating and cooling systems strain providing greater consumption of energy this way making the comfort of your house to drop. With Home Air Tightness Testing, professionals can pinpoint exactly where air is escaping and recommend tailored solutions to seal these weak spots effectively.
REIL (Retrofit Energy Ireland Ltd) provides a total package of Air Tightness Testing services to achieve the very same wherein the homeowners in the nation of Ireland get to diagnose and find the best ways to address such latent problems. These well-trained specialists work with advanced tooling such as blower door systems that measure the airtightness of your property and determine its compliance with the modern energy standards. This testing is of particular importance towards the compliance with Building Regulations Part L and the enhancement of your Building Energy Rating (BER).
In addition to saving on heat bills, enhancing airtightness also leads to a healthier indoor environment where the level of outdoor pollution, allergen and moisture infiltration are minimized. It is also one of the major elements of passive houses and deep retrofit development.
In case you want to be sure that your house is operating at its full potential, it is worth making an appointment with REIL. They can assist you to make the next move to your more convenient and cost-effective home with their reportage and professional suggestions.
#Home Insulation Grant Ireland#Home Air Tightness Testing#Roof Insulation Between Rafters#Installing Insulation Between Rafters
0 notes
Text
Can Residential Metal Roofing Be Installed Over Plywood?
Are you considering upgrading your roof and wondering about the benefits of residential metal roofing? If you’re looking for a durable, energy-efficient solution that contributes to a greener planet, metal roofing might be the perfect fit for your home. This article will explore whether residential metal roofing can be installed over plywood and the advantages and considerations associated with this option. By the end, you’ll understand how to approach your roofing project better.
Understanding Residential Metal Roofing
Residential metal roofing has gained popularity in recent years for good reason. Made from materials like steel, aluminum, or copper, these roofs are aesthetically pleasing and incredibly functional. One of the standout features of metal roofing is its longevity; many metal roofs can last 40 years or longer with proper care. This durability translates into fewer replacements and repairs over time, ultimately saving homeowners money.
Benefits of Installing Over Plywood
You might wonder why installing residential metal roofing over plywood is an option. Here are some of the benefits:
Solid Foundation: Plywood provides a strong, stable surface for your metal roofing. This added rigidity helps maintain the roof's shape and mitigate issues like warping or sagging over time.
Ease of Installation: Metal roofing over plywood simplifies the process. The plywood acts as a deck, making securing the metal panels properly easier.
Improved Insulation: As discussed in the background information, insulation plays a vital role in energy efficiency. Plywood can serve as a base layer for insulation materials, helping to keep your home comfortable year-round.
Moisture Barrier: When combined with appropriate underlayment, plywood can help create a moisture barrier, reducing the risk of leaks and water damage.
Preparing for Installation
Before diving into the installation process, you should take a few steps to ensure everything goes smoothly.
Cleaning the Surface
Whether you’re worth an existing roof or starting fresh, cleaning the surface is essential. Remove debris, dirt, and old roofing materials to create a clean foundation for your metal roofing.
Assess Plywood Condition
If you’re installing over existing plywood, you’ll want to inspect it thoroughly. Check for signs of rot, warping, or damage. Sound plywood is crucial for a successful installation. If you notice any issues, it may be wise to replace the damaged sections before proceeding.
House Wrap Installation
Add a layer of house wrap or building paper over the plywood to enhance moisture resistance. This will help protect the plywood from moisture intrusion and contribute to the overall durability of your roofing system.
Installing Insulation
If you want to maximize energy efficiency, installing insulation beneath your residential metal roofing is smart. A few options exist, including fiberglass batts.
Rigid Board Insulation
For those installing new metal roofing, rigid foam boards are an excellent choice. Here’s how to incorporate them:
Prepare the Surface: Make sure the plywood is clean and dry.
Install the Plywood: If not already done, lay plywood over the rafters and secure it with nails.
Add House Wrap: Place a layer of house wrap over the plywood to protect against moisture.
Install Foam Boards: Cut the rigid foam boards to size and place them over the house wrap, ensuring a snug fit.
Fiberglass Batts
If you use fiberglass batts, consider combining them with foam insulation for optimal performance. Here’s how to do it:
Fit the Batt: Place fiberglass batts between the rafters, ensuring they are not compacted.
Cover with Rigid Board: After the batts are in place, add rigid board insulation for increased thermal performance.
Final Steps: Installing the Residential Metal Roofing
Once your insulation is in place, it's time to install the metal roof panels. Follow these steps for a successful installation:
Following Manufacturer Instructions
Each metal roofing product has specific installation guidelines. Always refer to the manufacturer’s instructions to ensure correct installation.
Securing the Panels
Begin at the lowest point of your roof and work your way up. Secure the metal panels to the plywood, ensuring they overlap correctly to prevent water ingress.
Finishing Touches
Once all the panels are in place, add any necessary finishing touches, such as trim and flashing, to enhance the roof’s appearance and functionality.
Considerations Before Installing
Before you embark on your metal roofing project, there are a few considerations to keep in mind:
Local Building Codes: Check with your local building department to ensure your installation meets all code requirements.
Climate Considerations: Depending on your climate, you may opt for specific insulation or roofing materials that better suit your needs.
Professional Assistance: If you need clarification on any aspect of the installation, consider consulting with a professional. They can offer guidance tailored to your specific situation.
Installing residential metal roofing over plywood is possible and can also be a smart choice for homeowners seeking durability, energy efficiency, and aesthetic appeal. With proper preparation and attention to detail, you can enjoy all the benefits of metal roofing while enhancing your home's value and comfort.
Are you ready to take the next step in your roofing project? Visit Lastime Exteriors today to explore our services and learn more about energy-efficient roofing solutions tailored to your needs. Let’s create a roof that protects your home and contributes to a sustainable future!
7 notes
·
View notes
Text
@vitalphenomena for mack.
The most essential electronic feature in the Baltimore State Hospital that Frederick employs (aside from his office's espresso machine or the automized locks installed in every door thick enough to contain one) is the site-wide thermostat. Therapy rooms are kept at a cool sixty-two degrees fahrenheit; it is harder to lie convincingly when one is physically uncomfortable, however minimal or subliminal. Effectiveness is consistent regardless of a patient's awareness of such tactics: the cold will not dissipate whether one notices it or not. (Behavior, notably, is much the same.) In fact, registering it or its purpose only serves to amplify its presence.
Exactly an hour before private sessions within a patient's room, the silver vent in the corner of the ceiling hisses to life like a long, metal reptile coiled (in sharp, forty-five degree angles) in the rafters.
Many rooms fill with this sluggish-chill—a cold, constricted blue—throughout the day. Often, patients or staff shiver when Frederick passes them in the hallway; a simple conditioned response the uncritical misattribute to fear. An assumption, however, he makes no effort to undo.
The astute quietly conspire, voices so low the cameras present in nearly every room and hall can't detect any chatter. They talk at medical carts (staff) or through toilet plumbing (patients) or all together in the common rooms; a group can predict which branch of the facility Frederick will visit that day solely by recording room temperatures.
He's storming the halls, he hears an officer whisper as he passes through administration. Cute. An impotent hurricane with a limp, a nurse replies. He'll reassign her shift to the noncompliant quarters.
Frederick is never cold. His two piece suits keep him well insulated during the hour-long sessions. Today, he chose a wool jacket and pants. Thick, coarse fabric; stiff but remarkably pliable; a beautifully dyed brown plaid with a pocket square tucked in the hidden breast pocket stitched into the satin lining of his jacket, there in the event that his face or neck show any signs of perspiration; the sensation of warm abundance is an experience allotted to him alone of which he makes no effort to hide amongst patients—and some staff.
This will be his first formal session with Miss Mackenzie Knight. She has been temporarily assigned to the high security women's hall as she undergoes evaluation. After two days, she was approved by the attending psychologist for private interactions. He'll wait no longer than that. Of course, in this section, there's no true privacy. Cushioned walls separate each cell, but thin, horizontal bars—wide enough for voices and for arms—display each patient to the hallway and whatever figures may be loitering therein. There are no individual vents here since every room is, in a sense, conjoined. But the single vent is on. Frederick feels it at the nape of his neck, on the slim area of exposed skin between his weekly-cut hair and starched, blue collar as he enters the hallway. That chill wind hissing out like an invisible snake tongue.
Frederick carries with him nothing. Mackenzie has no backlog of hospital records for him to refer to. No written reports were found in the wreckage. Not hers, or anyone's. It would seem either the cult had no interest in writing physical or mental reports, no interest in physical or mental resources, or the records were burned along with everything else on the compound. A query, among many, Frederick mentally makes note of.
He does not peer into the other cells as he walks by. His attention is pointedly, consciously set forward. He walks with a casual, strained poise, shoulders sharp, their movement smooth then lurching with the new integration of a cane. Refusal to acknowledge a patient or their actions is the most efficient way to diffuse misbehavior and promote compliance. Like ignoring a toddler's tantrum. Some thrash against the bars, some yell. He reacts to none of it. Mackenzie's cell is last. Not unplanned: it is the closest to the hallway camera. But an annoying distance nonetheless.
A foldout chair is already set out, heralding Frederick's arrival. He steps behind it, into view, and fixes his gaze on his own hands as they wrap around the top of the backrest; he leans forward, relieving weight from his concave abdomen. Once situated, his gaze flicks up (his eyes large, weighty—pinning) then his head rises to meet hers, seeing her in-person for the first time (he had watched a few initial assessments on the camera feed in the comfort of his office during his lunch break; he found her to be remarkably rational for a girl who attempted to, and largely succeeded in, killing her entire family only a few weeks ago).
She is sitting on her bed. She looks approachable. She looks ordinary. Comfortable. Like a college student in her freshman dorm room. Frederick smiles, a flash of intrigue and excitement he does not conceal. "Hello, Miss Knight. Or, would you prefer Mackenzie? I apologize for the enforced uniform. An institution such as this shares more than a few characteristics with cults." The air conditioner kicks onto a heavier setting; louder, churning. His gaze momentarily drifts towards the noise, then back to her. Smiling, because he is able to indulge his own machinations under the guise of cordiality: "Are you comfortable?"
#ic#vitalphenomena#vitalphenomena: mack.#vitalphenomena. 001#i feel so so sooo rusty writing wise. thanks for humoring me#you don't have to match length. you can reply with two lines if you want. truly. i'm trying to feel him out is all. stretch those limbs.#this takes place at some time around s2 jsyk
3 notes
·
View notes
Text
Prefab Structures vs Pre-Engineered Buildings: What’s the Difference?
In today’s fast-paced construction landscape, Prefab Structures and Pre-Engineered Buildings (PEBs) have revolutionized the way we build. Both methods offer significant benefits over traditional construction—speed, efficiency, cost-effectiveness—but they are not the same. If you're planning a project and trying to decide between the two, understanding the key differences can help you make an informed decision.
What Are Prefab Structures?
Prefab (Prefabricated) Structures refer to buildings or components manufactured off-site in a controlled environment and then transported to the site for assembly. These structures can range from small kiosks to modular homes, site offices, and even industrial shelters.
Key Features of Prefab Structures:
Modular Construction: Built in sections (modules) that can be easily transported and assembled.
Material Variety: Often made from a combination of steel, wood, concrete, and insulation materials.
Highly Customizable: Designs can be adjusted for size, layout, and purpose.
Fast Installation: Reduces on-site labor and construction time drastically.
Versatility: Commonly used for temporary or semi-permanent installations like railway shelters, portable cabins, and remote site offices.
What Are Pre-Engineered Buildings (PEBs)?
Pre-Engineered Buildings are steel structures designed and fabricated in a factory using a predetermined inventory of raw materials and components. These are engineered to exact specifications, ensuring structural efficiency and cost optimization.
Key Features of PEBs:
Steel Framework: Built primarily from structural steel members such as columns, rafters, and purlins.
Engineered Precision: Each component is designed for load, wind, and seismic resistance.
Suitable for Large Spans: Ideal for industrial buildings, warehouses, exhibition halls, and aircraft hangars.
Durability & Strength: Designed to last for decades with minimal maintenance.
Scalable & Expandable: Easy to modify or expand in the future.
Prefab vs PEB: Head-to-Head Comparison
Which One Should You Choose?
Choose Prefab Structures if you're looking for quick deployment, mobility, and flexibility—for example, a site office, temporary housing, or a railway shelter.
Choose PEBs if your project demands long-term durability, large interior spaces, and structural strength, such as warehouses, showrooms, or manufacturing units.
Final Thoughts
While prefab and pre-engineered buildings both offer modern solutions to conventional construction, their uses, strengths, and structures differ considerably. Selecting the right approach depends on your project goals, timeline, budget, and scale.
Still unsure? At Engko, we specialize in both prefab structures and PEBs, and can guide you in choosing the right solution tailored to your needs. Contact us today to discuss your project.
1 note
·
View note
Text
Top Ceiling Insulation Company

Our products come in a wide selection or R-Values to suit climates though a higher R-value is ideal throughout the home, some areas require more insulative power than others. The ceiling is responsible for up to your home’s heat loss and gain which is more than any other area of the home. Choose the recommended R-value for your zone to optimize temperature control and energy savings- ceiling insulation brisbane.
Addressing any underlying moisture or ventilation issues is also crucial to the success of this insulation upgrade. When in doubt, consulting with a professional can provide tailored advice and ensure that your insulation addition maximizes energy efficiency and comfort. By following these steps, you can ensure your home is properly insulated, leading to improved energy efficiency and comfort. Remember, investing time in calculating your insulation needs can result in significant long-term savings on energy costs. We offer a bespoke insulation service from homes to commercial properties and projects of all sizes. One of the best ways to insulate an exterior wall is to clad it with rigid polystyrene foam - insulation installers brisbane.
Reflective or radiant barriers work differently than traditional insulation, and so this material’s effectiveness is not measured by R-values. While standard insulation reduces heat flow in a home, reflective insulation instead reflects the heat away from the home to prevent heat gain and radiant heat transfer to cooler surfaces indoors. Professionals are equipped with the necessary gear and knowledge to mitigate risks, including those related to falls, electrical hazards, and exposure to insulation materials. When choosing insulation for a vaulted ceiling, building regulations require a minimum U-value for pitched roofs with insulation between rafters.
Our insulation stands out as a sustainable alternative to synthetic soundproofing materials, offering impressive acoustic performance while maintaining strong environmental credentials. Harvested from the bark of cork oak trees without harming them, this renewable resource has gained popularity among eco-conscious homeowners and designers. Cellulose insulation is another option commonly used for ceiling insulation. For more information, please visit our site https://roofsuckers.com.au/
0 notes
Text
The Complete Guide to Loft Insulation Grants in the UK (2025)
For homeowners across the United Kingdom, loft insulation represents one of the most cost-effective ways to improve energy efficiency and reduce heating bills. With heat rising and up to 25% of a property's warmth escaping through an uninsulated roof, proper loft insulation can make a significant difference to both comfort and energy costs. This comprehensive guide explains everything you need to know about loft insulation grants available in 2025, including eligibility criteria, installation processes, and the substantial benefits this home improvement offers.
Understanding Loft Insulation
Loft insulation involves placing insulating material between and over the joists in your roof space to prevent heat from escaping. The current recommended depth for optimal performance is 270mm to 300mm of insulation material, typically mineral wool, although other options exist. This creates a thermal barrier that keeps warmth in your living spaces during winter and helps maintain cooler temperatures in summer.
There are three main types of loft insulation commonly installed in UK homes:
Roll or blanket insulation - The most common type, made from mineral wool that comes in rolls and is laid between joists
Loose-fill insulation - Made from recycled materials like cellulose or mineral fibres that are blown into place
Rigid insulation boards - Used for loft conversions or rooms in roof spaces where the insulation needs to be fitted between rafters
The type recommended for your home will depend on several factors including your roof structure, whether you use the loft for storage, and if you have any plans to convert the space in future.
Why Loft Insulation Matters in 2025
With energy prices remaining volatile and climate change concerns growing, improving home insulation has never been more important. Here are the key reasons why loft insulation should be a priority:
Substantial Energy Savings The Energy Saving Trust estimates that installing loft insulation in an uninsulated home can save between £240 and £400 annually on heating bills. For many households, this means the insulation pays for itself within just a few years through energy bill reductions alone.
Improved Thermal Comfort Properly insulated lofts help maintain more stable temperatures throughout the home, eliminating cold spots and reducing draughts that often occur when heat escapes through the roof.
Reduced Carbon Footprint By lowering energy consumption, loft insulation can reduce a household's carbon emissions by around 500kg per year, contributing to the UK's net zero targets.
Condensation Prevention Insulation helps prevent the formation of condensation in loft spaces which can lead to mould growth and associated health issues.
Increased Property Value Homes with better insulation typically achieve higher EPC ratings, making them more attractive to potential buyers and often commanding higher prices.
Year-Round Benefits While most noticeable in winter, loft insulation also helps keep homes cooler in summer by reducing heat gain through the roof.
Current Loft Insulation Standards
Building regulations in England and Wales currently recommend a minimum of 270mm of loft insulation for optimal thermal performance. Many older properties have significantly less than this, with some having no insulation at all. Even homes that were insulated decades ago may now have compacted or degraded material that needs replacing.
The quality of installation is just as important as the thickness. Gaps or compression in the insulation can dramatically reduce its effectiveness, which is why professional installation through government-backed schemes is recommended.
Loft Insulation Grants Available in 2025
Several government initiatives can help cover the cost of loft insulation, with some households qualifying for completely free installation:
ECO4 Scheme The Energy Company Obligation (ECO4) is the primary scheme for energy efficiency improvements, running until March 2026. Under ECO4:
Energy companies are obligated to fund insulation measures
100% of costs can be covered for eligible households
Focuses on low-income and vulnerable households
To qualify for free loft insulation under ECO4, you must:
Own your home or have permission from your landlord if renting privately
Have less than 100mm of existing loft insulation
Have at least one household member receiving qualifying benefits including:
Universal Credit
Pension Credit
Income-related ESA/JSA
Income Support
Housing Benefit
Child Tax Credit
Working Tax Credit
Great British Insulation Scheme (GBIS) Launched in 2023, GBIS offers:
Partial funding for insulation measures
Broader eligibility criteria than ECO4
Available to homeowners and tenants in council tax bands A-D in England or A-E in Scotland/Wales
Local Authority Flexible Energy (LA Flex) Scheme For households not receiving benefits but with:
Low incomes (typically under £31,000 annually)
Health conditions affected by cold homes
Properties with poor energy efficiency (EPC ratings D-G)
How to Check Your Eligibility
The simplest way to check if you qualify for a loft insulation grant is to:
Use the online eligibility checker on the ECO4 Grants website
Contact your local council's energy efficiency team
Speak to approved installers in your area
You'll typically need to provide:
Details about your property type and age
Information about your current loft insulation (if any)
Proof of benefits receipt if applying through ECO4
Council tax band information for GBIS applications
The Installation Process
Professional loft insulation installation follows a structured process:
Initial Assessment A qualified surveyor will:
Inspect your loft space
Measure current insulation depth
Check for any damp or ventilation issues
Assess safe access and working space
Preparation
Clear any stored items from the loft (installers can help with this)
Ensure adequate lighting is available
Protect any fragile ceilings below
Installation
Installers lay insulation between joists
Add additional layers across joists to achieve required depth
Ensure proper coverage around pipes, tanks and eaves
Maintain adequate ventilation at eaves level
Completion
Final inspection of work
Issue of guarantee documentation
Advice on maintaining insulation effectiveness
Most installations take just a few hours for an average-sized loft, with minimal disruption to the household.
Types of Loft Insulation Materials
The most common materials used in grant-funded installations are:
Mineral Wool
Made from glass or stone fibres
Excellent thermal performance
Fire resistant
Easy to install between joists
Sheep's Wool
Natural, sustainable material
Good moisture regulation
More expensive than mineral wool
Recycled Materials
Made from recycled textiles or paper
Environmentally friendly option
Often used as loose-fill insulation
Multifoil Insulation
Thin, reflective layers
Useful where space is limited
Often more expensive than traditional options
The material chosen will depend on your specific loft characteristics and the installer's recommendations.
Costs and Savings Breakdown
While grant funding can cover all costs for eligible households, it's useful to understand the underlying economics:Property TypeTypical Cost (Unfunded)Annual SavingsPayback PeriodMid-terrace£400-£600£240-£3001.5-2.5 yearsSemi-detached£500-£800£300-£4001.5-2.5 yearsDetached£600-£1,000£350-£4501.5-3 years
These figures demonstrate why loft insulation is considered one of the most cost-effective home improvements available.
Additional Benefits Beyond Energy Savings
While reduced heating bills are the most obvious advantage, loft insulation offers several other benefits:
Reduced Condensation Properly installed insulation helps prevent the warm, moist air from living spaces condensing in cold lofts.
Noise Reduction The insulating material can help dampen external noise from rain or wind.
Pipe Protection Insulation helps prevent water tanks and pipes from freezing in winter.
Fire Safety Many insulation materials have excellent fire resistance properties.
Summer Comfort Insulation works both ways, keeping homes cooler in hot weather.
Common Concerns Addressed
Many homeowners have questions or concerns about loft insulation:
Will it make my loft too hot in summer? Properly installed insulation actually helps regulate loft temperatures year-round. Adequate ventilation is maintained to prevent overheating.
Can I still use my loft for storage? Yes, installers can fit raised boarding over the insulation to create storage platforms without compressing the material.
Does it cause damp problems? When correctly installed with maintained ventilation, insulation prevents damp issues rather than causing them.
How long does it last? Most loft insulation materials will perform effectively for 40 years or more with no maintenance required.
What about pests? Modern insulation materials are not attractive to pests, and proper installation includes measures to maintain a pest-free environment.
Why Choose Grant-Funded Installation?
While DIY loft insulation is possible, there are significant advantages to professional installation through grant schemes:
Correct Installation Professionals ensure the right depth and coverage without gaps or compression.
Safety Working in lofts can be hazardous - professionals have the right equipment and training.
Guarantees Grant-funded installations typically come with 25-year guarantees.
Additional Measures Installers can identify and address related issues like ventilation or pipe insulation.
No Cost For eligible households, there's no reason not to use the professional service.
The Application Process Step-by-Step
Check Eligibility Use online tools or contact providers to confirm you qualify for funding.
Home Assessment An approved surveyor visits to assess your loft and confirm insulation needs.
Grant Approval Your application is processed (typically 2-4 weeks for ECO4).
Installation Scheduled Work is booked at a convenient time, usually completed within a day.
Post-Installation Receive all documentation and advice on maintaining your insulation.
Act Now - Funding is Limited
Government funding for loft insulation is not unlimited, and grants are allocated on a first-come, first-served basis. With the ECO4 scheme ending in March 2026, now is the ideal time to apply.
Conclusion
Loft insulation remains one of the simplest yet most effective ways to improve your home's energy efficiency. With significant savings on heating bills, improved comfort, and potential grants covering all costs, there's never been a better time to insulate your loft.
To begin the process:
Check your eligibility for grants
Arrange a free home assessment
Have your insulation professionally installed
Start enjoying a warmer home and lower energy bills
Don't let another winter pass with heat escaping through your roof - take advantage of available funding and upgrade your loft insulation in 2025.
#roof insulation#loft insulation#loft apartment#internal wall insulation#insulation services#thermal insulation
1 note
·
View note
Text
Metal Roofs and Noise: What You Really Need to Know
The Roots of the Noise Rumor
This myth didn’t appear out of thin air. It probably started in places like barns and backyard sheds. Think about it—thin metal sheets slapped onto open rafters, no insulation, no padding. Yeah, that’s going to sound like a rock concert when it rains.
But that’s not your house.
Today’s residential metal roofs? Completely different ballgame. They're layered with underlayment, insulation, decking, and often, attic space. These layers work like sound mufflers, soaking up noise before it ever reaches your ears. So, comparing your home’s roof to a barn’s tin lid? Not even close.
How They Really Sound When It Rains
If a metal roof is properly installed, it’s about as loud as an asphalt shingle roof. Sometimes even quieter.
Here’s why that happens:
Decking power: Most homes have solid wood decking beneath the panels. It’s like a sound buffer built right into your roof.
Smart installation: Today’s systems use smart fastening that stops panels from rattling.
Bonus soundproofing: Add attic insulation into the mix, and you’ve got another layer that dulls any outside noise.
Many homeowners who’ve switched say rain actually sounds softer and kind of peaceful. Not what you’d expect, right?
Not All Metal Roofs Are the Same
Let’s talk materials. Metal options affect how much sound gets through.
Standing seam roofs (those sleek, modern ones with hidden fasteners) vibrate less. Heavier-gauge steel panels? They’re thicker, so they absorb more sound than thin aluminum ones. And those textured coatings some roofs have? They scatter sound waves, making rainy days even quieter. The takeaway? Material and style matter big time.
Looks Great, Works Hard
It’s easy to focus on the noise talk and miss the other wins metal roofing brings. Metal roofs are stylish, low-maintenance, and energy-saving. They bounce sunlight, which helps with cooling bills. When you work with a premier metal roofing supplier in Flint TX, you get access to finishes and designs that fit your home’s personality. No need to choose between looks and performance. You can have both.
If You’re Still Worried About Sound…
Still not fully sold on the whole “it’s not that loud” thing? No problem. You’ve got options.
Talk to your installer about sound-dampening underlayment.
Boost your attic insulation
No attic? Ask about acoustic panels under the metal.
And here’s the twist: some folks end up loving the gentle patter of rain on their roof. It’s more Zen than noisy. Think white noise, not a rock concert.
0 notes
Text
Loft Boarding vs. Loft Conversion: What’s Best for Your Birmingham Property?

If you’re a homeowner in Birmingham looking to make the most of your property, your loft could be the key to unlocking valuable space. Whether your goal is to create a little more storage or to add an entirely new room, you’re likely considering two popular options: loft boarding and loft conversion.
But which one is right for your home? Let’s explore both solutions in detail—looking at the benefits, costs, and factors to consider—so you can make an informed choice that fits your lifestyle, needs, and budget.
What Is Loft Boarding?
Loft boarding involves installing a durable platform of wooden boards across the floor joists in your attic or loft space. This makes the area safe and practical for storage, allowing you to walk across the space and organize belongings without damaging insulation or stepping between rafters.
It’s a simple and cost-effective way to make use of your loft without converting it into a habitable room.
What Is Loft Conversion?
A loft conversion goes much further than boarding. It transforms your attic into a fully functioning living space—typically a bedroom, office, or guest room. This process often involves structural modifications, the addition of insulation, flooring, lighting, windows, and sometimes plumbing and electrical work.
The result is an entirely new room, complete with everything needed to use it as part of your home.
Advantages of Loft Boarding
A Budget-Friendly Upgrade
One of the biggest advantages of loft boarding is the cost. Compared to a full conversion, it’s much more affordable. For many Birmingham homeowners, this makes it the ideal solution for gaining extra space without taking on a major renovation project.
Minimal Disruption
Loft boarding projects are quick and non-intrusive. In most cases, they can be completed in a day or two. There’s no need to vacate your home, deal with extensive construction noise, or live in a mess for weeks.
Improved Home Organization
Do you struggle with clutter? Loft boarding offers a neat, secure place to store items like holiday decorations, suitcases, seasonal clothing, or old paperwork. It helps free up space in your main living areas, improving your home's overall organization.
Protects Your Insulation
Modern loft boarding systems are designed to be raised above insulation levels. This allows airflow and maintains energy efficiency by preventing insulation compression, which can lead to heat loss and higher energy bills.
Advantages of Loft Conversion
Adds Valuable Living Space
A loft conversion adds real, usable space to your home. Whether you need a new bedroom, a home office, or a quiet retreat, converting your attic provides a blank canvas to design a space that meets your needs.
Increases Property Value
In Birmingham’s competitive housing market, adding an extra room can significantly increase your property’s value. A well-executed loft conversion can boost your home’s resale price by up to 20%, depending on the type of room and the quality of the finish.
Customized to Your Needs
Unlike boarding, a loft conversion allows for a fully tailored design. Want skylights to bring in natural light? Or built-in storage to maximize space? With a conversion, you can create a truly bespoke room to suit your taste and lifestyle.
Improved Energy Efficiency
When done properly, loft conversions can enhance your home's thermal performance. With new insulation, double-glazed windows, and modern lighting, you can create a warm, efficient space that’s comfortable year-round.
Key Considerations Before Deciding
Choosing between loft boarding and a loft conversion depends on several factors unique to your property and your personal goals.
Think About Your Budget
If you're working with a limited budget, loft boarding is a more accessible option. It offers improved functionality without a hefty price tag. However, if you can afford a larger investment and want to significantly increase your living space and property value, a loft conversion may be worth the cost.
Consider Your Property’s Layout
Not all lofts are suitable for conversion. Factors such as ceiling height, structural integrity, and roof pitch will determine whether a full conversion is feasible. If your attic has limited headroom or structural challenges, boarding might be the more practical choice.
Evaluate Your Long-Term Goals
Are you planning to stay in your home for many years, or are you preparing it for sale? If you’re staying long-term and need extra living space, converting your loft could dramatically improve your lifestyle. If your primary need is simply storage, loft boarding offers a straightforward, less disruptive solution.
Why Loft Boarding in Birmingham Makes Sense
For many Birmingham homeowners, Loft Boarding in Birmingham has become an increasingly popular solution to storage issues. With growing families, limited space, and rising property prices, making the most of your existing home is more important than ever.
Loft boarding offers an affordable way to expand functionality without moving or extending your home. Plus, local companies in Birmingham are familiar with common house types in the area—whether it’s a Victorian terrace or a 1930s semi—and can provide customized solutions that comply with safety and building standards.
Opting for a local installer also means better support, faster turnaround times, and a deeper understanding of regional building codes and insulation requirements.
Different Types of Loft Solutions
Variations of Loft Boarding
Depending on your storage needs and budget, you can choose from several types of loft boarding solutions:
Basic Loft Boarding: Ideal for small areas where light storage is required.
Raised Loft Boarding: Designed to sit above insulation, preventing compression and maintaining airflow.
Fully Floored Loft Area: Includes high-quality boarding, lighting, ladders, and safety measures for maximum usability.
Loft Conversion Types
If you're considering a conversion, you’ll find a few main options:
Velux (Rooflight) Conversion: Adds windows to the existing roof without changing its structure.
Dormer Conversion: Builds a vertical extension onto the roof, creating additional headroom.
Hip-to-Gable Conversion: Extends the sloping side of the roof to form a vertical wall.
Mansard Conversion: Involves major roof restructuring but provides maximum space.
Each option varies in terms of cost, complexity, and suitability for your property’s shape and design.
Planning and Permissions
Planning Permission Requirements
One of the great things about loft boarding is that it usually doesn’t require planning permission, as it doesn’t alter the structure or function of the loft.
In contrast, loft conversions often do require planning permission, especially if you’re altering the roofline or exceeding volume limits. It’s important to consult Birmingham City Council or a local planning expert before starting any conversion work.
Building Regulations
Both loft boarding and conversions must adhere to building regulations if structural changes are made or if the loft is intended for frequent use. For example:
Loft boarding may need approval if heavy loads are stored or structural joists are altered.
Loft conversions will require approval for safety, insulation, ventilation, and fire escape provisions.
Always work with professionals who understand local regulations and can help guide you through the approval process.
Maintenance and Upkeep
Maintaining Your Loft Boarding
Loft boarding is low maintenance, but it’s wise to inspect the space annually. Look out for signs of moisture, inspect for pests, and avoid placing overly heavy items in a small area. Keeping the loft ventilated will also help prevent condensation.
Maintaining a Loft Conversion
Converted lofts require the same care as other rooms in your home. This includes maintaining windows, ensuring insulation remains effective, and checking for leaks or cracks. If your loft includes plumbing or HVAC systems, routine maintenance is essential.
Which Option Should You Choose?
Ultimately, the best choice comes down to how you plan to use the space.
Choose loft boarding if you need more storage, want a fast and cost-effective solution, and don’t plan to use the loft as a living area.
Choose a loft conversion if you're looking to add a bedroom, office, or living room, and you’re willing to invest more time and money for long-term value.
Conclusion
Whether you’re drawn to the simplicity of loft boarding or the expansive potential of a loft conversion, both options can help you unlock the hidden potential of your Birmingham home. For homeowners who need better storage without the hassle of a major renovation, Loft Boarding in Birmingham offers a practical, affordable, and quick solution.
On the other hand, if you’re dreaming of an extra bedroom or a private workspace, a loft conversion could be one of the best home investments you’ll ever make.
Before you decide, consider your goals, budget, and the structure of your property. And remember—professional advice is invaluable when making changes that could impact the value and comfort of your home.
Frequently Asked Questions (FAQs)
1. How long does it take to board a loft?
Most loft boarding installations can be completed in just one to two days, depending on the size of the loft and any additional features like lighting or ladders.
2. Will a loft conversion add value to my property?
Yes, a well-designed loft conversion can increase your home’s value by up to 20%, especially in areas like Birmingham where extra living space is in high demand.
3. Can all lofts be converted?
Not necessarily. Your loft must meet specific requirements regarding height, structure, and access. A professional survey is recommended to determine suitability.
4. Do I need planning permission to board my loft?
Generally, no. Loft boarding is considered a minor home improvement and usually falls under permitted development rights.
5. Is loft boarding safe for storing heavy items?
Raised loft boarding systems are designed for storage but have weight limits. Avoid placing extremely heavy items in one spot, and ensure your joists are structurally sound.
0 notes
Text
Are Skylights Suitable for All Types of Roofs?
When considering home improvements, skylights can be a transformative addition that enhances natural light and ventilation within your space. However, not all roofs are created equal, and it’s essential to understand whether skylights suit your particular roofing type. In this article, we’ll explore the compatibility of skylights with different roofs and help you make informed decisions for your home.
Skylights are roof-mounted windows designed to allow natural light into your home. They come in various styles, including vented skylights for ventilation and fixed skylights for pure illumination. The choice of skylight largely depends on the specific requirements of the room and the type of roof you have.
The Compatibility of Skylights with Different Roof Types
While skylights can be a fantastic way to brighten your home, they are not universally compatible with every roof type. Here are some factors to consider:
Roof Structure: Roofs with rafters generally provide better skylight support than truss-framed roofs. The spacing in a rafter roof typically allows for more flexibility in installation without compromising structural integrity.
Roof Slope: The angle of your roof will also determine the type of skylight best suited for your home. Flat roofs often require flat skylight options, while pitched roofs can accommodate various styles, such as curb-mounted or deck-mounted skylights.
Roof Material: Your roof's material can also influence skylight installation. Certain materials may require specialized flashing or installation techniques to prevent leaks and ensure durability.
What Types of Roofs Are Best for Skylights?
Rafter Roofs: These roofs provide the best support for skylights, making installation straightforward. They can accommodate various styles of skylights, enhancing both light and ventilation in your home.
Pitched Roofs: These roofs are ideal for various skylight options, including curb-mounted and flush-mounted skylights. The slope allows for effective water drainage and minimizes the risk of leaks.
Flat Roofs: Flat roofs can support skylights, but you’ll need to choose the right type—typically flat or deck-mounted skylights—to ensure they function correctly and efficiently.
Choosing the Right Skylight for Your Roof Type
Consider Your Room's Needs
Understanding the primary purpose of your skylight can help you select the right type for your room. Are you looking to illuminate a hallway or provide ventilation in a kitchen? Choosing between a vented or fixed skylight is key to achieving your goals.
Assessing Roof Shape and Climate
The shape of your roof and the climate in your area are essential factors to consider. You’ll want to select a skylight style that conforms to the roof shape and performs well under local weather conditions. For instance, a more robust skylight may be necessary in areas with heavy snowfall.
Common Myths About Skylights
Are All Skylights Made of Glass?
It’s a common misconception that all skylights are constructed from glass. While many skylights feature glass glazes, they can also be made with plastic. The choice of material will affect your skylight's durability, insulation, and overall performance.
Making the Decision: Are Skylights Right for You?
Before deciding to install skylights, it’s important to weigh the benefits against the specific characteristics of your roof. Here are some questions you might want to ask yourself:
What is the current structure of my roof?
Does my roof slope, or is it flat?
What is the primary function of the skylight I want to install?
Is my roof material compatible with skylight installation?
Skylights can bring abundant natural light and fresh air into your home, but they are unsuitable for every roof type. Understanding your roof’s structure, shape, and material is key to making the right choice.
If you’re considering installing skylights in your home, Lastime Exteriors is here to help guide you. Our experienced team can assess your roof and recommend the best options tailored to your needs.
Don’t hesitate to reach out! Call us at (402) 330-0911 for any questions or to schedule an appointment. You can also email [email protected] for a free estimate. Let’s brighten up your space with the perfect skylight!
2 notes
·
View notes
Text
Traditional vs. Modern Loft Conversion Methods

Loft conversions are a fantastic way to add space and value to a home, but choosing between traditional and modern methods can be challenging. Both approaches have their own benefits, costs, and aesthetic impacts. This guide explores the key differences to help you make an informed decision.
1. Construction Techniques
✔ Traditional Method: Uses timber framing and hand-built structures, requiring more labor but offering craftsmanship and durability. ✔ Modern Method: Prefabricated panels and modular components speed up installation and minimize disruption.
2. Time & Efficiency
✔ Traditional Method: Typically takes longer due to on-site construction and customization. ✔ Modern Method: Faster completion time with pre-built elements, sometimes within weeks.
3. Cost Considerations
✔ Traditional Method: Often more expensive due to labor-intensive work and high-quality materials. ✔ Modern Method: Can be more budget-friendly as modular components reduce labor costs.
4. Design Flexibility
✔ Traditional Method: Highly customizable, ideal for period homes where maintaining original aesthetics is key. ✔ Modern Method: Sleek, minimalist designs with contemporary materials like steel and glass.
5. Insulation & Energy Efficiency
✔ Traditional Method: Uses conventional insulation like mineral wool, requiring careful placement to avoid heat loss. ✔ Modern Method: Incorporates high-performance insulation, airtight construction, and eco-friendly materials for better energy efficiency.
6. Structural Impact
✔ Traditional Method: Requires reinforcement of joists and rafters, which may increase project complexity. ✔ Modern Method: Uses lightweight materials and engineered beams, reducing structural load concerns.
7. Aesthetic Appeal
✔ Traditional Method: Works well with classic interiors, exposed beams, and natural materials. ✔ Modern Method: Best suited for open-plan spaces, glass extensions, and contemporary finishes.
Final Thoughts
The choice between traditional and modern loft conversion methods depends on budget, timeframe, and personal preference. Traditional conversions offer timeless charm and craftsmanship, while modern techniques provide efficiency and innovative design. Understanding these differences will help you create the perfect loft space for your home.
1 note
·
View note
Text
7 Essential Roofing Layers: Why They Matter for a Long-Lasting Roof
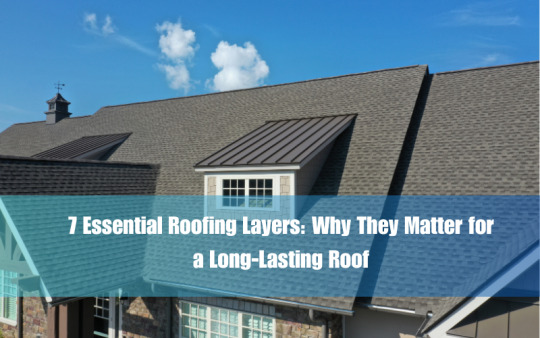
When you think about the durability of your roofing, you might have only thought about having robust roofing material with anti-algae and other protection features as the most important factors to make your roof strong. But many homeowners don't realize that roofing durability is due to the layers that your roofing is made of, which makes your roofing durable, energy-efficient, and leak-proof.
So, whether you are a longtime homeowner looking for the best replacement option or new homeowners unsure about which roofing you should choose, understanding these seven roofing layers will make your selection easier. Moreover, knowing the roof layer in depth can save you time and money in the long run.
What Are Roof Layers?
Roofing layers refer to different components or parts from which the whole roofing system is made. Each layer of the roof has a specific function that helps in the efficiency of the roofing and makes it strong.
As for how many layers roofing has, a typical roofing has seven main layers, though this number can vary depending on the roofing type, whether it's flat roof layers (3) or pitched or slope roofing. In the end, each layer of the roofing is designed to make your roofing strong.
Most Important 7 Layers of Roof Shingles: Why Are They So Important?
For the overall performance of the roofing, these seven layers are crucial for protection, durability, and longevity. Here are the typical seven layers of the roof that are commonly found in almost all roofing types.
1: Roofing structure (framing)
The first layer of the roofing is the roofing structure or roof framing. This base (skeleton) of the roofing supports all the other roofing layers. So, without a robust roofing structure, your roofing would not function effectively.
A typical roof framing consists of other roofing components like beams, trusses, rafters, etc., which are the main pillars used to support the whole roofing. These parts are then responsible for holding other layers of roofing like insulation, decking, and shingles. In short, if the roofing structure is not strong, it wouldn't be able to carry the whole weight of the roofing; on top of that, it wouldn't be able to protect your house from other external elements like sun, rain, and wind.
2: Insulation layer
The second layer of roofing that comes after framing is insulation. The roofing insulation is a very important layer of the roof that helps regulate your house's indoor temperature. In simple words, insulation is the layer installed between the roofing structure and the ceiling. The main purpose of roofing insulation is to control the heat that escapes from the inside of your home or enters it from the outside. Without proper insulation, cooling your house in summer or heating them in winter would become much harder. Moreover, it could also increase the dependency on heating and coolers.
Generally, most roofing insulation uses fibreglass, foam boards, or foam sprays. While insulation is installed all over the house, the most common areas where insulation is installed are the attic and between roof rafters.
3: Roofing deck (sheathing)
Roofing decking or sheathing is the third layer of the roofing. This layer is just at the top of the roofing structure, and most of the roofing decks are made from strong materials like plywood or metal. The roofing deck is the base for other layers like underlayment, shingles, and insulation.
Roof decking is generally a flat-level layer installed on the top of the roofing structure. Their main purpose is to be the flat surface supporting other roofing layers. In addition, the roofing deck also adds more strength and stability that allows it to bear the weight of different materials and resist external forces like wind, snow, and rain. The decking makes it easier to distribute the whole weight of the roofing, which helps prevent sagging and collapse.
4: Underlayment
Another crucial layer of the roofing is underlayment. This layer of the roofing is placed on the top of the roofing deck before the roofing material (roofing covering) is installed. The main purpose of underlayment is to act as a protective layer against water, moisture, and other elements that might penetrate through the roof covering.
Most underlayments are made using synthetic materials that add more security to the roofing. This layer acts as a second barrier that prevents water from seeping inside the house. It’s especially useful in areas where heavy rain or snow is common.
5: Ice and water shield
This layer is like underlayment and protects your roofing from ice dams and water infiltration. This type of layer is typically installed around roofing edges and valleys, with a high chance of roofing being damaged. Furthermore, ice and water shields are made using self-adhesive membranes that have sticky backing. This type of layer is essential in the cold regions where ice dams are often formed around the roofing edges.
Besides, this roof layer is installed mostly around the other roofing areas where water is collected most like roof valleys, eaves, edges, etc. Adding this layer of roofing also boosts the life expectancy of your roofing, preventing costly repairs that are caused by leaks.
6: Roof covering
This layer of the outermost layer of the roof is also the most visible layer of the roofing that everyone sees. Roof covering could also be referred to as the first line of defense against environmental factors like sun, rain, wind, ice, etc. There are various roof covering materials that are found in the market, like asphalt shingles, metal shingles, tiles, slates, etc.
This layer of roofing is laid on the top of the underlayment, furthermore, this is the layer that determines the appearance of your roofing. It is available in many styles, colors, and materials to suit the architectural design of your home.
7: Flashing
Last but not the least is flashing. Flashing is the core component of the roofing layer. This part of roofing helps prevent water seeping inside the house through the vulnerable areas of the roofing. Flashing is often installed around roofing walls, chimneys, skylights, or vents.
Flashing is the thin roofing layer made using aluminium, copper, or steel. Protecting the vulnerable areas of the roofing increases the roof's overall integrity and durability.
Conclusion
Knowing all seven roofing layers is vital; knowing them better would help make the correct choices to boost the roofing's robustness, durability, stability, and longevity. From the base layer to the outermost layer of the roof, each roofing layer has a specific function that enhances the robustness of the roof. When installing a new roof or replacing an old one, having high-quality roofing shingles in Bangalore, along with the correct layering, is the right way to go. By making the right decisions, you are guaranteeing that your roof will be sturdy, water-proof, and good-looking during the long-haul.
0 notes
Text
A Beginner’s Guide to Understanding Framing in Construction
If you’ve ever seen a house or building under construction, you’ve probably noticed the skeleton-like structure that seems to hold everything up. That’s framing! Framing is the backbone of any building project, and it’s one of the most important steps in construction. But what exactly is framing, and why is it so crucial? Let's break it down in simple terms.
What is Framing?
Framing is the process of creating the basic structure or skeleton of a building. It involves the installation of vertical beams (studs), horizontal beams (joists), and diagonal supports (rafters) to form the framework that supports the rest of the building. Think of it like assembling a giant puzzle where each piece is a different component that will eventually support walls, ceilings, floors, and roofs.
In residential construction, framing usually involves wood, though steel or concrete can be used in larger or more commercial projects. The type of framing chosen depends on the size of the structure, the budget, and the location’s climate.
Types of Framing
Platform Framing: This is the most common type of framing used for homes. It involves building each floor separately, with the floor frame being constructed first and then walls added on top. This method is popular because it's relatively easy to construct and cost-effective.
Balloon Framing: An older technique, balloon framing uses long, continuous studs that run from the foundation to the roof. While it’s rarely used today due to safety and material concerns, it was a common method before platform framing became popular.
Timber Frame Construction: This type of framing uses large wooden beams and posts to support the structure. It’s typically seen in older homes or custom-designed buildings and provides a rustic, traditional look.
Steel Framing: In commercial buildings or modern residential construction, steel framing is sometimes used because it offers greater durability and can withstand more weight. Steel framing also resists fire better than wood.
Why Is Framing Important?
Framing forms the entire structural foundation of your building. It’s like the bones of a human body — without it, nothing else can be added. The walls, floors, roof, and even windows all rely on the framing to stay in place and hold everything together. Without a strong, well-built frame, the building could potentially collapse or have significant structural issues later on.
Here are a few reasons why framing is so important:
Structural Integrity: The frame supports the weight of the entire building, from the roof to the floors and everything in between.
Foundation for Other Work: Once the frame is in place, the rest of the construction can take place — from plumbing and electrical systems to drywall, flooring, and finishing touches.
Safety: A solid frame keeps the building safe for people who live or work inside. It ensures stability during high winds, heavy snowfall, or earthquakes, depending on the materials used.
Energy Efficiency: Properly framed homes allow for better insulation and energy-efficient heating and cooling systems.
Framing Materials
The materials used in framing depend on the type of building and its intended use. The most common materials for residential construction are:
Wood: It's affordable, easy to work with, and versatile. Wood framing is standard for most homes.
Steel: Steel framing is used for larger buildings or homes in areas prone to termites, fire, or other environmental threats. It’s stronger and more durable than wood.
Concrete: Concrete framing is often used for commercial buildings or structures in flood-prone areas.
Choosing the Right Framing Service
Building a strong, safe, and durable frame is a crucial part of any construction project. So, if you’re planning a home or commercial building project, you’ll want to ensure the framing is done by experts who understand the ins and outs of this process. That’s where Atlantic Builders WY in Jackson, WY, comes in.
Atlantic Builders WY is renowned for providing top-notch framing services, ensuring that your building’s frame is strong, stable, and ready to support the rest of your construction. Whether you’re building a custom home or a commercial space, their team of experienced professionals can handle all your framing needs. They specialize in using high-quality materials, attention to detail, and safety measures to create the perfect frame for your building.
Choosing Atlantic Builders WY means you’re working with a company that’s committed to providing the best structural support for your project. Don’t leave the framework of your dreams to chance — trust the experts for a solid, reliable foundation!
In conclusion, framing is the critical first step in any construction project. Whether you're building your dream home or a commercial space, framing sets the stage for everything else. It ensures safety, stability, and durability for years to come. For the best framing services in Jackson, WY, consider partnering with Atlantic Builders WY — your trusted experts in framing and construction!
0 notes
Text
Stone wool installation method
Rock wool insulation, also known as mineral wool, is a popular choice for soundproofing, thermal insulation, and fireproofing. Installing rock wool is a straightforward process, but proper technique is essential to achieve optimal results. Here’s a step-by-step guide to help you install rock wool insulation in your home or building.
Materials Needed:
Rock wool insulation batts or rolls
Utility knife
Measuring tape
Safety gloves
Dust mask or respirator
Safety glasses
1. Prepare the Area
Start by ensuring the space where the insulation will be installed is clean and dry. Remove any debris, old insulation, or obstacles that may interfere with the installation. It’s essential to wear safety gloves, glasses, and a dust mask to avoid skin irritation and inhaling fibers.

2. Measure the Space
Before cutting the rock wool insulation, measure the width and length of the spaces between the studs or rafters. Use a tape measure to determine the exact size required for each batt or roll. Make sure to account for any obstructions like pipes or wires that may need to be cut around.
3. Cut the Rock Wool Insulation
Using a utility knife, carefully cut the rock wool to fit the measured dimensions. It’s best to cut slightly larger than needed to ensure a snug fit. If you're working with batts, they can usually be torn by hand along the pre-scored lines for more precision. When cutting, be sure to wear safety gloves to avoid any irritation.
4. Install the Insulation
Place the cut pieces of rock wool insulation between the studs, rafters, or joists. Gently press the insulation into place so that it fits snugly without gaps. If you're using rolls, unroll the material and cut it to size as you go. The insulation should fit tightly but not be compressed.
For wall cavities, ensure that the insulation fills the entire space between studs, leaving no voids. For ceilings and floors, make sure the insulation covers the entire surface, ensuring maximum thermal and acoustic efficiency.
5. Secure the Insulation
In most cases, rock wool insulation doesn’t need additional fastening as it typically stays in place due to its friction fit. However, if you are installing it in a vertical cavity (e.g., between studs), you may need to use insulation support clips or netting to keep it in position.
6. Seal Gaps and Joints
After the insulation is installed, seal any gaps or joints using a spray foam or caulk. This helps to improve the energy efficiency of the installation and prevents drafts. Pay special attention to areas where the insulation meets walls, ceilings, and floors.
7. Check for Coverage
Once installed, double-check the insulation to ensure it’s covering all surfaces without any exposed gaps. This is crucial for maximizing its thermal and soundproofing effectiveness.

8. Clean Up
After installation, clean up any debris and dispose of any scrap material. Make sure all tools are stored safely and remove any protective gear.
Final Thoughts
Installing rock wool insulation is a great way to improve the energy efficiency and soundproofing of your home or building. With the right materials, tools, and techniques, you can complete the installation process with ease. Always ensure to follow safety precautions during installation to avoid injury and achieve the best results.
By following these steps, you can enjoy the benefits of a well-insulated space that maintains comfortable temperatures, reduces noise, and offers increased fire protection
source: https://www.arshehonline.com/fa/tiny/news-144138wool
0 notes
Text
Roof Insulation

The insulation of a roof is just as important as the outer material. Insulation material is important to the longevity of your roofing system and has been used since ages. Over the years, insulation has changed and adapted, but its purpose is the same; keeping heat inside when you need it and outside when you don’t. Insulating the roof of your building saves you money every year. By controlling the internal building temperature insulation saves the need for energy. Using less energy means you are saving money and protecting the environment by leaving behind a smaller carbon footprint - insulation installers brisbane.
This creates an effective barrier that reduces air leakage and fully insulates against heat loss. Before we get into the specifics of each roof insulation material, let’s discuss R-value. The R-value is the insulation’s ability to resist heat that travels through it. When insulating a pitched roof using the warm roof method, the goal is to create a continuous thermal barrier directly under the roof, keeping the entire roof space warm. Warm insulation is applied under the roof covering, directly on the rafters, creating a warm, insulated envelope that includes the roof space. This comprehensive guide will explore the most effective roof insulation materials, including traditional options like fibreglass and cellulose and modern solutions like spray foam - ceiling insulation brisbane.
By grasping the advantages and disadvantages of each type, you can make well-informed decisions to ensure that your home stays well-insulated, comfortable, and energy-efficient all year round. When recycled papers are treated with fire-retardant and added with chemicals, cellulose insulation material comes into existence. This environment-friendly and sustainable insulating material consists of highs thermal efficiency and resistance against heat flow. Insulating your roof is one of the most important ways to keep your home warm during the winter and cool in the summer.
Due to thermal insulation transfer of heat between inside and outside of the room is restricted. This results in less quantity of energy required for maintaining the desired temperature in the room. Thermal Insulation Prevent Heat Transfer, the room remains cooler in summer and warmer in winter than outside. Hence, a room provided with thermal insulation gives comfort both in summer and winter. Prevention of thermal stress on roofs. Due to thermal stresses, roof decks tend to crack. These would be reduced to a great extent. For more information, please visit our site https://roofsuckers.com.au/
0 notes
Text
How To Select The Ideal Insulation For Your Roofing System
Introduction:
When it comes to improving a home’s energy efficiency and comfort, selecting the right insulation for the roofing system is crucial. Insulation plays a key role in regulating temperature, preventing energy loss, and protecting the structure from moisture damage. However, with a wide range of insulation options on the market, making the right choice can be challenging. Understanding your building's specific needs, along with the characteristics of different insulation materials, is essential to making an informed decision.

Key Considerations for Selecting Roofing Insulation
Roof Design and Material Compatibility: The structure and material of a roof are significant factors when choosing insulation. Pitched roofs, for example, may require insulation that can be easily fitted between rafters, such as fiberglass batts or blown-in insulation. In contrast, flat roofs benefit from materials like rigid foam boards, which provide consistent coverage and excellent thermal resistance. Ensuring compatibility between the roof's design and insulation type is essential for effective energy management.
Thermal Performance and R-Value: The insulation's R-value, which measures thermal resistance, is another critical consideration. Roofs in colder climates require insulation with a high R-value to minimize heat loss during winter months. On the other hand, homes in hot climates benefit from materials that reflect heat, such as radiant barriers, which can be combined with traditional insulation for optimal thermal performance. Evaluating your region’s climate and building requirements will help determine the necessary R-value.
Air Sealing and Energy Efficiency: Effective insulation not only provides thermal resistance but also helps seal the roof from air leaks, which can significantly impact energy efficiency. Spray foam insulation, for instance, offers excellent air-sealing properties, making it an ideal choice for roofing systems with hard-to-reach areas. Reducing air leakage through proper insulation can lower energy costs by reducing the load on heating and cooling systems.
Moisture Protection: Moisture can be a severe issue if not addressed during the insulation process. Certain insulation materials, such as closed-cell spray foam and rigid foam, offer superior moisture resistance, making them ideal for areas prone to heavy rain or humidity. Including a vapor barrier or breathable membrane in the roofing system can further protect against condensation and moisture damage, preventing the growth of mold and mildew.
Cost and Installation: Budget is always an important consideration when selecting roof insulation. Some insulation materials, like fiberglass and cellulose, are cost-effective and relatively easy to install, making them suitable for a wide range of roofing projects. More advanced materials, such as spray foam or rigid foam boards, may require professional installation but offer superior performance in terms of energy efficiency and moisture protection. Balancing the initial cost of insulation with long-term energy savings is crucial for making the best investment.
Sustainability and Environmental Impact: Increasingly, homeowners are looking for insulation options that are both energy-efficient and environmentally friendly. Materials like cellulose, which is made from recycled paper, and natural wool offer eco-friendly solutions for roof insulation. Additionally, reducing energy consumption through high-quality insulation contributes to a smaller carbon footprint, aligning with broader sustainability goals.
Common Types of Roof Insulation
Blown-In Insulation: Blown-in insulation, such as cellulose or fiberglass, is often used in attics and roofing systems where it can easily fill gaps and irregular spaces. It offers good thermal performance and is relatively inexpensive. However, it may settle over time, reducing its effectiveness if not installed properly.
Fiberglass Batts: Fiberglass batts are a common choice for roofing insulation, especially in pitched roofs. They offer a balance of affordability and performance, though proper installation is critical to avoid gaps that can reduce thermal resistance.
Rigid Foam Insulation: Rigid foam insulation is popular for flat roofing systems. Offering high R-values and excellent moisture resistance, it is ideal for buildings requiring a durable, long-lasting insulation solution. Common types include polyisocyanurate and extruded polystyrene.
Spray Foam Insulation: Spray foam insulation is highly effective at sealing roofs and preventing air leaks. Its expanding properties make it perfect for filling hard-to-reach areas, ensuring comprehensive coverage. Closed-cell spray foam also provides superior moisture protection, making it suitable for humid climates.
Conclusion:
Choosing the right insulation for a roofing system is essential for enhancing energy efficiency, reducing moisture-related issues, and ensuring long-term comfort. By considering factors such as roof design, climate, moisture protection, and budget, homeowners can make informed decisions about the best insulation material for their needs. With the right insulation in place, not only will a home become more energy-efficient, but it will also enjoy enhanced protection against environmental factors, making it a worthwhile investment for years to come.
0 notes
Text
How is thatch roof installed?
Installing a thatch roof is a traditional craft that involves layering natural materials, such as straw, reeds, or palm leaves, to create a water-resistant and durable covering. The process requires skilled labor and attention to detail to ensure a strong, long-lasting roof. Here's an overview of how it's done:
1. Preparation of Materials:
Thatching materials are selected based on the climate and availability. Common materials include:
Water reeds (used in cooler climates).
Long straw (wheat or rye).
Palm leaves (common in tropical regions).
The materials are cleaned and bundled into manageable sections.
2. Roof Structure:
A strong timber framework is constructed to support the thatch.
Wooden battens are laid horizontally across the rafters, creating a base to attach the thatch bundles.
Proper ventilation is ensured to prevent moisture buildup, which could lead to decay.
3. Laying the Thatch:
The thatch is applied starting from the bottom of the roof, working upward to the ridge.
Each layer of thatch overlaps the layer below, ensuring that water runs off easily.
Thatch bundles are tightly secured to the battens using thatching twine or wire. This prevents them from being displaced by wind.
The process continues layer by layer, with special attention to making sure the thickness and compactness are consistent.
4. Shaping and Trimming:
Once the entire roof is covered, the thatch is shaped and trimmed for uniformity and aesthetics.
The roof edges (known as eaves) are neatly cut, ensuring a smooth finish.
A thatch knife or shears are often used to refine the shape.
5. The Ridge:
The ridge is one of the most vulnerable parts of a thatch roof, so it needs additional protection.
Materials such as sod, turf, or specially prepared reeds are applied to cap the top, making it weather-resistant.
Decorative features may also be added at this stage.
6. Weatherproofing (Optional):
While natural thatch is usually water-resistant, some installers apply a water-repellent coating for extra protection, especially in wet climates.
7. Maintenance:
A thatch roof requires periodic maintenance, such as removing moss or debris and checking for any signs of damage or wear.
A well-maintained thatch roof can last between 25 to 50 years, depending on the quality of the material and craftsmanship.
Benefits of a Thatch Roof:
Excellent insulation properties (both thermal and sound).
Eco-friendly, as it uses renewable and natural materials.
Traditional, aesthetically pleasing look, especially for cottages and heritage buildings.
Would you like to know more about specific materials or maintenance tips?
0 notes