#Joowin WiFi Extender Setup
Text

Quick Guide for Joowin WiFi extender setup.
For an easy Joowin WiFi extender setup, open the web browser and type 192.168.10.1 IP address in the browser bar. Now, enter the login details and you will reach the smart home dashboard. Here, visit the Basic or Advanced settings to configure the device accordingly. To know the detailed information, get in touch with us!
0 notes
Text
Ecobee is a leading manufacturer of smart thermostats and home automation systems. The company was founded in 2007 and is headquartered in Toronto, Canada.
Ecobee's flagship product is its smart thermostat, which is designed to optimize energy efficiency and provide convenient control over home heating and cooling systems.
Ecobee thermostats are known for their advanced features and connectivity options. They incorporate Wi-Fi connectivity, allowing users to control and monitor their thermostats remotely through a smartphone app or web interface.
This enables homeowners to adjust temperature settings, create schedules, and receive energy usage reports from anywhere, providing greater comfort and energy savings.
The Ecobee thermostat is a popular choice among homeowners for its energy efficiency and smart features. However, one frustrating issue that users may encounter is the thermostat disconnecting from Wi-Fi.
In this article, we will explore the possible causes of this problem and provide a comprehensive troubleshooting guide to help you resolve the issue and keep your Ecobee connected to Wi-Fi seamlessly.
Read Also: " Maximizing Your Wireless Coverage with Joowin Wifi Extender Setup: A Comprehensive Setup Guide"
Troubleshooting Guide
Check Wi-Fi Signal Strength: A strong and stable Wi-Fi signal is crucial for uninterrupted connectivity with your Ecobee thermostat. Begin by checking the signal strength in the vicinity of the thermostat. You can use a Wi-Fi analyzer app or follow the instructions provided by your router's manufacturer. If the signal strength is weak, consider repositioning your router or using Wi-Fi extenders to improve coverage in that area.
Router Placement: The placement of your router plays a significant role in the Wi-Fi signal's reach and strength. Ensure that your router is positioned in a central location, away from obstructions like walls, large appliances, or metal objects that can interfere with the signal. Optimal router placement can enhance the overall Wi-Fi performance throughout your home.
Network Congestion: Network congestion can hinder Wi-Fi connectivity and lead to intermittent disconnections. With numerous devices connected to the same network, bandwidth can become limited. To alleviate network congestion, try disconnecting devices that are not in use and prioritize your Ecobee thermostat's connection by assigning it a higher bandwidth allocation in your router settings.
Wi-Fi Interference: Various factors can cause Wi-Fi interference, including other electronic devices and physical barriers. Devices such as cordless phones, baby monitors, or even neighbouring Wi-Fi networks can disrupt the signal. Try moving your router away from such devices and ensure that your Ecobee thermostat is not placed near large metal objects or thick walls that can impede the Wi-Fi signal.
Router Firmware Update: Outdated router firmware can lead to compatibility issues and hinder the Wi-Fi connection with your Ecobee thermostat. Check the manufacturer's website for firmware updates and follow their instructions to update your router's firmware. Keeping your router up to date can enhance performance and resolve compatibility-related problems.
Ecobee Software Update: Similarly, outdated firmware or software on your Ecobee thermostat can cause connectivity issues. Check for updates by accessing the thermostat's settings menu or the Ecobee mobile app. If an update is available, follow the prompts to install it. Regularly updating your Ecobee thermostat ensures that you have the latest features and fixes any bugs that might be affecting its Wi-Fi connection.
Wi-Fi Channel Selection: Your router operates on different channels, and selecting the right channel can minimize interference from neighbouring networks. Access your router's settings and try changing the Wi-Fi channel to a less congested one. Experiment with different channels to find the one that provides the best Wi-Fi performance for your Ecobee thermostat.
Wi-Fi Password and Authentication Issues: Sometimes, a simple mistake like entering an incorrect Wi-Fi password or encountering authentication issues can cause disconnections. Double-check the password you entered for your Wi-Fi network and ensure that it is correct. If the issue persists, try re-entering the password or resetting the Wi-Fi settings on your Ecobee thermostat.
Distance from Router: The distance between your Ecobee thermostat and the router can affect the strength of the Wi-Fi signal. If your thermostat is located far away from the router, consider moving it closer or installing a Wi-Fi extender to boost the signal strength. A stronger signal will result in a more reliable connection.
Rebooting Router and Ecobee: Performing a simple reboot of both your router and Ecobee thermostat can often resolve connectivity issues. Turn off your router and Ecobee thermostat, wait for a few minutes, and then turn them back on. This simple step can help refresh the connection and resolve any temporary glitches.
Contact Ecobee Support: If you have followed all the troubleshooting steps and your Ecobee thermostat still keeps disconnecting from Wi-Fi, it's advisable to reach out to Ecobee's support team. They have dedicated experts who can provide further assistance and help resolve the issue. Visit Ecobee's website or contact their customer support via phone or email for personalized troubleshooting guidance.
Conclusion
Maintaining a stable Wi-Fi connection is crucial for the seamless operation of your Ecobee thermostat. By following the troubleshooting steps outlined in this article, you can address the issue of your Ecobee thermostat disconnecting from Wi-Fi.
Remember to check Wi-Fi signal strength, optimize router placement, address network congestion and interference, update router firmware and Ecobee software, ensure correct Wi-Fi password and authentication, manage distance from the router, and try rebooting both devices.
If the problem persists, don't hesitate to contact Ecobee's support team for further assistance. Enjoy the benefits of a connected and efficient smart home with your Ecobee thermostat.
[rank_math_rich_snippet id="s-df08d291-9da4-4a11-81ce-7b4a3989a522"]
0 notes
Link
Joowin Wifi Extender Setup, Installation & Troubleshooting
To start with your Joowin wifi extender setup plug it in to the outlet. Now type 192.168.188.1 in the url of your browser. Joowin setup can also be done.
0 notes
Text
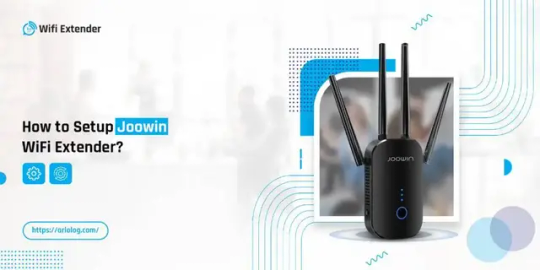
How to Setup Joowin WiFi Extender?
For the Joowin WiFi Extender Setup, log into the “192.168.10.1” IP address using the default login details. After that, visit the admin setup page, follow the on-screen instructions, and complete the setup process. If you are unable to set up your Joowin WiFi Extender, connect with our team for further guidance.
0 notes
Text
Cricket Wireless has gained popularity as an affordable and reliable mobile service provider in recent years.
However, like any other carrier, users may encounter activation problems during the initial setup process.
In this blog post, we will explore common Cricket Wireless activation issues and provide troubleshooting steps to help you overcome these challenges.
Cricket Wireless and its Activation Process:
Before delving into the activation problems, let's familiarize ourselves with Cricket Wireless and its activation process. Cricket Wireless is a prepaid wireless service provider that operates on the AT&T network, offering affordable plans with no annual contracts.
To activate your Cricket Wireless service, you need to follow a few simple steps, including purchasing a Cricket SIM card, selecting a plan, and activating the SIM card online or through the Cricket Wireless app.
Read Also: " Maximizing Your Wireless Coverage with Joowin Wifi Extender Setup: A Comprehensive Setup Guide"
Common Issues Faced during Cricket Wireless Activation:
SIM Card Recognition Problems: Some users may face difficulties in getting their Cricket SIM card recognized by the device. This issue can arise due to improper insertion, a faulty SIM card, or device compatibility problems.
Activation Error Messages: During the activation process, you might encounter error messages such as "Invalid SIM Card," "SIM Card Not Provisioned," or "Activation Failed." These messages can indicate various underlying issues, such as an incompatible device, network connectivity problems, or account-related discrepancies.
Account Verification Challenges: Cricket Wireless requires users to provide accurate personal information for identity verification. If there are discrepancies or errors in the provided details, the activation process may get stuck.
Porting Delays or Failures: Porting refers to the process of transferring your existing phone number from another carrier to Cricket Wireless. Sometimes, users may experience delays or failures in porting their numbers, resulting in extended activation periods or incomplete transfers. This issue can occur due to incorrect or incomplete information provided during the porting request, outstanding balances or contractual obligations with the previous carrier, or technical issues between the carriers.
Activation Fee or Payment Problems: Occasionally, users may encounter difficulties with the activation fee or payment during the activation process. This can include issues such as declined credit or debit card transactions, payment processing errors, or confusion regarding the activation fee amount or payment method options. These problems can hinder the successful completion of the activation process.
Troubleshooting Steps for Cricket Wireless Activation Problems:
Ensure Proper SIM Card Insertion: Double-check that the Cricket SIM card is correctly inserted into your device's SIM tray. Refer to your device's manual or Cricket Wireless website for instructions specific to your device model.
Check Device Compatibility: Verify if your device is compatible with Cricket Wireless. Some older or locked devices may not be supported. Use Cricket's online device compatibility tool or contact customer support for assistance.
Confirm Network Coverage: Check if your location has sufficient network coverage. Poor signal strength or being in an area outside Cricket's coverage map can affect the activation process.
Restart Device and Retry Activation: Sometimes, a simple restart can resolve activation glitches. Power off your device, remove and reinsert the SIM card, and power it back on before attempting the activation process again.
Verify Personal Information: Ensure that the personal information provided during activation, such as name, address, and social security number, matches the details on your identification documents. Contact customer support to update any incorrect information.
Contact
Cricket Wireless Customer Support: If you have exhausted all troubleshooting steps and still face activation issues, reach out to Cricket Wireless customer support via phone, live chat, or social media. Their knowledgeable representatives can assist in resolving complex activation problems.
Tips and Best Practices to Avoid Activation Problems:
Use Compatible Devices: Before purchasing a device, check if it is compatible with Cricket Wireless. This ensures a smooth activation process.
Verify Device Unlock Status: If you're using a previously owned device, confirm that it is unlocked and can be used with any carrier. Locked devices might encounter activation hurdles.
Stable Internet Connection: Ensure a stable internet connection during the activation process. Connect to a reliable Wi-Fi network or use cellular data if Wi-Fi is unavailable.
Keep Documentation Handy: Have your identification documents, such as a driver's license or passport, readily available during the activation process. Accurate information is crucial for successful activation.
Verify Device Compatibility Before Purchasing: Before purchasing a new device, it's crucial to ensure that it is compatible with Cricket Wireless. Check the device's specifications and confirm that it supports the necessary network bands and technologies used by Cricket Wireless.
Clear Previous Carrier Restrictions: If you're switching from another carrier to Cricket Wireless, make sure to clear any outstanding balances, contractual obligations, or device payment plans with your previous carrier. Failure to settle these matters may result in activation problems or delays.
By following these tips and best practices, you can proactively address potential compatibility issues and ensure a smooth transition to Cricket Wireless.
Conclusion
Cricket Wireless offers affordable and reliable mobile service, but activation problems can occur during the initial setup process. By following the troubleshooting steps outlined in this article and implementing the suggested tips and best practices, you can overcome these activation hurdles.
Remember, if you exhaust all options and still face issues, reaching out to Cricket Wireless customer support will provide you with personalized assistance to resolve your activation problems.
Stay patient and persistent, and soon you'll be enjoying the benefits of Cricket Wireless service without any activation troubles.
[rank_math_rich_snippet id="s-c8d1ed60-5859-4fd3-8e77-efde0c87777e"]
0 notes
Last Seen Blogs

lokis-worlds
Loki

lumenflower
りり

snapdragon154
Reality Settings

loftmansw12
South London Lofts

luvmazer-com
Luvmazer Intimacy APP