#MemoryPreserved
Explore tagged Tumblr posts
Visit Tumblr Blog
Explore Tumblr blogs with no restrictions, modern design and the best experience.
Last Seen Tumblr Blogs


Fun Fact
Tumblr was acquired by Yahoo for $1.1B in 2013.
Text

📚 Where Premium Craftsmanship Meets Your Precious Memories
At RDimagination, we don’t just design photo albums—we preserve the feeling behind every photograph.
That’s why every one of our photo books is built with intention and care. Here's what sets our products apart:
🧵 Unmatched Material Quality Each album is crafted using archival-grade, acid-free paper, ensuring your photos retain their vibrancy for generations.
🌟 Durable Gloss & Matte Finishes Whether you choose a classic leather-textured cover or a rich velvet touch, you’ll feel the difference in your hands.
📖 Lay-Flat Binding That Tells a Story Seamlessly No more broken images or page warping—just a smooth storytelling experience from start to finish.
��� Custom-Fit Carry Cases for Extra Protection Our albums come with custom horizontal or vertical carry cases, built to match the style of the book while offering robust protection from dust, moisture, and handling wear.
🛡️ Crafted to Last a Lifetime (or Two) Whether it’s your wedding day, your child’s first year, or a once-in-a-lifetime trip, our albums are built to endure.
💬 Ready to preserve your story with class and durability? ✨ Send us a message to order your custom album or explore our combo sets with mugs, frames, and more.
📦 We ship across India. Let us help you create memories that last a lifetime.
#WeddingAlbum#MemoryPreserved#PhotoKeepsake#PremiumQuality#photography#rdimagination#culture#inspiration#album#creativeweddingalbum#business#wedding#weddingphotography
1 note
·
View note
Text
💾 Breathe New Life into Old Reels – 8mm Film to Digital Watford
🎞️ Got boxes of old 8mm films collecting dust? You’re not alone. So many precious memories are sitting on aging reels, unseen and unshared. At Tapes To Digital Watford, we help families just like yours bring those memories back to life with our 8mm film to digital Watford service. 💾✨
From childhood milestones to vintage family vacations, every reel holds a story worth saving. Our expert transfer process ensures your 8mm film is digitised with clarity and care, ready to watch, share, and cherish on any device.
Looking for a trusted local solution for 8mm film to digital Watford? We’ve got you covered—fast turnaround, friendly service, and quality results every time.
🎬 Don’t let the past fade away. Drop your reels off today and let’s preserve your family’s legacy together.

#8mmFilmToDigitalWatford#TapesToDigital#WatfordVideoTransfer#PreserveMemories#FilmToDigital#WatfordServices#MemoryPreservation
0 notes
Text
Flashback Frames Launches Cutting-Edge DVD Digitization Service to Safeguard Precious Memories
Flashback Frames, a trusted name in digital preservation, proudly announces its advanced DVD digitization service, designed to convert aging home videos into high-quality digital formats. With decades of memories at risk of degradation, this service ensures that cherished moments remain accessible on modern devices.
Explore the official announcement: Flashback Frames Launches Cutting-Edge DVD Digitization Service to Safeguard Precious Memories
0 notes
Text
Flash Back Frames DVD Digitization Service | Preserve Memories Effortlessly

Flash Back Frames is a trusted DVD digitization service that helps you preserve your priceless memories by converting your old DVDs into high-quality digital files. Whether it’s weddings, birthdays, or family events, we make it easy to save and share your moments on USB drives, private YouTube links, or downloadable files.
Contact Information:
Address: OC 822, Buzzz Booster, 8th Floor, Gaur City Center, Greater Noida West, U.P.
Phone: +91 88262 14661
Email-Id: support.flashbackframes.in
Website: https://flashbackframes.in/
Article Link Inside: Flash Back Frames: DVD Digitization Service
0 notes
Text

Family Retouching Service - Siena Sigdha
Our skilled family retouching service enhances your precious memories. We expertly remove blemishes, adjust lighting, and improve overall image quality, delivering beautiful, timeless photos you'll cherish.
Cherish your family memories. Our expert retouching service enhances photos, removing imperfections for beautiful, timeless results.
#FamilyPhotos#PhotoRetouching#ImageEnhancement#MemoryPreservation#PhotoEditing#FamilyPortraits#PicturePerfect#RestorePhotos#DigitalRetouch#SienaSigdha#RetouchingService#FamilyMoments#TimelessPhotos#CherishedMemories#ImageCorrection#ProfessionalRetouch#BeautifulPhotos#FlawlessPhotos#PhotoMagic#PictureRevive
0 notes
Text
#EventPhotography#PhotographyTips#ProfessionalPhotographer#CaptureTheMoment#WeddingPhotography#CorporateEvents#PhotographyGuide#SpecialOccasions#PhotoStorytelling#EventPlanning#MemoryPreservation#ChooseTheRightPhotographer#UnforgettableMoments
1 note
·
View note
Link
This article aims to offer guidance on navigating the complex emotions of grief, ways to honor and
#legacyprojects#siblingloss#siblingmemories#emotionalhealing#healingfromgrief#griefstages#familysupportingrief#memorypreservation
0 notes
Text
Welcome to Whiskers to Wagging Tails
#DigitizeCenter#TheDigitizeCenter#MemoryPreservation#family history#genealogy#old photos#ho#home videos
0 notes
Text
Negative and Slide Scanning Services
Old photographs and slides stored in boxes, albums, and film canisters are at risk of being forgotten, damaged, or lost. Whether you have 35mm negatives, vintage slides, or medium format film, digitising them ensures they are preserved for future generations. At Document Production Australia, our Negative and Slide Scanning Services help you convert your treasured memories into high-quality digital images.
Why Digitise Negatives and Slides?
Negatives and slides degrade over time, losing their clarity and colour due to age, exposure to light, and environmental factors. Digitising these film formats provides several benefits:
✅ Preservation – Prevent deterioration and loss of detail. ✅ Convenience – Easily access, share, and print digital copies. ✅ Restoration – Enhance faded colours, remove dust and scratches. ✅ Security – Store your images safely on USBs, hard drives, or cloud storage.
Our Negative and Slide Scanning Services
We specialise in high-resolution scanning of various negative and slide formats, ensuring the highest quality conversion.
Negative Scanning
We scan a wide range of negative formats, including:
📌 35mm Colour & Black & White Negatives – Standard film negatives professionally digitised. �� 110 & 120 Colour & B&W Negatives – Small and medium format negatives converted into high-resolution digital images. 📌 Medium Format Negatives (120 & 220) – Sizes including 6x4.5cm, 6x6cm, 6x17cm, and up to 6x22cm. 📌 127 Negatives – Digitisation of vintage 127-format film.
Slide Scanning
We carefully convert various slide formats to digital, including:
📌 35mm Slides – The most common slide format digitised at high resolution. 📌 127 & 126 Slides – Medium format slides professionally scanned. 📌 110 Slides – Smaller slides converted into clear digital images. 📌 Super 35mm & Super 127 Slides – High-quality digitisation for archival purposes. 📌 Half Slides & Medium Format 120/220 – Professional-grade scanning for photographers, businesses, and families.
Why Choose Our Services?
✔ High-Resolution Scanning – Up to 4800 DPI for crystal-clear images. ✔ Dust & Scratch Removal – Advanced digital restoration techniques for a clean finish. ✔ Colour & Contrast Enhancement – Restore faded negatives and slides to their original vibrancy. ✔ Multiple Digital Formats – Choose from JPEG, TIFF, or PDF on USB, DVD, or cloud storage. ✔ Quick Turnaround Times – Fast and efficient processing to suit your needs. ✔ Secure Handling – Your negatives and slides are treated with care and confidentiality.
Get Started Today!
Don't let your memories fade away! Our Negative and Slide Scanning Services at Document Production Australia provide a secure, high-quality, and efficient way to digitise your most cherished moments.
Contact us today to preserve your legacy for generations to come!
#NegativeScanning#SlideScanning#PhotoDigitization#FilmToDigital#PreserveMemories#DocumentProductionAustralia#HighResolutionScanning#ConvertNegatives#ConvertSlides#PhotoRestoration#DigitalArchiving#VintagePhotoScanning#FilmRestoration#MemoryPreservation#ScanYourMemories#Document Production Australia
0 notes
Text
#immortality#AI#artificialintelligence#futuretech#techinnovation#PreserveYourLegacy#digitalimmortality#TimelessMemories#DigitalTransformation#digitallegacy#MemoryPreservation#aiimmortality#eternalmemories#PreserveYourStory#FutureOfHumanity#AIandHumanity#aiconsciousness#DigitalAfterlife#AIRevolution#virtualidentity
0 notes
Text
Tips to Get the Best Out of EmulateMe AI
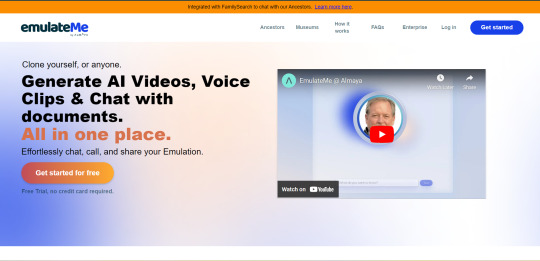
EmulateMe is a powerful tool for creating personalized digital avatars and preserving memories. Here are some tips and tricks to help you make the most of EmulateMe’s features.
Tip 1: Use High-Quality Photos for Better Avatars
Explanation: Upload a clear, high-quality photo to get the best visual representation for your avatar.
Tip 2: Record a Natural Voice Note
Explanation: When recording your voice note, speak naturally and clearly. This will help EmulateMe create an accurate and realistic voice clone.
Tip 3: Personalize Your Avatar’s Training
Explanation: Upload meaningful text documents or stories to train your avatar. The more information it has, the more engaging and lifelike the responses will be.
Tip 4: Engage with Your Avatar Regularly
Explanation: Chat with your avatar to keep adding data and make the emulation more refined and accurate over time.
Tip 5: Create Videos to Share with Loved Ones
Explanation: Use the video generation feature to create personalized messages or stories, allowing you to connect with friends and family in a unique way.
Get the most out of EmulateMe with these tips. Create your digital legacy today at aiwikiweb.com/product/emulateme/
#AI#EmulateMe#DigitalLegacy#Avatars#VoiceCloning#TechTips#PersonalStories#MemoryPreservation#Innovation#FamilyConnection
0 notes
Video
youtube
The Importance of Storytelling in Photo Preservation
0 notes
Text
Trusted VHS to DVD Transfer Haynes Specialists at Your Service
📼💻📲 Don’t let your treasured VHS tapes fade into oblivion. At Tapes To Digital Haynes, our professional VHS to DVD transfer Haynes services preserve your videos with stunning clarity and durability.
VHS tapes suffer from wear and tear, and bulky players are no longer practical for everyday use. Digitizing your collection converts fragile tapes into reliable DVDs, ensuring your videos can be enjoyed anytime, by anyone.
Our skilled technicians clean and convert your tapes using cutting-edge equipment, capturing every detail and sound with precision. Whether your videos are personal memories or business archives, we provide flexible packages tailored to your needs and budget.
With quick turnaround and competitive pricing, Tapes To Digital Haynes is the trusted local choice for your VHS to DVD transfer Haynes.
Protect your memories today! 📲 Contact us via message or visit our website to book your conversion.

0 notes
Text
DIY Calligraphy Photo Frames: Capture Memories
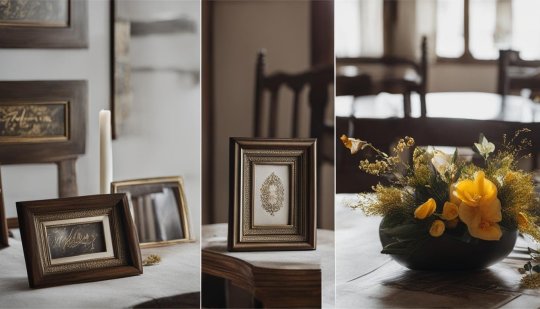
DIY Calligraphy Photo Frames: Unleash Your Creativity and Capture Precious Memories Today!
Create personalized DIY calligraphy photo frames to capture and display your cherished memories. These handmade frames add a touch of elegance to any space and can be customized to suit your style and decor preferences. With just a few simple materials and some creativity, you can create unique and beautiful frames that will showcase your favorite photos in a special way. Key Takeaways: - DIY calligraphy photo frames are a creative way to capture and display your memories. - These personalized frames add elegance and can be customized to suit your style and decor. - Create unique and beautiful frames with just a few simple materials and some creativity. - Showcase your favorite photos in a special way with DIY calligraphy photo frames. - Bring your cherished memories to life with these handmade frames.
Meet Valerie Akkerman: A Calligraphy Lover and DIY Enthusiast
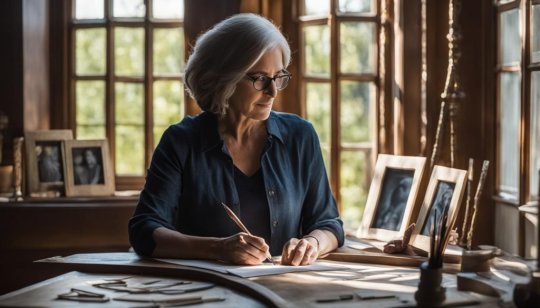
Valerie Akkerman is a talented calligraphy lover and a passionate DIY enthusiast. Her journey into the world of calligraphy began when her son gifted her a calligraphy pen, igniting her creativity and fueling her love for this art form. Inspired by the beauty and elegance of calligraphy, Valerie decided to pursue her passion further by studying Graphic Design. Today, she is known for her expertise in calligraphy crafts and her ability to create stunning and personalized pieces. Valerie's love for calligraphy extends beyond just the art itself. She enjoys exploring different calligraphy projects and is always eager to try new and innovative ideas. With her background in Graphic Design, Valerie brings a unique perspective to her DIY calligraphy photo frames. Her attention to detail, understanding of color and composition, and creative flair make her an excellent source of inspiration for both beginners and experienced crafters alike. Valerie believes that calligraphy is not just a creative outlet, but a way to express oneself and capture moments in a unique and artistic manner. She is dedicated to sharing her knowledge and inspiring others to explore the world of calligraphy through easy yet meaningful projects. Whether you're looking to create personalized gifts, enhance your home decor, or simply explore a new hobby, Valerie Akkerman's expertise in calligraphy crafts is sure to inspire and guide you every step of the way. The Journey of a Calligraphy Lover Valerie's love for calligraphy began with a simple gift from her son, a calligraphy pen. This small gesture ignited her passion for the art form and set her on a journey of self-discovery and creativity. Through dedication and hard work, Valerie honed her skills and expanded her knowledge of calligraphy, ultimately leading her to study Graphic Design. Today, she is well-versed in various calligraphy styles and techniques, and her expertise shines through in her DIY calligraphy photo frames. Crafting with Calligraphy Valerie believes that calligraphy is not just about writing beautifully; it's also about creating unique and meaningful pieces. She loves experimenting with different materials, combining calligraphy with other crafting techniques to add depth and dimension to her projects. From adding embellishments to incorporating mixed media elements, Valerie's creativity knows no bounds. Her easy calligraphy projects are designed to inspire others to explore their own creativity and discover the joy of crafting with calligraphy.
Materials Needed for DIY Calligraphy Photo Frames
Creating your own DIY calligraphy photo frames requires a few essential materials. These tools will help you bring your creative vision to life and make stunning personalized frames: - Calligraphy Pen: A high-quality calligraphy pen is essential for achieving elegant and precise lettering. It allows you to create beautifully curved lines and varying thickness in your designs. Invest in a pen that suits your comfort and style preferences. - Brush Pens: Brush pens are excellent for adding flair and variation to your lettering. They have flexible tips that mimic the strokes of a brush, allowing you to create thick and thin lines effortlessly. Experiment with different brush pen sizes to achieve different effects. - Fineliners: Fineliners are perfect for adding intricate details and fine lines to your calligraphy photo frames. They come in various sizes, allowing you to create precise outlines, shadows, and embellishments. - Paper Pad: A good quality paper pad will provide a smooth surface for practicing your calligraphy and creating your final artwork. Choose a pad with suitable thickness to prevent ink bleed-through. - Pencil: A pencil is essential for sketching and planning your layout before starting the calligraphy. It allows you to make adjustments and ensure a well-balanced design. - Eraser: An eraser is handy for removing any graphite marks or mistakes made during the sketching process. It helps you achieve clean and polished final artwork. Having these materials on hand will set you up for success in creating your own DIY calligraphy photo frames. They are readily available at art supply stores or online retailers, allowing you to easily gather everything you need to get started on your creative journey.
Step-by-Step Guide to Creating DIY Calligraphy Photo Frames
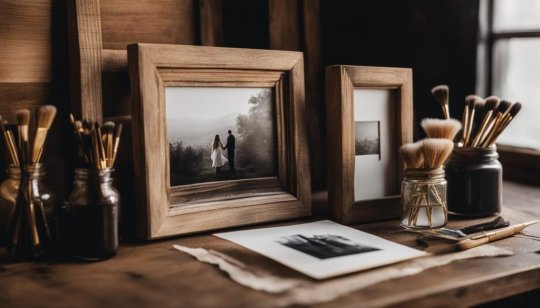
Creating your own DIY calligraphy photo frames is a fun and rewarding project that allows you to showcase your creativity while preserving cherished memories. Follow this step-by-step guide to transform simple materials into beautiful and personalized frames: Step 1: Trace a Circle Begin by tracing a circle on your paper using a bowl or circular object as a guide. This will serve as the base for your calligraphy lettering and design. Make sure the circle is centered and evenly drawn. Step 2: Select Your Lettering Styles Next, start placing your words inside the circle using a variety of calligraphy lettering styles. Alternate between brush pens and fineliners to create variation and visual interest. Experiment with different sizes, thicknesses, and flourishes to find a style that suits your taste. Step 3: Add Embellishments and Small Details To enhance the design of your DIY calligraphy photo frame, consider adding embellishments and small details. This could include decorative elements such as floral motifs, borders, or small illustrations. Pay attention to the overall composition and balance of your design as you add these elements. Step 4: Erase and Frame Once you are satisfied with your calligraphy and design, carefully erase any visible pencil marks. This will give your frame a clean and polished look. Finally, frame your finished piece and proudly display it to showcase your creativity and the special memories it holds. With these simple steps, you can create stunning DIY calligraphy photo frames that capture the essence of your most cherished moments. Experiment with different techniques, lettering styles, and embellishments to add your own personal touch to each frame. Remember, the joy of DIY calligraphy photo frames lies in the process of creation. Let your imagination run wild as you explore different designs and techniques. These handmade frames will not only add a touch of elegance to your home decor but also serve as a constant reminder of the special moments and people in your life.
Explore Creative Ideas for DIY Calligraphy Photo Frames

When it comes to DIY calligraphy photo frames, the possibilities for creativity are endless. In addition to incorporating beautiful lettering, you can add decorative elements, doodles, illustrated elements, and custom shapes to make your frames truly unique. Let your imagination run wild and experiment with different ideas to create personalized and visually stunning frames. To add decorative elements to your calligraphy photo frames, consider drawing wavy circles around words or phrases to create a whimsical and artistic touch. You can also use shadows to give your frames depth and dimension. Another idea is to incorporate arrows or other shapes to point to special moments or highlight important details in your photos. If you have a knack for doodling, why not incorporate your drawings into your calligraphy photo frames? You can create intricate patterns, flowers, or other designs that complement your lettering and add a playful and artistic twist. These doodles can be placed around the words or used as borders to frame your photos. For those who enjoy illustration, illustrated elements can take your calligraphy photo frames to the next level. Consider adding small images or icons that represent the memories captured in your photos. These illustrations can be placed strategically throughout the frame or used as accents to enhance the overall design. Table: Creative Ideas for DIY Calligraphy Photo Frames Decoration Element Description Wavy Circles Create a whimsical touch by drawing wavy circles around words or phrases. Shadows Add depth and dimension to your frames by incorporating shadows. Arrows and Shapes Point to special moments or highlight important details in your photos with arrows or other shapes. Doodles Let your creativity shine by incorporating doodles, such as patterns or flowers, into your frames. Illustrated Elements Add small images or icons that represent the memories captured in your photos.
Capture Memories with Elegance: Photo Frame Wax Seal Head
Elevate your DIY calligraphy photo frames with a Photo Frame Wax Seal Head. This high-quality brass head creates a stunning 3D vintage frame effect, adding elegance and sophistication to your photo frames. Choose from various sizes and designs, and pair them with your calligraphy lettering to create a unique and personalized touch. The durable construction ensures that your photo frames will stand the test of time. With a Photo Frame Wax Seal Head, you can achieve a vintage frame effect that adds a touch of glamour to your DIY calligraphy photo frames. The brass construction not only provides durability but also gives the frames a timeless appeal. Whether you're creating frames for yourself or as gifts for loved ones, the wax seal head will take your projects to the next level. By incorporating the Photo Frame Wax Seal Head into your designs, you can create photo frames that exude elegance and charm. The 3D effect adds depth and visual interest, making your frames truly stand out. Whether you're displaying cherished family photos, wedding memories, or capturing everyday moments, the vintage frame effect will enhance the overall aesthetic and create a captivating display in your home. Table: Photo Frame Wax Seal Head Features Feature Description Material High-quality brass construction for durability and longevity. Design Various sizes and designs available to suit different frame styles. Application Compatible with a wide range of frame materials, including wood, glass, and metal. Easy to Use Simple and straightforward process for creating the vintage frame effect. Customization Pair with different calligraphy lettering styles and colors for personalized frames. Versatility Ideal for both beginner and experienced crafters looking to enhance their photo frames. Enhance your DIY calligraphy photo frames with a Photo Frame Wax Seal Head and bring an extra touch of elegance to your cherished memories.
DIY Calligraphy Photo Frames for the Holidays
Take your DIY calligraphy photo frames to the next level by incorporating them into your holiday decorations. Whether you're looking to create custom photo ornaments, design a festive gallery wall, or even make a DIY advent calendar, there are plenty of creative and fun ways to incorporate calligraphy frames into your holiday decor. Custom Photo Ornaments One way to add a personalized touch to your Christmas tree is by creating custom photo ornaments with calligraphy frames. Simply print out wallet-sized photos of your loved ones and insert them into small frames. You can then hang these frames on your Christmas tree or even on holiday garlands throughout your home. This adds a sentimental touch and allows you to showcase cherished memories during the holiday season. Festive Gallery Wall If you're looking to create a statement piece for your holiday decor, consider designing a festive gallery wall using calligraphy photo frames. Choose frames of different sizes and styles to create visual interest, and fill them with holiday photos or artwork. You can mix and match calligraphy frames with other holiday-themed frames for a cohesive and eye-catching display. Hang your gallery wall in a prominent area of your home to spread the holiday cheer. DIY Advent Calendar Add some excitement to the countdown to the New Year by transforming a calligraphy frame into a DIY advent calendar. Attach rows of string or ribbon to the back of the frame, and hang numbered photos or small gifts from each string. Each day, you or your family can open a new photo or gift, creating a fun and interactive holiday tradition. The calligraphy frame adds an elegant touch to the advent calendar and makes it a beautiful focal point in your home. By incorporating DIY calligraphy photo frames into your holiday decor, you can create unique and personalized pieces that capture the spirit of the season. Whether you choose to make custom photo ornaments, design a festive gallery wall, or create a DIY advent calendar, these frames will add a touch of elegance and sentimentality to your holiday celebrations.
Spread Holiday Cheer with Holiday-Themed Frames
https://www.youtube.com/watch?v=SwQfT8dp-EY Enhance the festive spirit in your home by creating holiday-themed frames that feature quotes, sayings, or artwork related to the season. These frames add a touch of holiday cheer and make for excellent decorative accents. Design your own frames with holiday quotes using calligraphy or apply vinyl decals for a clean and modern look. These frames can be placed on mantels, displayed on walls, or given as unique gifts to loved ones. If you're looking to involve your children in the holiday preparations, consider using holiday-themed frames to display their artwork. Create a gallery wall using frames of different sizes and styles, showcasing their festive drawings and crafts. This not only makes them feel proud of their creations but also contributes to the overall festive decor of your home. Your child's art display will add a personal touch and become a centerpiece of holiday memories. By incorporating holiday-themed frames with quotes, vinyl decals, and displaying children's art, you can spread joy and holiday cheer throughout your home. Whether it's a stylish quote frame on a mantel or a gallery wall filled with your child's creations, these frames add warmth and character to your holiday decor. Get creative and let the holiday spirit shine through with these festive frames. So, unleash your creativity and infuse your home with holiday cheer using holiday-themed frames. Whether you opt for quotes, vinyl decals, or kid's art display, these frames will bring a festive ambiance while showcasing your personal style. Let your imagination run wild and create unique, eye-catching frames that will elevate your holiday decorations to the next level.
Conclusion
DIY calligraphy photo frames offer a creative and personal way to showcase your cherished memories. These custom photo frames add a unique touch to your home decor, and with a few simple materials and a dash of creativity, you can create beautiful and meaningful pieces. Whether you're a beginner or an experienced crafter, DIY calligraphy photo frames are a fulfilling project that allows you to express your creativity and create special mementos. From capturing everyday moments to celebrating holidays, these frames offer endless possibilities for customization and personalization. So why wait? Start your own DIY calligraphy photo frame project today and bring your cherished memories to life. With their elegance and personal touch, these frames will not only display your favorite photos but also become a statement piece in your home. Explore different lettering styles, add decorative elements, and let your creativity shine. The result will be a unique and beautiful custom photo frame that captures the essence of your memories. Get ready to transform your home decor with these creative DIY frames. Whether you're looking for a way to personalize your space or searching for a thoughtful handmade gift, DIY calligraphy photo frames are the answer. Let your imagination run wild and create custom photo frame ideas that reflect your style and personality. Happy crafting!
FAQ
What materials do I need for DIY calligraphy photo frames? You will need a calligraphy pen or brush pens, fineliners of various sizes, a paper pad, a pencil, and an eraser. How do I create DIY calligraphy photo frames? Start by tracing a circle on your paper, then place your words inside the circle using different lettering styles. Experiment with embellishments and details, erase any pencil marks, and frame your finished piece. How can I add a personal touch to my DIY calligraphy photo frames? Get creative by adding decorative elements such as doodles, illustrated elements, and custom shapes. Experiment with different designs and let your creativity shine through. What is a Photo Frame Wax Seal Head? A Photo Frame Wax Seal Head is a high-quality brass head that creates a 3D vintage frame effect. It adds elegance and sophistication to your photo frames. How can I use DIY calligraphy photo frames for the holidays? You can create custom photo ornaments, design a festive gallery wall, or transform a frame into a DIY advent calendar. Spread holiday cheer and showcase your favorite holiday photos or artwork. How can I spread holiday cheer with holiday-themed frames? Design frames with holiday quotes using calligraphy or vinyl decals. Display kid's holiday-themed artwork in gallery wall frames. Use them as decorative accents or unique gifts. Read the full article
#CalligraphyArt#CaptureMemories#CraftProjects#CustomizedKeepsakes#DIYCalligraphy#HandmadeDecor#HomeDecor#MemoryPreservation#PersonalizedFrames#PhotoFrames
1 note
·
View note
Text

📦 Preserve Memories for Future Generations with a Time Capsule Creator App 🌟
At Sun Shine IT Solution, we’re excited to introduce a Time Capsule Creator App that empowers users to capture and preserve their most cherished memories for years to come. With advancements in technology, our app makes creating, storing, and sharing digital time capsules simple and meaningful.
Please explore our YouTube channel for informative content. Link :- https://www.youtube.com/@sunshineitsolutions
TimeCapsuleApp #MemoryPreservation #CustomSoftware #Innovation #SunShineITSolution
0 notes
Text
"The Resurgence of Optical Storage: Trends in the Recordable Disc Market (2024-2033)"
Recordable Optical Disc Market : Recordable optical discs are making a resurgence in the digital age, offering a reliable and tangible solution for data storage and multimedia content. With the increasing need for data backup, archiving personal memories, and creating high-quality audio-visual projects, these discs provide an excellent balance between capacity and durability. Recordable optical media, such as CD-Rs, DVD-Rs, and Blu-ray discs, allow users to easily write and store vast amounts of data, making them ideal for everything from personal collections to professional use in filmmaking and music production. As people seek effective ways to manage their digital lives, the tactile nature of optical discs offers a refreshing alternative to cloud storage and flash drives.
To Request Sample Report : https://www.globalinsightservices.com/request-sample/?id=GIS23977 &utm_source=SnehaPatil&utm_medium=Article
As technology evolves, so do recordable optical discs, with advancements in materials and production processes enhancing their storage capabilities and longevity. The emergence of ultra-high-definition Blu-ray discs caters to the growing demand for high-resolution video, providing an unparalleled viewing experience for film enthusiasts and content creators alike. Moreover, with sustainability in mind, manufacturers are focusing on eco-friendly production methods and materials, positioning recordable optical discs as a greener choice in the storage landscape. As the digital world continues to expand, these discs serve as a timeless medium for preserving cherished memories and important data, proving that sometimes, the old-school methods remain relevant in the fast-paced tech era.
Relevant Link : https://linkewire.com/2024/10/24/gaming-projector-market-enhancing-immersive-experiences-2024-2033/
#RecordableOpticalDisc #DataStorage #DigitalMemories #CDR #DVDR #BluRay #EcoFriendlyTech #Multimedia #AudioVisual #ContentCreation #TangibleStorage #MemoryPreservation #SustainableTech #HighDefinition #TechResurgence
0 notes