#MeshLab
Explore tagged Tumblr posts
Visit Tumblr Blog
Explore Tumblr blogs with no restrictions, modern design and the best experience.
Last Seen Tumblr Blogs


Fun Fact
Tumblr.com is the 103rd most visited website in the world.
Text
I'm learning how to use tindercad and meshlab purely so that I can 3d print a Solaire of Astora figure
#miyazaki can take my husband from me but I'll bring him into the real world with me and keep him safe#🪼
5 notes
·
View notes
Text
Gotta love Windows collapsing web search and computer search into one interface. Tried pulling up MeshLab just now and instead ended up Bing-searching one of the leaders of Hamas on my government-issued work computer.
2 notes
·
View notes
Text
Hmm. I have acquired a .obj file of a doll head that I was thinking about printing, but it is unclear to me what to do next or how much inconvenience or cost this would incur. All I have is a .obj file. I know less than nothing about 3d printing or modeling. I downloaded "Meshlab" to try and open and view it since google said this was a free program that could open .obj files but it gives an error so I don't even know how to open the thing : p
#the head was sculpted by a friend who has already printout out their own version#but theres enough of a language barrier that i don't want to hassle them with questions unless absolutely necessary#and also i assume any print service they used would be like. in china and not relevant to my needs lol
10 notes
·
View notes
Text
Mastering the Art of 3D Scanning: Tips and Tricks for Optimal Results
3D scanning technology has revolutionized various industries, from e-commerce to healthcare. By capturing the physical world in digital form, 3D scanners offer unparalleled precision and detail. Whether you're a beginner or looking to refine your skills, this guide provides essential tips and tricks for mastering 3D scanning.
Understanding 3D Scanners
Before diving into tips, it's crucial to understand the types of 3D scanners available:
Laser Scanners: Use laser beams to measure the distance between the scanner and the object. They are highly accurate and ideal for detailed scans.
Structured Light Scanners: Project a pattern of light onto the object and capture the deformation of the pattern to create a 3D model. They are fast and suitable for a variety of surfaces.
Photogrammetry: Uses photographs from different angles to create a 3D model. This method is cost-effective but requires good lighting and a high-quality camera.
Contact Scanners: Physically touch the object to measure its dimensions. These are less common but very precise.
Tips and Tricks for Effective 3D Scanning
1. Choose the Right Scanner
Selecting the appropriate scanner for your needs is the first step. Consider factors like the object's size, required precision, surface texture, and budget. For instance, laser scanners are excellent for intricate details, while structured light scanners are better for larger objects.
2. Prepare the Object
Proper preparation of the object ensures a smoother scanning process:
Clean the Surface: Dust and dirt can interfere with the scan quality.
Apply Matting Spray: For shiny or reflective surfaces, use a matting spray to reduce glare and improve scan accuracy.
Stabilize the Object: Ensure the object is stable and won't move during scanning.
3. Optimal Lighting
Good lighting is crucial for photogrammetry and structured light scanners. Use diffuse lighting to minimize shadows and reflections. Avoid direct sunlight or harsh lighting, which can create unwanted glare.
4. Correct Positioning
Positioning the scanner and the object correctly is vital:
Maintain a Steady Distance: Keep a consistent distance between the scanner and the object.
Multiple Angles: Capture multiple angles to ensure all parts of the object are scanned. This is particularly important for photogrammetry.
5. Calibration and Testing
Regularly calibrate your scanner to maintain accuracy. Conduct test scans to ensure settings are optimal. Adjust the scanner's resolution and speed based on the object's complexity and desired detail level.
6. Use High-Quality Software
Post-processing software is as important as the scanner itself. Use reputable software to refine the scanned model, remove noise, and fill in any gaps. Some popular software options include:
MeshLab: Free and open-source, great for editing and processing 3D scans.
Blender: Powerful, free software with extensive features for 3D modeling.
Geomagic: Professional-grade software with advanced editing capabilities.
7. Patience and Practice
3D scanning is an art that requires patience and practice. Don’t be discouraged by initial failures. Experiment with different settings, angles, and techniques to improve your skills.
Common Challenges and Solutions
Problem: Incomplete Scans
Solution: Re-scan missing parts from different angles and merge the scans using software.
Problem: Poor Surface Detail
Solution: Increase the scanner's resolution or use a different scanning method.
Problem: Excessive Noise in the Scan
Solution: Use software tools to clean up the noise and smooth the model.
Advanced Tips
Use Turntables
For smaller objects, use a turntable to rotate the object smoothly during scanning. This ensures consistent coverage and saves time.
Leverage Markers
Place markers around the object to help the scanner track its position accurately, especially useful in large or complex scans.
Combine Scanning Methods
For comprehensive results, combine different scanning methods. For example, use a structured light scanner for the object's overall shape and a laser scanner for fine details.
Conclusion
Mastering 3D scanning involves selecting the right equipment, preparing adequately, and refining your technique through practice. By following these tips and tricks, you'll achieve high-quality 3D scans that can enhance your projects and applications. Remember, the key to success in 3D scanning lies in patience, experimentation, and continuous learning. Happy scanning!
#3DScanning#3DScanner#3DScan#3DPrinting#3DModeling#3DTechnology#LaserScanning#StructuredLight#Photogrammetry#3DDesign#DigitalScanning#ScanningTips#TechInnovation#Ecommerce#OnlineStore#EBayStore#ProductPhotography#ProductVisualization#TechTrends#CAD#IndustrialDesign#3DArt#Innovation#TechGadgets#TechNews#DigitalTransformation#TechCommunity#SmartTech#FutureTech#DigitalArt
3 notes
·
View notes
Text
5 Tips for Optimizing 3D Printing with a 3D Scanner
3D scanning and 3D printing go hand in hand, making it easier than ever to replicate objects, customize designs, and create detailed models. However, getting the best results requires more than just scanning and hitting “print.” To truly optimize your workflow, here are five key tips to enhance your 3D printing experience with a 3D scanner.
1. Ensure High-Quality Scanning for Better Prints
A great print starts with a great scan. The quality of your 3D scan directly affects the final print, so it’s essential to optimize your scanning process. Here’s how:
Proper Lighting: Avoid direct sunlight or harsh shadows, as inconsistent lighting can create noise in your scan. A well-lit environment with soft, even lighting works best.
Stable Object Placement: If the object moves during scanning, your model may end up distorted. Use a turntable or secure the object to prevent shifting.
Correct Scanner Settings: Adjust the resolution and exposure settings based on your object’s texture and material. Shiny or transparent objects may require matting spray for better results.
By fine-tuning your scanning process, you’ll capture cleaner and more accurate models, reducing the need for excessive post-processing.
2. Clean and Optimize the 3D Model Before Printing
Even the best 3D scans often require some digital cleanup before they’re ready for printing. Post-processing your scanned model helps remove errors and improve print quality.
Fix Mesh Errors: Use software like Meshmixer, Blender, or Revo Scan to fill holes, remove unnecessary parts, and smooth out rough edges.
Reduce Polygon Count: If your model has an excessively high polygon count, it may slow down slicing and printing. Tools like MeshLab can simplify the geometry without sacrificing detail.
Ensure Watertightness: A printable model should be "watertight," meaning there are no gaps or holes in the mesh. Many software tools offer automatic repair functions to help with this.
Taking the time to refine your scanned model can make a significant difference in print success.
3. Choose the Right 3D Printing Settings
A perfect scan won’t translate into a great print unless you choose the right printing settings. The following factors can improve your prints:
Layer Height: Lower layer heights (e.g., 0.1 mm) provide finer details, while higher settings (e.g., 0.3 mm) speed up the printing process. Choose based on your project’s needs.
Infill Density: Solid objects require high infill percentages, while decorative pieces can use lower infill to save material.
Support Structures: If your scanned model has overhangs or complex geometry, supports may be necessary to ensure a successful print. Customize them in your slicer software to make post-processing easier.
Experiment with these settings to find the best balance between speed, strength, and detail for your prints.
4. Calibrate Your 3D Printer Regularly
No matter how perfect your scan is, a poorly calibrated 3D printer can ruin your print. Regular calibration ensures precision and prevents printing issues.
Bed Leveling: A properly leveled print bed is crucial for adhesion and accuracy. Check and adjust it before each print.
Extruder Calibration: Make sure your printer extrudes the correct amount of filament. Over- or under-extrusion can lead to failed prints.
Check for Mechanical Issues: Loose belts, worn-out nozzles, or misaligned axes can cause print defects. Routine maintenance helps keep everything running smoothly.
Taking care of your printer will give you consistent, high-quality results when working with 3D scans.
5. Experiment and Iterate for the Best Results
Even with careful planning, your first print might not be perfect. Instead of getting frustrated, use it as an opportunity to refine your process.
Analyze Print Failures: Look for issues like warping, layer shifting, or poor adhesion and adjust settings accordingly.
Modify the Model if Needed: If certain details didn’t print well, tweak your 3D model to enhance the structure or reduce problematic areas.
Test Different Materials: PLA is great for quick prints, but if you need strength or flexibility, consider using PETG, ABS, or TPU.
The more you experiment, the better you’ll understand how to optimize your workflow, leading to consistently better prints.
Using a 3D scanner with a 3D printer can open up endless possibilities, from replicating objects to creating custom designs. By focusing on high-quality scanning, optimizing your 3D model, fine-tuning printing settings, maintaining your printer, and continuously improving your process, you can achieve professional-level results. So, start experimenting and take your 3D printing projects to the next level!
1 note
·
View note
Text
0 notes
Text
0 notes
Text
Reverse Engineering Service CAD
Reverse engineering CAD (Computer-Aided Design) involves creating a digital 3D model of an existing physical object. This process is commonly used in various industries for product development, redesign, and quality control. Here’s a general overview of the steps involved in reverse engineering CAD:
Steps in Reverse Engineering CAD:
Data Acquisition:
3D Scanning: Use 3D scanners (laser, structured light, or photogrammetry) to capture the physical dimensions and surface geometry of the object. This process generates a point cloud or a mesh that represents the object’s surface.
Manual Measurement: In cases where 3D scanning is not feasible, manual measurement tools like calipers and micrometers can be used to capture dimensions.
Data Processing:
Point Cloud Processing: Clean and filter the point cloud data to remove noise and redundant points. This may involve aligning multiple scans to create a complete model of the object.
Mesh Generation: Convert the point cloud into a mesh, which is a collection of vertices, edges, and faces that define the shape of the object.
Model Creation:
Surface Reconstruction: Use CAD software to create a surface model from the mesh. This can involve fitting surfaces to the mesh data and creating a watertight (solid) model.
Solid Modeling: Convert the surface model into a solid model, which is a more detailed and structured representation used for engineering purposes. This step might involve creating parametric features (e.g., extrusions, fillets, holes) in CAD software.
Validation and Refinement:
Dimensional Inspection: Compare the reverse-engineered CAD model to the original physical object to ensure accuracy. This may involve dimensional checks using CMM (Coordinate Measuring Machine) or comparison tools within the CAD software.
Refinement: Adjust and refine the CAD model to correct any discrepancies and ensure it meets the desired specifications.
Documentation and Output:
Technical Drawings: Generate technical drawings and documentation from the CAD model for manufacturing, assembly, and quality control.
Export Files: Export the CAD model in various formats (e.g., STEP, IGES, STL) for use in downstream applications such as CAM (Computer-Aided Manufacturing) or FEA (Finite Element Analysis).
Tools and Software for Reverse Engineering CAD:
3D Scanners: Examples include Faro, Creaform, and Artec 3D scanners.
CAD Software: Common CAD software used in reverse engineering includes SolidWorks, Autodesk Inventor, Siemens NX, and PTC Creo.
Mesh Processing Software: Tools like Geomagic Design X, MeshLab, and Rapidform are used for processing and converting mesh data into CAD models.
Inspection Software: PolyWorks, Verisurf, and GOM Inspect are used for validating and inspecting the accuracy of the reverse-engineered models.
Applications of Reverse Engineering CAD:
Product Development: Reverse engineering helps in redesigning and improving existing products.
Legacy Parts: Creating digital models of obsolete parts for which no CAD data exists.
Quality Control: Ensuring that manufactured parts conform to design specifications.
Customization: Adapting existing designs to create customized products.
Reverse engineering CAD is a powerful technique that bridges the gap between physical objects and digital models, facilitating innovation and ensuring the accuracy and quality of manufactured products.
0 notes
Text
3D scan to CAD
Converting a 3D scan to a CAD (Computer-Aided Design) model involves several steps and specialized software. Here's a general overview of the process:
Acquisition of 3D Scan:
Use a 3D scanner to capture the physical object's geometry and texture data. There are different types of 3D scanners available, including laser scanners, structured light scanners, and photogrammetry.
Point Cloud Generation:
The 3D scanner produces a point cloud, which is a set of data points in a 3D coordinate system representing the external surface of the object.
Point Cloud Processing:
Clean up and process the point cloud data to remove any noise or unwanted artifacts. This step involves filtering, smoothing, and decimating the point cloud to reduce its size and complexity.
Mesh Generation:
Convert the point cloud into a mesh, which consists of polygons that approximate the surface of the object. This can be done using software like MeshLab, CloudCompare, or proprietary software provided by the scanner manufacturer.
Mesh Refinement:
Refine the mesh to improve its quality and accuracy. This may involve smoothing, filling holes, and optimizing the mesh topology.
CAD Conversion:
Import the mesh into a CAD software package such as SolidWorks, Autodesk Fusion 360, or Rhino. These programs allow you to convert the mesh into a CAD model by creating surfaces or solid bodies that accurately represent the geometry of the scanned object.
CAD Modeling:
Once the mesh is imported, you can use CAD tools to further refine the model, add features, and make adjustments as needed. This step often involves manually editing the geometry to ensure that it meets design requirements and tolerances.
Detailing and Finalization:
Add any additional details, textures, or annotations to the CAD model as necessary. Perform a final inspection to ensure that the model is accurate and ready for use.
Export:
Export the CAD model in a suitable file format (e.g., STEP, IGES, STL) for further analysis, manufacturing, or visualization.
Each step of this process requires careful attention to detail and may require specialized knowledge and skills in 3D scanning, point cloud processing, mesh editing, and CAD modeling. Additionally, the specific software and techniques used may vary depending on the complexity of the object and the desired level of detail in the final CAD model.
0 notes
Text
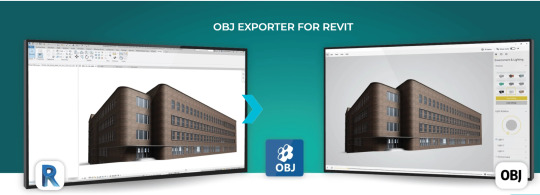
OBJ Exporter for Revit: Bridging the Gap in 3D Design
Introduction
Autodesk Revit is a powerful Building Information Modeling (BIM) software used by architects, engineers, and construction professionals for designing, documenting, and managing building projects. While Revit is renowned for its 3D modeling and drafting capabilities, there are times when users need to collaborate with professionals using other 3D modeling software or rendering engines. This is where OBJ Exporter for Revit comes into play. In this in-depth blog, we will delve into the need for OBJ Exporter for Revit and explore its significance in the world of architectural design and visualization.
Understanding the OBJ File Format
Before delving into the need for an OBJ exporter, it's important to understand the OBJ file format. OBJ stands for "Object" and is a widely used file format for 3D geometry data. It's a simple and open standard that stores 3D models in a way that is easily readable and usable by a wide range of 3D modeling and rendering software. OBJ files can contain information about vertices, faces, texture coordinates, normals, and material properties. This format's versatility makes it an ideal choice for interchanging 3D data between various software applications.
The Need for OBJ Exporter in Revit
Revit, while a robust BIM tool, primarily focuses on the architectural and structural aspects of a building project. This includes creating detailed models of walls, floors, roofs, and other building components. However, it may not always cover the entire spectrum of 3D design and rendering needs, especially when it comes to creating highly detailed and realistic 3D scenes, and animations, or collaborating with professionals using different 3D software.
Here are some key reasons for needing an OBJ exporter for Revit:
1. Interoperability: Not all 3D modeling or rendering software supports the direct import of Revit files. Exporting Revit models to the OBJ format provides a universally accepted 3D model that can be easily imported into various applications, fostering collaboration and integration with other tools in the design and visualization pipeline.
2. Advanced Rendering and Visualization: OBJ files are versatile and can carry texture, material, and lighting information. Exporting a model in OBJ format allows for more advanced rendering and visualization in software like Blender, Maya, or 3ds Max, where you can apply realistic textures, lighting, and environmental effects to create stunning visualizations.
3. Virtual Reality and Augmented Reality: OBJ files can be used to create interactive and immersive experiences in virtual and augmented reality. Exporting Revit models as OBJ files enables professionals to develop applications and experiences for VR and AR, providing clients with a richer understanding of the design.
4. 3D Printing: OBJ files are compatible with many 3D printers. By exporting Revit models in OBJ format, architects and designers can easily prepare their designs for physical manifestation through 3D printing.
5. Sculpting and Post-Processing: OBJ files can be manipulated in software like ZBrush or MeshLab to further refine the model, sculpt details, or make necessary adjustments, which is crucial in the production of highly detailed and customized designs.
6. Game Development: Game developers often require 3D assets in OBJ format for integration into their game engines. Exporting Revit models as OBJ allows for the creation of architectural elements within game environments.
Conclusion
The OBJ Exporter for Revit plays a vital role in extending the functionality of Autodesk Revit. It provides architects, engineers, and designers with the flexibility to collaborate with professionals using different 3D modeling and rendering tools, enabling them to take full advantage of advanced rendering, visualization, and interactive experiences. In a world where design and visualization are becoming increasingly sophisticated and interconnected, the OBJ Exporter for Revit is an indispensable bridge that empowers professionals to create, share, and utilize 3D models to their fullest potential. Whether it's for advanced rendering, virtual reality, 3D printing, or any other creative endeavor, the OBJ Exporter for Revit has become an essential tool in the arsenal of modern design professionals.
Get A FREE TRIAL Today!
#OBJ Exporter in Revit#ProtoTech's OBJ Exporter in Revit#Revit#Autodesk Revit#OBJ Exporter#OBJ Format
0 notes
Text
组装3D打印机(下手前调查)
最近上头了,要搞3d打印机,而且主要玩打印机,所以准备DIY 2023/10 方案一览 ��前找到的方案有: Voron 2.4 Voron Tridents 软件 控制器 Klipper Marlin 建模 blender meshlab – archlinux 编译失败 openscad 切片 Voron Voron 2.4 (flying Gantry) 看起来具有更高的可玩性 优点 时间长,玩家多,mod多 缺点 系统缺陷:违背运动学定律,导致系统一部分弯曲[1] 不易维护,皮带老化速度快[2] Voron Tridents (tripoints leveling) 相对便宜,但是对于玩打印机来说,价格不是决定因素 优点 构建相对容易,校准快…
View On WordPress
0 notes
Text
Some suggestion s from the internet. How much each option has value will depend on knowledge/skills and resources. I hope this helps
convert CT scans into 3D Printable Models
Said by PlaceboGazebo
3D printed my brain - I'm a biomedical engineer, and for a while was working for a research institute in France. ..... answer your specific points - I would go for MRI over CT - CTs tend to have high radiation doses, especially if you plan to do a full-body scan. I can't recommend it. MRIs are much less harmful. There are private clinics where you can pay for a full body "preventive" MRI - this will set you back a nice sum, >€1000 in the Netherlands, IIRC. Segmenting the resulting DICOM file is difficult. It will require a fair bit of work. Look into ITK / VTK / 3Dslicer. You will absolutely have to clean up and probably remesh any resulting stl/obj, I recommend using meshlab for that. From there, 3D printing can be done with any personal printer that has a large enough volume to not take forever. Using an external service, e.g. shapeways will be very expensive. If you don't have your own printer, you should probably look into an inexpensive FDM printer, I personally use an original prusa i3 Mk2.5.
Maybe try to connect with local universities to find observational studies.
edit because I realised I sound very negative. I actually think you have a really cool idea. Please do go ahead if you have the time and money, and for the love of all that is holy, blog it for posterity.
⋆⭒˚.⋆⋆⭒˚.⋆⋆⭒˚.⋆⋆⭒˚.⋆⋆⋆⭒˚.⋆⋆⭒˚.⋆⋆⭒˚.⋆⋆⋆⭒˚.⋆⋆⭒˚.⋆⋆⭒˚.⋆⋆⋆⭒˚.⋆⋆⭒˚.⋆⋆⭒˚.⋆
How expensive would it be to get a full 3D scan of my skeletal system if I don't medically need it. And how would I get it? Are there private practices that I could book an appointment with? Would the file output be compatible with 3D printing software? What I am asking is; where can I get a life sized 3D print of my own skeleton?
71 notes
·
View notes
Video
sunflow test | Jessica Rosenkrantz
24 notes
·
View notes
Text
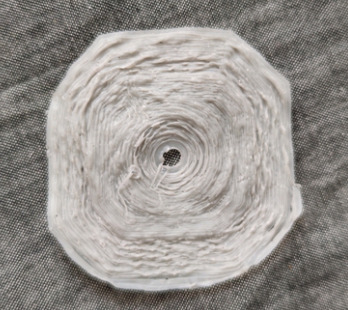
Hex edited point cloud in meshlab.
2 notes
·
View notes
Photo

#meshlab #seattleasianartmuseum https://www.instagram.com/p/By31XebnKX1/?igshid=r1nnb5mghd9x
1 note
·
View note
Text
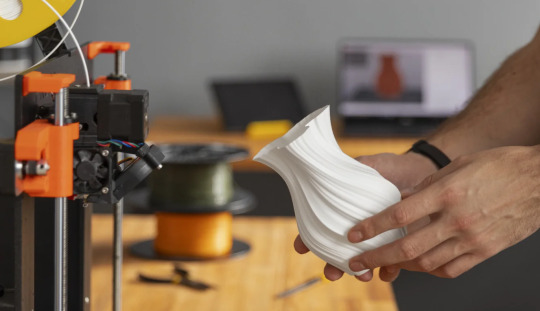
How to Scan, Edit, and Print: Mastering 3D Scanning for 3D Printing
The world of 3D printing is a creative playground where imagination meets technology. However, many makers and hobbyists are now discovering that 3D scanning can be just as important as 3D printing itself. With the ability to capture real-world objects and turn them into digital 3D models, 3D scanning opens up new possibilities for customization, repair, and innovation. In this blog, we’ll guide you through the steps of scanning, editing, and printing your own creations using 3D scanning technology.

Step 1: Scanning – Capturing Your Object
The first step in using 3D scanning for printing is to capture the physical object. Whether you want to replicate an existing item or modify it for a new purpose, 3D scanning allows you to easily digitize the physical world.
To start scanning, you’ll need a 3D scanner. There are various types available, ranging from handheld scanners to stationary ones, depending on the complexity and size of the object you wish to scan. Handheld scanners are excellent for scanning smaller objects, while more advanced desktop 3D scanners can handle larger or more intricate items.
When scanning, it’s essential to ensure the object is well-lit and stable to avoid inaccuracies. Move the scanner around the object to capture its full geometry, paying special attention to the details that matter most. Some 3D scanners come with software that automatically stitches the scan together, while others may require manual adjustments to ensure the model is complete.
Step 2: Editing – Refining Your 3D Model
Once you’ve captured your object, the next step is editing. Raw 3D scans often need a little touch-up to ensure they’re ready for printing. This stage allows you to modify the model to suit your needs.
There are several tools and software options available for editing your 3D scans. Programs like Meshmixer, Blender, and Autodesk Fusion 360 provide powerful features to clean up models, remove any unwanted artifacts, and add or adjust features. You can fix issues such as holes or gaps in the mesh, smooth out rough surfaces, or even resize and scale the model.
One of the great things about editing a 3D scan is that you can add custom modifications to your model. Whether you’re enhancing a part, combining multiple scans into one object, or designing something completely new based on your scanned model, the possibilities are limitless. You can even make slight tweaks to the design to improve functionality or aesthetics before printing.
Step 3: Printing – Bringing Your Digital Model to Life
Now that you have a refined 3D model, it’s time to bring it to life with your 3D printer. Before you hit "print," there are a few things to keep in mind to ensure your model prints successfully.
Start by checking the file format. Most 3D printers work with STL or OBJ files, which are common formats for 3D printing. If your scan is in a different format, you may need to convert it using software like MeshLab or Netfabb.
Next, choose the right print settings for your project. Consider the material you're using (PLA, ABS, resin, etc.) and adjust the print settings, such as print speed, layer height, and infill density, to match the requirements of your design. The quality of the print can vary greatly depending on these settings, so make sure to fine-tune them based on your object’s complexity.
Don’t forget to check for any print issues before starting. This includes ensuring the printer bed is level and the filament is loaded correctly. Once everything is ready, hit "start," and watch your model take shape layer by layer.
Step 4: Post-Processing – Finishing Your Print
After your object is printed, you’ll likely need to do some post-processing to achieve a smooth, professional finish. This could include removing any support structures, sanding the surface, or adding paint for a polished look.
For items printed with resin, you may need to cure the print under UV light to harden it further. Other finishing techniques may include smoothing rough edges, filling in imperfections, or even assembling parts if your model consists of multiple components.
While post-processing can take time, it’s essential for ensuring the final product looks its best. It’s also a great opportunity to personalize your printed objects even further.
Why Mastering 3D Scanning Is Essential for Makers
Mastering the process of scanning, editing, and printing with 3D technology offers incredible advantages to makers, hobbyists, and inventors. By combining 3D scanning with 3D printing, you can create custom parts, repair broken objects, and explore an entirely new world of design possibilities. The ability to easily capture real-world objects, tweak them digitally, and print them with precision makes this combination of technologies indispensable for anyone passionate about creating.
With 3D scanning and printing, the creative possibilities are endless. By learning how to scan, edit, and print, you’ll be able to bring your ideas to life in ways that weren’t possible before. Whether you’re recreating a lost part, customizing a design, or building something entirely new, mastering 3D scanning for 3D printing opens up a world of opportunities for makers everywhere. Don’t just imagine your creations—bring them to life!
1 note
·
View note