#Netgear Router Basic Settings
Explore tagged Tumblr posts
Visit Tumblr Blog
Explore Tumblr blogs with no restrictions, modern design and the best experience.
Last Seen Tumblr Blogs


Fun Fact
Tumblr has been providing a Korean-language service since 2013.
Text
Explore the Advantages of Orbi Login
In today’s fast-paced world, Orbi Routers are well-regarded for their tri-band mesh technology, which offers expectational network speeds and eliminates dead zones. They are celebrated for providing a stable and secure internet connection. To fully benefit from these features, it’s important to understand the orbi login process.
Moreover, this page provides a comprehensive guide to logging in. We outline the essential requirements, detail the methods for completing the orbi router login procedure, and offer troubleshooting solutions in case you encounter difficulties while attempting to log in. Let’s dive into the step-by-step procedure outlined below.
How to Login Netgear Orbi Router?
Additionally, several factors are important for the login procedure of Orbi Router. Here are the initial requirements for accessing the admin panel of your networking device: an active internet connection, a web/IP address, the default admin credentials, the Netgear Orbi app, a laptop or computer, a mobile phone, and ethernet cables.
Furthermore, once you have gathered all the necessary items, you can proceed with the steps to log in to your smart router. The login process can be completed using two methods: via the web GUI method or through the Netgear Orbi app. Below, you will find clear and straightforward steps for both methods.
Orbi Login Using the Web Interface
Firstly, make sure that the Orbi device is powered on.
Now, connect the Windows system to the router’s network.
Hereon, you can use a wired connection via an ethernet cable to link with the network, or you can directly join the Wi-Fi.
Then, open the web browser and type the orbilogin.net web address in the browser bar.
Later, enter the default admin credential on the login window that appears on the screen.
Next, you visit the smart home page of the device.
After that, navigate the Basic Settings>Wireless>Edit the SSID name and pre-shared key domain.
Now, mention your network name and a powerful password for your router’s network.
Further, tap on Apply to perform and save the alterations.
Finally, you are done with the login process of the Orbi Router.
How to Login Netgear Orbi Router Through the App
First and foremost, confirm that the smartphone is connected to the present network available.
Now, install and download the modernized version of the Netgear Orbi app on your mobile phone by visiting the Play/App Store.
Then, open the app and then create a new account or use your email to register on the app.
Next, mention the valid credentials on the login window that seems on your screen.
After that, you reach the smart setup dashboard of the device.
Next, tap on the Basic>Wireless/Wi-Fi settings of the device to alter the SSID name and password domain.
Further, type the unique network name and complicated passwords in the alteration field.
Afterward, click on Save/Apply to end the login process of the networking device.
Not Able to Perform the Orbi Router Login Process? Here Are the Fix-Outs!
If you are having difficulty logging into your Orbi device, several factors could be causing the issue. Common problems include a weak internet connection, browser-related issues, power outages, or incorrect admin credentials.
It is important to resolve these issues quickly to ensure that your smart router operates effectively. Here are some effective methods to help you identify and address these problems:
Ensure that the Orbi device has a stable internet connection.
Make sure you are entering the correct admin login credentials.
Confirm that the power cord and adaptor are properly connected to a working electrical outlet.
Enter the accurate web address in the browser bar to perform the orbi login effortlessly.
Temporarily disable any VPNs, firewalls, or ad blockers while attempting to log into the Orbi Router.
Make sure you have installed the modernized version of the Netgear Orbi app on your mobile device.
Confirm that there is an adequate power supply to the Orbi device and its associated devices.
Check that your mobile phone is compatible with the Netgear Orbi app.
Consider performing a soft reset on the networking device to eliminate technical bugs and glitches.
Bottom line
Overall, the information provided above can help you access your orbi login with ease. Additionally, we have included a troubleshooting guide to assist you in resolving common issues during the login process.
1 note
·
View note
Text
Ever wondered why some homes have fast internet while others don't? It's often down to a good network setup. With more of us relying on the internet for work, gaming, or smart devices, knowing how to set up a network is key. This guide will cover the basics, tips, and best practices to get your network running smoothly.Key Takeaways Understanding the importance of a well-structured home network is crucial for better connectivity. The right hardware, like routers and switches, is essential for a fast network. Both wired and wireless connections have their benefits that impact network speed. Securing our network protects our data and makes it faster and more reliable. Quick fixes for common issues can improve network performance. Staying updated with technology can greatly enhance our network setup. Regular maintenance and updates keep our network running well over time. Understanding Home NetworksOur use of technology keeps growing, making it key to know about home networks. These networks let us connect devices and the internet, making sharing files and printers easy. They're the base for using network protocols, especially the TCP/IP protocol, which helps devices talk to each other.Definition and ImportanceHome networks are crucial for our digital lives, supporting devices from computers to smart gadgets. With more devices online, we need reliable connections. Knowing how our network works helps us tackle speed, security, and connectivity issues.Components of a Home NetworkBuilding a good home network needs key network components. These include: Modem: Connects our network to the internet. Router: Lets devices connect to the internet and manage traffic well. Switches: Add more LAN ports for more devices. Wireless Access Points (WAPs): Improve wireless coverage for devices. Knowing and using these parts can make our networks better and safer. For setting up your network, check out this guide. Wired networks are faster and more secure than wireless, less prone to interference and hacking12. Wi-Fi has improved a lot, with the latest versions offering fast speeds, making our networks more useful3.Hardware Requirements for NetworkingTo set up a strong home network, we need to pick the right devices for smooth connectivity and data flow. Key items include routers, switches, and Ethernet cables. Each plays a big part in making our network work well.Essential Devices for SetupWe need these main devices: Modem: Connects our network to the Internet Service Provider (ISP). Router: Directs traffic between devices and the Internet. The router's capacity affects performance, especially with many devices. Switches: Create wired connections among devices, offering stable and secure links for high-bandwidth devices. Choosing the right gear depends on our home size, how many devices we have, and the internet speed we need. For networks with 20 or more devices, commercial-grade Wi-Fi routers are best. Brands like Netgear and Linksys offer various options for different needs.Choosing the Right EquipmentUpgrading to newer tech, like CAT6 Ethernet cables, boosts performance by supporting faster data transfer. This is great for reliable wired connections4. When picking switches, consider unmanaged and managed options. Unmanaged switches are cheaper for small offices, while managed switches offer more features for big offices5.Here’s a table to help us decide: Device Type Best For Key Features Router General home usage Traffic management, security features Switch Connecting multiple devices Wired connections, bandwidth allocation Ethernet Cable High-speed connections Length variance, types like CAT6 Knowing what hardware we need is key to a great home network. It supports our needs and improves our connectivity. For more info, check out this detailed guide on network hardware here45.Network Setup and ConfigurationSetting up a home network is key to getting online smoothly. We start by making sure we have everything we need. We'll go through the steps and important settings to get the best internet connection.
Step-by-Step Setup ProcessFirst, we connect the modem to our Internet Service Provider (ISP). Then, we link our router to the modem with an Ethernet cable. After setting up the physical links, we log into the router’s web interface for setup. Changing the default SSID and password boosts security. These steps lead us to a stable internet connection.Configuration Settings You Should KnowUnderstanding the router's settings is crucial for managing the network well. We need to know about DHCP, NAT, and firewall settings. Setting these up right helps manage traffic, protect devices, and keep internet access smooth for everyone. Getting familiar with these settings keeps our network safe and efficient. For more on easy network setup, check out the simplified guide by Nile Access Services.Types of Home Network ConnectionsSetting up our home network means knowing the different connection types. We can pick wired, wireless, or a mix of both. Each type has its own benefits for our needs.Wired Connections and Their AdvantagesWired connections give us a stable and fast way to link devices, often using Ethernet cables like Cat6 or Cat6a6. They're great for tasks needing steady speed, like gaming or big file transfers. Though setting them up might need expert help, their dependability makes them a top choice for many.Wireless Connections and Their BenefitsWireless connections let devices connect without cables, using WLAN tech in the 2.4 GHz or 5 GHz bands7. This gives us flexibility and ease at home. Yet, we should watch out for interference or slower speeds with more devices on the network. Finding the right mix of wired and wireless can boost our network's performance.Choosing between wired and wireless depends on our home's needs and layout. This affects the best way to get efficient network performance. For more help on setting up home networks, check out resources here. Also, consider reliable repair services for devices like the latest iPhone series here8.Extending Your Network RangeHaving good Wi-Fi coverage at home is key today. We can extend our network using access points, wireless repeaters, and mesh systems. Each option has its own benefits and can greatly improve our home's connectivity.Using Access PointsAccess points boost Wi-Fi coverage by linking to our router with an Ethernet cable. They give strong signals in areas where the router's signal fades. The best part is, they keep high-speed connections without the signal loss of wireless repeaters9.Evaluating Wireless Repeaters vs Mesh SystemsWireless repeaters are simple devices that boost an existing signal, making them easy to set up. However, they cut the bandwidth in half because they use the same frequency for both receiving and sending signals10. Mesh systems, on the other hand, have multiple nodes that form a seamless Wi-Fi network. They automatically connect devices to the strongest signal, ensuring great performance as we move around10.When deciding to improve our Wi-Fi range, it's important to weigh our options carefully. Wireless repeaters might be cheaper and quicker to set up, but mesh systems offer a more advanced networking experience. By considering our specific needs, we can choose the best method for extending our network11.Network Security Best PracticesProtecting our home networks is crucial. We need strong security to keep out cyber threats. It's vital to use good network security to keep our data safe and devices secure.Importance of Strong PasswordsCreating strong, unique passwords is key to network security. Weak passwords attract cybercriminals. Using letters, numbers, and special characters makes a big difference. Updating these passwords often helps protect against breaches.Setting Up Firewalls and Security ProtocolsFirewalls are a strong security tool. They act as a shield between our network and threats. By controlling traffic, they prevent unauthorized access. Using encryption like WPA2 or WPA3 also keeps data safe from being intercepted.Network security is about using strong passwords and firewalls, along with encryption.
These steps create a safe space for everyone on our network. For more info, check out network security features to learn more12.Network Performance OptimizationTo make our network better, we need to know what affects it. Things like latency, bandwidth, and how our hardware is set up play big roles. For example, managing our bandwidth well helps by giving priority to important devices and limiting others. This can make our network faster and more reliable13.What Affects Network PerformanceThings like walls and other devices can slow down our network. Doing speed tests often helps find these problems. The design of our network parts and how busy it is also matter a lot. Using Quality of Service (QoS) settings helps make sure important tasks get done first, keeping things running smoothly14.Testing and Improving Your SetupUsing tools to check our network's performance helps us fix problems and test how it works for users. Tools like Obkio let us keep our networks running well and find issues early13. Making sure our protocols are up to date and our hardware is current is key to making our networks faster. With good testing, management, and the latest tech, our networks work their best.Common Issues and Troubleshooting TipsEven with the best efforts, connection problems can happen. It's important to find out why these issues occur for better network troubleshooting. Slow internet, dropped connections, and devices not connecting are common issues. Studies show that 53% of network problems are due to slow speeds15. Also, 28% of issues come from weak Wi-Fi signals, especially in offices15. We should check our modem, router, devices, and settings.Identifying Connection ProblemsTo fix problems, we can follow a step-by-step approach. It's found that 67% of issues come from faulty hardware like routers and switches16. Physical issues, like damaged cables, make up 12% of problems15. Making sure cables are secure helps solve these issues. Also, duplicate IP addresses cause about 15% of problems15.Basic Troubleshooting StepsLet's look at simple steps to fix these issues. Rebooting devices and checking cables are good first steps. Research shows human mistakes, like unplugged cables, cause 22% of problems16. Running diagnostics can show if we have an IP address issue, which is 9% of cases15. Issue Percentage of Occurrence Slow Network Speeds 53% Weak Wi-Fi Signals 28% Faulty Hardware 67% Human Error 22% Physical Connectivity Issues 12% Duplicate IP Addresses 15% Exhausted IP Addresses 9% With these tips and knowledge, we can handle potential network problems better.ConclusionSetting up a home network is key for smooth digital living. As tech gets better, knowing how to manage our networks well is more important. This article has shown us how to make networks that fit our needs.Knowing about routers and switches helps us feel confident in our network setup. As we use more tech, keeping our networks safe and running well is crucial. This is especially true in our connected world.Checking our home networks often helps them work their best. Using services like Gadget Kings Prs in Newport for repairs is smart. They fix many devices well. Making smart choices improves our online life for everyone at home. For more info, check out this research on network science and consider their repair services1718.FAQWhat is a home network?A home network links devices together and to the internet. It lets you share things like files and printers. It uses network protocols like TCP/IP for device communication.What are the essential devices needed for setting up a home network?You'll need a modem for internet connection, a router for traffic control, and switches for wired devices. Wireless access points (WAPs) can boost coverage.How do I secure my home network?Use strong, unique passwords for Wi-Fi and devices. Turn on firewalls on your router. Use encryption like WPA2 or WPA3 for wireless security.What factors can affect network performance?Bandwidth, latency, and your home's layout affect performance.
Improve it by testing speeds and managing bandwidth for important devices.How can I extend the range of my home network?Use access points via Ethernet cables or wireless repeaters. Mesh systems are great for creating full Wi-Fi coverage at home.What are common issues that can arise in a home network?Issues include slow internet, dropped connections, and device failures. Fix them by checking modem and router status, testing devices, and reviewing settings.How do I choose the right router for my needs?Look at your home size, device count, internet speed needs, and the features of brands like Netgear and Linksys when picking a router.What is network automation and why is it important?Network automation uses software to manage devices automatically. It boosts efficiency, cuts down on mistakes, and keeps your network secure and reliable.
0 notes
Text

How To Login Netgear Router?
To access the routerlogin.net setup page, open the web browser and type the above-mentioned web address in the browser bar. Now, enter the login credentials and you will reach the smart setup wizard of the device. Here, visit the basic & advanced settings to configure the further process. For more detailed information regarding the configuration procedure, do drop us a line!
0 notes
Text
what vpn works with netgear router
🔒🌍✨ Get 3 Months FREE VPN - Secure & Private Internet Access Worldwide! Click Here ✨🌍🔒
what vpn works with netgear router
Netgear router VPN compatibility
Title: Exploring Netgear Router VPN Compatibility: A Comprehensive Guide
In today's interconnected world, ensuring the security and privacy of your internet connection is paramount. Virtual Private Networks (VPNs) have emerged as a popular solution, offering encrypted tunnels to protect data transmission. For users seeking to integrate VPN functionality directly into their home or office network, compatibility with their existing hardware, such as Netgear routers, is crucial.
Netgear, a leading provider of networking equipment, offers a range of routers with varying features and capabilities. When it comes to VPN compatibility, Netgear routers generally support VPN passthrough, allowing VPN traffic to pass through the router to VPN servers on the internet. However, not all Netgear routers are equipped to handle VPN connections natively.
For users looking to set up a VPN directly on their Netgear router, it's essential to choose a model that supports VPN client or server functionality. Models such as the Nighthawk series often offer built-in support for VPN services, allowing for easy configuration and management directly through the router's interface.
Alternatively, users can opt for third-party firmware solutions like DD-WRT or Tomato, which can be installed on compatible Netgear routers to unlock additional features, including enhanced VPN capabilities. These firmware options provide greater flexibility and customization options for users looking to tailor their VPN setup to their specific needs.
Before selecting a Netgear router for VPN usage, it's essential to research compatibility with your chosen VPN service provider. Not all VPN protocols may be supported, and certain configurations may require manual setup or port forwarding.
In conclusion, Netgear routers offer varying levels of compatibility with VPN services, ranging from basic passthrough functionality to advanced VPN client and server capabilities. By selecting the right router model and configuring it correctly, users can enjoy enhanced security and privacy for their internet connection.
VPN setup for Netgear routers
Setting up a Virtual Private Network (VPN) on your Netgear router can enhance your online security and privacy, allowing you to browse the internet anonymously and securely from any device connected to your home network. Follow these steps to configure a VPN on your Netgear router:
Choose a VPN Service: Start by selecting a reputable VPN service provider that offers compatibility with Netgear routers. Look for one that supports OpenVPN, as it's a commonly supported protocol by Netgear devices.
Subscription and Configuration: Subscribe to the VPN service of your choice and obtain the necessary configuration details. This typically includes the server address, username, password, and any other authentication details provided by your VPN provider.
Access Router Settings: Open a web browser on a device connected to your Netgear router's network and enter the router's IP address (usually something like 192.168.1.1) into the address bar. Log in using your router's admin credentials.
Navigate to VPN Settings: Once logged in, locate the VPN settings section in your router's admin interface. This may vary depending on the specific model of your Netgear router, but it's usually found under the "Advanced" or "Advanced Setup" menu.
Configure VPN Connection: Enter the VPN configuration details provided by your VPN service into the appropriate fields in the router's VPN settings. This typically includes the server address, VPN protocol (e.g., OpenVPN), username, and password.
Apply Settings: After entering the VPN configuration details, save your settings and apply them. Your Netgear router will then establish a connection to the VPN server using the provided credentials.
Test Connection: Once the settings are applied, test the VPN connection to ensure that it's working properly. You can do this by accessing a website that detects your IP address and confirming that it displays the IP address associated with the VPN server.
By following these steps, you can successfully set up a VPN on your Netgear router, providing enhanced security and privacy for all devices connected to your home network.
Best VPNs for Netgear routers
Choosing the right VPN (Virtual Private Network) for your Netgear router can enhance your online security and privacy while providing smooth and secure internet browsing. With a plethora of VPN options available, selecting the best one for your specific needs can be challenging. Here are some top VPNs recommended for Netgear routers:
ExpressVPN: Known for its blazing-fast speeds and robust security features, ExpressVPN offers easy-to-use apps compatible with Netgear routers. With servers in numerous locations worldwide, it ensures reliable connectivity and bypasses geo-restrictions with ease.
NordVPN: Renowned for its extensive server network and top-notch security protocols, NordVPN is an excellent choice for Netgear routers. Its advanced encryption and CyberSec feature block ads and malware, providing a secure browsing experience.
Surfshark: With unlimited simultaneous connections and strong encryption, Surfshark is a budget-friendly option for Netgear router users. It offers dedicated apps for various router models, ensuring seamless integration and protection for all connected devices.
CyberGhost: Offering specialized servers for streaming and torrenting, CyberGhost is an ideal VPN for Netgear routers. Its user-friendly interface and one-click connect feature make it easy to use, even for beginners.
IPVanish: With its own network of servers and unlimited bandwidth, IPVanish delivers fast and reliable connections for Netgear routers. It provides customizable settings for advanced users and supports multiple VPN protocols for enhanced security.
Before selecting a VPN for your Netgear router, consider factors such as server locations, encryption protocols, and compatibility with your router model. Additionally, ensure that the VPN service offers a reliable customer support system to assist you in case of any issues. By choosing one of these top VPNs, you can enjoy a secure and private internet experience on your Netgear router.
Configuring VPN on Netgear router
Configuring a VPN (Virtual Private Network) on your Netgear router can provide an added layer of security and privacy to your network. By encrypting your internet connection and masking your IP address, a VPN helps protect your online activities from prying eyes and potential threats.
To set up a VPN on your Netgear router, you first need to choose a reliable VPN service provider and create an account. Many VPN providers offer detailed instructions and configuration files for setting up a VPN connection on various router models, including Netgear.
Once you have chosen a VPN provider, you can log in to your Netgear router's web interface to begin the configuration process. Navigate to the VPN section and select the option to add a new VPN connection. Enter the necessary connection details provided by your VPN service, such as the server address, username, and password.
After entering the VPN connection details, save the settings and test the connection to ensure everything is working correctly. You can then connect your devices to the VPN-protected network by selecting the newly created VPN connection on each device.
Configuring a VPN on your Netgear router can help safeguard your online privacy, secure your data transmission, and access geo-restricted content from anywhere in the world. Remember to keep your VPN software updated and periodically check the connection status to ensure optimal performance and security.
VPN compatibility testing with Netgear router
Title: Ensuring Seamless VPN Compatibility with Netgear Routers: A Comprehensive Testing Guide
In today's digitally interconnected world, safeguarding online privacy and security is paramount. One effective tool for achieving this is a Virtual Private Network (VPN), which encrypts internet traffic and masks IP addresses. However, not all VPN services seamlessly integrate with every router, making compatibility testing essential, especially for Netgear routers, known for their reliability and performance.
To ensure a smooth VPN experience with a Netgear router, comprehensive compatibility testing is crucial. Here's a step-by-step guide to conducting such tests:
Research VPN Compatibility: Before testing, research VPN providers known for their compatibility with Netgear routers. Look for user reviews, forums, and official documentation to gauge compatibility.
Router Firmware Update: Ensure your Netgear router is running the latest firmware version. Firmware updates often include bug fixes and compatibility improvements that can enhance VPN performance.
VPN Installation: Install the VPN client software on your device(s) and configure it according to the provider's instructions. Ensure compatibility with the router by selecting protocols supported by both the VPN and the router.
Connection Testing: Establish a connection between your device and the VPN server. Test the connection speed, stability, and latency to ensure optimal performance.
Multi-Device Testing: If using multiple devices, test VPN compatibility across different operating systems (Windows, macOS, iOS, Android) to identify any platform-specific issues.
DNS Leak Test: Conduct DNS leak tests to ensure the VPN is effectively masking your IP address and preventing DNS leaks, which could compromise your privacy.
Kill Switch Functionality: Test the VPN's kill switch feature, which automatically disconnects internet access if the VPN connection drops, to prevent data exposure.
Long-Term Performance: Monitor the VPN connection over an extended period to assess long-term compatibility and reliability with the Netgear router.
By following these steps, users can effectively test VPN compatibility with Netgear routers, ensuring a secure and seamless online experience. Remember to periodically retest compatibility, especially after router firmware updates or VPN software upgrades, to maintain optimal performance.
0 notes
Text
does netgear wnr2000 support vpn
🔒🌍✨ Get 3 Months FREE VPN - Secure & Private Internet Access Worldwide! Click Here ✨🌍🔒
does netgear wnr2000 support vpn
Netgear WNR2000 VPN compatibility
Title: Exploring Netgear WNR2000 VPN Compatibility: What You Need to Know
The Netgear WNR2000 router is a popular choice for home and small business networks, known for its reliability and affordability. However, when it comes to VPN compatibility, users often have questions about whether this router supports VPN connections and how to set it up.
The Netgear WNR2000 does not have built-in VPN functionality, which means it cannot directly establish a VPN connection on its own. However, this doesn't mean that VPN usage is impossible with this router. There are alternative methods to use VPN services with the Netgear WNR2000.
One common approach is to configure VPN connections on individual devices rather than on the router itself. Most operating systems and devices, including Windows, macOS, iOS, and Android, have built-in support for VPN connections. Users can install VPN client software or configure VPN settings manually on their devices to encrypt internet traffic and protect their online privacy.
Another option is to use VPN-enabled firmware such as DD-WRT or Tomato. These third-party firmware replacements offer advanced features, including VPN support, that are not available in the stock firmware of the Netgear WNR2000. By flashing DD-WRT or Tomato firmware onto the router, users can configure VPN connections directly on the router and protect all devices connected to the network.
It's important to note that flashing third-party firmware onto a router carries some risks and may void the router's warranty. Users should carefully follow instructions provided by the firmware developers and understand the potential implications before proceeding.
In conclusion, while the Netgear WNR2000 router does not natively support VPN connections, users have options to enable VPN functionality either through individual device configurations or by using third-party firmware replacements. By taking advantage of these alternatives, users can enhance their online security and privacy while using the Netgear WNR2000 router.
VPN support on Netgear WNR2000
If you own a Netgear WNR2000 router and value your online privacy and security, you might be wondering if it supports VPN (Virtual Private Network) connections. VPNs are crucial tools for encrypting your internet traffic and protecting your online activities from prying eyes, especially when using public Wi-Fi networks or accessing geo-restricted content.
The Netgear WNR2000 is a basic wireless router commonly used in home and small office settings. While it offers essential networking features, it does not have built-in support for VPN connections like some higher-end routers do. However, this doesn't mean you can't use a VPN with the WNR2000.
To utilize a VPN with your Netgear WNR2000 router, you have a few options:
VPN Client Software: Some VPN providers offer client software that can be installed on individual devices such as computers, smartphones, and tablets. You can install the VPN client on each device you want to protect and configure it to connect to the VPN server of your choice.
VPN-enabled Devices: Alternatively, you can use devices that support VPN connections directly, such as computers, smartphones, or certain streaming devices. These devices can establish their own VPN connections without the need for router-level support.
VPN Router Configuration: While the WNR2000 does not have native VPN support, you can set up a VPN connection on a separate device, such as a computer or dedicated VPN router, and then configure the router to route all its traffic through the VPN connection. This method effectively extends VPN protection to all devices connected to the router.
Keep in mind that setting up a VPN connection may require some technical expertise, especially if you opt for the third option. However, once configured, a VPN can significantly enhance your online privacy and security, regardless of the router you're using, including the Netgear WNR2000.
Setting up VPN on Netgear WNR2000
Setting up a VPN on your Netgear WNR2000 router is a prudent step towards securing your online activities and protecting your privacy. By encrypting your internet connection, a VPN (Virtual Private Network) shields your data from prying eyes and potential threats, whether you're browsing the web, accessing sensitive information, or streaming content.
Here's a step-by-step guide to setting up a VPN on your Netgear WNR2000 router:
Choose a VPN Service: First, select a reputable VPN service provider that offers compatibility with routers. Ensure they support OpenVPN, as it's commonly used for router configurations.
Subscribe and Obtain Credentials: Sign up for a subscription plan with your chosen VPN provider. Once subscribed, you'll receive login credentials including a username, password, and possibly an OpenVPN configuration file.
Access Router Settings: Open a web browser and enter your router's IP address in the address bar (usually something like 192.168.1.1). Log in using your router's admin credentials.
Navigate to VPN Settings: Once logged in, navigate to the VPN or Advanced settings tab. Look for an option related to VPN or OpenVPN.
Upload Configuration File: If your VPN provider supplied an OpenVPN configuration file, upload it to the router's VPN settings. Alternatively, manually enter the VPN server details provided by your provider.
Enter Credentials: Input your VPN username and password in the appropriate fields.
Save Settings and Connect: After entering the necessary details, save your settings and initiate the VPN connection. Your Netgear WNR2000 router should now establish a secure VPN tunnel to your chosen server.
Verify Connection: To ensure the VPN is working correctly, check your router's status or use an online service to confirm your new IP address.
By following these steps, you can enjoy enhanced security and privacy for all devices connected to your Netgear WNR2000 router through the VPN connection. Remember to periodically update your VPN settings and firmware for optimal performance and security.
Netgear WNR2000 VPN configuration
Setting up a VPN (Virtual Private Network) on your Netgear WNR2000 router can enhance your online security and privacy, allowing you to securely access your network from remote locations. Follow these steps to configure VPN on your Netgear WNR2000:
Access Router Settings: Open a web browser and enter the router's IP address (usually 192.168.1.1) in the address bar. Log in with your username and password.
Navigate to VPN Settings: Once logged in, navigate to the "VPN" section of the router settings. This may be located under the "Advanced" or "Security" tab, depending on your router's firmware version.
Choose VPN Type: Select the type of VPN you want to set up. Netgear routers typically support VPN protocols such as PPTP, L2TP, and OpenVPN. Choose the one that best fits your needs.
Enter VPN Server Information: Enter the required information for your VPN server, including the server address, username, and password provided by your VPN service provider.
Configure VPN Connection: Follow the on-screen instructions to configure the VPN connection settings. This may include selecting encryption settings, enabling VPN passthrough, and specifying DNS settings.
Save Settings: Once you've entered all the necessary information, save your settings and reboot your router to apply the changes.
Test VPN Connection: After rebooting, test your VPN connection to ensure it's working properly. You can do this by connecting to the VPN server from a remote location and verifying that you can access your network resources securely.
By following these steps, you can configure VPN on your Netgear WNR2000 router to encrypt your internet connection and protect your online privacy. Remember to keep your VPN settings secure and up-to-date to ensure maximum security for your network.
VPN options for Netgear WNR2000
If you own a Netgear WNR2000 router and are looking to enhance your online privacy and security, using a Virtual Private Network (VPN) can be a great option. A VPN encrypts your internet connection, ensuring that your online activities remain private and secure from potential prying eyes. However, not all VPNs are compatible with all routers, so it's essential to choose the right VPN option for your Netgear WNR2000.
One popular VPN option for Netgear WNR2000 is to set up a VPN connection directly on the router itself. This way, any device connected to the router will benefit from the VPN protection without the need to install VPN software on each individual device. There are various VPN providers that offer step-by-step instructions on how to set up their service on a Netgear router, making it a convenient option for users.
Another option is to use VPN software on individual devices and connect them to the VPN service separately. While this option may offer more flexibility in terms of choosing different VPN providers for different devices, it may not provide the same level of security for all devices connected to the router.
When choosing a VPN option for your Netgear WNR2000, consider factors such as the level of encryption offered, the number of simultaneous connections supported, server locations, speed, and price. It's also essential to choose a reliable VPN provider with a good reputation for privacy and security.
Overall, using a VPN with your Netgear WNR2000 router can help enhance your online security and privacy, allowing you to browse the internet with peace of mind.
0 notes
Text
does nighthawk router offer a free vpn
🔒🌍✨ Get 3 Months FREE VPN - Secure & Private Internet Access Worldwide! Click Here ✨🌍🔒
does nighthawk router offer a free vpn
Nighthawk router VPN features
Title: Unlocking Online Freedom: Exploring Nighthawk Router VPN Features
In the digital age, ensuring online privacy and security is paramount. With cyber threats looming large and privacy concerns on the rise, individuals are increasingly turning to Virtual Private Networks (VPNs) for protection. Nighthawk routers, renowned for their robust performance and innovative features, have stepped up to meet this demand with built-in VPN capabilities.
Nighthawk routers, developed by NETGEAR, integrate VPN functionality seamlessly into their systems, offering users a reliable and secure means to safeguard their online activities. By enabling VPN on a Nighthawk router, users can encrypt their internet connection, effectively shielding their data from prying eyes and potential cyber threats.
One of the key advantages of Nighthawk router VPN features is the ability to establish a secure connection for all devices connected to the network. Whether it's a laptop, smartphone, or smart home device, users can enjoy peace of mind knowing that their data is encrypted from end to end.
Moreover, Nighthawk routers often come equipped with advanced VPN protocols such as OpenVPN and IPsec, providing users with flexibility and compatibility across various platforms and devices. This ensures a seamless VPN experience without compromising on performance or security.
Additionally, Nighthawk routers empower users with control over their VPN settings, allowing them to customize their security preferences according to their needs. Whether it's choosing specific VPN servers or configuring encryption settings, users have the freedom to tailor their VPN experience to suit their requirements.
In conclusion, Nighthawk router VPN features offer a comprehensive solution for individuals seeking to enhance their online privacy and security. With robust encryption, compatibility across devices, and customizable settings, Nighthawk routers empower users to take control of their digital footprint and enjoy a safer online experience.
Free VPN options on Nighthawk router
Using a Virtual Private Network (VPN) is crucial for safeguarding your online privacy and security. While premium VPN services offer robust features, many users seek free alternatives, especially when it comes to integrating VPN functionality directly into their routers like the Nighthawk series. Here are some options to consider for implementing a free VPN on your Nighthawk router:
Built-in VPN Services: Some Nighthawk routers come equipped with built-in VPN capabilities. Check if your model supports VPN functionality out of the box. While these built-in options may not offer as many features as dedicated VPN services, they can still provide basic encryption and anonymity.
OpenVPN: OpenVPN is a popular open-source VPN protocol known for its strong security features. Many free VPN services support OpenVPN, and you can configure your Nighthawk router to use OpenVPN through third-party firmware like DD-WRT or Tomato. This option requires a bit of technical know-how but offers flexibility and customization.
VPN Gate: VPN Gate is a volunteer-run VPN network that offers free access to a wide range of VPN servers worldwide. While the performance and reliability may vary, VPN Gate can be configured on Nighthawk routers using OpenVPN or other compatible protocols.
ProtonVPN: ProtonVPN offers a limited free plan that allows users to access servers in three countries with medium speed. While the free plan has some limitations compared to the paid versions, it still provides secure encryption and no data caps, making it suitable for basic browsing and online activities.
Before choosing a free VPN option for your Nighthawk router, consider the level of security, speed, and reliability you require. While free VPN services can be convenient, they may also come with limitations and potential risks, so it's essential to weigh your options carefully and prioritize your online privacy and security.
Nighthawk router VPN subscription
Title: Enhance Your Online Security with a Nighthawk Router VPN Subscription
In an era where cyber threats loom large and online privacy is increasingly at risk, safeguarding your digital presence has become paramount. One effective solution gaining popularity is the integration of a VPN (Virtual Private Network) with your router. Among the top choices for such a setup is the Nighthawk router VPN subscription, offering robust protection and enhanced privacy features.
A Nighthawk router VPN subscription combines the advanced capabilities of Netgear's Nighthawk routers with the encryption and anonymity provided by a VPN service. By routing your internet traffic through a secure server and encrypting your data, a VPN ensures that your online activities remain private and protected from prying eyes, including hackers, advertisers, and even your Internet Service Provider (ISP).
One of the key advantages of using a Nighthawk router VPN subscription is its seamless integration with your home or office network. Once configured, all devices connected to the router automatically benefit from the VPN's protection, including smartphones, tablets, computers, smart TVs, and IoT devices. This comprehensive coverage ensures that every aspect of your digital life is shielded from potential threats.
Moreover, a Nighthawk router VPN subscription offers access to geo-restricted content by masking your IP address and providing access to servers in different regions around the world. Whether you want to stream your favorite shows, access region-locked websites, or enjoy online gaming without restrictions, a VPN-enabled Nighthawk router opens up a world of possibilities.
In conclusion, investing in a Nighthawk router VPN subscription is a proactive step towards fortifying your online security and reclaiming control over your digital privacy. With its seamless integration, robust encryption, and access to geo-restricted content, it's a versatile solution suitable for both personal and professional use.
Nighthawk router VPN compatibility
Nighthawk routers are known for their high-quality performance and premium features, including VPN compatibility. VPN, or Virtual Private Network, allows users to create a secure connection to another network over the internet. This technology encrypts data and ensures online privacy and anonymity.
Nighthawk routers support VPN services to protect users' online activities from potential threats and unauthorized access. By enabling VPN on your Nighthawk router, you can browse the web securely, access geo-restricted content, and safeguard your sensitive information from cybercriminals.
Setting up a VPN on your Nighthawk router is a straightforward process. Most Nighthawk routers come with built-in VPN client capabilities, making it easy for users to configure their VPN settings directly on the router's interface. Alternatively, users can choose to set up a VPN connection by manually entering the VPN server details provided by their VPN service provider.
When selecting a VPN service for your Nighthawk router, it is essential to choose a reputable provider that offers reliable encryption protocols, fast connection speeds, and a vast server network. Popular VPN services compatible with Nighthawk routers include ExpressVPN, NordVPN, and CyberGhost.
Overall, VPN compatibility is a valuable feature of Nighthawk routers that enhances online security and privacy for users. Whether you're looking to protect your sensitive data or unblock restricted content, enabling VPN on your Nighthawk router can significantly improve your online experience.
Setting up VPN on Nighthawk router
Setting up a Virtual Private Network (VPN) on your Nighthawk router can enhance your online security and privacy, ensuring that your internet activities remain private from prying eyes. Nighthawk routers, known for their robust performance and advanced features, offer a straightforward process for configuring a VPN connection.
Firstly, ensure that your Nighthawk router supports VPN connections. Most modern Nighthawk models support VPN functionality, but it's always wise to double-check your router's specifications to confirm.
Next, access your router's admin panel by typing its IP address into your web browser. Typically, this is either "192.168.1.1" or "192.168.0.1". Log in using your router's credentials, usually found on the router itself or in the manual.
Once logged in, navigate to the VPN settings section. Here, you'll have the option to configure a VPN connection using various protocols such as OpenVPN, PPTP, or L2TP. Select your preferred protocol, keeping in mind that OpenVPN is often recommended for its security and reliability.
Enter the VPN server details provided by your VPN service provider. This includes the server address, username, password, and any other authentication details required.
After entering the necessary information, save your settings and activate the VPN connection. Your Nighthawk router will now establish a secure VPN tunnel, encrypting all data transmitted between your devices and the internet.
To ensure everything is functioning correctly, you can perform a quick test by accessing a website or checking your IP address to confirm that your internet traffic is now routed through the VPN server.
By setting up a VPN on your Nighthawk router, you can enjoy the benefits of enhanced online security and privacy, safeguarding your personal information from potential threats while browsing the web.
0 notes
Text
does netgear wnr2000v5 support vpn client
🔒🌍✨ Get 3 Months FREE VPN - Secure & Private Internet Access Worldwide! Click Here ✨🌍🔒
does netgear wnr2000v5 support vpn client
Netgear WNR2000v5 VPN compatibility
Title: Exploring Netgear WNR2000v5 VPN Compatibility: A Comprehensive Guide
The Netgear WNR2000v5 router is a popular choice for home and small business networking needs due to its reliable performance and user-friendly interface. However, one question that often arises among users is its compatibility with virtual private networks (VPNs).
VPN compatibility is crucial for users who prioritize privacy, security, and the ability to access geo-blocked content. Thankfully, the Netgear WNR2000v5 does support VPN connections, but there are some considerations to keep in mind.
Firstly, the WNR2000v5 supports both PPTP and L2TP VPN protocols, which are commonly used by many VPN service providers. This flexibility allows users to choose from a wide range of VPN services and configurations to suit their specific needs.
However, it's important to note that while the WNR2000v5 does support VPN passthrough, it may not be able to handle the encryption and decryption processes required for more advanced VPN protocols like OpenVPN. Users who require support for OpenVPN may need to consider alternative router options.
Setting up a VPN connection on the Netgear WNR2000v5 is relatively straightforward, with most VPN services offering step-by-step guides or automated setup tools. Users typically need to access the router's web interface to configure VPN settings and establish a connection to their chosen VPN server.
Overall, while the Netgear WNR2000v5 may not offer the most advanced VPN compatibility compared to high-end routers, it provides sufficient support for most users' basic VPN needs. Whether you're looking to enhance your online security or access restricted content, the WNR2000v5 can serve as a reliable networking solution with VPN capabilities.
VPN client support on Netgear WNR2000v5
VPN client support on the Netgear WNR2000v5 router opens up a world of possibilities for users seeking enhanced security and privacy. The WNR2000v5, a reliable and affordable router option, offers built-in support for VPN client connections, allowing users to encrypt their internet traffic and protect their online activities.
With VPN client support, users can establish secure connections to remote VPN servers, adding an extra layer of security when accessing the internet. This feature is particularly valuable for those concerned about privacy breaches, as it encrypts data transmitted between the router and the VPN server, shielding it from prying eyes.
Setting up VPN client support on the Netgear WNR2000v5 is relatively straightforward, thanks to its intuitive user interface and comprehensive documentation. Users can configure the router to connect to their preferred VPN service provider, entering the necessary credentials and settings to establish a secure connection.
Once configured, the router will route all internet traffic through the VPN tunnel, ensuring that data remains encrypted and protected from interception. This is especially useful when accessing sensitive information or conducting online transactions, as it helps prevent unauthorized access to personal or financial data.
Furthermore, VPN client support on the Netgear WNR2000v5 enables users to bypass geo-restrictions and access content that may be blocked in their region. By connecting to VPN servers located in different countries, users can circumvent censorship and enjoy unrestricted access to online services and websites.
In conclusion, VPN client support on the Netgear WNR2000v5 router enhances security, privacy, and online freedom for users. Whether safeguarding sensitive data or accessing geo-blocked content, this feature empowers users to take control of their internet experience with ease.
Netgear WNR2000v5 VPN features
The Netgear WNR2000v5 is a popular wireless router equipped with impressive VPN features that cater to users seeking a secure and private connection for their online activities. Virtual Private Networks (VPNs) have become crucial tools for ensuring data encryption and anonymity while browsing the internet. With the Netgear WNR2000v5, users can easily set up a VPN connection to safeguard their online information from potential threats and prying eyes.
One of the key features of the Netgear WNR2000v5 is its support for VPN pass-through, allowing users to establish VPN connections with external VPN servers without any hindrance. This capability ensures seamless integration of VPN services, enabling users to enjoy enhanced privacy and security without compromising on internet speed.
Additionally, the Netgear WNR2000v5 offers robust encryption protocols such as PPTP, L2TP, and IPSec, enhancing the level of security provided by the VPN connection. These protocols ensure that data transmitted between the user's device and the VPN server remains encrypted and protected from unauthorized access.
Moreover, the Netgear WNR2000v5 boasts a user-friendly interface that simplifies the process of setting up and managing VPN connections. Users can easily configure their VPN settings through the router's web-based interface, making it accessible even to those with limited technical knowledge.
Overall, the Netgear WNR2000v5 stands out as an excellent choice for individuals looking to secure their online activities through a reliable and feature-rich VPN-enabled router. With its advanced VPN features, easy setup process, and strong encryption protocols, the Netgear WNR2000v5 offers a comprehensive solution for maintaining online privacy and security.
Setting up VPN on Netgear WNR2000v5
Setting up a VPN on your Netgear WNR2000v5 router is a great way to enhance your online security and privacy. By using a VPN (Virtual Private Network), you can encrypt your internet connection and protect your data from prying eyes. Setting up a VPN on your Netgear WNR2000v5 router is a relatively simple process, and this guide will walk you through the steps.
To begin, you will need to access your router's admin panel. You can do this by opening a web browser and typing in the router's IP address (usually 192.168.1.1) in the address bar. Enter your username and password to log in to the admin panel.
Once you are logged in, navigate to the VPN section of the router settings. Here, you will need to enter the VPN server settings provided by your VPN service provider. This will typically include the server address, username, password, and any other necessary information.
After entering the VPN server settings, save your changes and restart your router. Your Netgear WNR2000v5 router should now be configured to use the VPN connection. You can now connect to the VPN from your devices by entering the VPN credentials provided by your service provider.
Setting up a VPN on your Netgear WNR2000v5 router is a quick and easy way to enhance your online security and privacy. By encrypting your internet connection, you can protect your data and browse the web anonymously. Follow the steps outlined in this guide to get started with your VPN setup today.
Netgear WNR2000v5 VPN configuration instructions
Setting up a VPN (Virtual Private Network) on your Netgear WNR2000v5 router can enhance your online privacy and security by encrypting your internet connection. Follow these step-by-step instructions to configure your VPN:
Access Router Settings: Open your web browser and enter the router's IP address (typically http://192.168.1.1) in the address bar. Log in with your username and password.
Navigate to VPN Settings: Once logged in, locate the "Advanced" or "VPN" section in the router settings menu. Click on it to access the VPN configuration options.
Choose VPN Service Provider: Select your VPN service provider from the dropdown menu. If your provider is not listed, choose "Other" or "Manual" configuration.
Enter VPN Credentials: Input the username, password, and any other required information provided by your VPN service provider. This information is necessary for establishing a connection to the VPN server.
Configure VPN Connection Type: Choose the appropriate VPN connection type supported by your VPN service provider. Common options include PPTP, L2TP, and OpenVPN. Refer to your provider's documentation for specific configuration details.
Apply Settings: Once you've entered all the necessary information, click on the "Apply" or "Save" button to save your VPN configuration settings.
Test Connection: After saving the settings, it's recommended to test the VPN connection to ensure it's working properly. Connect a device to your network and verify that you can access the internet securely through the VPN.
Troubleshooting: If you encounter any issues during the setup process or with the VPN connection, refer to the troubleshooting section of your router's user manual or contact your VPN service provider for assistance.
By following these instructions, you can easily configure a VPN on your Netgear WNR2000v5 router to protect your online activities and data privacy.
0 notes
Text
How To Change The Netgear Orbi Login Password?
Are you curious about How to Change the Netgear Orbi Login Password? The setup and configuration procedure isn't as hard as it might appear. By going onto the admin interface, you can update the Netgear Orbi password and perform other configuration tasks on your own.
You may quickly gain access to the control panel of your Wi-Fi network by going to the configuration page. Additionally, you can modify the Wi-Fi settings, user credentials, and security protocols to suit your needs.

Steps to Change the Netgear Orbi Login Password
You should look into a few things if you're wondering how to change the settings on your Netgear Orbi. By following a few simple steps, you may gain access to your router, modify its Wi-Fi settings, and enable features like security alerts to enhance its functionality. Here are some steps for How to Change the Netgear Orbi Login Password.
Open a web browser on a computer or mobile device that is linked to the Orbi network, and type the URL bar's value, "http://orbilogin.com." The window for logging in opens.
Click the "Log In" button after entering the router user name and password in the required areas.
Note: Admin is the user name. Password is the default password. Case sensitivities apply to the password and user name. It shows the BASIC Home page.
Choose Administration > Advanced > Change Password and the page to set your password appears.
After filling out the form, press the “APPLY” button.
In addition, you can modify the Advanced Wi-Fi Settings on your Netgear Orbi. Additionally, keep in mind that models may differ in terms of available options.
Bottom Line
The above blog post explains the complete process of How to Change the Netgear Orbi Login Password. But if you think that you can still do it, or see your “Netgear Orbi” app not working, chat with our technical team. They can handle these scenarios because of their years of experience and competence. As a result, they guide you to set up the Netgear Orbi and remove any issue that you may encounter.
0 notes
Text
Troubleshooting Guide 2024: Mywifiext Not Working — Resolving Common Issues

Check the Basics: Before delving into complex troubleshooting, ensure the basics are in order.
Confirm that your WiFi extender is powered on.
Verify that the extender is within the range of your existing WiFi network.
Make sure you’re using the correct web address for the Mywifiext setup.
Browser Compatibility: Mywifiext is optimized for certain browsers. Incompatibility issues might arise if you’re using an outdated or unsupported browser. Try accessing the setup page using different browsers like Chrome, Firefox, or Edge.
Clear Browser Cache: Cached data can interfere with the loading of web pages. Clear your browser cache and try accessing Mywifiext again.

Connectivity Issues:
Ensure a stable and active internet connection. If possible, connect your computer directly to the extender with an Ethernet cable to rule out WiFi issues.
Reboot your modem, router, and extender to refresh the network.
Firewall and Antivirus Settings: Security software may sometimes block access to Mywifiext. Temporarily disable your firewall and antivirus programs and attempt to access the setup page. Remember to re-enable them after troubleshooting.
Firmware Updates: Ensure that your extender’s firmware is up to date. Check the Netgear support website for the latest firmware version and update if necessary.
Factory Reset: If all else fails, consider performing a factory reset on your WiFi extender. This will revert the settings to default, and you can start the setup process anew.
Contact Support: If the issue persists, it might be time to seek professional help. Contact Our support (+1855–201–8071) for assistance. Be prepared to provide detailed information about your setup, including the extender model and any error messages you encountered.
Conclusion: The “Mywifiext not working” issue can be caused by various factors, ranging from simple configuration errors to more complex network issues. By systematically troubleshooting each potential problem, you increase your chances of resolving the issue and enjoying a seamless WiFi extender experience. Remember to document any changes you make during troubleshooting for future reference.
#Mywifiext Not Working#mywifiext net not working#www mywifiext net refused to connect#mywifiext net is not working
0 notes
Text
How can I find the IP address of a device connected to my Netgear router?

Have you ever wanted to learn more about IP addresses? In this article, we'll discuss what an IP address is, and how to find the IP address of a device connected to your Netgear router.
What Is An IP Address?
An IP address is a unique numerical identifier assigned to each device connected to the internet protocol for communication. It allows devices to communicate with each other and find each other on the network. Every device has a different IP address, and they are usually assigned by your ISP (internet service provider). You can think of an IP address like a phone number for your computer - it's how other devices on the internet know how to find and connect to it. You can find the IP address of any device connected to your router by logging into your router's web interface and looking at the list of connected devices. The IP address will be listed next to each device.
How to Find the IP Address Of A Device Connected To Your Router?
When it comes to finding the IP address of a device connected to your router, there are several methods you can use. Here is a list of them: Through the Router's Web Interface The easiest way to find the IP address of a device connected to your router is through the router's web interface. To identify the IP address of a device connected to your router: - Access the login page for your router. For NETGEAR routers, refer to the instructions on "How do I log in to my NETGEAR home router?" Note: If you do not have a NETGEAR router, consult your specific model's user manual or support page. - Locate the section of the router's web interface that displays connected devices. - On NETGEAR routers, navigate to the "Attached Devices" page under the "BASIC" tab. Note: The menu label may vary on other models and be called "Device Manager" or similar. - Each connected device will display information such as the device name and IP address. For further assistance, refer to your router's support page or contact NETGEAR Support. Using a Command Prompt (Windows) If you're using Windows, you can find your IP address by opening a command prompt and typing "ipconfig". Your IP address will be displayed next to the "IPv4 Address" field. Using Network Settings (MacOS/iOS) If you want to find the IP address of a device connected to your router, you can do so using the network settings on your Mac or iOS device. - Access System Preferences and select the Network option. - Select the location that corresponds to your current network setup (if you need help determining which one it is, look at the network icon in the menu bar). - Click on Advanced and then select the TCP/IP tab. - The IP address will be listed next to "Router". Using a Network Scanner A third way to find the IP address of a device connected to your router is by using a network scanner. Network scanners are software tools that scan your network and provide information about connected devices, including IP addresses. There are many different network scanners available, both paid and free. Some popular options include Fing and Advanced IP Scanner. Note: It's worth noting that some devices may have a dynamic IP address which can change over time.In conclusion, finding the IP address of a device connected to your router is a straightforward process that can be accomplished using various methods. Whether you choose to use the router's web interface, command prompt or terminal, or a network scanner, you should be able to quickly identify the IP address of the device you are trying to locate. Knowing the IP address of a device connected to your router can be helpful in a variety of situations, such as troubleshooting network issues or configuring security settings. With this knowledge, you can easily manage and maintain your home network.Reference form: https://mynetgearrouterlogin.com/find-the-ip-address-of-connected-device/ Read the full article
#mynetgearrouterlogin#IPaddress#router#network#deviceIP#networkmanagement#homenetwork#networktroubleshooting#IPconfig#networkscanner#netgear
0 notes
Text
Netgear Access Point Setup : Find the Way

Are you unable to find How To Set Up a Netgear Wireless Router as an Access Point? Then don’t worry, you are at the right place. Here you will get to know how to do the same.Netgear WiFi extender is a wireless repeater, which is placed between the base router and the location where you want better wireless coverage.
It also expands the WiFi network, by connecting to your existing network and improving coverage. And it repeats the wireless signal from your router to expand its coverage. Netgear WiFi extender is also known as a WiFi booster. Performing Netgear Access Point Setup is not a challenging task, it is simpler than you think. If you are unable to do this on your own, then here are some simple steps to do the same. Simply go through the following guide for Netgear Access Point Setup.
Methods for How To Set Up a Netgear Wireless Router as an Access Point
If you ask yourself, what to do with unused wireless network devices, then you may need to learn How To Set Up a Netgear Wireless Router as an Access Point. Using an old router as an access point helps to extend the range of the network and eliminate those dead spots. If you don’t know How To Set Up a Netgear Wireless Router as an Access Point.
Then the following instructions will help you to do the same. Simply go through the below steps for the Netgear Access Point Setup.
Firstly, you need to cover the WAN or internet port of the secondary router with tape to prevent you from accidentally using it later.
After this, launch a web browser on the device, which is connected to the network of your router.
And then enter www.routerlogin.net on the address field of the web browser.
Now Netgear WiFi extender login page will appear, login with your default credentials i.e., username and password.
The default name of the WiFi extender is “Admin” and fill in the login information carefully because the username and password are case-sensitive.
After this basic home page or dashboard will appear on the screen.
From the homepage, click on “Advanced,” and then on “Advanced Setup.”
After this, choose “Wireless Access Point.” Some models might use slightly different menu labels, like Router / AP / Bridge Mode.
Then from the Nighthawk Pro Gaming routers, click on the “Settings” option.
And then click on “Setup,” and then choose “Wireless Access Point.”
Now select “Access Point” mode, and choose the IP Address settings on this access point.
Also, make sure that you get it from the existing router by default. Only enable fixed IP settings on this device setting if you have advanced network experience.
And if you want to do it manually, then assign a specific IP address to the router while it is in AP mode.
After doing this, click on “Apply” and lose the Internet connection between your router and your computer. Now our Netgear router is in AP mode.
Sum up
Certainly, the above instructions will help you with How To Set Up a Netgear Wireless Router as an Access Point. So, before seeking help from some, go through the above easy, and simple methods to do the same. And it is also required to follow the above steps as given.
Netgear Access Point Setup does not require too many steps, you just need to go through some simple and easy steps to do the same. From now on, you can use your Netgear as an access point.If the above steps are unable to help you with Netgear Access Point Setup. Then you may need expert assistance. Try to get in touch with Netgear experts. They will provide you with full assistance, and also help you with Netgear Access Point Setup.
0 notes
Link
0 notes
Link
0 notes
Link
0 notes
Text
Buyer's manual: a way to choose a wi-fi router
How to select the right wi-fi router for you
what is a wi-fi router? A wi-fi router is a tool that connects to your own home or workplace modem, so you can also connect a couple of devices, usually wired and wi-fi to your internet connection on the equal time. Past the basic provision of wi-fi internet inside your own home or office, there are numerous additional features which should be considered when looking at buying a new wireless router. Please see under for the maximum common features of wi-fi routers, and read on for detailed explanations of what those capabilities are, and how they'll benefit you. Range on varison fios site is good for new buyers.
the range of a wireless router is a measurement of the way a ways (typically in feet) the signal of the router will tour. This dimension is generally decided in a lab-kind setting, so you can generally anticipate a touch much less range while setting one up in your private home or workplace. Many various things will have an effect on the range of your router, from the bodily placement close to a wall or window, to interference from different devices together with cordless phones or child monitors. Maximum correct wi-fi routers are capable of broadcasting your signal to quite a number around a hundred and fifty ft indoors, assuming standard household conditions. Sure wireless routers just like the d-link dir-655 are able to sign variety as much as 300 ft in your own home, once more - assuming ideal situations. Variety will also be tormented by the form of antenna the router uses to broadcast the wireless sign. For more data about how antenna layout impacts wi-fi signal, see the antenna segment below. Unmarried band or dual band
whilst seeking out a wi-fi router, you'll encounter differing types - single band and dual band. The 'band' is the wireless frequency at which your wireless router outputs its' signal, and could either be 2. 4 of 5ghz (gigahertz). As you might have guessed, twin band routers will broadcast your wi-fi sign on both the two. 4ghz and 5ghz bands, as a consequence giving you an improved and first-class signal. Although a dual band router will allow you more alternatives for turning in wi-fi sign in your home or office, the 5ghz signal frequency has some caveats. First off, the 5ghz frequency may not allow your wireless internet sign travel as some distance as a 2. 4ghz frequency sign will. On account that most common family home equipment do not operate inside the 5ghz frequency range, you will run into much less interference that's best, however you might not be capable of take benefit of that signal from too some distance away. The other drawback to this, is that no longer all wi-fi gadgets are capable of accepting a 5ghz wi-fi sign, so no longer every tool you personal can take benefit of the delivered frequency. When you have quite a few other wi-fi gadgets in your home, or stay in a crowded area, you'll need to pick a wireless router with twin band. The delivered degree of signal first-rate will assist to deliver your wireless internet sign in your pc or smartphone without getting mixed up with the relaxation of the alerts transferring via the airwaves. Choosing a router that offers twin band technology is usually recommended - although now not every tool can take benefit of the 5ghz band, having each bands broadcast approach you'll be capable of serve up a wireless signal no matter what's connecting on your router. A, b, g, n
wireless signals are available in some one-of-a-kind requirements, regarded normally as 802. 11a, 802. 11b, 802. 11g, and 802. 11n. As the letter receives higher, the signal high-quality will increase, with n being the most up-to-date standard in wi-fi generation. Maximum new gadgets could be able to connecting thru 802. 11n, however you'll want to ensure whilst putting in your wireless router that you may account for older devices you could have as well. Due to the fact that a few gadgets still use the older however more popular 802. 11g popular, you'll need to make certain you can broadcast both the brand new 802. 11n signal, as well as the older 802. 11g, and beyond. 802. 11a - 802. 11a is an ieee wi-fi networking standard that specifies a most records switch rate of 54mbps and an operating frequency of 5ghz. 802. 11b - 802. 11b is an ieee wireless networking fashionable that specifies a most information switch price of 11mbps and an running frequency of 2. 4ghz. 802. 11g - 802. 11g is an ieee wi-fi networking fashionable that specifies a maximum statistics transfer price of 54mbps and an operating frequency of 2. 4ghz. 802. 11n - 802. 11n is an ieee wireless networking standard the specifies a maximum statistics switch charge of as much as 540mbps and an utilizes mimo (more than one enter a couple of output) era to increase sign quality. Security
while you are putting in place a wi-fi network at your private home or workplace, you want to make sure you take your wi-fi protection significantly. Picking a wireless router that is capable of imposing the famous protection protocols will make sure that you could setup a cozy wireless network that may not go away you prone. The most common varieties of wireless safety protocols are wep, wpa, & wpa2. Every offers positive advantages, and requires a exceptional form of passcode to allow access. Wep - wep (stressed out equivalent privacy) is a protection protocol for wireless networks that can guard facts through encryption over radio waves using point-to-factor transmission. A pre-shared key (psk), or passcode, is used to allow communication between the wireless router and the endpoint (your pc or pc). Wpa - wpa (wireless included get entry to) is just like wep, however wpa in addition protects your wireless records transmission via encryption. Wpa uses a key just like wep, but the benefit of using wpa over wep is that the secret is automatically encrypted, making that rather more tough in your passcode to be decoded. Wpa2 - wpa2 (wi-fi included access 2) is similar to wpa, however geared closer to human beings requiring the best stage of wireless protection. Wpa2 gives a far more potent encryption service through the usage of aes or advanced encryption trendy. Maximum wireless routers in the marketplace nowadays will provide wep, wpa, and wpa2, with a few routers including extra ranges of security. On the subject of retaining your wi-fi community comfy, it will come all the way down to your implementation of security measures greater so than which router you choose to buy. Usb capability
a few wi-fi routers together with the netgear wndr4500 consist of a usb port that may be used for added capability. You can pick out to connect the netgear wndr4500's usb port to a usb thumb power to easily share documents to your community(also referred to as nas - network connected garage), or even hook up a printer immediately to the router, and then get right of entry to that printer wirelessly from any computer or computer related in your wireless community. Even in case you do not have a right away need for this functionality right now, if you can, pick out a router that has a usb port on it. Always future evidence whenever you may! Wired ports
similarly to supplying a wi-fi connection, maximum wireless routers will also offer stressed out ports, so that you may also bodily connect a close-by computer at once to the router. Computer systems which might be bodily linked for your router will advantage from improved velocity and reliability, so in case you are capable of, it's constantly an excellent idea to get a router like the medialink wireless n router that also has lan ( or nearby vicinity network) ports so that you can bodily connect your laptop on your router. If you discover a wireless router without local network ports, ensure that it is truly a router, and no longer just an access point. An get right of entry to point is very just like a router, and can even look comparable, but the access factor will best offers wi-fi connection, and no longer the additional functionality needed to permit your computer to access the internet wirelessly. If you already have a wi-fi router in your own home or workplace, you can use an get admission to point to provide an extra supply of wi-fi, so long as your primary router offers the fundamental routing features for your property network
antenna layout
when selecting a new wi-fi router, you need to take into consideration the type of antenna design the router makes use of, if you want to either be inner or external. Aesthetically, a number of the famous producers are actually choosing an inner antenna this is housed within the frame of the wi-fi router. At the same time as an internal antenna may appearance a little 'cleaner' than having a small outside mast type antenna sticking up from the top of your router, the outside mast kind antennas typically give a higher overall performance and range than a router with an internal antenna. Mimo
mimo (multiple input a couple of output) is a fairly new generation located in new routers in order to allow you to get higher pace and range from your wireless router, by permitting the wireless router to broadcast and acquire more than one one of a kind alerts straight away. To offer you a better idea of what mimo is and the way it affects your wi-fi router's overall performance, imagine how lots better highway site visitors flows when there are five lanes for visitors as opposed to simply one. That is the same precept that permits mimo to increase a wireless router's speed and performance. Ipv6
since the net is expanding exponentially each day, the deliver of precise addresses is hastily strolling out, and that means in some unspecified time in the future soon, we are going to ought to start the use of ipv6 addresses. You needn't worry approximately the technical variations between ipv4 and ipv6 addresses, just play it safe and ensure that if you are going to purchase a brand new wi-fi router - ensure it supports ipv6.
1 note
·
View note
Text
How do I reset my Netgear Nighthawk router to factory settings?
Are unable to log into your Netgear Nighthawk router? Have you forgotten the user name and password of your WIFI device? Well, the only option left is to implement the reset process on your Netgear Nighthawk router. Often users deal with Netgear Nighthawk setup problems. The issues may range from slow internet connectivity to not getting WIFI proper signal. These all are the requirements that a person needs to reset the router.
Why do we need a Netgear Nighthawk setup to reset?
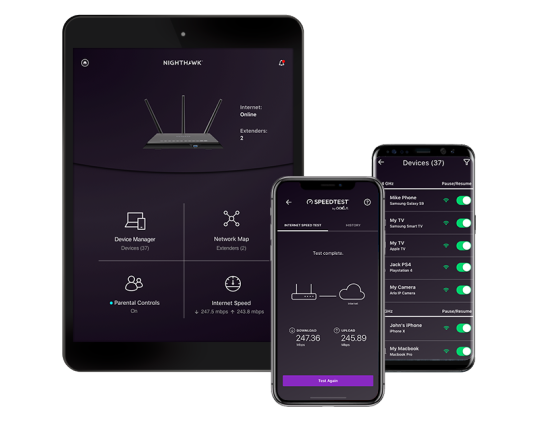
· If your Netgear Nighthawk device is going offline, again and again,
· it might not be able to connect to the access page by putting in the password.
· The Netgear Nighthawk router might face weak or slow connectivity.
· The WIFI card inserted into your device might not be inserted properly.
· The position of your Netgear Nighthawk router also matters a lot.
· Place the router to an optimal locus where no hurdles are lying around.
· Check whether your router is getting a proper internet connection or not.
· If there are any connection issues, the router will not turn up.
· The power cord of your device should be associated with the modem, computer, and Netgear Nighthawk device.
Netgear Nighthawk Before reset- requirements

Being aware of the fact that a factory reset erases all the personalized information of your device including the WIFI network name, username, and password. SO, if you need any data for later use, make sure you have taken a backup of the data you might need.
· Once you attained Netgear Nighthawk back-up, follow a few more steps before reset:
· Remove your default WIFI password, in case it ever changes or is configured to something else.
· Log out of your previous logged Netgear Nighthawk account which applies to the hard reset.
Perform Netgear Nighthawk Router Factory reset
1. Via Hard reset button

1. Before the reset, verify the router is turned up If not press the power on the button given at the back of the router.
2. Take a survey of your Netgear Nighthawk device to find out the hard reset button on it.
3. Look for a reset pin or a similar object, such as a screw or a match stick.
4. Press the reset button which is hiding under a small hole.
5. Press the reset button with the help of any reset object.
6. Do not release the reset button for up to fifteen seconds.
7. When the power LED light begins blinking, the reset process is going on.
8. When you see the power LED has stopped flickering, the Netgear router has done with the reset process and attained all its default settings.
Netgear Nighthawk Factory reset
2. Via Netgear Nighthawk app
Performing a reset process using the Netgear Nighthawk app is a very simple and smooth process. Just do as following:
· Go to the app basket of your devices, such as the play store or Apple app store.
· Search for the Nighthawk app and as you found, download it.
· When the app is downloaded and installed on your device successfully, launch it.
· On launching the app, log in to your Netgear account.
· Once done, without any delay navigate to the settings of your Netgear Nighthawk settings.
· Locate the reset option under settings and click on it.
· As you select and click the reset option, your Netgear Nighthawk device is set to default factory settings.
How can I log in back to the Netgear Nighthawk dashboard after reset?

1. Initially connect your Netgear Nighthawk device to the computer. For this, you need to use an Ethernet cable.
2. Use the LAN port of your router and the same on your computer to establish this connection.
3. Secondly, use the WAN port of your router and the same of your modem to associate them using another Ethernet cable.
4. If you already had made this setup, leave and proceed to the next step.
5. On your device that you are using for configuration purposes, launch a web browser.
6. Type in the IP key address 192.168.1.1 or the web domain www.nighthawk-app.com and click the enter button.
7. Enter the username and password in the needed field and then click the login tab.
8. If you don't find the username and password, look into the user manual or the label on your device.
9. However, you may use admin as the username and password as the password to complete the username and password field.
10. After that, you can see you have acquired the Basic home page or dashboard of your router.
The Basic Home page of your router is the place where you can set up the entire settings of your router. From here, you may change the WIFI password, Username, and security encryptions. After reset, the router gains all its default login credentials which are not considered safe. You must have changed them to give an extra layer of protection to your device.
Netgear Nighthawk reset- Conclusion
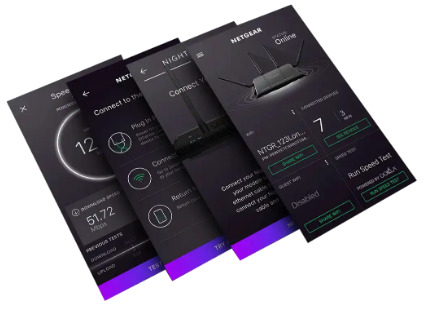
This is how a user can reset his Netgear Nighthawk router. Remember that a factory reset removes all the settings and personal information, so you need to keep a backup off all you need. There are some cautions that each one of us should follow before reset and after reset. Wrong use of the reset process leads to corrupt your firmware of the Netgear Nighthawk router.
If you are not a tech-savvy person, get in touch with our technical experts. They will surely help you to process a reset process on your Netgear Nighthawk device. You should consider all the above-mentioned precautions and suggestions during the reset process. While facing any issue that is given in the above section, go for a reset process. After reset, log in back to the web-based interface of your router is the foremost requirement as the entire device connected to the router will have gone disconnected from the network.
#nighthawk-app.com#netgear nighthawk app#www.nighthawk-app.com#netgear nighthawk#netgear nighthawk router#netgear nighthawk login#netgear nighthawk r7000#netgear nighthawk ac1900#netgear nighthawk setup#netgear nighthawk x10#netgear nighthawk extender#netgear nighthawk mesh#nighthawk netgear#nighthawk x6 r8000 firmware#netgear nighthawk x6 r8000#netgear nighthawk x6 setup#netgear r8000#netgear genie
1 note
·
View note