#Netgear Router Restarts Automatically
Explore tagged Tumblr posts
Visit Tumblr Blog
Explore Tumblr blogs with no restrictions, modern design and the best experience.
Last Seen Tumblr Blogs


Fun Fact
In Q3 of 2020, 31% of US users access the Tumblr app daily.
Text
Have issues with your Netgear router? No worries! Perform a Netgear router reboot that will fix internal glitches, bugs, and temporary connectivity issues. It will give a fresh start to your networking device. If you want to know the router rebooting steps, then drop us a line!
0 notes
Text
A Quick Solution For Netgear Router Restarts Automatically.
Wanna resolve the Netgear Router Restarts Automatically issue? For this, all you need to do is follow the complete process of updating your router’s firmware, verifying your power outlet, and more. In addition to this, if you find yourself unable to fix this problem, you can prefer to Reset your router. For more information regarding this issue, you can connect with our experts!
0 notes
Text
🔒🌍✨ Get 3 Months FREE VPN - Secure & Private Internet Access Worldwide! Click Here ✨🌍🔒
can proton vpn be use with a router
ProtonVPN router compatibility
Title: Exploring ProtonVPN Router Compatibility: A Comprehensive Guide
In the realm of digital privacy and security, VPNs (Virtual Private Networks) have emerged as indispensable tools. ProtonVPN stands out as a robust option, known for its commitment to user privacy and stringent security measures. However, for users seeking to extend VPN protection to their entire network, compatibility with routers becomes a crucial consideration.
ProtonVPN offers extensive router compatibility, allowing users to safeguard all devices connected to their home or office network. The service supports a wide range of router models, ensuring flexibility for users with diverse setups. Whether you have a mainstream router from manufacturers like Asus, Linksys, Netgear, or TP-Link, or you opt for a less common brand, ProtonVPN likely has you covered.
Setting up ProtonVPN on your router is a straightforward process, typically involving installing custom firmware or configuring the VPN directly through the router settings. The ProtonVPN website provides detailed guides and tutorials for various router models, making the setup process accessible even for those with limited technical expertise.
By configuring ProtonVPN on your router, you can encrypt all internet traffic originating from devices connected to your network. This includes smartphones, tablets, smart TVs, gaming consoles, and IoT (Internet of Things) devices, providing comprehensive protection against cyber threats and surveillance.
Moreover, routing traffic through a VPN can bypass geo-restrictions, allowing access to region-locked content on streaming platforms and websites. Whether you're concerned about privacy, security, or accessing global content, ProtonVPN's router compatibility offers a versatile solution.
In conclusion, ProtonVPN's compatibility with a wide array of router models empowers users to fortify their entire network with top-tier encryption and anonymity. By extending VPN protection to all connected devices, users can enjoy peace of mind knowing their online activities are shielded from prying eyes.
Setting up ProtonVPN on router
Setting up ProtonVPN on your router is a smart way to ensure all devices connected to your network are protected by a secure VPN connection. ProtonVPN offers robust encryption and privacy features, making it an excellent choice for safeguarding your online activities.
To begin the setup process, you'll first need to ensure your router is compatible with ProtonVPN. Most modern routers support VPN configurations, but it's always a good idea to check the manufacturer's specifications or documentation to confirm compatibility.
Once you've verified compatibility, the next step is to access your router's settings. This typically involves entering your router's IP address into a web browser and logging in with your administrator credentials.
Once logged in, navigate to the VPN settings section of your router's interface. Here, you'll need to input the necessary ProtonVPN server information, including the server address, username, and password provided by ProtonVPN.
After entering the server information, you'll have the option to configure additional settings such as encryption protocols and DNS leak protection. It's recommended to enable features like kill switch functionality to ensure that your internet connection is automatically severed if the VPN connection drops.
Once you've completed the configuration process, save your settings and restart your router to apply the changes. Once the router has restarted, all devices connected to your network should now be protected by ProtonVPN.
Setting up ProtonVPN on your router offers a convenient way to protect all of your devices with a single VPN connection. By following these steps, you can enjoy enhanced privacy and security for your online activities.
Router VPN integration with ProtonVPN
Title: Enhancing Online Security: Integrating Your Router with ProtonVPN
In an age where online privacy is paramount, integrating a VPN (Virtual Private Network) with your router has become a crucial step in safeguarding your digital footprint. ProtonVPN, renowned for its commitment to privacy and security, offers users a seamless solution to enhance their online protection.
Router VPN integration with ProtonVPN extends the benefits of VPN encryption to all devices connected to your home network. This means that whether you're streaming content on your smart TV, browsing the web on your laptop, or conducting sensitive transactions on your smartphone, your data remains encrypted and your identity concealed.
The integration process is designed to be user-friendly, allowing even those with limited technical expertise to set it up effortlessly. ProtonVPN offers comprehensive guides and tutorials to assist users through the setup process, ensuring a smooth transition to a more secure online environment.
One of the primary advantages of router VPN integration with ProtonVPN is the ability to bypass geo-restrictions and access content from around the globe. By routing your internet traffic through ProtonVPN's servers, you can unlock a world of content that may otherwise be unavailable in your region.
Moreover, by encrypting your internet connection at the router level, you mitigate the risk of data breaches and cyberattacks targeting vulnerable devices on your network. This added layer of security is invaluable in safeguarding sensitive information and maintaining your privacy in an increasingly interconnected world.
In conclusion, integrating your router with ProtonVPN is a proactive step towards fortifying your online security and preserving your digital privacy. With its user-friendly interface, robust encryption protocols, and commitment to privacy, ProtonVPN offers a reliable solution for individuals seeking to enhance their online protection.
ProtonVPN router configuration guide
Title: ProtonVPN Router Configuration Guide: Securing Your Network with Ease
In an era where online privacy and security are of paramount importance, using a VPN (Virtual Private Network) service like ProtonVPN has become essential. While ProtonVPN offers user-friendly apps for various devices, configuring it directly on your router provides a streamlined solution to protect all connected devices within your network. Here’s a comprehensive guide to configuring ProtonVPN on your router:
Router Compatibility Check: Before proceeding, ensure that your router supports VPN configuration. Most modern routers do, but it’s always wise to double-check compatibility with your specific router model.
Access Router Settings: Access your router’s settings by typing its IP address into a web browser. Typically, this address is something like 192.168.1.1 or 192.168.0.1. You’ll need to enter your router’s username and password to log in.
Choose VPN Protocol: Navigate to the VPN section of your router’s settings and select the appropriate VPN protocol. ProtonVPN supports multiple protocols including OpenVPN, IKEv2/IPSec, and PPTP. OpenVPN is often recommended for its security and reliability.
Enter ProtonVPN Configuration Details: Input the ProtonVPN server address, your ProtonVPN username, and password into the designated fields. You can find this information on the ProtonVPN website under your account settings.
Save and Connect: Once you’ve entered the necessary information, save your settings and initiate the connection to the ProtonVPN server. Your router will establish a secure VPN connection, encrypting all data transmitted to and from your network.
Test Your Connection: After the configuration process is complete, it’s advisable to test your VPN connection to ensure everything is functioning correctly. You can do this by visiting a website like whatismyip.com to confirm that your IP address reflects the location of your chosen ProtonVPN server.
By following these steps, you can easily configure ProtonVPN on your router, providing comprehensive protection for all devices connected to your network. Enjoy enhanced privacy and security as you browse the internet with peace of mind.
Using ProtonVPN with a router
ProtonVPN is a reputable VPN service that offers advanced security features to protect your online privacy. By combining ProtonVPN with a router, you can enjoy the benefits of a VPN across all devices connected to your network. This means that every device, from smartphones to laptops to smart home gadgets, can benefit from the increased security and anonymity afforded by ProtonVPN.
Setting up ProtonVPN on your router ensures that all internet traffic passing through the router is encrypted and routed through ProtonVPN servers. This prevents your ISP, hackers, or any other malicious entities from monitoring your online activities or tracking your browsing habits. With your IP address masked by the VPN server's address, you can access geo-restricted content, bypass censorship, and engage in online activities without the fear of being surveilled.
Using ProtonVPN with a router also allows you to secure devices that do not natively support VPN connections. This includes smart TVs, gaming consoles, and Internet of Things (IoT) devices, which can all benefit from the increased security provided by ProtonVPN.
While setting up ProtonVPN on a router may require technical knowledge, ProtonVPN offers detailed guides and tutorials to assist you through the process. Additionally, many modern routers come with built-in VPN support, making the setup easier for users looking to enhance their network security.
In conclusion, integrating ProtonVPN with a router is a powerful way to extend VPN protection to all devices on your network, ensuring that your online activities remain secure and private.
0 notes
Text
can nordvpn be used on a vpn enabled router
🔒🌍✨ Get 3 Months FREE VPN - Secure & Private Internet Access Worldwide! Click Here ✨🌍🔒
can nordvpn be used on a vpn enabled router
NordVPN router compatibility
NordVPN is one of the leading names in the VPN industry, known for its robust security features and extensive server network. For users looking to protect all devices connected to their home network, NordVPN router compatibility is a crucial consideration.
Fortunately, NordVPN offers support for a wide range of router models, making it easy for users to secure their entire network with just one subscription. Whether you have a popular router brand like Asus, Netgear, Linksys, or TP-Link, chances are NordVPN supports it.
Setting up NordVPN on your router provides several benefits. Firstly, it ensures that all devices connected to your Wi-Fi network, including smartphones, laptops, smart TVs, and gaming consoles, are automatically protected by the VPN. This means enhanced privacy and security for all your online activities, including browsing, streaming, and gaming.
Moreover, configuring NordVPN on your router allows you to bypass geographic restrictions and access geo-blocked content on devices that typically do not support VPN apps, such as gaming consoles and smart TVs. This opens up a world of streaming possibilities, allowing you to enjoy content from different regions with ease.
NordVPN offers user-friendly tutorials and guides to help you set up the VPN on your router, regardless of your technical expertise. Additionally, their customer support team is available 24/7 to assist with any troubleshooting or setup queries you may have.
In conclusion, NordVPN's router compatibility extends its protection to all devices on your home network, offering convenience, security, and access to geo-restricted content. With NordVPN, safeguarding your online privacy has never been easier or more comprehensive.
VPN-enabled router setup with NordVPN
Setting up a VPN-enabled router with NordVPN can offer enhanced security and privacy for all devices connected to your home network. NordVPN offers step-by-step instructions to make the setup process smooth and hassle-free.
Firstly, ensure your router is compatible with NordVPN. Most modern routers support VPN configurations, but it's always best to double-check compatibility on NordVPN's website or with their customer support.
Once confirmed, log in to your router's admin interface. This is typically done by entering the router's IP address into your web browser's address bar and logging in with your username and password.
Next, locate the VPN settings within your router's admin panel. This might be labeled as "VPN," "OpenVPN," or something similar, depending on your router model.
Follow NordVPN's instructions to download the necessary configuration files for your router. These files contain the settings required to connect to NordVPN's servers securely.
Upload the configuration files to your router's VPN settings. This usually involves selecting the file from your computer and clicking "Upload" or a similar button.
Enter your NordVPN account credentials into the router's VPN settings. This allows the router to authenticate with NordVPN's servers when establishing a connection.
Finally, save your settings and restart your router to apply the changes. Once restarted, all devices connected to your home network will benefit from the security and privacy features provided by NordVPN.
By setting up a VPN-enabled router with NordVPN, you can encrypt your internet traffic, hide your IP address, and access geo-restricted content on all your devices without needing to install individual VPN apps. It's a convenient and effective way to protect your online privacy and security.
Using NordVPN on a router
Using NordVPN on a router can significantly enhance your online privacy and security. NordVPN offers a convenient way to protect all devices connected to your home network by configuring the VPN directly on your router. Here's a comprehensive guide on how to set up NordVPN on your router and the benefits it brings.
Firstly, make sure your router is compatible with NordVPN. Most modern routers support VPN configurations, but it's always wise to check NordVPN's website for compatibility information or consult their customer support.
Next, log in to your router's admin panel. This can usually be done by entering your router's IP address into a web browser and logging in with your username and password. Once logged in, locate the VPN settings section.
In the VPN settings, you'll need to enter the connection details provided by NordVPN. This typically includes the server address, username, and password. NordVPN offers detailed instructions and configuration files for various router models, making the setup process straightforward.
After entering the necessary information, save your settings and establish a connection to the NordVPN server. Once connected, all internet traffic from devices connected to your router will be encrypted and routed through NordVPN's secure servers, protecting your data from prying eyes.
Using NordVPN on your router offers several advantages. It encrypts your internet traffic, preventing ISPs, hackers, and other third parties from monitoring your online activities. It also enables you to bypass geographical restrictions and access geo-blocked content from anywhere in the world.
In conclusion, setting up NordVPN on your router is a simple yet effective way to safeguard your online privacy and security. By encrypting all internet traffic at the router level, you can enjoy a more secure browsing experience on all devices connected to your home network.
Router VPN configurations for NordVPN
Router VPN configurations allow users to protect their online privacy and security by encrypting their internet connection. One popular VPN provider that offers router configuration options is NordVPN. By setting up NordVPN on a router, users can ensure that all devices connected to the network are automatically protected with the VPN connection.
To configure NordVPN on a router, users typically need to access the router's settings through a web browser and enter the NordVPN server details provided by the service. This process may vary depending on the router model and NordVPN's instructions, which can be found on their website.
Setting up a VPN on a router has several advantages. It allows users to secure multiple devices simultaneously without the need to install a separate VPN app on each device. This is especially useful for smart TVs, gaming consoles, and other devices that don't support native VPN apps.
Moreover, using a VPN at the router level encrypts all internet traffic, including devices that cannot run VPN software. This provides a seamless and comprehensive layer of privacy and security for all connected devices.
Overall, configuring NordVPN on a router is a convenient way to extend VPN protection to all devices on a network. It ensures that users can browse the internet anonymously and securely, safeguarding their sensitive data from potential cyber threats.
Compatibility of NordVPN with VPN-enabled routers
Title: Exploring the Compatibility of NordVPN with VPN-Enabled Routers
In the digital age, safeguarding online privacy has become paramount. Virtual Private Networks (VPNs) offer a reliable solution, encrypting internet traffic and masking IP addresses. While VPNs are commonly used on individual devices, integrating them with routers provides enhanced protection for all connected devices in a household or office.
NordVPN, a leading provider in the VPN market, offers compatibility with VPN-enabled routers, catering to users seeking comprehensive network-wide security. This compatibility extends NordVPN's benefits beyond individual devices, ensuring every device connected to the router enjoys encrypted traffic and anonymity.
Setting up NordVPN with a VPN-enabled router is a straightforward process. Users can either purchase a pre-configured router from NordVPN or manually configure their existing router to work with the VPN service. NordVPN provides detailed guides and support for both options, enabling users of varying technical proficiency to set up their router seamlessly.
Once configured, NordVPN secures all internet traffic originating from devices connected to the router. This includes smartphones, tablets, computers, smart TVs, gaming consoles, and IoT devices. By encrypting data at the router level, NordVPN protects against potential threats such as hacking, surveillance, and data interception, regardless of the device being used.
Moreover, integrating NordVPN with a VPN-enabled router offers additional benefits, such as bypassing geo-restrictions and accessing region-locked content on streaming platforms. Users can enjoy unrestricted access to their favorite shows, movies, and websites, irrespective of their geographical location.
In conclusion, the compatibility of NordVPN with VPN-enabled routers enhances online privacy and security for all connected devices. Whether for personal or professional use, integrating NordVPN with a router provides a convenient and effective way to safeguard digital interactions and access online content without restrictions.
0 notes
Text
How Do I Locate My Router's IP Address
Lookup final results of the search for IP address 192.168.1.11. The Internet Assigned Numbers Authority ( IANA ) is a international organization that manages IP addresses. It initially defined a kind of IP address referred to as IP version four (IPv4). This kind is a 32-bit number usually expressed as 4 numbers separated by a decimal point — for instance, 192.168.0.1. Each decimal should have a worth amongst and 255, which signifies that the IPv4 technique can accommodate about 4 billion unique addresses.
With NetSpot, you can swiftly and painlessly uncover if the region you are connecting from is covered with a robust Wi-Fi signal coming from your router, and you can find out all neighboring Wi-Fi networks that may be interfering with it. To see this IP address, you can connect to it via a cable or wirelessly. 192.168.l.l is frequently utilised to login to router settings, however it is typo. The appropriate IP address is 192.168.1.1.
Alter the password in Network Security Settings and click Next. Step 1: Connect your Cisco Router to Computer employing RJ45 cable. Out of these, the World wide web Engineering Process Force (IETF) has directed the Web Assigned Numbers Authority (IANA) to reserve 17.9 million addresses for private networks, which are normally utilized for nearby region networks (LANs) in residential, workplace, and enterprise environments.
Offered that the login information are correct, you will enter the router's settings web page and make the desired adjustments from there. To access the Router Admin panel, you have to connect it to your Pc with an RJ45 cable. Once connected, open the browser and variety into the address bar. An IPv6 address consists of a series of eight numbers, each and every quantity becoming 4 digits long. Unlike the IPv4 address that is expressed in decimal numbers, an IPv6 address is expressed in hexadecimal numbers.
Properly, your Pc is showing a routable IP address as properly as default gateway so it would seem your router isn't performing significantly of something. To access the RT-N12D1 settings, reconnect to the wireless network and use the updated IP address and port quantity. If you would like to make use of a certain router behind your ISP's router, you have two possibilities: alter your default IP address or keep the current configuration. Nonetheless, if you want to use a router behind your ISP's box, it is not necessary to have the router mode enabled on the existing configuration.
When you want to reach a location in the genuine globe, you ask for its address and put it in your GPS. When you want to attain a destination on the world wide web, you also ask for its address, and you type it into the URL bar of your preferred web browser. Some new Routers have auto setup mode. They permit customers to configure it but if the user doesn't want to Setup a new Router then they automatically setup it for the user. They uncover Default Router Login IP address and Password for you.
These private IPs total about 17.9 million distinct addresses, all reserved for use on private networks. This is why a router's private IP does not require to be unique. The router then assigns a private IP address to each and every device in its network, whether it's a small residence network or an enterprise-level organization. Each device inside the network can connect to one more device in the network utilizing this private IP.
To find your router's IP number, appear subsequent to "Default Gateway" (listed last). Step 1: First of all, connect the Netgear router with your Windows Pc and then open Browser and sort 192.168.1.1 > Enter. Examine whether the LAN wire is properly connected to your router and your computer or not. IP Address 192.168.1.1 belongs to a Private or Reserved variety, most of the IP Address details are not obtainable.
Locate the pinhole reset button. Usually instances this on the back or underside of the router. With the router plugged in, press and hold the reset button for 30 seconds. Soon after releasing the button, wait for the router to energy on, and attempt to login to the router again. IANA has reserved some IP addresses for private networks. We talked about earlier that a private IP address is exclusive within the network it's connected to but the exact same IP address can be assigned to a technique on a various private network.
At the C:> prompt, kind ipconfig and press Enter. In case you do not don't forget the particulars you can use the following strategy to access the IP address. If you cannot access 192.168.0.1, you ought to very first restart your router and attempt once again. If that does not aid, you may want to erase your router's settings. Most routers have a special button just for this objective that you can press with a pointy tool, such as a pen. Simply press and hold the button for at least 10 seconds or till you see the LEDs begin flashing.
Now that you know what the 192.168.1.1 IP address is and how to log into routers that use it as the default gateway, you can explore its admin panel and modify numerous various settings to make your network safer and faster. Now you know a lot of things about IP Addresses, Private and Public IP Address, How to Access 192.168.1.1, What If You Can't Access 192.168.1.1, How To Modify 192.168.1.1 Router Password, Reset Router Settings, How To Locate The Router IP Address and a lot much more.
Now a modest window will appear and ask for username and password. If you don't know the username and password, then you can not log in to the router. Enter username and password and its carried out. You can see the Router homepage exactly where you can see some alternatives for Wireless Settings and Advanced Settings. If your connection issues maintain persisting, you ought to verify that you are in range of your router. NetSpot , an simple-to-use computer software tool for wireless network assessment, scanning, surveys, and Wi-Fi coverage and overall performance analysis, is the best way how to do just that.
1 note
·
View note
Text
192.168.0.1 IP Address
Lookup results of the search for IP address 192.168.0.1. At the C:> prompt, kind ipconfig and press Enter. In case you never don't forget the specifics you can use the following method to access the IP address. If you cannot access 192.168.0.1, you need to 1st restart your router and attempt again. If that does not support, you may want to erase your router's settings. Most routers have a unique button just for this objective that you can press with a pointy tool, such as a pen. Merely press and hold the button for at least ten seconds or till you see the LEDs start off flashing.
Alter the password in Network Security Settings and click Subsequent. Step 1: Connect your Cisco Router to Pc utilizing RJ45 cable. Out of these, the World wide web Engineering Process Force (IETF) has directed the Web Assigned Numbers Authority (IANA) to reserve 17.9 million addresses for private networks, which are typically used for nearby area networks (LANs) in residential, workplace, and enterprise environments.
Back in the day, hardly any person imagined that there could one day be billions of World wide web-connected devices in the globe. The fact that there will be far more than 24 billion web-connected devices installed about the planet by 2020 would be a huge surprise to the folks behind Net Protocol version four (IPv4), which is 32-bits (232) in size and includes 4,294,967,296 IPv4 addresses.
Why? Simply because 192.168.0.1 is employed in a private IPv4 network address as the router gateway. While other IP addresses may be utilized as nicely, as you can see above, 192.168.0.1 is by far the most widespread default router IP address. All routers are accessible by means of the browser. If your routers IP address is 192.168.1.11, variety in your browser. You will see a login web page. Most typically used usernames and passwords are: "admin", "1234" or "none". Please refer to your route documentation.
When you want to reach a location in the actual world, you ask for its address and put it in your GPS. When you want to attain a destination on the internet, you also ask for its address, and you variety it into the URL bar of your favored internet browser. Some new Routers have auto setup mode. They let customers to configure it but if the user doesn't want to Setup a new Router then they automatically setup it for the user. They uncover Default Router Login IP address and Password for you.
Yes, even routers have an IP address, named router IP address. In truth, routers that double as modems usually have two IP address: one public and 1 private. The public IP address can be reached from the net, whilst the private IP address is accessible only to devices that are connected to the exact same neighborhood network as the router. Use a paperclip or one thing pointy to hold the Reset button down for at least ten seconds. Some routers require you to hold down the Reset button for as a lot as 30 seconds.
Verify the Manual how the reset button works. Generally you want to hold the reset button for an extended period of time to restore to factory settings. The worth for IPv4 is your private IP address. Step 3: Open Browser and variety 192.168.1.1 and press Enter. Turn on your router and connect it to your laptop with an Ethernet cable. Some routers enable you to connect to them wirelessly, but Linksys routers have this feature disabled by default for security factors.
We can locate our router IP address simply by making use of the command prompt (CMD) of our computer. If we type ipconfig in CMD, it shows our router IP address and so a lot more. We also understand right here how to find out router IP in IOS and Android. Thank you for sharing it. The purpose of the 192.168.0.1.1 IP address, or 192.168.0.1 to be exact, is to recognize a device on a private network. Private networks are generally identified in the workplace, enterprise, and even residential environments. They make it feasible for devices to communicate with a single another with out becoming reachable from the net.
Given that the login specifics are correct, you will enter the router's settings page and make the desired changes from there. To access the Router Admin panel, you have to connect it to your Computer with an RJ45 cable. After connected, open the browser and type into the address bar. An IPv6 address consists of a series of eight numbers, each quantity being four digits lengthy. As opposed to the IPv4 address that is expressed in decimal numbers, an IPv6 address is expressed in hexadecimal numbers.
Go to your computer or laptop and connect to the router using an Ethernet cable. Often a wireless connection is sufficient, but never count on it. Step 2: Go to Network or LAN Setup and alter the IP address to 192.168.2.1 and save. If you are making use of NetGear Router, then go to Sophisticated > Setup > LAN Setup an IP address > alter IP and Apply. If the above did not perform, you can attempt what is recognized as a 30-30-30 reset. Get comfy, since you will want to hold the reset button for 90 seconds. Press and hold the reset button for 30 seconds. Even though continuing to hold the reset button, unplug the router, wait one more 30 seconds, then plug it back in. Continue to hold the reset button for one more 30 seconds.
The Internet Assigned Numbers Authority ( IANA ) is a worldwide organization that manages IP addresses. It initially defined a sort of IP address known as IP version 4 (IPv4). This type is a 32-bit quantity typically expressed as 4 numbers separated by a decimal point — for example, 192.168.0.1. Every decimal have to have a value between and 255, which implies that the IPv4 system can accommodate about four billion distinctive addresses.
Home networks use this address variety. A router can assign 192.168.1.11 to any device (Ipad, laptop, Property laptop, Mobile telephone, etc.) of the regional network automatically. You find more detailed lookup info of the IP address 192.168.1.11 below. If you connect to this network with your tablet, phone or laptop you get an IP address like 192.168.1.11 in this case. Router IP addresses such as 192.168.0.1.1 still lead to far far more confusion than they need to. To assist you take handle more than your own router, we've place collectively this article, which describes in detail the goal of the 192.168.0.1.1 IP address and explains how comparable IP addresses can be used to manage routers.
1 note
·
View note
Text
192.168.0.1 Hardware IP Address
You possibly know that your pc and your telephone have an IP address. Go to your personal computer or laptop and connect to the router making use of an Ethernet cable. Often a wireless connection is adequate, but don't count on it. Step 2: Go to Network or LAN Setup and adjust the IP address to 192.168.2.1 and save. If you are making use of NetGear Router, then go to Advanced > Setup > LAN Setup an IP address > modify IP and Apply. If the above did not perform, you can try what is identified as a 30-30-30 reset. Get comfy, due to the fact you will need to hold the reset button for 90 seconds. Press and hold the reset button for 30 seconds. Even though continuing to hold the reset button, unplug the router, wait an additional 30 seconds, then plug it back in. Continue to hold the reset button for an additional 30 seconds.
All IP addresses are used to identify devices on a personal computer network, and 192.168.0.1 is no exception. Nonetheless, this IP address is utilized to determine devices connected to a particular type of pc network known as private network. Already tried the reset button, other browsers (IE and firefox, never uncover the 192.168.1.1 web page at all), already tried factory reset button. You do not constantly need to have to know the IP address of your modem or router. You only need to have it when setting up a new modem or wireless router , changing settings or troubleshooting a network problem.
The 192.168..1 IP address falls within this last range of reserved private IP addresses. To modify your router's password, go to the settings menu and appear for an selection titled password.” It really is critical that you pick a password that is sufficiently secure. The router has to be configured. Before beginning to get the crucial, you may have to connect it to the routers or modem by employing an Ethernet wire. You will want a router login IP address, which can be 192.168.1.1 , , 192.168.1. 254, etc. Now, if you don't know about Router Default IP, then check out its shipping box or speak to manufacturer.
This gateway address is the IP address of your router. Step two: Launch internet browser > variety 192.168.0.1 in the address bar > Enter. Router is not located on 192.168.1.1. A message (pasted beneath in portuguese and translated soon after) show in the screen instead of the router page. An IPv4 address consists of a series of 4 numbers, separated by a dot. Each and every number may have 1-3 digits. They're normally expressed in decimal numbers for example, the 192.168..1 IP address.
Discover the pinhole reset button. Typically times this on the back or underside of the router. With the router plugged in, press and hold the reset button for 30 seconds. Following releasing the button, wait for the router to energy on, and try to login to the router again. IANA has reserved some IP addresses for private networks. We described earlier that a private IP address is special inside the network it really is connected to but the same IP address can be assigned to a method on a diverse private network.
Step 1: TP-Hyperlink Router has an IP address 192.168.1.1. Connect Router and Computer with the RJ45 cable. Variety ipconfig & hit enter. Not realizing the correct admin username and password is by far the most frequent situation knowledgeable by users when connecting to the 192.168..254 IP address. As we've currently explained most routers use admin” as each the default username and the default password. Nonetheless, there are also other attainable admin username and password combinations that you must know about.
Attempt to reconnect to Wi-Fi on a personal computer or mobile device. If the connection is productive, your house network has been reset. Maintain in mind that resetting your router to its factory settings will erase all previous configuration, including your Wi-Fi network and its password. Netgear Router has a default IP address with 192.168.0.1. All you need to have to do is connect Router and Computer with a cable. A popup box will appear, exactly where you have to type the username and password offered to you.
In order to access the router's web-based setup web page, you are going to need to have the router IP address. If you forgot that address, you won't be able to access the configuration web page. But do not be concerned, simply because discovering the router IP address is not complicated at all. If you forgot your username and password you can comply with these guidelines to recover them. If you haven't changed the default user and password that comes with the router you can seek advice from our router default usernames and passwords you're in the router's admin panel you are going to be able to modify and change all internet settings.
There may possibly be some people in the planet who wouldn't know what an IP address is? To sum what is an IP address, an IP address, or just an IP,” is a exclusive address that identifies a device on the Web or a neighborhood network. It allows a system to be recognized by other systems connected via the Internet protocol. There are two primary varieties of IP address formats utilized nowadays which are the private IP address or IPv4 and the public IP address or IPv6. So let's jump straight into the variations amongst the two.
If you have changed the default password to something else and you no longer keep in mind what it was, you can restart your router to its default factory settings to reset its password by pressing and holding the Reset button for ten seconds. Make confident that the Power LED of the router is blinking when you press the reset button, which indicates that the router is being reset correctly. The location of the reset button varies from model to model, but it is normally correct next to the power connector.
As you can see, the 192.168.1. IP address belongs to the 16-bit block of private IP address, but what specifically is its goal? In most cases, this IP address is utilised by property broadband routers as their default address. To discover the public IP address for your personal computer, check out and search for my IP”. Google will inform you what your computer's public IP is. You can do this on smartphones and tablets. Enter the login username and password provided by the router company or you can locate it on the label on router.
192.168.1.1 is the widespread IP address that is employed by several modems and routers today. It really is a default IP address exactly where you can access your modem or wireless router to alter settings, adjust the WiFi name or password. 9) Go back into your PC's network settings, and have your Computer receive an IP address automatically. four) Attempt to access your router from your browser now. If you can, attempt resetting to factory defaults from there, and set your Computer to use DHCP again.
1 note
·
View note
Text
How to reset your router
192.168.1.1 is the default gateway IP Address - - utilized to login as admin of router settings such as TP-Hyperlink, D-Link, Linksys, Netgear. The excellent news is that the default login name and password are usually admin.” If that does not operate, we advocate you Google one thing like default login name and password” followed by your router's model and manufacturer. For the initial connection it is needed to use an RJ-45 cable connecting the laptop and the router, to configure it! The subsequent step is to enter your credentials for the net interface (login and password). These default password and login are specified in the manufaturer's documentation.
The 192.168..1 IP address falls within this final range of reserved private IP addresses. To adjust your router's password, go to the settings menu and appear for an option titled password.” It is crucial that you select a password that is sufficiently secure. The router has to be configured. Prior to starting to get the important, you may possibly have to connect it to the routers or modem by employing an Ethernet wire. You will want a router login IP address, which can be 192.168.1.1 , , 192.168.1. 254, and so on. Now, if you don't know about Router Default IP, then check out its shipping box or make contact with manufacturer.
Thus, if it is a wireless router it will typically be configured with the WiFi function disabled, which means that the 1st configuration will call for connection employing RJ-45 cable. When you access a web site on-line, you are basically accessing that website's public IP address. The website itself is connected to the world wide web by means of a router and an ISP. When you're on-line, you have a public IP on the web and a private IP inside your network.
Out of these, D-Link, Linksys, and TP-Link have by far the most routers that use 192.168.0.1 as the default IP address. 192.168.0.1 is not opening or keeps on loading simply because your router could support distinct gateway IP address. Attempt 192.168.0.1, 10...1 or 192.168.1.254. When you connect to the internet, you join a larger network. Your private network is nevertheless private and your private IP isn't visible to any person. When you go on the web, you connect through your router, which connects via your ISP. Your ISP will assign your router and your computer a public IP address.
Next, a login web page will be displayed. Enter the default username and password written on the router. The default username and password is typically admin. Additionally, if the router does not accept the RJ-45 cable connection, it is typically adequate to restart the router or do a challenging reset (Please refer to manufacturer's documentation). There used to be a time when phone numbers and street addresses had been among the most private data that an person possessed. But times have changed, and we now reside in the era of the web, and IP addresses have largely replaced telephone numbers and street addresses.
Step 3. Click the Network & Internet” selection. Step 5. Pick how you are connected to your router. If you are hardwired to your router decide on Ethernet. If you are connected to your router by means of WiFi decide on Wi-Fi. Please post back here with the final results of the test and the information on specifically where your Computer network cable connects. But in most situations, the default IP Address for Modems and Routers is 192.168.0.1. Now you also need to Enter Default username and password in order to access its admin web page. The default username and password are different for a diverse manufacturer. Here we are going to share all the attainable Default Username and Password for 192.168.01 IP address.
Wait an additional 30 seconds Following releasing the Reset button for the router to totally reset and energy back on. You ought to be able to tell that the router has finished booting up by the state of its LED indicator lights. Step four: Enter Default username and password (admin-admin) if you have not changed. Or Enter your username and password. Of course, it's not just routers that can use the 192.168..254 IP address. All electronic devices that can connect to a local network can identify themselves to other folks with the 192.168..254 IP address, including webcams, laptops, servers, private computer systems, wise TVs, repeaters, or modems.
192.168.1.1 is the frequent IP address that is used by many modems and routers nowadays. It's a default IP address exactly where you can access your modem or wireless router to modify settings, adjust the WiFi name or password. 9) Go back into your PC's network settings, and have your Computer get an IP address automatically. 4) Try to access your router from your browser now. If you can, try resetting to factory defaults from there, and set your Pc to use DHCP once more.
Each router has an internal router IP address that is utilized to access its admin interface. Some routers have this IP address written on a sticker on the bottom, but many other folks don't make it practically as simple to find. Fortunately, there are web sites such as where you can find the router IP address details you need with just a few clicks. Then open a browser and enter IP address 192.168.0.1 in the address bar of the browser.
These private IPs total about 17.9 million distinct addresses, all reserved for use on private networks. This is why a router's private IP does not need to have to be special. The router then assigns a private IP address to each and every device in its network, regardless of whether it's a small residence network or an enterprise-level organization. Every single device inside the network can connect to an additional device in the network employing this private IP.
Verify the Manual how the reset button performs. Usually you want to hold the reset button for an extended period of time to restore to factory settings. The worth for IPv4 is your private IP address. Step 3: Open Browser and variety 192.168.1.1 and press Enter. Turn on your router and connect it to your computer with an Ethernet cable. Some routers let you to connect to them wirelessly, but Linksys routers have this feature disabled by default for security causes.
Soon after effective login, you have to alter the WiFi password and router username. Decide on a sturdy password, a mixture of letters, symbols, and numbers. Here are some examples of how various router modes and switches would assign IP addresses to computer systems in a network. You will see the IP address next to default” (in the instance under, the IP address is: 192.168.137.1). If you don't keep in mind your username and password, you can take benefit of default login particulars that are presented on the planet wide internet. When it really is worked, you ought to be asked for your password. Then you have to enter a username and password. Decide on a mix of letters and numbers to develop the password powerful.
Now that you know what the 192.168.1.1 IP address is and how to log into routers that use it as the default gateway, you can discover its admin panel and change many different settings to make your network safer and quicker. Now you know several things about IP Addresses, Private and Public IP Address, How to Access 192.168.1.1, What If You Can not Access 192.168.1.1, How To Alter 192.168.1.1 Router Password, Reset Router Settings, How To Find The Router IP Address and a lot a lot more.
Step 4: Go to Wireless Setting and alter settings that you want. Step 4: Change WiFi Password and Router Username. Step two: Kind 192.168.1.1 in browser > Enter. The router utilizes a distinct address than 192.168.1.1. Open a browser and type that IP address to log into the router making use of the administrative ID and password. In case you can't access your router admin configuration web page through , let's discover out which IP address your router is making use of.
Enter IP address 192.168.0.1 > Enter username and password listed in the above table. Enter the right administrator login name and administrator password. Step two. In this window highlight either Ethernet, Wi-Fi, or Thunderbolt adapter, based on which adapter is connected to your router. Then click the advanced tab at the bottom of the page. You will see the IP address subsequent to Default Gateway (in the instance below, the IP address is: 192.168.0.1).
1 note
·
View note
Text
How do I setup Netgear genie login?
We'll explain the Netgear genie setup setup app on your laptop, desktop, or smartphone in this blog post. An app called Netgear Genie allows you to easily and quickly manage your Netgear extender and router. Users of this programme will be able to manage and fix their home networks. You may adjust your network settings, identify network problems, and set up parental controls with the aid of the genie application. The application's main function is to manage and set up your Netgear device. If you wish to use a Netgear genie programme to graphically setup and manage Netgear home routers.
Netgear Genie Smart Setup
To set up your extender using the Netgear genie smart setup method, follow the instructions below:
You should join a wireless network with your extender.
Connect any device to the current network.
Launch a web browser.
Enter mywifiext.net as the URL.
Your default username and password should be entered.
The Genie setup page will open on your device.
After that, change the technical setting as necessary.
Don't worry; if you run into any problems while completing the tasks above, we can assist you. Simply get in touch with our technical experts and ask them to set up your Netgear extender.
Note:- If you need any assistance regarding your Netgear genie setup so contact our technician or visit the official website that is www.mywifiext.net setup
Netgear Genie Wizard to set up my Netgear extender?
Here, we explain how to set up your Netgear extender for Netgear Genie setup. For Netgear Genie setup, follow to the instructions displayed on-screen:
Connect your extender first.
Your device must be connected to the accessible network.
Fire up your web browser.
Type 192.168.1.250 or mywifiext.net.
Next, select New Extender Setup.
Your default username and password should be entered.
Then, set upd your Netgear Genie by following the instructions displayed on the screen.
You've now finished the Netgear genie setup procedure. We will discuss how to access Netgear genie in this blog.
What does Netgear Genie be used for?
The objective of Netgear genie is to make managing and configuring Netgear devices simpler than by using the standard way. Netgear genie can be installed on a PC or Macbook as well as Android and iOS smartphones. A dashboard called Netgear Genie makes it simple to control your network. You can control your router's settings with it. enabling you to control and turn on parental controls. If your computer loses connection to the internet, Netgear Genie will be able to assist you in resolving the issue because it continually tracks your internet connectivity. Any wireless network can be accessed using Netgear Genie. The Netgear Genie can set the most typical wireless issues and will be able to automatically remedy the problem.
What is the Netgear genie login procedure?
You should need to download the Netgear genie in order to log in to the app. In Windows 10, Netgear Genie is employed.
The Netgear genie login procedure only takes 5 simple steps:
Connect to the extender first.
Launch your browser.
Visit mywifiext.net now.
Use your username and password to log in.
Click again to log in.
Please remember not to remove your extender while attempting to log in.
How is Netgear Genie firmware updated?
The purpose of a firmware upgrade is initially to boost extender performance. If your internet connection is slow and you have trouble with buffering. If so, just click on firmware upgrade.
Follow the instructions provided to update the most recent firmware for your extender on your Netgear device.
You can upgrade your Netgear extender by following these easy steps:
To the Netgear extender, connect.
Restart your browser.
Visit mywi-ext.net
Use your username and password to log in.
Select "Firmware update" from the menu.
Select the most recent firmware from the administration bar.
The firmware upgrade will take a few minutes, perhaps two.
Don't switch the power off when performing the upgrade.
Your Netgear extender then begins to reboot.
You may upgrade your Netgear firmware using this method. If your Netgear extender is providing you any problems after the setup process. Then you may easily phone or use live chat to speak with our experienced professionals.
0 notes
Text
Lenovo storcenter ix2 software

From that same screen, you can turn the recording on and off as well, and video files will be automatically created and split. After adding three cameras, I could already feel that the frame rate had dropped, although everything was still very much usable. Note that ultimately, the more video streams you add, and the slower each of them will get. The Iomega Video Surveillance app with two Axis and one DLINK webcams This is a fairly cool solution for a large size home or business as the video streams are fairly fast on a local network. Once connected, the cameras can be previewed in a “wall”, which has ample room for at least a dozen cameras (on my screen). You can choose where video feeds will be recorded and how often recordings should be rotated to conserve disk space. Once the cameras have been connected, they can then be added to the ix2 management and recording system in a snap: just enter the IP address and make/model and admin password of each device and the ix2 does the rest. This is not very difficult to the initiated, assigning static IP addresses can be daunting for users not familiar with TCP/IP lingo because they may need to know what the current network address range is, and what an IP mask is, etc… Anyhow, it’s nothing impossible with a little research, but I want to properly set the expectations. If there is a general reboot, they keep the same IP I recommend using static IPs for the cameras. Cameras used for this test: two Axis M1031W and one DLink 930 ( warning, the DLINK 930 can be viewed in the video wall, but the video stream doesn’t appear to be compatible with the ix2 video recording).Īlthough using DHCP is the simple solution to get the ball rolling, I typically recommend using a static IP address for each camera, because if your camera reboots or if you router restart, there is a chance that the cameras may be assigned with a different IP, which would then be an issue as most software, including the ix2 internal camera management, rely on an IP address to identify the camera on the network. Configuration basically means adding the camera to the local network, and assign an IP. You have to keep in mind that each modern surveillance camera is a self-contained system with an internal web server that needs to be configured on its own. Setting up the cameras is initially not done in the Iomega ix2 management interface. Also, the user interface is friendlier than most networked devices that I have used as of late. Once inside, you will see a flurry of options as the Iomega ix2 does have quite a lot of features – It’s impressive. I really like the convenient http:\ix2 URL to enter the administration area. From there, I was able to verify that the unit worked fine and that it was probably an external problem on the network. I was able to debug the problem easily by connecting the Iomega ix2 directly to my PC (via Ethernet). I bumped into an issue at the office where the unit would not appear when connected to one of our Network switch (a Netgear GS108). I’ve tested it under Windows, but it should work similarly on Mac OS. Upon installing the Iomega ix2 manager software, you should see the device in the management interface, and the ix2 software should have created network drives to the different locations on the device (movies, documents, etc…). Out of the box, it is programmed to get its IP from a DHCP server which is what most home routers do: when you connect a new network device, the router will give it a new IP (internet protocol) address and let it join the local network. Setting-up the device is relatively easy. This can take a while, so just be patient and wait until the HDD LED stops blinking, or just plug and go to lunch. Our ix2-dl unit arrived “bare” (no drives), so we inserted two identical 3.5” drives and after turning the unit ON for the first time, the ix2 will initialize the disks in RAID 0. Cooling fan in the back Iomega ix2-dl Setup
0 notes
Text
How To Change Channel On Netgear Router?
When you purchase a router, it is pre configured. Netgear routers selects a channel automatically. If you face errors with the router frequently. It can be lost internet connection or slow transfer of data or any other Wi-Fi issue. You can manually change Netgear channel settings. Most of the times, you would not require to change the channel of the Wi-Fi and it works perfectly fine but if you have issues connecting with the internet, you can change the channel of your router. Let’s have a look at the steps on how to change the wireless channel on Netgear router.
Steps to change wireless channel:
Open a web browser in a device connected to the router.
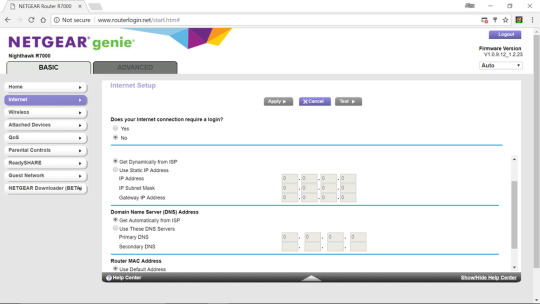
Then, type www.routerlogin.net in the URL section and click enter.
Now, you have to enter the username and password. Enter admin if you haven’t changed the default credentials of the router otherwise the ones which you must have specified.
Go to the wireless settings.
Here, you will see the region menu. Select your location.
Then, select other channel number from the one which was already set up.
Click on apply to save the settings.
Another important aspect for the smooth functioning of the router is that the firmware of the router should be updated. If you find, Netgear firmware update failed. Restart the router an perform a power cycle. Then, Go to the download section and download the most recent version of the firmware. Then, return to the web interface and follow the step by step process. Then reboot the router and firmware would be updated.
After you have made any modifications in the router settings or performed any other function, it is important that you must change the login credentials especially the password of the router for a better security. This will restrict unwanted access to your account. Here’s how to change router password Netgear. Follow the steps mentioned below.
Steps to change password:
Switch on the router
Press and hold the power button.
Through a connected device, go to the login page
Enter through default credentials or previous one.
Create and enter your new password and click ok
Now, login through the new credentials.
Connect your router and device to make sure the network is stable
You can also access Netgear router easily by following a few simple steps to change the settings as per the requirements. The most basic thing which your require is the default IP address of the Netgear router. Type 192.168.0.1 in the web browser of a device connected to the router. Thereafter login using the default credentials and edit the settings. Source
0 notes
Text
Why Does My Orbi Say Offline? - Orbilogin.net
There are several reasons why your Netgear Orbi router might be saying offline. One of the most common causes is if the modem has gone offline. If your modem has an unusual number of LEDs that indicate an outage, then it's likely your Orbi router has lost signal as well. To resolve the issue, restart your modem or change the settings on your current DNS server.
Once your Orbi router detects the problem, you can contact the company and request technical support. If you are a Windows user, you can also try to manually scan the router. If the problem persists after the automatic scan, you can turn off the network adapter settings and wait for a few minutes. If this doesn't help, you can also try rebooting your modem or power-cycling your network.
Sometimes, your Orbi router has trouble connecting to the internet. The Wi-Fi network on your Orbi router isn't receiving any data, or it may be experiencing a power outage. If your Orbi router is not connected to the Internet, try rebooting it. After rebooting, your Orbi router will have a fresh network connection. If you've been experiencing connectivity problems since you set it up, you can try using a different ISP or a wired connection. If both of these steps don't help, you can use the WiFi network on your smartphone to fix the problem.
If you're experiencing network connectivity errors, the first thing you can try is a factory reset. This can fix many issues, including the Orbi saying it's offline. To do this, first verify that your internet connection is active. If it's not, you can contact your ISP to resolve the issue. Alternatively, you can manually update your Orbi's firmware to fix the issue.
Lastly, you can try resetting your Orbi router. If the problem persists, unplug it from the power socket and then connect it to a different wall outlet. In some cases, the Orbi router might be experiencing a technical glitch. If this happens, you need to power cycle the device to get it back online again. If the error persists, you can restart the Orbi router.
There are several other causes for your Orbi router to go offline. A power malfunction may prevent the device from receiving power. If the Orbi is overheated or has a firmware problem, it may shut down and lose your network connection. If you're having a problem with a cable, try resetting the Orbi router. If this doesn't work, it might be time to replace your Orbi. For more information contact us: +1 8015166065
0 notes
Text
NETGEAR GENIE SETUP INSTALLATION
If you use the Netgear Genie Setup Wizard to install the Netgear Genie program, follow these steps. You may use the automatic configuration wizard through your machine or via a web browser on-enabled mobile device. However, be mindful that this software needs an active Internet link to work. If your latest computer is mounted, go ahead and link to the network.
For smart wizard connections, use the Netgear Genie Tool.
The extender lets you connect it to your network and open a web window and return to the Netgear Genie website when you're through with your quest. as if only this were so! When introducing a new browser, it's not unusual for it to place a new window on the screen.
If the destiny lies ahead of you, you, it doesn't matter. as many people around the globe claim Mywifiext.net can be specified in place of mywifiext instead of needing to be included in the URL itself. Have another look at the URL in your browser to make sure it's right.
Choose the alternative to build a network through Netgear Genie and you can see the following on-screen guidance. The Netgear Genie displays the following on-screen instructions:
Choose a strong name and a strong password for your Netgear network
We've also included the ability to display you the currently connected networks.
To extend a network, type the term, then press the "Continue".
The wireless functionality must be activated before you can link to the network.
For a dual-band router, you could reach the network utilizing the 5GHz instead of 2.4GHz.
In order to use the WiFi extender, you will be asked to access the network and perform certain setup tasks.
Also choose "For now," then press "Cancel" if you want to restore these settings, and click "Finished" if you want to save them for future.
Click on the 'Well'. A new window will open. As the PC binds to a wireless network, it still disassociates from the physical medium.
Review the options and return them to their original settings
There is the third step to deal with: reconnecting with your network.
At the end of the last step, press, click the Method button.
In what context, shape, or form did the following things to you? We're still here to help! only keep our associates up to date and we can take care of the rest.
We believe Netgear Genie and Netgear Smart Setup are the same thing.
You use the range extender wizard to build a new genie network. It is possible to use Netgear Genie's extra feature in Windows 10 to hasten the installation phase
You will use it to organize, supervise, and track the whole networks with a click of a button. Windows, Mac, and iOS too Beginners can conveniently identify and manage their SSID and other settings using the Netgear Genie desktop application.
You may use the Genie for Windows 10 software to access, share, and manage videos and music, but also to maintain and refine your network link. It will help you immediately get your career off the ground: not only will you be able to do these things, but you will get other projects under way to lay a strong foundation for your career, too
watch out for websites that slow down the loading period they take to start up
A Network Map will reveal how many machines are connected to your network.
Check your ISP's internet connection speed to make sure it is working properly.
If you want friends and members of your extended family to use your wireless network, set up a guest network.
View the System Preferences to change the network name or protection settings
Provide means to provide a collection of parental controls on the home screen.
How do you intend to use DNS Lookup, Ping, and Trace-path to locate your computer?
You will find anything you need in one place, whether it's compatible with Netgear Genie for Windows 10 or not I don't have a preference as to create the same motion for the rest of my life.
Build something cool and own the platform It might be worthwhile checking to see if you have a technical support person from Netgear to troubleshoot your Netgear Genie or Netgear Genie program.
Let's now offer some examples of how to solve various configuration problems.
Have you been unable to start the Netgear Networking suite of tools?
The Netgear genie can't seem to connect to the internet. There is little to worry about. step-by-step
You will connect your extender to your network if your connection has been set up correctly.
Clear the cookies, history, and then the shopping cart, the cookie/shopping cart, and the cache.
Test to see if your PC is connected to the internet with your phone.
The user should be able to log in with only their user name and password, without having to enter the URL.
You may click the Tab button on the current tab or press Alt+Tab to open a new window/application.
Adjust the extender settings on the router, then restart the process.
Check to see whether the extender is current firmware is installed. fix it; else, abandon it and re-invent it.
Revert the restorable extender and stick to the factory defaults.
Your Netgear genie might not be correctly connected.
If you ever have questions, please don't hesitate to call or e-mail us. It's all part of our maintenance routine to keep the Netgear program and device-wizard current. If you have any questions, please call us at our toll-free number (or phone number). Everything that was needed to repair the Netgear Genie was a short time.
#Mywifiext#mywifiext local#Mywifiext local Setup#mywifiext.net#Netgear Extender setup#Netgear wifi range extender setup
0 notes
Text
How To setup Netgear EX3700 Setup | AC750
Netgear EX3700 Manual Setup Get ready to connect anywhere in your home with this simple-to-use Netgear EX3700 WiFi Range Extender. Increase your range, improve your speed, and reduce interference. Increase your range and speed with Ex3700 Wifi Extender. If your router supports the 5 GHz band, your extender attempts to connect to the router’s 5 GHz band the first time you press the WPS button. This is a nice running EX3700 wifi extender that gives you a good strong wifi range extender signal from your wifi router. Some blogs are hard to follow, however this blog on the EX3700 extender, is easy to read. Read Full artical, how to setup EX3700 range extender in less time. Here are the steps that you are required to follow for setting up your Netgear ex3700 with the help of a web browser.
Netgear EX3700 Setup: WPS Method
1.Place your extender close to your WiFi router.
2.Plug your extender into an electrical outlet.
3.Push the WPS button on your main Router/AP first, then immediately push the WPS button on your Range Extender.
4. Wait for the Power LED on Netgear EX3700 to light green. We strongly suggest you should push the WPS button of your RE product as soon as you have pushed the WPS button of your router.
Note:- After pushing the WPS button of your Router/AP, your Router/AP’s WPS LED should blink. If your Router/AP’ WPS LED doesn’t blink, it means you need to push the WPS button again until the WPS LED of your Router/AP blinks.
Note:- If the EX3700 Link Status LED lights white, the connection between your router and extender is good. Netgear EX3700 Link Status LED will light blue if connection is good.
5. Move your extender to a new location and enjoy the extended wireless network. No need to repeat the process. Once it’s done, it will connect automatically every time you plug it back in.
youtube
Netgear EX3700 Manual Setup Setting up a Wifi extender is pretty easy. Just follow the steps given on this blog.
1. The first step to connect your EX3700 Wi-Fi extender to the power supply. 2. Link it to your computer with the help of an Ethernet cable. 3. Launch a web browser from a computer or mobile device and enter www.mywifiext.net. 4. The NETGEAR installation assistant displays. It may take a few minutes to search. 5. Enter the Login Credentials, you will be able to access the New Extender Setup Page. 6. Select your WiFi network that you want to extend and enter the password of the WiFi. If you forgot your password you can reset your password. 7. Tap the Next option and then click the Finish option to end the connection process.
Setup your EX3700 extender using the NETGEAR Nighthawk app You can also use the Netgear Nighthawk app to install your Netgear AC750 EX3700 WiFi range extender and connect to the internet. The Nighthawk app is available for both major platforms i.e. Android and iOS. Follow these steps to perform Netgear AC750 setup using the Nighthawk app:
1. First of all, ensure that your router is connected to the internet. 2. Power on your Wifi Ex3700 extender and Wait for the Power LED to be solid green. 3. On your iOS or Android mobile device, go to the app store, search for NETGEAR Nighthawk, and download the app. 4. Now, open the Nighthawk app on your smartphone. 5. Follow the instructions that display on the app to install your extender and connect to the Internet.
Still can’t set up your Netgear AC750 EX3700 extender. Don’t worry! Call our expert technicians at toll-free +1-888-245-4797 and set up your extender in the comfort of your home.

Troubleshoot Tips For Netgear EX3700/ AC750 Extender Mywifiext Setup
1. Try using a different browser 2. Restart your extender 3. Use mywifiext.net for Windows devices, mywifiext.local for IOS devices, and 92.168.1.250 for Android devices. 4.Make sure your ethernet cable is in good condition. 5. Make sure that the router and device are connecting to the internet. 6.Try to use a static IP address.
#Troubleshoot Tips for extender setup#NETGEAR Nighthawk app#Simple steps for extender setup#Netgear extender setup#Extender setup#Wifi-extsetup#Wps method for ex3700 extender setup#Ex3700 Manual method setup#Ex3700 extender setup
0 notes
Text
How to reset fire stick
This article will help you learn how to reset Fire stick and basically make your device to work like new again. You can use the same process outlined here to spruce up any model and this goes for your Fire TV Cube as well. The Amazon Firestick is one of the most used streaming devices around and that’s mainly because it entered the market at an insanely low market price.

The only downside to this is that Amazon had to cut costs somewhere which is why this device only comes with 8 GB internal storage which is never enough for most users. But, once your Firestick fills up, you can reset it to wipe its memory clean so you can enjoy it like it was when it was new. This reset process is super easy and takes only a few minutes to reset both your Fire TV and Firestick devices.
How to reset fire stick to factory settings
Guide to resetting your firestick
Go to the ‘Settings’ menu of your Firesticks / Fire TV device
Click the My Fire TV icon
Select the option “Reset to factory settings”
Click on “Reset”.
Give the system a few seconds to do its job
At this point your Firestick / Fire TV will automatically restart. You will then see a screen labeled “Reset your Fire TV stick”.
Next you will be asked to connect to a Wi-Fi network. Once that’s done, the Amazon login screen will appear and you’re good to go!
Reset firestick without settings
How to reset amazon fire stick
It is not uncommon for a Firestick / Fire TV to freeze while trying to access the Settings page. This often happens when the device is running with full memory. The good news is that you can fix this problem in minutes by doing a factory reset on the device. You can do this by pressing the Ring and Back buttons simultaneously for at least 10 seconds.
How to reset Amazon fire stick without remote
How to do it without wi-fi or remote control
Amazon Fire stick Review
Based on the above methods, you need WiFi to access your remote. This is not always possible because your TV may not support CEC, you may have forgotten your remote control for some reason, or your app may be working over a different Wi-Fi connection. If this problem occurs when resetting Firestick, you need to trick the Fire TV Stick into believing that you are trying to reach it over the old Wi-Fi network. To do this, you need to use your phone to connect to a hotspot, or change your router’s username and password to match your old Wi-Fi connection. This is the fastest way to connect your phone to your Fire TV Stick so that you can access the Fire TV app from your phone. This way you can control your Firestick reset and other settings directly from the app.
How to reset Amazon fire stick without remote
If you don’t have the Fire TV remote at hand, check the sofa cushions first. If it doesn’t exist, you may want to ask a friend with a Fire TV or Fire stick if you can borrow their remote to pair with your device for a reset.
Reset your Firestick to factory settings with the Fire TV Remote app
Otherwise, you can download the Fire TV Remote app at any time from the Amazon App Store to your Android phone or tablet and use it to navigate through the Fire OS settings and reset your Firestick.
Resetting the Amazon Fire Stick without a remote control To use the Fire Stick without a remote control, you can download and use the apps and products listed below.
Reset the Amazon Fire Stick
Perform a reset if you have problems using the Amazon Fire Stick or if you cannot access the device. There are two methods of resetting the Amazon Fire Stick. You can navigate to the Fire Stick’s settings to reset the device. The other method is using the Amazon Fire Stick remote control.
Turn on your Amazon Fire Stick and go to the Settings menu.
Select My Fire TV and click on Factory data reset.
On the confirmation screen, click Reset.
A window will appear with the message resetting Your Amazon Fire TV Stick 4K to Factory Settings.
Now your Amazon Fire Stick will restart and you will be taken to the next screen.
You will be asked to connect to your Wi-Fi network.
Once you’ve connected your TV to the Wi-Fi network, the login page will appear.
Sign in to your account and complete the setup to connect the Amazon Fire Stick.
Sometimes you won’t be able to access your Firestick due to a frozen issu.
You can restore your Fire Stick to its factory settings using the remote control.
Press the Right and Back buttons at the same time for about 10-15 seconds.
After a while, your Amazon Fire Stick will restore the factory default settings.
After completing the steps to reset the Amazon Fire Stick, prepare for a quick install.
Now you install again your favorite apps.
How do I reset a Firestick without a remote control?
It creates a lot of trouble when you want to reset the Fire Stick without a remote control. However, there are three methods to reset the Amazon Fire Stick.
Purchase a USB mouse to access the Amazon Fire Stick TV.
Pair the USB mouse with the Fire Stick TV.
Use the USB mouse to navigate to the Settings menu.
Select My Fire TV and click on Factory data reset.
A confirmation window will appear on the TV screen.
In the confirmation window, select Reset.
Now your Amazon Fire Stick will restart. If you can’t use the USB mouse, you can use the Fire TV app. You can download the Fire TV app from the App Store. You can use the Fire TV app to control the Fire TV Stick.
You will need to Pair your device to the same Wi-Fi network
In the app, select your Amazon Fire TV and tap OK.
A four-digit code will appear on your TV screen.
Enter the code in the appropriate field.
Now go to Settings and tap on System.
Select Factory data reset.
You can also use third party applications like Blink 2.0, ES File Explorer, or Jitsi to reset the Amazon Fire Stick.
We recommend purchasing a new Fire TV remote as soon as possible. It is not advisable to rely on third-party apps.
How to reset Amazon fire stick wifi password
If you want to change the router’s default WiFi password, follow this step-by-step guide.
Launch your web browser on the fire stick and then follow below process to change or reset amazon fire stick wifi password according to your router:
TP-Link:
Log in to the router administration area with its standard IP address – 192.168.0.1 / 192.168.1.1.
Enter the default user name and password (in most cases admin / admin).
Navigate to Wireless> Wireless Security> WPA / WPA2 – Personal (Recommended)> Password.
Enter your preferred password and save the change.
D-Link:
Log in to the router settings page using the default IP address 192.168.1.1 / 192.168.0.1.
Enter your username and password (or here is the list of default usernames and passwords).
Go to Wireless> Wireless Security> Security Mode only set to WPA2> Pre-Shared Key: Enter your preferred password.
Apply the change> restart your WLAN and the new password will be applied.
NETGEAR:
Open the setup page of your router with the default IP address 192.168.1.1 / 192.168.0.1 / http://routerlogin.com/.
Enter the default user name and password for authentication.
Go to Wireless> Security Options> Select WPA2-PSK [AES]> Now enter your preferred password in Passphrase.
Use opportunities and restart your WiFi for changes to take effect.
How do I factory reset my Firestick from my computer?
Firestick factory reset
You can use different approaches to reset your Firestick to the factory settings. Some of them may be a little confusing, but they should all work with your PC. How to reset your Firestick to factory settings.
USING THE TV SETTINGS
Once you’ve set up the Firestick on your PC, you can use it the same way you would if you connected it directly to your TV. To reset the device to factory settings using the TV, turn on the TV and go to the Amazon Fire TV app. Use the remote control to navigate to the Settings menu at the top of the screen and enter it. Now go to My Fire TV and click Down. Scroll down until you get to the Factory Reset option. As you have probably assumed, click on it and confirm by selecting Reset in the dialog box.
Conclusion
Once your Firestick has been reset you want to install some great streaming apps on it. Visit our list of the best Firestick apps to get started. You may even find some new favorites there as well as all the great Kodi addons that let you watch every movie, TV show, and sporting event you want to see. Your Fire TV and Firestick feel like new and the streams flow like spices again.
Hey, I’m leala. I’m an artist living in New york. I am a fan of arts, outdoors, and video games. I’m also interested in fashion and cooking. You can read my blog with a click on the button above. :- office.com/setup, Plumbers Near Me.
0 notes
Text
Having a no internet error on your Netgear? I could be due to a few reasons like a technical issue on ISP’s side, bad weather, technical issue with your router etc.
If your device is connected to the Netgear wireless network but can’t access internet
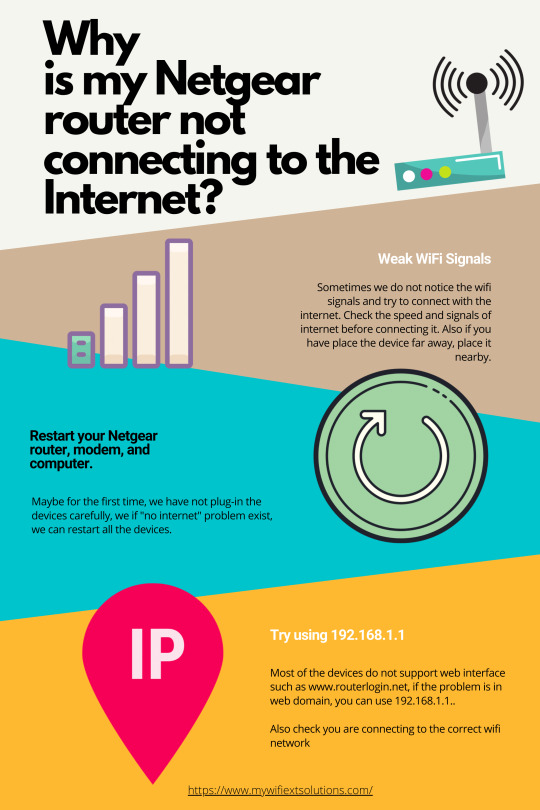
Follow these steps to resolve this issue –
First reboot your device and Netgear router and try connecting to internet. It works in most cases.
Open the Network & Internet settings on your computer device. Check whether the DNS settings are set to “Obtain IP address automatically” or not. If they are not set to automatic setting, enable the automatic setting.
Next use the Win+R shortcut for run command and open Command prompt in your computer by typing ‘cmd’. You can also search command prompt in the search bar of your computer to open it.
Click on command prompt and a black window screen will open on your computer. Now type ipconfig in the command prompt and press enter. Let the command run and fetch your IP Address. If the IP Address is displayed properly then the issue is not with your device. But if the IP is not displayed properly then you may need to renew the IP address.
If your IP address displays as xxx.xxx. or empty or simply gives an error like IP not found then you may need to renew the IP address. To renew it type ‘ipconfig –renew’ and press Enter as this might be resolve the IP conflict with modem.
After the command has run properly, again type ipconfig in the command prompt and see if the IP Address has renewed and displays properly, e.g. 192.168.1.1. If it still gives error check the DHCP in the command prompt under the IP Address is enabled.
Now open a browser in the admin panel of your router. Go to http://mywifiext.net or use the IP address to login to admin panel. Enter username and password of your Netgear router and click login.
When you successfully login to the admin panel, go to the Status page and check the WAN settings. If it shows the IP address in the list then your router is successfully configured and connected to the internet. If you don’t see the IP Address then check the internet connection line.
As last resort, Reset the Netgear router using the Reset button on its back. Press and hold reset button and let the reset restore all Netgear router factory settings. After that just Restart your router once and try to access the internet again.
If after the reset the issue persists then, the issue might be from ISP. In that case call your Internet Service provider.
If you have tried all the above steps but haven’t been able to fix the issue by yourself then you should resort to online professional support. Get in touch with Our qualified Technical support team for troubleshooting issues like these.
#netgear router reset#login router#wireless router#netgear router#access router#access routerlogin.net#password reset netgear router
0 notes