#ON A LVL 160 BOSS TOO
Text
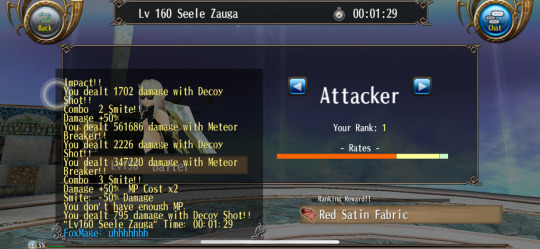
New max damage!! *^* My meteor has now reached 900k
#toram online#lol my silly toram life ;.;#the adventures of baltiboo#I CANT BELIEVE IT#I NEVER THOUGH THIS WAS POSSIBLE#ON A LVL 160 BOSS TOO#Im so happy about this
5 notes
·
View notes
Text
Mitigation made Manifest - A Scholar Analysis

Hello everyone, and welcome to the first part of my analysis series! Today we're going to be taking a look at the titular Scholar job, as well as delve into how it works, what it excels at, what it comes short on, and how well it is designed!
In an effort to keep everything organized, I'll section off this post into 4 main portions. If you're on a computer, you can use ctrl+f (or command+f if you're on a mac) to search for the following headings:
[ Basics ]
[ How Scholar Works ]
[ Gameplay, Tips and Design ]
[ Final Evaluation ]
With that out of the way, let us begin!
[ Basics ]

Before we dive into Scholar, I believe I must go over a few things, the first being the issue of Scholar’s origin. Scholar, and by extension, its sibling, Summoner, have a unique system wherein they originate from the same base class, Arcanist, and also share each others’ levels (i.e if you level Summoner to 71, your Scholar will also be 71). As per most jobs, many of the base class’ actions translate to its advanced jobs, but the issue comes in its respective role - Arcanist is a magical dps. For Summoner, this is a fine transition as they share this role, but for Scholar, it is a tad awkward. At no point in your time as an arcanist are you ever really taught how healing in FFXIV functions, nor is it ever your ‘job’. The only real healer you can even start the game with is Conjurer, and beyond that, if you want to pick up a healer on the side without a level skip, only Astrologian and Conjurer are healers right out of the gate. As such, It’s hard to recommend Scholar as someone’s first healer as its levelling experience does not translate to how healers are played effectively.
Though, on this topic of effective healer play, I also feel the need to describe XIV’s healing design. At its core, a healer’s job is to obviously keep the party, and most importantly their tank, from dying. But, this is where some issues arise. In higher-end content, a healer is expected to also carry their weight in terms of DPS, and should have comparable RDPS (Damage taking into account buffs/debuffs applied) to that of a party’s tanks. This brings me to the focus of XIV’s healer philosophy: One is to balance the healing they must do with the damage they output. Spending all of your MP on healing is forsaking your duty to at least deal some damage, and only doing damage will obviously cause your party to die. Healing is essentially a game of ‘how low can I go?’, and as you gain more experience and comfort in the role, you can push that threshold lower and lower.
As for more general terms to be aware of, I shall make a small list!
DPS/ADPS/RDPS: Damage per second/Actual damage per second/Raid-contributing damage per second. These are terms used mostly by raiders to quantify how much damage is contributed. For classes that have buffs and debuffs, their DPS/ADPS do not accurately show their true damage, but their RDPS takes into account the bonus damage their buffs and debuffs have granted.
Slidecasting: A term describing the leniency that cast times are given in this game because of server connection. For all spells, you do not have to be sitting through their entire cast bar, as they can instead be cut short so that one can still move while in the last bit of their cast. When one can slidecast a spell is dependent upon the cast time of the spell and the spell speed of the individual.
HoT/DoT: Heal over time, Damage over time.
GCD/OGCD: Global Cooldown/Off-Global Cooldown. Spells and weaponskills operate off of something called a ‘GCD’. A GCD is essentially a lockout until you can cast your next spell/weaponskill. For spells, as they have a cast time equivalent to their GCD, you can cast another right after you finish the first. By default, this GCD is 2.5 seconds for every class, and is reduced by abilities and skill/spell speed. But for weaponskills/spells that are classified as instant, that GCD lockout can instead be used to move or to use OGCD’s, namely abilities, that aren’t constricted by the GCD. The use of OGCD’s during a GCD lockout is called...
Weaving: Using OGCD’s during a GCD lockout. Using just one in this timeframe is referred to as a single weave, and using two is referred to as a double weave. For SCH, you want most weaves to be double weaves.
Ghosting: The bane of all arcanist-based classes. Unfortunately due to the AI of pets in this game, there is a delay between when you input an action and when your pet performs it, and a general delay in all pet actions if you are moving and they have to catch up. Sometimes when inputting abilities too quickly or using a demi-summon as actions are queued (like Summon Bahamut, Phoenix Trance and Summon Seraph), the queued action will either be delayed or never go off, but will still go on cooldown. Hence the term ‘ghosting’.
[ How Scholar Works ]

Now with the basics made clear, we can get to the actual meat of this analysis! In FFXIV, there are two denominations of healers: Shielding and Pure. Scholar falls into the prior classification as most of its kit is themed around the prevention of damage. Adloquium and Succor, for example, heal less than White Mage’s Cure II and Medica II, but apply a shield equivalent to 125% of the health restored. As such, Scholar is less of a reactive healer, but more of a proactive one; they set up their resources in advance so that the fight flows with less chaos. Scholar’s base kit is as follows:
Ruin/Broil I, II, and III: Your standard damage spell for a healer. Cast this when you’re not healing.
Bio/Bio II/Biolysis: Your standard DoT spell for a healer, ticks 10 times over 30 seconds. Make sure to always have this on the enemy, that is unless the enemy is about to go away, or will die in 15 seconds or less. if this spell sticks to a target for more than 15 seconds, then it technically has outdamaged 1 broil, thus making it a theoretical gain!
Physick: The basic heal for a healer; heals for about 400 potency. Once you get to a higher level, you should realistically never touch this heal again.
Adloquium (Lvl 30): Scholar’s ‘big single target heal’; heals for 300 potency while erecting a shield equivalent to 125% of the healing done (technically 675 potency in total). Shields generated by this are denoted by the ‘Galvanize’ buff. If this crits, bonus shields will be added as another buff called ‘Catalyze’. This shield does not stack with itself, Succor, Seraphic Veil, or Nocturnal AST’s shields.
Succor (Lvl 35): Scholar’s AoE heal; heals for 180 potency and erects a shield equivalent to 125% of the healing done (technically 405 potency in total). Shields generated by this are denoted by the ‘Galvanize’ buff. Like Adlo, it does not stack with what was listed above.
Ruin II (Lvl 38): An instant cast version of ruin. It’s potency upgrades as you level, capping at 200 at level 72. This spell is mostly used to weave OGCD’s, or to just generally move while not missing too many casts.
Art of War (Lvl 46): Your standard AoE spell for a healer. Deals 160 potency to all enemies in 5 yalms and is instant. Unlike Holy, this spell is a DPS gain on 2 targets or more.
Deployment Tactics (Lvl 56): As an OGCD, spreads the target’s Galvanize buff to all nearby allies within 10 yalms. Does not spread Catalyze.
Emergency Tactics (Lvl 58): Transforms the shields from Adlo and Succor into a flat heal. Useful in a pinch, hence its name, and gives Scholar a chance at outputting fat heals.
Chain Stratagem (Lvl 66): Where Scholar’s RDPS comes from. Applies a debuff to a target that increases the chance they receive critical hits from all allies hitting it by 10% for 15 seconds. Multiple of these cannot be applied to the same boss, and will overlap. Keep in mind its 120 second cooldown as it is crucial to getting better at Scholar!
Recitation (Lvl 74): Your next Succor, Adloquium, Excogitation, or Indomitability will always crit. In the case of Succor and Adlo, they will also not cast mana. In the case of Excog and Indom, they will not require an aetherflow stack. Mostly used to cast excog/indom through a double weave, and is immensely useful to make healing easier. 90 second cooldown.
To build off of my last point of resources, it’s high time to introduce two of Scholar’s best friends: Eos and Selene! Eos and Selene, as per SCH’s Arcanist base, are the pets for this job. Unlike carbuncles and egis, they do not deal damage, but instead use their actions to heal, and are crucial to Scholar’s gameplay. Also like the other pets, their action potencies scale differently as opposed to the player’s. For example, Eos/Selene’s Whispering Dawn skill has a listed regen potency of 120, meanwhile WHM’s Medica II regen has a listed potency of 100. One would think that Whispering Dawn would tick for more than Medica II, but through my testing, it is only about 86.8% as effective (due to number variation in FFXIV, this percentage is subject to change). The factor in which pet scaling affects your fairy’s heal is about 64%. With that little disclaimer out of the way, the Faeries’ kits are as follows:
Embrace (Lvl 1): A 150 (96 with pet scaling) potency single-target heal. This is what your fairy will do with its free time.
Whispering Dawn (Lvl 20): A 120 potency regen over 21 seconds (537 potency heal in total with pet-scaling). Due to FFXIV’s server ticks, HoT’s and DoT’s hit every 3 seconds, and as such, WD translates to about 840 potency (in terms of your pet’s scaling that is). This ability is activated by the player as an OGCD.
Fey Illumination (Lvl 40): A buff that reduces magic damage taken by all allies in range by 5% and increases their healing received by 10%. Lasts 20 seconds.
Dissipation (Lvl 60): Munch on your Fairy to gain 3 aetherflow charges and +20% healing magic. This does NOT AFFECT THE POTENCY OF YOUR OGCD HEALING. Your fairy will automatically respawn after the 30 second duration.
Aetherpact & Fey Union (Lvl 70): Designate an ally as an OGCD to form a tether between them and your fairy. Your Fairy gauge will then deplete by 10 every 3 seconds to apply a 400 potency (256 potency with pet scaling) heal. This tether will break after the target is 15 yalms away, if you cancel it by using aetherpact again, or if you use another fairy skill.
Fey Blessing (Lvl 76): As an OGCD, spend 10 Fairy Gauge to have your Fairy perform an aoe heal of 350 potency (224 potency with pet scaling).
Summon Seraph (Lvl 80): As an OGCD, replace your fairy with Seraph. Embrace now becomes Seraphic Veil, a 200 potency (128 potency heal with pet scaling) heal + shield.
Consolation (Lvl 80): Essentially Fey Blessing, but only available during Seraph. Heals for 300 potency (192 potency with pet scaling), and shields for the same amount. Has 2 charges per every Seraph summon, and the shield stacks with your own shields as well as a nocturnal Astro’s shields.
Now that those are out of the way, you must be thinking, “The fuck is fairy gauge and aetherflow?” Well, I’m glad you asked, as they’re both intrinsically tied to each other! Starting at level 70, every time you spend an aetherflow stack, you gain 10 fairy gauge, pretty simple, yea? As for aetherflow itself, every 60 seconds you can cast the skill named, well, Aetherflow, to gain 3 stacks of it and recover 1000 MP. These Aetherflow stacks can be used on the following OGCD abilities:
Lustrate (Lvl 45): A 600 potency heal. Very straightforward, and often not used because of the value of the other options.
Energy Drain (Lvl 45): A 100 potency damaging OGCD. If you don’t need to heal, and you don’t think you need to heal for a bit, this is your go-to aetherflow dump. Also, if you’re attempting parses on Scholar, have fun using all your aetherflow on this.
Sacred Soil (Lvl 50): Create a bubble that reduces damage taken by all allies inside by 10% for 15 seconds. At level 78 this upgrades to offer a 100 potency heal (500 potency heal in total). Only costing 1 aetherflow gauge, having a 30 second cooldown, and lasting 15 seconds, this skill is INCREDIBLY GOOD, especially after the level 78 upgrade.
Indomitability (Lvl 52): A 400 potency AoE heal. Straightforward, but very effective because of its numbers.
Excogitation (Lvl 62): An 800 potency heal that triggers when the target falls under 50% HP, or if its 45 second duration ends. While it feels awkward to use for beginners, its usefulness is immeasurable. It is technically a higher potency version of Lustrate, with a slight cooldown and delay, but fills a more ‘fire-forget’ niche. Very useful inside of all settings but remember, it will not proc if the target will outright die to the damage before it triggers (i.e if a tank takes a tankbuster at 51% health, and the hit does 60%, excog will not proc.)
[ Gameplay, Tips and Design ]

Scholar, as I have stated, fills the role of a preemptive healer, especially with all of the mitigation present in its kit, as well as the existence of Excog. As such, this job sees a greater increase in effectiveness as you yourself learn a fight compared to a pure healer such as WHM/Diurnal AST. If you know when the party/raid-wide damage is coming, and you prepare accordingly with... Say, A sacred soil and a succor, that is a good chunk of damage you or your co-healer won’t have to heal, thus affording both of you more time to deal damage. Inside of higher end content, like savage raids, having said mitigation is both invaluable for progressing through fights, as well as streamlining and perfecting them. For a while, because of that fact, SCH was the unofficial ‘king’ of healers for a very long time, especially considering there used to be a lot more damage inside of SCH’s kit (rest in peace almost everything that made it unique lol). The start of Shadowbringers was when SCH was finally taken off of its throne, not by AST like many would think (also because it took quite the hit), but by WHM of all things. Thankfully through a series of buffs since 5.0, SCH would begin to see themselves slowly climb back and situate in a comfortable position, but while Scholar is in a good spot now, that does not mean it’s perfect.
Scholar’s ability to heal pure HP is a bit lacking, especially so when dealing with attacks that place the party or specific players at 1 hp. SCH’s find themselves having to use multiple resources in trying to recover that lost HP, often losing much more damage uptime in comparison to WHM or AST (Which is why the ideal healing composition involves 1 pure healer and 1 shield healer). This usage of multiple resources also makes SCH a fair bit more punishing to inexperienced healers than AST or WHM. With the HP recovery of fairies being nerfed in Shadowbringers, much more of the agency is placed back upon the player, who in turn must pay attention to everything that the class has to offer. Obviously not all content is going to necessitate OPTIMAL PLAY, but with all the moving parts present within its kit, Scholar demands a bit more attention to be paid towards it and its skills.
Outside of a learning curve and lack of pure healing, Scholars are punished heavily for dying. Not only must they spend a GCD in resummoning their fairy, all fairy gauge and aetherflow stacks are also lost on death, and if aetherflow was on cooldown at the time, A SCH is going to not have a majority of their kit for awhile on top of having reduced healing due to weakness/brink of death. This once again lends itself to Scholar being less beginner-friendly as opposed to the other healers, even with the existence of freebie heals from your fairy.
Hell, speaking about fairies, therein lies an issue itself - Scholar being a pet class. Conceptually it’s awesome, but with how FFXIV handles pets/demi-summons and their AI, it’s also quite the hassle. Like I mentioned above, ghosting is a problem when it comes to pet classes, and if you don’t properly adjust around it, some of your cooldowns can simply just go poof. Weaving both Whispering Dawn and Fey Illumination in the same double weave will cause the one that’s cast later to cast quite a bit later. On top of that, if you’re moving while you’re weaving them, there’s a chance you’ll have to wait for the fairy to catch up to you to finally cast them (which is why placing your fairy pre-battle is very useful). And as a general rule of thumb, never use summon seraph right after you use Whispering Dawn or Fey Illumination. Wait until after you see the buff apply on everyone as using Seraph will cancel the queued action.
With all that being said, however Scholar is still highly effective in what it does, it just requires a bit of experience. While I can’t offer tutorials on every fight, there are a few general tips I can give for aspiring scholars out there!
[ Tips ]
(General Advice + Combos)
Double weaving on Scholar is rather straightforward, but if you're using Ruin II to do so after your Broil, it will be a technical DPS loss if you do not use an energy drain within the weave window!
Broil III has a potency of 290, Ruin II has a potency of 200, and Energy Drain has a potency of 100. In weaving without the use of energy drain, you will lose 90 potency in comparison to if you were to cast another Broil III. Using Energy Drain will add another 100 potency, thus gaining you 10 potency overall. Of course you shouldn't always dump an aetherflow on energy drain when you're weaving, but it is something to keep in mind when you are aiming to do more damage!
- Healing Combos -

[Single Target]
If you are AoE'ing, replace ruin II/Biolysis with Art of War!

[AoE Mitigation]
(Shield + 5% magic damage mitigation + 10% all damage mitigation)

[Panic AoE Healing]
(1029 potency AoE Healing)
As a bonus little tip in regards to this, remember Scholar's AoE healing spell/ability priority! The above combo is when you cannot afford time for a regen, but if you can, follow this list.
1. Whispering Dawn (if you can afford time for the regen)
2. Fey Blessing
3. Sacred Soil (if you can afford time for the regen)
4. Indomitability
5. Succor + Emergency Tactics
6. Succor
Scholars luckily have a wonderful mobility tool in Ruin II which allows them to position easily, though at the cost of DPS. However, this loss is minimal compared to its cohorts, wherein WHM either has to clip their Dia or use a lily, and AST either has to use Lightspeed, or slowly shuffle over with Malefics. This makes Scholar a bit easier to navigate when learning fights! Don't be afraid to use Ruin II if you're looking to push for a clear or learn a mechanic better, as a dead scholar is worse than one that is losing dps.
A crucial part of Scholar's kit is actually Chain Stratagem. While it loses much of its usefulness in public groups, or those who do not exactly care for proper rotations, when you can coordinate buffs and opening combos, it provides a large boost in DPS for the whole party. Typically, the ideal time to use Chain Stratagem is upon your 4th GCD, and everytime it comes off cooldown after, but this can change depending on your group. Here is an example 4th GCD Chain opener.

(Dungeons)
While AoE’ing mob packs, you can keep your focus target on the tank. It will make it much easier to heal them in a pinch.
Sacred Soil is essentially a free 15 second long cooldown for the tank, that ALSO heals at level 78 and above. It’s very, very useful.
Using Excog and adlo between pulls will allow you to spend more time AoE’ing mobs
Don’t forget about your fairy skills, especially fey union. Lazy mode is using fey union after whispering dawn, fey illumination and sacred soil and then proceeding to press art of war until the cows come home.
(Trials/Raid)
Recitation + Excog on your main tank pre-pull. Many use recitation+Adlo and then spread the shield with deployment tactics, but you don’t need to use recitation for that! Catalyze is the bonus shielding a crit adlo creates, and cannot be spread. Therefore save your recitation for a free excog and use a normal adlo+deployment tactics afterwards.
Please, please, PLEASE, if you are in a static or raid environment, make sure you allies stand in Sacred Soil when they can. It makes all of your lives easier.
Pre-placing your fairy in the center of the arena is a good habit to get in, but if you need your fairy AoE’s while you’re away from the center, make sure to press heel on your fairy hotbar to make it follow you again.
[Design]
Outside of all that, there is a collection of miscellaneous things that I do want to prattle off in relation to this category, mostly being some design choices and ideas I had for the class going forward. So, let’s begin!
Why does Fey Blessing not become Consolation when you have Seraph out? They are essentially the same thing, and you CAN’T EVEN USE FEY BLESSING WHEN YOU HAVE SERAPH OUT. WHY IS FEY BLESSING AND CONSOLATION SEPARATE BUTTONS. ANSWER ME SQUARE ENIX, TELL ME WHY.
There should be another way to dump Fairy gauge. It would make the system a bit more interactive (A lot like how lilies got an AoE version as well as Afflatus misery with SHB).
We should be able to cancel fey union in the middle of a cast. Breaking the tether does not have an animation nor any animation lockout, and in my eyes is technically not an OGCD. With this change, cancelling fey union can be done on the fly and not require a weave so as to not lose uptime.
The delay upon shield application is a tad annoying, especially so in the use of deployment tactics. Sometimes, if you cast too late, the boss’ Aoe will eat the heal, but not the shield. And in the case of the latter, if you use deployment tactics too quickly, you’ll spread nothing.
Bring back fairy uniqueness ;-;
[ Final Evaluation ]
Now comes time for my final grading.
Going forward with these Class Analyses, I will grade the class upon a set of categories unique to their role (DPS, Tank, Healer). As such, in my grading of Scholar, I will judge it based on the following categories, on a scale of F-S:
Damage (Personal) - The damage they bring to the table by themselves.
Damage (Raid setting) - The damage they bring based upon their RDPS potential
Accessibility - How easy is it to pick up and play?
Mitigation - How well can they prevent damage?
Healing - How well can they heal damage?
Fun - Well, is it fun?
Fantasy fulfillment - Does it fit the class aesthetics/lore?

Damage (Personal) [7] - While not as powerful alone as White Mage, Scholar is not entirely dependent upon team mates for damage like Astrologian.
Damage (Raid Setting) [8] - The addition of chain stratagem to Scholar’s already decent damage takes that one extra step beyond.
Accessibility [4] - Starts as a DPS in Arcanist, has many unique functions and is punished heavily if they die in the middle of a battle.
Mitigation [10] - They’re the originator of shield healers, and definitely keep the crown. Sacred soil is always going to be ridiculous.
Healing [6.5] - Scholar’s pure healing is a bit lacking, but with Square’s fight design, any healer should be able to make it through a fight. Therefore, I cannot rate Scholar all too low in this category.
Fun [7.5, almost 8] - Keeps you engaged, but lacks the pizzazz of Astro and the oomph of White Mage. Still a fun class at the end of the day, though!
Fantasy Fulfillment [9] - As tactical geniuses in the lore, the feel of Scholar gameplay fits that ideal! Through your mitigation, pre-planned abilities, and setting up of fairy abilities, you definitely feel like a tactician controlling the flow of battle, though it does falter a bit with a lot of their old options being removed in SHB.
[ End ]
And with that, we are done with this analysis! As for my personal conjecture with Scholar, it’s one of my mains, and used to be my go to raid healer, that is until my static needed a bit more upfront healing for e12s prog awhile back. If you were to look at my FFlogs, you’d probably see an absolute deluge of WHM parses since it’s uhh... Kinda technically my new healer main, but I still love SCH I swear! Another thing that made me switch from SCH to WHM was the inclusion of a DRK in our static. The ability to instantly remove Walking Dead with one button is so much easier than blowing cooldowns on both healers. Though, technically, from a savage perspective, the highest damage team setup is SCH + AST (Mostly because boosting teammate damage will always do more than just being good yourself, especially this late in the tier).
Anywho... This is the REAL end of the analysis. Hope you enjoyed and if you have any suggestions, questions or things to address, just comment and let me know!
Yabi, out~
28 notes
·
View notes
Last Seen Blogs

grmrper
memento mori

cherryblogss
maria

starstruckpersonknightzonk
Sin título

alyxfoot
alyx_foot

catsandtea-writing-blog
* Cats • Writing • Tea *