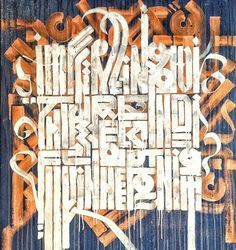
#ShadowStyle
Text
Elevate your Image with our expert Orginal shadow Photo Editing services.


Orginal Shadow Photo Editing
Editing an original shadow photo involves enhancing the visual impact of the shadows while maintaining the integrity of the image. This process aims to bring out details, depth, and mood within the shadows, resulting in a more dynamic and captivating photograph.
Contrast Enhancement: By adjusting the contrast levels, the distinction between light and shadow is amplified, leading to more pronounced shadows and highlights. This step adds depth and dimension to the image.
Brightness Adjustment: Fine-tuning the brightness helps balance the overall exposure of the photo. It ensures that the shadows are neither too dark nor too light, allowing for optimal visibility of details within the shadowed areas.
Color Correction: Correcting the color balance ensures that the hues within the shadows appear natural and harmonious with the rest of the image. This step may involve adjusting the temperature, tint, or saturation to achieve a cohesive color palette.
Selective Editing: Targeted adjustments may be made to specific areas within the shadows to enhance details or emphasize certain elements of the composition. This selective editing technique adds precision and control to the overall enhancement process.
Creative Effects: Creative effects, such as vignetting or toning, can be applied to enhance the mood or atmosphere of the photo. These effects add a unique aesthetic flair and contribute to the overall visual storytelling of the image.
Final Touches: Fine-tuning and refining the edits ensure that the final result meets the desired artistic vision. This may involve sharpening details, reducing noise, or applying additional adjustments to perfect the image.
Overall, editing an original shadow photo involves a balance of technical expertise and creative expression to transform a raw image into a visually compelling work of art. Through thoughtful editing, the inherent beauty and drama of the shadows are accentuated, resulting in a captivating visual narrative.
Visite More Details....
#ShadowEdit#ShadowArt#ShadowEnhance#ShadowAdjustment#ShadowPhotography#ShadowStyle#ShadowRefinement#pixcretouch#EditWithLove
0 notes
Text
Download Link
Pass: drop357
Adobe Photoshop 2024 Crack is a leading image editing software globally recognized for inspiring creativity. Used by millions of designers, photographers, and artists worldwide, it enables users to achieve remarkable results. Whether designing posters, creating website banners, or crafting memorable logos, Photoshop empowers users to push boundaries and bring ideas to life.
With its intuitive interface and innovative Adobe Sensei AI technology, Adobe Photoshop CC Full Version 2023 offers photographers a multitude of options, including black and white conversions, pattern brushes, painting tools, and depth of field adjustments. Additionally, it simplifies workflows with one-click theme selections and offers skin-smoothing effects for portraits.
Adobe Photoshop 2024 Crack introduces new features such as symmetry mode for precise painting, customizable axes, and predefined shapes like wheels, radials, mandalas, and spirals. The frame tool allows users to easily create shapes or text frames as placeholders on the canvas. Overall, Adobe Photoshop CC 2023 Full Version streamlines processes and empowers photographers to enhance and personalize digital images with ease.
#AdobePhotoshop#PhotoshopShadows#ShadowEffects#ShadowCreation#ShadowManipulation#DropShadows#ShadowTechniques#ShadowStyles#PhotoshopTips#PhotoshopTutorials
1 note
·
View note
Text
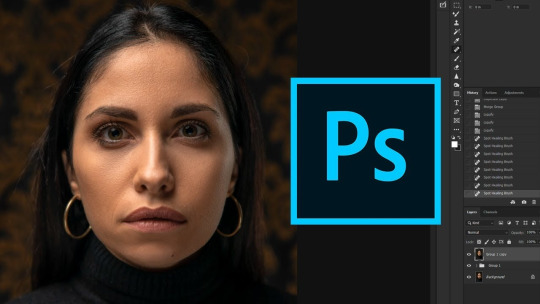
Download Link
Pass: drop357
Adobe Photoshop 2024 Crack is a leading image editing software globally recognized for inspiring creativity. Used by millions of designers, photographers, and artists worldwide, it enables users to achieve remarkable results. Whether designing posters, creating website banners, or crafting memorable logos, Photoshop empowers users to push boundaries and bring ideas to life.
With its intuitive interface and innovative Adobe Sensei AI technology, Adobe Photoshop CC Full Version 2023 offers photographers a multitude of options, including black and white conversions, pattern brushes, painting tools, and depth of field adjustments. Additionally, it simplifies workflows with one-click theme selections and offers skin-smoothing effects for portraits.
Adobe Photoshop 2024 Crack introduces new features such as symmetry mode for precise painting, customizable axes, and predefined shapes like wheels, radials, mandalas, and spirals. The frame tool allows users to easily create shapes or text frames as placeholders on the canvas. Overall, Adobe Photoshop CC 2023 Full Version streamlines processes and empowers photographers to enhance and personalize digital images with ease.
#AdobePhotoshop#PhotoshopShadows#ShadowEffects#ShadowCreation#ShadowManipulation#DropShadows#ShadowTechniques#ShadowStyles#PhotoshopTips#PhotoshopTutorials
0 notes
Text
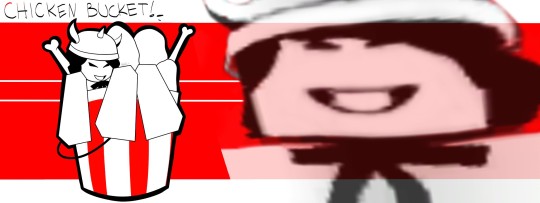
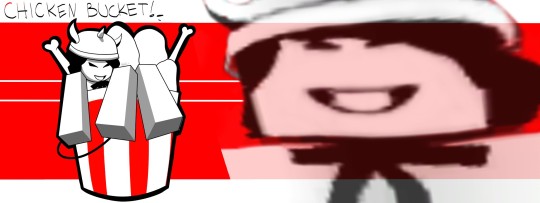
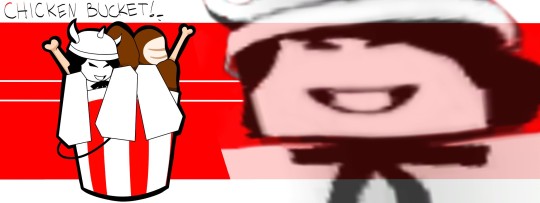
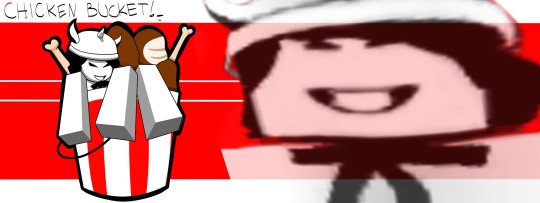
CHICKEN BUCKETTTTT!!!!
(here are a few versions I made 👇)


2 notes
·
View notes
Text
Caninetragedy > Shadowstyle. How was this url not taken what the fuck
3 notes
·
View notes
Photo
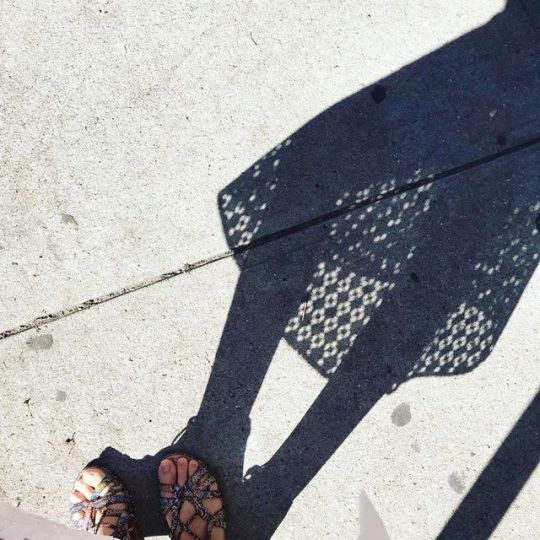
Summer Friday vibes. Sometimes the shadow is as good as the real thing. #summervibes #shadowplay #shadowfashion #shadowstyle #summer https://www.instagram.com/p/Bx2JLtSJC5z/?igshid=6vxt1o617l44
0 notes
Video
youtube
ORG「gansilverart」Giya and Dorsi Fureawa「White,black and shade
0 notes
Photo
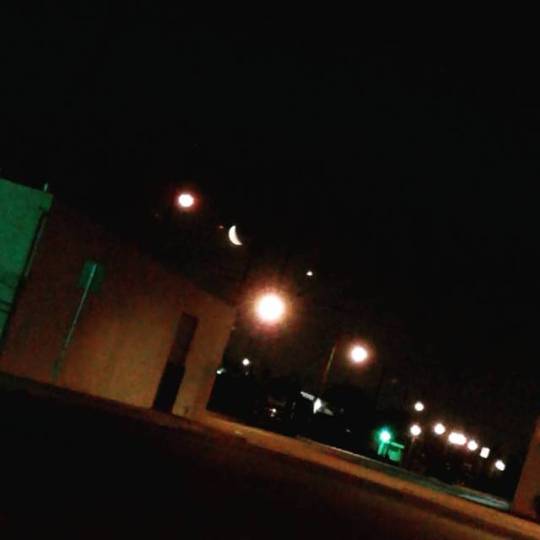
#BeachCityFresh #LBOriginals #WestCoast #NightScapes #InnerCityLife #MoonVibe #ShadowStyle
0 notes
Photo
For the Love of Money #calligraffiti #shadowstyle https://ift.tt/2Jmfzit
0 notes
Video
Final battle Jayd Illa concrete Allstars vs HiJack 808 Breakers at Shadow Styles 5 in Hawaii at Pow wow #hilife808 #monsterenergy #silverbackbboyevents #probreakingtour #udef #ShadowStyles #shadowstyles5 #floorlords @_jaydd_ @hijck #powwowhawaii
#hilife808#powwowhawaii#udef#shadowstyles5#silverbackbboyevents#probreakingtour#monsterenergy#shadowstyles#floorlords
0 notes
Text
Các Ấn Phẩm Khác
Các Ấn Phẩm Khác
Các Ấn Phẩm Khác
',
shadowStyle: 1,
padding: 20,
borderRadius: 4,
arrowSize: 20,
borderWidth: 1,
borderColor: '#EEE',
disableAutoPan: true,
hideCloseButton: true,
arrowPosition: 30,
backgroundClassName: 'phoney',
arrowStyle: 2,
position: myLatlng,
});
infoBubble.open(map, marker);
});
}
google.maps.event.addDomListener(window, 'load', initialize);
http://ift.tt/2rF1qCp
Coi thêm tại :
Các Ấn Phẩm Khác
0 notes
Photo
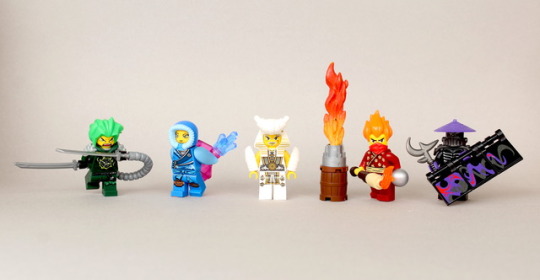
All Rights Reserved. Official Flickr: Valork75 (gofigure!)
From left to right...
Gaius - Swordmaster
Katara - Waterstyle User
Old Man Fu - Monk
Blaine - Canoneer
Golbez - Shadowstyle User
First post in a year and 4 months (first if its on tumblr although I’ll add the old pics soon). Since then, Iv'e been working on a "Legodex" of roughly 100 figs: 1/3 Ninja-themed and inspired by Naruto & several other animes, 1/3 Classic medival RPG style such as LOTR or D&D, and finally a third random themes such as gods, spirits, elementals, mythical creatures ect. This best yet to come !
#Shinobi#Ninja#Naruto#Lego#Figbarf#Fig-barf#MOC#Custom#Boruto#Brickwarriors#Waterbender#Avatar#Minifig#Minifigs#Minifigures#Monk#Canoneer#Swordmaster#Fantasy#Anime#Gofigure!
0 notes
Text
26 / abril / 17
Efectos tipográficos en canvas :
Cómo prevenir la multiplicación de alfa
En un ejemplo más complejo, como el efecto neón de Line25, se debe utilizar la propiedad shadowBlur para emular el efecto correctamente. Dado que el efecto neón depende de varias sombras, nos encontramos con un problema; en <canvas> cada objeto vector solo puede tener una sombra. Por tanto, para dibujar varias sombras, es necesario dibujar varias versiones superpuestas del texto. Esto tiene como resultado una multiplicación de alfa y, como consecuencia, bordes irregulares.
Intenté ejecutar ctx.fillStyle = “rgba(0,0,0,0)” o “transparent” para ocultar el texto, al mismo tiempo que mostraba la sombra... sin embargo, este intento fue inútil, ya que la sombra nunca puede ser más opaca que fillStyle porque la sombra es una multiplicación del valor alfa de fillStyle.
Afortunadamente, hay una forma de solucionarlo. Podemos dibujar la sombra alejada del texto, manteniendo ambos separados (de forma que no se superpongan) y ocultando así el texto que quede fuera de la pantalla.
var text = “Hello world!” var blur = 10; var width = ctx.measureText(text).width + blur * 2; ctx.textBaseline = “top” ctx.shadowColor = “#000” ctx.shadowOffsetX = width; ctx.shadowOffsetY = 0; ctx.shadowBlur = blur; ctx.fillText(text, -width, 0);
Cómo recortar alrededor del bloque de texto
Para limpiar esto un poco, podemos añadir una ruta de recorte para evitar que fillText se dibuje en primer lugar (al mismo tiempo que permitimos que se dibuje la sombra). Para poder crear una ruta de recorte que rodee el texto, necesitamos conocer el ancho y la altura del texto (llamada “altura Mt” por ser históricamente la altura de la letra “M” en las imprentas). Podemos obtener el ancho con ctx.measureText().width, sin embargo, ctx.measureText().height no existe.
Afortunadamente, gracias a este truco CSS (consulta este artículo sobre medidas tipográficas para conocer más formas de corregir antiguas implementaciones de <canvas> con medidas CSS), podemos calcular la altura del texto midiendo el valor de offsetHeight de un <intervalo> con las mismas propiedades de fuente:
var d = document.createElement(”span”); d.font = “20px arial” d.textContent = “Hello world!” var emHeight = d.offsetHeight;
A partir de aquí, podemos crear un rectángulo para utilizarlo como ruta de recorte, encuadrando la “sombra” mientras eliminamos la forma simulada.
ctx.rect(0, 0, width, emHeight); ctx.clip();
Si lo intentamos todo a la vez y lo optimizamos (si una sombra no tiene efecto borroso, se puede utilizar fillText para conseguir el mismo efecto, ahorrándonos el tener que configurar la máscara de recorte):
var width = ctx.measureText(text).width; var style = shadowStyles[text]; // add a background to the current effect ctx.fillStyle = style.background; ctx.fillRect(0, offsetY, ctx.canvas.width, textHeight - 1) // parse text-shadows from css var shadows = parseShadow(style.shadow); // loop through the shadow collection var n = shadows.length; while(n--) { var shadow = shadows[n]; var totalWidth = width + shadow.blur * 2; ctx.save(); ctx.beginPath(); ctx.rect(offsetX - shadow.blur, offsetY, offsetX + totalWidth, textHeight); ctx.clip(); if (shadow.blur) { // just run shadow (clip text) ctx.shadowColor = shadow.color; ctx.shadowOffsetX = shadow.x + totalWidth; ctx.shadowOffsetY = shadow.y; ctx.shadowBlur = shadow.blur; ctx.fillText(text, -totalWidth + offsetX, offsetY + metrics.top); } else { // just run pseudo-shadow ctx.fillStyle = shadow.color; ctx.fillText(text, offsetX + (shadow.x||0), offsetY - (shadow.y||0) + metrics.top); } ctx.restore(); } // drawing the text in the foreground if (style.color) { ctx.fillStyle = style.color; ctx.fillText(text, offsetX, offsetY + metrics.top); } // jump to next em-line ctx.translate(0, textHeight);
Introducir todos estos comandos de <canvas> manualmente es muy tedioso, por lo que he incluido un sencillo analizador de sombra de texto en el código fuente de la demo que permite convertir los comandos CSS a comandos <canvas>. Ahora, nuestros elementos <canvas> tienen toda una gama de estilos que se pueden utilizar. Estos mismos efectos de sombra se pueden utilizar en cualquier objeto vector, desde WebFonts hasta formas complejas importadas de SVG, para generar formas de vector, etc.
Ver efectos de sombra de texto en <canvas>
Imágenes 3D
Al escribir esta sección del artículo, el ejemplo estereoscópico despertó mi curiosidad. ¿Sería muy difícil crear un efecto de pantalla de película 3D usando <canvas> y dos imágenes tomadas desde perspectivas ligeramente diferentes? Aparentemente, no. El siguiente kernel combina el canal rojo de la primera imagen (data) con el canal cian de la segunda imagen (data2):
data[i] = data[i] * 255 / 0xFF; data[i+1] = 255 * data2[i+1] / 0xFF; data[i+2] = 255 * data2[i+2] / 0xFF;
Visita la demo de Stereoscopic para ver cómo crear imágenes para mejorarlas con gafas 3D (cian/magenta). Ya solo faltaría que alguien se pegase dos iPhones con cinta adhesiva en la frente y pulsara el botón de “grabar vídeo” al mismo tiempo para poder hacer una película 3D con HTML5. ¿Algún voluntario?
Efectos combinados: neón-arcoíris, cebra-reflejo
Combinar varios efectos en <canvas> es fácil, pero es necesario disponer de algunos conocimientos básicos de globalCompositeOperation (GCO). En comparación con las operaciones de GIMP (o Photoshop), existen 12 GCO en <canvas>. Dos de ellos, darker y lighter se pueden considerar modos de fusión de capas; las otras 10 operaciones se aplican a las capas como máscaras alfa (una capa elimina los píxeles de la otra). globalCompositeOperation une las “capas” (o, en nuestro caso, las cadenas de código), combinándolas de formas nuevas y emocionantes:
La gráfica globalCompositeOperation muestra los modos GCO en funcionamiento; esta gráfica utiliza una gran parte del espectro de colores y varios niveles de transparencia alfa para mostrar en detalle lo que se puede esperar. Yo recomendaría consultar las descripciones textuales de este documento de referencia sobre globalCompositeOperation de Mozilla. Para realizar una investigación más profunda, puedes ver cómo funciona la operación en este artículo sobre composición de imágenes digitales de Porter Duff.
Mi modo favorito es globalCompositeOperation=”lighter”. El modo lighter mezcla los píxeles añadidos de forma similar a como se mezcla la luz; cuando las luces roja, verde y azul están en su máxima intensidad, vemos luz blanca. Es increíble cuando la pruebas, especialmente cuando se establece en <canvas> un valor bajo para globalAlpha, permitiendo un control más preciso y unos bordes más regulares. Al modo lighter se le ha dado muchos usos. De los más recientes, mi favorito es un creador de fondos de escritorio en HTML5 que encontré en http://weavesilk.com/. Una de mis demos, Breathing Galaxies (JS1k), también utiliza el modo lighter. En los patrones de dibujo de estos dos ejemplos se puede empezar a ver los efectos que puede crear este modo.
NOTA: tenemos que solucionar algunas carencias de compatibilidad entre navegadores de algunos de los modos GCO. Seis de los modos funcionan en todos los navegadores (Chrome, Safari, Firefox y Opera): source-over, source-atop, destination-over, destination-out, lighter y xor. Esperamos solucionarlo en próximas versiones. Para obtener más información, consulta este artículo sobre cómo manejan globalCompositeOperation los navegadores.
Efecto de vibración neón-arcoíris
En la siguiente demo, vamos a conseguir un efecto neón-arcoíris-resplandor similar al de Photoshop con un contorno vibrante, al combinar efectos mediante globalCompositeOperation (source-in, lighter y darker). Esta demo es una progresión de la demo de “sombras de texto en <canvas>”, usando la misma estrategia para separar la sombra del texto (consulta la siguiente sección):
Ver efecto de vibración neón-arcoíris
function neonLightEffect() { var text = "alert('"+String.fromCharCode(0x2665)+"')"; var font = "120px Futura, Helvetica, sans-serif"; var jitter = 25; // the distance of the maximum jitter var offsetX = 30; var offsetY = 70; var blur = getBlurValue(100); // save state ctx.save(); ctx.font = font; // calculate width + height of text-block var metrics = getMetrics(text, font); // create clipping mask around text-effect ctx.rect(offsetX - blur/2, offsetY - blur/2, offsetX + metrics.width + blur, metrics.height + blur); ctx.clip(); // create shadow-blur to mask rainbow onto (since shadowColor doesn't accept gradients) ctx.save(); ctx.fillStyle = "#fff"; ctx.shadowColor = "rgba(0,0,0,1)"; ctx.shadowOffsetX = metrics.width + blur; ctx.shadowOffsetY = 0; ctx.shadowBlur = blur; ctx.fillText(text, -metrics.width + offsetX - blur, offsetY + metrics.top); ctx.restore(); // create the rainbow linear-gradient var gradient = ctx.createLinearGradient(0, 0, metrics.width, 0); gradient.addColorStop(0, "rgba(255, 0, 0, 1)"); gradient.addColorStop(0.15, "rgba(255, 255, 0, 1)"); gradient.addColorStop(0.3, "rgba(0, 255, 0, 1)"); gradient.addColorStop(0.5, "rgba(0, 255, 255, 1)"); gradient.addColorStop(0.65, "rgba(0, 0, 255, 1)"); gradient.addColorStop(0.8, "rgba(255, 0, 255, 1)"); gradient.addColorStop(1, "rgba(255, 0, 0, 1)"); // change composite so source is applied within the shadow-blur ctx.globalCompositeOperation = "source-atop"; // apply gradient to shadow-blur ctx.fillStyle = gradient; ctx.fillRect(offsetX - jitter/2, offsetY, metrics.width + offsetX, metrics.height + offsetY); // change composite to mix as light ctx.globalCompositeOperation = "lighter"; // multiply the layer ctx.globalAlpha = 0.7 ctx.drawImage(ctx.canvas, 0, 0); ctx.drawImage(ctx.canvas, 0, 0); ctx.globalAlpha = 1 // draw white-text ontop of glow ctx.fillStyle = "rgba(255,255,255,0.95)"; ctx.fillText(text, offsetX, offsetY + metrics.top); // created jittered stroke ctx.lineWidth = 0.80; ctx.strokeStyle = "rgba(255,255,255,0.25)"; var i = 10; while(i--) { var left = jitter / 2 - Math.random() * jitter; var top = jitter / 2 - Math.random() * jitter; ctx.strokeText(text, left + offsetX, top + offsetY + metrics.top); } ctx.strokeStyle = "rgba(0,0,0,0.20)"; ctx.strokeText(text, offsetX, offsetY + metrics.top); ctx.restore(); };
Efecto reflejo-cebra
El efecto reflejo-cebra se inspiró en el excelente recurso de WebDesignerWall sobre cómo animar tu página con CSS. Ahora llevamos la idea un poco más lejos, creando un “reflejo” para el texto, tal y como se vería en iTunes. El efecto combina fillColor (blanco), createPattern (zebra.png) y linearGradient (brillo); esto ilustra la capacidad de aplicar varios tipos de relleno para cada objeto vector:
Ver efecto reflejo cebra.
function sleekZebraEffect() { // inspired by - http://www.webdesignerwall.com/demo/css-gradient-text/ var text = "Sleek Zebra..."; var font = "100px Futura, Helvetica, sans-serif"; // save state ctx.save(); ctx.font = font; // getMetrics calculates: // width + height of text-block // top + middle + bottom baseline var metrics = getMetrics(text, font); var offsetRefectionY = -20; var offsetY = 70; var offsetX = 60; // throwing a linear-gradient in to shine up the text var gradient = ctx.createLinearGradient(0, offsetY, 0, metrics.height + offsetY); gradient.addColorStop(0.1, '#000'); gradient.addColorStop(0.35, '#fff'); gradient.addColorStop(0.65, '#fff'); gradient.addColorStop(1.0, '#000'); ctx.fillStyle = gradient ctx.fillText(text, offsetX, offsetY + metrics.top); // draw reflected text ctx.save(); ctx.globalCompositeOperation = "source-over"; ctx.translate(0, metrics.height + offsetRefectionY) ctx.scale(1, -1); ctx.font = font; ctx.fillStyle = "#fff"; ctx.fillText(text, offsetX, -metrics.height - offsetY + metrics.top); ctx.scale(1, -1); // cut the gradient out of the reflected text ctx.globalCompositeOperation = "destination-out"; var gradient = ctx.createLinearGradient(0, offsetY, 0, metrics.height + offsetY); gradient.addColorStop(0.0, 'rgba(0,0,0,0.65)'); gradient.addColorStop(1.0, '#000'); ctx.fillStyle = gradient; ctx.fillRect(offsetX, offsetY, metrics.width, metrics.height); // restore back to original transform state ctx.restore(); // using source-atop to allow the transparent .png to show through to the gradient ctx.globalCompositeOperation = "source-atop"; // creating pattern from <image> sourced. ctx.fillStyle = ctx.createPattern(image, 'repeat'); // fill the height of two em-boxes, to encompass both normal and reflected state ctx.fillRect(offsetX, offsetY, metrics.width, metrics.height * 2); ctx.restore(); };
Sombras internas/externas en Canvas
Las especificaciones de <canvas> no tratan el tema de las sombras “internas” y “externas”. De hecho, a primera vista, da la sensación de que las sombras “internas” no son compatibles. Este no es el caso. Simplemente es un poco difícil de habilitar ;) Como se propuso en una entrada reciente del blog F1LT3R, puedes crear sombras internas mediante las propiedades únicas de las reglas de rebobinado en el sentido y en el sentido contrario de las agujas del reloj. Para hacerlo, hay que dibujar un rectángulo contenedor para crear una “sombra interna” y, a continuación, con las reglas de rebobinado opuestas, dibujar una forma de recorte para crear el inverso de la forma.
El siguiente ejemplo permite que la sombra interna y fillStyle apliquen el estilo color+gradiente+patrón de forma simultánea. Puedes especificar la rotación del patrón individualmente; observa que las rayas de cebra ahora son perpendiculares entre sí. Al utilizar una máscara de recorte del tamaño del cuadro contenedor, se elimina la necesidad de un contenedor de gran tamaño para abarcar toda la forma de recorte, mejorando así la velocidad al evitar que se procesen las partes innecesarias de la sombra.
Ver efecto de sombra interna
function innerShadow() { function drawShape() { // draw anti-clockwise ctx.arc(0, 0, 100, 0, Math.PI * 2, true); // Outer circle ctx.moveTo(70, 0); ctx.arc(0, 0, 70, 0, Math.PI, false); // Mouth ctx.moveTo(-20, -20); ctx.arc(30, -30, 10, 0, Math.PI * 2, false); // Left eye ctx.moveTo(140, 70); ctx.arc(-20, -30, 10, 0, Math.PI * 2, false); // Right eye }; var width = 200; var offset = width + 50; var innerColor = "rgba(0,0,0,1)"; var outerColor = "rgba(0,0,0,1)"; ctx.translate(150, 170); // apply inner-shadow ctx.save(); ctx.fillStyle = "#000"; ctx.shadowColor = innerColor; ctx.shadowBlur = getBlurValue(120); ctx.shadowOffsetX = -15; ctx.shadowOffsetY = 15; // create clipping path (around blur + shape, preventing outer-rect blurring) ctx.beginPath(); ctx.rect(-offset/2, -offset/2, offset, offset); ctx.clip(); // apply inner-shadow (w/ clockwise vs. anti-clockwise cutout) ctx.beginPath(); ctx.rect(-offset/2, -offset/2, offset, offset); drawShape(); ctx.fill(); ctx.restore(); // cutout temporary rectangle used to create inner-shadow ctx.globalCompositeOperation = "destination-out"; ctx.fill(); // prepare vector paths ctx.beginPath(); drawShape(); // apply fill-gradient to inner-shadow ctx.save(); ctx.globalCompositeOperation = "source-in"; var gradient = ctx.createLinearGradient(-offset/2, 0, offset/2, 0); gradient.addColorStop(0.3, '#ff0'); gradient.addColorStop(0.7, '#f00'); ctx.fillStyle = gradient; ctx.fill(); // apply fill-pattern to inner-shadow ctx.globalCompositeOperation = "source-atop"; ctx.globalAlpha = 1; ctx.rotate(0.9); ctx.fillStyle = ctx.createPattern(image, 'repeat'); ctx.fill(); ctx.restore(); // apply fill-gradient ctx.save(); ctx.globalCompositeOperation = "destination-over"; var gradient = ctx.createLinearGradient(-offset/2, -offset/2, offset/2, offset/2); gradient.addColorStop(0.1, '#f00'); gradient.addColorStop(0.5, 'rgba(255,255,0,1)'); gradient.addColorStop(1.0, '#00f'); ctx.fillStyle = gradient ctx.fill(); // apply fill-pattern ctx.globalCompositeOperation = "source-atop"; ctx.globalAlpha = 0.2; ctx.rotate(-0.4); ctx.fillStyle = ctx.createPattern(image, 'repeat'); ctx.fill(); ctx.restore(); // apply outer-shadow (color-only without temporary layer) ctx.globalCompositeOperation = "destination-over"; ctx.shadowColor = outerColor; ctx.shadowBlur = 40; ctx.shadowOffsetX = 15; ctx.shadowOffsetY = 10; ctx.fillStyle = "#fff"; ctx.fill(); };
En estos ejemplos se puede observar que con globalCompositeOperation podemos combinar efectos, creando efectos más elaborados (mediante enmascarados y fusión). La pantalla es tu ostra ;)
Spaceage, efectos generativos
En <canvas>, es posible pasar del carácter Unicode 0x2708:
... a este ejemplo con sombra:
... ejecutando varias veces ctx.strokeText() con un valor bajo de lineWidth (0,25), al mismo tiempo que se reduce lentamente el desplazamiento de x y alfa, lo que daría a los elementos de nuestro vector la sensación de movimiento.
Si representamos la posición XY de los elementos en una onda seno/coseno y cambiamos de color mediante la propiedad HSL, podemos crear efectos más interesantes, como este ejemplo de “riesgo biológico”:
HSL: matiz, saturación y brillo (1978)
HSL es un formato compatible con las especificaciones de CSS3 desde hace poco. Mientras que HEX se diseñó para ordenadores, HSL se diseñó para que las personas pudieran leerlo.
Ilustración de la sencillez de HSL: para recorrer el espectro de colores, solo hay que incrementar el “matiz” a partir de 360; el matiz se representa en el espectro de forma cilíndrica. El brillo controla si el color debe aparecer más claro o más oscuro; 0% indica un píxel negro, mientras que 100% indica uno blanco. La saturación controla la viveza o la intensidad del color; los grises se crean con una saturación del 0%, mientras que los colores vivos se crean con un 100%.
Dado que HSL es un estándar reciente, sería aconsejable seguir utilizando versiones más antiguas de los navegadores, lo cual es posible mediante la conversión color-espacio. El siguiente código acepta un objeto HSL { H: 360, S: 100, L: 100} y genera un objeto RGB { R: 255, G: 255, B: 255 }. A partir de ahí, puedes utilizar esos valores para crear una cadena rgb o rgba. Para obtener información más detallada, consulta este artículo de la Wikipedia sobre HSL.
// HSL (1978) = H: Hue / S: Saturation / L: Lightness HSL_RGB = function (o) { // { H: 0-360, S: 0-100, L: 0-100 } var H = o.H / 360, S = o.S / 100, L = o.L / 100, R, G, B, _1, _2; function Hue_2_RGB(v1, v2, vH) { if (vH < 0) vH += 1; if (vH > 1) vH -= 1; if ((6 * vH) < 1) return v1 + (v2 - v1) * 6 * vH; if ((2 * vH) < 1) return v2; if ((3 * vH) < 2) return v1 + (v2 - v1) * ((2 / 3) - vH) * 6; return v1; } if (S == 0) { // HSL from 0 to 1 R = L * 255; G = L * 255; B = L * 255; } else { if (L < 0.5) { _2 = L * (1 + S); } else { _2 = (L + S) - (S * L); } _1 = 2 * L - _2; R = 255 * Hue_2_RGB(_1, _2, H + (1 / 3)); G = 255 * Hue_2_RGB(_1, _2, H); B = 255 * Hue_2_RGB(_1, _2, H - (1 / 3)); } return { R: R, G: G, B: B }; };
Cómo crear animaciones con requestAnimationFrame
En el pasado, para crear animaciones en JavaScript, había dos opciones: setTimeout y setInterval.
window.requestAnimationFrame es el nuevo estándar que va a sustituir a ambos; te permitirá ahorrar electricidad (y ahorrará esfuerzo a tu ordenador) al permitir al navegador regular las animaciones en función de los recursos disponibles. Algunas de las funciones más importantes son:
Cuando un usuario sale del marco, la animación puede ralentizarse o detenerse por completo para evitar el uso de recursos innecesarios.
El límite de velocidad es de 60 fps. La razón es que este límite está muy por encima del nivel de percepción humano (la mayoría de las personas ven de forma “fluida” una animación a 30 fps).
A la hora de escribir, es necesario aplicar los prefijos específicos de los fabricantes para utilizar requestAnimationFrame. Paul Irish ha creado una capa de corrección de compatibilidad para distintos fabricantes, disponible en la página requestAnimationFrame for smart animating:
// shim layer with setTimeout fallback window.requestAnimFrame = (function(){ return window.requestAnimationFrame || window.webkitRequestAnimationFrame || window.mozRequestAnimationFrame || window.oRequestAnimationFrame || window.msRequestAnimationFrame || function(/* function */ callback, /* DOMElement */ element){ window.setTimeout(callback, 1000 / 60); }; })();
Los más ambiciosos pueden ir un poco más lejos y combinarlo todo con un código polyfill como requestAnimationFrame.js (hay algunas funciones que hay que mejorar) para mantener la compatibilidad con versiones anteriores de los navegadores al aplicar este nuevo estándar.
En los siguientes ejemplos se muestra cómo crear una animación mediante el envío de miles de llamadas a strokeText a través de un alfa bajo sin saturar el navegador. Los controles son un poco extraños, pero los resultados son alucinantes:
Ver efecto Spaceage
(function animate() { var i = 50; while(i--) { if (n > endpos) return; n += definition; ctx.globalAlpha = (0.5 - (n + startpos) / endpos) * alpha; if (doColorCycle) { hue = n + color; ctx.strokeStyle = "hsl(" + (hue % 360) + ",99%,50%)"; // iterate hue } var x = cos(n / cosdiv) * n * cosmult; // cosine var y = sin(n / sindiv) * n * sinmult; // sin ctx.strokeText(text, x + xoffset, y + yoffset); // draw rainbow text } timeout = window.requestAnimationFrame(animate, 0); })();
https://www.html5rocks.com/es/tutorials/canvas/texteffects/
Elaborado por: Sebastian Cardozo Leon 10-A.
0 notes
Video
Web Underground Flow vs Hijack at Shadow Styles 5 these two made it to the top 4 and was not playing letting them skills go. #shadowstyles5 #shadowstyles #probreakingtour #monsterenergy #udef #powwowhawaii #hawaiihiphop #breaklife #bboy #battle #hilife #808breakers #undergroundflow #underground @hijck @ryanwebalmiranez #bayarea #hawaii
#shadowstyles#808breakers#powwowhawaii#bayarea#hawaiihiphop#bboy#monsterenergy#breaklife#battle#underground#probreakingtour#shadowstyles5#hawaii#udef#undergroundflow#hilife
0 notes
Text
Món Ngon Việt Nam
Món Ngon Việt Nam
Món Ngon Việt Nam
',
shadowStyle: 1,
padding: 20,
borderRadius: 4,
arrowSize: 20,
borderWidth: 1,
borderColor: '#EEE',
disableAutoPan: true,
hideCloseButton: true,
arrowPosition: 30,
backgroundClassName: 'phoney',
arrowStyle: 2,
position: myLatlng,
});
infoBubble.open(map, marker);
});
}
google.maps.event.addDomListener(window, 'load', initialize);
http://ift.tt/2qPpFP7
Coi nguyên bài viết ở :
Món Ngon Việt Nam
0 notes
Last Seen Blogs

laura-sagaz-gilbert
Los rincones de Ságaz

bennycurri
BENNY CURRI

hypmic-battlex3
"Battle Battle Battle" - English Cover

jeyradan
punk rock scientist
dovakiind
I Never Stoped Playing Skyrim