#The Selvedge Yard
Text
DENIM DUDES -- STREET STYLE, VINTAGE, WORKWEAR, OBSESSION | PRPS x TSY JEAN

View On WordPress
1 note
·
View note
Text

"Nancy Sinatra and Lee Hazlewood were an oddly powerful duo. His thinly-veiled lyrics of drugs and decadence were delivered with such wooden stoicism that nary a soil thought twice. But when Nick Cave himself cites you as one of his biggest influences– you must have been doing something wrong, oh so right. Hazlewood created a signature moody sound– filled reverb, space and mood a-plenty. Phantasmagoric, at times."
~ The Selvedge Yard
1 note
·
View note
Text
one of the most satisfying feelings in the world is ripping woven fabric along the grain to get good square pieces to sew with
#sewing#fabric#my sewing#in the sense that I am in fact preparing fabric to be sewn#I washed up three yards of that navy blue 100% silk satin that I ordered and then dried and ironed it#measured twice to figure out the three different rectangles I need#then just snipped through the selvedge and tore the rest of the way across in a nice crisp line#it's way faster and more accurate than cutting if you want to stay on the grain#and it makes SUCH a good noise#it's just so satisfying#2024 pillowcase project#and the little sleepmask I'm making the left-over fabric#should be a nice quick sewing project that results in immediately-usable items#which is nearly as satisfying as that ripping sound lol
5 notes
·
View notes
Photo
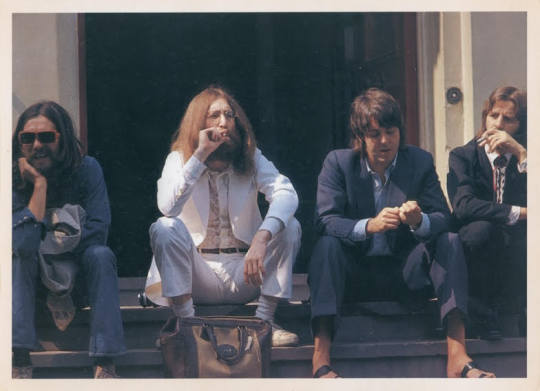

Photos by Linda McCartney.
August 8, 1969
Tommy Nutter on dressing John, Paul, and Ringo for the cover...
“Tommy Nutter dressed three out of the four Beatles for the Abbey Road album cover. True to his non-conformist roots, George Harrison opted to dress in denim.” - The Selvedge Yard, April 4, 2012
“Well, I dressed them. George Harrison is wearing denim — he was always a tricky bugger.” - Tommy Nutter to Timothy Everest, quoted in Yorkshire Post, October 31, 2015
For George and Mal, it was then on to Regent’s Park Zoo...
“[After the photo session] George and Mal [Evans] went to visit the Regent’s Park Zoo. They spent several hours wandering around the cages and animal houses and afterwards walked around Regent’s Park.
The extraordinary thing was that during the whole morning absolutely no one recognized George Harrison. Perhaps there are so many similar haircuts in London these days that no one spares a second glance for anyone with long locks.” - The Beatles Book, September 1969
* * *
“I didn’t know at the time that it [Abbey Road] was the last Beatle record that we would make, but it felt as if we were reaching the end of the line.” - George Harrison, The Beatles Anthology
#George Harrison#Ringo Starr#Paul McCartney#John Lennon#The Beatles#Linda McCartney#quote#quotes about George#quotes by George#Tommy Nutter#Abbey Road#Mal Evans#et al.#fits queue like a glove
314 notes
·
View notes
Text
Steal this look:
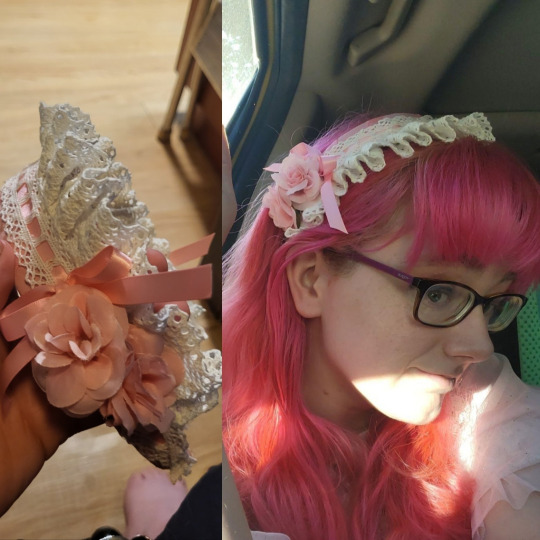
Recently, I've been feeling the need to build a few more easy and cheap lolita tutorials. In the interest of getting back to the budget lolita roots, I thought it was time to give this old post a remake:
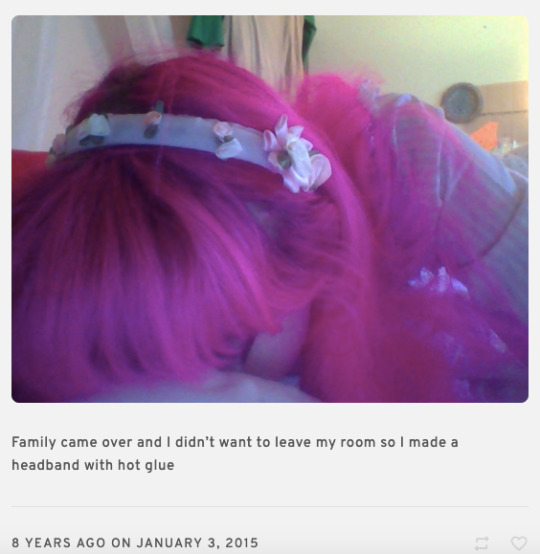
[image caption: Family came over and I didn't want to leave my room so I made a headband with hot glue. Posted 8 years ago on Jan 3, 2015]
So, today I made a headband with hot glue. I didn't take pictures, but here's a rough run through of what I used, so you can make one too:

a 2" wide headband, which seem to run about $8, which is a lot more than I expected. Inflation's a bitch. Going to have to change the blog to 50dollarlolita to keep up.

This project did not remotely take 54 yards of cluny lace, but honestly if you're going to make handmade lolita, you should buy 54 yards of cluny lace. (I have not bought from this listing, but it looks pretty legit). If we math it out per yard, it used about 40 cents worth of lace.

I have actually bought this ribbon in multiple colors. Once again, it's a really good thing to have on hand if you make lolita. If you only buy one color, I recommend buying the color that you can use for the back lacing of most of the dresses you own. Those ribbons always seem to get lost when I do laundry, and it's also an easy way to pick a color that you'll use for accessories. $6 for 100 yards comes out to about 12 cents worth of ribbon.
I can't begin to fully articulate how valuable having trims available is for making handmade lolita. Lolita fashion is all about putting as many details into a garment as you can tastefully add, and being able to "Oh, this would be nice to have a ribbon! Oh, this would be nice with a line of lace!" can really help you push your designs to the right level of detail.
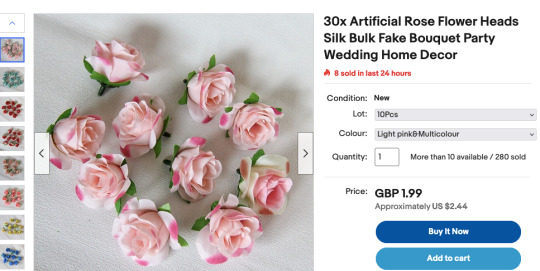
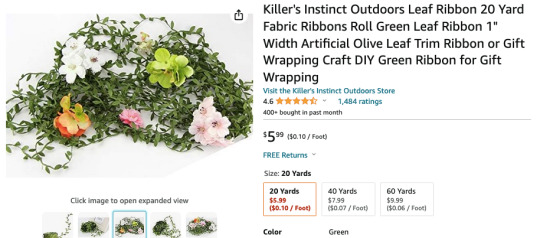
Fake flower heads and leaf ribbon. I almost didn't include the leaf ribbon in this list, but I think it really added something. I don't find a ton of need for this in lolita fashion, but it seems the smallest amount you can buy is like 20 yards. (I actually got my flowers and leaf ribbon from a cheap flower crown, but it seems you have to buy the flower crowns in packs of 10, making it more expensive than getting the components).
The flowers that I have on my headband came with a little felt tab on the back, which made them easier to glue. It might be worth it to glue a felt strip onto the plastic stem, and then glue that onto the headband.
I'm not going to count the selvedge edge of the fabric that i had lying around. You probably also have fabric scraps lying around.

Assembly strategy is a little bit up to you, but here's my thoughts:
I wrapped the headband with a scrap of fabric, and then wrapped ribbon around that in the other direction. In addition to looking nice, I think that wrapping in opposite directions is going to make the fabric wrap stronger. The front ruffle is just a 1.5-2" wide lace (I didn't measure) that was sloppily pleated. Each pleat was tacked down with hot glue.

To cover the sloppy pleats, I stuck a piece of lace over the pleated edge. This smoothed things out, and I believe that will also help reduce damage to the ruffle. The lace here is beading lace, which is intended for you to weave a ribbon through. The only ribbon I had was too wide, so I just glued the beading on top and hoped no one would notice. Spoiler alert: no one did.

What I've noticed on these kinds of accessories is that they need two things to feel complete: they need some kind of element to frame the face and make the headband visible from the front, and they need a large accessory at each ear. This isn't universally true for all substyles, but I've found that in general, it's what I shoot for.
I had an old flower crown from a party, so i just cut some roses and leaves off that crown and stuck them on the sides. I added some little ribbon bows to help sell the "this is not me cheating at beading lace" illusion.
(If you're looking for inspiration for doing this without a ruffle or a side focus, and you don't know where to start looking, I'd start with Innocent World and Moi Meme Moitie).
If you're buying ALL the components listed here, so buying all 50+ yards of lace and 100 yards of ribbon, it's going to be $37. This is a lot, but it's cheaper than a taobao headdress once you factor in shipping. If we only count the cost of what will be used in the headband, it comes out to about $13. I really cannot express enough how much having lace and ribbon on hand will improve your handmade lolita life, so if you're looking for an excuse to buy a lot of lace, here's your excuse.
And that's it! Put it on your head and you're good to go out into the world!
I think this is a great improvement over the one I made 8 years ago, although the other one did a better job at avoiding my family.
Just a quick note about building with hot glue: less is more. It's easier to hid small dots than to hide big long lines. Get a silicone thimble and really push your glued material into the glue (note: i live on the edge and just lick my finger and smooth it down, and I get burned a lot). The more texture an item has, the more likely it'll glue well. How your piece is structured will impact its longevity, so think about the strongest possible way to construct something. And if you don't like hot glue, but still want to make this, my suggestion would be to use Aleen's Super Fabric Adhesive and letting it cure between steps. My other hot glue advice is that if your design is a mess, good construction won't save you, and if your glue is a mess, good design won't save you. So this is a case where hot glue is already saving you 96 hours of cure time, so respect it and be careful.
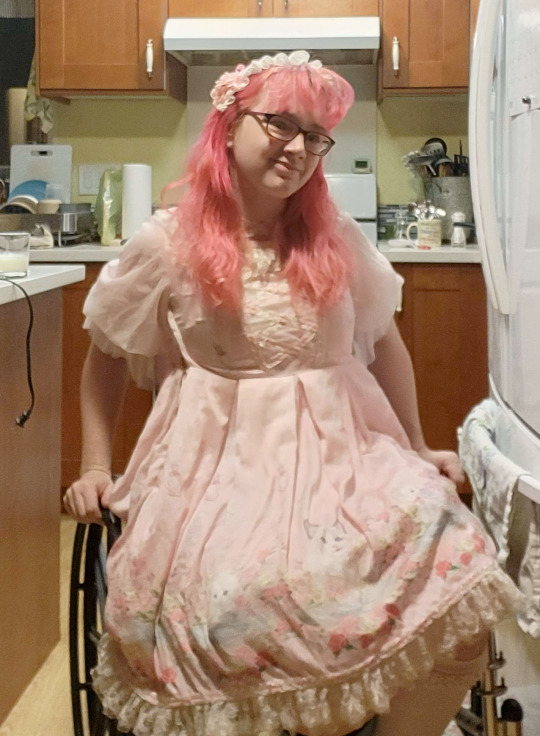
I made this to coordinate with this dress, because the dress has some pretty modern elements like the rose trim and the sleeves, that want to push it into being a very extravagant dress, but it also don't have enough room to be very poofy (not that I'm wearing a petticoat anyway, but y'all know what I mean). I don't know how to articulate the difference between silky polyester lolita dresses and old cotton twill lolita dresses, but this is definitely better with the silky poly than the cotton twill.
#20dollarlolita#lolita fashion#long post#handmade lolita#lolita headdress#fun fact i spent years where my bangs were SUPER heavy cut#i think I used to cut basically all my hair in front of my temples into my bangs
130 notes
·
View notes
Text
I've made some towel progress but all my photos pretty much look the same because of how they roll into the front bar. But I have allllmost 2 out of 4 towels done. I didn't expect my last post about the selvedges to take off like it did but I will try to record a little video for those who asked!
Meanwhile I'm working on getting the wool blankets warped up on a wider loom at the weaving studio. I got the heddles threaded but didn't have enough time to check for any errors or get the reed sleyed. The sectional warping beam (with the pegs) was a bit weird for me but it seems to be working okay!
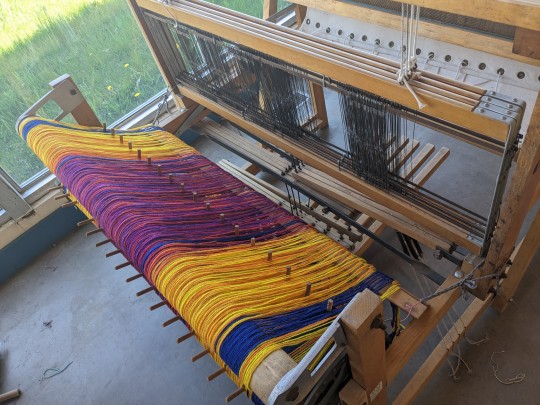

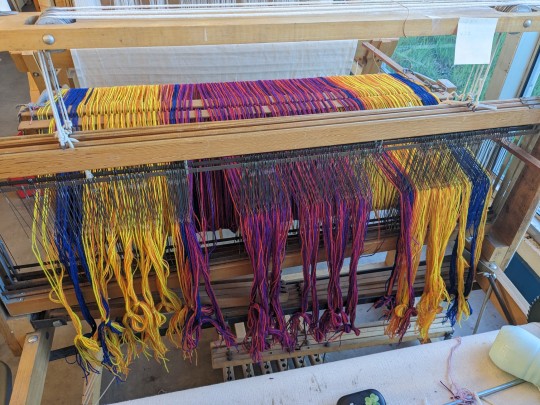
I'm going back tomorrow for a couple hours and really hoping that these blankets will weave up quickly. It's about a 5 yard warp for two blankets, using chunky yarn for the warp and the same yarn doubled up yarn for the weft.
14 notes
·
View notes
Text
car organizer
So I wanted to make myself the kind of organizer that hangs over the back of your car seat to hold your stuff, to keep the things that ought to stay in my car in, because with my old car, I hauled so much cargo and loaded and unloaded the thing so often and wound up with so much random junk in there that I lost my tire inflator, foldable shovel, and most of the rest of it. I thought, if I just attach those to the back of one of the front seats then it doesn't matter what I do with the car, if I'm hauling baby chicks or small humans, passengers or cargo or what, I don't have to worry.
I shopped around but I didn't see anything like what I wanted, so I went down in the basement and poked around.
Thus follows not exactly a tutorial, but a description of my thought process. This took forever but if I had to do it again I could do it faster, I think.
I had a weird but perfectly-sized rectangle of heavy-duty polyester canvas (twice as long as I needed, but exactly as wide, so I could use it double thickness), some suit interfacing, and then several yards of an all-plastic but beautiful brocade I bought from Jo-Ann's back when I didn't know how to shop for fabric.
So I bought myself a new tire inflator and folding shovel, and then measured the jump-start powerbank I already own, and made pockets exactly sized for those three things. I also guesstimated a pocket for my motley collection of ratchet straps. And then I laid those out on the bit of canvas, and figured I had room for a wide short pocket across the top-- gathered the bottom, and put a channel at the top and pulled elastic through, then sewed two seams down it to hold it into three separate pockets.
I did french seams on the first square pocket then realized that made it too small so I had to piece a little extension around the back of it. Then I realized that all-plastic brocade ravels horribly... unless you run a lighter along all the cut edges. Bickety-bam instant selvege. So I melted the edges of all the rest of my fabric, and no more French seams means no more excessive seam allowances.
(I didn't exactly follow this method but I did find a good tutorial here for how to make a cargo pocket. It might have worked better than what i did, LOL. I only made one pocket pleated, and one gathered, the others I tried mostly to make to size.)

[image description: a black panel of canvas lies on a table, with three pockets made of brown/black/gold polyester brocade lying atop it, chalked around like crime scene bodies.]
Laid them out, traced with chalk, futzed with the placement. Realized I didn't have to center that top one, and if I off-set it, I could fit the ratchet strap pocket next to it.
Attached the pockets to the canvas, then spray-adhesived the interfacing to the back, then folded the canvas in half, sewed it right sides together leaving one short side open, turned it right-side out, gingerly ironed it (everything is plastic). I had some of those huge thick plastic strips they seal around big boxes sometimes in the garbage in the basement so I pulled those out, carefully ironed them flat under a press cloth, and then cut lengths of them-- it was heavy-duty stuff, I think a dehumidifier had come in the package, solid plastic an inch wide-- and used those as horizontal boning at the bottom, middle, and top, securing in place with a line of stitching above and below wherever there weren't pockets. The top, I closed up by just folding the front over the back; it was the selvedge edge, so I left that raw, and zig-zagged it shut with the piece of "boning" inside, then pushed the boning up against the seam with my fingers and sewed the other side of the channel with a straight stitch.
I could not for the life of me figure out how to measure the straps. so i went out and sat in my car with a lighter, scissors, needle, thread, a pair of old shoelaces, a length of 2" wide elastic torn out of an unsuccessful earlier make (i have a roll of the stuff... at the farm, not here), and a length of heavy-duty twill tape I don't know where I got.
I held the organizer up to the seat, safety-pinned the twill tape to the top, threaded it around the headrest, safety-pinned it to the other side. Decided it needed more support, as the upper corners wanted to flop. Used a drawstring threader to pull the shoelace through the flap at the bottom of the seat, where all the cabling for the heated seat is stored-- there's upholstery covering it, open at both sides, so I threaded the shoelace through that, just to pull the whole shebang in taut against the seat instead of letting it swing freely into the knees of whoever might sit back there. Sewed it down on one side, safety-pinned it to the other. Cut the shoelace off, then sewed the remnant to one upper extreme corner, wrapped it past the headset, safety-pinned it to the other side. Finally took the 2" wide elastic, sewed it firmly down on one side, passed it around the seat, measured it, then passed it behind the seat to sew it down un-stretched to the other side, then put it on properly. So the non-stretch fasteners are only sewed on one side, and can be unpinned on the other if I need to take the thing off.
Then I loaded it up with stuff.

[Image description: the rear of a car driver's seat, taken from the rear seat behind it, with an organizer hanging from the headrest, brocade pockets stuffed full of objects. There's a green object hanging from a keychain at the top left-- it is a folding knife patterned to look like a leaf.]
Now the things that ought to just always be in my car can (mostly) just always be there. I should check that the tire inflator works, and I should periodically charge up the jump pack, but I already checked if the foldable shovel works (it does), and I carefully bundled up the ratchet straps into bags I made out of the cuffs of old crew socks, which sewn shut where I cut the threadbare foot off make perfectly-sized padded stretchy storage bags for light duty ratchet straps.
Top left to bottom right, it's got:
Ratty old work gloves, a clipped-on keychain with a decorative rosary and a functional folding knife, a sock-cuff bag containing a multitool screw driver, a little baggie of tampons, and some Kleenex
The tire inflator kit, the jump pack kit
three ratchet straps, a folding shovel multitool thingy, and a bag of toiletries with spare socks, chapstick, hand cream, a travel toothbrush and dry toothpaste kit, and a couple other things-- most of it is shit that was handed out the one time I flew business class on Icelandair.
Then, to the right, around my center console, I took a vintage like circa 2004 Old Navy nylon drawstring backpack, threaded those heavy-duty twist tie things they use to close disposable coffee bags through the drawstring bit of the mouth to keep it open, sewed some of the twill tape to the top, and added a magnetic catch to hold a plastic bag in place. The magnetic catch didn't do enough so I have some half-broken old hair clips holding the plastic bag in better position: that's now my car's trash bag, and the backpack's two tiny zippered pockets hold spare plastic bags.
Now the last thing I want to do is to get some hooks to hang from the passenger headrest, and get loops attached to my snow brush and squeegee, and hang those from the hooks, because otherwise they are always scattered around the floor of my car in the way of whatever I want to do.
Anyway. Ready for the inaugural road trip Sunday, when I drive back to the farm.
31 notes
·
View notes
Text
Sky: Children of the light cosplay writeup

Wig: The fun part about skykids is you can do basically any hairstyle, so long as it’s in white. Good quality wigs start at about 20 dollars; I just happened to have one on hand that I was willing to recycle for this. If you’re on a budget, consider checking secondhand websites, local cosplay swap meets, and facebook marketplace.
Mask: I used this pattern from Punished Props to make the mask out of 5 mm EVA foam (Which would cost… I want to say $2 at michaels to get a similar sheet?) and then decided I didn’t like it, so I did it over again at 75% size. The gem is resin, painted with nail polish. I like using nail polish as paint; I know it’s not conventional, but it’s super fun and gives a nice shimmer without being overbearing. And then I stuck some aluminum foil onto the back of the gem to give it a nice reflective shine! The eye holes were enlarged somewhat because I shrunk the pattern to begin with, so as they are, I think they give it a more appropriately childish vibe. I put some of the plastic mesh that knitters use in the eye holes and painted it with a bit of shimmery gold! Finally, I just hot glued elastic to use as the strap, no need for leather or anything.

Cloak: 2.5 yards anti pill fleece. It’s a ¾ circle shape, so what you do is buy 1 ¼ yards of the color you want, then the same amount for the(Comes out to 15-20 dollars total; fleece is relatively cheap) and take one, and fold it in half and lay it down so the selvedge is going up and down. Measure on the center fold 29 inches up from the bottom edge, and make a mark with washable marking pen. This is the center. Now, using a yardstick or other measuring tool, continue marking in a circle 19 inches from that dot.
Make a smaller circle using the same dot as a focus, this one about 4 inches in diameter. There’s your neck hole. Now use the first piece of fabric as a pattern to cut out the second. Applique on your stars (I did a five star cape because the look I’m going for is that of a young moth who’s just barely becoming a butterfly, but you can do however many stars you want!) After this, you put the two layers together, and sew, leaving a small opening for turning. Turn, topstitch near the edge, and you’re all done!
You can also use this tutorial if you want more in depth instructions! However, keep in mind that this one requires more fabric to begin with.
Tunic: This was made out of a t shirt pattern and a curtain I thrifted for two dollars. The only real advice I can give here is to make a small pintuck on the inside to sort of cheat the seam on the right side of the chest, and don’t be afraid to make it baggy!
Pants: I already owned these, they’re just a regular pair of khakis, but I’ll budget in five dollars to thrift a new pair.
Shoes: Another thing I already owned. I’m going to cut this out of the budget, because frankly you will want comfortable shoes at the con and can likely get away with something casual.
Candle: Six dollar flameless candle at hobby lobby. The outside is made of actual wax, which is odd and not super durable. I also bought a real red candle and a white one for photoshoots.
So, overall? About $55 in total. You can cut down or cut corners or use coupons, and I don’t think it’s terrible, but there’s also the option of cutting out the mask entirely. Which is entirely fair; masks are a hassle to wear and to see out of, and often require a handler, which cuts down on the things you can do. Anyways, if this helps you at all to put together a cosplay, I’d love to see it!
7 notes
·
View notes
Photo

LEGENDARY CLASH STYLE | FROM PUNK ROCK ROUGH TO SARTORIAL SMOOTH | The Selvedge Yard
59 notes
·
View notes
Text
DIY Duvet Cover

Project by Brett Bara:
I don’t know about you, but I never cease to be shocked at the price of bedding. And nothing sets off my “I could make that myself so much cheaper and better” instincts like duvet covers. It’s just a big flat case of fabric, yet even the simplest options easily soar into the three digits—but all it takes to make your own is a bunch of fabric, a few straight seams, and a spare afternoon.
Not only will going DIY with your duvet cover save you some cash, it’ll also allow you to custom-make exactly what you are looking for. What’s better than that? Let’s go! –Brett Bara
What You’ll Need
Approximately 10 yards fabric (see below to calculate exact amount; I suggest buying extra just in case)
Yard stick, long quilter’s ruler or tape measure
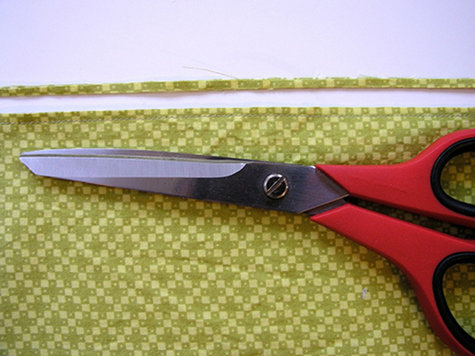
Sharp scissors
Straight pins
Sewing machine
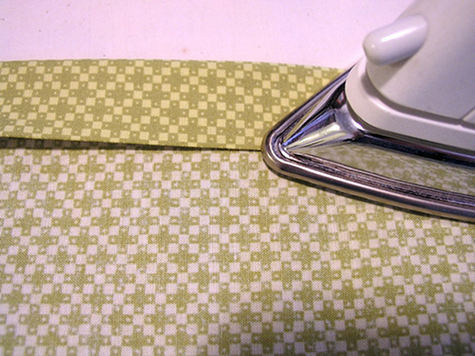
Iron and ironing board
Selecting and Preparing Fabric
I recommend machine-washable cottons or cotton-linen blends for duvet covers. Quilting shops are a great place to look for fabrics, as there are tons of choices there for cottons in tiny prints, large prints, solids and everything in between.
Here I’m working with Denise Schmidt Hope Valley Piney Woods from Free Spirit Fabrics.
Be sure to wash, dry and iron your fabric before beginning to pre-shrink it.
Fabric Tips
*If you find yourself head over heels for designer bedding, check to see if you can buy two flat sheets from the line, and use these to sew your own duvet cover. This can be much less expensive than buying the duvet cover itself, and sometimes the manufacturer uses the very same fabric for the sheets as for the duvets, so you’re really working with the exact same material.
*Consider using a different fabric for the front and back of the duvet so that the piece is reversible—two looks for the price of one, and a special bonus for the décor commitment-phobes among us.
Planning and Cutting
There aren’t strict standards for bedding sizes in the US (comforter sizes tend to vary among manufacturers), so I recommend measuring the comforter you plan to cover and using those numbers to plan your duvet cover.
Since fabric generally isn’t sold in widths wide enough for a full duvet, you’ll need to seam a few panels of fabric together to make the front and back. I suggest placing one full panel down the center of the duvet with two smaller panels to each side of it; this is generally nicer-looking than making one seam down the middle of the duvet.
NOTE: Remember that you should trim off the selvedge edges of your fabric (these are the finished edges on both sides of the fabric which are a little different in texture and/or color from the rest of the fabric) before sewing. Remember to subtract the selvedge edge from any measurements as you plan your piece.
Measure the width of your fabric without selvedge; plan to place one full panel of fabric down the center of the duvet and two smaller panels to each side of it. Simply make the side panels as large as they need to be to reach the desired width of your duvet cover, adding 1” to the width of each panel to allow for seam allowance.
So, if your center panel needs to be 40” wide and each side panel needs to be 20” wide, cut the panels 41” wide and 21” wide. Those extra inches will be consumed by the seams.
The length of your duvet is simply the desired finished length plus 2 ½” for hem and seam allowance.
*Remember that you need a front and a back, so plan all your measurements and double them to calculate the total amount of fabric you’ll need.

Here’s what your panels will look like when they’re ready to go. (Note: I’m making a mini duvet here to make it easier to see the big picture of shape and construction.)
Sewing: French Seams
To begin, you’ll sew each side panel to its corresponding center panel, to make the front and back of the cover.
For a really nice professional-looking finished result, I recommend using French seams in this project. These seams are finished on both the inside and outside, so that no raw edges of fabric will be visible anywhere.
French seams may sound fancy, but they’re really easy! Here’s how:

Place two pieces of fabric WRONG SIDES TOGETHER. (This is the opposite of normal; usually you sew most seams right sides together.)
Sew the seam with a ¼” seam allowance.
Trim away about ½ of the seam allowance, being careful not to get too close to the stitches.
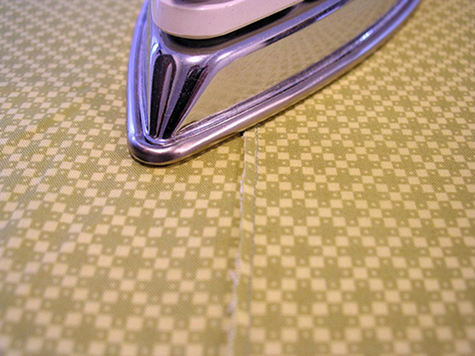

Iron the seam to one side, then fold at the seam so that right sides of the fabric are facing together, and iron the seam closed.

Pin the seam closed to avoid shifting, and sew it again with a ¼” seam allowance. Iron this seam to one side, and your French seam is done.

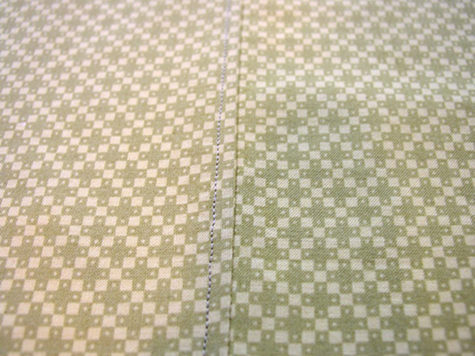
From the outside it looks like a regular seam, but on the inside all you see is this nice finished flap. Nice, right?!

For a nice finishing touch, you can top stitch to tack down the flap. All you do is top stitch on the right side of the duvet alongside the French seam, stitching over the folded-over flap in the back.
Iron the seam once again after top stitching to smooth and relax it.
Repeat for all center/side panels so that you have a complete front and back.
Attaching the Front and Back Together
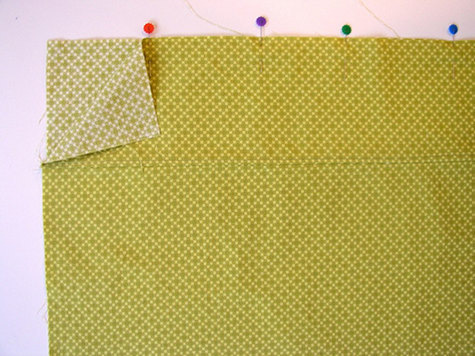
Place the front and back together with wrong sides facing, pinning each side seam in place. Sew each side with French seams as described above (but skip the top-stitching for the sides). After sewing the sides, sew the top closed with a french seam as well.

The inside of the duvet is now fully finished, with no raw edges visible at all. Isn’t that nice? Here is what the corners will look like on the inside.
To hem the bottom of the duvet, fold 1” of fabric to the inside and press. Fold up another 1” and press again; pin folds in place.

Stitch hem close to the exterior fold line and again close to the interior fold line.
Getting Closure
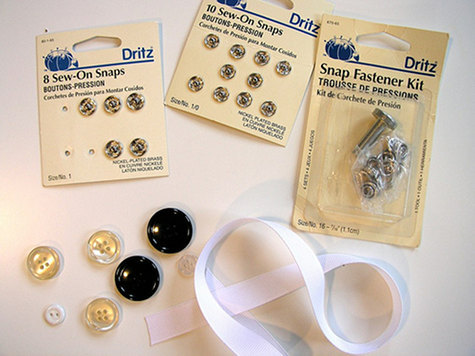
You have many options for closing up the bottom of the duvet (in each of these cases, I suggest placing a button/snap/ribbon about every 8” along the bottom):
*Buttons and buttonholes: easy to do with the buttonhole attachment that comes with most sewing machines.
*Sew-on snaps: very easy to sew on by hand, and quick to snap/unsnap when you change the duvet.
*Snap fastener kit: All you need is a hammer and the special tool that comes in this set to attach snaps without sewing for a very professional-looking result. (Check the instructions on the package.)
*Ribbon or twill tape: even easier to install. I suggest tucking 10” lengths of ribbon or tape under the folds of the hem before sewing it.
*Zippers: long zippers can be purchased online; you might consider a zipper closure along the bottom, using the same zipper-installation method as the zippered pillow cover.

That’s all there is to it! Don’t you feel so wonderfully nice and cozy with your new handmade duvet cover?!
14 notes
·
View notes
Text
Time to get organized with my SQQ sewing project.
Yes, I indeed am alive and I kicked this sewing project waaay down the line. I moved, then it took 2 months for my stuff to arrive, in between that I broke my wrist and I had tons of physical therapy which went on well into November of 2022.
But now, I have a con approaching and it is time to get my Shen Qingqiu sewing project started. Before I could even do much of anything, I needed to pull out my fabric which I finally organized into one tupperware bin and iron everything - again.
I hate ironing 4 yards of silk fabric - not fun at all. I have 3 yards of cream bamboo fiber for the zhong yi underlayer which needs a new sleeve pattern drafted for it. I will likely start with the main piece since I already drafted that for my WKX one, using the red layer for sizing. I might reduce the sleeves a bit so the top layer can use the wide pattern I already have.
Right now this is all I’ve gotten done. I pulled out the teal silk which got a good sniff inspection and ironed all of it on both sides. I tried to refold it not along any of the creases that still remained after the ironing.
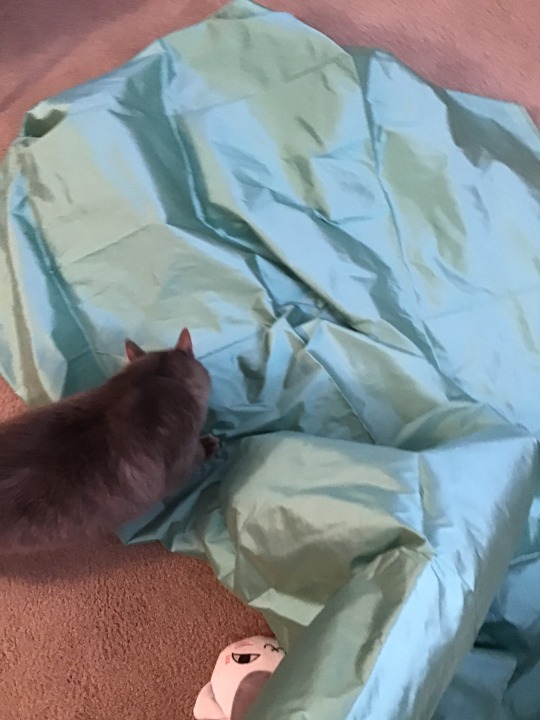
My assistant always has to check things out.
I also got all of the cream bamboo jersey done as well.

This one also looks like I won’t need to overlock the raw edge of the fabric as it rolls up on itself making it hard to tell the selvedge edge from the cut end. Nice! May you be a friendly fabric to work with.
My next update will likely be cutting out the silk and getting the main piece sewn together with any notes, tips, or tricks.
Sorry, I don’t have any more information, but I’ll start to get going on this. I need to balance it with another cosplay which has no sewing involved as all the clothing is normal, but that I need to make some rather large props which will be interesting. Never thought it would be difficult to replicate a mini-church with a cardboard box, but here I am.
22 notes
·
View notes
Text
THE SELVEDGE YARD SHOP X FREE PEOPLE "VINTAGE LOVES" PHOTO SHOOT

View On WordPress
0 notes
Text

behold this sequin fabric I got from FabricMart--purple! 100% cotton knit base fabric! $3.99/yard!...because it has flaws
(fabric examination and enthusiasm under the cut)
It looks like the sequin-sewing machine got misaligned for a section, for the entire length of the yardage, so that two sets of two rows of sequins, 6" apart, meander slightly--sometimes there's an extra wide space between the rows, sometimes they touch, sometimes they overlap

The irregular rows are visible in this image, and they're basically "not too obvious from a respectable distance," and the fabric is 60" wide with about 54" of sequin coverage, so there's enough width to work around the really obvious problem areas.
There are some areas of lint trapped under the sequins, but, so far, those that I've found and messed with have had the lint come out easily.
There's a section where Something Happened and the sequin stitching is missing about 4½" of sequins in one row and 6" in another, with a few more missing and loose threads between, but that's near a selvedge and close to one cut end, so will also be really easy to work around.
And then there's this, which I suspect is part of the process of maintaining the stitching so the next reel of sequins can be loaded without having to deal with any mid-row back-stitching weirdness. I am delighted to have this section, across the full width of the sequins, to work with.

The sequin mill end fabric precut I found in Wamart earlier this year (I'm still shocked) has the same thing (different shape) on one end

and I hope I can find a way to use that, too.
Shipping bumped the price up to averaging $6/yard, which is still an incredible price for sequins. Of course, FabricMart did a day of significantly lower shipping after my order had shipped. It's fine. I didn't want to risk the sequin fabric selling out while I would have potentially been waiting and hoping for a shipping price sale. I have a list of criteria for what I want in a sequin fabric, and the few requirements this purple fabric doesn't meet are made up for by having a cotton base.
I have several ideas for things to make for people from the purple sequin fabric, and the sequins are small enough to work for doll clothes.
(I have an idea for the pink sequins, too, but I don't have as much of that and the overall sequined width is narrower, so I'm still trying to figure out the best pattern to use, because I won't have a chance for do-overs.)
12 notes
·
View notes
Text
How to Choose the Best Weft yarn?

There are fewer guidelines for choosing a weft yarn than for picking a suitable warp yarn. Because it is under less tension when on the loom, the weft fibre does not need to be as strong as the warp, or even as "structurally sound."
Take a look around you; weft can be made of any linear substance you notice. With everyday household items and materials, such as plastic bags, shoe laces, straws, chopsticks, and extra-long CVS receipts, you may make experimental weavings. Even natural materials, such as dried flowers, can be used for weaving. Weft yarn materials can be hard and come in a variety of thicknesses, although they are often flexible and naturally bend like yarn.
We've divided the yarns below into two categories: yarns for weaving built textiles and yarns for play. Any yarn in our shop can be used as weft (including roving fibre), however, we've highlighted a couple below. On any style of loom, you can use any of these weft materials. We also developed this yarn selection guide.
What Is Wrap?
Warp is the term for the yarn that runs perpendicular to the fabric's edge. The strands that run lengthwise or longitudinally through the cloth are called warps. They are kept immobile.
The warp yarns are first drawn from the warped beam during fabric production, and then they are stretched. Later, they are passed through with the weft yarns that were drawn during the weaving process.
Through the warping process, the strings create a parallel sheet of yarn looped onto the beam. The fundamental goal of warping is to create a warp sheet with the length and quantity of parallel threads that are wanted.
What is Weft?
The strands that are weaved horizontally are known as weft or woof. The transverse weft is drawn and inserted over and under the warp. To weave the cloth, it is shuttled back and forth over the warps. Normally, they sprint from selvedge to selvage.
The threads tend to be shorter since the weft controls the horizontal direction. Frequently, a shuttle with weft threads attached travels back and forth across the warp.
Tips for Weaving Constructed Textiles
We define built textiles as weavings that resemble production textiles, carpets, tapestries, scarves, tunics, and household items like napkins, table runners, blankets, and curtains. They are structurally sound and won't unravel or lose their shape when worn, cleaned, touched, or moved.
The warp and weft strands should complement one another while weaving a structured textile, especially if the finished product will be washed. When wet laundered, all fibres shrink to varied degrees, and combining fibres can result in the warp and weft shrinking at various speeds, occasionally leading to puckering, draw-in, or felting. Even if accidental, these effects can be gorgeous, but the best way to foretell how a woven fabric will turn out is to wash and swatch it first.
Weave a single sample or several samples at once to examine and evaluate the impact of wet finishing on yarn blending. We frequently combine cotton and wool, cotton and linen, silk and wool, and linen and hemp yarn in our studio.
What Does PPI Stand For?
The number of picks of weft yarn that drop in 1 inch of your fabric is known as the PPI (picks per inch). This establishes the fabric's density and enables you to compute the number of yards of weft yarn required to weave the fabric you want. Your fabric's PPI will vary depending on the thickness of the yarn, the type of weave, and how firmly you beat the yarn into place.
Weft yarn manufacturers provide quality yarn for needs. Make sure to choose only the best always.
0 notes
Link
Check out this listing I just added to my Poshmark closet: Gustin Selvedge Denim Jeans.
0 notes
Text


BEDROOM SIGHTS, SMELLS, & SOUNDS OF THE SUPER-SEVENTIES -- VALLEY GIRLS EDITON.
PIC(S) INFO: Spotlight on twin sisters Cherie (ex-RUNAWAYS vocalist) and Marie Currie, photographed in the shared bedroom of their childhood in the San Fernando Valley, Encino, CA, c. 1978. 📸: Brad Elterman.
Sources: www.reddit.com/r/OldSchoolCool/comments/3chziw, Pinterest, & The Selvedge Yard.
#CherieCurrie#MarieCurrie#ValleyGirls#SanFernandoValley#ValleyGirlsCA#70s#BedroomPhotography#EncinoCA#1970s#Photography#SuperSeventies#Encino#CherieandMarieCurrie#VintageAesthetic#BradElterman#VintageStyle#RetroStyle#TwinSiblings#TwinSisters#Rockandroll#Twins#Fashion#Post-GlamRock#Glam
0 notes
Last Seen Blogs

elinhaven
Sans titre

simplyilianaa
Satan's finest work

healthadvocatetraining-blog
Health advocate training

amitesh123456781234jitoj
Untitled

levkostenko
Photo & video