#TheSims4Mac
Explore tagged Tumblr posts
Visit Tumblr Blog
Explore Tumblr blogs with no restrictions, modern design and the best experience.
Last Seen Tumblr Blogs


Fun Fact
Celebrities use Tumblr as well.
Text
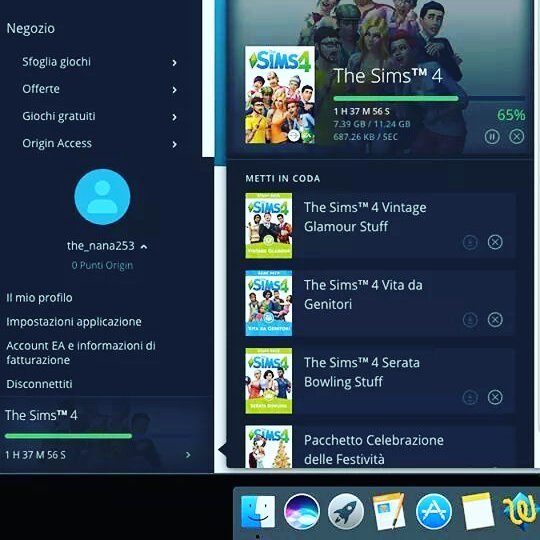
Hope you backed up your files…
ITS PATCH DAY
2 notes
·
View notes
Photo
😍😍😍😍😍 #thesims #thesims4 #thesims4mac #thesims4 #EAPLAY #origingames
0 notes
Photo
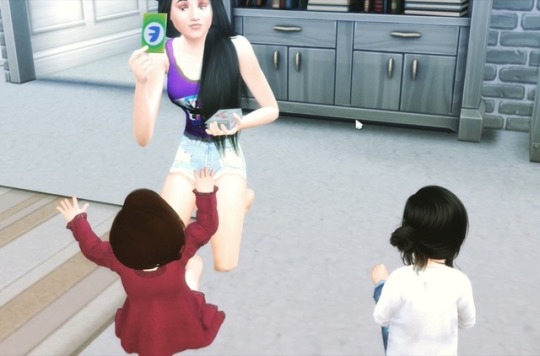
Finally getting some filming time for part 3 of Birth to Death: FtoM Norah/Noah Matthews. #thesims #thesims4 #thesimseries #thesimsmachinima #thesims4 #thesims4cc #thesims4story #thesims4life #thesims4mac #thesims4machinima #ts4 #ts4drama #ts4life #ts4story #ts4cc #ts4toddlers #youtube #youtuber #youtubechannel #southernbellesimmer #machinima #transgender #transformation #trans #transboy #transbeauty #mirroringreallife #differentwalksoflife #differentwalksoflove
1 note
·
View note
Text
THANK YOU!
This is dedicated to all the modders! The last couple of weeks have been rough to say the least and most of them are working around the clock to update for our game play, and putting up with a lot of players bullsh*t behavior.
Thank you modders, you are the real MVP!
Tag your favorite modder to say thank you!
#thesims4#thesims4mac#thesims#ts4#thesims4cc#ts4mac#ts4cc#ts4mods#ts4mods t#ts4infant update#ts4infant cc
16 notes
·
View notes
Text
Running The Sims 4 Folder from an External Drive.
If you are a Mac player like me, you are most likely running out of space or are currently completely out of space.
This is how I moved The Sims 4 (TS4) from my computer to an external hard drive.
Some users are able to drag and drop the Electronic Arts folder to the drive, I however was not.
⛔️ WARNING
Entering incorrect commands into Terminal can have severe consequences both for the stability of your operating system and your data. You should only follow these instructions if you are comfortable using Terminal and have a solid backup of your system.
If anything goes completely wrong you can always wipe and reinstall your macOS through Internet Recovery or bootable installer (advanced option) but you WILL lose all your data.
I am using WD - My Passport Ultra for Mac 2TB External USB 3.0 Portable Hard Drive from BestBuy
⚠️⚠️⚠️⚠️⚠️⚠️⚠️⚠️⚠️⚠️⚠️⚠️⚠️⚠️⚠️
CONTINUE AT YOUR OWN RISK
I highly suggest reading the entire post before making any changes.
NOTE: These instructions move the ENTIRE Electronic Arts (EA) folder to the external drive. Any game you have installed and stores data in the EA folder will need to have the external drive plugged in to be accessed. This includes Sims 3, Sims Medieval, Sims 4, Sims 4 Legacy Edition and any other game folders in your EA folder.
As a good measure, backup your EA folder to a separate external drive or cloud storage.
Plug in your external storage device and check it is properly mounted in Finder or on your Desktop. Tech & Design on YouTube has an easy to follow step by step walkthrough on how to set up your external drive for Mac. ➡️ Here.
Step 1 – Moving the Electronic Arts folder to the external drive:
First - You have to tell your Mac to move the EA folder from the Documents folder to the external drive. To do so, open any text document and copy and paste the following command into the document.
(mv means move and the tilde “~��indicates your home directory) This is purely for editing purposes:
mv ~/Documents/Electronic\ Arts /Volumes/USB/
Replace USB with the name of your external drive. For example, if your external is called EXTERNAL the command would be:
mv ~/Documents/Electronic\ Arts /Volumes/EXTERNAL/
However, if your external is called EXTERNAL DRIVE you have to introduce backslashes before the spaces in the name (like Electronic Arts in the Documents folder):
mv ~/Documents/Electronic\ Arts /Volumes/EXTERNAL\ DRIVE/
To show where the spaces are, a black X in the command below (for visual purposes only):
mvX~/Documents/Electronic\XArtsX/Volumes/EXTERNAL\XDRIVE/
IMPORTANT: Note that the directory file paths are separated with forward slashes / and file and folder names with multiple words are separated with backslashes \ .
If your EA folder is within another folder on the external you must state this clearly in the command. For example, if your EXTERNAL DRIVE has a folder called Game User Data and you would like the Electronic Arts folder to be within this folder the command would look like this:
mv ~/Documents/Electronic\ Arts /Volumes/EXTERNAL\ DRIVE/Game\ User\ Data/
and with the black X denoting the spaces:
mvX~/Documents/Electronic\XArtsX/Volumes/EXTERNAL\XDRIVE/Game\XUser\XData/
Once you are happy with the command, open Terminal and copy and paste it from the text document into the Terminal window so it looks like this but with your own information. If it is highlighted black just press the right arrow on your keyboard to move the cursor to the end of the line:
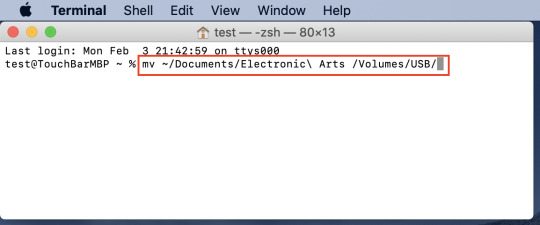
Hit enter/return to execute the command. Your EA folder should have moved from your Documents folder to your external drive. Open the Documents folder to check and open a second Finder window showing the external drive.
Step 2 – Creating the symlink for the Electronic Arts folder:
Copy the following command into your text document:
ln -s /Volumes/USB/Electronic\ Arts ~/Documents/
replacing USB with your external drive name and paying attention to the forward and back slashes and spaces. If we use the same example as before with the EXTERNAL DRIVE > Game User Data file paths and names this would be the result:
ln -s /Volumes/EXTERNAL\ DRIVE/Game\ User\ Data/Electronic\ Arts ~/Documents/
and with the black X denoting the spaces:
lnX-sX/Volumes/EXTERNAL\XDRIVE/Game\XUser\XData/Electronic\XArtsX~/Documents/
Once you are done with the command, open Terminal and copy and paste it from the text document into the Terminal window so it looks like this but with your own information. If it is highlighted black just press the right arrow on your keyboard to move the cursor to the end of the line:

Hit enter to execute the command. An Electronic Arts folder will appear in your local Documents folder as an alias with a little arrow in the bottom left corner:
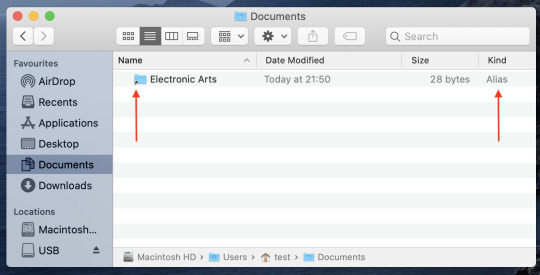
The actual Electronic Arts folder is still safe on the external drive (The game is also installed on the external, ignore the app in the image below):

Step 3 – Launch your game:
Launch the game as you would normally. There should be no notice difference, you should be able to pick up where you last saved the game. There may be extended loading, but as a Mac player, we are use to it.
You will also have to change the installation path on Origin, this allows any updates and new packs/ kits you purchase to be downloaded on your external drive.
A super helpful step by step guide ➡️ Here.
Happy Simming!
-Beans
#TheSims4#Mac#TS4#TS4CC#TheSims4Mac#TheSims4CC#TheSims4CustomContent#TS4Mods#TheSims#EA#Orign#BlackGirlGamer#GirlGamer
7 notes
·
View notes
Text
DON’T FORGET
Back up your saves & mods!
And it’s a good idea to play in a mod free save immediately following the update.
1 note
·
View note
Text
Sul Sul!
Hey, I’m Beans and I have been playing The Sims since ‘02.

I originally played PC, but I am currently a MAC player and have been for the past 10-ish years.
(I know stop yelling, MaCs ArEnT mAdE fOr GaMiNg. We know, and when know that’s why our fan sounds like a 747 in flight.)

It’s difficult to find help when you are a Mac player, so I’m just sharing what I’ve learned throughout the years to help with your game play.
-Beans
#TheSims4#TS4#TheSims4CC#TS4CC#TheSims4Mac#TS4Mac#TheSims4Mods#TS4Mods#TheSims4GamePlay#TS4GamePlay#GamerGirl#BlackGirlGamer
1 note
·
View note