#Uninstall Unused Programs
Text
wish there was like a guy i could take my computer to and just say like "Hey I bought this computer pre-built in 2018 and it still runs mostly fine most of the time even under large modern video games but I want/need it to last another several years if possible. Is she doing okay"
#like a PC doctor who just tells me if there's any startling issues or if she's gonna implode on me at random bc my idea of of maintenance is#occasionally dust the physical box and occasionally uninstall unused programs#like ive never replaced any parts i dont even know what i *would* replace or if it actually needs it#but the thing is six years old now surely it needs some kind of maintenance fhdjDNDN
7 notes
·
View notes
Text
I think what a lot of the linux vs windows usability arguments are missing is that yes, linux takes more time to set up than just using the default windows/whatever your device comes with HOWEVER once you've got it working, you don't have to constantly spend ages after each time it updates turning off/uninstalling if possible all the programs windows runs in the background that make your computer crash constantly because there's so much running or are spyware.
Like yeah sometimes installing something takes a bit longer, but that definitely totals less than the whole windows 'my laptop is unusable for 2 minutes each time after I turn it on because it automatically starts up a bunch of useless background programs I do not have the RAM for + it takes 20 minutes to uninstall them because windows makes that as difficult as possible and sometimes does not even let you do it and all of this is reverted each time it updates.'
#idk about apple stuff I have never used it#also. the command line will not hurt you. and the commands for it are consistent so at least once you've learnt how to do something you#can keep doing it. unlike the sinister and labyrinthine depths of windows settings. ugh.
8 notes
·
View notes
Text
you know, i kind of thought all the preparations i made for installing a new OS (cleaning up hundreds of gigabytes of files, uninstalling unused programs, defragging, running chkdsk, updating the BIOS) would have done Anything to make windows start up a little less slowly for me but it feels exactly the same as before... come on man
2 notes
·
View notes
Text
Yeah, my days of using Vegas are 100% over.
I uninstalled the program again, and this time, it wouldn't reinstall. Thought I would try the latest version of Magix's Movie Studio and the program is absolute hot garbage, completely unusable as far as I'm concerned.
I also can't use Premiere, it's too intense on my computer and will completely lock it up.
Right now I'm going to see if I can use Resolve for video editing. I tried it back in 2021 but found the UI to be a little intimidating. I'm gonna give it another shot and see how it works for me.
If not, I am stuck with Clipchamp for sometime...
2 notes
·
View notes
Text
SpeedUp Your Desktop/Laptop
Here are some tips for improving the performance of a slow computer:
Uninstall unused programs and delete unused files
Run a virus scan
Disable start-up programs
Update drivers and operating system
Add more RAM
Perform regular disk clean-up and disk de-fragmentation
Install a solid-state drive
Keep the computer cool and dust-free
Limit background processes
Seek professional help if the problem persists.
Try these steps to see if they help speed up your computer. If not, it may be time to consider upgrading or replacing your current machine.
13 notes
·
View notes
Text

UnHackMe Free Download Now
A tool called UnHackMe was created to find and get rid of rootkit-based Trojans. In contrast to its analogs, it makes use of the double-checking concept to guarantee that any suspect code is removed before it is executed by the system.
UnHackMe employs a variety of effective tools and techniques to find rootkits and other covert threats. Additionally, this program enables you to successfully uninstall additional undesirable and harmful apps (PUPs, pop-up ads, Trojans, spyware, etc.).
Features of UnHackMe:
Specializing in issues that antivirus software is unable to resolve.
Rootkit scanning.
Finding rootkits in the kernel, register, and boot record.
Unreachable by rootkits.
Examining installed software to find potentially malicious software (PUP).
Looking for unused files produced by spyware, adware, and PUPs.
Examining the drivers, services, and startup applications for Windows.
Verifying Windows keyboard shortcuts.
Understanding browser search options.
Examining browser add-ons.
1 note
·
View note
Text
Quick Solution For Repairing Your Laptop
Quick Solutions for Repairing Your Laptop
Laptops are crucial for both personal and professional tasks, so when they malfunction, finding quick solutions is essential. Here are some easy fixes for common laptop problems:
Overheating
Overheating can slow down your laptop or cause it to shut down unexpectedly. To fix this, clean the air vents with compressed air and make sure your laptop is placed on a hard, flat surface to improve airflow. A cooling pad can also help regulate temperature.
Slow Performance
If your laptop is running slower than usual, it may be due to too many background programs, malware, or lack of storage space. Close unused programs, run a virus scan, and uninstall unnecessary files. For better performance, consider upgrading your RAM or replacing the hard drive with a faster SSD.
Battery Issues
If your battery drains too quickly or doesn’t hold a charge, adjust power settings to optimize energy usage. If the battery is old, replacing it may be necessary to restore performance.
Connectivity Problems
For issues with Wi-Fi or Bluetooth, restarting the laptop or resetting the router often solves the problem. You can also try updating the network drivers or troubleshooting the network settings.
If these steps don’t solve the issue, professional help may be required.

#QuickLaptopFixes#LaptopRepair#TechSolutions#DIYRepairs#LaptopTroubleshooting#OverheatingFix#SlowPerformanceFix#BatteryIssues#ConnectivityFix#TechTips#LaptopCare#FastRepairs#LaptopMaintenance
0 notes
Text
Understanding and Fixing Laptop Hanging Issues
Understanding and Fixing Laptop Hanging Issues
Laptop hanging, where a device becomes unresponsive or freezes during use, is one of the most frustrating problems users encounter. Whether you are in the middle of important work or just browsing the internet, a laptop that constantly hangs can slow down productivity and cause stress. There are several reasons behind this issue, ranging from software glitches to hardware malfunctions. This article aims to explore the root causes of laptop hanging issues and provide solutions to help you troubleshoot and resolve the problem effectively.
Common Causes of Laptop Hanging
1. Overloaded CPU or Memory (RAM) Usage
One of the most common causes of a laptop hanging is when the CPU or RAM is overloaded. When you run too many programs simultaneously, or if one of the programs consumes too many resources, the system can become overwhelmed. This leads to a freeze, as the laptop struggles to process all the tasks.
2. Software Bugs or Glitches
Many laptops freeze because of poorly optimized software or bugs within an operating system or application. For instance, an outdated program might be incompatible with your system's current OS version, causing it to hang. Similarly, drivers that control hardware functions, like display or sound, can have bugs or become corrupted over time, leading to instability.
3. Insufficient Storage Space
Laptops with limited disk space, particularly when the hard drive is over 90% full, tend to experience slowdowns and freezing. The operating system relies on free disk space to manage virtual memory and run efficiently. A nearly full hard drive limits its ability to create and manage temporary files, leading to lag or crashes.
4. Malware or Virus Infection
Malware infections are another significant cause of laptop hangs. Malicious programs running in the background can take up critical system resources or cause conflicts with other software. Some malware even manipulates your operating system, creating instability that results in frequent crashes or freezes.
5. Overheating
Laptops are prone to overheating, especially when used for extended periods or placed on soft surfaces like beds or couches that block air vents. Overheating can cause the CPU to throttle down or shut off, leading to sudden freezes or the entire system becoming unresponsive. Dust accumulation in the laptop’s fan or vents is also a major contributor to this issue.
6. Hardware Issues
Laptops may freeze due to failing hardware components, such as a faulty hard drive or malfunctioning RAM. Over time, hard disks may develop bad sectors, making data access slower or leading to crashes. Similarly, defective RAM modules may fail to properly store and retrieve data, leading to system instability.
How to Fix Laptop Hanging Issues
1. Check CPU and RAM Usage
You can monitor your system's resource usage by opening the Task Manager on Windows (Ctrl + Shift + Esc) or Activity Monitor on macOS. Look at the CPU and memory usage to see if a particular application is consuming too many resources. If an application is using an abnormal amount of resources, consider closing it or finding an alternative that is less resource-intensive.
2. Update Software and Drivers
Ensure that both your operating system and all installed applications are up to date. Most software updates include patches for bugs and improvements in performance, which can help fix freezing issues. Additionally, check for driver updates for your hardware, especially graphics, sound, and network drivers, which are often responsible for system instability.
3. Free Up Disk Space
If your hard drive is nearly full, delete unnecessary files, uninstall unused programs, or transfer data to external storage. You can use built-in tools like Disk Cleanup on Windows or Disk Utility on macOS to identify and remove large or unnecessary files. If you frequently work with large files, consider upgrading your laptop’s storage capacity by installing a larger hard drive or SSD (Solid State Drive).
4. Scan for Malware
Perform a full system scan using reliable antivirus or anti-malware software. Ensure that your antivirus program is up to date so it can detect the latest threats. If malware is found, follow the software’s recommended steps for quarantine or removal.
5. Prevent Overheating
Make sure your laptop has proper ventilation, especially during intensive tasks like gaming or video editing. Place it on a flat, hard surface to avoid blocking the air vents. Cleaning the fan and vents can also improve airflow and reduce overheating. If your laptop continues to overheat, consider investing in a cooling pad or taking it to a professional technician for internal cleaning.
6. Perform a Hardware Check
If you suspect hardware issues, run built-in diagnostic tools to check for problems with your hard drive or RAM. On Windows, you can use the "Windows Memory Diagnostic" tool to check for RAM issues, and tools like “CHKDSK” can scan your hard drive for bad sectors. On macOS, use the "Apple Diagnostics" feature to detect hardware problems. If the tests indicate any issues, you may need to replace the faulty component.
7. Reset or Reinstall the Operating System
If none of the above solutions work, resetting your operating system to factory settings might be a final option. This process removes all your installed programs and restores the laptop to its original state. Make sure to back up your important files before proceeding. In more severe cases, a clean installation of the OS can help resolve persistent hanging issues caused by deeply-rooted software problems.
Preventing Laptop Hanging Issues
Once you've resolved the freezing issue, it’s essential to maintain your laptop to prevent future problems. Regular software updates, periodic malware scans, and keeping the hard drive free from clutter are vital steps. Moreover, avoid running too many applications at once, especially if your laptop has limited RAM. Over time, you may also want to consider upgrading your RAM or switching to an SSD if your laptop’s hardware is outdated.
Conclusion
Laptop hanging can be caused by various factors, including software bugs, insufficient resources, overheating, or hardware malfunctions. By identifying the root cause and applying the appropriate fixes, most laptop freezes can be resolved without professional intervention. However, if your laptop continues to hang despite troubleshooting, it might be time to consult a technician or consider hardware upgrades to keep your device running smoothly
0 notes
Text
Advanced Tech Tips: Mastering Your Digital World

The additional hints besides core ones can elevate your tech life and performance to a new height:
Optimize Your Device Performance
Disk Cleanup: The first step for the optimization of speed is the removal of temporary files and the uninstallation of unused programs. These steps can improve the performance of Windows.
RAM Management: If you notice that your RAM storage is almost full, try to quit the apps that are using the most resources.
SSD Upgrades: These SSDs (Solid State Drives) increase the speed of booting and launching applications. So, if your disk is still taking too long, it is advisable to upgrade it.
Harness the Power of Automation
Create Macros: Repetitive tasks can be automated in applications like Excel or Word through Macros.
Use IFTTT: The IFTTT option integrates various apps and gadgets so they can trigger automatic actions.
Discover RPA: This is a technology that automates even more sophisticated business processes.
Enhance Online Security
Implement Two-Factor Authentication: This is a process that requires two stages of verification to get access to your account. But first, implement some security measures.
Use a VPN: VPN encrypts your connection to the server so it becomes difficult to intercept and hack by third parties.
Regularly Update Software: Fixing software vulnerabilities is one of the primary approaches to protecting your system.
Master Advanced Search Techniques
Have the Boolean operators: Again, perform a targeted search using AND, OR, and NOT to get the best outcomes.
Search Engines Advanced Operators Use: Take advantage of the search by specific site option, search by file type, etc.
Maximize Google Search Tips: Check out these additional search functions to get the most relevant results.
Through the implementation of these techniques in your tech routine, observe that you will come across even higher levels of control and efficiency over your digital life.
#advancedtechtips#techtips#digitaltips#techhacks#productivity#efficiency#techsavvy#digitalmastery#techlife
0 notes
Text
How to Free Up Space on Windows 10: A Comprehensive Guide
As your Windows 10 system accumulates more files and applications, it can start to slow down and become less efficient. Freeing up space not only improves your system’s performance but also extends its lifespan. In this guide, we’ll explore various methods to free up space on Windows 10, going beyond the basics to ensure you have a well-optimized system.

Table of Contents
Introduction
Understanding Disk Space Usage
Utilizing Built-in Windows Tools
Disk Cleanup
Storage Sense
Uninstalling Unnecessary Applications
Managing Temporary and Cached Files
Cleaning Up System Files
Windows Update Cleanup
System Restore and Shadow Copies
Using Third-Party Disk Cleaners
Handling Large Files and Folders
Moving Data to External Storage
Using Cloud Storage Solutions
Conclusion
1. Introduction
As modern software and files grow larger, managing disk space effectively becomes crucial. This guide offers practical steps and tips to reclaim disk space on your Windows 10 computer, ensuring it runs smoothly and efficiently.
2. Understanding Disk Space Usage
Before freeing up space, it’s essential to understand how your disk space is being used. Navigate to Settings > System > Storage to view a detailed breakdown. This will help identify which areas need attention.
3. Utilizing Built-in Windows Tools
Disk Cleanup
Windows 10 features a built-in Disk Cleanup tool designed to delete unnecessary files. To access it:
Type “Disk Cleanup” in the search bar and select the app.
Choose the drive you want to clean.
Select the file types to delete (e.g., temporary files, system cache).
Storage Sense
Storage Sense automates disk cleanup. To enable it:
Go to Settings > System > Storage.
Toggle on Storage Sense and configure settings to regularly delete temporary files.
4. Uninstalling Unnecessary Applications
Unused applications take up significant space. To uninstall them:
Go to Settings > Apps > Apps & features.
Review the list and uninstall non-essential programs.
5. Managing Temporary and Cached Files
Temporary files can quickly accumulate and consume disk space. Use Disk Cleanup or third-party tools to regularly clear these files. Browsers also store cached data, which can be cleared from the browser settings.
6. Cleaning Up System Files
Windows Update Cleanup
Old update files can take up substantial space. Disk Cleanup includes an option to remove these:
Open Disk Cleanup and select Clean up system files.
Choose Windows Update Cleanup.
System Restore and Shadow Copies
System Restore points and shadow copies can consume significant disk space. Manage these by:
Typing “System Protection” in the search bar.
Selecting the drive and clicking Configure.
Adjusting the Max Usage slider to limit space usage.
7. Using Third-Party Disk Cleaners
Third-party tools like CCleaner provide more comprehensive cleaning options. They can remove junk files, clean registries, and manage startup programs to free up space.
8. Handling Large Files and Folders
Identifying and managing large files is crucial. Use tools like WinDirStat to find large files and folders. Consider moving non-essential large files to external storage.
9. Moving Data to External Storage
Free up space by moving data such as videos, photos, and documents to external hard drives or USB sticks. Ensure you regularly back up important data to avoid loss.
10. Using Cloud Storage Solutions
Cloud storage services like OneDrive, Google Drive, and Dropbox offer substantial space. Move infrequently accessed files to the cloud to save local disk space.
11. Conclusion
Regular maintenance and mindful storage practices can keep your Windows 10 system running efficiently. Use the tips and tools outlined in this guide to manage and optimize your disk space effectively.
External Authoritative Sources
Microsoft Support: Free up drive space in Windows
CCleaner Official Website
How-To Geek: The Ultimate Guide to Freeing Up Space on Your Windows PC
By following these detailed steps, you can efficiently manage and optimize your disk space on Windows 10, ensuring your system remains fast and reliable.
#Windows 10 Performance#Disk Cleanup#Storage Management#System Optimization#PC Maintenance#Free Up Space#Windows 10 Tips#Specific Techniques:#Disk Cleanup Tool#Storage Sense#Uninstall Programs#Temporary File Management#System File Cleanup#Third-Party Disk Cleaners#Advanced Techniques:#Large File Management#External Storage Solutions#Cloud Storage for Windows#System Restore Management#Windows Update Cleanup#How-To Guide#Windows 10 Efficiency
1 note
·
View note
Text
0 notes
Text
Laptop Maintenance and Service Guide

1. Regular Cleaning
External Cleaning: Use a microfiber cloth to wipe down the screen, keyboard, and exterior. For tough spots, a mixture of water and isopropyl alcohol (in a 1:1 ratio) on the cloth works well.
Internal Cleaning: Dust can accumulate inside your laptop, causing overheating. Use compressed air to blow out dust from the vents and fans. If comfortable, open the laptop to clean the interior more thoroughly, but ensure you follow the manufacturer’s instructions or seek professional help. Phone Repair Franchise in India
2. Software Maintenance
Update Your Operating System: Regularly check for and install updates for your operating system to keep it secure and efficient.
Update Drivers: Ensure all your device drivers are up-to-date. This includes graphics, sound, and network drivers.
Antivirus and Malware Protection: Install a reliable antivirus program and perform regular scans. Keep the antivirus software updated.
Uninstall Unnecessary Programs: Remove bloatware and unused programs to free up resources and improve performance.
3. Data Management
Backup Your Data: Regularly back up your important files to an external hard drive or cloud storage service.
Disk Cleanup: Use built-in tools like Disk Cleanup (Windows) or Optimize Storage (macOS) to remove temporary files, old backups, and system logs. Best Mobile Franchise Business in India
Defragment Your Hard Drive: For HDDs, use a defragmentation tool to reorganize fragmented data. SSDs do not require defragmentation.
4. Battery Care
Optimize Battery Settings: Adjust power settings to improve battery life. Use power-saving modes when possible.
Calibrate the Battery: Occasionally let the battery discharge completely and then recharge it to 100% to recalibrate it.
Avoid Overheating: Keep your laptop cool by using it on hard, flat surfaces. Consider using a cooling pad.
5. Performance Optimization
Manage Start-up Programs: Disable unnecessary programs that start up with your laptop to speed up boot time.
Increase RAM: If your laptop is slow and supports additional RAM, consider upgrading it.
SSD Upgrade: Upgrade from an HDD to an SSD for significantly improved speed and performance.
6. Network and Connectivity
Update Network Drivers: Keep your Wi-Fi and Bluetooth drivers updated. Laptop Repair Franchise
Secure Your Network: Ensure your Wi-Fi network is secure with a strong password and encryption.
7. Hardware Troubleshooting
Check Connections: Ensure all external devices are properly connected. Check for loose cables or ports.
Test Components: Use diagnostic tools to check the health of your hard drive, RAM, and other components.
Professional Repair: For hardware issues beyond your expertise, seek help from a certified technician.
8. Common Issues and Solutions
Laptop Won’t Turn On: Check the power supply and battery. Try a different charger if possible. Remove the battery (if removable) and hold the power button for 30 seconds, then try to power it on again.
Overheating: Clean the vents and fans. Use a cooling pad. Ensure the laptop is in a well-ventilated area.
Slow Performance: Run a virus scan, uninstall unnecessary programs, clean up disk space, and consider hardware upgrades like RAM or SSD. Authorized Mobile Service Center Franchise
Wi-Fi Issues: Restart your router, update network drivers, and check your network settings.
9. Preventive Measures
Use a Surge Protector: Protect your laptop from power surges.
Handle with Care: Avoid dropping or knocking your laptop. Use a protective case or bag.
Regular Maintenance: Schedule regular maintenance checks to keep your laptop in top condition.
Following these tips can help maintain your laptop’s performance and extend its lifespan. If you encounter complex issues, it’s always best to consult with a professional technician.
0 notes
Text
Top 10 Laptop Problems and How to Fix Them
Laptops are fantastic tools for work, school, and entertainment.expand_more But like any machine, they can run into problems. Here's a breakdown of the top 10 laptop issues and some solutions you can try at home.
Slow Performance: Over time, laptops accumulate clutter – temporary files, unused programs, and outdated software.expand_more This bogs down your system.expand_more Solutions: Regularly clean up junk files, uninstall unused programs, and keep your operating system and software updated.expand_more Consider adding more RAM if your laptop allows it.expand_more
Overheating: Laptops use fans to stay cool.expand_more If the vents get blocked by dust or you use your laptop on soft surfaces like beds, it can overheat.expand_more This can damage internal components and cause unexpected shutdowns.expand_more Solutions: Clean the vents regularly with compressed air.expand_more Use your laptop on a hard, flat surface and avoid using it on soft surfaces for extended periods.expand_more
Battery Drain: A laptop with a short battery life can be frustrating.expand_more There are several reasons for this, including using high-power settings, having too many programs running in the background, or a failing battery.expand_more Solutions: Adjust your power settings to optimize battery life, close unnecessary programs, and reduce screen brightness. If these steps don't help, consider replacing the battery.
Wi-Fi Connectivity Problems: Finicky Wi-Fi can be a major headache. It could be an issue with your router, internet service provider, or the laptop itself. Solutions: Restart your router and modem. Check for software updates on your network card drivers. If you're still having trouble, forget the Wi-Fi network and reconnect.
Virus and Malware Infections: Viruses and malware can wreak havoc on your laptop, slowing it down, stealing data, and even causing crashes. Solutions: Install a reputable antivirus program and keep it up to date. Be cautious when clicking on links or downloading files from untrusted sources.
Hardware Failures: Sometimes, the problem lies with the physical components of your laptop. This could be a faulty keyboard, a failing hard drive, or a damaged screen. Solutions: For minor hardware issues, like a sticky key, you might be able to clean it yourself. However, for more serious problems, you'll likely need to take your laptop to a professional for repair or replacement.
Software Crashes: Programs can crash for various reasons, from bugs in the software to conflicts with other programs. Solutions: Make sure you're using the latest version of the software. If the problem persists, try restarting the program or your laptop entirely. In rare cases, reinstalling the software might be necessary.
Data Loss: Losing important files can be a disaster. This can happen due to accidental deletion, hardware failure, or even malware attacks. Solutions: The best defense is a good offense. Regularly back up your data to an external hard drive or cloud storage.
Noisy Fans: A noisy fan can be a sign of overheating or dust buildup.expand_more Solutions: Clean the vents as mentioned earlier. If the noise persists even after cleaning, it could be a failing fan that needs professional attention.
Broken Screen: A cracked or broken screen is a major problem. Depending on the severity of the damage, you might be able to replace the screen yourself, but for most cases, professional repair is necessary. Solutions: To prevent screen damage, avoid putting pressure on the screen and invest in a protective case.
If you're facing any of these laptop problems, don't despair. By trying these solutions, you might be able to fix the issue yourself. If not, there are always professional laptop repair Dubai services available to help.
0 notes
Video
youtube
In this video we discuss the way we can create, install, and uninstall .deb packages in Debian Linux.1. Create a Directory for Your Project:mkdir hello-worldcd hello-world2. Write the C++ Program (main.cpp)3. Compile the Program:g++ main.cpp -o hello-world4. Create the Directory Structure for the .deb Package:mkdir -p hello-world-1.0/usr/local/binmkdir -p hello-world-1.0/DEBIAN5. Move the executable:mv hello-world hello-world-1.0/usr/local/bin/6. Create the control file:vim hello-world-1.0/DEBIAN/control7. Add the following content to the control file:Package: hello-worldVersion: 1.0Section: basePriority: optionalArchitecture: amd64Maintainer: Your Name [email protected]: A simple Hello World program This is a simple Hello World program written in C++.8. Set the necessary permissions:chmod 755 hello-world-1.0/DEBIANchmod 755 hello-world-1.0/usrchmod 755 hello-world-1.0/usr/localchmod 755 hello-world-1.0/usr/local/binchmod 755 hello-world-1.0/usr/local/bin/hello-world9. Build the package:dpkg-deb --build hello-world-1.010. Install the package:sudo dpkg -i hello-world-1.0.deb11. Run the program to test:hello-world12. Uninstall the Package:sudo dpkg -r hello-worldor:sudo apt remove hello-world13. Remove Configuration Files (if any):sudo dpkg --purge hello-worldor:sudo apt purge hello-world14. Clean Up Unused Dependencies:sudo apt autoremove15. Verify Uninstallation:which hello-worldAll Open Source!Arashtad provides high quality tutorials, eBooks, articles and documents, design and development services, over 400 free online tools, frameworks, CMS, WordPress plugins, Joomla extensions, and other products.More Courses ▶ https://tuts.arashtad.com/Business Inquiries ▶ https://arashtad.com/business-inquiries/Affiliate Programs ▶ https://arashtad.com/affiliate-programs/eBooks ▶ https://press.arashtad.com/Our Products ▶ https://market.arashtad.com/Our Services ▶ https://arashtad.com/services/Our Portfolio ▶ https://demo.arashtad.com/Free Online Tools ▶ https://tools.arashtad.com/Our Blog ▶ https://blog.arashtad.com/Documents ▶ https://doc.arashtad.com/Licensing ▶ https://arashtad.com/licensing/About us ▶ https://arashtad.com/about/Join Arashtad Network ▶ https://i.arashtad.com/Our Social Profiles ▶ https://arashtad.com/arashtad-social-media-profiles/Vimeo ▶ https://vimeo.com/arashtadUdemy ▶ https://www.udemy.com/user/arashtadGitHub ▶ https://github.com/arashtadLinkedin ▶ https://www.linkedin.com/company/arashtadTwitter ▶ https://twitter.com/arashtad#deb #debian #linux #debpackage #installdebpackages #linuxtutorials
#deb#linux#debian#deb package#linux tutorials#debian package#install deb packages#create deb packages
0 notes
Text
Messing Windows Up Then Attempting To Fixing It, Part 1
I know, this is very much unrelated to this entire blog, but I am trying an experiment.
I call myself good with technology. I can program some stuff. If you remember from this post, I am a minor (under 18 where I live). I will give you a more precise age range without doxxing myself: 13-16. So, yeah, I am gifted.
Before we continue,
THIS ENTIRE EXPERIMENT HAS BEEN CONDUCTED IN A VIRTUAL MACHINE, SAFE FROM PHYSICAL HARDWARE, AND PREVENTIONS HAVE BEEN TAKEN, LIKE SNAPSHOTS.

UNDER NO CIRCUMSTANCES SHOULD YOU EVER, EVER, EVER TRY THIS AT HOME. EVER. YOU CAN AND WILL LOSE DATA. CLICK THE READ MORE BELOW TO EXPAND THE WHOLE ARTICLE.
Still interested? Ok. Lets go.
Im running Windows 10 Pro 22H2 in VirtualBox 7.0.14, on an old laptop, activated on a home license. The laptop I have has 8GB of DDR3 ram, and an Intel i5-2520m. Virtualization IS enabled. 4GB of ram and 2 of my threads are dedicated to the virtual machine. Windows is unactivated, but this is legal, although against the Windows TOS.
(please forgive me Microsoft i am just doing an experiment)
Lets begin.
So, Attempt 1: the classic "Delete System 32".
The age old fable: "DELETE SYSTEM32 TO SPEED UP SYSTEM"
NEVER DO THIS!
Anyway, I'm doing it.
Once again, I'm in a virtual machine made specifically for this purpose, so my hardware is safe.

As you can see, I put a file there, so I can see if I can fix the mess I will make without deleting data.
Here we go. I'm just running a couple of commands i found to delete it...

And i have been denied. Anyway, time to take ownership of the directory with
TAKEOWN /F C:\Windows\System32
Time to delete system32 again.
AND I'm denied again.
But... it actually started deleting stuff.
Then it denied me again.
Lets reboot, and assess the damage.

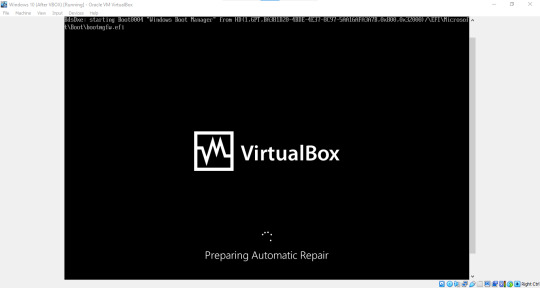
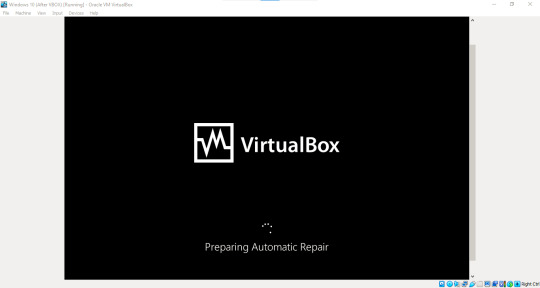
and it blue-screened. 3 times. Yep, I definitely messed Windows up. Afterwards, it prepared an automatic repair.
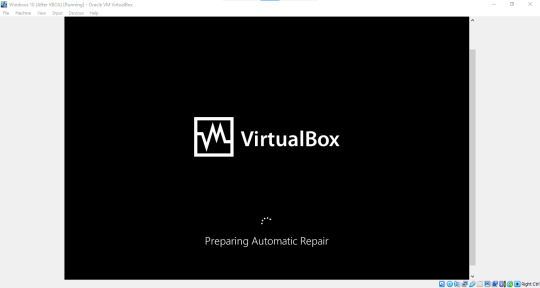
I assume it failed, since I was thrown into the recovery menu.

Ok. Now, lets try to recover this.
Whelp I had to pause for a while so I accidentally shut it down lol. Anyway, now lets recover this for real. Well, here's another automatic repair screen:
(Also, please forgive me for the small screen size,I am running this on my old laptop with a 1366x768 screen lol)
Now, I will try recovery locally, then if all else fails, recover from the ISO. Resetting will be done last for the local recovery (after snapshotting of course).
Recovery Attempt 1: Startup Repair
I clicked "More Advanced Options", then "Startup Repair". I signed in, then it began diagnosing my PC.
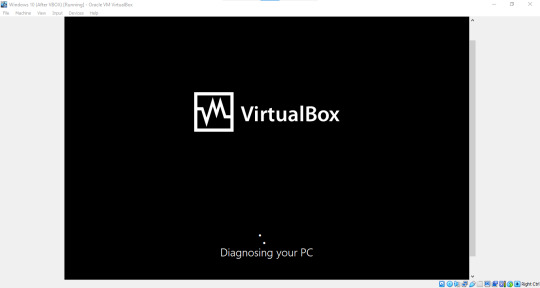
And it failed.
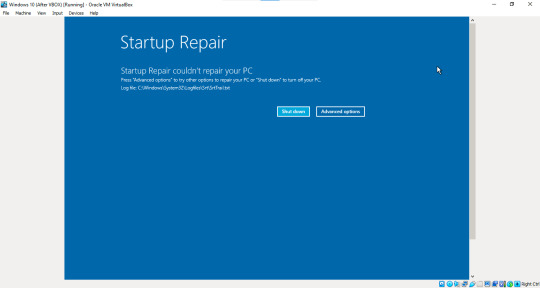
Whelp, it failed. I can't uninstall updates, and there is no way in heck I trust myself to fix it with the command prompt, but there is a system restore. Lets try that, and revert it back TO before Virtualbox Guest Additions.
(Note here, a system restore is not the same as recovering a snapshot. Recovering a snapshot is only done via Virtualbox, and system restore is available on any PC. Look it up, it is real.)
Recovery Attempt 2: System Restore
And no restore points. That failed fast.
There are no system images I manually made, so that's out of the question. Lets try startup settings.
Recovery Attempt 3: Startup Settings.
There are 10 of them.

Debugging won't do anything, boot logging is useless since windows cant boot, low-resolution is unusable since windows cant boot. Lets try Safe Mode.
Recovery Attempt 3A: Safe Mode
The VM froze before I was able to select it. Lets try again.
I waited for the Recovery Environment to boot, then
And it auto-repaired again.
That failed. Whelp, Windows is royally done for. Time to reset it! (I made a snapshot before doing this).
Recovery Attempt 4: Reset (The Final Local Resort)

Ok, a cloud download, at least to me, would be considered cheating since it downloads Windows again, but if all else fails (including USB), I will do that. Doubt it will work.

Lets do this.
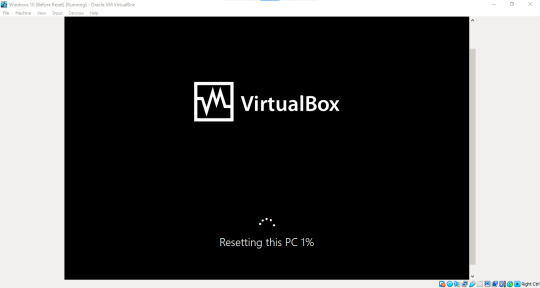
We are now resetting. Sit back and relax, this will take a bit.
And a while. 20 minutes and its only gone up 36%. I might need to revert to right before the reset, save state, and try again tomorrow, since its late.
And I did that.
4/24/2024
Its tomorrow now, so lets try again. Its resetting for real this time. this time (still locally reinstalling)

And it failed... again. Well, that's all for local attempts, time to boot into the Windows 10 ISO and try recovery from there.

Welcome back to the Windows 10 22H2 ISO. I will begin the same steps from the ISO.

It looks the exact same, right? Well, time to do steps 1-4 again, although this time FROM the ISO.
ISO Recovery Attempt 1: Startup Repair

First step, Startup Repair. From the ISO, targeting Windows 10, not the Recovery Environment that was created during the reset.

Now its diagnosing... again.
Congrats me, it failed.
System Restore, System Image, and Safe Mode won't work, and Reset isn't there, so...
Windows 10 is done for.
Time to reset with a cloud download. I can't do anything else, so a cloud download reset, like I said I would, has to be done.
First, I enter into the recovery environment (with the "Exit and Continue to Windows Recovery Environment" option), then troubleshoot, then "Reset This PC." "Keep my files", of course, then I log into my user. I then select "Cloud Download", and it got my "Ethernet" (aka the Network Address Translation network) up and running. It failed the first time,
it failed the second,
And it failed the third. Well, time to cut my losses. It's over.
Moral of the story?
DON'T DELETE SYSTEM32!!!
Time to restore the snapshot for the next breaking of windows.
Thanks for reading this fancy thing I decided to do lol
I might do more, I might not. See all of you soon.
#legendarywindowtrash#windows 10#messing up windows#deleting system32#tech#not usually what I post#computer#breaking stuff#breaking shit#windows
0 notes
Text
did mcafee remove the vpn
🔒🌍✨ Get 3 Months FREE VPN - Secure & Private Internet Access Worldwide! Click Here ✨🌍🔒
did mcafee remove the vpn
McAfee VPN removal confirmation
When uninstalling McAfee VPN, it is essential to pay attention to the removal confirmation process to ensure that the software is fully removed from your system. Once you initiate the uninstallation process, you may be prompted with a removal confirmation dialog box to verify your decision.
Confirming the removal of McAfee VPN is a crucial step to avoid any remnants of the software lingering on your device, which could potentially cause conflicts with other programs or compromise your system's security.
To confirm the removal of McAfee VPN, carefully read through the confirmation dialog box that appears on your screen. The dialog box will typically provide information about the consequences of uninstalling the software and may ask you to confirm your decision by clicking on a button such as "OK" or "Confirm."
It is important to note that confirming the removal of McAfee VPN will permanently delete the software from your device, along with any associated settings and configurations. Therefore, before confirming the removal, ensure that you have backed up any important data or settings related to the VPN application.
By following the removal confirmation process accurately, you can safely and effectively uninstall McAfee VPN from your system without leaving any traces behind. This will help optimize your device's performance and ensure a seamless user experience without any unnecessary clutter from unused software.
McAfee VPN uninstall process
Uninstalling McAfee VPN from your device is a straightforward process that can be completed in just a few simple steps. Whether you're switching to a different VPN provider or no longer need VPN services, removing McAfee VPN can be done quickly and easily.
Here's a step-by-step guide to uninstalling McAfee VPN:
Open Control Panel: Begin by opening the Control Panel on your Windows device. You can usually find this by searching for "Control Panel" in the Windows search bar.
Navigate to Programs and Features: Once in the Control Panel, navigate to the "Programs" section, and then click on "Programs and Features." This will display a list of all the programs installed on your computer.
Locate McAfee VPN: Scroll through the list of installed programs until you find McAfee VPN. It may be listed as "McAfee Safe Connect" or a similar name.
Uninstall McAfee VPN: Right-click on McAfee VPN and select "Uninstall" from the drop-down menu. Follow any on-screen prompts to confirm the uninstallation process.
Complete Uninstallation: Once the uninstallation process is complete, restart your computer to ensure that all components of McAfee VPN have been removed from your system.
Check for Residual Files: After restarting your computer, it's a good idea to check for any residual files or folders related to McAfee VPN. You can do this by searching for "McAfee" in the Windows search bar and deleting any remaining files or folders.
By following these simple steps, you can uninstall McAfee VPN from your device and free up valuable space on your computer. Remember to restart your device after uninstallation to ensure that all components of the VPN have been removed completely.
McAfee VPN elimination details
McAfee has recently announced the discontinuation of its VPN service. This decision comes as part of McAfee's strategic shift towards focusing on its core security offerings. The McAfee VPN service will no longer be available for purchase, and existing subscribers will be proactively notified of the elimination of the service.
The McAfee VPN elimination details include the termination of all VPN servers and infrastructure related to the service. Users who have active subscriptions will no longer be able to use the VPN software and will need to seek alternative VPN solutions. McAfee will provide prorated refunds to customers who have purchased long-term subscriptions to the VPN service.
It is recommended that current McAfee VPN users transition to a different VPN provider to ensure continued privacy and security while browsing the internet. There are many reputable VPN services available in the market that offer similar features and benefits to McAfee's VPN service.
The elimination of the McAfee VPN service does not impact the availability of other McAfee security products, such as antivirus software and internet security suites. McAfee remains committed to providing comprehensive cybersecurity solutions to protect users from online threats and malicious attacks.
Overall, the discontinuation of the McAfee VPN service reflects the evolving landscape of cybersecurity and McAfee's strategic focus on delivering cutting-edge security solutions to its customers. Users are advised to stay informed about the elimination details and take necessary steps to transition to a new VPN service for their online privacy needs.
McAfee VPN eradication steps
McAfee VPN eradication steps ensure the complete removal of McAfee's Virtual Private Network (VPN) software from your device. Whether you want to switch to a different VPN provider or no longer require a VPN service, following these steps will help you effectively uninstall McAfee VPN.
Firstly, navigate to the Control Panel on your Windows device. Locate the "Programs" section and click on "Uninstall a program." From the list of installed programs, find McAfee VPN and select it. Click on the "Uninstall" button and follow the on-screen instructions to remove the software from your device.
After uninstalling the program, it is recommended to restart your device to complete the process. This ensures that any lingering files or configurations related to McAfee VPN are fully removed from your system.
Additionally, you may want to delete any remaining files or folders associated with McAfee VPN manually. Search for any leftover files in the installation directory or other relevant folders on your device and delete them to ensure a clean uninstallation.
To further ensure the eradication of McAfee VPN, consider running a system scan using a reputable antivirus program to detect and remove any potential leftover files or traces of the software.
By following these steps diligently, you can effectively eradicate McAfee VPN from your device and transition smoothly to a different VPN service or simply uninstall the software if it is no longer needed.
McAfee VPN deletion verification
Title: Ensuring Deletion Verification for McAfee VPN: Why It Matters
McAfee VPN offers users a secure and private online browsing experience, allowing them to protect their data and maintain anonymity while accessing the internet. However, ensuring the complete deletion of user data when uninstalling or discontinuing the use of McAfee VPN is equally crucial for maintaining privacy and security.
When users decide to uninstall McAfee VPN or stop using the service, they expect their personal data, browsing history, and any other information collected during their VPN sessions to be completely erased from the system. This deletion process is essential for safeguarding user privacy and preventing any potential misuse of their data.
Verification of data deletion is paramount to instill trust and confidence among users. Without proper verification mechanisms in place, users may remain uncertain about the fate of their data even after uninstalling the VPN. This uncertainty can undermine the credibility of the service and deter users from opting for McAfee VPN in the future.
McAfee VPN must implement robust deletion verification procedures to reassure users that their data is indeed removed from the system after uninstallation. This can include providing users with confirmation messages upon successful deletion of their data, as well as offering transparency regarding the deletion process through clear and concise documentation.
Furthermore, McAfee VPN should adhere to industry best practices and regulatory requirements regarding data privacy and protection. By demonstrating compliance with relevant standards and regulations, McAfee can enhance user trust and differentiate itself as a provider committed to safeguarding user privacy.
In conclusion, ensuring deletion verification for McAfee VPN is essential for maintaining user trust and confidence in the service. By implementing robust verification mechanisms and adhering to privacy standards, McAfee can uphold its commitment to protecting user data and delivering a secure online browsing experience.
0 notes
Last Seen Blogs

thatonebrokenangel
Angelic

hey-it-geg
Dat Stuff

chasunwooph
chasunwooph

stxrry-dxys
absolute clown

violet-femme-fatale
I'm an overgrown wallflower