#User Defined Function In Js
Explore tagged Tumblr posts
Visit Tumblr Blog
Explore Tumblr blogs with no restrictions, modern design and the best experience.
Last Seen Tumblr Blogs


Fun Fact
Tumblr Inc. has $15.1M in annual revenue.
Text
Universal Scroll Button(Autochange Direction) For Any Host
Hey, do you have a site with a lot of forums? Does your host allow you to use Javascript? Boy does this weirdo have a deal for you! For the low low price of free, you can get right now access to a scroll button that swaps directions when you scroll automatically, as well as changing the target & title on hover! Act fast, this deal won't last! I kid, but enough of the ShamWowery. In reality, this is a very simple script that reads how far you have scrolled a window, & applies or removes a class to your scroll button, as well as changing the target of said scroll button & adjusting the title to reflect which way it will take you!
It's so simple, crediting me seems superfluous but if you want, feel free to credit with a link to my blog <3 I hope the new verse of our song is eminently kind to everyone!
See it In Action(Click, or look Below):
I currently use this code on two different WIPS, so feel free to check out some gifs;


To Begin
Before the end of your </body> tag in your wrappers(for Jcink) or wherever the HTML templates go on other sites, you want to place this script:
<script> $(window).scroll(function() { if ($(this).scrollTop() > 800) { $('#scroll').attr("title","To Top?").attr("href","#Top").addClass('totop'); } else { $('#scroll').attr("title", "To Bottom?").attr("href","#Bottom").removeClass('totop'); } });</script>
This seeks out an id of Scroll to adjust the href & title as needed depending on the scroll position within the relevant window. The scroll amount is in px, so to change how quickly it changes the button, alter the number 800 to whatever you desire, fiddle with it; one size never fits all.
The Styling
Once you've saved that, move to your CSS, or wherever your Style tag is to add styling for the link itself. Keep in mind the link should be contained within a container that handles its positioning for it as otherwise the script will fuck with the positioning as well as the transformation & you really just want it to spin upwards.
The styling for the link should be as follows;
#scroll { display: inline-block; positioning: relative; transform: rotate(0deg); transition: transform .5s ease-in-out; /*** ^ change the .5s to alter duration or the ease-in-out to alter the timing of the transition between button states ***/ }
#scroll.totop { transform: rotate(180deg); }
The first statement defines the default state (linking to the bottom) of the scroll button on the load of the page, the second defines the change of position once the window has been scrolled far enough to activate one's script.
The HTML
Now you've got the behaviour defined via JS & the styling defined via CSS, it's time to input the HTML, or the bone structure of the code itself. In your wrappers, template, or wherever HTML goes on your host, locate three places;
One, where you want the TOP scroll location to be. This is where the scroll button will take you once it has changed states on scrolling a certain distance. Here, you place an anchor span as follows;
<span id="Top"></span>
Two, Where you desire for the BOTTOM or BODY scroll location to be, as in where the scroll button will take you on click initially. This could also be a scroll to the start of content, in which case I recommend changing #Bottom & id="Bottom" respectively to reflect the syntax, it's entirely up to you. Here, you place an anchor span as follows;
<span id="Bottom"></span>
Finally, It's time to add the scroll button. Keep in mind, where you put it is a function of utility & design choice. Some like it persistently hovering in a fixed position, some like it in a sidebar or on userlinks, some prefer it in the navigation bar.
Wherever you place it, try to ensure that it's easily accessible on any device, screen size, & matches the User Interface logic you've used everywhere else. If you have all text buttons, don't use just an icon, if you have all icons, don't suddenly use just text. Match your action calls, so users don't feel confused while using your site.
Once you've decided where you want it, place the following code, NOTING that there should be a container for this code that positions it for you. I've provided two options; the Icon Font option (courtesy of Phosphoricons -- a free & reliable Icon Font I recommend -- As well as one which includes text, so both UI/UX design philosophies are accommodated.
Note the option with text will only rotate the caret from downwards to upwards, so the scroll text shouldn't need editing unless you want to add or supplement flavourtext.
Please choose the appropriate option for yourself;
Icon Font
<a id="scroll" class="ph-fill ph-caret-down"></a>
Icon Font with Text
<span>Scroll <a id="scroll" class="ph-fill ph-caret-down"></a>?</span>
Some Notes:
I just want to add a bit of info:
If your browser isn't scrolling smoothly to your anchors? Check your settings, & be sure the root of your CSS has scroll-behaviour: smooth; in it.
If you use this guide & have problems getting it to work, please let me know! I will troubleshoot this for you & tumblr has strange coding, I may have futzed something up, I want this to be as accessible as possible, so don't be silent; questions help!
If you are not using Jcink, or another host with a Jquery library pre-loaded, be aware that one is needed for this script to work. Most hosts will have a default Jquery library, but if yours doesn't or you're self hosting, any should do. The Jcink file is below, however, if you want to just use that.
10 notes
·
View notes
Text
React JS
Unleashing the Power of User Interfaces: A Guide to React.js
In the ever-evolving landscape of web development, creating interactive and dynamic user interfaces is crucial to delivering engaging online experiences. One technology that has risen to prominence in this domain is React.js. Developed by Facebook, React.js has transformed the way developers build web applications by providing a powerful framework for building modular and reusable UI components. In this blog post, we'll delve into the world of React.js, exploring its core concepts, benefits, and practical applications.
Understanding React.js:
At its heart, React.js is a JavaScript library that focuses on the efficient rendering of user interfaces. It employs a declarative approach to building UI components, where developers define how the interface should look at any given point in time, and React takes care of efficiently updating and rendering the UI when data changes.
Key Concepts:
Components: In React, user interfaces are constructed using components - self-contained, reusable building blocks that encapsulate both UI elements and the logic to manage their behavior. Components can be nested within each other, forming a tree-like structure that represents the entire user interface.
Virtual DOM: One of the most powerful features of React is its Virtual DOM. Rather than directly manipulating the actual DOM, React creates a lightweight virtual representation of the DOM in memory. When there are changes in the data or state of a component, React calculates the difference (also known as the "diff") between the previous and current virtual DOM states, and then applies only the necessary updates to the actual DOM. This process greatly improves performance and minimizes unnecessary re-rendering.
State and Props: State represents the dynamic data that can change within a component. Props (short for properties) are immutable data that are passed from parent to child components, allowing for dynamic content and customization.
Lifecycle Methods: React components have a lifecycle, consisting of phases from initialization to rendering, updating, and unmounting. Developers can tap into these lifecycle methods to control behavior at various points in a component's existence.
Hooks: Introduced in React 16.8, hooks are functions that allow developers to add state and lifecycle features to functional components. This enables a more concise and readable code structure, promoting the use of functional components over class components.
Benefits of Using React.js:
Modularity and Reusability: React's component-based architecture promotes modular development. Components can be reused across different parts of an application or even shared between projects, leading to more efficient development and easier maintenance.
Performance: By employing the Virtual DOM and selective rendering, React minimizes the performance overhead of constantly updating the actual DOM. This results in faster, smoother user interfaces, even for complex applications.
Community and Ecosystem: React has a vast and active community that contributes to its ecosystem. This means there are numerous libraries, tools, and resources available to enhance and streamline the development process.
SEO-Friendly: React applications can be rendered on the server side, improving search engine optimization (SEO) by providing search engines with a fully rendered HTML page.
Practical Applications:
React.js finds applications in a wide range of projects, from simple web apps to complex enterprise-level solutions. Some common use cases include:
Single-Page Applications (SPAs): React excels in building SPAs where fluid user experiences are key. Platforms like Facebook and Instagram use React to power their dynamic interfaces.
E-Commerce Websites: React's modular nature is beneficial for e-commerce sites, allowing developers to create reusable components for product listings, carts, and checkout processes.
Data Dashboards: React is suitable for building data visualization dashboards that require real-time updates and interactive charts.
Mobile Applications: React Native, an extension of React.js, is used to develop cross-platform mobile applications with a native-like experience.
In Conclusion:
React.js has revolutionized the way web applications are developed by providing a powerful set of tools for building modular, efficient, and interactive user interfaces. Its component-based architecture, Virtual DOM, and rich ecosystem make it a top choice for developers looking to create modern and engaging web experiences. Whether you're building a personal project or a complex enterprise application, React.js is a valuable technology to have in your toolkit. So, embrace the power of React.js and embark on a journey to create stunning user interfaces that captivate and delight your audience.
6 notes
·
View notes
Text
Design Systems in Web Development: Why Agencies Use Them for UI Consistency
In today’s digital-first world, users expect sleek, intuitive, and consistent interfaces—regardless of the device or platform they’re on. For businesses developing large-scale websites or apps, delivering a consistent experience across teams and pages can be a challenge. That’s where design systems come into play.
Modern Web Development Company teams rely heavily on design systems to ensure that every button, heading, form, and layout element follows unified principles. This not only enhances the user experience (UX) but also streamlines collaboration, speeds up development, and maintains brand identity across all digital touchpoints.
What Is a Design System?
A design system is a comprehensive set of guidelines, reusable components, and tools that define how a digital product should look and behave. It typically includes:
Design Tokens: Standardized values like colors, typography, spacing, and shadows
UI Components: Buttons, cards, modals, forms, and navigation elements
Code Snippets: Ready-to-use HTML/CSS/JS or React/Vue components
Usage Guidelines: Rules on when and how to use each element
Brand Standards: Logos, icons, image styles, and tone of voice
Design systems act as a single source of truth for designers, developers, and content teams—ensuring consistency and efficiency throughout the project lifecycle.
Why UI Consistency Matters
Imagine using a website where buttons look different on every page or where forms behave unpredictably depending on the section you’re in. Inconsistency like this can:
Confuse users
Undermine trust
Increase bounce rates
Slow down development due to repetitive work
Make QA testing more difficult
Design systems eliminate these issues by enforcing visual and functional uniformity across all parts of a website or app.
How Web Development Companies Use Design Systems
Let’s break down how professional web development companies use design systems to deliver high-quality, scalable digital products.
1. Streamlined Collaboration Between Teams
Design systems align developers, designers, product managers, and QA testers. When everyone references the same UI library and brand rules, communication becomes smoother and handoffs are more precise.
Instead of reinventing UI for every page or screen, developers pull from a shared system of reusable components, while designers create mockups using pre-approved assets.
Why it matters: Less ambiguity, faster iterations, and fewer design-to-dev mismatches.
2. Faster Development and Deployment
Reusable code and components mean faster development cycles. Once a UI element like a dropdown or form field is built, it can be reused throughout the project with minimal adjustments.
Many agencies even create component libraries in frameworks like React, Vue, or Angular—reducing redundant work and shortening the time-to-market.
Why it matters: Design systems cut development time significantly, especially for large or growing platforms.
3. Scalability and Maintenance
As websites grow—new pages, new features, additional teams—it becomes harder to maintain design and code consistency. A design system ensures that updates made to a component (like changing button styles) automatically propagate across all instances where that component is used.
Why it matters: Scalability becomes effortless without compromising on consistency or introducing technical debt.
4. Enhanced Accessibility and UX Standards
Most agencies build accessibility guidelines into their design systems, ensuring that components meet WCAG standards for color contrast, focus states, keyboard navigation, and screen reader support.
This makes it easier to build inclusive experiences for all users from the ground up.
Why it matters: Accessibility becomes a built-in feature, not an afterthought—helping both UX and compliance.
5. Brand Consistency Across Digital Products
Whether it's a website, mobile app, microsite, or internal dashboard, using a design system ensures the brand identity stays cohesive. Colors, typography, iconography, and spacing are applied uniformly, reinforcing the brand across every touchpoint.
Why it matters: Consistent branding improves recognition, professionalism, and user trust.
6. Better Testing and QA Processes
When components are standardized, testers can focus on edge cases and workflows, not whether each UI element matches design specs. Automated tests can even be tied to the design system to ensure that no updates break key UI elements.
Why it matters: QA becomes faster and more effective, reducing bugs and UI inconsistencies.
Final Thoughts
In modern web development, delivering a consistent, scalable, and user-friendly interface is no longer optional—it’s expected. That’s why top-performing Web Development Company teams build and maintain robust design systems that unify design and development across every project.
If you’re looking to build a high-quality digital product that scales smoothly and looks polished on every screen, investing in a design system—and working with a team that knows how to implement it—is a smart move. It’s not just about design—it’s about creating a repeatable, maintainable system that accelerates your digital growth.
0 notes
Text
The Development Process of Metaverse Game
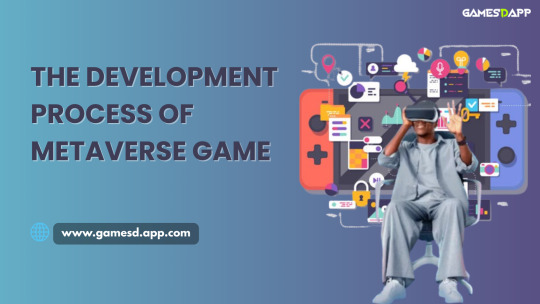
Introduction
The metaverse is changing fast the way individuals engage with digital spaces. With virtual reality (VR), augmented reality (AR), and blockchain tech becoming increasingly available, metaverse game development is becoming a primary driver of immersive online experiences. These virtual worlds support gaming, social networking, digital commerce, and more.
In order to develop a metaverse gaming platform that's scalable and compelling, developers go through a strategy development process using a mix of creativity, innovation, and decentralized architecture. That is a summarized account of metaverse game building from scratch below:
1. Planning and Conceptualization
Metaverse game development begins with concept creation. The vision, key gameplay mechanics, and final purpose of the virtual world are set by developers.
Develop a concept for game and story
Identify players and their behaviors
Define monetization frameworks (e.g., NFTs, tokens)
Define technical requirements and scope
Effective planning results in smooth operations in the subsequent stages.
2. Virtual World Designing
Design is one of the central aspects of player experience. The process of crafting the appearance, feel, and structure of the virtual world during this phase occurs.
Develop 3D models, characters, and environments
Prioritize UI/UX design for ease of navigation
Implement immersive worlds utilizing software such as Blender
A rich and interactive visual space is crucial for player interaction.
3. Choosing the Technology Stack
The technology stack chosen plays a crucial role in the success of metaverse game development. Developers choose engines, libraries, and cloud solutions specific to the needs of the project.
Unity: A general-purpose engine well-suited for cross-platform development, with VR/AR support, real-time rendering, and an extensive asset store.
Unreal Engine: Famous for upscale graphics and cinema-style experiences, ideal for large-scale, detailed metaverse worlds.
Web3.js and Ethers.js: These libraries add support for blockchain functionality like NFT transactions, wallet integration, and smart contract calls.
Blender: Open-source software for 3D creation used to create avatars, virtual assets, and animations needed for engaging gameplay.
Amazon Web Services (AWS): Offers cloud infrastructure to enable multiplayer features, data storage, and scalability.
The right tech stack ensures a smooth, scalable, and immersive experience.
4. Blockchain Integration
Blockchain is a major pillar of metaverse game development, enabling true digital ownership and decentralized experiences.
Create NFTs for in-game assets and collectibles
Build play-to-earn economies using tokens
Use smart contracts for transparency and automation
Enable user control through decentralized governance (DAOs)
Blockchain integration makes virtual environments more interactive and secure.
5. Game Logic Development and Testing
After assets and infrastructure are available, the development of the core begins. Coding game mechanics, systems, and testing are a part of this.
Develop multiplayer mechanics and game logic
Integrate game with blockchain features
Perform performance and security testing across devices
Correct bugs and game flow optimization
Extensive testing guarantees a launch that is bug-free and high-quality.
6. Deployment and Maintenance
Once tested, the game is rolled out on supported platforms (web, mobile, VR). After launch, developers keep an eye on performance and further refine the experience.
Release updates and fresh content
Gather feedback and refine gameplay
Scale infrastructure according to user activity
Offer technical support and resolve issues
Continuous development keeps the platform fresh and ready for the future.
Why Opt for GamesDApp for Metaverse Game Development
GamesDApp is a reliable name in metaverse game development with end-to-end solutions from concept to deployment. With proficiency in Unity, Unreal Engine, blockchain integration, and cloud infrastructure, they turn engaging virtual experiences into reality.
Full-cycle development assistance
Both design and blockchain expertise
Customized and scalable solutions for various industries
Successful experience in developing successful metaverse projects
Conclusion
As the online universe turns towards immersive and decentralized experiences, metaverse games will keep influencing the future of gaming and interaction. Creating dynamic and interesting virtual worlds has never been easier with the right tools, technologies, and development process.
0 notes
Text
Learn React JS Classes with Fusion Software Institute

At Fusion Software Institute, we are dedicated to helping aspiring developers master modern web technologies. One of the most essential topics in front-end development is React JS Classes. React has revolutionized how we build user interfaces, and understanding class components in React is crucial for building scalable and maintainable applications.
Read more: Learn React JS Classes with Fusion Software Institute
What are React JS Classes?
React JS Classes refer to the class components used in React to define and manage the UI and behavior of an application. Before the introduction of Hooks in React 16.8, class components were the primary way to handle state and lifecycle methods in React. Although functional components with Hooks are more common today, class components are still widely used in many projects and understanding them is essential.
Why Learn React JS Classes?
Here are a few reasons why learning React JS Classes is beneficial:
Legacy Codebases: Many existing React applications still use class components. Understanding them helps you maintain and upgrade these apps.
Deep Lifecycle Control: Class components give you clear access to lifecycle methods like componentDidMount, shouldComponentUpdate, and componentWillUnmount.
Stronger OOP Concepts: Using classes encourages understanding object-oriented programming concepts which are helpful across various programming languages.
When to Use Class Components
When working on older projects.
If your team prefers class-based architecture.
When learning the full React lifecycle flow from scratch.
Conclusion
Mastering React JS Classes is a valuable skill for any React developer, especially those working with legacy codebases or seeking a deeper understanding of React’s foundations. At Fusion Software Institute, we offer in-depth training in React JS and other modern technologies to help you build a successful career in web development. Join us to get hands-on experience and personalized guidance to boost your skills!
Visit here: https://www.fusion-institute.com/courses/react-js
0 notes
Text
Learning TypeScript for Safe Programming

TypeScript is a superset of JavaScript that adds static typing to the language, making it a powerful tool for building robust and maintainable applications. By catching errors at compile time rather than at runtime, TypeScript helps developers create safer and more predictable code. This post explores the fundamentals of TypeScript and how it can improve your JavaScript development experience.
What is TypeScript?
TypeScript is an open-source programming language developed by Microsoft. It builds on JavaScript by adding optional static types, interfaces, and advanced tooling. TypeScript code is transpiled into plain JavaScript, allowing it to run in any environment where JavaScript does.
Why Use TypeScript?
Static Typing: Identify type-related errors at compile time, reducing runtime errors.
Improved Readability: Types serve as documentation, making code easier to understand.
Enhanced Tooling: Better autocompletion, navigation, and refactoring support in IDEs.
Large-Scale Applications: Facilitates building and maintaining complex applications with better structure.
Community Support: Growing ecosystem and support from popular libraries and frameworks.
Getting Started with TypeScript
Installation: You can install TypeScript using npm:
Compile TypeScript: Use the TypeScript compiler (tsc) to transpile .ts files into .js files.
Configuration: Create a tsconfig.json file to customize your TypeScript project settings.
Basic Types in TypeScript
TypeScript supports various data types, including:
Primitive Types: string, number, boolean, null, undefined, void, symbol.
Arrays: Use the syntax number[] or Array.
Tuples: Define an array with fixed number and types of elements.
Enums: Create a set of named constants for better readability.enum Direction { Up, Down, Left, Right }
Interfaces and Type Aliases
Interfaces allow you to define custom types for objects, promoting better type safety:interface User { name: string; age: number; } const user: User = { name: 'Alice', age: 30 };
Classes and Inheritance
TypeScript supports object-oriented programming with classes and inheritance:class Animal { constructor(public name: string) {} move() { console.log(`${this.name} moves.`); } } class Dog extends Animal { bark() { console.log('Woof! Woof!'); } } const dog = new Dog('Buddy'); dog.move(); // Buddy moves. dog.bark(); // Woof! Woof!
Best Practices for TypeScript Development
Always define types for function parameters and return values.
Use interfaces and types to enforce consistency in data structures.
Utilize TypeScript’s strict mode for better type-checking.
Regularly update your TypeScript version to take advantage of new features.
Conclusion
Learning TypeScript is a valuable investment for any JavaScript developer. By incorporating static typing and leveraging TypeScript's advanced features, you can create safer, more maintainable, and scalable applications. Start experimenting with TypeScript in your next project, and enjoy the benefits of safer programming!
0 notes
Text
Advantages of Using TypeScript in React JS
React JS has gained immense popularity for its ability to build dynamic, fast, and interactive user interfaces. While JavaScript is the go-to language for React development, TypeScript, a superset of JavaScript, is becoming increasingly popular in the React ecosystem. TypeScript adds static types to JavaScript, making it easier to manage large codebases, spot errors early, and improve developer productivity.
In this article, we’ll explore the advantages of using TypeScript in React JS and why it’s a game-changer for modern web development.
What is TypeScript?
TypeScript is a statically typed superset of JavaScript, developed and maintained by Microsoft. It adds optional static typing and other features to JavaScript, offering improved tooling and enhanced code quality. TypeScript compiles to plain JavaScript, meaning any browser or JavaScript engine can run it.
TypeScript is not a replacement for JavaScript but rather a powerful extension that allows developers to catch potential issues at compile-time, rather than runtime.
Key Features of TypeScript:
Static typing: TypeScript allows you to define types for variables, function parameters, and return values.
Enhanced IDE support: Modern IDEs (Integrated Development Environments) offer TypeScript-specific features, such as autocompletion, type checking, and inline documentation.
Error detection: TypeScript can catch many errors during development, reducing bugs and improving the quality of code.
Improved refactoring: TypeScript offers better support for refactoring large codebases with confidence.
Why Use TypeScript with React?
TypeScript offers several advantages when paired with React JS, especially for large-scale applications and team-based projects. Let's look at some of the key benefits:
1. Type Safety and Error Prevention
One of the most significant benefits of TypeScript is type safety. In JavaScript, data types are dynamic, which can lead to unpredictable behaviors and bugs. TypeScript enforces type-checking, allowing you to define specific types for variables, props, and function parameters.
Example:
In a React component, you can define the expected types for props like this:
tsx
CopyEdit
interface GreetingProps { name: string; } const Greeting: React.FC<GreetingProps> = ({ name }) => { return <h1>Hello, {name}</h1>; };
With TypeScript, the compiler will catch issues if you pass incorrect types to the component (e.g., passing a number instead of a string), reducing the chances of runtime errors.
2. Better Developer Experience
TypeScript enhances the developer experience by providing features like auto-completion, code navigation, and intellisense in modern IDEs. With TypeScript’s type annotations, developers can quickly understand the shape and structure of the code, making development faster and more efficient.
Additionally, TypeScript provides powerful refactoring tools. When working on a large React codebase, refactoring can be risky without proper checks. TypeScript helps prevent common mistakes during refactoring by showing type mismatches in real-time.
3. Improved Code Readability and Maintainability
As your React application grows in size and complexity, maintaining clean and understandable code becomes essential. TypeScript helps with this by providing clear type definitions. Developers can immediately understand what type of data is being passed and returned by functions, making the codebase more self-documenting.
For instance, with TypeScript, you can define interfaces for props and state, which helps both current and future developers working on the project:
tsx
CopyEdit
interface User { name: string; age: number; } interface UserProps { user: User; } const UserProfile: React.FC<UserProps> = ({ user }) => { return <div>{user.name} is {user.age} years old.</div>; };
This improves the readability and maintainability of the code, especially when the project involves multiple developers.
4. Enhanced Tooling and IDE Support
Modern IDEs such as Visual Studio Code provide excellent support for TypeScript. The auto-completion and intellisense features offered by TypeScript are invaluable when working with React components. These features help developers avoid mistakes, complete code faster, and boost productivity.
For example, if you're working with a component that expects a certain type of data, your IDE will automatically suggest the correct types and give you real-time feedback on what is expected:
tsx
CopyEdit
const MyComponent: React.FC<{ count: number }> = ({ count }) => { return <div>{count}</div>; };
The editor will highlight any incorrect type assignments immediately.
5. Better Collaboration in Teams
When working in a team, TypeScript ensures that everyone adheres to the same types and standards. Type declarations provide clarity on how data flows within the app, improving communication and reducing misunderstandings between team members. With TypeScript, collaborating on complex applications becomes much smoother, as everyone is aware of the expected data structures and types.
Moreover, as TypeScript has optional strict mode, you can enforce rigorous type-checking rules across the entire team, ensuring better consistency and fewer bugs.
6. Scalability for Large Applications
React applications tend to grow in complexity as more features are added. TypeScript’s static typing provides better tooling and makes it easier to scale large React applications. With type-checking, refactoring, and debugging become more manageable, even in large teams or large codebases.
By catching errors early during development, TypeScript helps developers avoid common pitfalls when building complex React apps. This makes it ideal for enterprise-level applications that require long-term maintainability.
How to Get Started with TypeScript in React
To start using TypeScript in your React projects, follow these steps:
Step 1: Setting Up TypeScript with React
You can quickly create a new React app with TypeScript by using the following command:
bash
CopyEdit
npx create-react-app my-app --template typescript
This will set up a React project with all the necessary TypeScript configurations.
Step 2: Configuring TypeScript in Existing Projects
If you already have a React project and want to migrate to TypeScript, you can follow these steps:
Install TypeScript and the required types: bashCopyEditnpm install --save typescript @types/react @types/react-dom
Rename your .js files to .tsx (for files containing JSX) or .ts (for regular TypeScript files).
Type your components, props, and states using TypeScript syntax, and enjoy the benefits!
Conclusion
TypeScript is a powerful tool that enhances React development by providing static typing, error prevention, and better developer tools. It’s especially beneficial when working on large-scale applications or in teams. By making your React code more predictable, maintainable, and scalable, TypeScript ensures that your projects are easier to manage and less error-prone.
If you’re starting a new React project or looking to improve your current workflow, incorporating TypeScript into your React apps is an excellent decision. With the growing adoption of TypeScript in the React ecosystem, it's a valuable skill that can open up better career opportunities in 2025 and beyond.
#TypeScript#ReactJS#WebDevelopment#JavaScript#FrontendDevelopment#ReactDevelopment#Programming#TechTips#DeveloperTools
0 notes
Text
Optimizing Performance in AngularJS Applications

The AngularJS framework is a very powerful JavaScript framework that allows one to create dynamic single-page applications (SPAs) easily. When applications become huge, they start to show performance issues, such as slow loading times and unresponsiveness for the user. Therefore, it is very crucial to have performance optimization in AngularJS applications in order to provide really smooth functioning as well as responsiveness.
This post will discuss the best ways to improve the performance of AngularJS applications and their efficiency. You can consider Angular JS Training in Chennai to sharpen your skills if mastering AngularJS and developing high-performing applications is your goal.
Using Fewer Watchers and Bindings Due to the true two-way data-binding modalities of AngularJS, the application will constantly keep a tab on whatever changes occur. The irony is that too many watchers and bindings slow down the performance. Each and every change triggers a digest cycle which is responsible for updating the UI.
Optimization: Limit defining $scope.$watch() to as few as possible in order to avoid unnecessary bindings. Make use of a one-time binding (::) to prevent static content changes from being continuously tracked. Keeping the use of expressions inside Angular directives such as ng-repeat to a minimum. By reducing the number of watchers, which could speed up the digest cycle in AngularJS, one gets faster performance from the application.
Optimize ng-repeat for Large Lists The ng-repeat is an often-used angular directive for rendering lists. Unfortunately, performance bottlenecks may occur with larger datasets.
Optimization: Use track by to efficiently rerender repeated elements. Ensure we have a pagination or lazy initialization such that we only load in those items we require. Alternatively, some may opt for third-party libraries such as AngularJS infinite scroll for improved list handling. The moment the ng-repeat is being managed efficiently, then the application would remain fast and responsive even to large datasets.
Scant DOM Manipulation Directly Direct manipulation of DOM is costly in terms of performance and would eventually slow down the application. Since AngularJS has provided directives to take care of the updates in DOM, it is more advantageous to avoid the direct manipulations frequently.
Best Practices: Make use of Angular directives like ng-show and ng-hide rather than modifying DOM elements manually. Limit the extent to which jQuery is used inside AngularJS applications. Cache DOM elements and reuse them instead of creating them again and again. Minimizing direct DOM manipulation enhances performance by reducing unnecessary reflow and repaint.
Optimization of HTTP Requests and API Calling The increased API calls can potentially slow down an application and put a lot of load on the server as well. So, optimization of data-fetching is one aspect without which the performance cannot be improved.
Optimization Techniques: Caching mechanisms can be used in an application in order to create the previously fetched data so that it can get stored and avoid going for another redundant API request. Debouncing the API from being called from the search fields to prevent the program from too many network requests. Fetch only what you need instead of fetching a complete database. Effective API handling means faster retrieval of data to give a smoother user experience.
Activate Lazy Loading for Modules Lazy loading is essentially a technique for improving initial load times since it loads only the required modules when you need them in AngularJS applications.
How Lazy Loading Helps: Decrease the size of the initial bundle, thus reducing the time it takes for pages to load. Supports dynamic loading, which improves the overall performance of application components. Grows scalability of application development. By lazy loading, AngularJS applications can better manage their resources and be more responsive.
Optimize filters and expressions Filters and expressions serve the purpose of formatting the data, but using these excessively slows down an application by making them run multiple times during the digest cycle.
Methods of Optimization: Use filters in controllers rather than in the direct template to minimize repeat evaluations. Avoid adding or using complex calculations using expressions. Cache values after they are computed so that they need not be recalculated again. It ensures application speed is maintained by efficient data processing happening.
Build tools for minification and compression By minifying JavaScript and CSS files, the size of the application is reduced and improves load time. This can all happen through the use of tools like Gulp, Grunt, or Webpack.
Benefits at a Glance: Files Minification eliminates unnecessary characters through which the code minimizes. Compression reduces the volume of data transferred to clients from the server. Concatenation wraps several files in one so that client machines make fewer requests through HTTP. All the above three techniques result in better performance with desired load speeds.
Monitor Performance Using AngularJS Batarang AngularJS Batarang is a chrome add-on that offers developmental features to the people managing angular applications. The insight it provides about performance bottlenecks will help developers in tracking their digest cycles while monitoring memory.
How To Use It: Identification of unnecessary watchers and bindings. Monitor the performance of digest cycle, eliminate unnecessary actions. Debugging slow running directives and expressions. Regular monitoring on Batarang can help maintain the performance of the application and spot areas to improve.
Final Thoughts In the end, the performance improvement of applications in AngularJS can pave way for an efficient user experience. Reducing the number of watchers, optimizing ng-repeat, minimizing DOM manipulation, improving API handling, lazy loading, and using build tools are some best practices that help developers build faster and more scalable applications.
If you wish to acquire a deep knowledge base and practical experience in developing high-performance AngularJS applications, take up Angular JS Training in Chennai and learn from industry experts to elevate the prospects of your career.
0 notes
Text
JavaScript 1 🧬 JavaScript Introduction
New Post has been published on https://tuts.kandz.me/javascript-1-%f0%9f%a7%ac-javascript-introduction/
JavaScript 1 🧬 JavaScript Introduction

youtube
a - JavaScript Introduction JavaScript is a versatile interpreted programming language. It was primarily used to add interactivity and dynamic behavior to web pages It runs on web browsers as well as on servers using Node.js You can also create desktop applications using Electron Using React Native, Ionic and other frameworks and libraries you can create mobile application for Android and iOS JS is one of the core technologies of the World Wide Web along with HTML and CSS JS originally designed by Brendan Eich at Netscape in 1995 b - Javascipt Key Features Interactivity → JS allows developers to create interactive web pages that change on user actions Client-Side execution → Running on the client-side(web browsers), reduces the server load Rich Web Applications → It supports complex applications through frameworks (React, Angular, and Vue.js) building single-page applications (SPAs) Cross-Platform Compatibility → While primarily used on browsers, JavaScript can also run in other environments such as Node.js for server-side programming, IoT devices, and more. Event-Driven Programming → JavaScript uses an event-driven model to respond to events triggered by the user or browser actions like mouse clicks, key presses, etc. Rich API → It provides a vast array of built-in functions (APIs) for tasks ranging from manipulating images and videos in real time to accessing hardware features directly through browsers. Dynamic Typing → JavaScript is dynamically typed, which means that variable types are not defined until the code is run and can change during execution. Popularity → It's widely used due to its simplicity and flexibility, making it a cornerstone for both front-end (client-side) and back-end development (using Node.js). c - JavaScript Versions 1/2 ES1 → ECMAScript 1 → 1997 → First release ES2 → ECMAScript 2 → 1998 → Minor changes ES3 → ECMAScript 3 → 1999 → regular expressions, do-while, switch, try/catch ES4 → ECMAScript 4 → Never Released. ES5 → ECMAScript 5 → 2009 → JavaScript strict mode, Multiline strings, String.trim(), Array methods, Object methods, Getters and setters, Trailing commas ES6 → ECMAScript 2015 → 2015 → let and const statements, Map and set objects, Arrow functions, For/of loop, Some array methods, Symbol, Classes, Promises, JavaScript Modules, New Number methods and properties, For/of loop, Spread operator ES7 → ECMAScript 2016 → 2016 → Exponential (**) operator, Array.includes() method ES8 → ECMAScript 2017 → 2017 → Async/await, Object.entries() method, Object.values() method, Object.getOwnPropertyDescriptor() method, string padding d - JavaScript Versions 2/2 ES9 → ECMAScript 2018 → 2018 → Rest object properties, JavaScript shared memory, Promise.finally() method, New features of the RegExp() object ES10 → ECMAScript 2019 → 2019 → String trim.start(), String trim.end(), Array.flat(), Revised Array.sort(), Revised JSON.stringify() / toString(), Object.fromEntries() method ES11 → ECMAScript 2020 → 2020 → Nullish Coalescing Operator (??), BigInt primitive data type ES12 → ECMAScript 2021 → 2021 → String.replaceAll() method, Promise.Any() method ES13 → ECMAScript 2022 → 2022 → static block inside the class, New class features, Top-level await ES14 → ECMAScript 2023 → 2023 → Array findLast() & findLastIndex(), Hashbang Grammer, Symbols as WeakMap keys
0 notes
Text
How to Audit Your Website Like a Digital Marketing Agency
Your website is often the first impression your brand makes—and if it's not optimized, you're likely losing traffic, leads, and conversions without even realizing it. That’s why auditing your site regularly is essential. But not just any audit—a comprehensive, data-driven review like a Digital Marketing Agency would perform.
In this guide, we’ll walk you through how to conduct a professional-level website audit—covering SEO, UX, technical performance, and content—so you can spot gaps and unlock new opportunities.
Step 1: Check Site Performance and Speed
Speed matters. A slow site increases bounce rates and kills conversions. Use tools like:
Google PageSpeed Insights
GTmetrix
WebPageTest
Look for:
Load time under 3 seconds
Compressed images and assets
Minified CSS/JS
Server response time
Pro tip: Agencies often recommend a CDN (Content Delivery Network) like Cloudflare to boost global load times.
Step 2: Run a Full SEO Audit
SEO is the backbone of organic visibility. Use tools like SEMrush, Ahrefs, or Screaming Frog to conduct an in-depth audit.
Key areas to check:
Title tags and meta descriptions: Are they optimized and unique?
Header structure (H1-H3): Is it logical and keyword-focused?
Broken links: Fix all 404s and redirects.
Internal linking: Are you passing link equity effectively?
Mobile-friendliness: Check with Google’s Mobile-Friendly Test.
Also review your robots.txt and XML sitemap to ensure your site is crawlable.
Step 3: Analyze User Experience (UX)
A Digital Marketing Agency always looks at UX as part of the audit because it directly affects bounce rates and conversions.
Evaluate:
Navigation: Is it intuitive and easy to use?
Mobile responsiveness: Does the site display properly on all devices?
Page layout: Are CTAs clear and above the fold?
Forms: Are they short, simple, and functional?
Use tools like Hotjar or Microsoft Clarity to view heatmaps and session recordings to understand where users drop off.
Step 4: Review Technical SEO & Site Architecture
Beyond content and keywords, your technical setup plays a huge role in visibility.
Checklist:
HTTPS secure (SSL certificate in place)
Canonical tags implemented correctly
Structured data/schema markup
Crawl depth (important pages should be 3 clicks or fewer from homepage)
Clean URL structure (e.g., example.com/services/seo instead of example.com/page?id=1234)
Agencies also check Core Web Vitals for stability, interactivity, and loading performance.
Step 5: Audit Your Content for Quality & Relevance
Content is what drives traffic and engagement, but only if it’s valuable and relevant.
Audit your content by asking:
Is it up to date and accurate?
Does it serve the user’s search intent?
Are you using relevant keywords naturally?
Are you targeting featured snippet opportunities?
Is your blog organized into topic clusters?
Use tools like Surfer SEO or Clearscope to benchmark content against competitors and find gaps in coverage.
Step 6: Evaluate Analytics and Conversion Tracking
If you’re not tracking your performance, you’re flying blind. A proper audit includes reviewing your analytics setup.
Ensure:
Google Analytics 4 is installed and configured correctly
Google Tag Manager is firing properly
Events like form submissions, button clicks, and purchases are tracked
Goals and conversions are defined and measurable
Set up UTM tags for all campaign links so you can track source performance accurately.
Step 7: Check Accessibility & Legal Compliance
An often overlooked area, accessibility and compliance are critical for user inclusivity and legal safety.
Run checks for:
Alt text on images
Keyboard navigation support
Color contrast ratios
GDPR/CCPA compliance and cookie consent banners
Use tools like WAVE or Axe for accessibility auditing.
Final Thoughts: Audit Like a Pro to Perform Like One
Auditing your website like a Digital Marketing Agency isn’t just about checking boxes—it’s about uncovering what’s blocking your traffic, conversions, and overall performance. A thorough audit provides clarity, direction, and measurable next steps to elevate your digital presence.
By consistently auditing and optimizing your site across SEO, UX, content, and analytics, you can turn your website from a static brochure into a lead-generating engine. And if the process feels overwhelming, a qualified Digital Marketing Agency can step in with the tools, talent, and insights to accelerate your results.
0 notes
Text
How to Prevent Web Cache Deception Attacks in Laravel
Web Cache Deception (WCD) is a critical security vulnerability that allows attackers to force a web server to cache sensitive data, making it accessible to unauthorized users. Laravel applications using caching mechanisms without proper security configurations are at risk. In this guide, we will explore Web Cache Deception attacks, demonstrate coding examples, and show how to secure Laravel applications against them.

What Is a Web Cache Deception Attack?
A Web Cache Deception attack tricks a web cache into storing sensitive user-specific data, which an attacker can later access. This occurs when URLs with user-specific content are cached due to misconfigured caching rules.
Example of a Vulnerable URL:
https://example.com/profile/settings
If a user accesses this page while logged in, the response may include personal information. However, if the caching system mistakenly caches it as:
https://example.com/profile/settings.css
An attacker can later request settings.css and access the cached version of another user's private content.
How to Check If Your Laravel App Is Vulnerable
You can use our Free Website Security Scanner to scan your Laravel application for vulnerabilities, including Web Cache Deception issues.

Screenshot of the free tools webpage where you can access security assessment tools.
Code Example: Laravel Application with Web Cache Deception Risk
Here’s an example of how an insecure Laravel route could expose your application to Web Cache Deception attacks:
Route::get('/user/profile', function () { return response()->view('profile')->header('Cache-Control', 'public'); });
Why Is This Dangerous?
The Cache-Control: public header allows this page to be stored in a shared cache.
If the attacker tricks the caching server into storing /user/profile.css, the next user might access another person’s profile data.
How to Prevent Web Cache Deception in Laravel
1. Implement Proper Cache-Control Headers
Modify the response headers to prevent unauthorized caching of dynamic pages.
Route::get('/user/profile', function () { return response()->view('profile')->header('Cache- Control', 'private, no-store, no- cache, must-revalidate'); });
🚀 Best Practice:
Use private, no-store, no-cache, must-revalidate to ensure sensitive pages are never cached.
2. Restrict Caching to Static Resources
Allow caching only for static files like CSS, JS, and images.
Route::get('/static/{file}', function ($file) { return response()->file(public_path('static/' . $file))- >header('Cache- Control','public, max-age=31536000'); })->where('file', '.*\.(css|js|png|jpg|jpeg|gif|svg)');
🔹 What This Does:
Only allows caching for files with .css, .js, .png, .jpg, etc.
Prevents caching of sensitive user data.
3. Use Middleware to Prevent Caching of Sensitive Pages
Create a Laravel middleware to block caching for user-specific routes:
namespace App\Http\Middleware; use Closure; class PreventCache { public function handle($request, Closure $next) { $response = $next($request); return $response->header('Cache-Control', 'private, no-store, no-cache, must-revalidate'); } }
Now, register this middleware in app/Http/Kernel.php:
protected $routeMiddleware = [ 'nocache' => \App\Http\Middleware\PreventCache::class, ];
Apply it to your sensitive routes:
Route::get('/user/profile', 'ProfileController@show')->middleware('nocache');
✅ Benefit: Ensures that user-specific pages are never cached.
4. Implement URL Whitelisting for Cacheable Content
Instead of allowing caching for all pages, define a whitelist:
$cacheablePaths = [ '/static/css/style.css', '/static/js/script.js', ]; if (in_array($_SERVER['REQUEST_URI'], $cacheablePaths)) { header('Cache-Control: public, max-age=31536000'); } else { header('Cache-Control: private, no-store, no-cache, must- revalidate'); }
🔥 Why It Works:
Only allows caching for pre-defined static resources.
Scan Your Website for Web Cache Deception Vulnerabilities
To ensure your Laravel application is secure, perform a free vulnerability scan using our Website Security Checker.

An Example of a vulnerability assessment report generated with our free tool, providing insights into possible vulnerabilities.
The Website Vulnerability Scanner tool helps detect misconfigured caching headers and other security risks in your web application.
Conclusion
Web Cache Deception attacks can expose sensitive user data if caching is misconfigured. By following the security measures outlined in this guide—such as using proper cache-control headers, restricting caching to static resources, and implementing middleware—you can protect your Laravel application.
For more security tips, visit our Pentest Testing Corp Blog.
💡 Stay safe and secure your Laravel application today! 🚀
1 note
·
View note
Text
Unlock the Secrets: A Comprehensive Guide to Building Your Own Job Portal Website

Online job portals are essential platforms in the job market, connecting employers with job seekers. The statistics state that the global online recruitment market is expected to hit $43.39 billion by 2027, with a CAGR growth rate of 7.1%. Whether you want to launch a niche job board or a comprehensive employment marketplace, developing a job portal website requires strategic planning, the right features, and technical expertise. In here, we are going to help you with how to create a successfully step-by-step Process and unleash with full potential of Job portal website.
Planning Your Job Portal Website
Before you jump into building, you need a solid plan. This stage is all about setting the foundation for your job portal's success. Think of it as drafting the blueprint before constructing a building.
Step 1:Defining Your Niche and Target Audience
The very first step is to understand what kind of jobs portal you want, whether it be general, niche-specific, freelance or remote jobs. Some examples are job market demand, competition and possible growth opportunities. Also Design a sustainable monetization model along with a revenue source such as subscription, per listing charge, earning through commission, featured job posting, and advertisement placements. Offering premium services such as resume highlighting or employer branding can also enhance profitability while ensuring continuous engagement from both job seekers and recruiters.
Step 2:Market Research and Competitive Analysis
If you are planning to start a job portal, research includes in-depth analysis of top job portals to understand how they measure, what are their strong points, weaknesses, and what makes them stand out. Analyze their monetization strategies, user retention methods, and strengths. In fact, Indeed has an exceptionally strong global presence, with over 250 million distinct visitors each month. Discovering any shortcomings in their offerings will allow you to gain a competitive edge for your platform.
Step 3: Defining Features and Functionality
Essential Features to Incorporate in Your Job Portal Every developer has an imaginary mind map of how their product will look like. Here are some of the most important features:
Job Seeker Features
Advanced Search Filters – Allow users to filter job search by category, location, experience level, and salary.
Resume Upload & Management — Enable Job seekers to upload and save resumes to easily apply for jobs
Job alerts & notifications – Users can be notified if new jobs are posted that meet their preferences.
Application Tracking System – Allow job seekers to track the status of their application in real time.
Employer Features
Seamless Job Posting Tools – Easy Creation and Management of Job Listings for Employers.
Applicant Management System – Monitor and organize correct candidates with an organised hiring process.
Company Branding Options – Improve employer profiles with logos, company information, and career pages to develop interest in available positions.
Analytics & Performance Tracking – Includes metrics for the number of views of the job posting, application rates, and candidate engagement.
Step 4: Choosing the Right Technology Stack
Choosing the right technology stack is important to ensure that your job portal runs smoothly, is scalable and offers a great user experience. What technologies you use often depends on the complexity of your platform, anticipated traffic, and functionalities required.
Frontend Development: React. js, Angular, or Vue. js provides a way to create a dynamic and responsive user interface that allows for smooth navigation and an engaging user experience.
Backend Development: Node. Business logic, data processing, and API integrations can be backed with js, Django or Laravel frameworks.
Database Management: If you need a relational database, then you have MySQL and PostgreSQL to choose from, while otherwise, you can go for MongoDB if you have a large amount of data and need flexible data storage.
Hosting Services: Managed services like AWS, DigitalOcean, Google Cloud can scale infrastructure, have availability, security features necessary to handle job listing and user profiles effectively.
Payment Gateway Integration: If your platform offers premium listings, subscriptions, or other monetization features, consider integrating payment gateways such as Stripe, PayPal, or Razorpay to facilitate secure payments.
Step 5: UI/UX Design for a Seamless Experience
That is, good user experience design is what will keep users coming back to your app, and a clean user interface will improve it. An effective UI design allows for easy navigation, whereas, a solid UX ensures job seekers and employers stay on your platform. Remember these UI/UX best practices:
Simple navigation and easy job search functionality – Users should quickly find relevant job listings with minimal clicks.
Mobile-responsive and fast-loading pages – More than 70% of job seekers utilize mobile devices so optimizing for responsiveness is key.
Clear CTAs (Call-to-Action) for job applications and postings – guide the users smoothly through the job search and applications.
Consistent color scheme and typography – A professional design gives users trust and strengthens brand identity.
Accessibility compliance (WCAG standards) – Make your site accessible to users with disabilities.
Monetization Strategies for Job Portals
A good job portal can earn revenue via different streams. Below are the best monetization strategies to get started with:
Paid Job Listings – Employers can pay a fee to post job vacancies on the platform, ensuring their listings reach a wide audience. This allows you to have different pricing levels for your users depending if the listing is up for a longer or shorter period and whether users want it to be visible in their search.
Subscription Plans – A subscription model for both job seekers and recruiters can also positively impact the user experience and create a recurring revenue model. Employers can subscribe to premium plans for unlimited job postings, while job seekers can pay for exclusive job alerts or resume boosting services.
Sponsored Job Listings – Companies can pay for their job posts to appear at the top of search results or an “Featured Jobs” section. It sheds visibility and enhances opportunities to receive quality applicants.
Google AdSense & Banner Ads – You can create passive income by displaying third party ads on your job portal. By implementing Google AdSense or selling the ads' space to the brands, you can get paid per impression and click.
Resume Database Access – Recruiters often seek direct access to a pool of candidates. Employers can be charged for browsing and downloading resumes, which can be done on a per-resume access basis or as a monthly plan.
Marketing and Promotion Strategies for Your Job Portal
Creating a job portal is just the first step; the real challenge is attracting job seekers and employers. Here are effective marketing and promotion strategies to ensure your platform gains visibility and engagement.
1. Search Engine Optimization (SEO)
SEO helps your job portal rank higher in search engine results, making it easier for users to find your platform.
Keyword Optimization – Conduct keyword research and integrate relevant terms into job descriptions and portal content.
On-Page SEO – Optimize meta tags, URLs, and internal linking for better search visibility.
Off-Page SEO – Build backlinks from high-authority websites to boost credibility and rankings.
2. Social Media Marketing
Leverage social media platforms to reach both job seekers and recruiters.
LinkedIn – Ideal for professional networking and job postings.
Facebook & Twitter – Great for engaging a broader audience with job alerts and career tips.
Instagram & TikTok – Share short career advice videos and success stories to attract younger audiences.
3. Content Marketing
Publishing valuable content helps establish your job portal as an industry leader.
Blog Posts – Write about resume-building tips, interview advice, and job market trends.
Industry News & Insights – Keep your audience informed about hiring trends and job opportunities.
Video Content & Webinars – Host live Q&A sessions, expert interviews, and career coaching videos.
Conclusion
Developing job portal website is not just some technical work but a huge task that involves careful planning and designing. Whether it is defining your niche and appending basic features, making it search engine optimized (SEO), or advertising it, all are important in encouraging users. Your next job portal idea can be a great source for both people looking for jobs and hiring companies, if done right, will act as a path for new careers to be settled down. With a clear roadmap in hand, you can now start planning to turn your job portal dream into reality!
Deorwine Infotech is one of the top Mobile app development & web development company that develop an online job portal for you as you want at a cost-effective price.
As the requirement for jobs has grown, it has added to the increased competition between the various job portal mobile apps. Consequently, it becomes important to develop a web, which can be in this ambitious environment. Therefore, you need to hire a skilled and skillful mobile app development team to explain your job portal web and app.
For more info visit us: https://deorwine.com/blog/job-portal-website-development-guide/
Contact Us:
Website: https://deorwine.com
Email id: [email protected]
Skype: deorwineinfotechFor Any Query Call Us at: +91-9116115717
#job portal development#job portal development cost#job portal development company#Job Portal feature#mobile app development company#mobile app development
0 notes
Text
Choosing the Right Data Visualisation Solution for Your Business Needs

Introduction
Businesses rely heavily on data visualisation solutions to extract meaningful insights and facilitate informed decision-making in the modern data-driven world. However, selecting the right solution can be overwhelming with the vast array of data visualisation tools available. A well-chosen visualisation tool can enhance business efficiency, improve collaboration, and provide deeper insights.
Understanding Data Visualisation Solutions
Data visualisation solutions transform raw data into graphical representations such as charts, graphs, dashboards, and maps. These solutions help businesses interpret complex data patterns, trends, and correlations more effectively. Choosing the right tool requires a thorough understanding of business objectives, data complexity, and user requirements.
Key Considerations When Choosing a Data Visualisation Solution
1. Business Objectives and Use Cases
Before selecting a tool, businesses must define their primary use cases. Are they looking to improve internal reporting, track key performance indicators (KPIs), or create real-time interactive dashboards? Understanding these objectives will narrow down suitable options.
2. Ease of Use and User Experience
A data visualisation solution should be user-friendly, catering to both technical and non-technical users. A tool with an intuitive interface and drag-and-drop functionalities can empower business users to generate insights without extensive technical expertise.
3. Integration with Existing Systems
The chosen tool must integrate seamlessly with existing databases, business intelligence (BI) platforms, and cloud services. Compatibility with data sources such as SQL databases, spreadsheets, and cloud applications ensures smooth data flow.
4. Customisation and Scalability
Businesses should consider whether the tool can be customised to meet specific needs and scale as the company grows. A scalable solution will support increasing data volumes and more complex analytics over time.
5. Advanced Analytical Capabilities
Some businesses require more than basic visualisation; they need predictive analytics, artificial intelligence (AI)-driven insights, and machine learning capabilities. Selecting a tool that provides these features can give businesses a competitive edge.
6. Collaboration and Sharing Features
For organisations with multiple teams, a tool that allows collaborative data exploration, report sharing, and real-time updates is essential. Cloud-based solutions enhance teamwork and remote access.
7. Security and Compliance
Data security is a top priority. Businesses must evaluate whether the solution meets compliance regulations (such as GDPR or HIPAA) and offers encryption, role-based access control, and secure authentication methods.
8. Cost and ROI Consideration
While budget constraints are important, businesses should weigh the cost against potential benefits. A higher-priced tool with robust features may offer greater long-term value compared to a cheaper, limited-scope solution.
Popular Data Visualisation Tools in the Market
Several tools cater to different business needs. Some of the most popular include:
Tableau – Best for advanced analytics and interactive dashboards.
Power BI – Ideal for Microsoft ecosystem users and enterprise-level reporting.
Google Data Studio – Great for free, cloud-based reporting and collaboration.
D3.js – Suitable for developers who need custom visualisation capabilities.
Looker – Best for integrating BI and data analytics into workflows.
Conclusion
Choosing the right data visualisation solution requires careful evaluation of business needs, technical requirements, and budget. By considering factors such as ease of use, scalability, integration, and security, businesses can select a tool that maximises the value of their data. Investing in the right data visualisation solution empowers organisations to turn raw data into actionable insights, driving business growth and success.
0 notes
Text
How to Build a Web App from Scratch: A Step-by-Step Guide (2024)
Building a web application from scratch helps turn a concept into a digital solution that can be used and enjoyed by many people. This process may seem complicated, but with a structured approach, you can take each step with confidence. We take a closer look at every step of building a web app, from idea to launch, covering everything from planning to supporting your app.
1. Defining the purpose of the application and the target audience
Clear objectives and an understanding of the target audience are the basis of a successful application.
Identify the root problem: Start by defining the problem or the unique address of your question. This will guide all subsequent decisions. For example, is it designed to simplify a task, bring people together, or provide entertainment?
Conduct audience research: Study the demographics, preferences and pain points of your target audience. Create user profiles that represent different types of users to visualize how they interact with your application.
Competitive Analysis: Research similar Apps in the market. Identify your app's strengths and weaknesses, as well as the opportunities that allow it to shine. Consider how existing solutions can be improved and analyze user reviews to identify common complaints or desired features.
2. Overview of basic features and functions
Describing features is an essential step in ensuring your app serves its purpose without overwhelming users.
List of essential features: Identify the essential features that users need to achieve the main objectives of the application. For a project management application, basic functions may include assigning tasks, tracking deadlines, and sharing documents.
Prioritize features for MVP: Start with a minimum viable product (MVP) to launch quickly and get feedback. Choose features that provide maximum value with minimum complexity. For example, you prefer secure login and task creation to advanced reporting features in your initial project management application.
Plan for future expansion: Although we focus on core features first, it is useful to list additional features that you can add after launch based on user feedback, such as notifications or integration with third-party tools.
3. User interface and user experience design (UI/UX)
Effective design is about balancing aesthetics and usability, ensuring that users can navigate and use the app smoothly.
Wireframes and prototypes: Start with simple wireframes, which are layout plans for your app that show the placement of buttons, text, and images. Then they create interactive prototypes to simulate the user journey and identify potential roadblocks.
Focus on user-centered design (UX): User experience design considers how users interact with your app. Try to make navigation intuitive and actions like registration and checkout seamless. Prioritize ease of use by keeping flows as simple as possible.
Create a visual aesthetic (UI): Visual elements such as color schemes, typography and button styles create the app's personality and should be consistent with your brand. Consistent images build user confidence, so avoid cluttered screens or flashy graphics.
4. Technology Package Selection
The technology stack is the combination of tools, programming languages, and frameworks needed to build and run your application.
Front-end technology: The front-end is the part of the application that users interact with. HTML, CSS and JavaScript are essential, while frameworks like React. js, See. js or Angular can simplify development by providing reusable components and interactive capabilities.
Backend Development: Backend takes care of data management, server logic and storage. Choose a language and framework that fits the needs of your application, such as Node. js for complete JavaScript-based applications, Django (Python) for rapid prototyping, or Laravel (PHP) for complex applications.
Databases and storage solutions: Store your data with SQL databases (such as MySQL, PostgreSQL) for structured data or NoSQL databases (such as MongoDB) if your data is not structured or require flexibility.
Hosting and deployment options: Choosing the right hosting provider is crucial for performance and scalability. Options like AWS, Heroku, and Google Cloud offer reliable hosting with scalability, monitoring, and built-in security features.
5. Development and testing of MVP
Creating an MVP allows you to quickly release a working version of your app and get real user feedback.
Start with core features: Focus on building the core features outlined in your MVP plan. Break each function down into smaller tasks and complete them step by step so you don't feel overwhelmed.
Application testing: Testing is necessary to identify bugs, ensure stability and verify that the application works on different devices and browsers. Manual testing helps uncover usability issues, while automated testing speeds up the process by validating repetitive tasks.
User Testing: Conduct beta testing to release the MVP to a limited set of users. Gather information about their experiences and look for patterns in their comments. This will help you prioritize future updates.
6. Refinement of the application based on feedback
User feedback is essential to understand how your app performs in real-world situations and to highlight areas for improvement.
Analyze feedback methodically: Categorize feedback into categories such as usability, performance, and features. Identify recurring issues as they represent the most urgent areas that need attention.
Iterate to improve: Focus on the most important feedback first, starting with blockers that affect core functionality or user experience. Introduce changes gradually and focus first on impressive improvements.
Scalability improvement: As feedback drives further improvements, consider upgrades to support increased use, such as optimizing database queries, improving security measures, and ensuring that the application can handle a growing number of users.
7. Preparation for launch
The launch is the first step of your app. It is therefore essential to plan a successful exit.
Final testing and quality assurance: Perform final testing of all app features and ensure that it is stable, secure and free of major bugs. Pay attention to compatibility between different devices and browsers.
Integrate analytics tools: Use tools like Google Analytics, Mixpanel, or Firebase to track how users interact with your app after launch. The analysis provides insight into user behavior, identifying known characteristics and areas for improvement.
App Marketing: A successful launch requires a solid marketing strategy. Use social media, digital advertising, email marketing and industry influencers to spread the word about your app and engage your target audience. Consider creating video demos or tutorials that demonstrate the value of your app.
8. Track and schedule future updates
The app is an evolving product that grows and improves over time, based on user needs and market trends.
Continuous monitoring and feedback collection: Monitor performance indicators such as user retention, visit duration and refund rate. This data reveals how users interact with your app and highlights areas for improvement.
Regular updates and improvements: Schedule regular updates to add new features, optimize performance, and meet user expectations. Resolves security vulnerabilities and compatibility issues as needed.
User Engagement: Build a community around your app by interacting with users through in-app messaging, email newsletters, or social media. A loyal user base will give you valuable feedback and help you promote your app.
Conclusion
Building a web application from scratch requires careful planning, a clear idea of the target audience, and a structured approach to development and testing.While this may sound like a complex process, breaking it down into manageable steps can make the journey easier and more efficient. From defining your idea and creating an MVP to gathering user feedback and preparing to launch, each step plays a vital role in the success of your app.Consistent improvement and patience are key to achieving success with your web application.
0 notes
Text
With continuous advance in Internet technology, the web master requires simple tools to enable the publication of data visualization through web browsers on various platforms. As the user-interface requires a lot of visualization for unleashing the full potential, along with another programming, JavaScript is rapidly becoming popular with programmers for interactive visualization that is embedded in the websites. There are many graph visualization library JavaScript ready for use that is faster, flexible and reliable. Some of the best available for users are described below: Vis.js Developed by a Dutch research firm, this library is programmed to operate on a large number of desktops as well as mobile browsers, including full touch support. In addition to that, this library supports various edge or network graphs, 2D as well as 3D charts and auto-clustering Cytoscape.js Developed via NIH grants, this interactive library has been written in pure JS and is highly optimized for users. It’s fully compatible with all Internet browsers as well as platforms such as mobile and desktop. The JavaScript InfoVis Toolkit Jit or JavaScript InfoVis Toolkit can be broadly described as a multi-purpose, interactive graph drawing and layout framework that offers easily accessed tools for interactive Data Visualization for the Internet. The toolkit has various advanced features such as TreeMaps and Hyperbolic Trees. D3js D3.js can be broadly defined as the JavaScript Library that can be used for manipulation of documents based on data. It enables the user to utilize full capabilities of the Internet browser without any collaboration, with any proprietary framework with powerful combination of visual components as well as data-driven approach. Plotly's JS Plotly's is one of the comprehensive suites that offer data collaboration as well as visualization tools for software engineers. The main function of this library is to make scientific graphing in any browser. Sigma.js Sigma.js is one of most lightweight yet powerful Graph Visualization Library JavaScript that is widely used for drawing graphs. With this library, it is easy to publicize the network on the Internet as it becomes easy to integrate the latest features of network exploration in any web application. JsPlumb Built with jsPlumb, the open-source project combines many years of experience about how to build any application quickly. It offers various features such as declarative connectivity, based on various standards and allows the seamless integration of mobile devices. Furthermore, it also offers advanced UI features that are required for quick building of any application. Springy Springy can be defined as the force that is directed to graph layout algorithms. Furthermore, this library uses real physics for improvement in the network graph’s appearance. This is a small but simple library that offers a platform for graph manipulation as well as calculation of the layout. Processing.js Sister project of the widely known Processing visual programming language, this library has been designed for Internet browsers. This library enables the user to use various features such as digital art, data visualization, educational graphs, interactive animations, video games and so on without the requirement of any plug-in. JS Graph It This library offers easy programming with drag and drop boxes that are connected by straight lines. One of the most simple and minimal programs, this library offers a simple auto layout of lines. RaphaelJS's Graffle One of the most simple and interactive Libraries, it offers the best examples of any generic multi-purpose vector drawing library. However, there is one drawback as it is unable to layout automatic nodes. JointJS Core Developed by David Durman, this Graph Visualization Library is mainly used in creation of a fully interactive application as well as diagramming tools or static diagrams as per requirement. HighCharts This is mainly a charting library that is written in pure JavaScript language. Based on SVG, the library also supports older browsers.
GoJS This is a feature-rich library that enables users to implement various interactive diagrams across the platforms as well as web browsers. The construction of complex node diagrams becomes very easy with customized layouts and templates. YFiles For HTML This commercial library offers various advanced features such as UI controls that can be used for viewing as well as editing unequaled layout algorithms as well as diagrams with one click. MxGraph This is one of the leading commercial libraries that offer full support to all Internet browsers across platforms, including older browsers. KeyLines This is one of the best network visualization toolkits that enable the user to understand the connections, patterns as well as trends that are obscure or hidden. Data Visualization Software Lab This is one of the best commercial visualization libraries that offer high performance, fast speed across all platforms and touch interface devices. Hope you find these libraries useful for analyzing complex graphs.
0 notes
Text
Website design is really tricky business. There are some many things that you need to learn so that you will be able to create the finest of websites. Remember the development of a website will affect not only its performance but its ranking on the search engines. The search engines have become ridiculously strict on what they give out to their users as top results on the search engine results pages. The quality of the work done depends on the technical knowhow of the designer. There are such things as JavaScript and CSS that every developer needs to understand. What Is JavaScript? Perhaps it would be great to start out with JavaScript. Everyone seems to know about JavaScript regardless of whether you are a developer or just a website user. Errors such as: ‘JavaScript not available for this site’ are not uncommon. However, ask some people what JavaScript and you will be amazed by the responses that they will give you. Some will say that it is that program with a logo that resembles a cup of steaming coffee. Others will give you answers that are completely off. JavaScript is basically a popular computer programming language that is object-focused. It is mainly used to develop the interactive effects with web browsers. Simply put, JavaScript is mainly of benefit to the user of the internet and not the owner. When JavaScript is enabled on the browser that is when the user gets to enjoy the interactivity that a site has to offer. How To Learn JavaScript? JavaScript can be learned using following resources Books - Recommended JavaScript books for beginners and advanced programmers. Tutorials - Here is the list of dozens of free JS tutorials on web. Stay up to date on latest JavaScript technology developments using JavaScript blogs. Learn some of the best JavaScript frameworks to quickly develop web application in JavaScript What Is CSS? On the other hand what is CSS? CSS is an abbreviation for Cascading Style Sheet. At the most basic level it is employed by the web pages to help maintain information in the right display format. The CSS files will help in defining the font, its size, color, spacing, borders and location of HTML information on a specific web page. It can also be used in creating a continuous look through several pages thus achieving balance. It always helps to have a similar style or look throughout a website. This makes it possible for people to understand your site more easily. You may also want to check best CSS tools that are used by experienced web developers and designers. What Is CMS? A CMS (content management system) is a platform on which websites are built. They include the likes of WordPress, Joomla, Drupal, Blogger and so forth. They are used for blogging and website development but then the computer programming language has to be applied here as well. A CMS like WordPress which is the most popular of them all uses JavaScript, CSS and HTML. These languages enable the platform to create an infrastructure for such added functionality. HTML and CSS are the foundations of just about all sites. JavaScript can add extra functionality but as aforementioned it is all on the client’s side. You can build a site that is very good in terms of quality and all but in order to increase interactivity then you will need more. For the most complicated functionality you will need to employ either a programming language or a server side scripting. For instance, if you wanted to create a content form for your site then you might have to use a programming language. It would collect the input data and forward it to a database through email. Blogging and such features like the contact forms and event calendars are examples of things that are rather easy to implement with a content management system (CMS) but they would be extremely complex to code without one. Most of the CMS platforms available today have made things totally simple for you. Therefore when you build a website you can easily do this by using the existing themes.
You can also add the plug-ins that will give you the authority to add things like the contact forms and event calendars. JavaScript and CSS Together Combining JavaScript and CSS efficiently makes it possible to create extremely dynamic and highly interactive websites. It makes the performance of your site on the CMS more effortless as well. Remember, people visiting your website or blog do not have time to figure out how to use your site. This is unless it is the only site that is providing certain content that they are looking for. Even then, it is only a matter of time that others realize this and a website better performing than yours shows up. JavaScript provides a means for dynamic user interaction like the checking of email address validity in the contact forms or whatever forms you have on your site. It is the feature which is responsible for the displaying of prompts like ‘did you really mean that?’ It may not be so reliable in terms of security because this is work for the web servers. When combined with the CSS, JavaScript is the powerhouse behind those very dynamic web pages that change right before your eyes and now when the server sends back a new page. The problem is that JavaScript can be ridiculously tricky to handle. This is mainly because of the major differences that exist between the ways the different browser designers have decided to implement it. Still, developers of the web browsers are coming up with clever ways that make work for the website developer easier. How does this help you? Unless you are web developer this might not make much sense to you. Many are the bloggers and website owners who are struggling to learn about these features. As a blogger you should not be too bothered by these. Otherwise what you need to do is make sure that you get in touch experts in web development to make the work easier for you. There is no reason why you should struggle setting up your blog figuring out programming languages while you can be doing something more interesting. Conclusion There are so many programming languages that are used in web development. They include the likes of JavaScript and PHP but then they are not of use to everyone. Only web developers have to struggle with such features. CMS platforms have even made it less complicated for web developers to deal with them. Now creation of a website is more like taking a walk in the park. The only thing that you need to do is enjoy the benefits that are added to your site by these features. Lalit Sharma is an SEO consultant who runs a SEO house called Ranking By SEO. He is specialized in link building and other SEO related activities. You can also find him on Twitter, Google+ and his personal blog.
0 notes